
Shadows: Price for Our Sins: Chapter Three: First Game Piece - The Groom
Help Dylan save her friends with our Shadows: Price for Our Sins Walkthrough. The Lord of Darkness Samhain has exacted his revenge by enslaving the souls of Dylan's friends. Now, it's up to you to help her set things right and free them from their bonds with a little help from our detailed instructions, custom screenshots, and hints and solutions to the many challenges you'll face along the way.
Chapter One: Getting to the party
Chapter Two: Missing Friends and Locked Doors
Chapter Three: First Game Piece - The Groom
Chapter Four: Second Game Piece - The Nanny
Chapter Five: Third Game Piece - The Priest
Chapter Six: Fourth Game Piece - The Blacksmith
Chapter Seven: Fifth Game Piece
Chapter Eight: The Last Game Piece
Ask for help in the comments below!
Part I: The Runaway Dog
- The First of the chained men has been freed, and our heroine now moves a bit closer to getting back into the house.
- You have picked up a CARRIAGE LANTERN from behind the first ghost, and there’s a CARRIAGE chained on top of the BRIDGE that’s missing one.
- Head back to the BRIDGE so you can return it to its rightful owner.
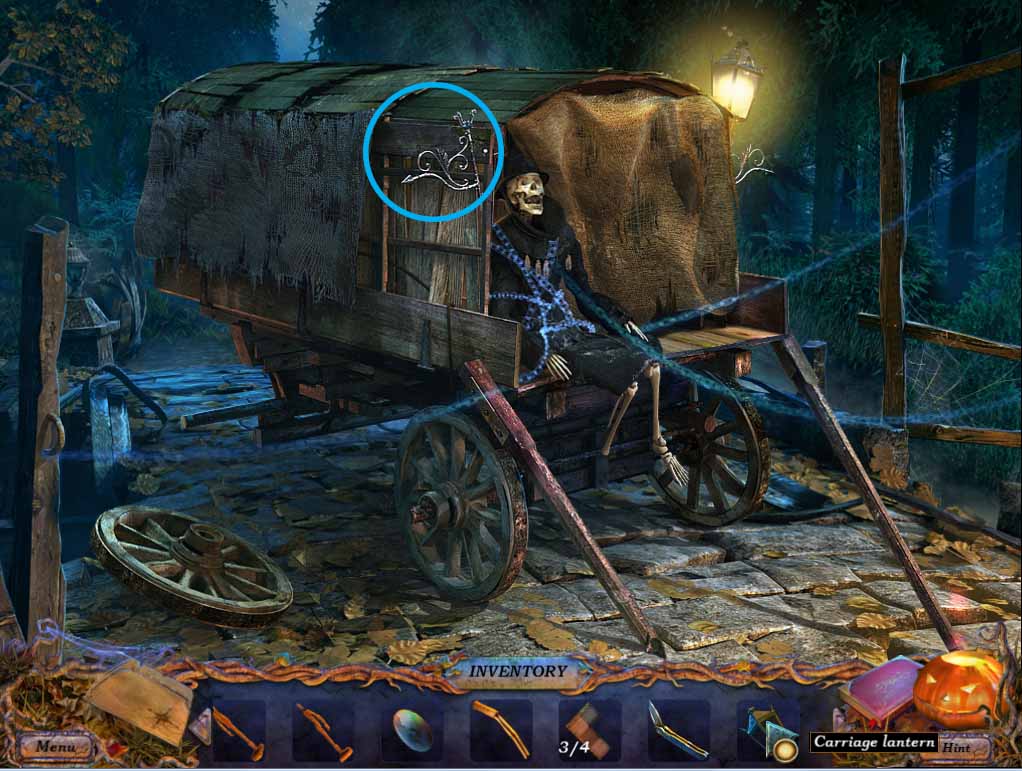
- Use the CARRIAGE LANTERN on the circled area shown above and another hidden object puzzle will start.
CARRIAGE HIDDEN OBJECT PUZZLE
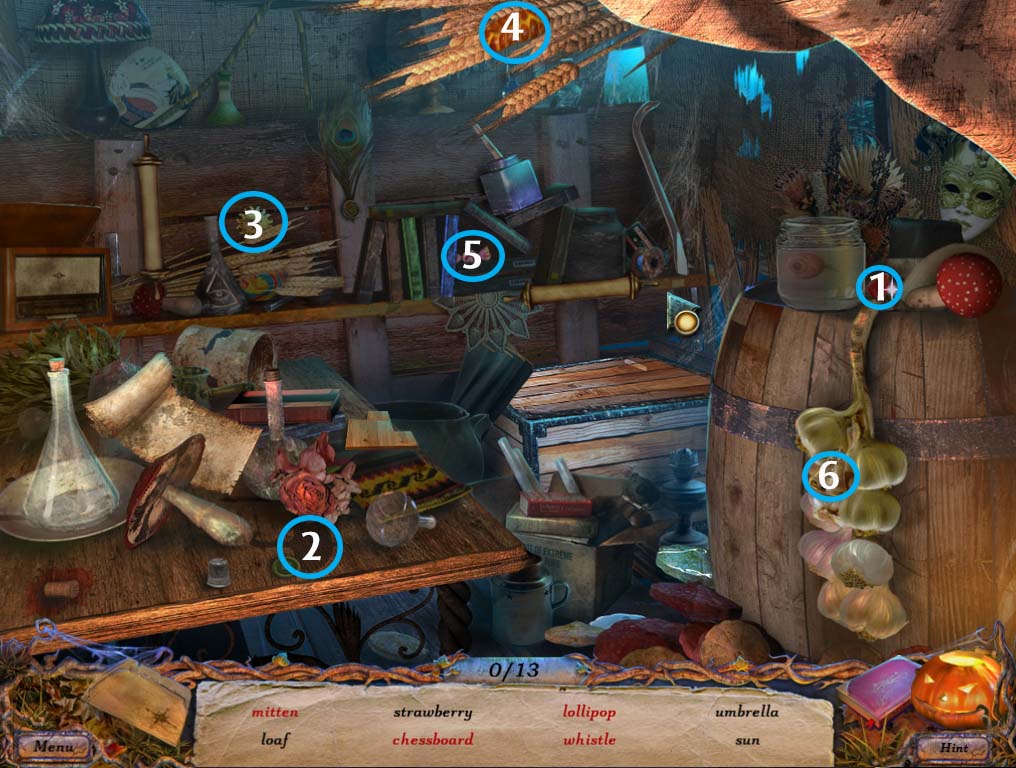
Black objects
- 1. Strawberry
- 2. Umbrella
- 3. Sun
- 4. Loaf
- 5. Candy
- 6. Bell
Red objects
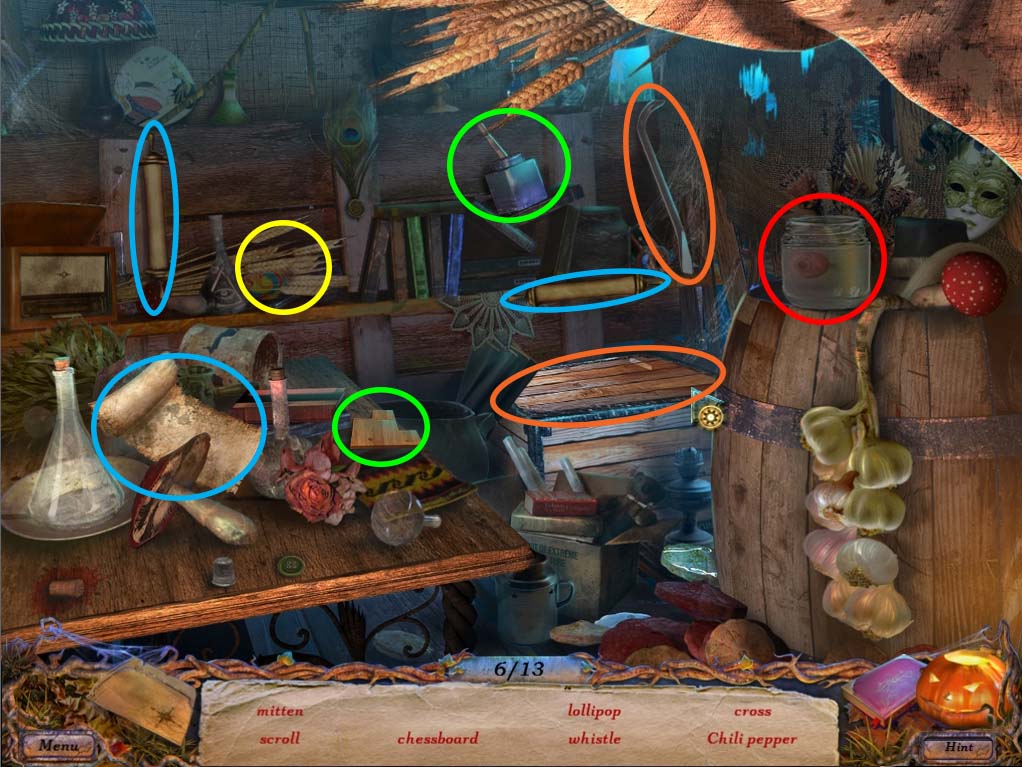
- Combine the items circled in blue to get the scroll
- Move the wheat (circled in yellow) to find the lollipop
- Move the jar (circled in red) to get the chili pepper
- Combine the items circled in green to get the chessboard piece
- And finally, use the crowbar on the box (circled in orange) then look further to find the whistle, cross and mittens (circled in blue below)
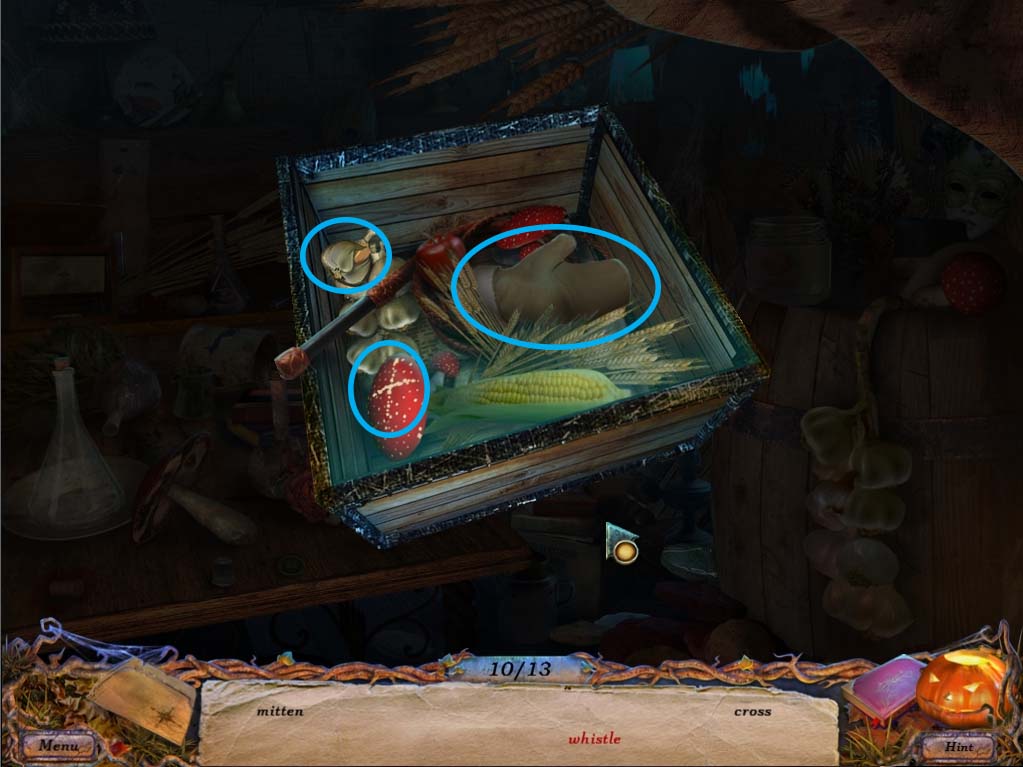
- You will be rewarded with a MITTEN and another CHESSBOARD piece (4 of 4) for your trouble.
- You’re finished here for now, and with all the CHESSBOARD pieces complete, you’re ready to head to the WINERY again.
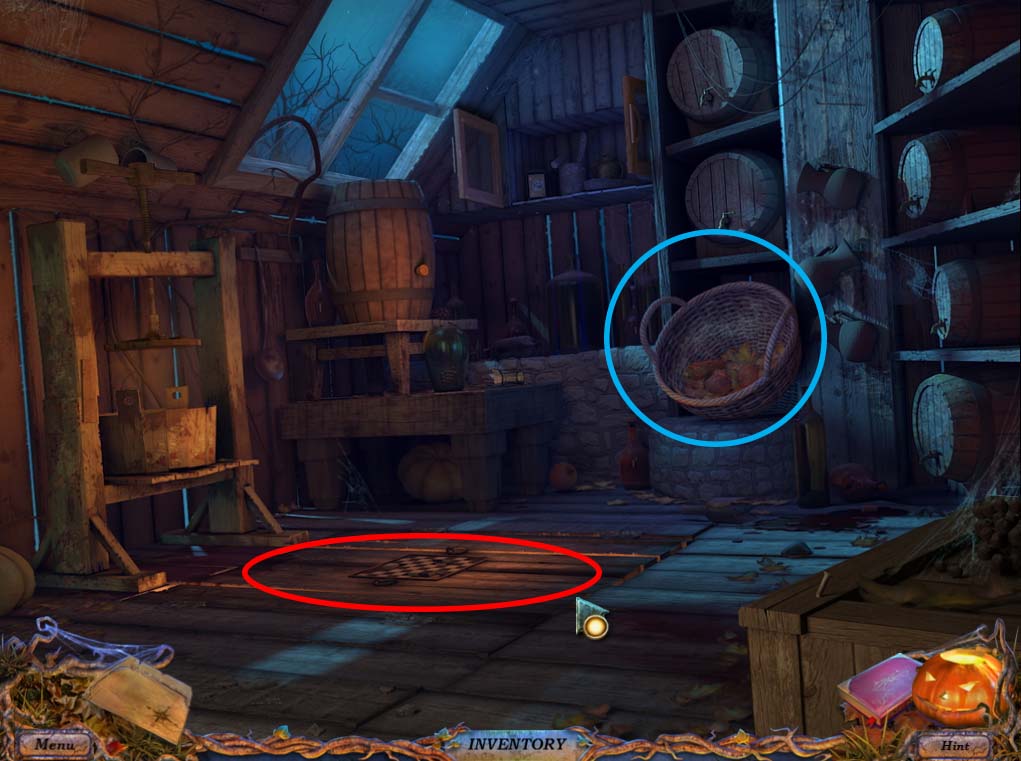
- Before you try and solve the next puzzle, check the basket (circled in blue) and use your MITTEN to brush away all the dirt.
- You’ll find a HAMMER on the bottom of the basket for your inventory.
- Once that’s done, check the chessboard (circled in red) to start the puzzle.
CHESSBOARD PUZZLE
- The object of the game is to arrange the jumbled pieces to reform the broken chessboard.
- The easiest way to solve this mini game is to separate pieces with borders on them so you can arrange them around the edges of the puzzle as shown in the image below:
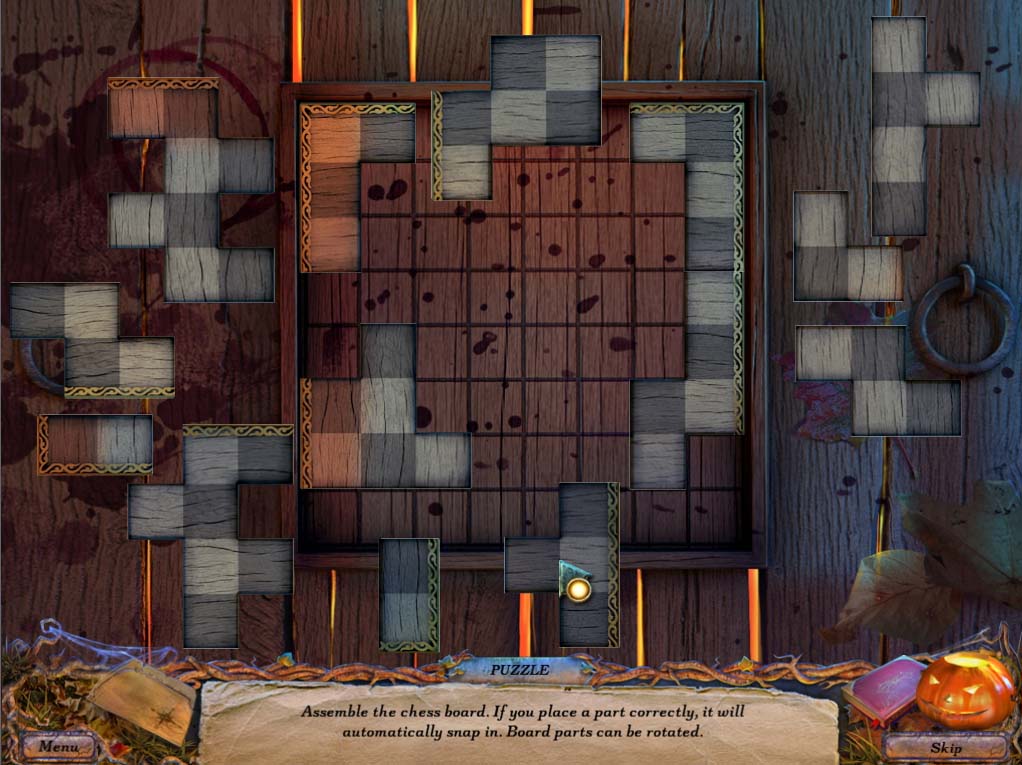
- As shown in the picture below, several pieces are slightly reddish on their left sides (circled in blue), and the rest of those with borders are plain black and white (circled in yellow).
- Use these hints to determine which pieces go where.

- Once the puzzle is complete, you’ll unlock the entrance to the WINE CELLAR
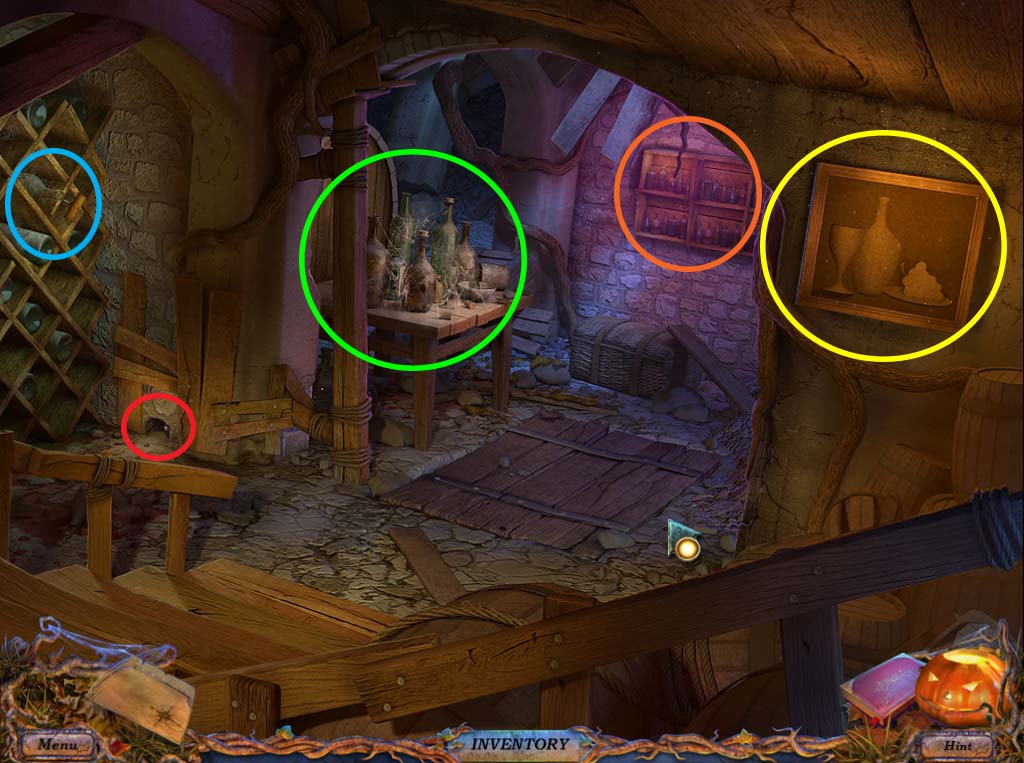
- Investigate the bottles to the left (circled in blue) to find the CORKSCREW and the mouse hole (circled in red) to find a MARBLE (1 of 4). Head back up the WINERY and investigate the BARREL.
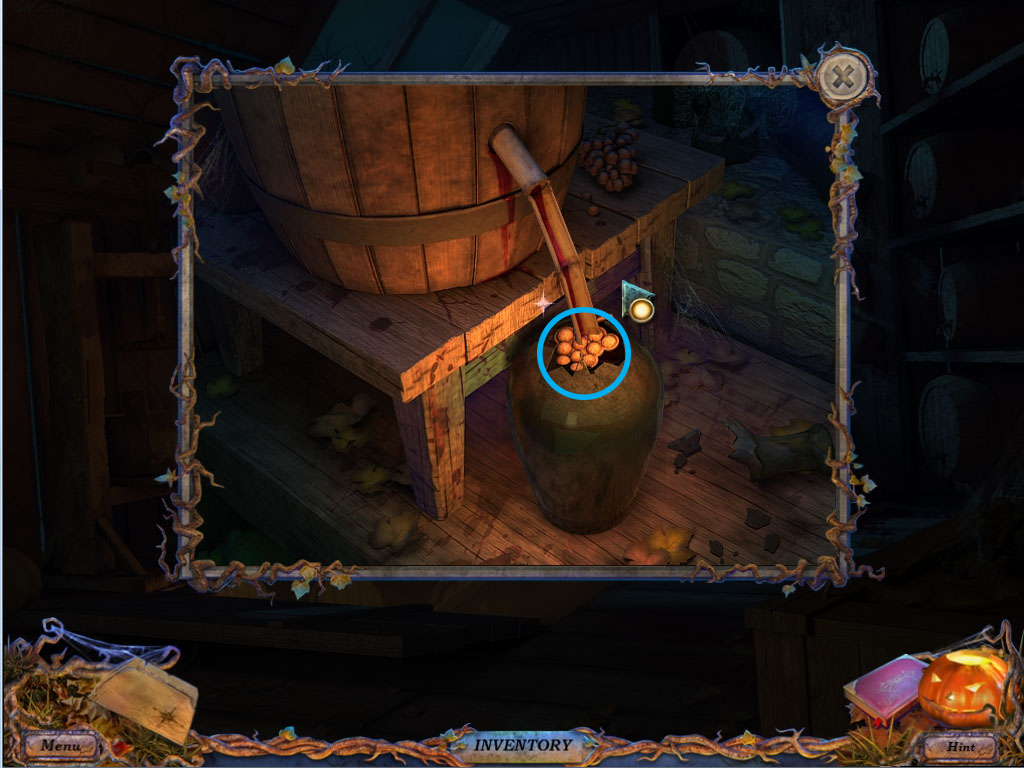
- At the BARREL, use the CORKSCREW you found in the WINE CELLAR to open the cork, when it can’t be turned anymore, use the GUTTER to fill in the bottle as shown in the picture below.
- You should be able to grab the GRAPES (circled in blue, below), then head back down the WINE CELLAR.
- Back in the WINE CELLAR, use the GRAPES on the painting (circled in yellow) to open a secret compartment.
- Inside you’ll find a BROOM that you can use to sweep the dust away off of the bottles (circled in green).
- Doing this starts the WINE CELLAR HIDDEN OBJECT PUZZLE.
WINE CELLAR HIDDEN OBJECT PUZZLE

Black objects
- 1. Labeled bottle
- 2. Knife
- 3. Weight
- 4. Pepper
- 5. Stopwatch
- 6. Cork x 4
- 7. Snowflake
- 8. Decoration
Afterwards, click the bag (circled in red) to find the following items:
- 9. Bow tie
- 10. Cork
- 11. Queen
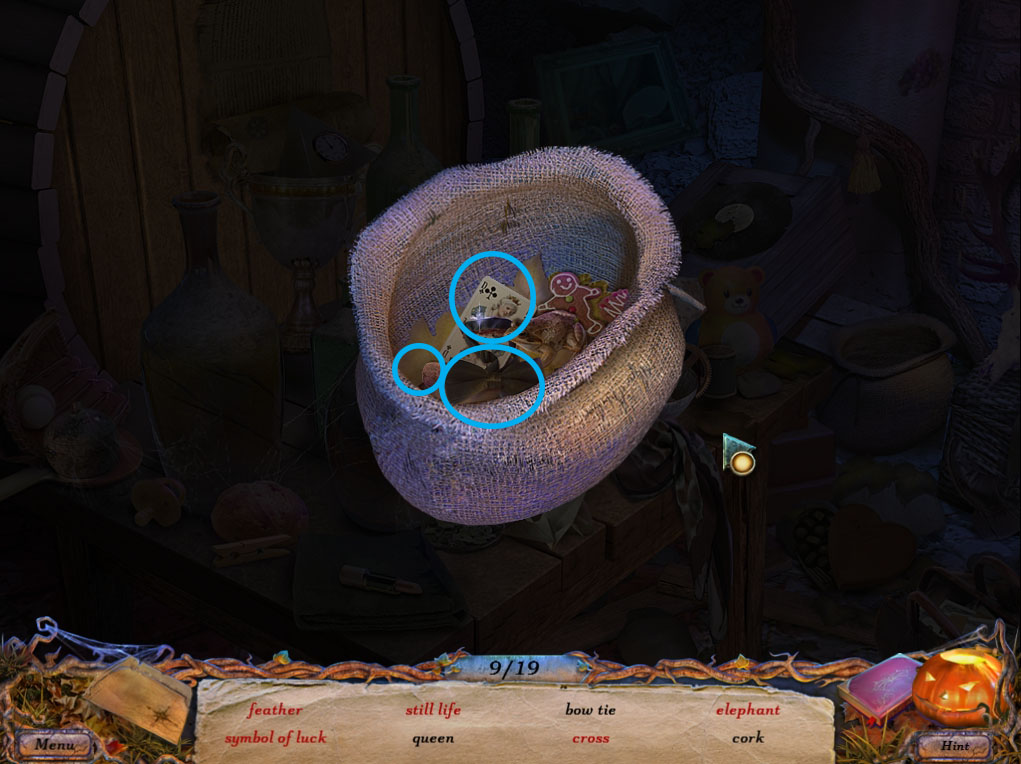
Red objects
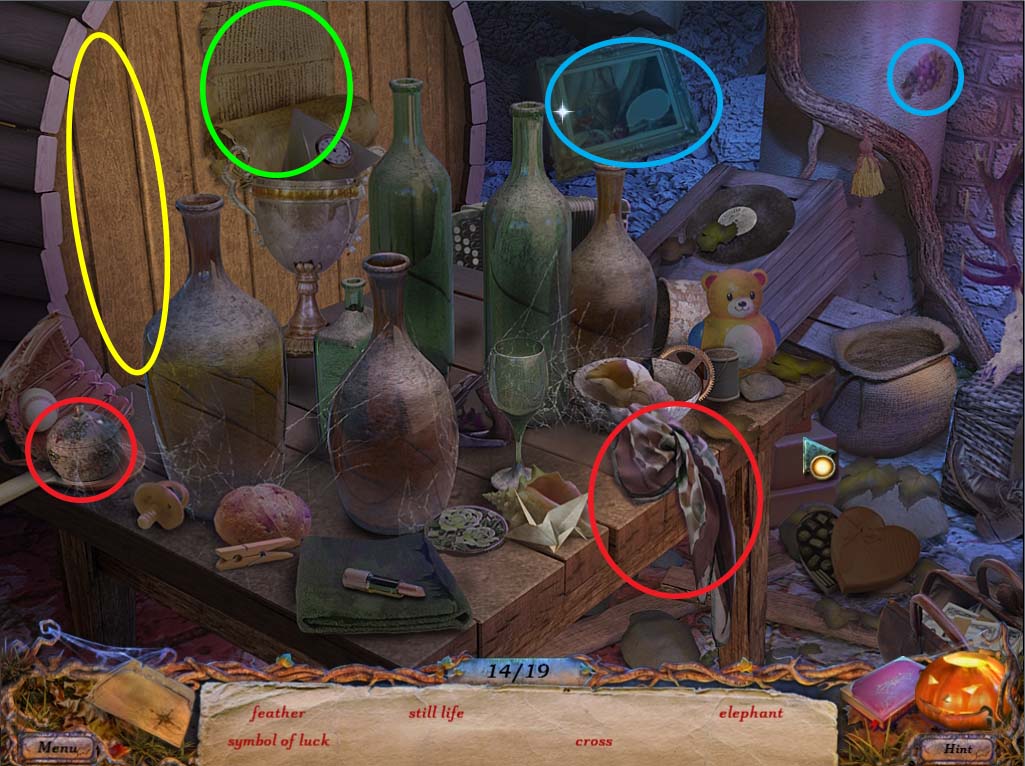
- Complete the painting (circled in blue) to get the still life.
- Knock down one of the wooden pieces of the barrel (circled in yellow) to find the feather
- Move the paper (circled in green) to find the cross
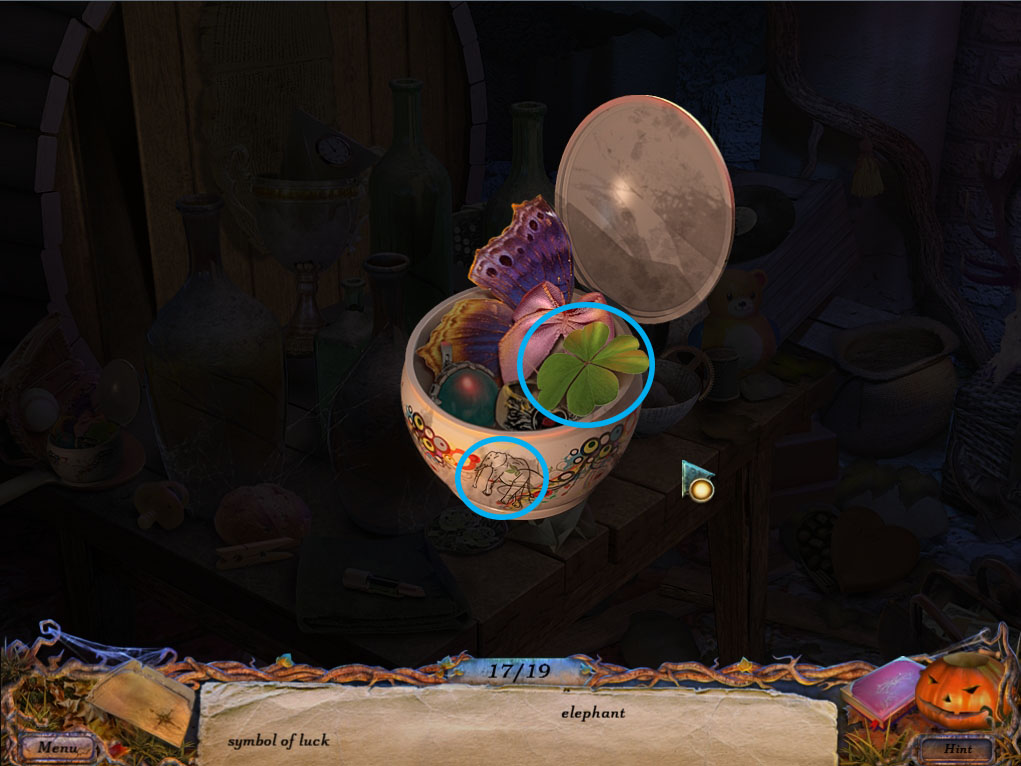
- Finally, use the scarf on the vase (circled in red) to find the elephant and the symbol of luck
- Completing the mini game will reward you with a BOTTLE and a WEIGHT for your inventory.
- Now check the WINE CABINET (circled in orange in WINE CELLAR image above) and use the BOTTLE that you have just found to start another mini game.
ARRANGING THE BOTTLES MINI GAME
- The object of this puzzle is to arrange the bottles so that those with corks are on the upper shelf and those without corks are in the lower shelf.
- Each bottle is labeled with a specific color, and should be arranged in a spectrum.
- If a bottle is transparent, it means that it is not in the right position.
- A bottle that is placed in the right order will become fully visible and will lock in place.
- The solution to the puzzle is shown on the image below:
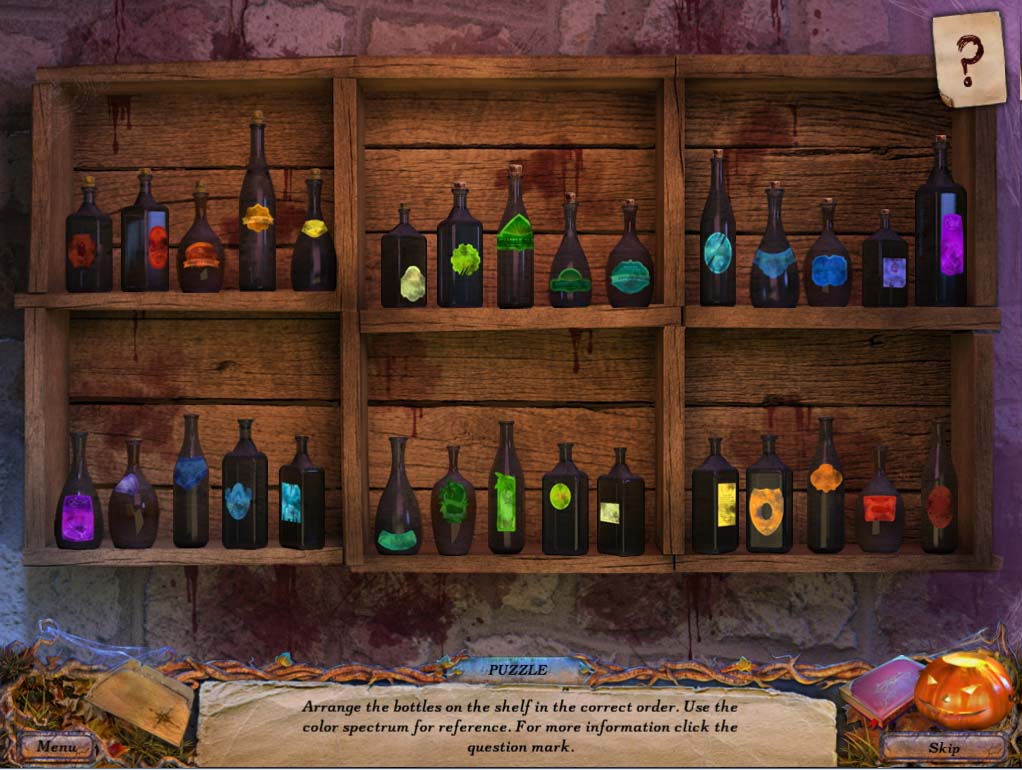
- With the puzzle solved, a secret compartment will open where you will be able to get an OIL CAN.
- There is also a GAME PIECE HALF inside the decanter, and you can use your HAMMER to open it.
- Once you get both items, go to the VINEYARD area.
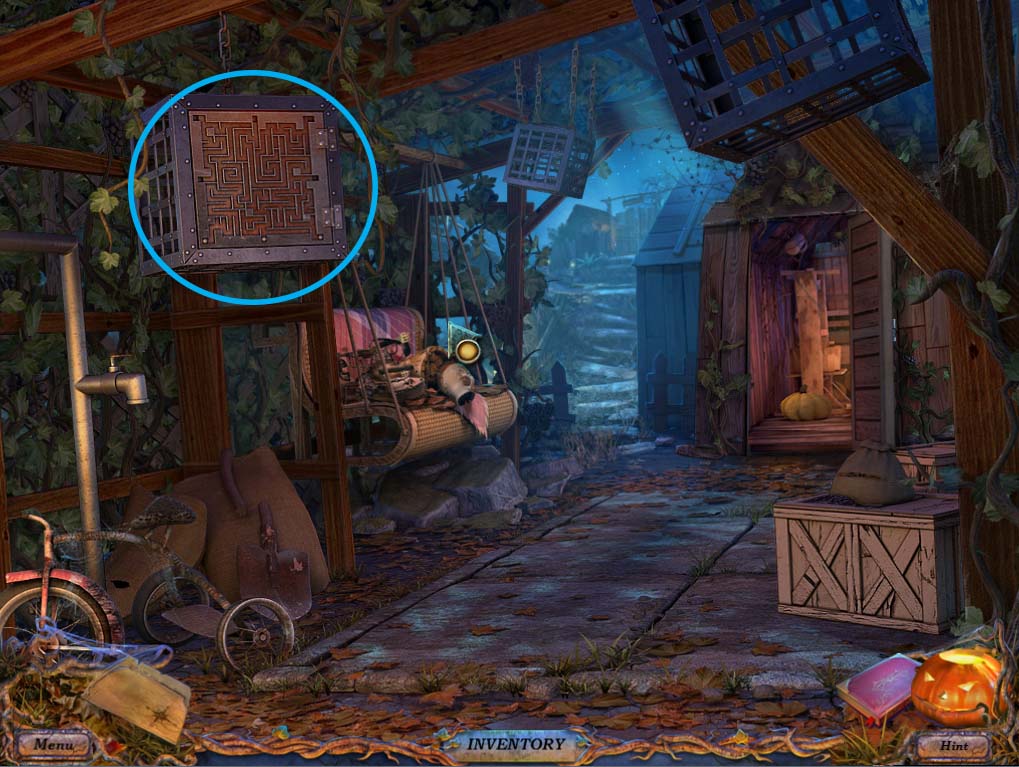
- At the VINEYARD, investigate the puzzle (circled in blue) and use your newly acquired OIL CAN to loosen up the metal ball.
- You won’t have to solve anything else here, as the puzzle opens up and gives you a BONE.
- The perfect thing to lure out the runaway dog!
- Go forward to the RIVER area and investigate the BARREL where the dog is.
- Place the BONE as you see it in the picture below, and catch the pesky DOG when it comes out of its hiding place.
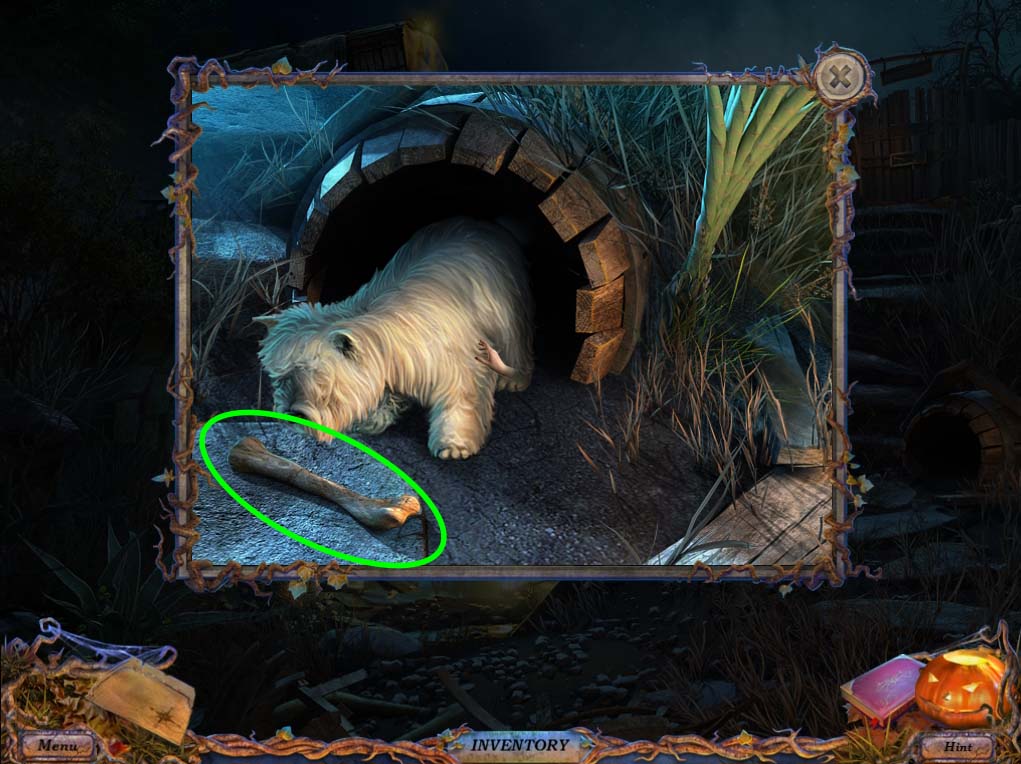
- With the missing animal now in your possession, head back to the BACKYARD and give it to the CRYING CHILD.
- In appreciation for the favor that you did for her, she’ll give you a FUSE.
- With this in hand, check the BACKDOOR, and use the FUSE on the strange lock.
- It’s time for another puzzle.
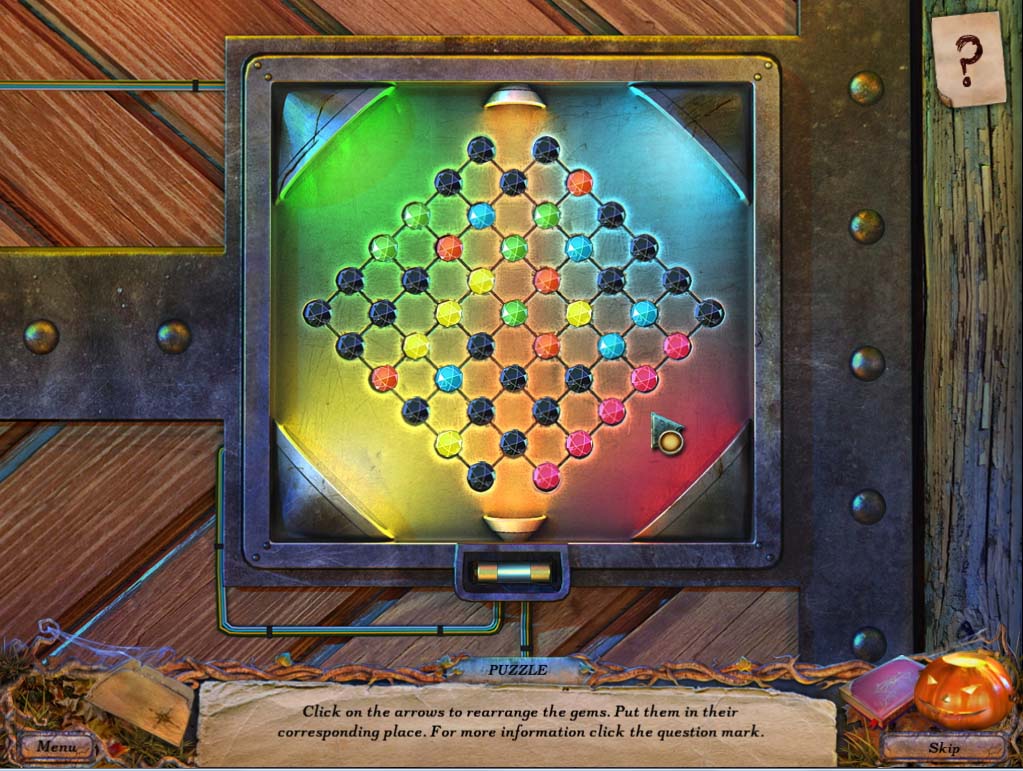
JEWEL DOOR PUZZLE
- This may be one of the harder puzzles in this game, as there is no quick solution to solve it.
- Clicking on any part of the puzzle will cause the jewels to move clockwise in groups of four, and to solve it, the puzzle must resemble the image below:

- Try matching the colored jewels in the outside first, leaving a lot of space in the center so that you won’t ruin any solved areas when you just want to move one jewel.
- A good way to solve it is to firs arrange red:
- Then blue:
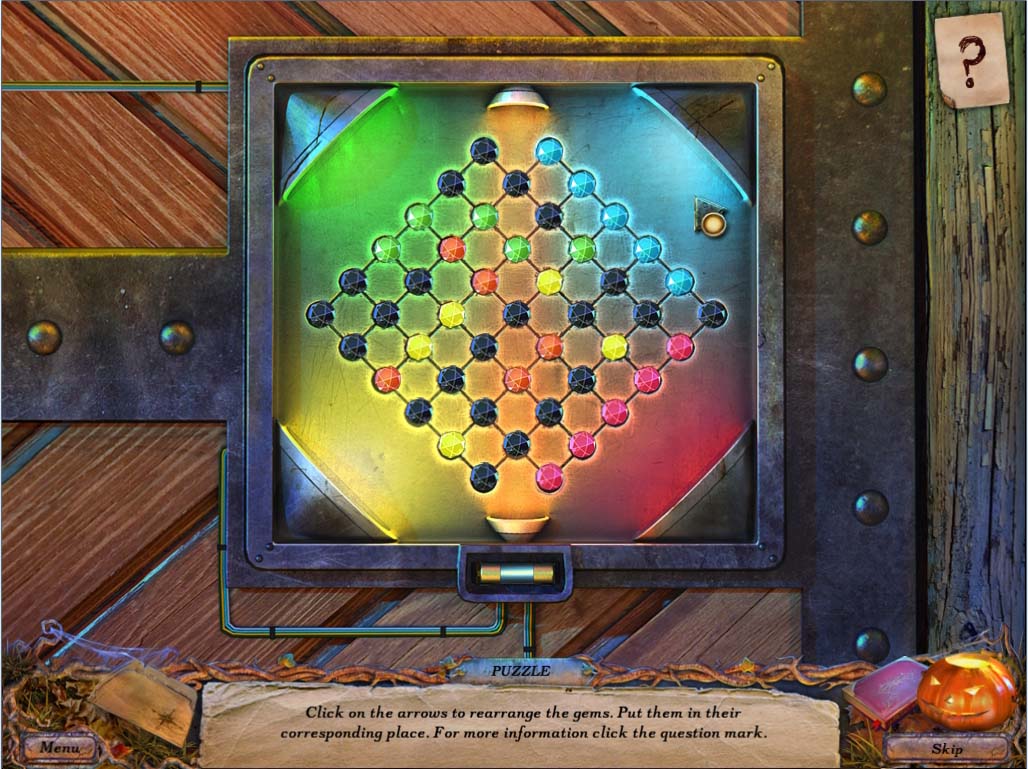
- Then green:

- Then yellow:

- With orange easily solved, as there is a lot of space to maneuver in the middle.
- With that, the door to the house is now open.
- Before you step inside to see the origin of this entire mess, grab the JACK doll that is hanging on the tree (circled in green below) by using your penknife.
- Once you have it, go inside the house.

Part II: The Board Game
- The room seems desolate and our heroine can’t believe that just a while ago she was there playing with all her friends.
- There’s no time to dally though. Pick up the CAMERA (circled in blue, and get ready for a surprise.
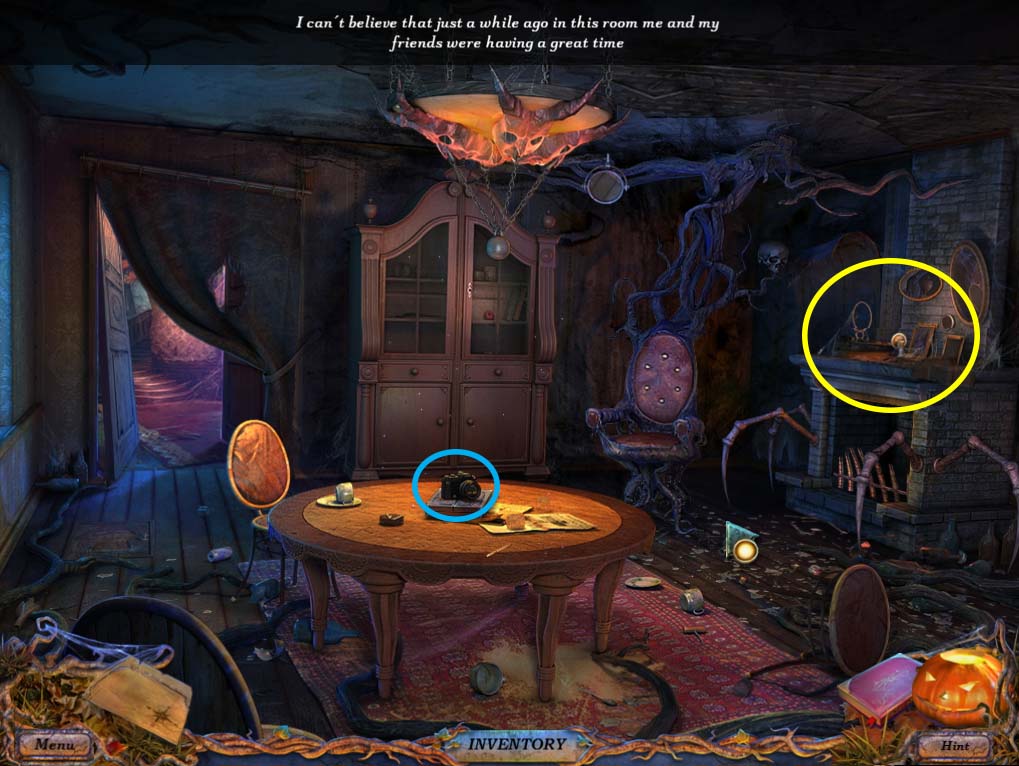
- Say hello to Jack Stone, a former owner of the house that you’re stuck in, and another ghost asking for your help.
- He has the BOARD GAME and has asked you to find some FUEL for him in exchange.
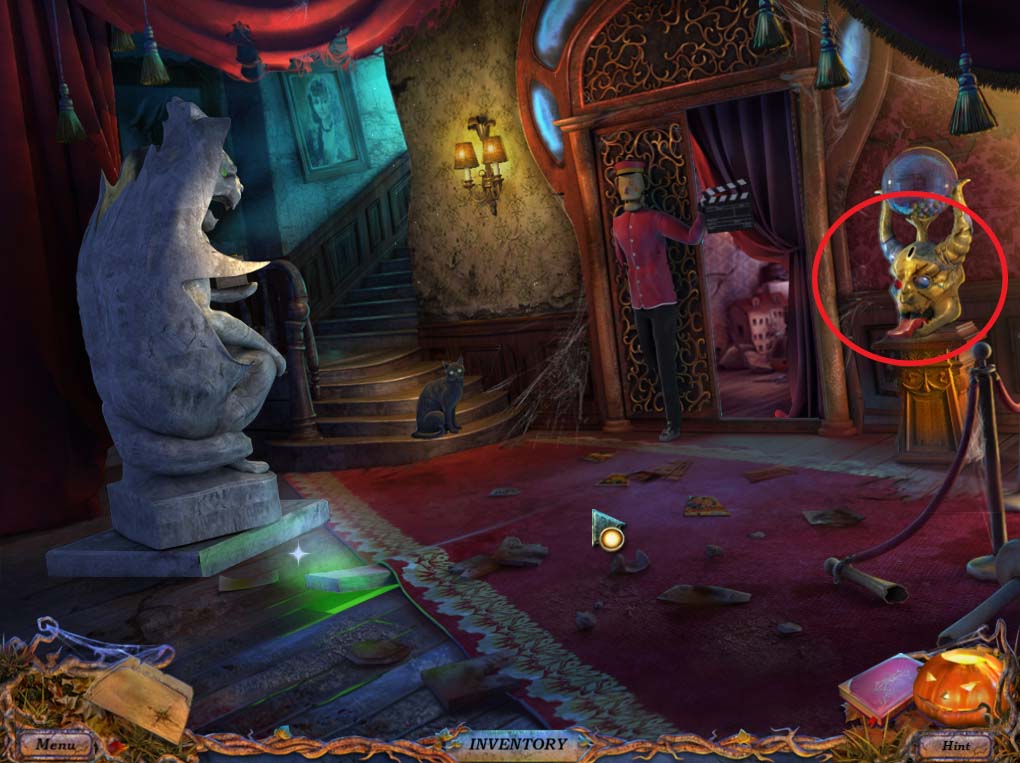
- Head to the room ahead, and you’ll find yourself in the HALL.
- There’s a weird candy dispenser by the side of the door (circled in red below).
- It’s wearing a SMALL MIRROR on its left eye that you can take.
- Grab it then go back to the LIVING ROOM.
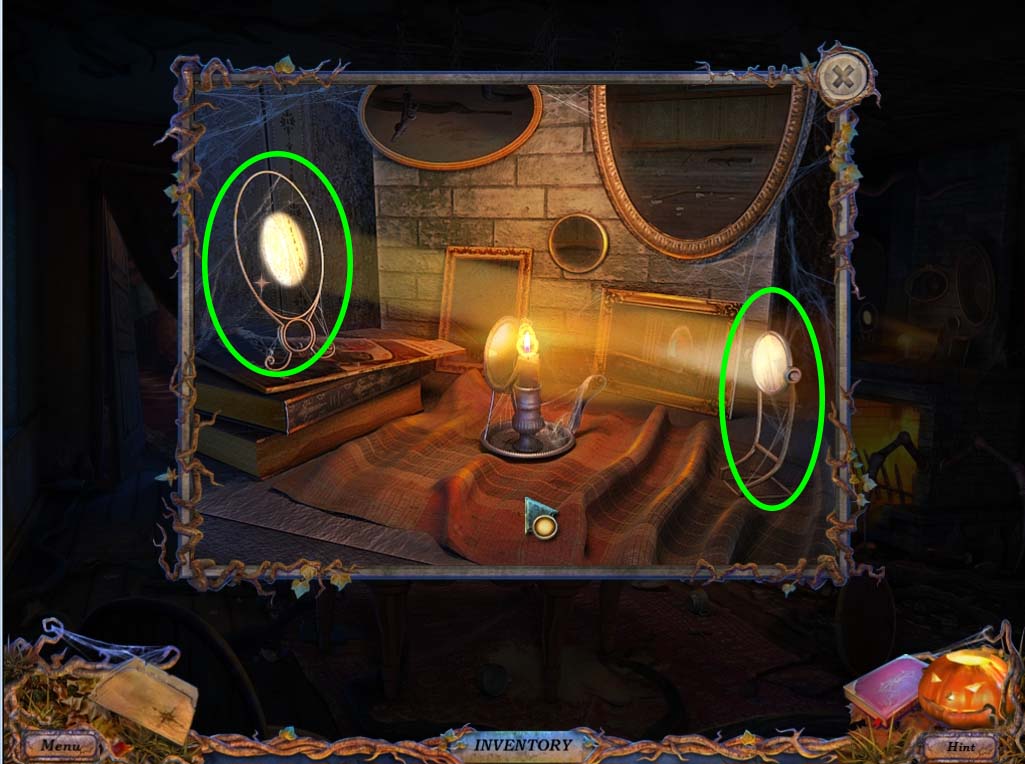
- Examine the MANTLE (circled in yellow in living room above) and place the MIRRORS in your inventory (there should be two of them in there) on the mirror frames as shown below.
- This will cause a beam of light to bounce around the room and light a particular spot on the floor. Investigate it.
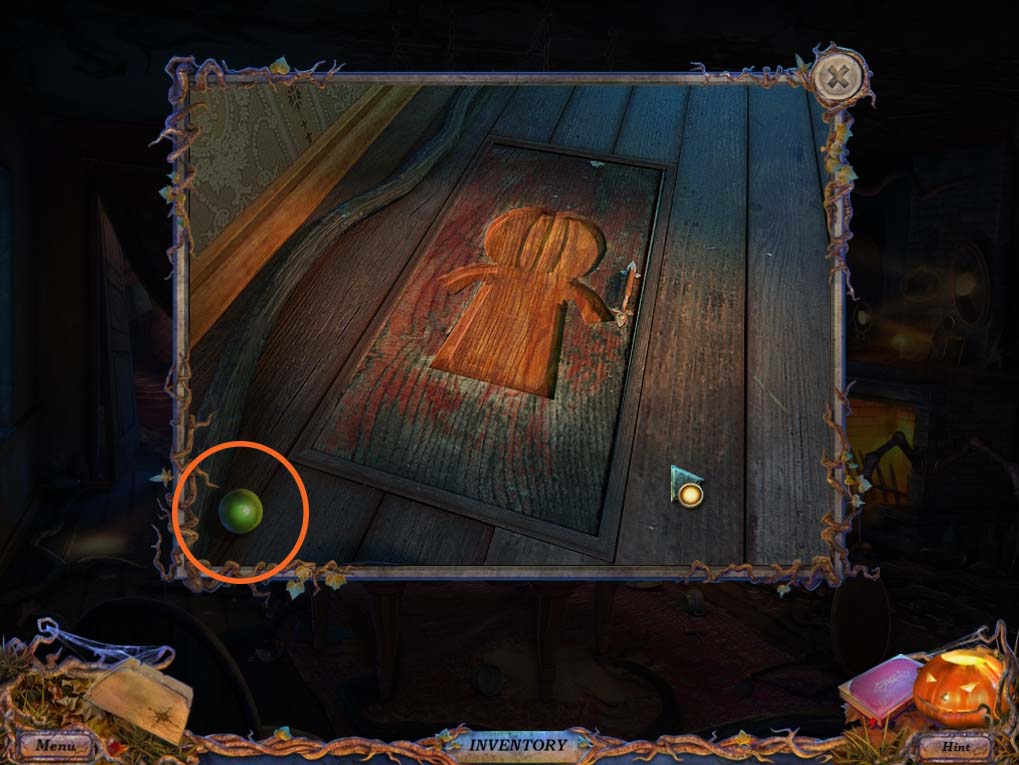
- You’ll find an indentation on the floor that is shaped like the JACK doll you picked up a while ago.
- There’s also a MARBLE (2 of 4) on the side (circled in orange) that you can pick up for your inventory.
- Open the trapdoor and take the FUEL.
- Hand this over to JACK and he’ll give you the BOARD GAME.
- You can now use the BOARD GAME whenever you wish, and whenever you complete a puzzle piece you can place it in the appropriate slot to get an item to help you on your mission.
- Speaking of GAME PIECES, you have two halves of a puzzle piece in your inventory right now.
- Use the BOARD GAME (lower left hand side of your screen) and place the pieces as shown below.
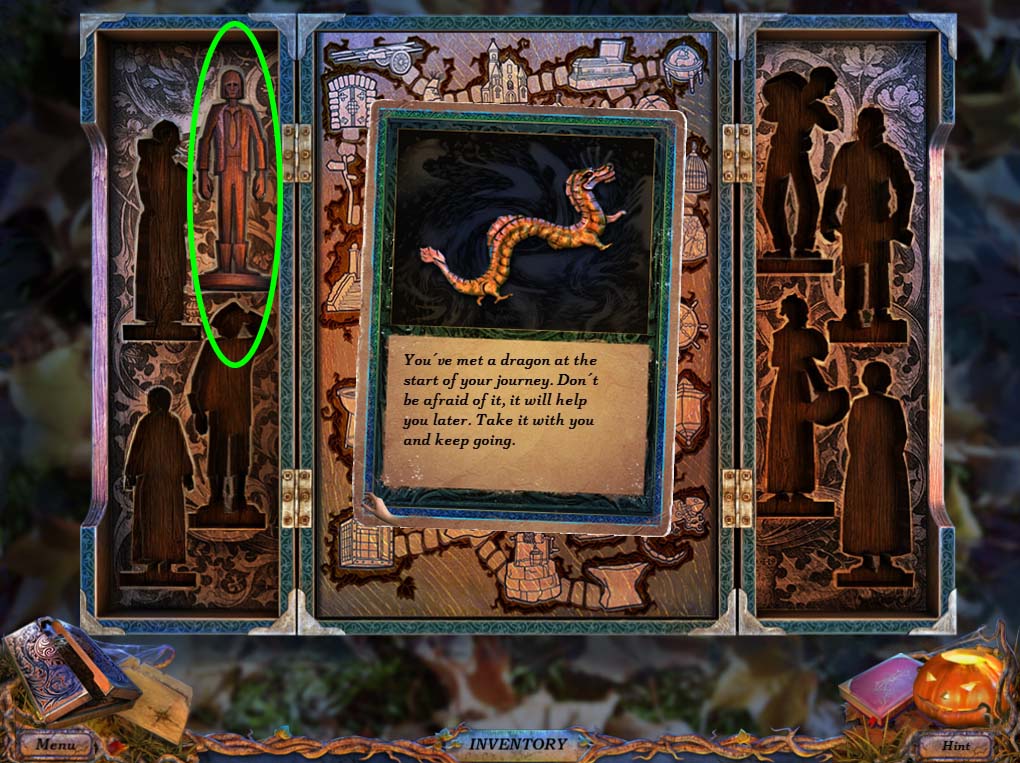
Doing this will give you an item called the DRAGON, take it and place it in your inventory. JACK STONE was quite clear on how to free your friends, you’ll need to find all of the game pieces and restore them on the board. Let the hunt begin!
End of Chapter III
Chapter One: Getting to the party
Chapter Two: Missing Friends and Locked Doors
Chapter Three: First Game Piece - The Groom
Chapter Four: Second Game Piece - The Nanny
Chapter Five: Third Game Piece - The Priest
Chapter Six: Fourth Game Piece - The Blacksmith
Chapter Seven: Fifth Game Piece
Chapter Eight: The Last Game Piece
Ask for help in the comments below!