
Shadows: Price for Our Sins: Chapter One: Getting to the party
Help Dylan save her friends with our Shadows: Price for Our Sins Walkthrough. The Lord of Darkness Samhain has exacted his revenge by enslaving the souls of Dylan's friends. Now, it's up to you to help her set things right and free them from their bonds with a little help from our detailed instructions, custom screenshots, and hints and solutions to the many challenges you'll face along the way.
Chapter One: Getting to the party
Chapter Two: Missing Friends and Locked Doors
Chapter Three: First Game Piece - The Groom
Chapter Four: Second Game Piece - The Nanny
Chapter Five: Third Game Piece - The Priest
Chapter Six: Fourth Game Piece - The Blacksmith
Chapter Seven: Fifth Game Piece
Chapter Eight: The Last Game Piece
Ask for help in the comments below!
Part I: The Gate
The game starts with a cutscene of our heroine driving to her friend, Samantha’s house for a Halloween party. During the drive, we see glimpses of her scrapbook filled with old pictures of her and her friends. Once she arrives, she hides the scrapbook in the glove compartment and heads to the gate. After finding the gates locked, she waves to the security camera and heads back to her car. This is where the actual game begins.
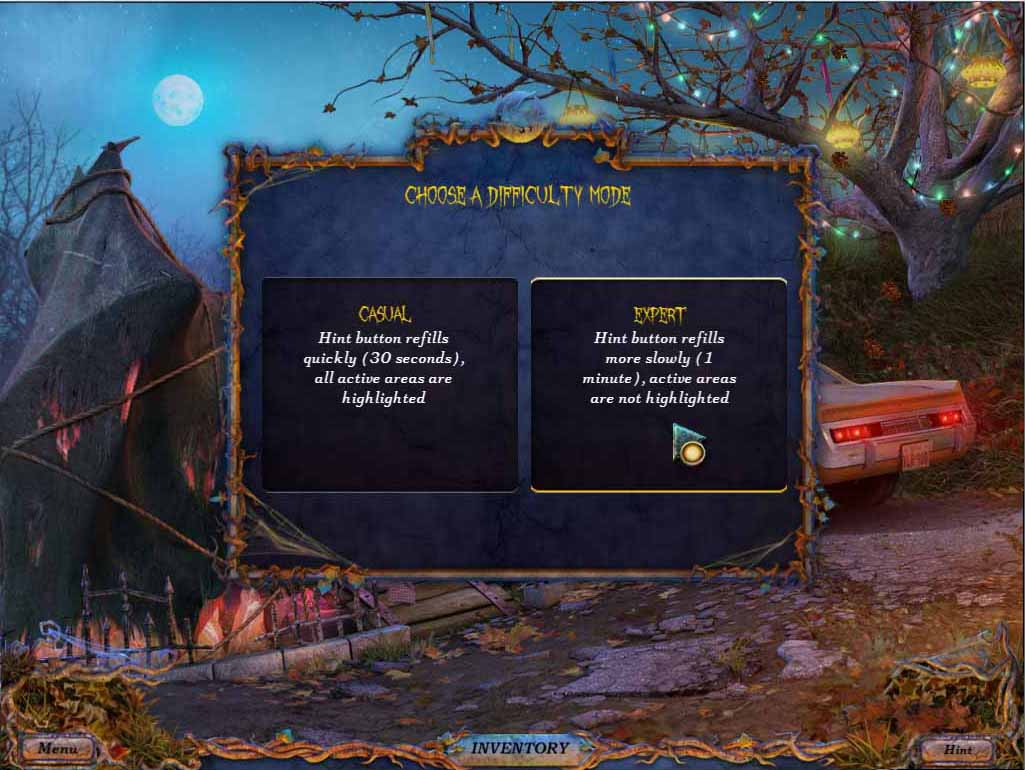
- Before any game play actually starts, Shadows: Price for Our Sins will ask you to select a difficulty mode.
-
The difficulty mode doesn’t really change how you play the game, but it will make the game a bit more challenging depending on which mode you pick. The differences of each mode are as follows:
- Casual: The “HINT” button refills quickly (every 30 seconds) and inventory items, hidden objects or clues that you need will sparkle every so often to guide you on what next to do. The “MAP” will also show which places have available actions (highlighted in green and indicated by a “!” icon)
- Expert: The “HINT” button refills slowly (every 60 seconds), the MAP will not show any available actions, and hidden clues, objects and inventory items will not sparkle.
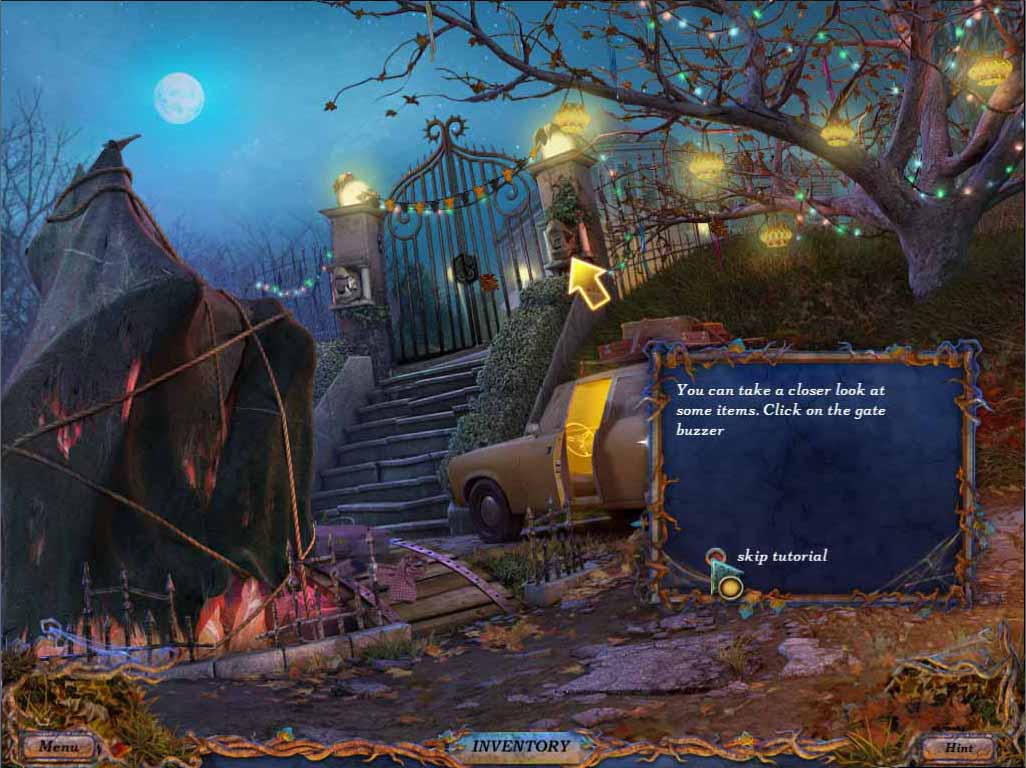
- Once you choose a difficulty setting, the game will point you to the intercom and will also give you an option to skip the tutorial by highlighting the button.
- Decide whether or not you want the tutorial and then click the intercom (your icon changes to a magnifying glass when you hover over an area you can investigate)
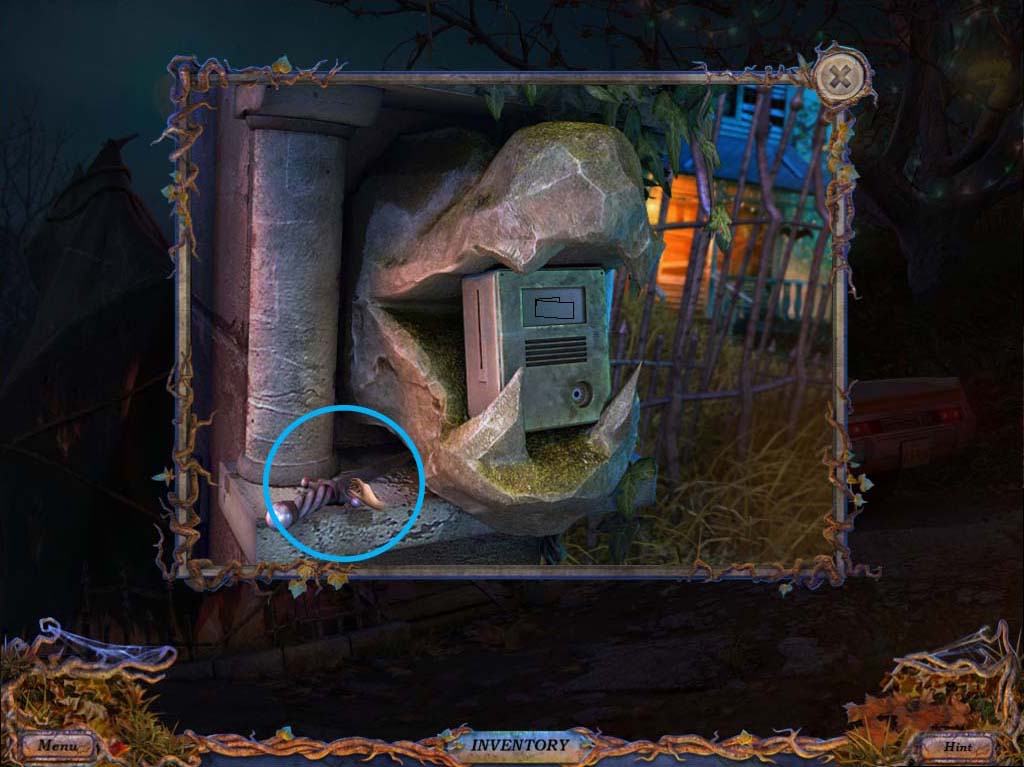
- At the intercom, you will notice that the call button is missing so you’ll need to find it.
- Pick up the DAGGER (indicated by blue circle) before you go.
- The DAGGER will be placed in your inventory, which can be opened at anytime by hovering over the inventory tab.
- Leave the intercom by clicking outside the picture (a cursor pointing outward will indicate that you’re about to leave the window or area) or clicking the “X” on the upper right hand side (this is also how you exit other windows like puzzles or clues).

- Once back at the gate, you’ll notice a large object covered by cloth.
- You’ll need to cut the ropes to reveal it, so move your cursor to your inventory then select the DAGGER.
- You can then cut the ropes by clicking on them.
- Once you do this you’ll reveal a statue (as shown above, inside the yellow box) and the first hidden item mini game will start.
-
Hidden item search:
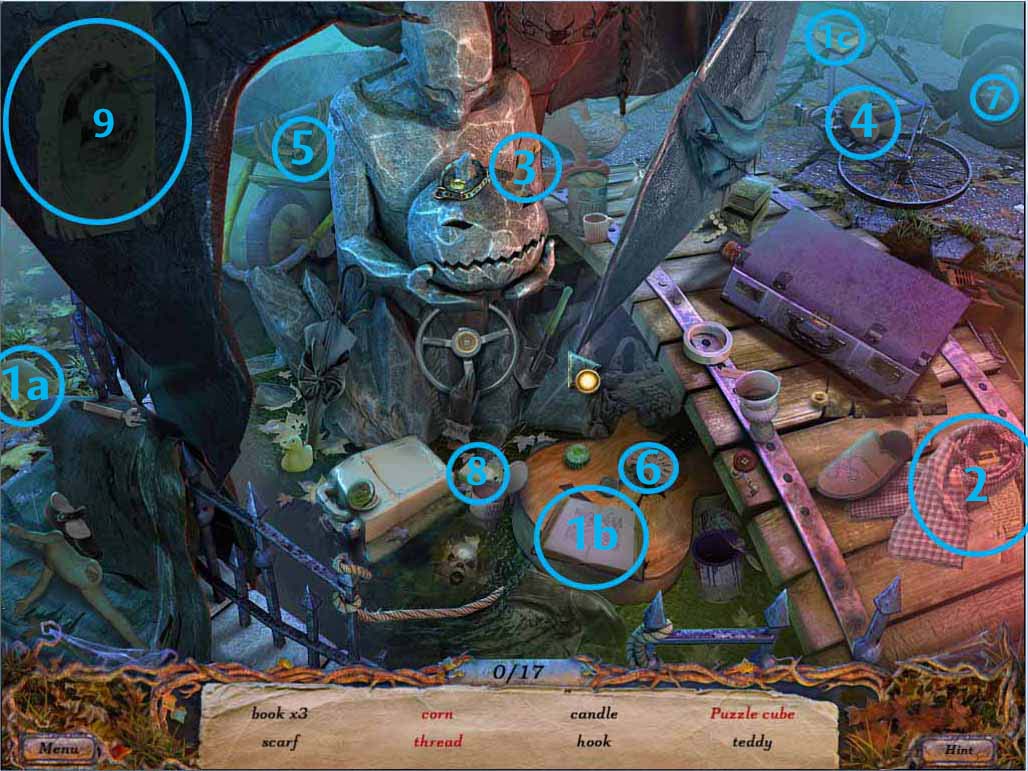
- The object of this mini-game is to find all the listed items which are hidden in the picture. There are two types of items to find, Black objects and red objects. The Black objects (written in black text) which are simply scattered in the picture needs only to be clicked to remove them from the list. The Red objects (indicated by red text) on the other hand, involves a bit of manipulating before you can select them. The amount of manipulation can be as simple as opening a box or drawing a curtain aside, to more complex ones like finding a secret code or putting a broken item back together. This guide will first list all of the Black objects you need to find and then show you how you can get each red object.
-
Black objects are indicated by blue circles and are as follows:
- 1. Book x 3 (1.a, 1.b, 1.c)
- 2. Scarf
- 3. Candle
- 4. Teddy
- 5. Hook
- 6. Clock face
- 7. Star
- 8. Soap
- 9. Poster
-
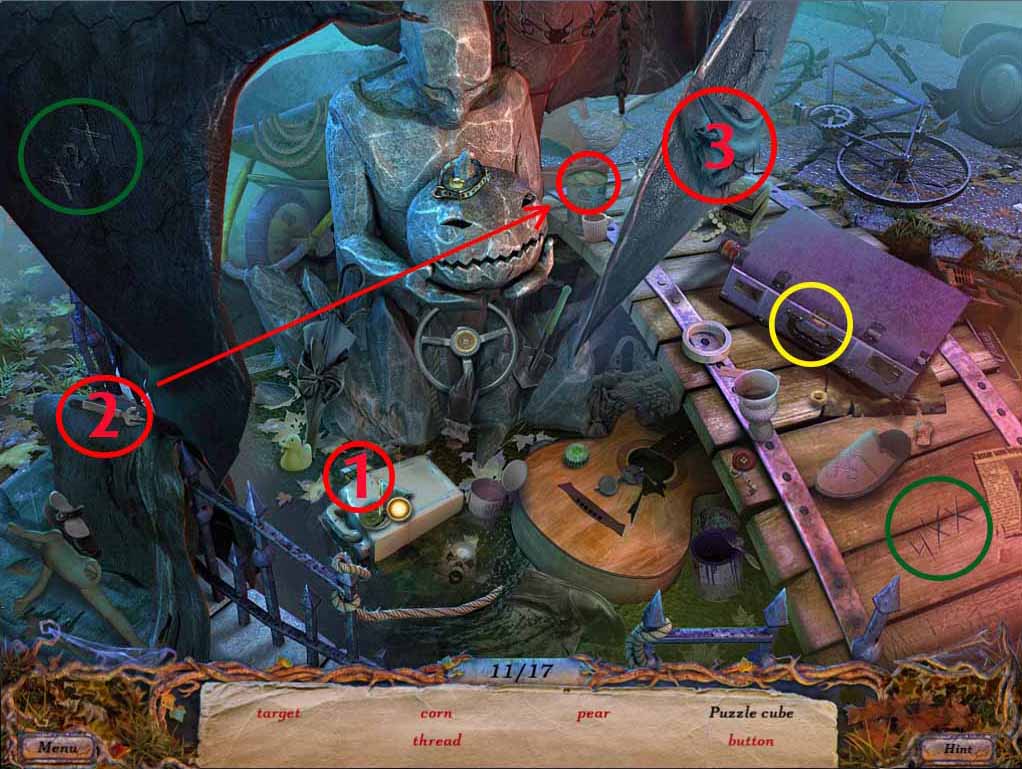
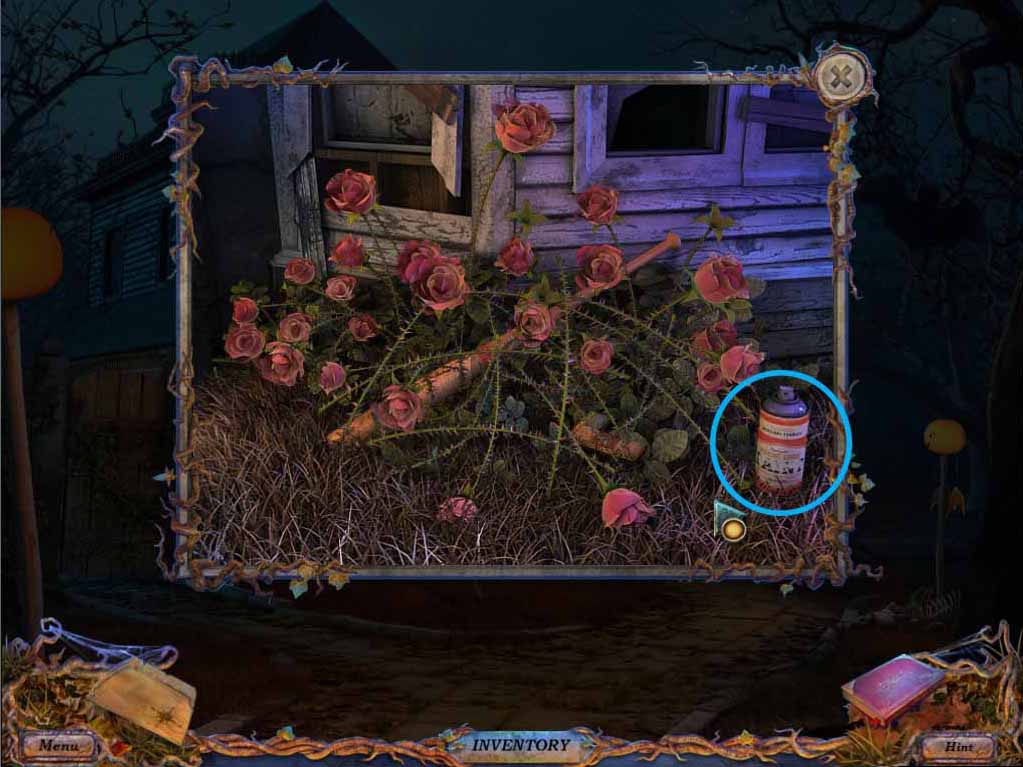
The first Red objects can be obtained by doing the following (circled in red):
- 1. Puzzle cube: Move gas can to get puzzle cube underneath
- 2. Corn: Pick up can opener and open can to get corn inside
- 3. Target: Move cloth to find target underneath
- Remember the numbers marked in green then click the suitcase (marked in yellow)
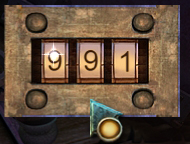
- Change the numbers in the lock so it reads: 421
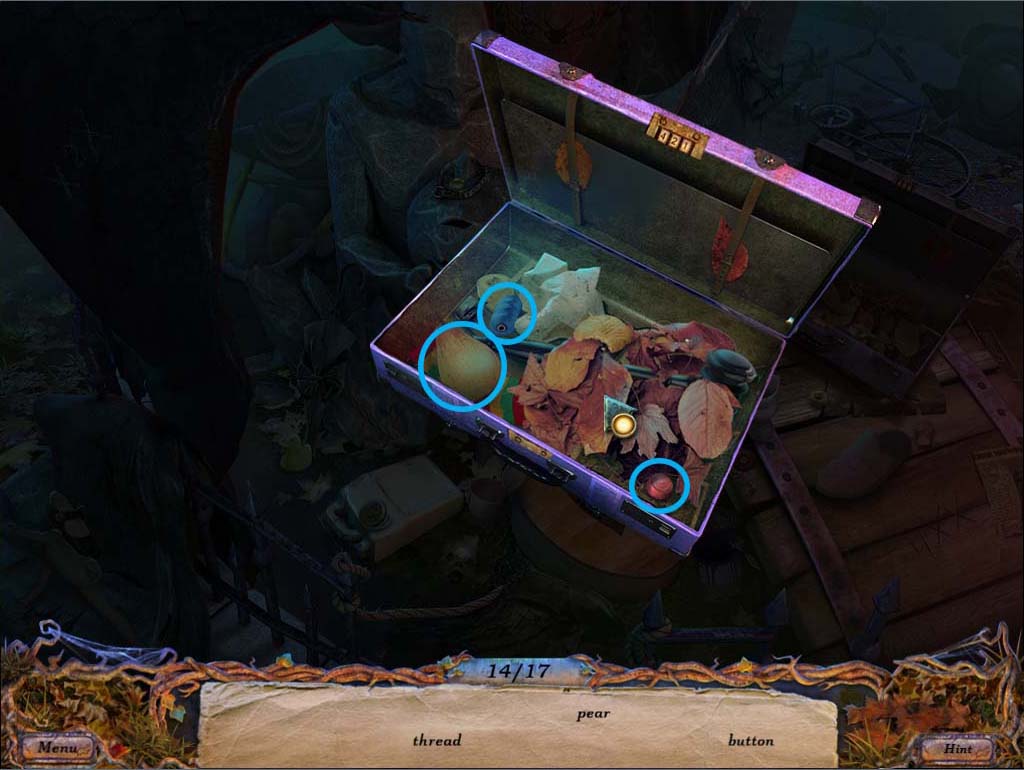
- With the suitcase now open, you can select the Pear, the Thread and the Button (marked in blue).
- Once finished, you will get 2 new items for your inventory, a BUTTON and a CANDLE (indicated as LANTERN PARTS in your inventory).
- You’ll automatically find yourself back at the gate, but before you head back to the intercom, go take a quick look inside your car.
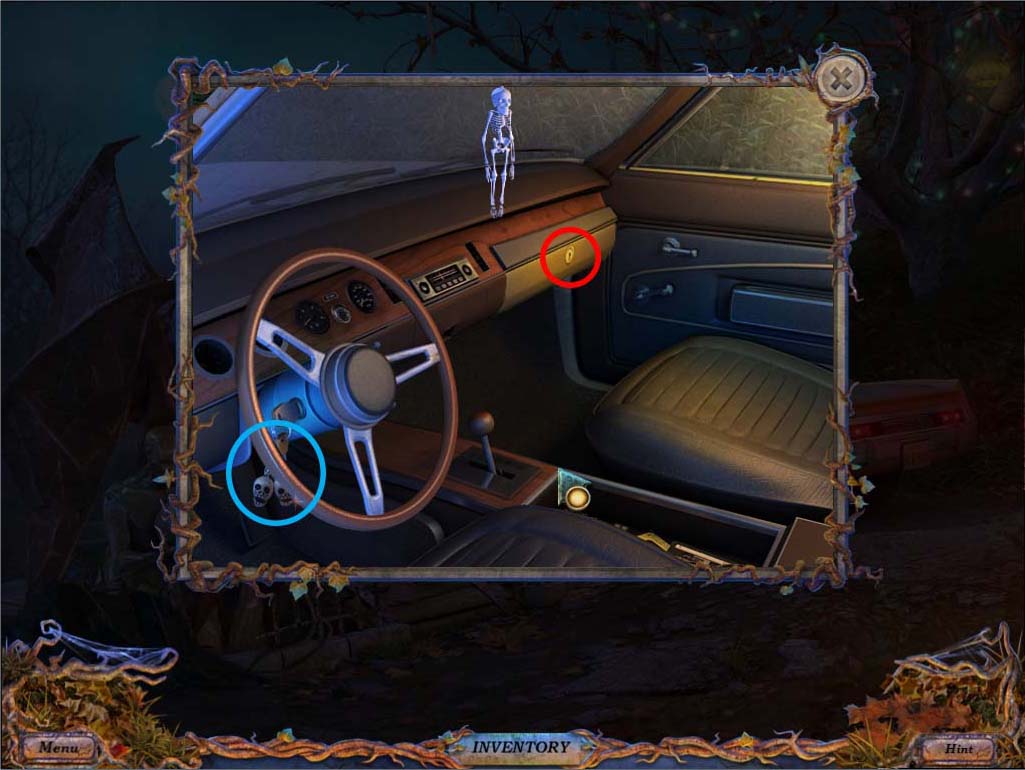
- Get the CAR KEYS (marked in blue) and use them to open the glove compartment (select car keys from inventory and click glove compartment which is circled red above).
- The SCRAPBOOK that our heroine first hid inside will fall out onto the seat.
- Click it to look inside and keep on doing so until you reveal the HALLOWEEN INVITATION.
- The HALLOWEEN INVITATION will go to your inventory and you will now be able to use your SCRAPBOOK at anytime to remind you of clues, puzzles and important events.
- Head back to the intercom, and select the bell button on your inventory.
- Once you put the button in place, select the invitation and then scan it on the lock.
- The gate will open and you can now enter the front yard.
Part II: The Front Yard
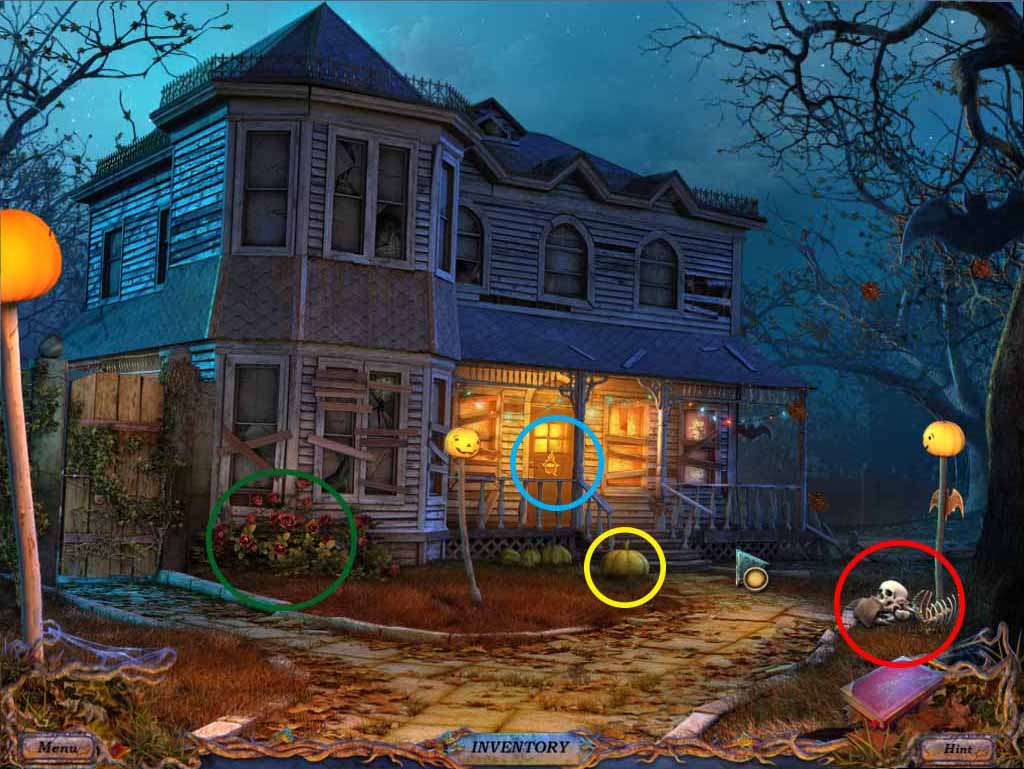
- There are a few tasks you need to do before you can get inside and meet your friends for the party.
- First, head to the door (circled in blue) to get a clue for what you need to do, there will be a sign in front that looks like this:
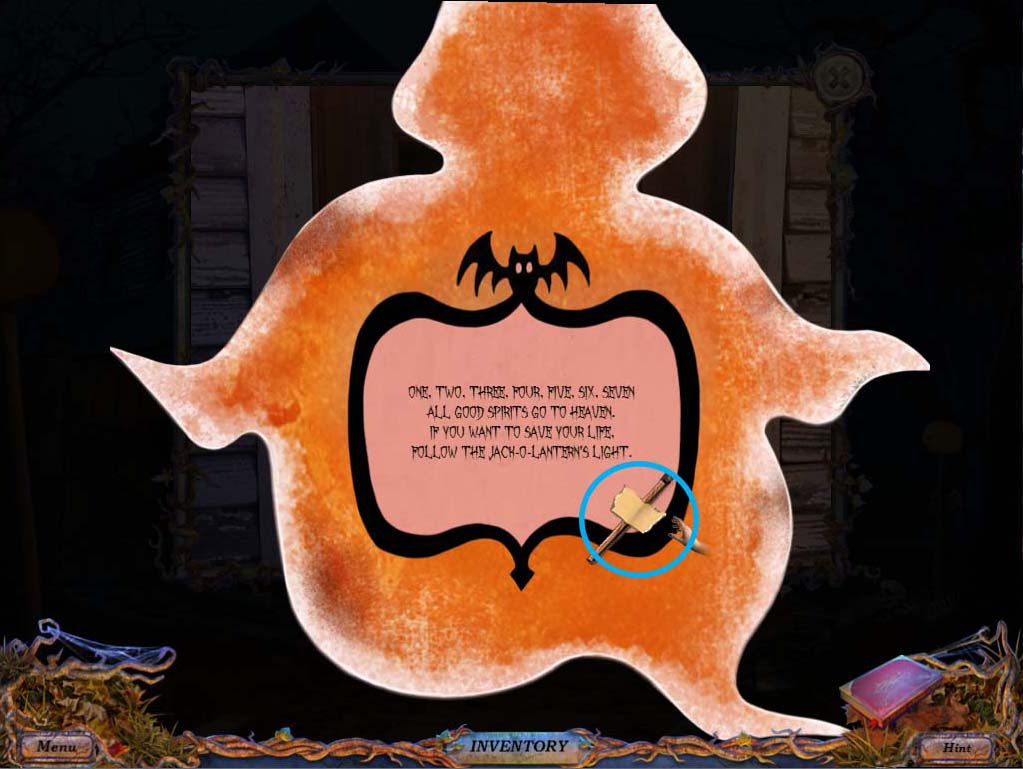
- It seems our heroine needs to make a jack-o-lantern before she can proceed.
- Grab the MATCH (circled in blue) and go back to the front yard.
- Select the pile of bones (front yard, circled in red) to reveal a MAP.
- Pick it up, and you’ll be shown the Map window:
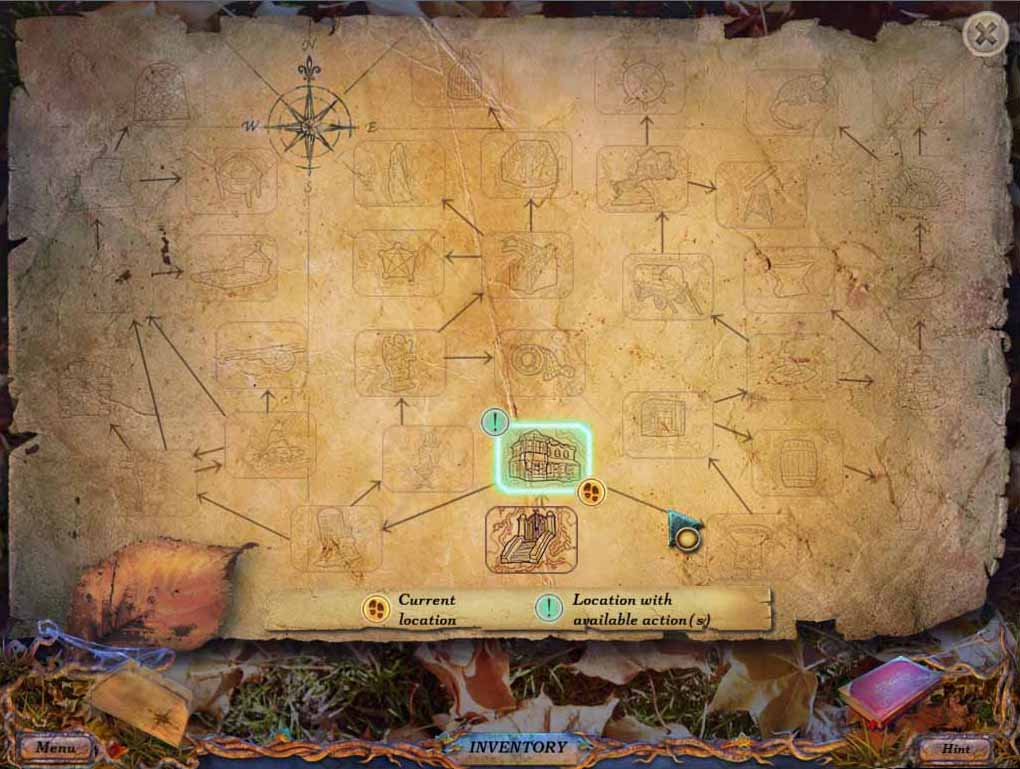
- Locations with available actions will be highlighted if you’re playing in casual mode, otherwise, it will just show the current location that you’re in.
- You can fast travel to any location you’ve already uncovered by clicking the appropriate icon.
- This comes in handy as many clues will often be several areas apart.
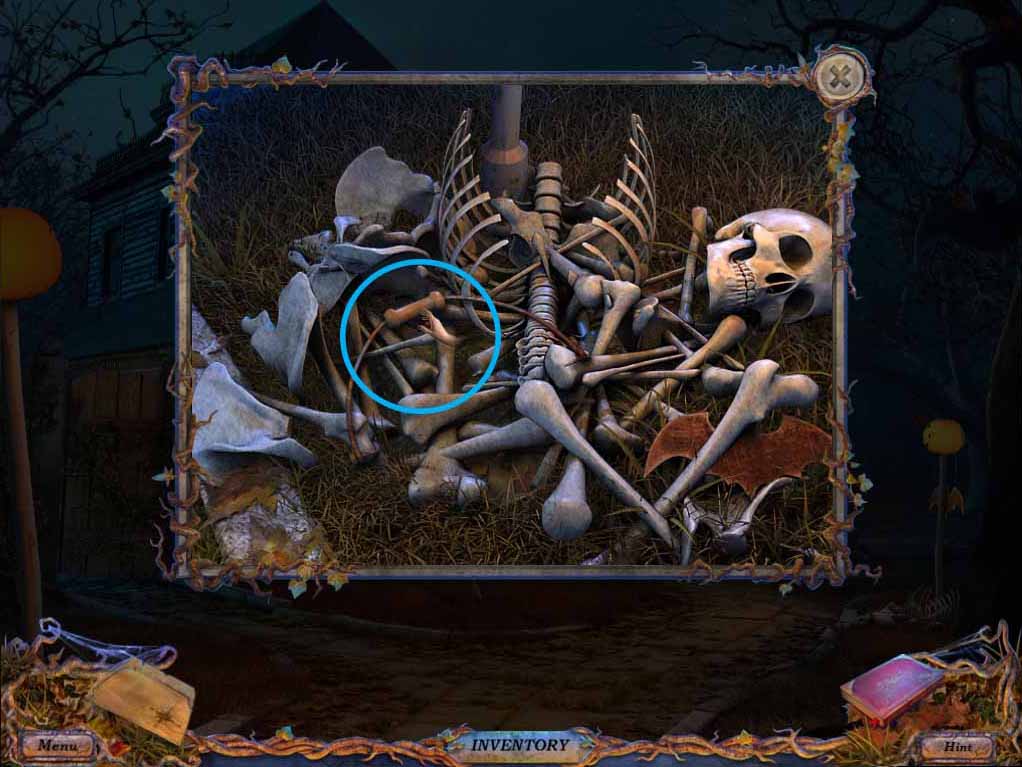
- Once you’ve gotten the map, click the pile of bones again.
- Move all the debris aside until you reveal a CUTTER as shown in this picture:

- Pick it up and then move the debris away again to reveal a HANDLE as shown here:
- Once you’ve picked the HANDLE up, look at the rose bushes (front yard, circled in green) and pick up the CAN OF PAINT:
- You now have all the items you need to make a jack-o-lantern.
- Go back to the front yard and look at the pumpkin (front yard, circled in yellow), choose the LANTERN PARTS from your inventory and click on the pumpkin.
- This will start a new mini-game shown below:
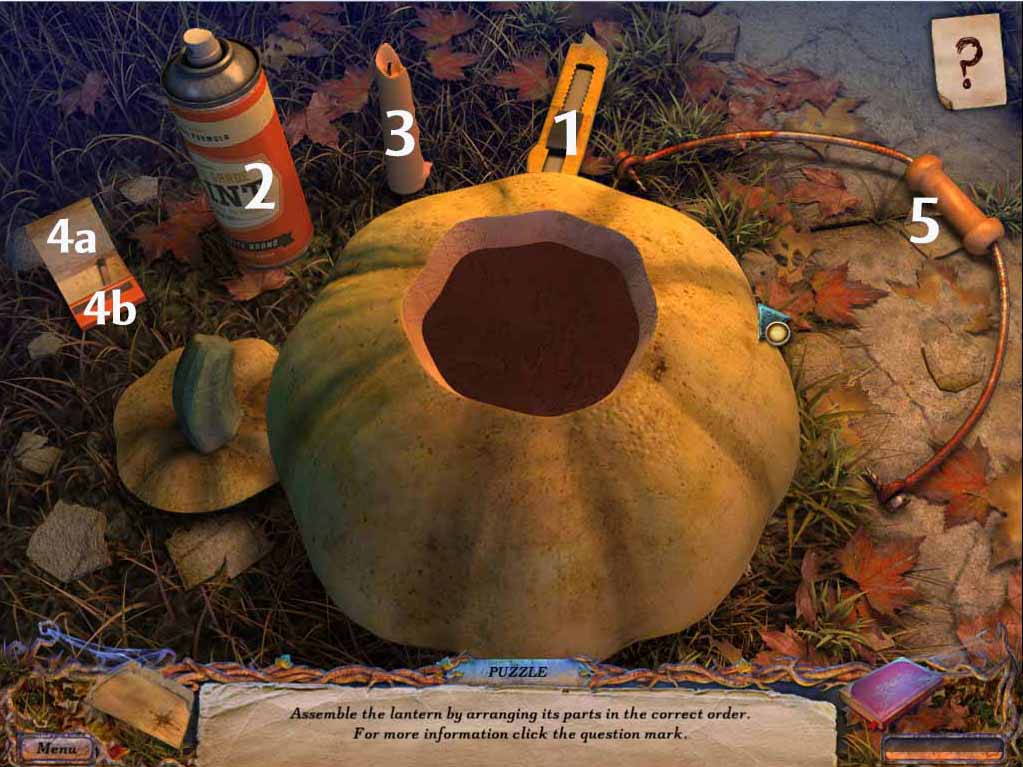
- The object of this mini game is to make a JACK-O-LANTERN following several pre-determined steps (cut out the eyes, paint the pumpkin, place the candle, light the candle, and attach the handle) and if you don’t follow them correctly, you’ll need to start at the beginning. The step by step instructions are numbered above. It is also important to note that you MUST strike the match first, then click on the candle inside the pumpkin, otherwise it will cause the mini-game to start over.
- Once you’re finished, pick up your JACK-O-LANTERN. It’s time to head into the party. A cutscene will begin as our heroine joins her friends inside the house. Something seems terribly wrong though. A devious grin crosses the face of our heroine’s friend Samantha as they start playing a mysterious board game, this night of darkness is about to become darker.
Part III: Escaping the Shadow
After that creepy cutscene, our heroine finds herself alone in the barbecue area. With her friend seemingly swallowed by shadows before her very eyes, she wants to find someone, anyone, to ask for help.

- Before doing anything, check the phone (marked in blue). The phone is broken so you can’t use it to call for help, but click it several more times to see a creepy screen capture and reveal a hidden item below the grate. You can’t get this item for now, but it will be important later. Better look for something else in the meantime.
- You can check the gate lock (marked in yellow above), the Piñata (marked in orange above) or the barbecue grill (marked in white above), but they don’t have anything that you can use at this moment.
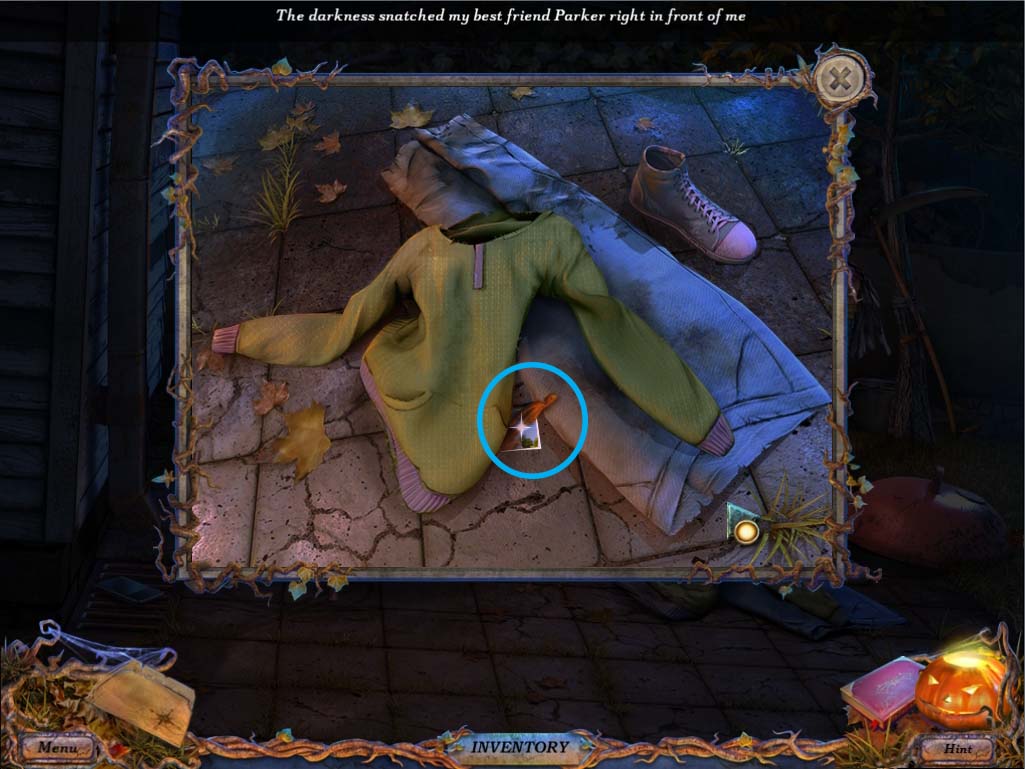
- Check the clothes (marked in red in image above) and inspect it closer (indicated by blue circle in image below) to find a GAME PIECE (goes to your inventory) and a PHOTO (goes to your SCRAPBOOK).
- Once you have both you’ll automatically return to the barbecue area.
- Check under the barbecue grill lid (circled in green) to find a KEY. Pick it up then head back to the GATE (you can either exit to the front yard and go out to the gate, or use the MAP to travel instantly to the GATE area).
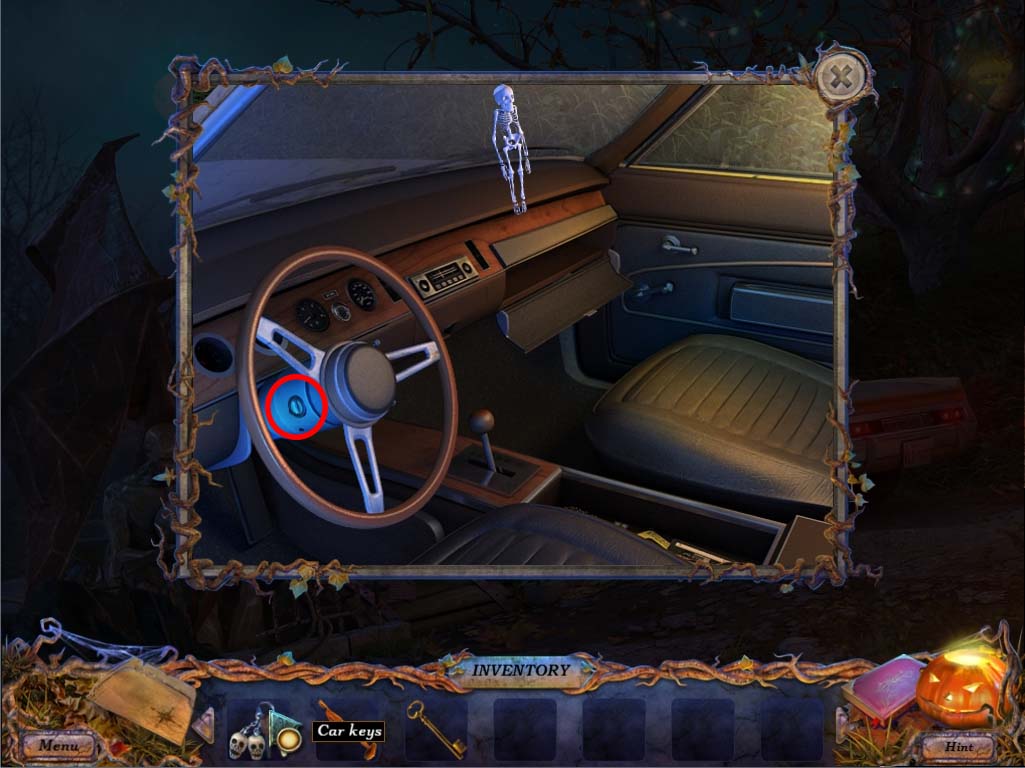
- Get inside the car and use the CAR KEYS on the ignition (circled in red) to try and get to safety.
- Our heroine’s attempts at an early escape prove futile however, and another cutscene makes this point all too clear.
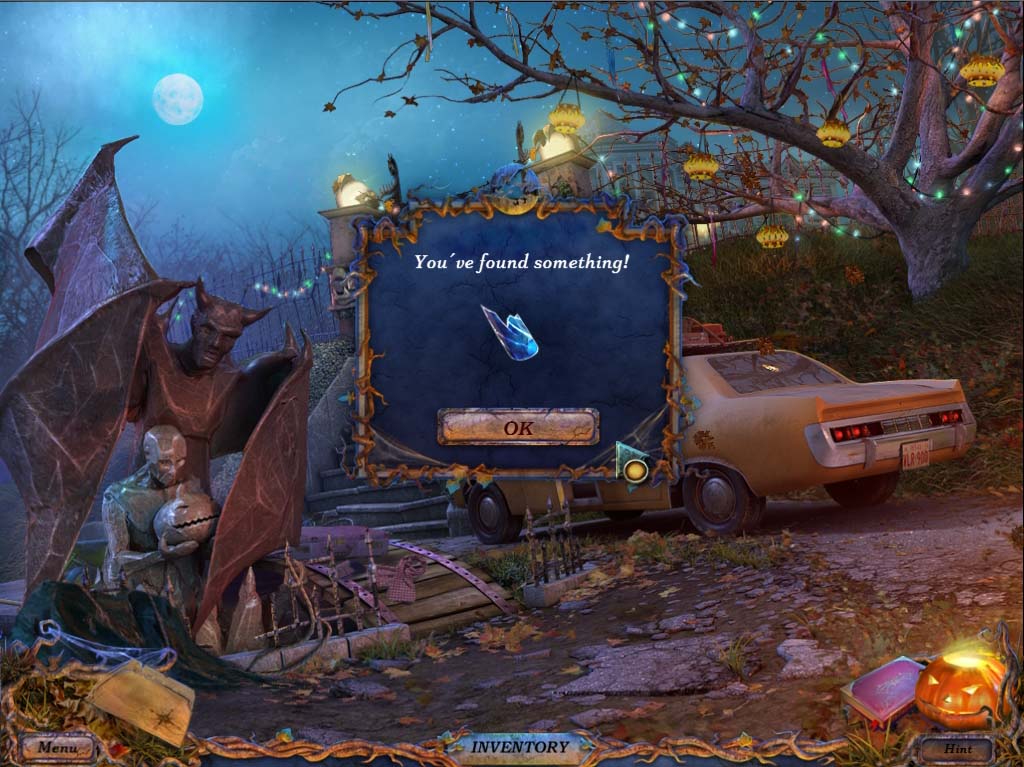
- She automatically gains another item, the SHARP FRAGMENT, and is now force to continue forward, as there is obviously no going back from this nightmare.
Chapter One: Getting to the party
Chapter Two: Missing Friends and Locked Doors
Chapter Three: First Game Piece - The Groom
Chapter Four: Second Game Piece - The Nanny
Chapter Five: Third Game Piece - The Priest
Chapter Six: Fourth Game Piece - The Blacksmith
Chapter Seven: Fifth Game Piece
Chapter Eight: The Last Game Piece
Ask for help in the comments below!