Mayan Prophecies: Ship of Spirits: Chapter 4: The Exorcism
Our Mayan Prophecies Ship of Spirits Walkthrough will help you stay out of trouble as you explore the dangers and mysteries of the ancient Spanish Galleon your boat crashed into. Chock full of valuable information and custom screenshots to help you complete each and every chapter, this comprehensive Mayan Prophecies Walkthrough is a must-have companion to this exciting hidden object adventure game.
General Info and Tips
Chapter 1: Entering the Ship
Chapter 2: Freeing the Cabin Boy
Chapter 3: The Treasure Room
Chapter 4: The Exorcism
Chapter 5: The Cure
Chapter 6: The Jacket
Chapter 7: Gregory’s Release
Chapter 8: Preparation
Chapter 9: The Portal
Chapter 10: Trapped
Ask for help in the comments below!
Chapter 1: Entering the Ship
Chapter 2: Freeing the Cabin Boy
Chapter 3: The Treasure Room
Chapter 4: The Exorcism
Chapter 5: The Cure
Chapter 6: The Jacket
Chapter 7: Gregory’s Release
Chapter 8: Preparation
Chapter 9: The Portal
Chapter 10: Trapped
Ask for help in the comments below!
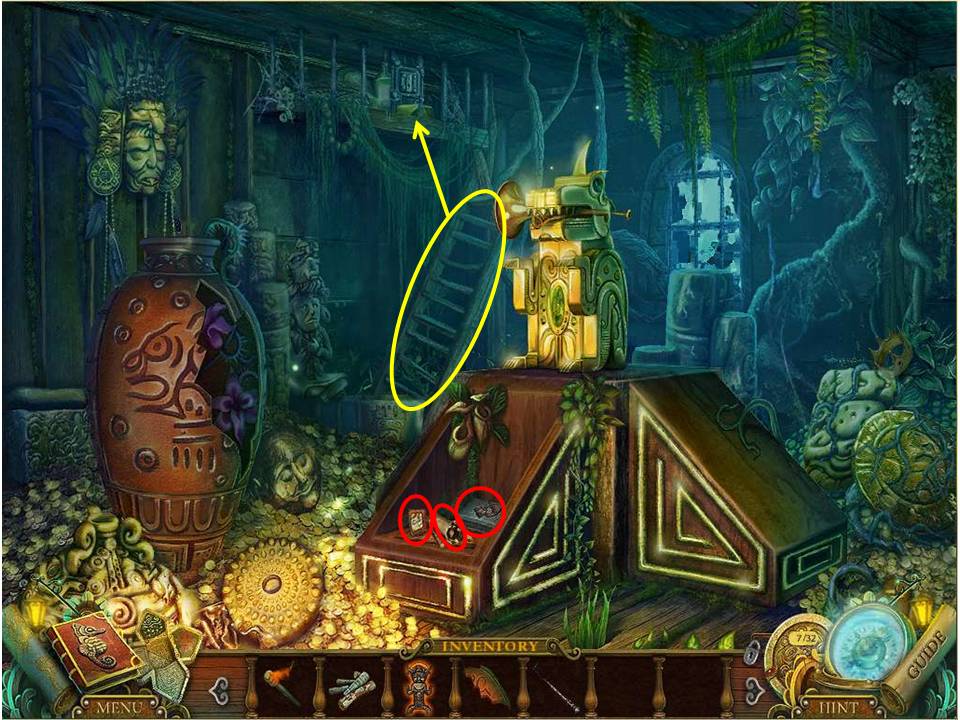
- Zoom in on the shelf at front.
- Take the scroll, Mayan calendar piece, and the MOLD.
- Click on the ladder to move it to a position where you can look at the grate above.
- Go to the galley.
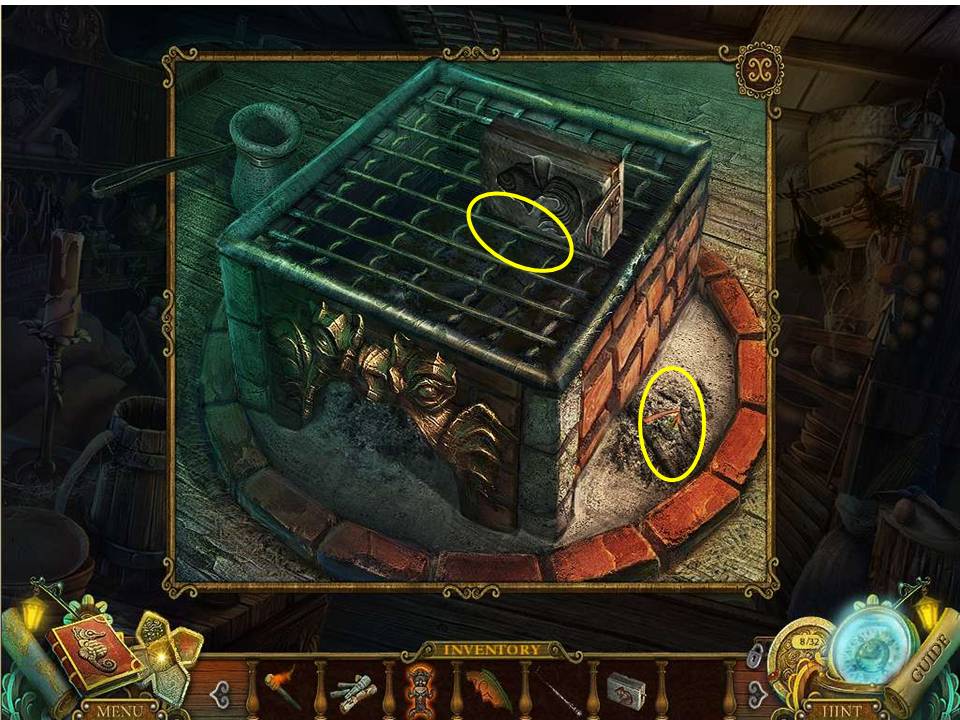
- Zoom in to the oven and use the POKER to clear the ashes and find another Mayan calendar piece.
- Place the missing half of the MOLD in place.
- Move on to the Mayan slab.
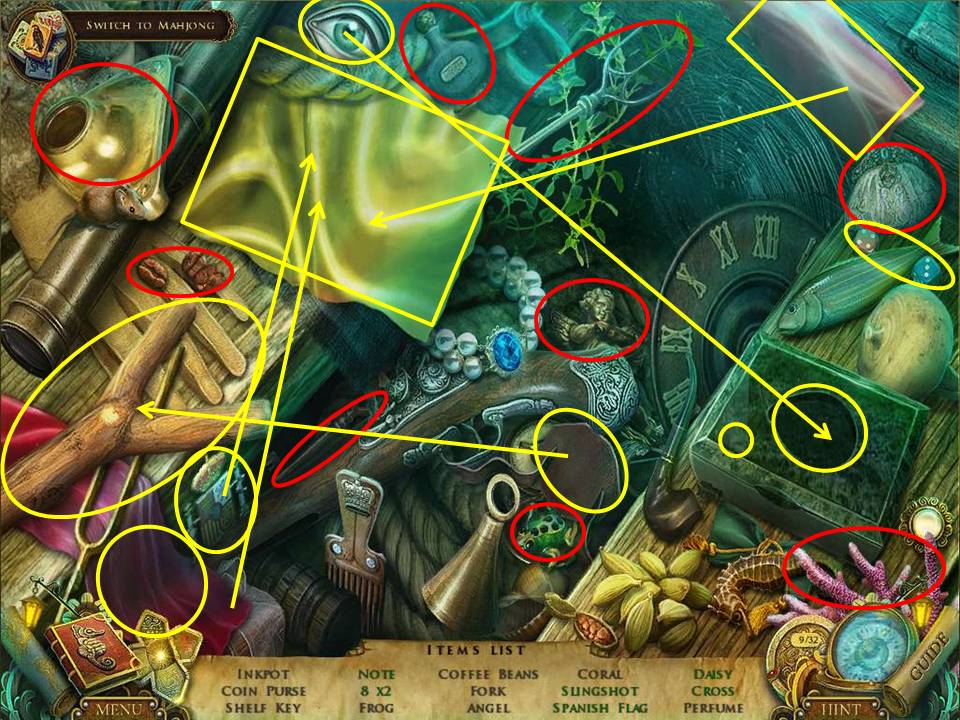
- Collect all the items circled in red, and go through the usual multiple move process for those circled in yellow.
- Click on the plate to release the hummingbird.
- Remove the VIII and the daisy from the clockface.
- Place the eye on the box to open it and retrieve the dice, the note, and the cross (from the lid) then click on the disc to release the hummingbird for capture.
- When complete, take the SHELF KEY and head off to the treasure room.
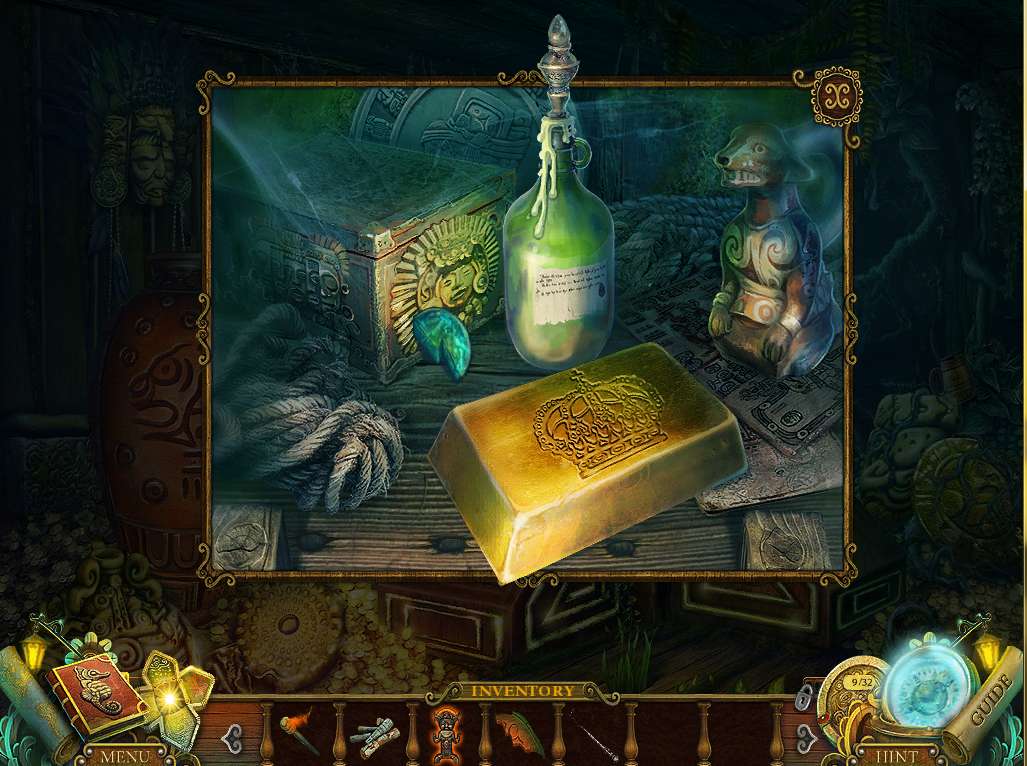
- Zoom in on the locked shelf above the ladder and use the SHELF KEY to unlock it.
- Take the GOLD BAR (with so much loot lying around on the floor, why the need to lock up a solitary gold bar?) the GLUE, and the CROCODILE EYE.
- Insert the latter in the golden statue to release the PAPYRUS SCROLL and TRUMPET into inventory.
- Next, use the GLUE on the vase to the left, then slot the VASE FRAGMENT in place.
- Collect the GOLDEN CORN that appears inside the base of the vase.
- Head down to the storage room.
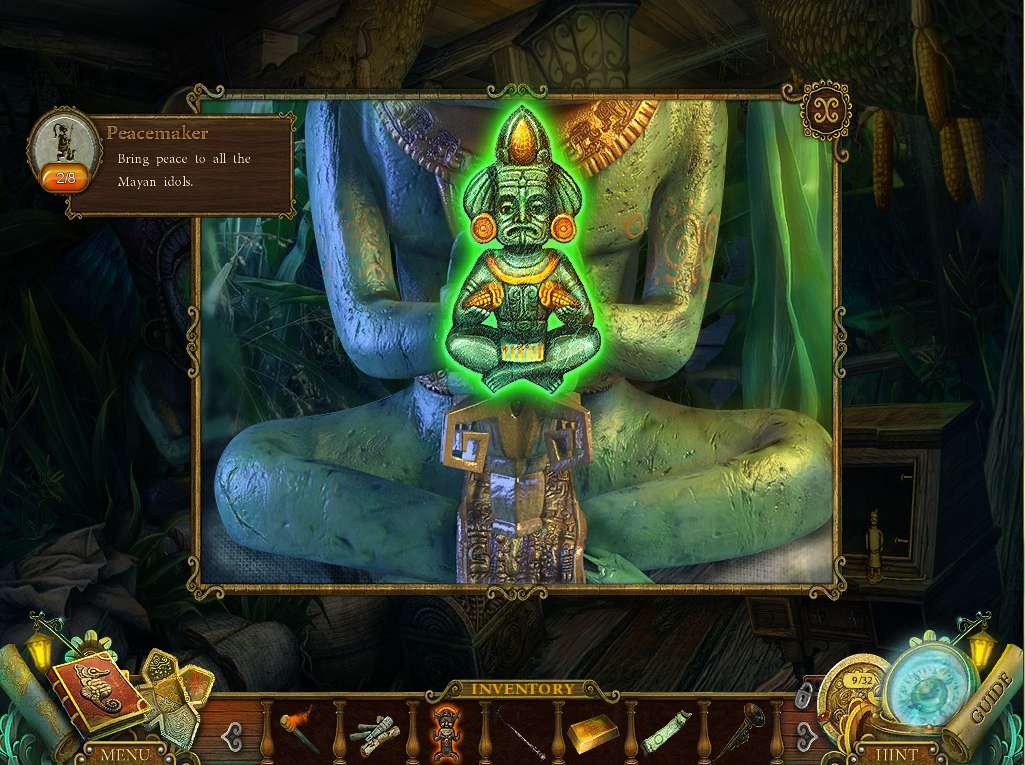
- Zoom in on the idol and place the GOLDEN CORN in the empty hand to the right.
- After the little bit of magic that takes place, grab the CORN GOD STATUETTE and head to the galley.
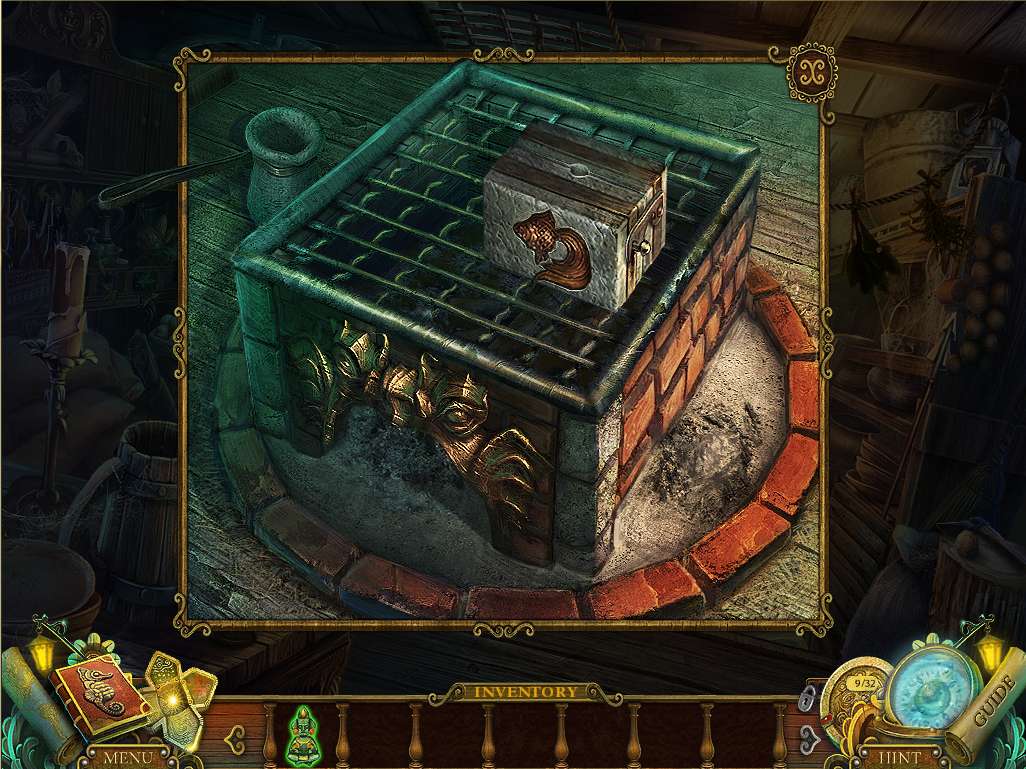
- Place the FIREWOOD in the grate and use the LIT TORCH to set it ablaze.
- Put the ladle on the grill and place the GOLD BAR inside it to melt down.
- Pour the molten gold into the MOLD and take the resulting GOLDFISH.
- Head down to the armory.
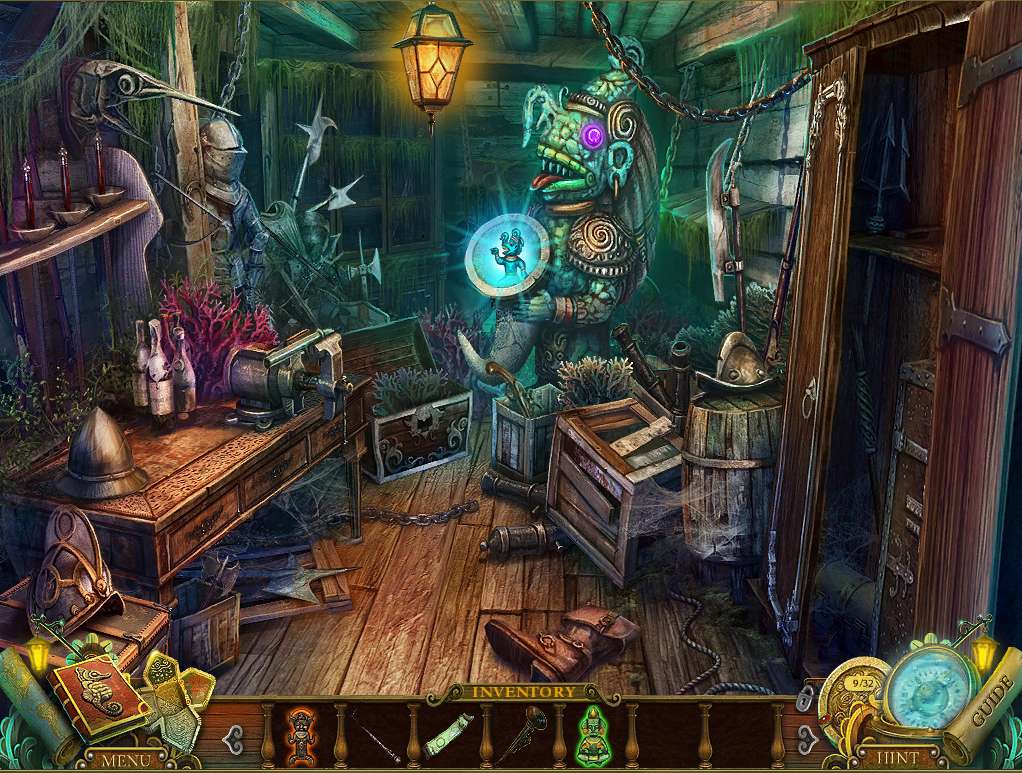
- Place the GOLDFISH on the wall of water and watch it swim away with all the liquid.
- Grab the RAIN GOD STATUETTE left behind – no wonder there was all this mysterious water in the room!
- Head down to the lower deck and initiate the HOA to the right.
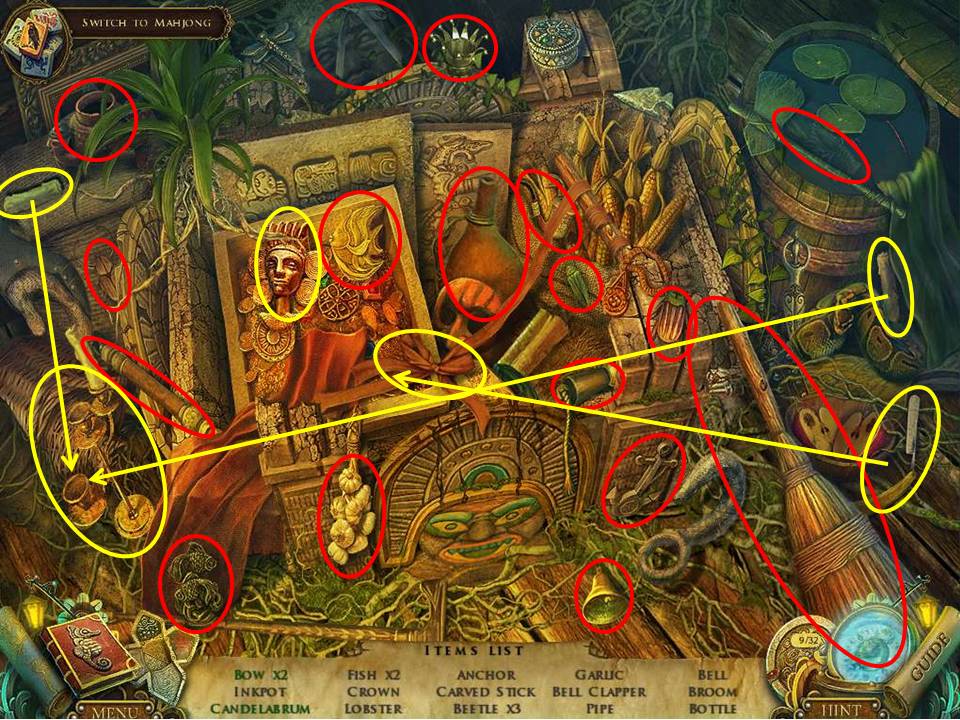
- You know the drill – collect the items circled in red, multi-moves required for those circled in yellow.
- Lift the lid on the gold box to click on the small statue, which will release the hummingbird.
- Slide the green fabric to one side to reveal the candle, which you can combine with the other one on the candelabra.
- Use the knife to release the bow.
- When finished take the BELL CLAPPER and head to the foredeck.
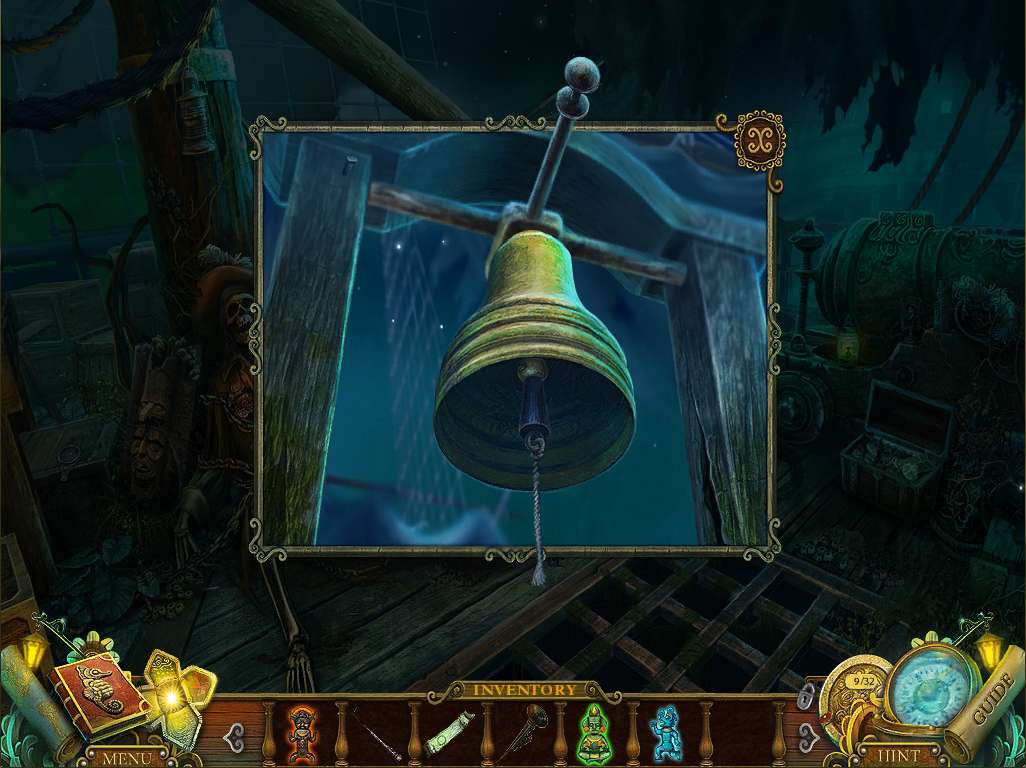
- Zoom in on the bell and insert the BELL CLAPPER to complete the BELL – take it. Head down to the Mayan slab.
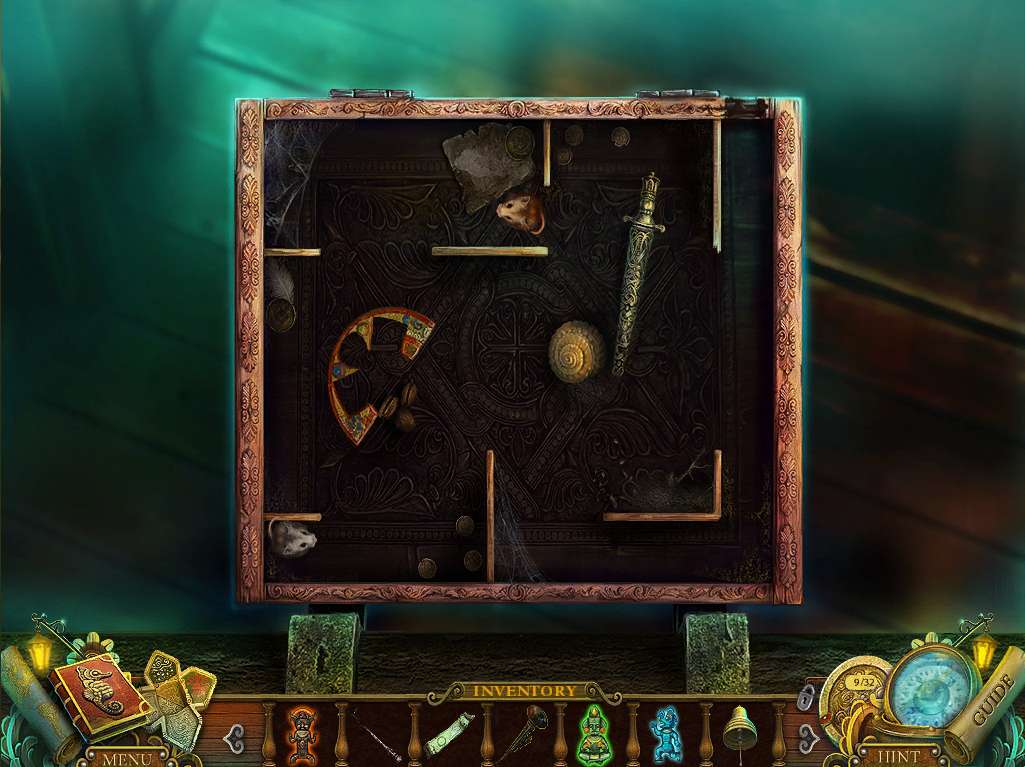
- Zoom in on the chest and add the BELL to it in order to initiate the next puzzle.
- The aim is to drive the mice out by using the bells on the sides (why you just can’t tip the box over is anyone’s guess! Or if they hate noise, why not just scream some mice-related obscenities at them?)
- Try playing around with this, as you have the backup of being able to reset and use the following solution.
- Working on the basis that the bells are marked Top, Bottom, Left and Right (and that the bells will drive the mice in the opposite direction) proceed this – Left, Bottom, Left, Top, Right, Top, Left, Bottom, Left, Bottom, Left, Top, Right, Top, Left, Bottom.
- When complete, take the Calendar piece and the CAPTAIN’S DIRK.
- Proceed to the captain’s bedroom.
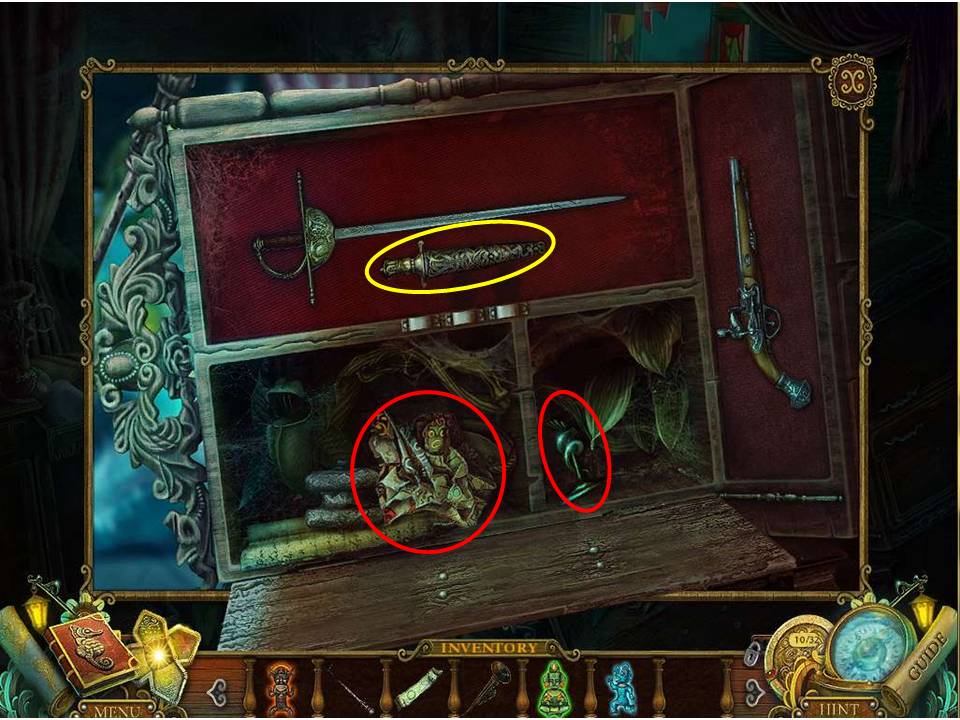
- Zoom into the cabinet on the right and put the CAPTAIN’S DIRK in place.
- Click on the lower half to open it, and retrieve the AESCULAPIUS SIGN and PICTURE PART.
- Next stop - the treasure room.
- Zoom in on the crocodile base and add the PICTURE PART to the other section.
- Head off to the captain’s quarters.
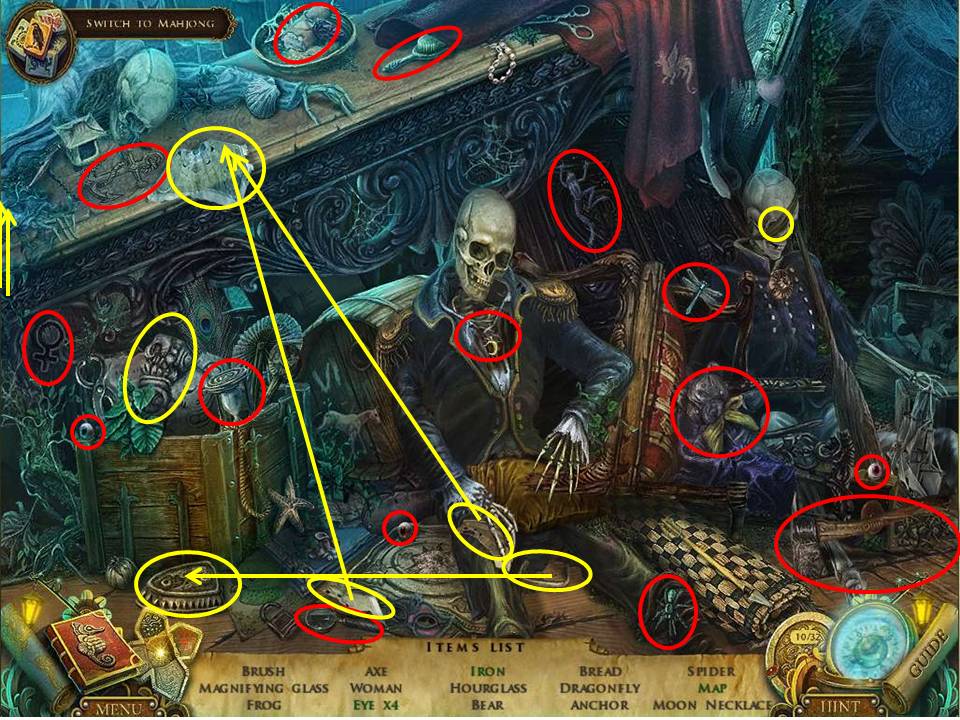
- Collect the items circled in red, yellow require multiple moves.
- Move the blue fabric to one side and click the statue to retrieve the hummingbird.
- Open the coat on the right skeleton to find the moon necklace and push the bandage across the eyes to find one of the eyes.
- Place the handle on the iron to complete it.
- Assemble the pieces to acquire the map.
- When complete take the IRON and return to the treasure room.
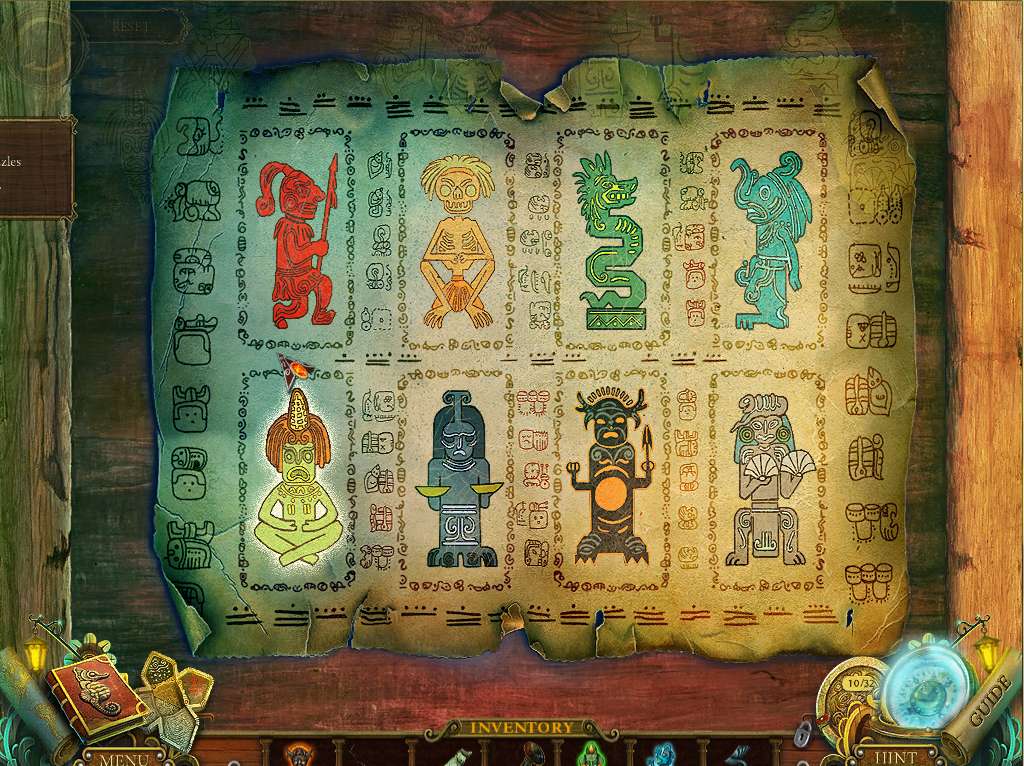
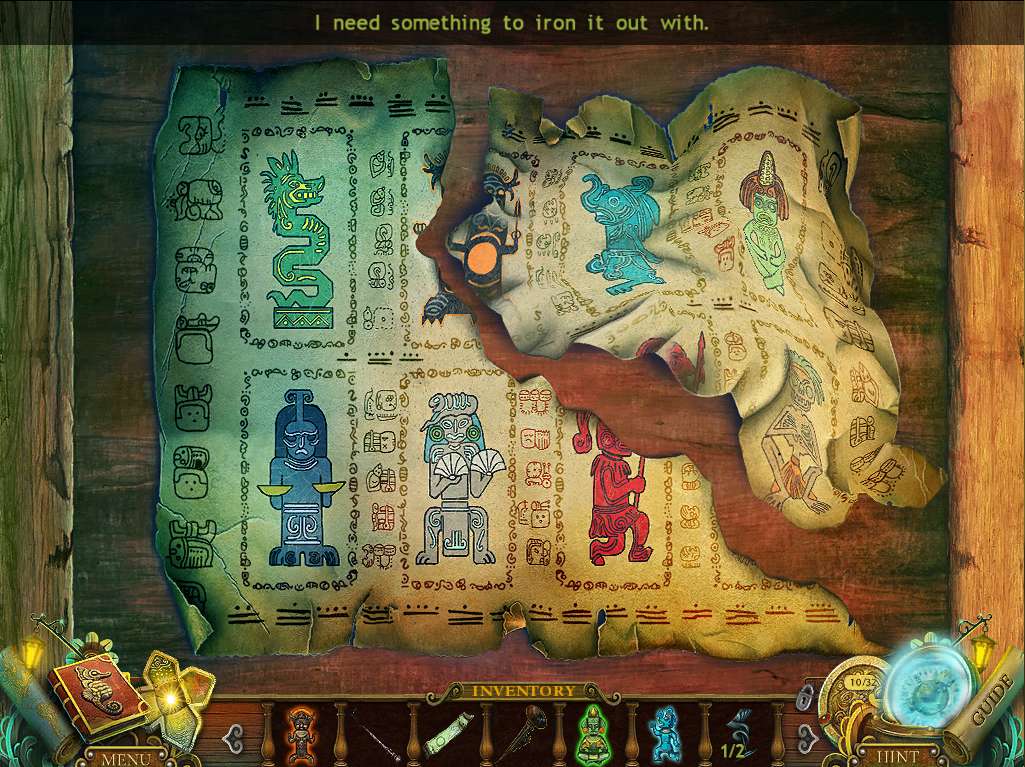
- Use the IRON to flatten the picture parts together to initiate the next puzzle.
- The object is to place the eight God figures in their correct position on the picture, using the scraps above for clues.
- See the screenshot for the solution.
- When complete take the WIND SYMBOL and head to the elevator.
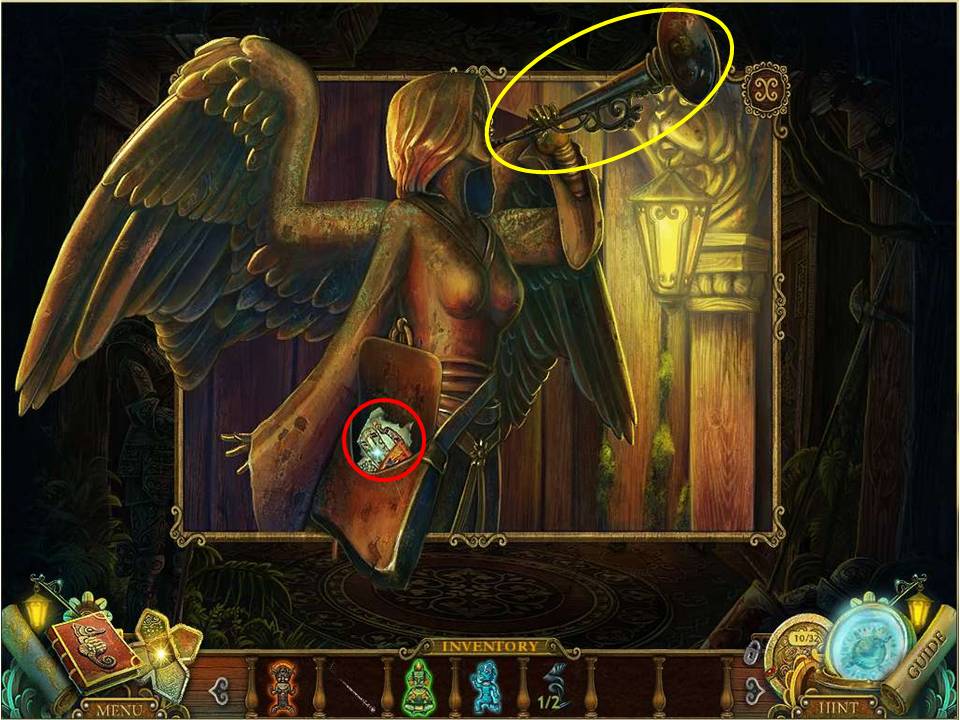
- Zoom in on the angel and give her the TRUMPET.
- The pouch will open, allowing you to retrieve a calendar piece and the SNAKE SYMBOL.
- Proceed to the captain’s bedroom.
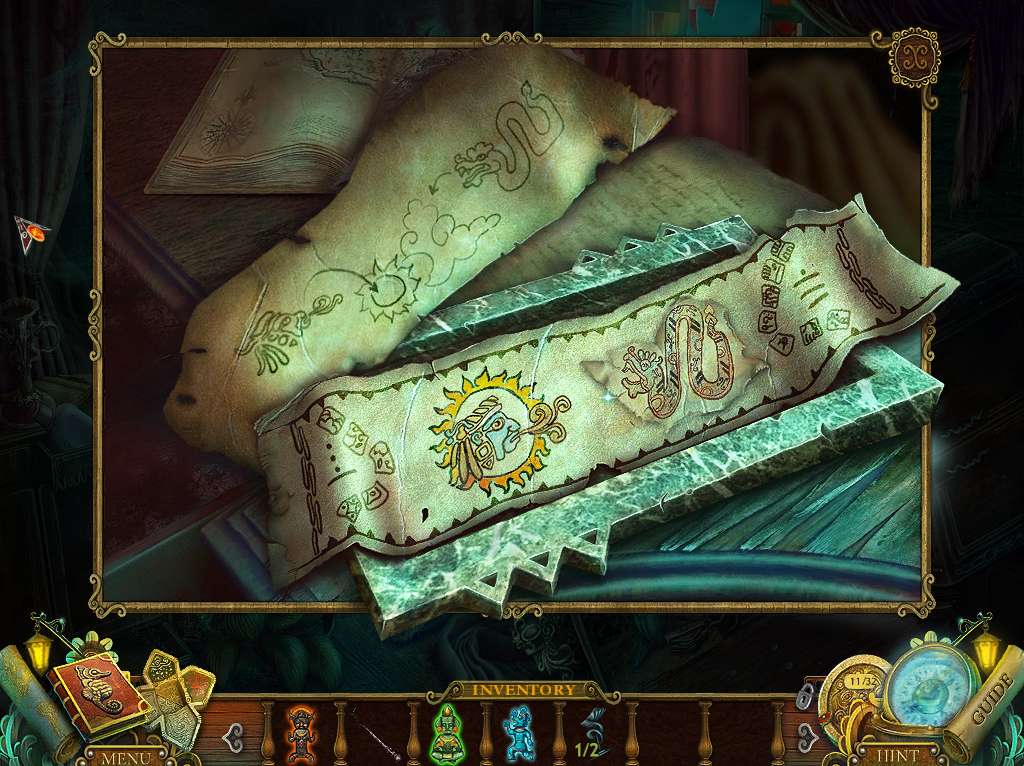
- Zoom in on the nightstand and place the WIND SYMBOL, the SNAKE SYMBOL and the PAPYRUS SCROLL on the marble plate.
- Take the completed SCROLL and head to the sarcophagus.
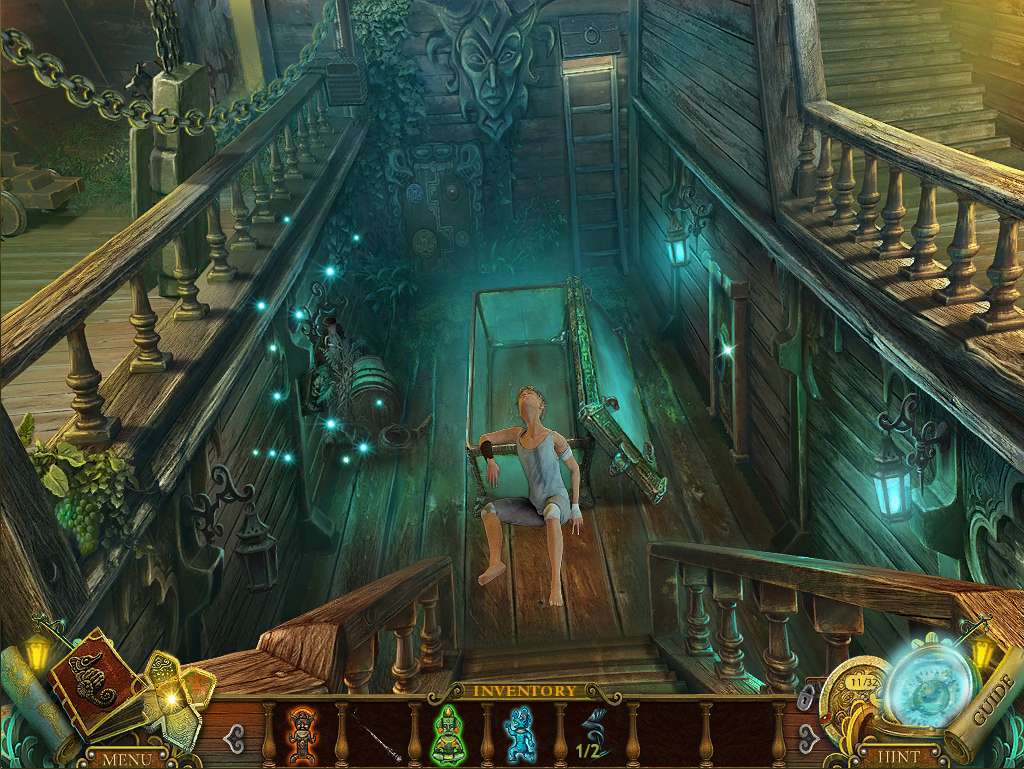
- Click on the demon with the SCROLL and watch the outcome.
General Info and Tips
Chapter 1: Entering the Ship
Chapter 2: Freeing the Cabin Boy
Chapter 3: The Treasure Room
Chapter 4: The Exorcism
Chapter 5: The Cure
Chapter 6: The Jacket
Chapter 7: Gregory’s Release
Chapter 8: Preparation
Chapter 9: The Portal
Chapter 10: Trapped
Ask for help in the comments below!
Chapter 1: Entering the Ship
Chapter 2: Freeing the Cabin Boy
Chapter 3: The Treasure Room
Chapter 4: The Exorcism
Chapter 5: The Cure
Chapter 6: The Jacket
Chapter 7: Gregory’s Release
Chapter 8: Preparation
Chapter 9: The Portal
Chapter 10: Trapped
Ask for help in the comments below!
