Mayan Prophecies: Ship of Spirits: Chapter 1: Entering the Ship
Our Mayan Prophecies Ship of Spirits Walkthrough will help you stay out of trouble as you explore the dangers and mysteries of the ancient Spanish Galleon your boat crashed into. Chock full of valuable information and custom screenshots to help you complete each and every chapter, this comprehensive Mayan Prophecies Walkthrough is a must-have companion to this exciting hidden object adventure game.
General Info and Tips
Chapter 1: Entering the Ship
Chapter 2: Freeing the Cabin Boy
Chapter 3: The Treasure Room
Chapter 4: The Exorcism
Chapter 5: The Cure
Chapter 6: The Jacket
Chapter 7: Gregory’s Release
Chapter 8: Preparation
Chapter 9: The Portal
Chapter 10: Trapped
Ask for help in the comments below!
Chapter 1: Entering the Ship
Chapter 2: Freeing the Cabin Boy
Chapter 3: The Treasure Room
Chapter 4: The Exorcism
Chapter 5: The Cure
Chapter 6: The Jacket
Chapter 7: Gregory’s Release
Chapter 8: Preparation
Chapter 9: The Portal
Chapter 10: Trapped
Ask for help in the comments below!

- Begin by taking the LIFE RING – it’s never too early to take precautions!
- Zoom into the mount to your right (the cylindrical contraption mounted on the deck).
- Take Gregory’s ID, the BROKEN FLARE GUN and the WINCH HANDLE.
- Next, throw the LIFE RING out to the box floating nearby to reel it in.
- Take the wanted poster and the GRAPPLING HOOK.
- Attach the latter to the mount and pitch it at the trap door on the bow of the ship (since when do boats have trap doors on the bow – kind of hazardous in rough seas, one would think!)
-
Place the WINCH HANDLE on the mount and ‘haul away’ – makes you feel all Long John Silver-ish, right?
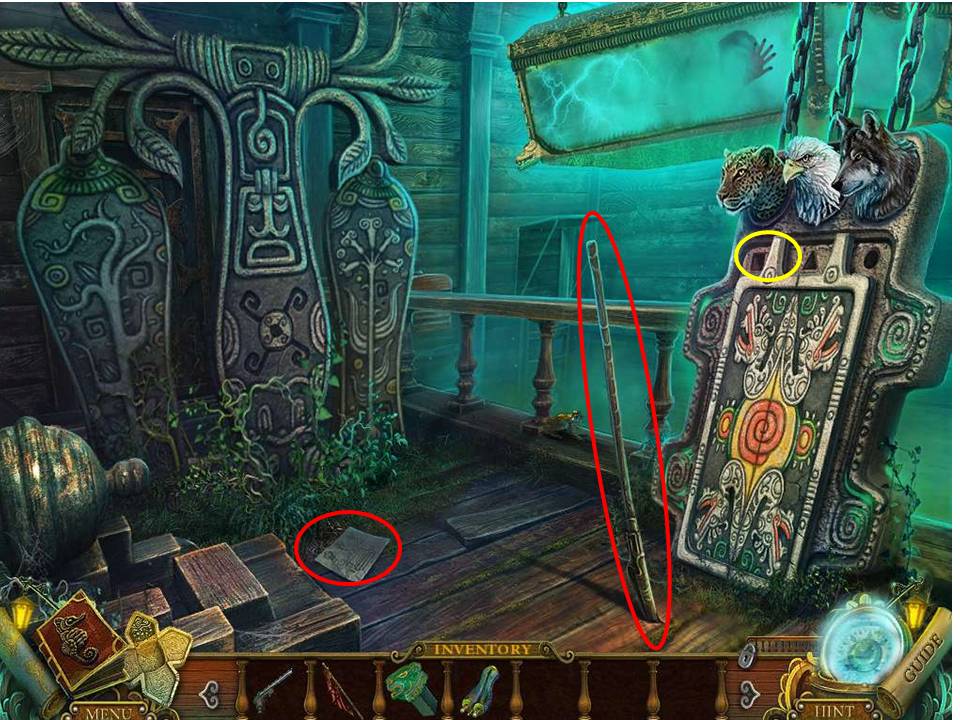
- Zoom in on the fire grate on the floor and take the FLAG.
- Read the notes sitting next to the pumpkin.
- Note the fresh fish.
-
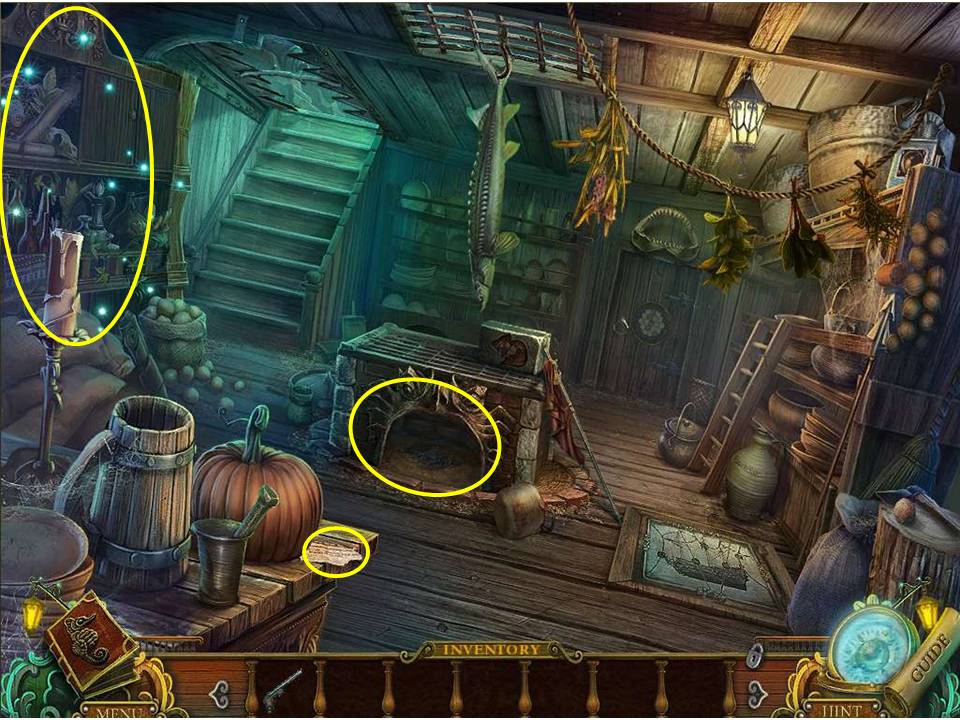
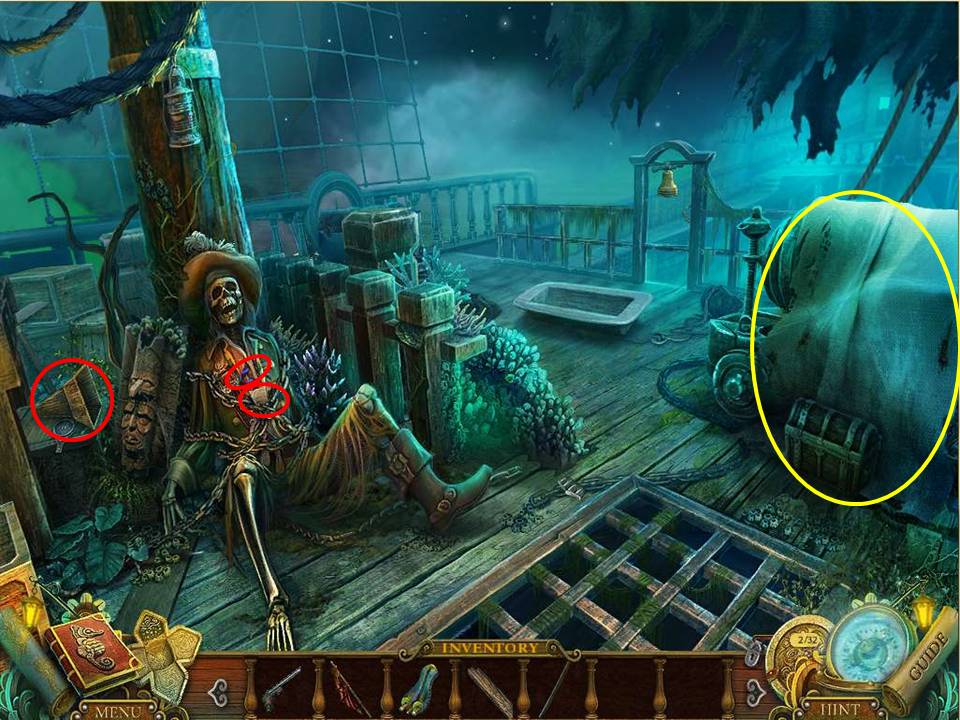
Zoom in on the HOA sparkling away on the left to initiate the first run at one during this game.
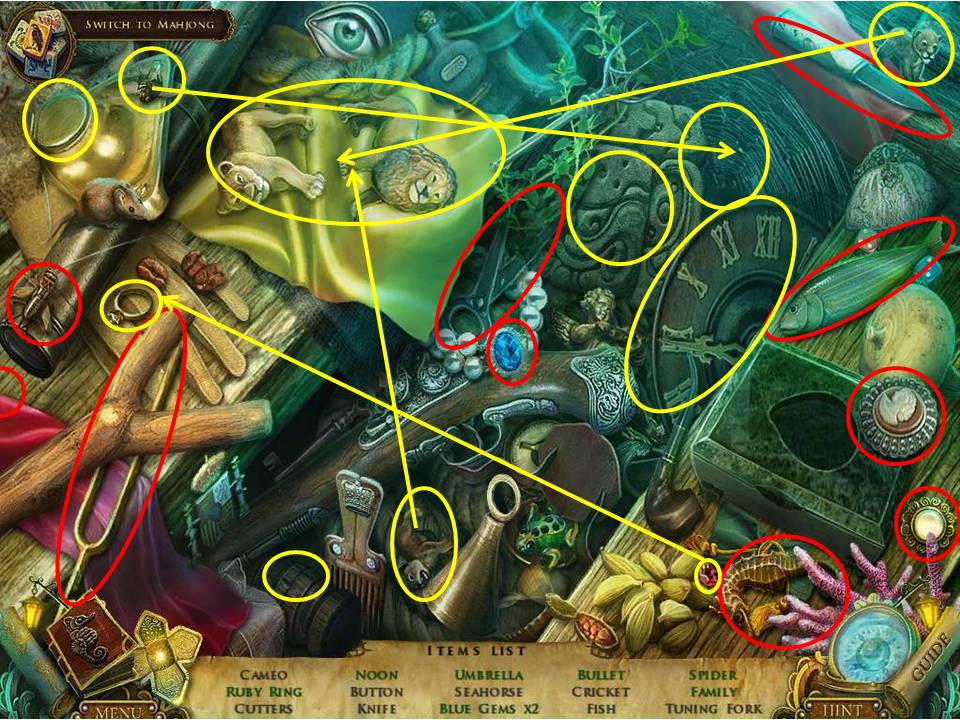
- Collect the items circled in red.
- Items circled in yellow require multiple moves – Click on the statue to discover the hummingbird, which you’ll have to chase around with the curser to collect – feel like Mr. Miyagi trying to catch flies with chopsticks?
- Grab the saw band use it on the wood to collect a chunk of wood.
- Grab the spear point and place it on the end of the shaft to make a spear.
- Place the door handle located to the left on the open piece of wood to the right to open it and retrieve the hammer and the horn.
- Finally put the blue bottle on the yellow one to make yourself a green bottle!
-
A GOLDEN TOKEN will appear which you can slot away in inventory for future use!
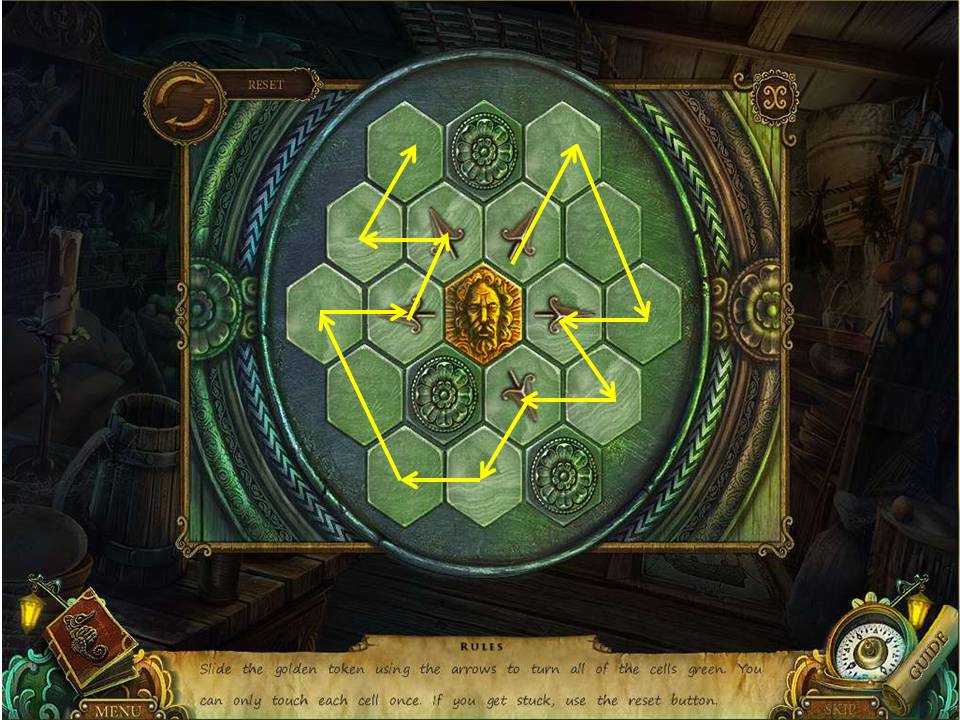
- Zoom into the door on the right and insert the GOLDEN TOKEN in the center to initiate the first puzzle.
- The aim of the puzzle is to turn all of the squares green without passing over the same squares twice.
- Play around with it if you like, as you can always reset and follow the screenshot for the solution if need be.
-
Once complete, enter through the door to the lower deck.
- Watch the cut scene, then trying going past the idol on the right – whoa! He isn’t letting you get by no matter how many times you try!
- Now try going down the stairs and see what happens to you! Fire, lighting – what’s next, frogs raining down?
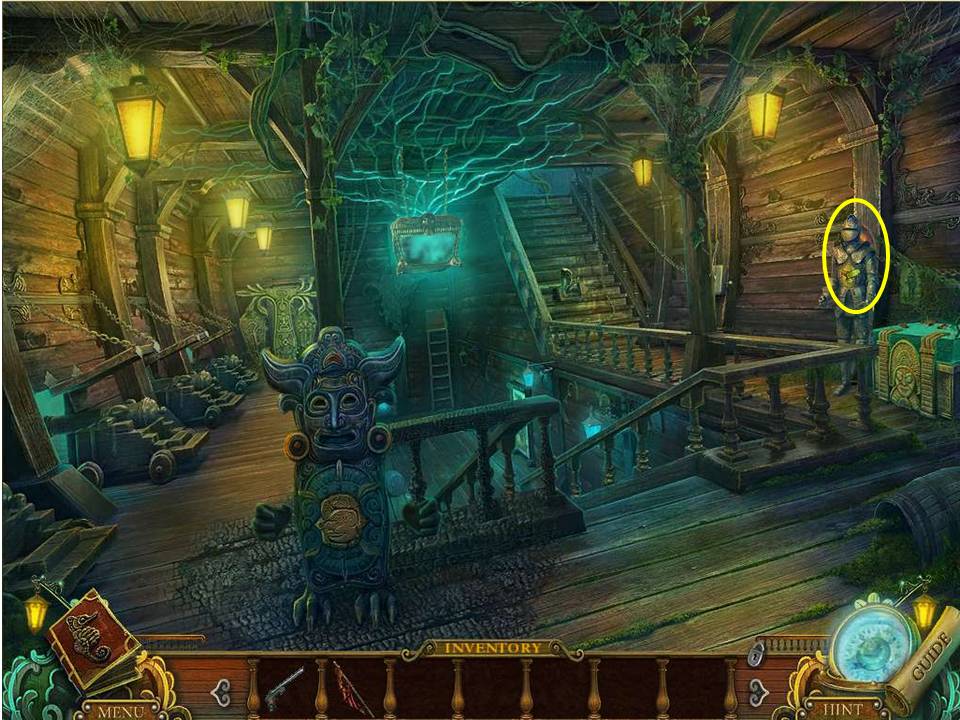
- Click on the knight – take the TOKENS.
- Click on the knight’s helmet and take the cannon ball, which will appear on the chest.
- Take a closer look at the diagram on the wall behind the knight.
- Zoom back, and try the steps behind the knight – drat, a cobra!
- Click on the device to the right for an insight into the eventual solution.
-
Exit back out to the galley.
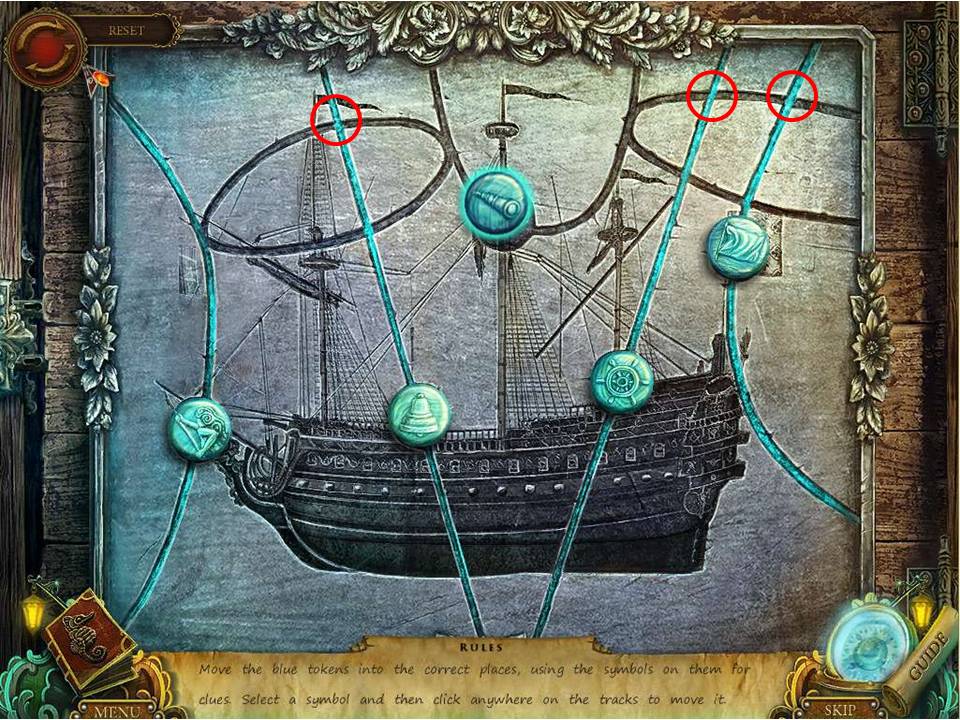
- Time to take a closer look again at the drawing of the ship on the floor.
- Place the TOKENS on it to initiate the next puzzle.
- Noting the symbol on each token, the aim is to place each one in its correct position on the ship - note the screenshot for the final positions.
- The basic rule is that to get a token to its appropriate position, no other token can be in the way of its path.
- As there are two places where the tokens can go – the actual slots for the tokens and any intersects on the paths, the solution is pretty easy. Pick whichever one you want to start with – say the figurehead for the bow – and move most of the others out of the way by sliding them up into three ‘holding’ intersects (marked in red) at the top where you can stash tokens without blocking the direct paths.
- That leaves only one extra symbol to deal with, which can easily be maneuvered around.
- Once the figurehead is in place, the others are then easily set in their appropriate positions.
-
When completed successfully, go down the trapdoor to the storage room.
- Pass the curser over the Mayan idol for an interesting effect, then zoom in to collect the JAGUAR TOTEM KEY and the METAL FROG TONGUE.
- Zoom back out, and collect the Ancient Map of the Ship to the totem’s right.
- Take the CROSSBAR leaning up near the totem.
- Zoom in on the desk and take the FIRE SYMBOL.
-
Go back up to the galley.
-
Place the CROSSBAR on the trap above the steps (better known as the jaws of death!) and head up to the hold.
- Collect the ARTIFACT and the second FIRE SYMBOL.
-
Return back down below.
- Go in to the lower deck and put the now complete FIRE SYMBOL in place.
- After the pyrotechnics, go forward to the Mayan slab and collect the SPEAR and the note.
- Slot the JAGUAR TOTEL KEY in place in the slab on the right.
-
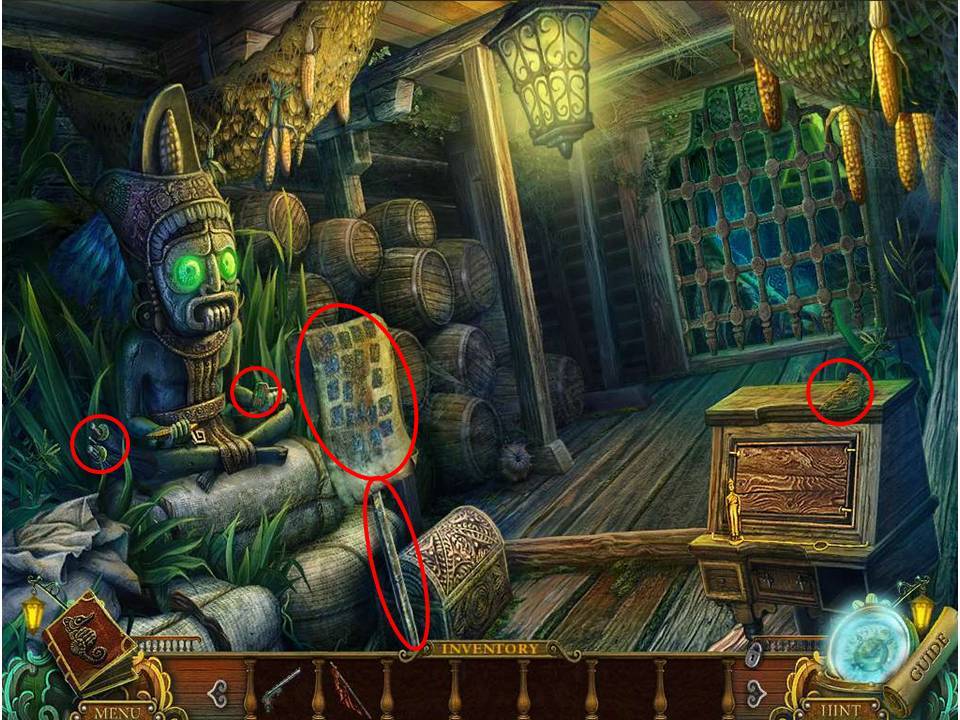
Once initiated, zoom into the floor to play the HOA puzzle.
- Collect all the items circled in red.
- Items circled in yellow require multiple moves to acquire – Click the idol to grab the pesky hummingbird.
- Zoom in on the clock and click the hands to the 12 O’clock position – also collect the small umbrella engraved in the clock face.
- Grab the little ruby and place it on the ring to complete the ruby ring.
- Open the golden receptacle to find the second blue gem.
- Return the two lion cubs to their parents to keep them happy.
- Put the fly on the web to coax the spider out.
- Click on the pistol to have it eject the bullet (which it’s not, it’s a lead ball).
-
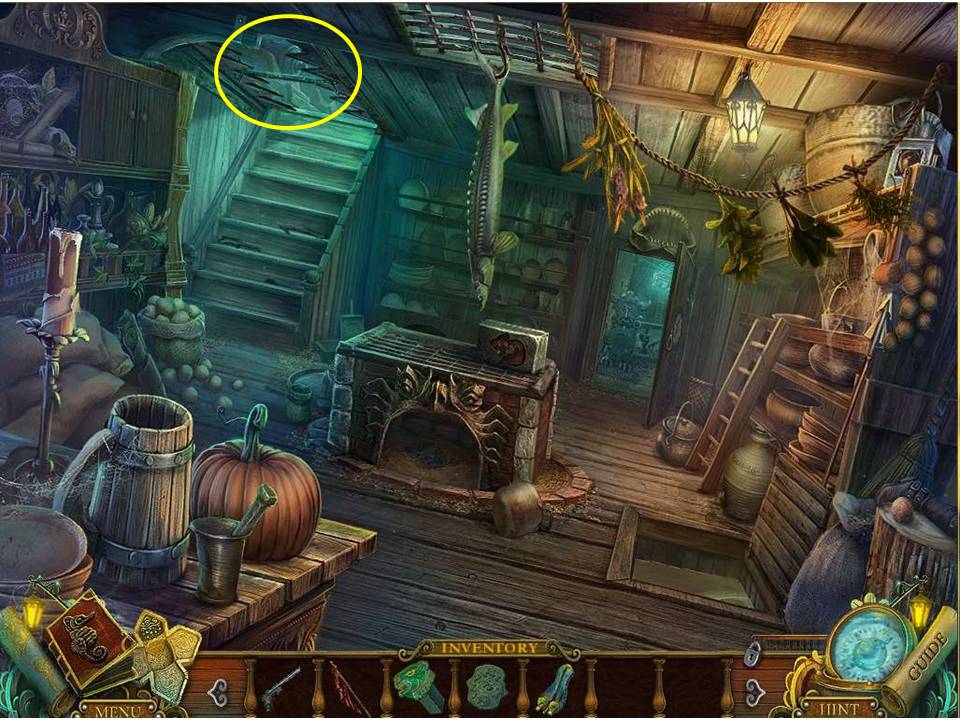
Once complete, receive the CUTTERS and return to the hold on the deck above.
- Watch the cut scene – a pet octopus on board?
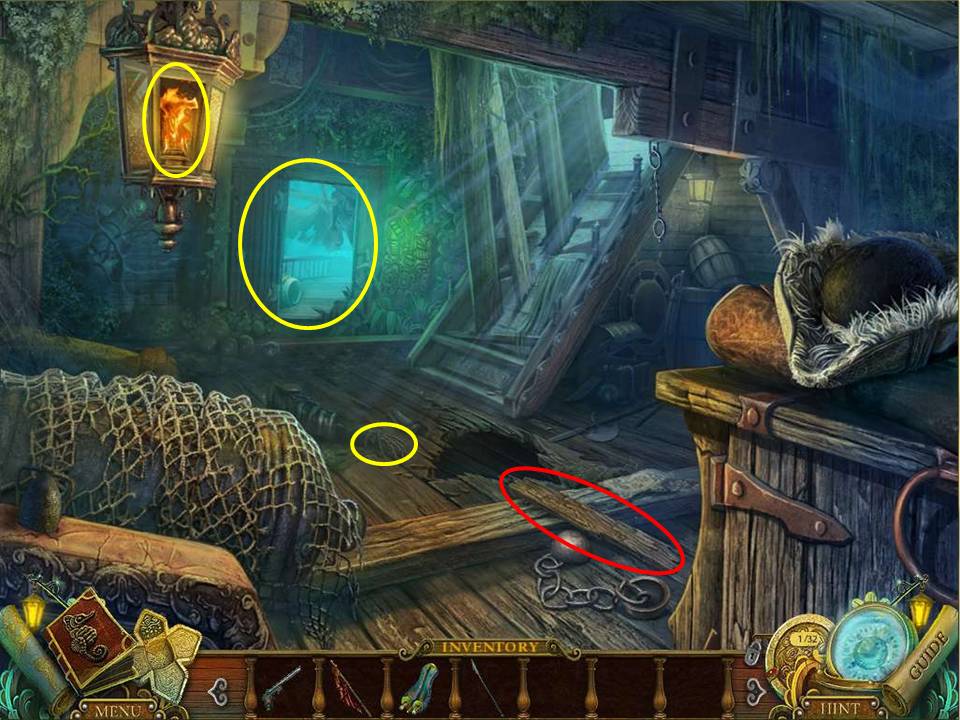
- Grab the BOARD lying next to the shackles on the floor, then zoom in on the GAUNTLET and use the CUTTERS to release it into the inventory.
- Also take the note.
- Click on the lantern to open it.
- Next take a closer look at the door covered in vines in the background – use the GAUNTLET to clear away the vines.
- Remove the beam across the door, take the Mayan calendar inlaid into it, and watch all the little ghosts go flying in all directions.
-
Open the door and enter the bow section of the ship.
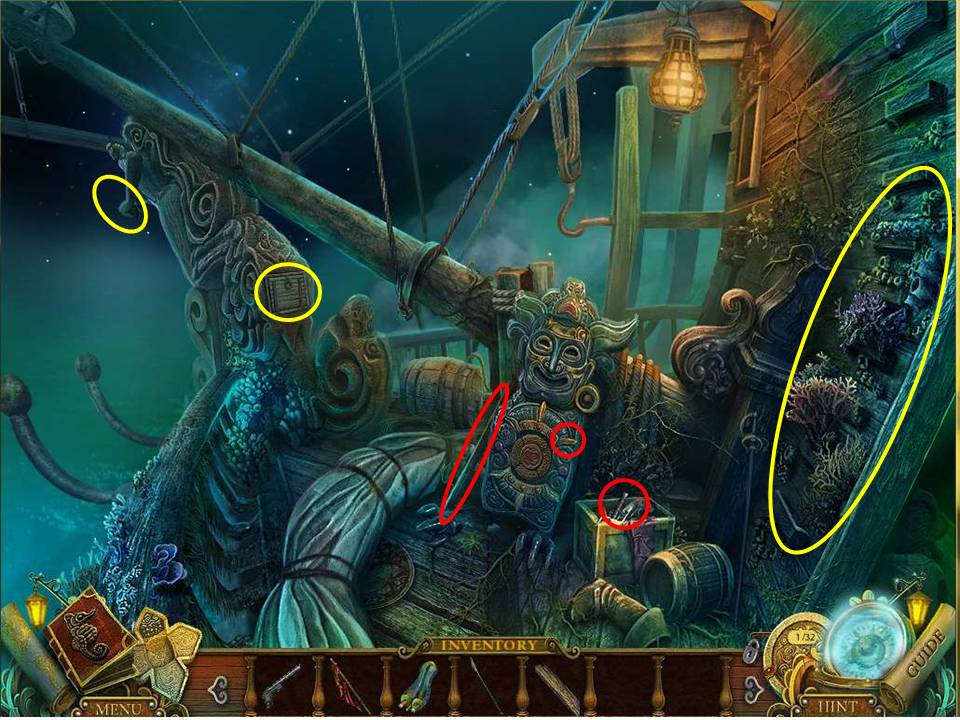
- Zoom in on the idol and pick up your first piece of the Mayan calendar.
- Also pick up the scroll and the WOOD BEAM.
- Place the SPEAR on the figurehead and take the CHISEL from the compartment at the back – note the jaguar with the missing teeth.
- Use the CHISEL on the corals to the right (x 4) to clear the steps leading upwards.
-
Head on up to the foredeck.
- Here’s some fun.
- Try and take the piece of the Mayan calendar and watch the seagull steal it away – where’s a musket when you need it, eh?
- Okay, the skeleton has a plan of attack on how to get the bird!
- Take the nearby RIBBON and also collect the FUNNEL to the left.
-
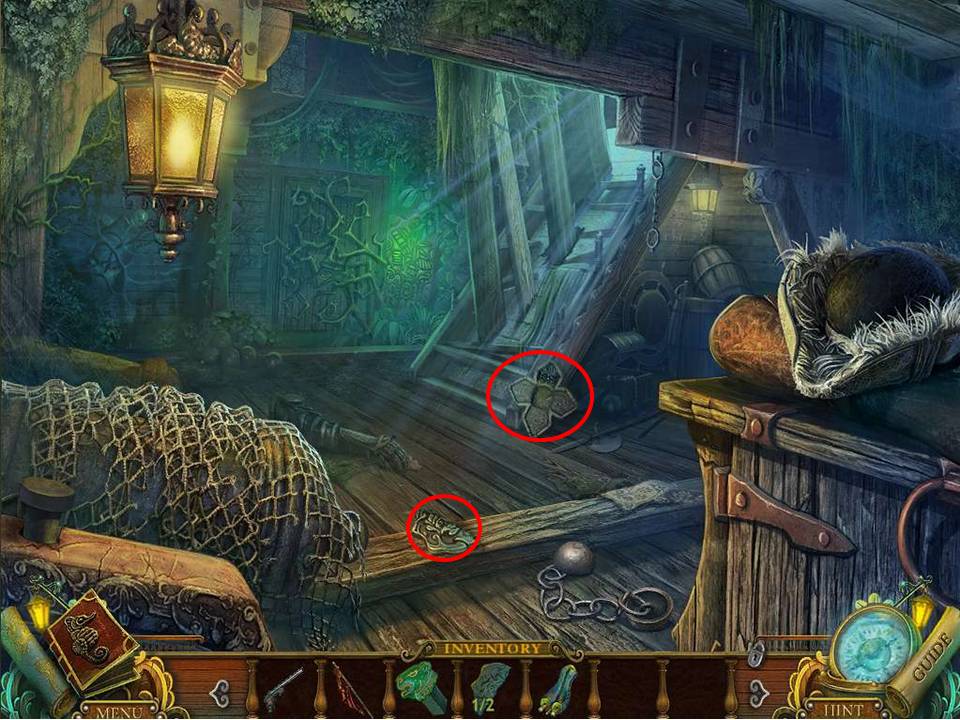
Finally, grab the cover to the left to reveal the next HOA puzzle.
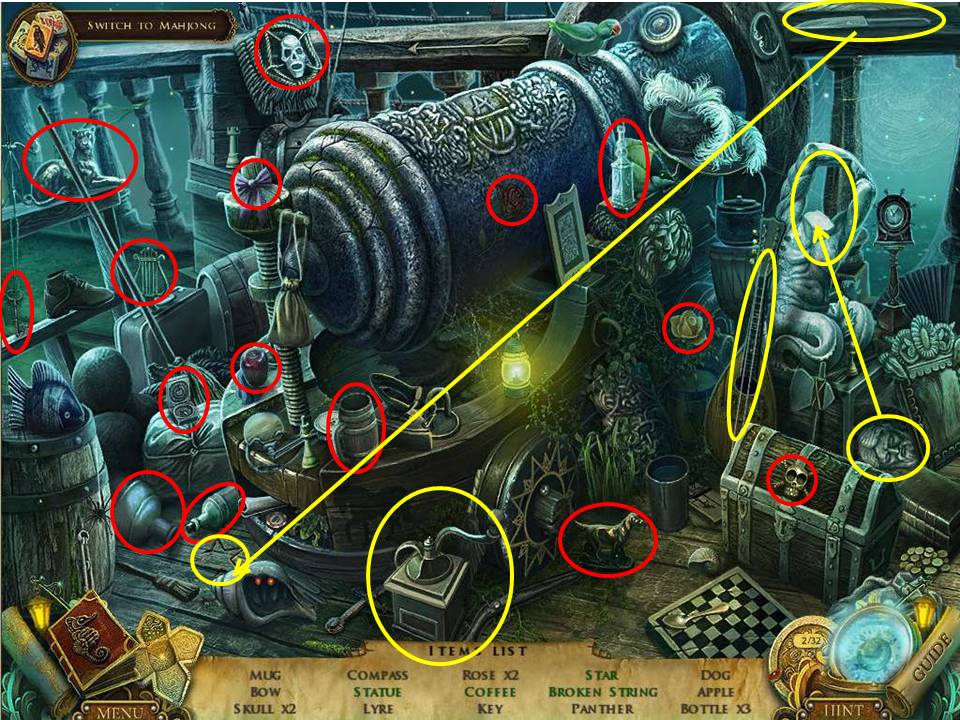
- As per usual, collect all the items circled in red, and note that those marked in yellow require multiple moves.
- Click on the statue beneath the cannon to release the hummingbird for capture.
- Place the head on the statue to complete it.
- Click on the grinder to make some coffee.
- Take the knife up on the right to help carve out the remainder of the star on the deck.
- The handkerchief conceals the apple.
- Pluck on the guitar string to break it (heavy-handed playing I guess).
-
When complete, accept the SHACKLES KEY and return back to the hold.
- Use the SHACKLES KEY to release the SHACKLES.
-
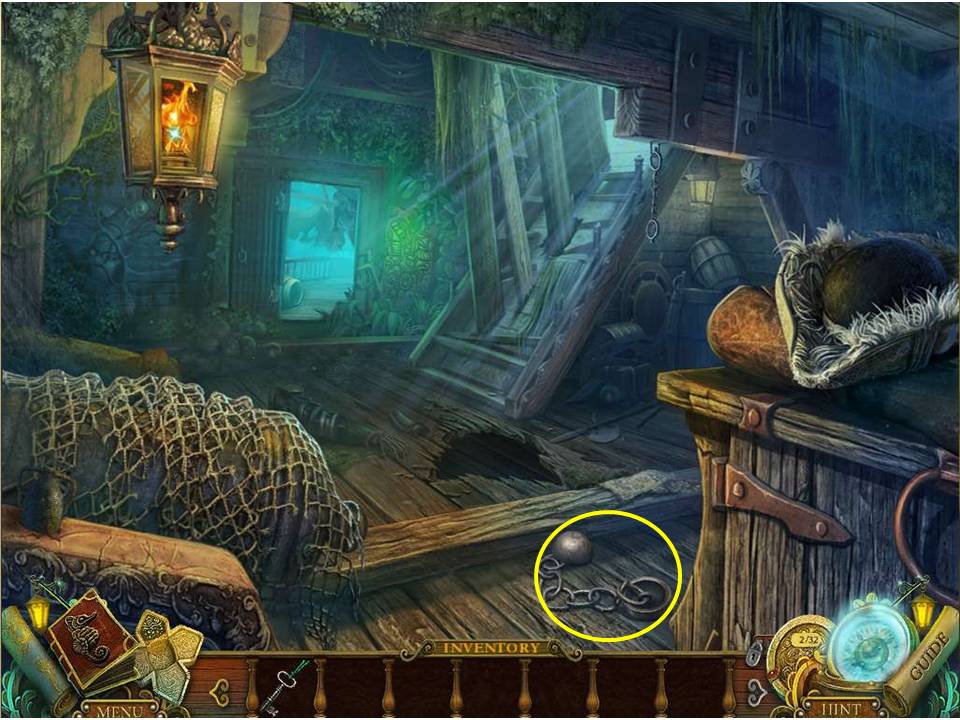
Once done, head back down to the lower deck and over to the steps guarded by the cobra.

- Click on the chains and attach the SHACKLES.
- Once done, pull on the lever to draw the snake away.
- Once done, go up the stairs.
General Info and Tips
Chapter 1: Entering the Ship
Chapter 2: Freeing the Cabin Boy
Chapter 3: The Treasure Room
Chapter 4: The Exorcism
Chapter 5: The Cure
Chapter 6: The Jacket
Chapter 7: Gregory’s Release
Chapter 8: Preparation
Chapter 9: The Portal
Chapter 10: Trapped
Ask for help in the comments below!
Chapter 1: Entering the Ship
Chapter 2: Freeing the Cabin Boy
Chapter 3: The Treasure Room
Chapter 4: The Exorcism
Chapter 5: The Cure
Chapter 6: The Jacket
Chapter 7: Gregory’s Release
Chapter 8: Preparation
Chapter 9: The Portal
Chapter 10: Trapped
Ask for help in the comments below!