
Mayan Prophecies: Ship of Spirits: Chapter 3: The Treasure Room
Our Mayan Prophecies Ship of Spirits Walkthrough will help you stay out of trouble as you explore the dangers and mysteries of the ancient Spanish Galleon your boat crashed into. Chock full of valuable information and custom screenshots to help you complete each and every chapter, this comprehensive Mayan Prophecies Walkthrough is a must-have companion to this exciting hidden object adventure game.
General Info and Tips
Chapter 1: Entering the Ship
Chapter 2: Freeing the Cabin Boy
Chapter 3: The Treasure Room
Chapter 4: The Exorcism
Chapter 5: The Cure
Chapter 6: The Jacket
Chapter 7: Gregory’s Release
Chapter 8: Preparation
Chapter 9: The Portal
Chapter 10: Trapped
Ask for help in the comments below!
Chapter 1: Entering the Ship
Chapter 2: Freeing the Cabin Boy
Chapter 3: The Treasure Room
Chapter 4: The Exorcism
Chapter 5: The Cure
Chapter 6: The Jacket
Chapter 7: Gregory’s Release
Chapter 8: Preparation
Chapter 9: The Portal
Chapter 10: Trapped
Ask for help in the comments below!
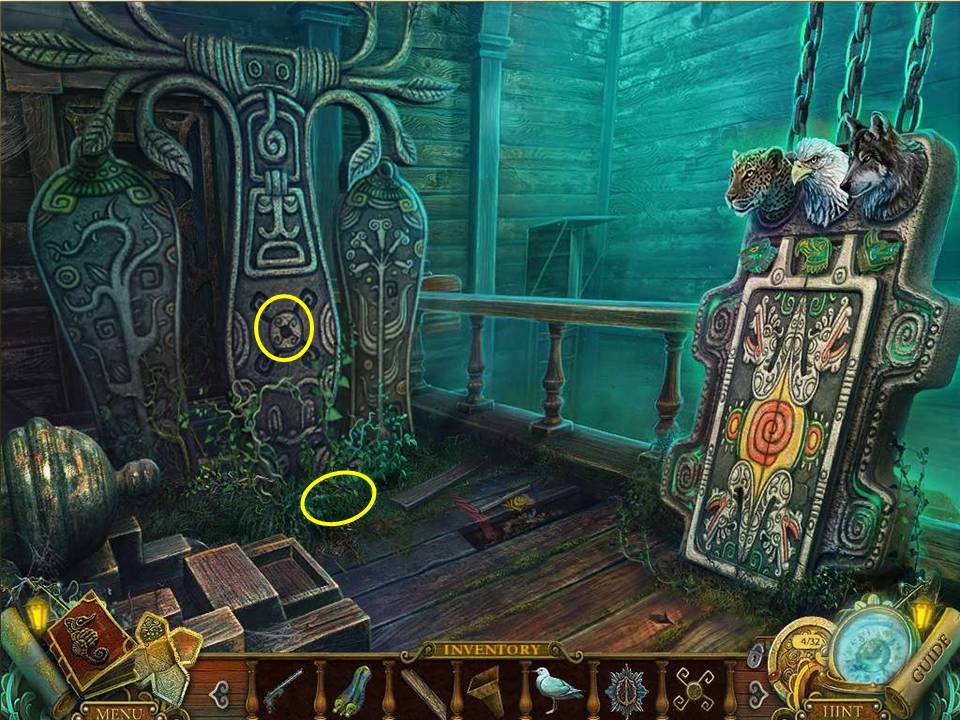
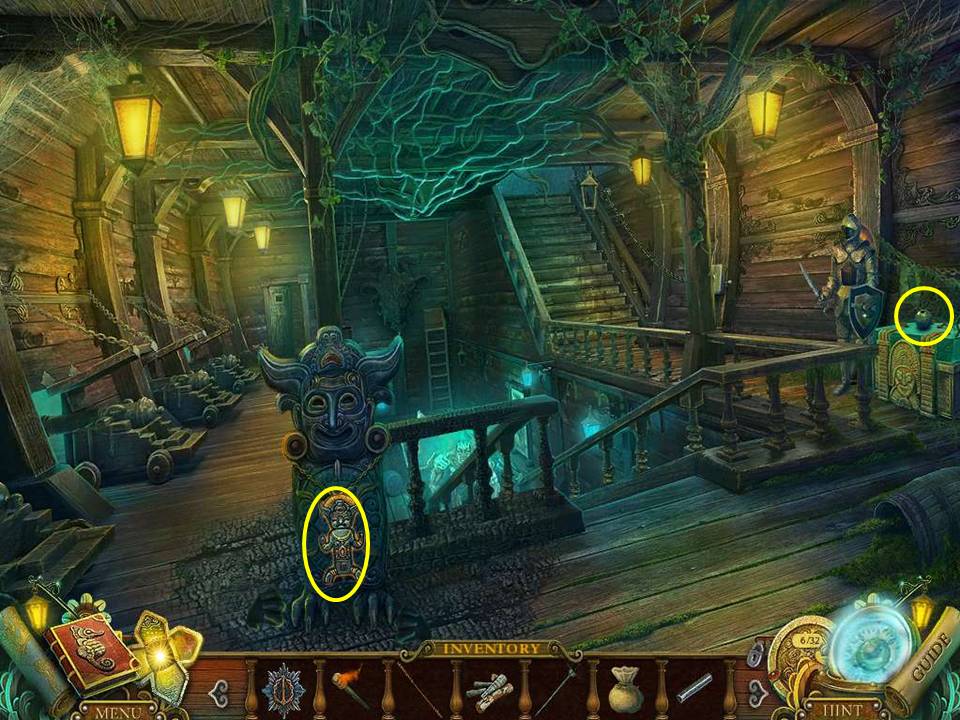
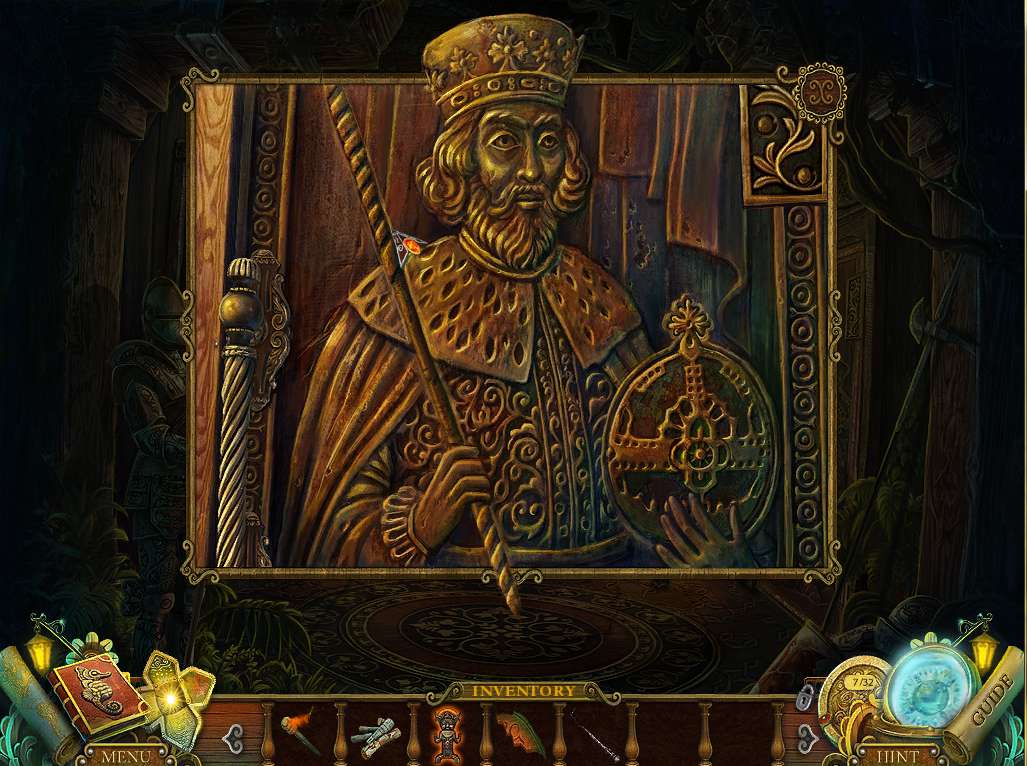
- Zoom into the totem on the left and place the DISK SEAL on the lock in the center.
-
Wow! So much for a valuable artifact! Note the note (I always wanted to say that) on the floor and make your way through the newly discovered doorway to the elevator.
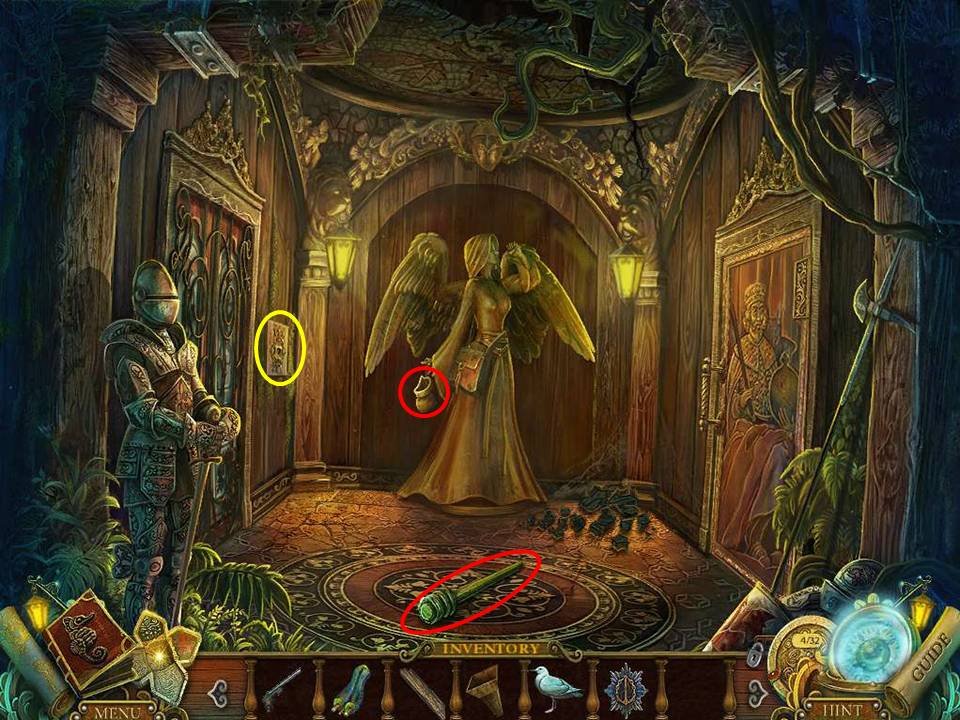
- Take the TORCH lying on the floor.
- Zoom into the angel and take the EMPTY BAG – really, what has it come to when you reduce yourself to stealing from angels, eh?
- Zoom in on the BUTTON to the left and take it.
-
Head back down to the hold.
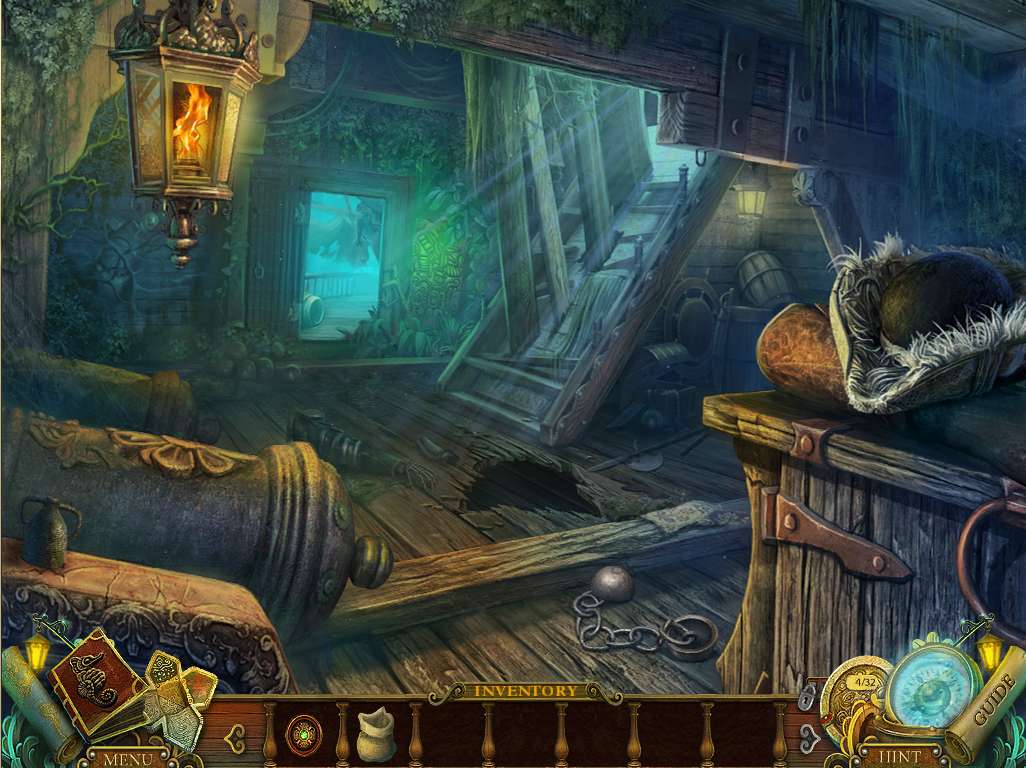
- Use the lantern to light the TORCH and put it in inventory – BBQ gull coming up.
-
On to the storage room.
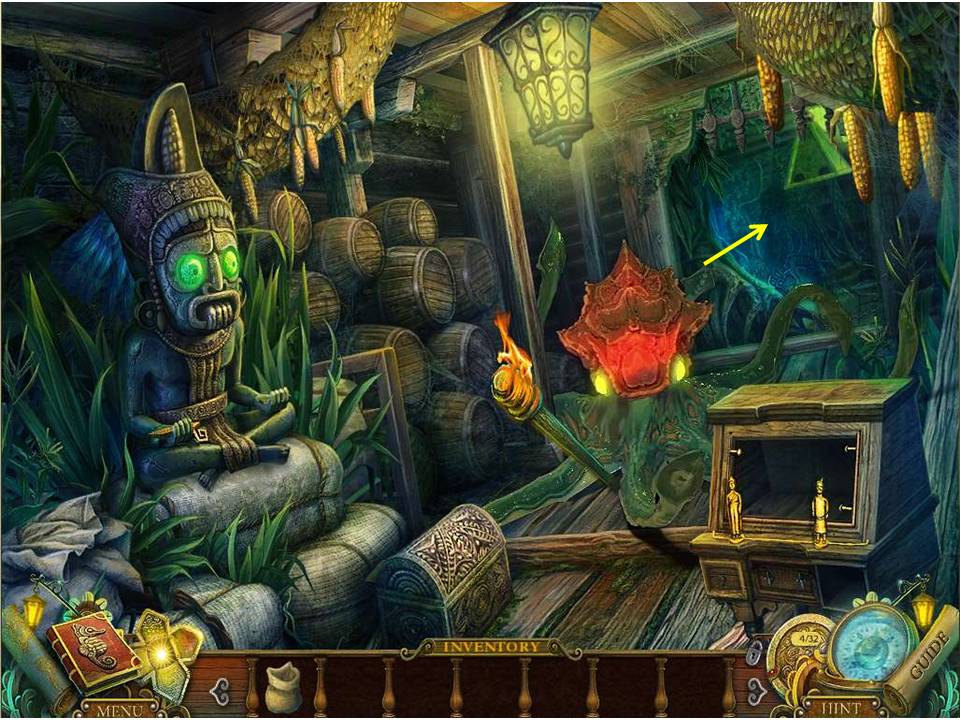
- Use the LIT TORCH to threaten to turn the octopus into calamari unless it goes away – thankfully it complies.
- Put you curser on the statue on the left to get a Mexican wave in gratitude for your successful effort.
-
Use the BOARD to make your way across the gap and move across to the brig.

- Watch the cut scene with the poacher.
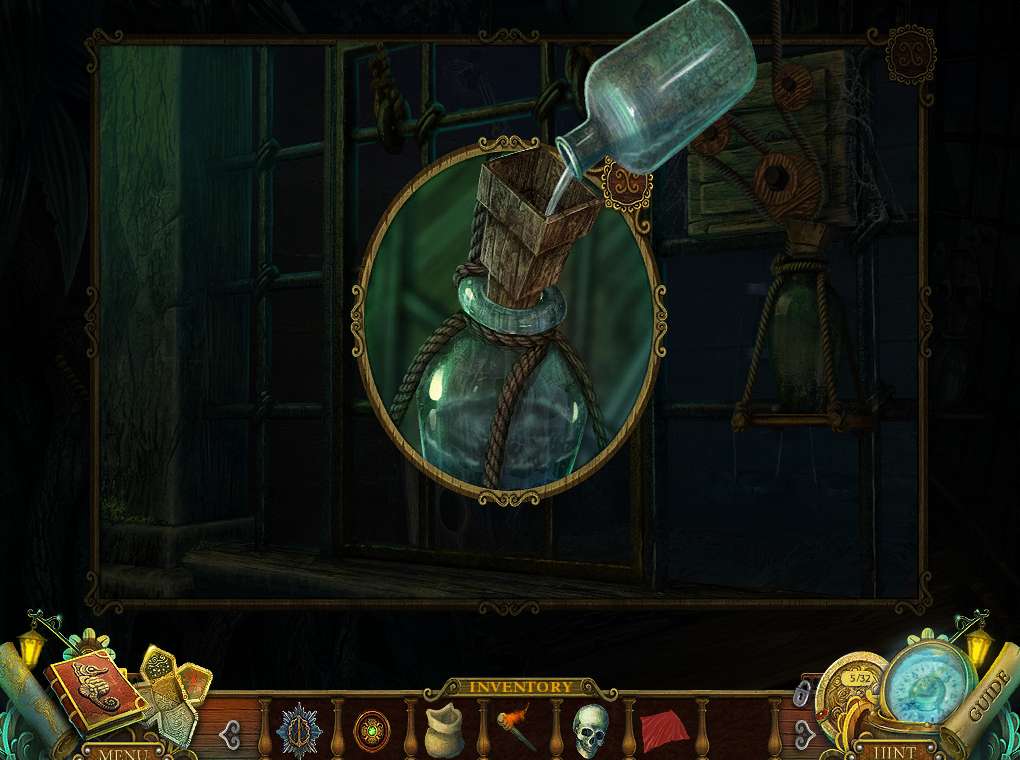
- Note the bottle hanging to the right and place the FUNNEL on it.
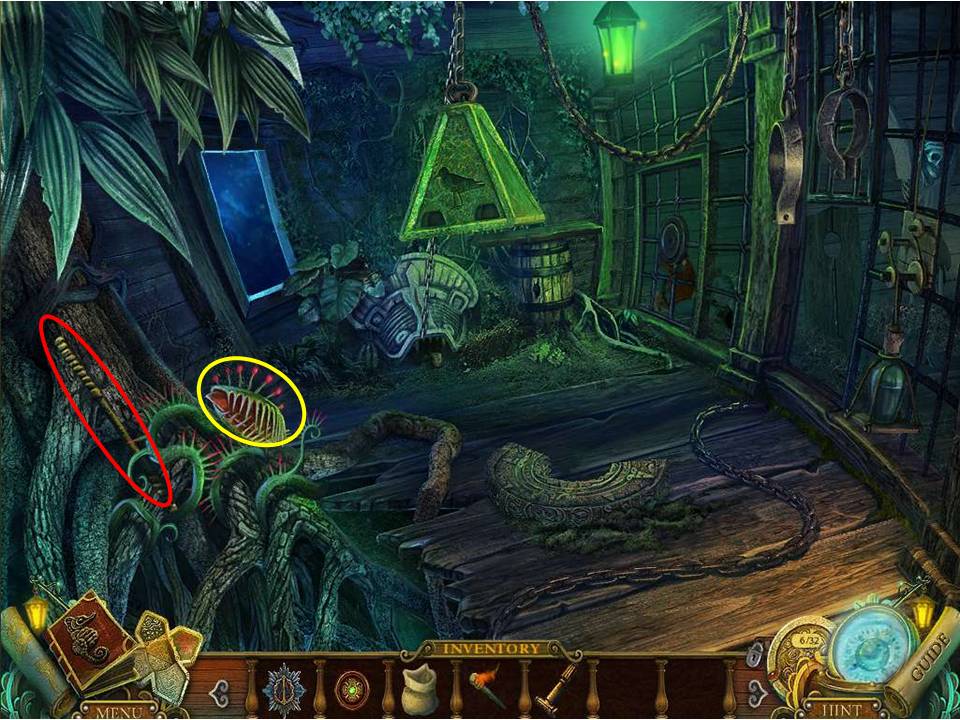
- Also note Gregory being held prisoner in the cell at the back – talk to him and take the RED HANDKERCHIEF.
- Take the EMPTY BOTTLE on the left and note the hungry plant wanting to take a bit out of you.
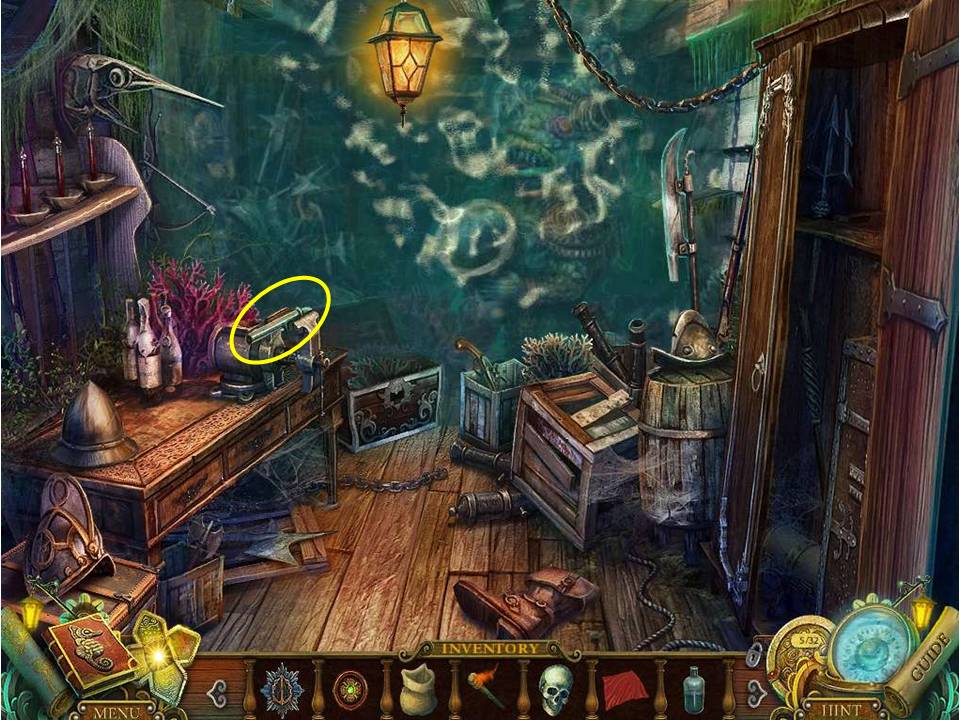
- Zoom in on the item at the back and place the METAL FROG TONGUE on it. Click on the tongue once done, which will drop the object hanging from the ceiling and allow you to retrieve the note from inside.
-
Next insert the SEAGULL into it to initiate the next puzzle.
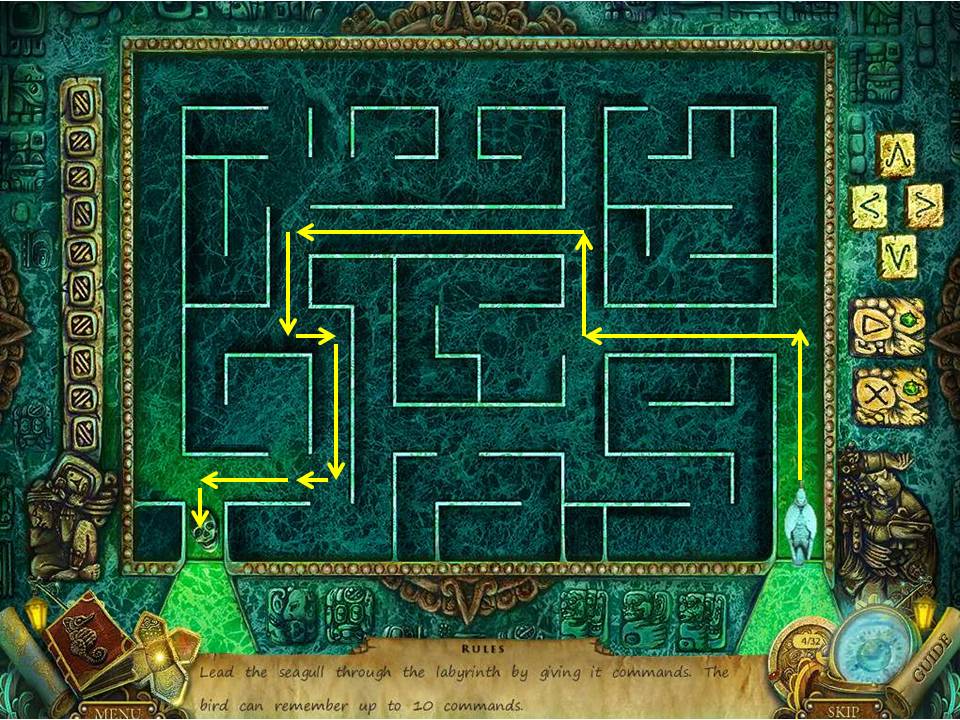
- The aim is to get the gull through the maze in 10 moves or less.
- There are more direct routes, but because passing alternate routes counts as an additional move, even if you don’t change direction, the moves rack up very quickly.
- That’s why you can’t take the most obvious route round the outer edge.
- There may be other routes, but the one I found to work was the following, noting that you basically have to program in all the moves first before you set the gull on its way - up, left, up, left, down, right, down, left, left, and down.
- Once complete, take the SAILOR’S SKULL.
-
Proceed to the foredeck.

- Try to proceed across.
- After the mast falls down, zoom in on the bell, and take the piece for the Mayan calendar embedded in the wood.
-
Go down to the armory.
- Use the EMPTY BOTTLE on the wall of water to fill it up and obtain (big drum roll!) a BOTTLE WITH WATER.
- While here, zoom in to the desk and slot the BROKEN FLARE GUN into the vice in preparation for repair.
-
Now head off to the brig.
- Use the BOTTLE WITH WATER to fill up the counter-balance device on the right and watch it open the brig door – too bad it doesn’t work on the other door, eh?
- Go inside and retrieve the piece for the Mayan calendar.
- Click on the skeleton for an interesting effect (got any aspirin?) and note the wrist.
- Place the SAILOR’S SKULL on the neck and wrap the RED HANDKERCHIEF around the it.
- Watch the scene play out, and take the ELEVATOR LEVER from the hand.
-
Head to the galley.
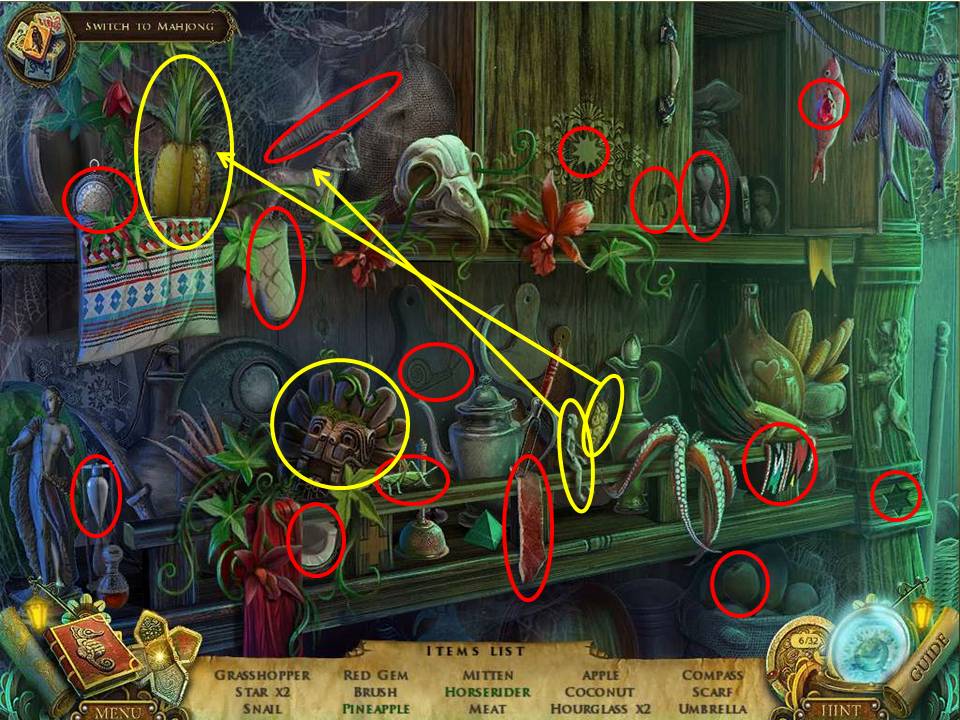
- Initiate the HOA puzzle.
- Collect all the items circled in red and the multiple-move items circled in yellow.
- Move the red blanket and click on the statue to release and capture the hummingbird.
- Move the pineapple segment to the main piece to collect the pineapple.
- Collect the small doll-like figure and place it on the horse to get the horse rider.
-
Once complete, take the MEAT proffered and return to the brig.
- Hand the meat to the hungry plant and take the KING’S SCEPTER.
-
Now head down to the elevator room.

- Take the ELEVATOR LEVER and seat it in the socket on the lever compartment.
- Question – how does an old sailing ship have an elevator on it?
-
Get in and ascend to the captain’s quarters.
- Zoom in on the fireplace and take the FIREWOOD.
-
Next, initiate the HOA puzzle to the right.
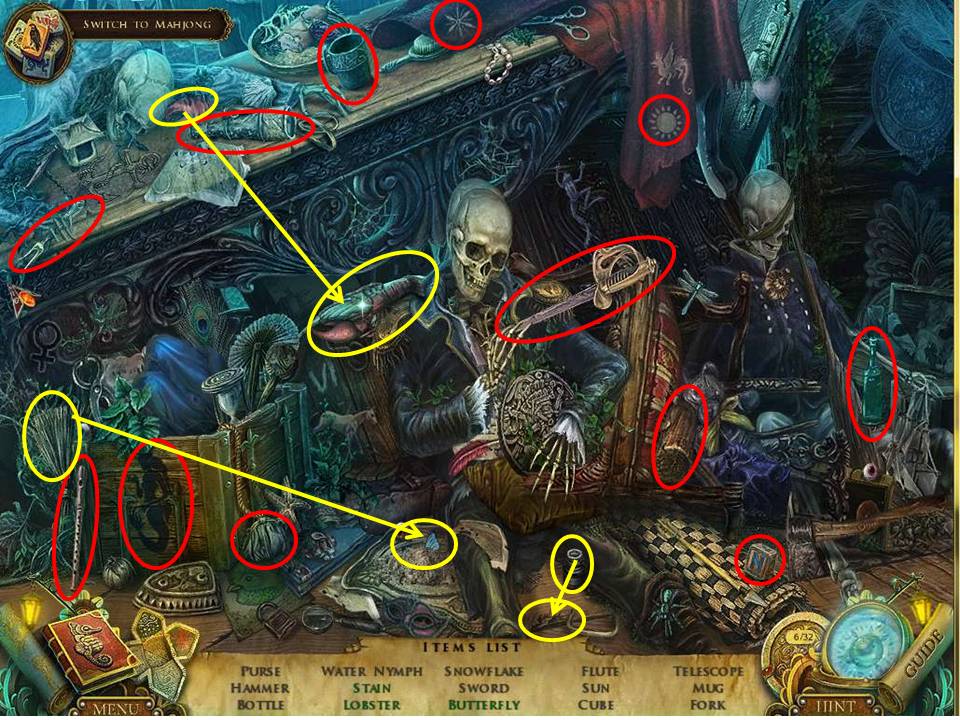
- Collect the items circled in red and acquire those circled in yellow through multiple moves.
- Click on the plate to release the hummingbird.
- Knock over the inkwell to obtain the stain.
- Use the duster to get butterfly.
- Make the lobster whole again by re-attaching its pincer.
-
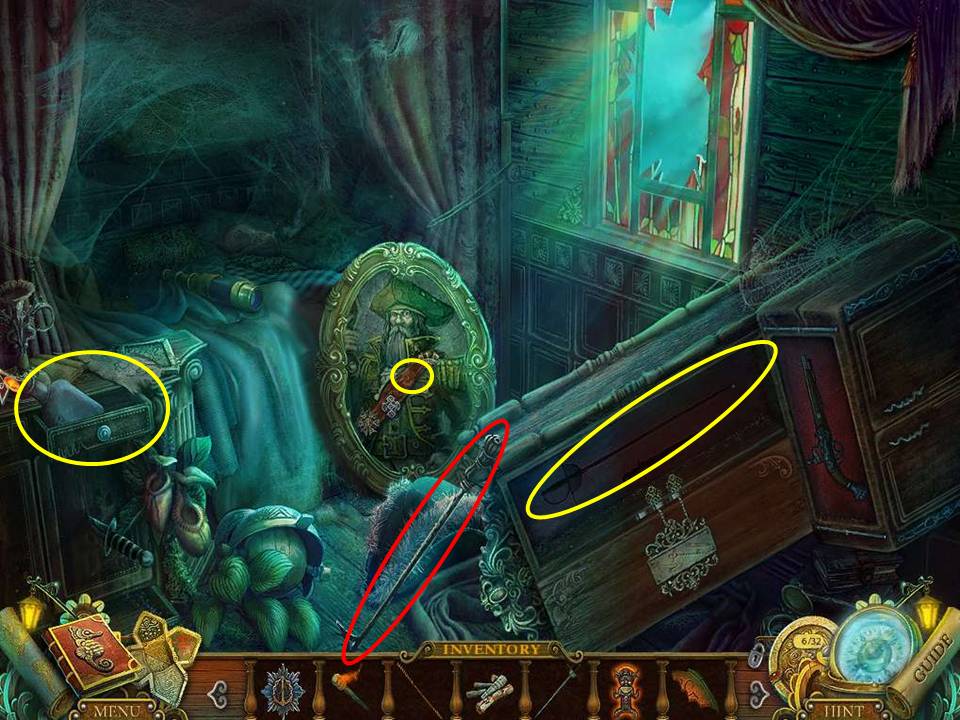
When complete, take the CAPTAIN’S SWORD.
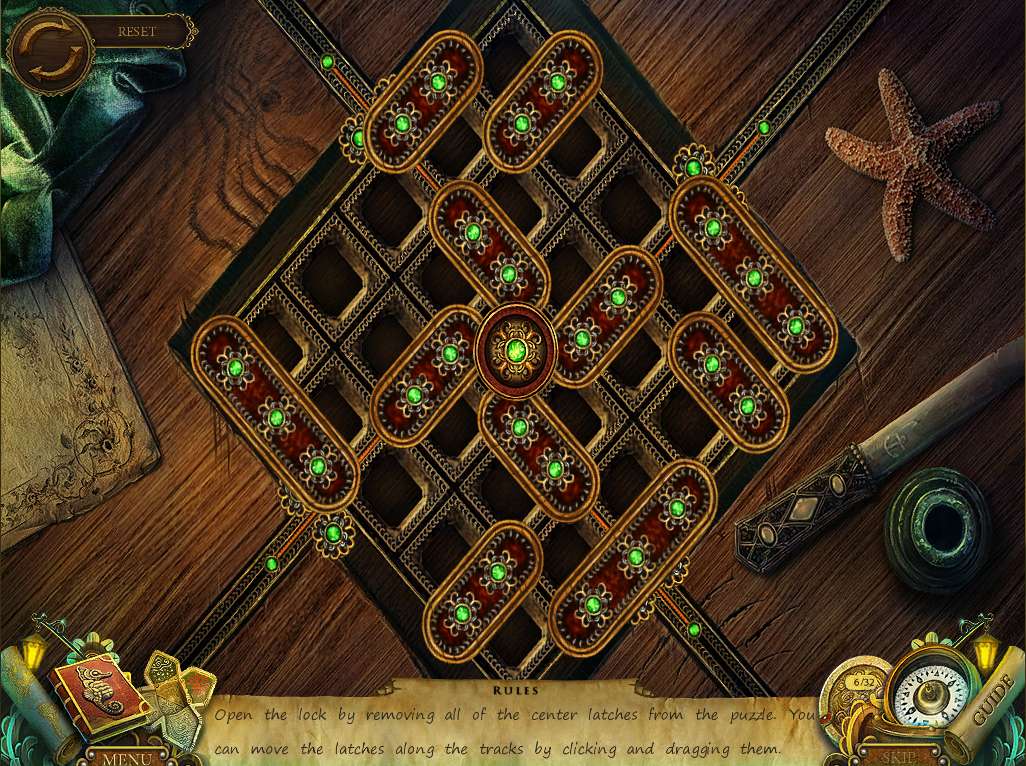
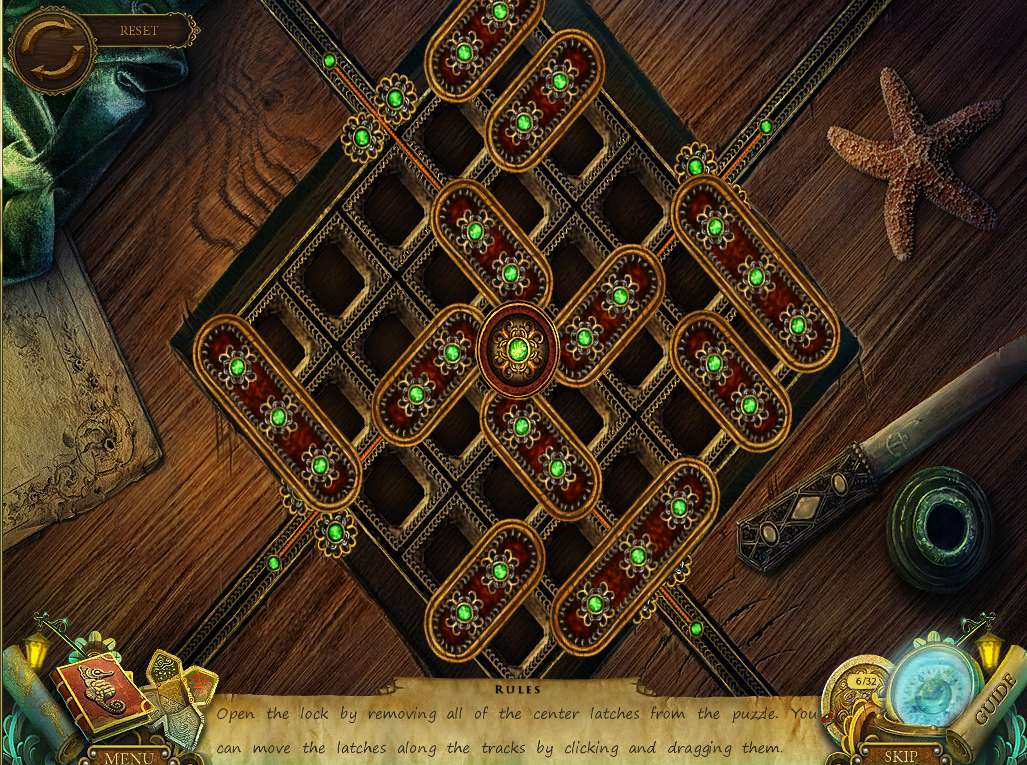
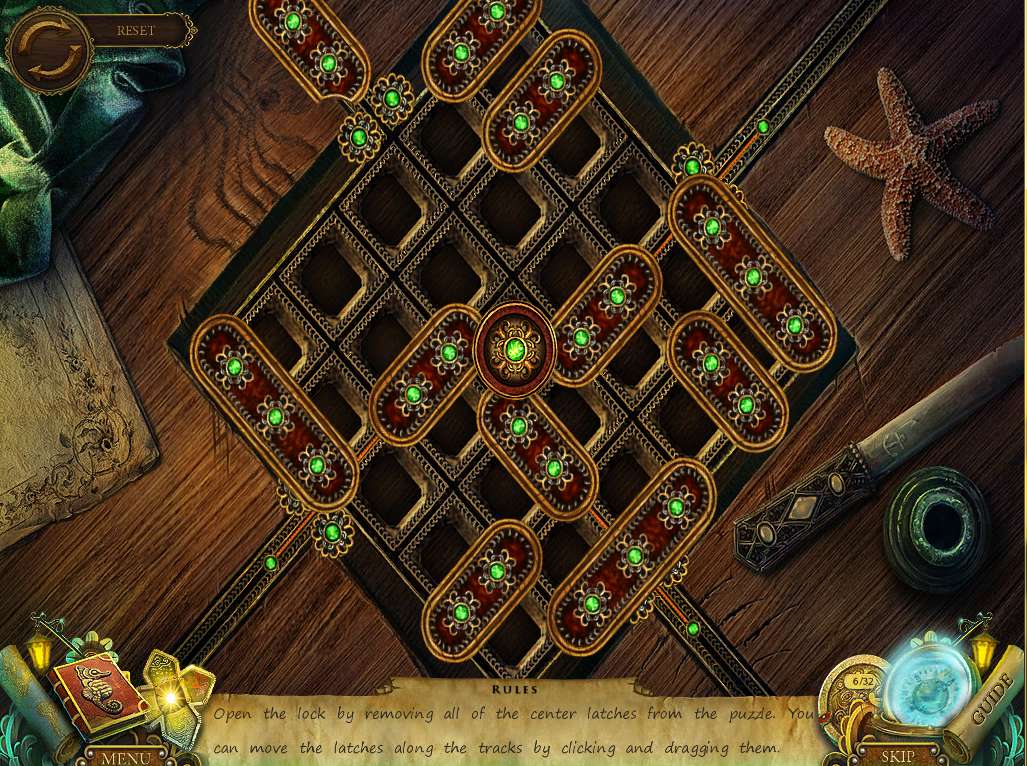
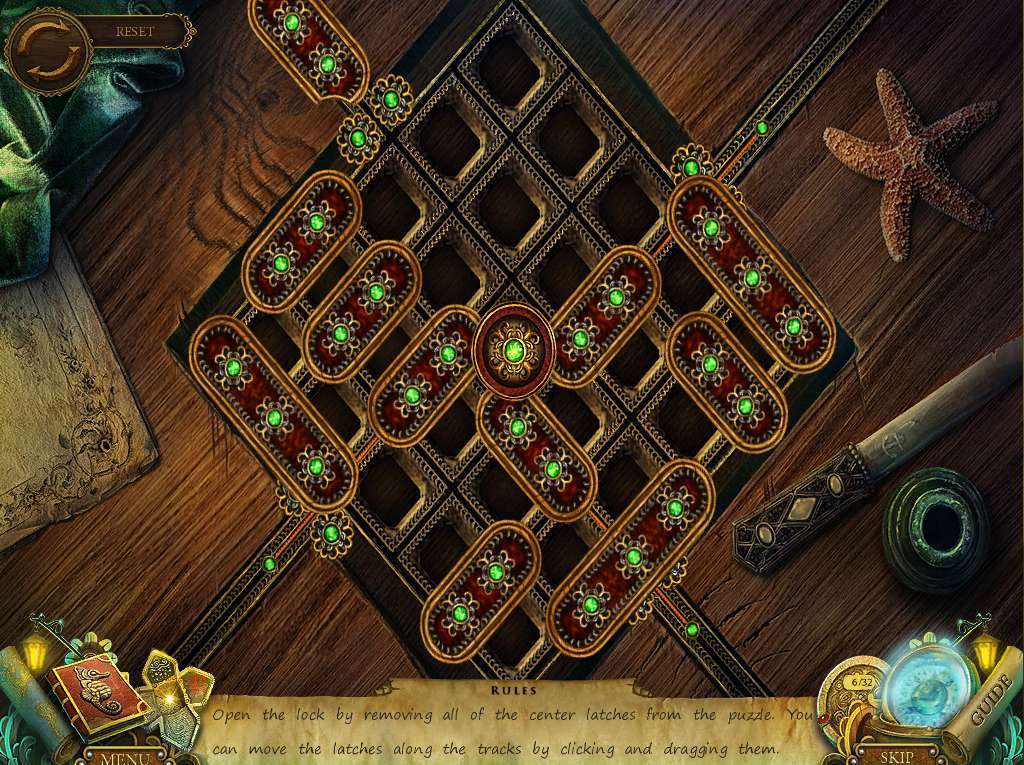
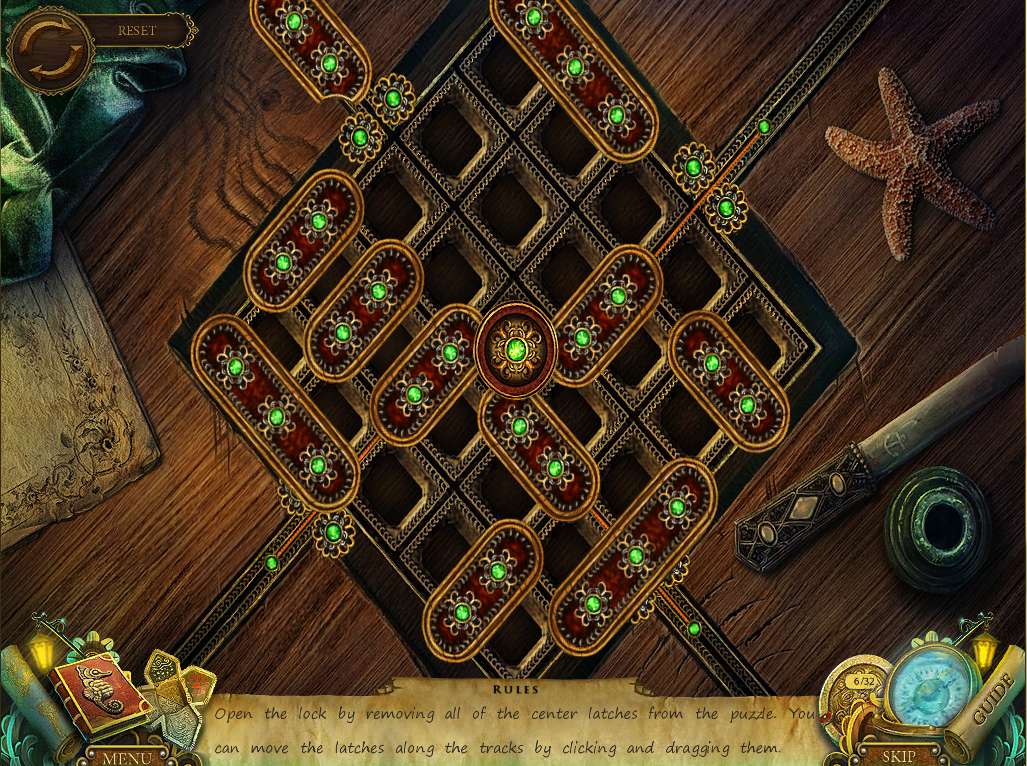
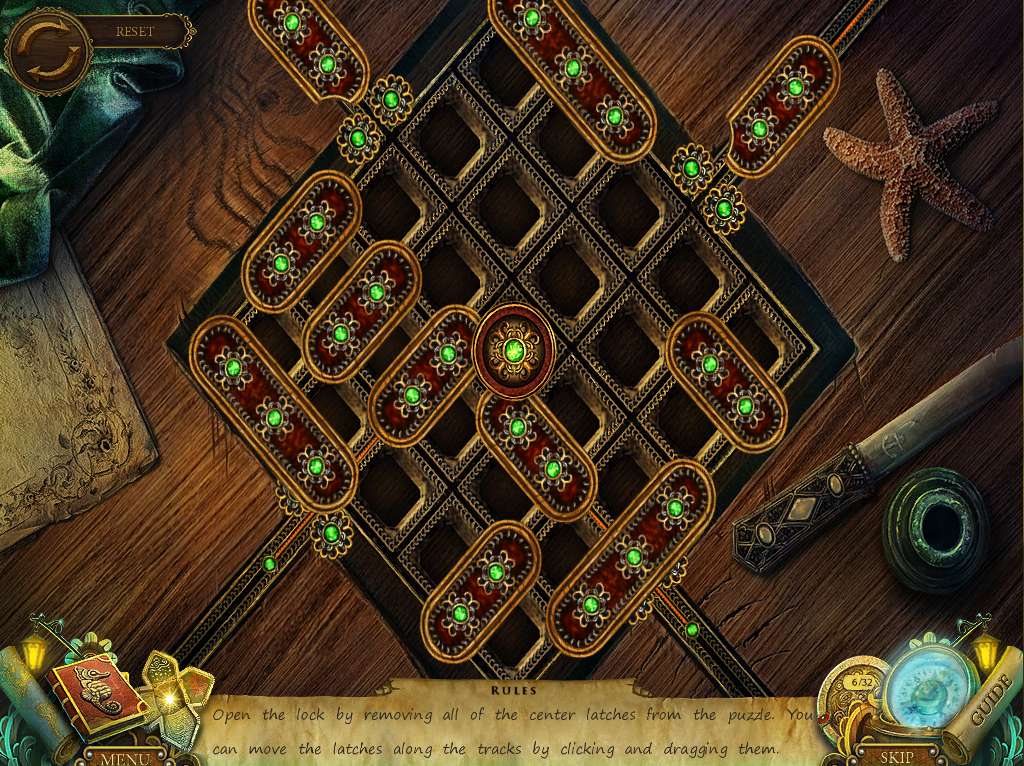
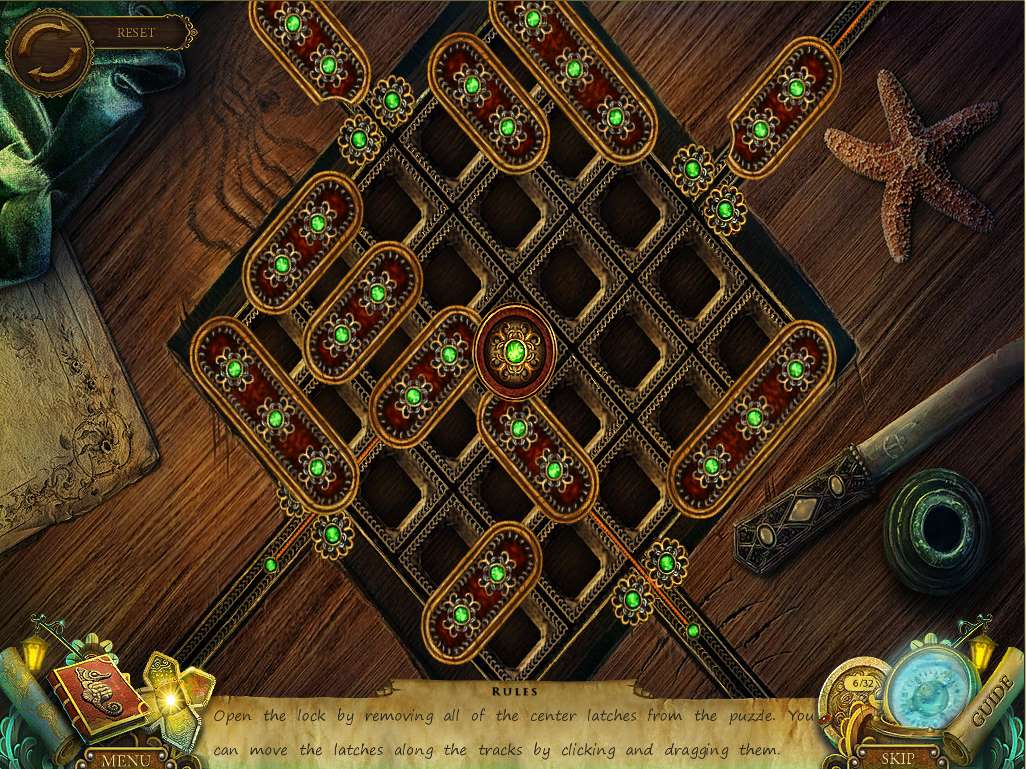
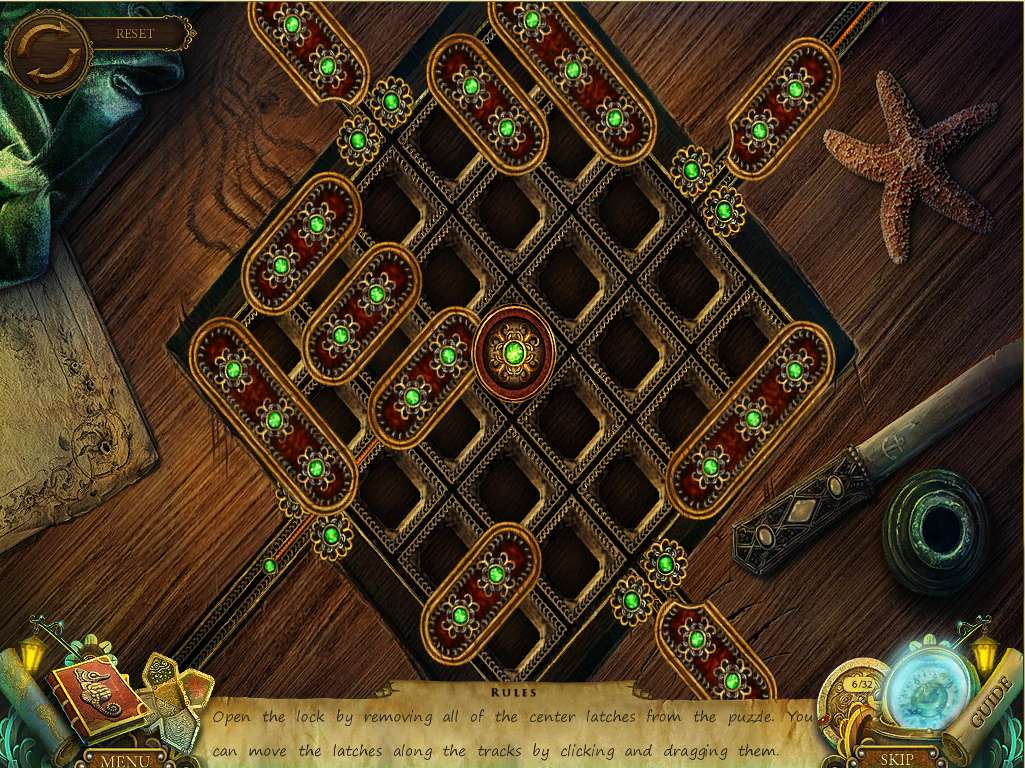
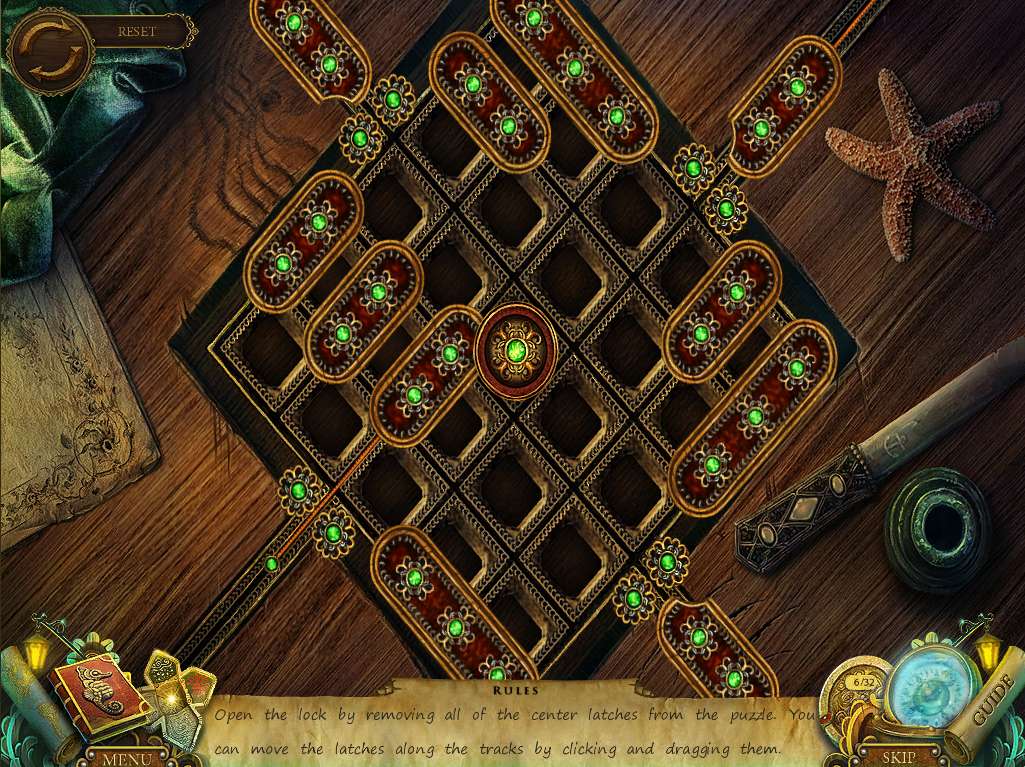
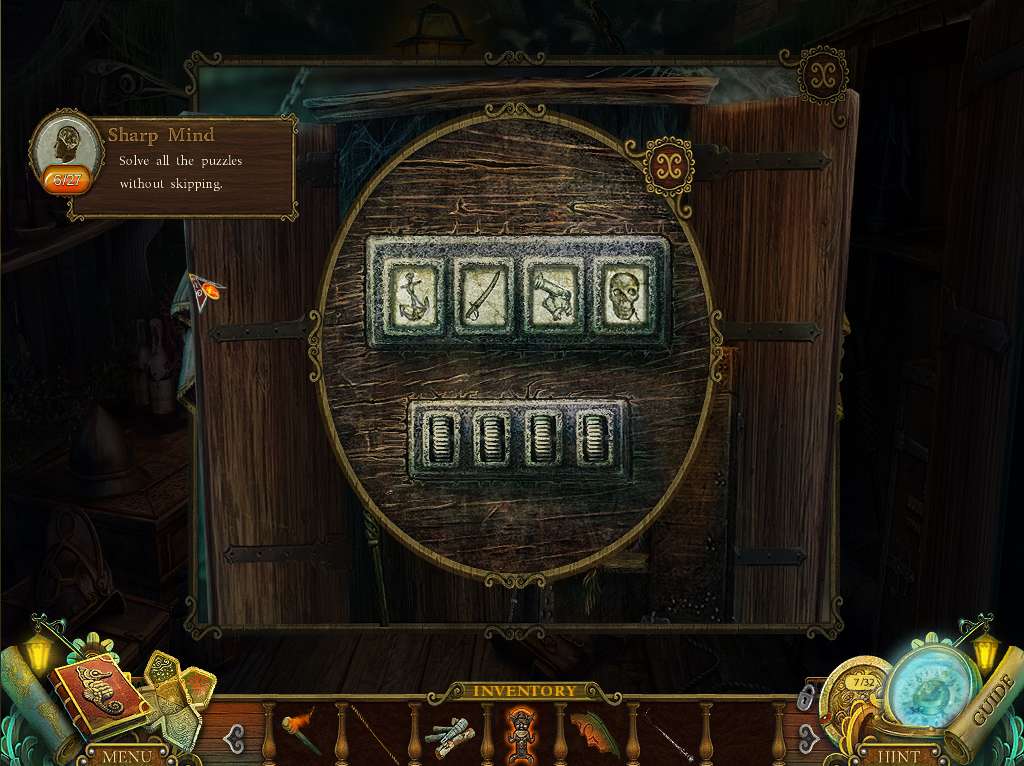
- Next, zoom in on the desk to initiate the next puzzle by placing the BUTTON on it.
- The aim is to reorient the latches in order to open the box. Play around with it if you like, because if all else fails you can always hit ‘reset’ and follow the screenshot sequence for the solution.
- Once complete remove the HACKSAW and the FIRE GOD NECKLACE from within.
-
Return to the armory, hacksaw at the ready!
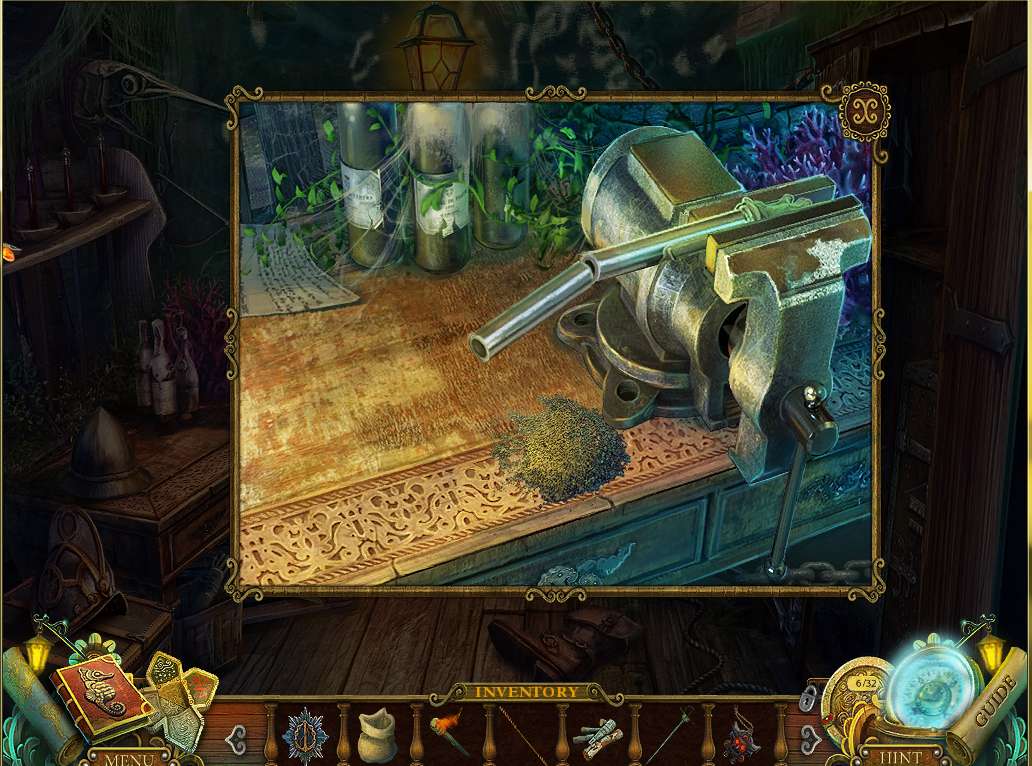
- Zoom into the desk and click on the BROKEN FLARE GUN with the HACKSAW to cut off the barrel.
- Use the EMPTY BAG to scoop up the GUNPOWDER.
-
Collect the METAL PIPE from the end of the gun and head down to the lower deck.
- Place the FIRE GOD NECKLACE on the idol and take the FIRE GOD STATUETTE.
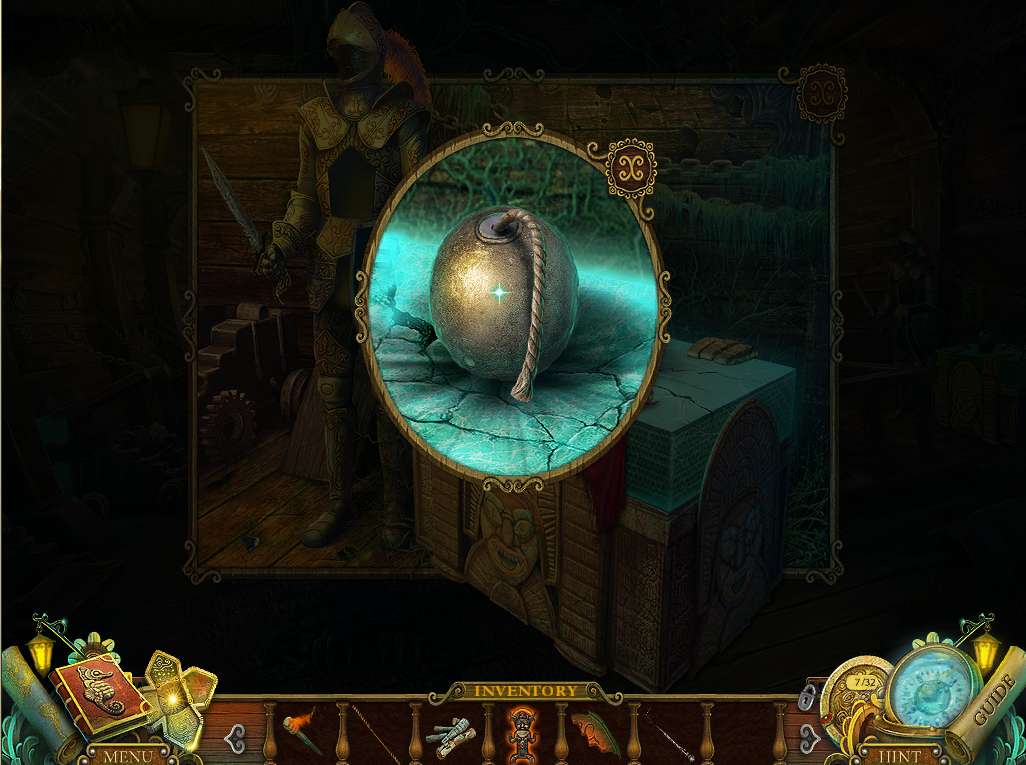
- While you’re here, zoom in on the knight and put the GUNPOWDER in the bomb.
-
Return to the captain’s quarters.
- Zoom in on the desk and use the METAL PIPE as a lever to open the compartment inside.
-
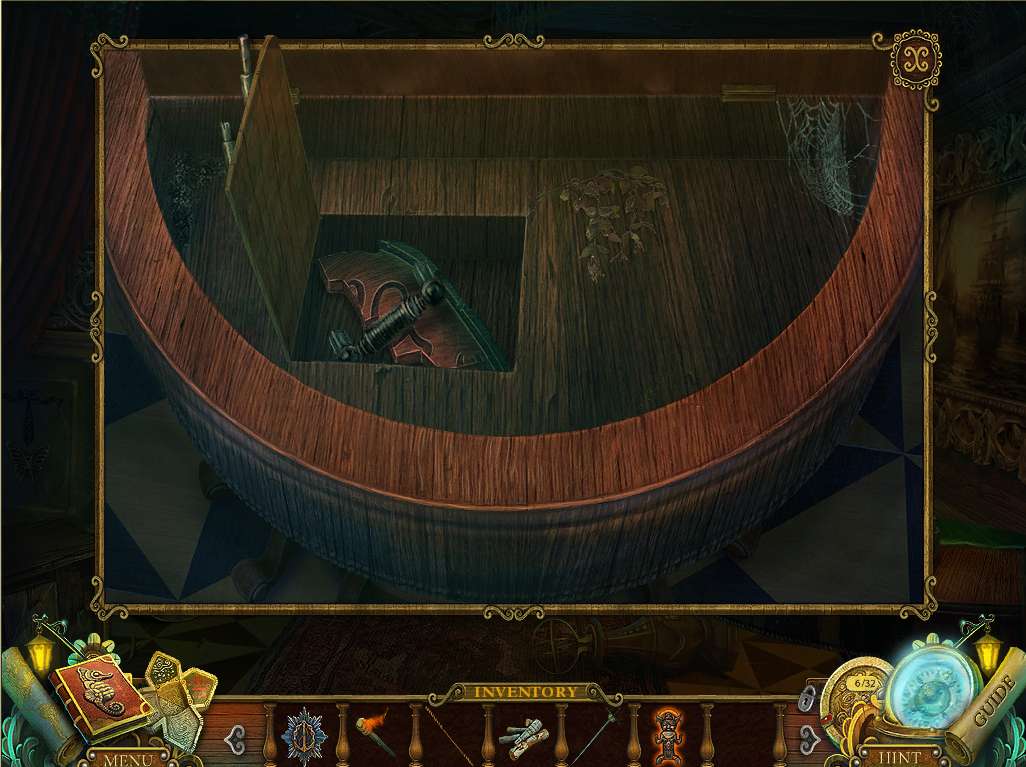
Take the VASE FRAGMENT and the HANDLE, then return to the Mayan slab.
- Zoom in on the chest in the background and place the HANDLE on it to open it.
-
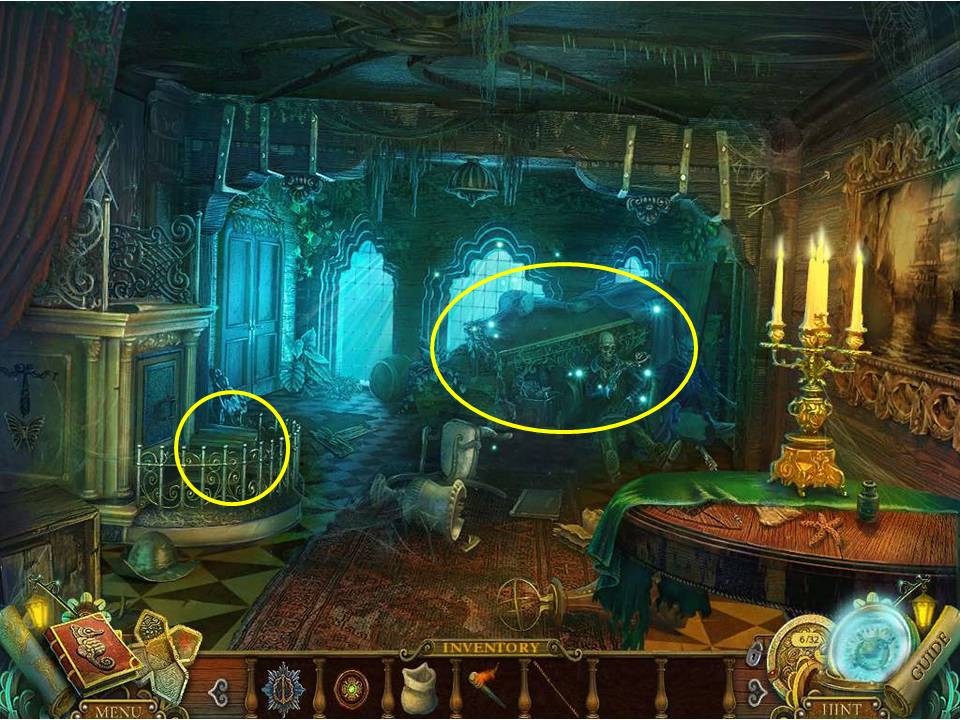
Go to the captain’s bedroom.
- Pick up the POKER, then zoom in to the case on the right and return the CAPTAIN’S SWORD to its place.
- Zoom in on the portrait and return the CAPTAIN’S MEDAL to its position, then note the resulting code.
-
Take a closer look at the bedside stand, pick up the calendar piece and the note, and head down to the armory.
- Zoom into the closet on the right and enter the code acquired from the portrait.
- Once opened, take the FUSE and instruction sheet.
-
Head to the lower deck.
- Zoom in on the knight to the right and set the FUSE in place on the bomb.
- Light the fuse with the LIT TORCH.
-
Once it goes off (no, you don’t throw it at the demon down below) zoom in on the HOA puzzle to initiate it.
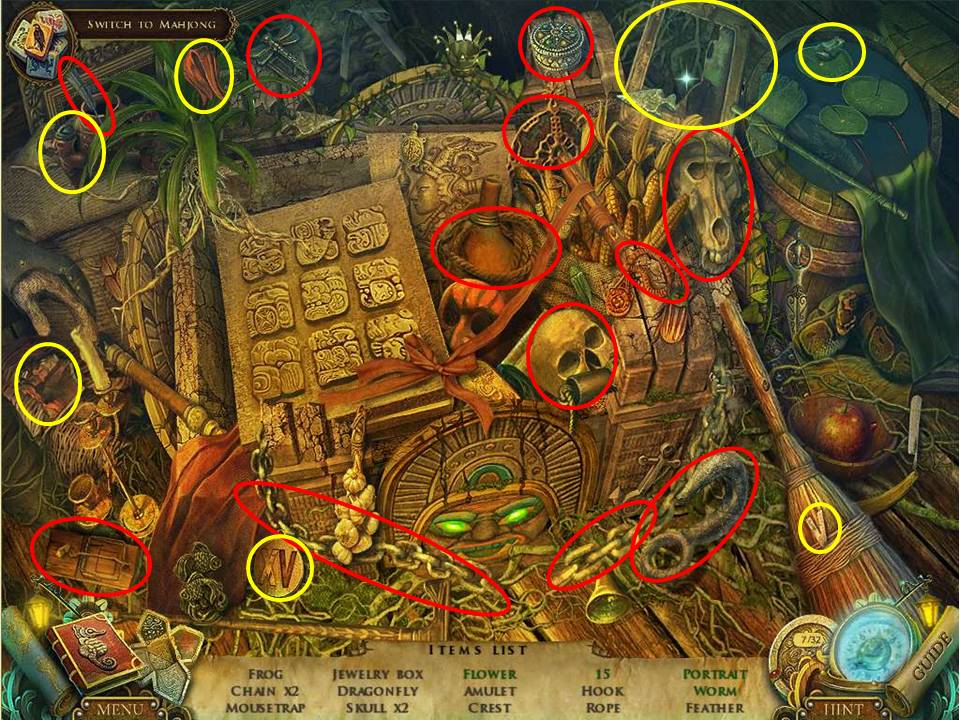
- Pick up all the items circled in red. As per usual, those items circled in yellow require multiple moves.
- Clicking the statue gets the hummingbird.
- Place the two portrait sections in the frame to restore it.
- Open the barrel lid to get the frog inside.
- Place the V on the plate to turn it into a XV.
- Open the flower bud to get the flower.
- Slice the apple with the razor to get the worm inside.
- When complete, take the KING’S CREST.
-
Head to the elevator.
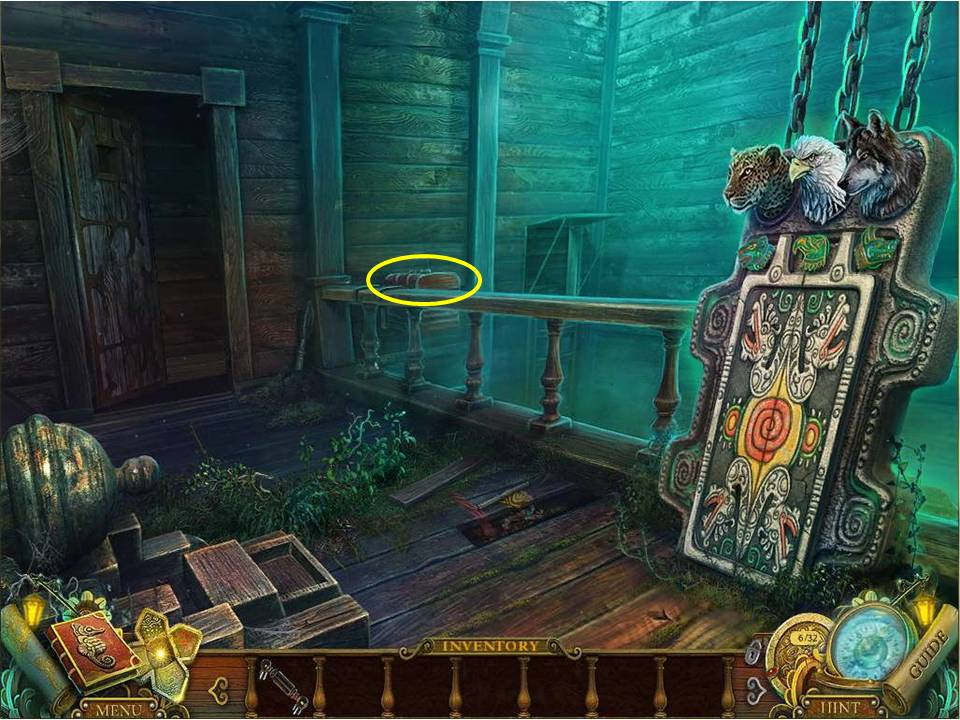
- Take the KING’S CREST and the KING’S SCEPTOR and place them on the panel to the right.
- Once the door opens, enter the treasure room.
General Info and Tips
Chapter 1: Entering the Ship
Chapter 2: Freeing the Cabin Boy
Chapter 3: The Treasure Room
Chapter 4: The Exorcism
Chapter 5: The Cure
Chapter 6: The Jacket
Chapter 7: Gregory’s Release
Chapter 8: Preparation
Chapter 9: The Portal
Chapter 10: Trapped
Ask for help in the comments below!
Chapter 1: Entering the Ship
Chapter 2: Freeing the Cabin Boy
Chapter 3: The Treasure Room
Chapter 4: The Exorcism
Chapter 5: The Cure
Chapter 6: The Jacket
Chapter 7: Gregory’s Release
Chapter 8: Preparation
Chapter 9: The Portal
Chapter 10: Trapped
Ask for help in the comments below!