Mayan Prophecies: Ship of Spirits: Chapter 10: Trapped
Our Mayan Prophecies Ship of Spirits Walkthrough will help you stay out of trouble as you explore the dangers and mysteries of the ancient Spanish Galleon your boat crashed into. Chock full of valuable information and custom screenshots to help you complete each and every chapter, this comprehensive Mayan Prophecies Walkthrough is a must-have companion to this exciting hidden object adventure game.
General Info and Tips
Chapter 1: Entering the Ship
Chapter 2: Freeing the Cabin Boy
Chapter 3: The Treasure Room
Chapter 4: The Exorcism
Chapter 5: The Cure
Chapter 6: The Jacket
Chapter 7: Gregory’s Release
Chapter 8: Preparation
Chapter 9: The Portal
Chapter 10: Trapped
Ask for help in the comments below!
Chapter 1: Entering the Ship
Chapter 2: Freeing the Cabin Boy
Chapter 3: The Treasure Room
Chapter 4: The Exorcism
Chapter 5: The Cure
Chapter 6: The Jacket
Chapter 7: Gregory’s Release
Chapter 8: Preparation
Chapter 9: The Portal
Chapter 10: Trapped
Ask for help in the comments below!
- Collect the calendar piece near the feet of the idol.
- Click on the idol for an interesting effect.
- Glance out the window to the right to pick up an important piece, the missing cog.
- Next, take the mirror in inventory and insert it on the cover of the mechanism on the floor.
- Now comes the tricky bit. As you’ve probably guessed, you need to redirect the beam of light via all the mirrors in the room.
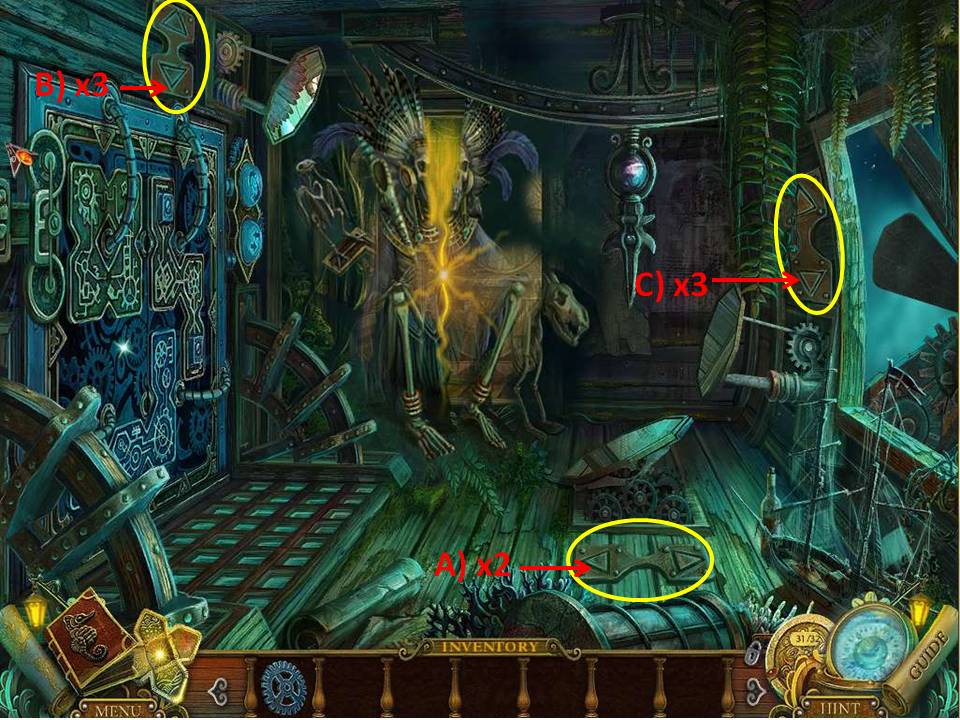
- Here’s how. There are three sets of controls in the room, as marked on the screenshot, one on the floor, one to the left of the window, and a third above the doorway you entered through. Start with the floor controls by clicking on the left button twice. Then focus on the controls above the door, clicking on the down button three times.
- Finally, turn to the window control and hit the down button once.
- Great – you’ve just obliterated a priceless Mayan artifact! Take the DEATH GOD STATUETTE and head into the room.

- Pick up the GEAR to the right, then zoom in on the telescope to initiate the next game.
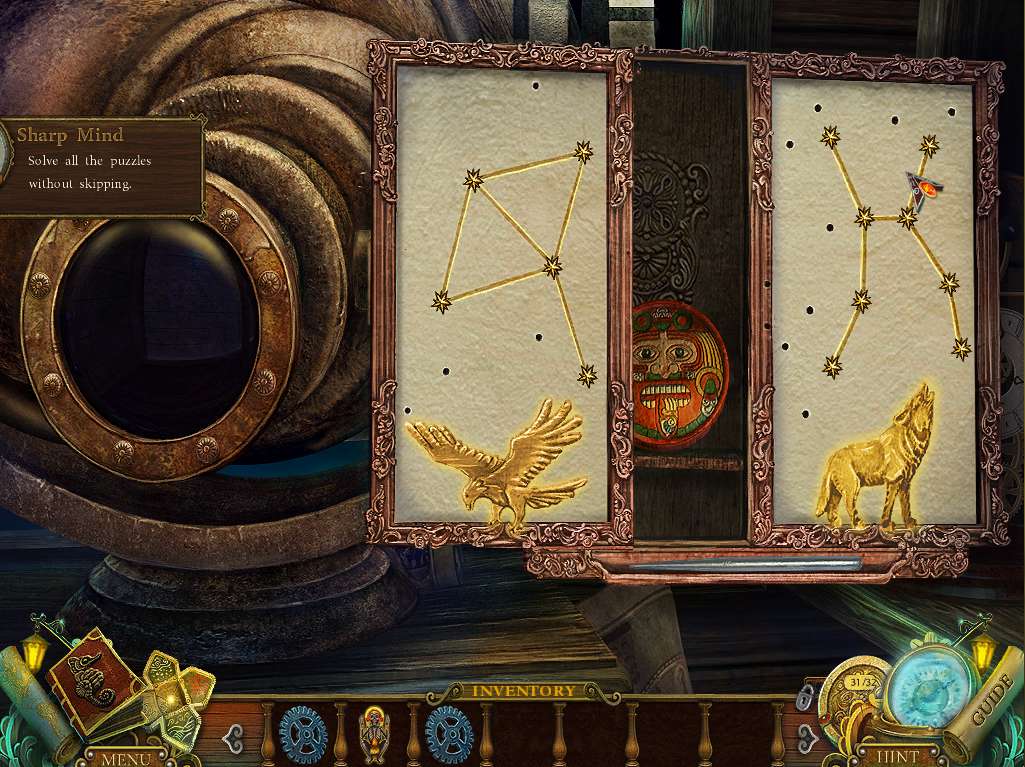
- The idea is to gaze through the telescope and find, via the knob on the right, the matching constellation points for the animals shown at the bottom of the plates.
- The first one is the hawk. The second is the wolf.
- When you get it right the lines and figure will turn golden.
- When finished, take the last calendar piece and receive the completed CALENDAR.
- Return to the engineering room.
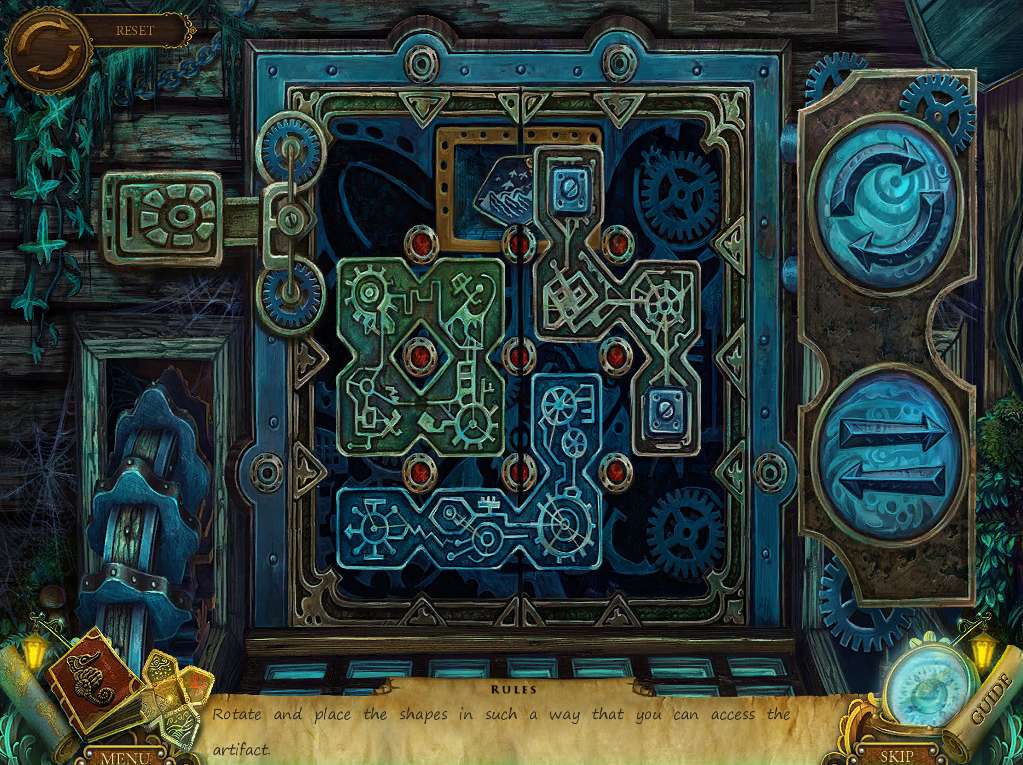
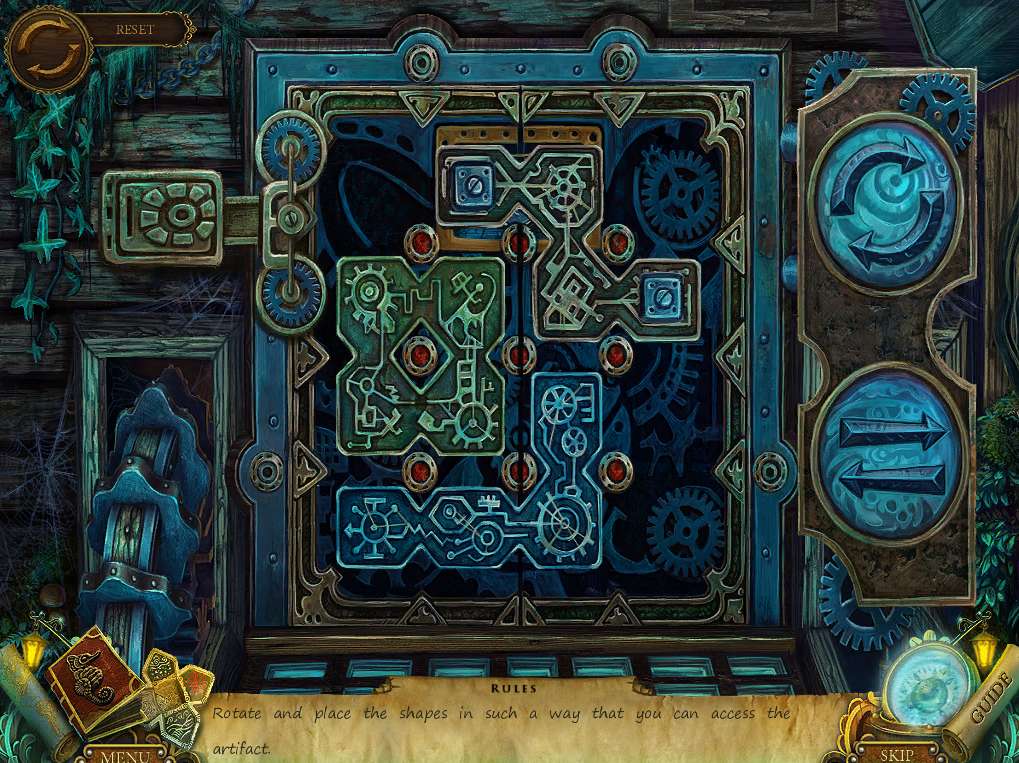
- Okay, time to stick it to the evil one by showing him you can get out of this place! Zoom in on the door, and insert the two GEAR pieces on the upper left to initiate the puzzle.
- The aim is to shift the three irregular shaped pieces within the frame in such a way that you can reach the final artifact concealed in a recess at the back.
- The controls to the right allow you to perform two sets of maneuvers – turn the objects, and reverse (mirror) them.
- To actually move the object, simply click on it. Oddly though, you actually have to place them over the controls on the right to perform a required maneuver.
- Follow the screenshot sequence below for the solution.


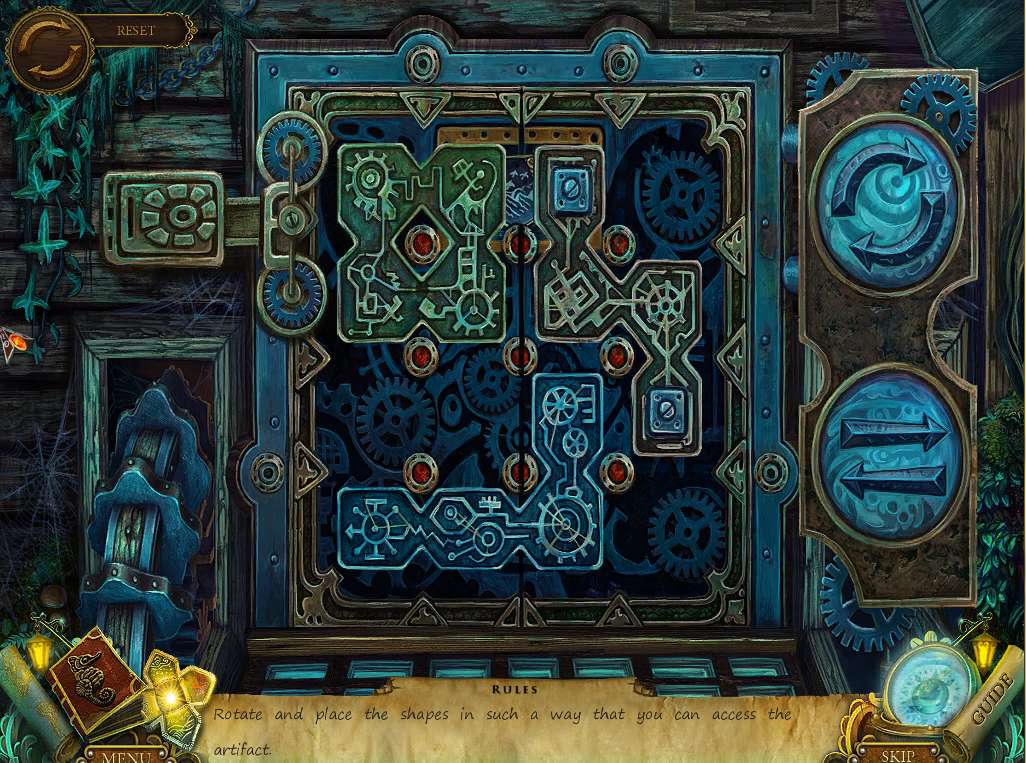
- Once complete, head to the portal.
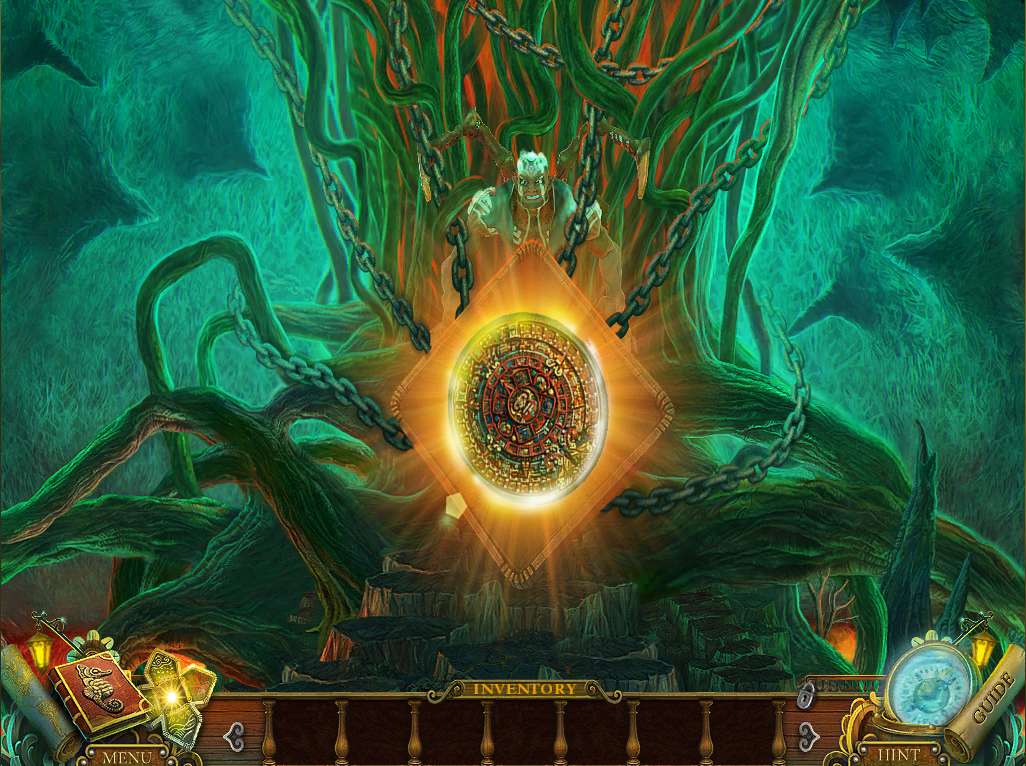
- Place the DEATH GOD STATUETTE in the remaining slot and move through the portal. Place the CALENDAR in the appropriate place, watch the resulting scene, and click on it one more time. Then click on the glowing artifact to the left of your inventory to initiate the final puzzle.

- The aim of this final conundrum is to place the segments in their correct positions. There are two parts to the puzzle – the inner circle of eight segments, and the outer frame of eight pieces. Clue is that once in the correct position, a piece will ‘color’ up. Easiest approach is to complete the inner part first, then work on the border. See the screenshot for the solution.
- When completed, you’re done!
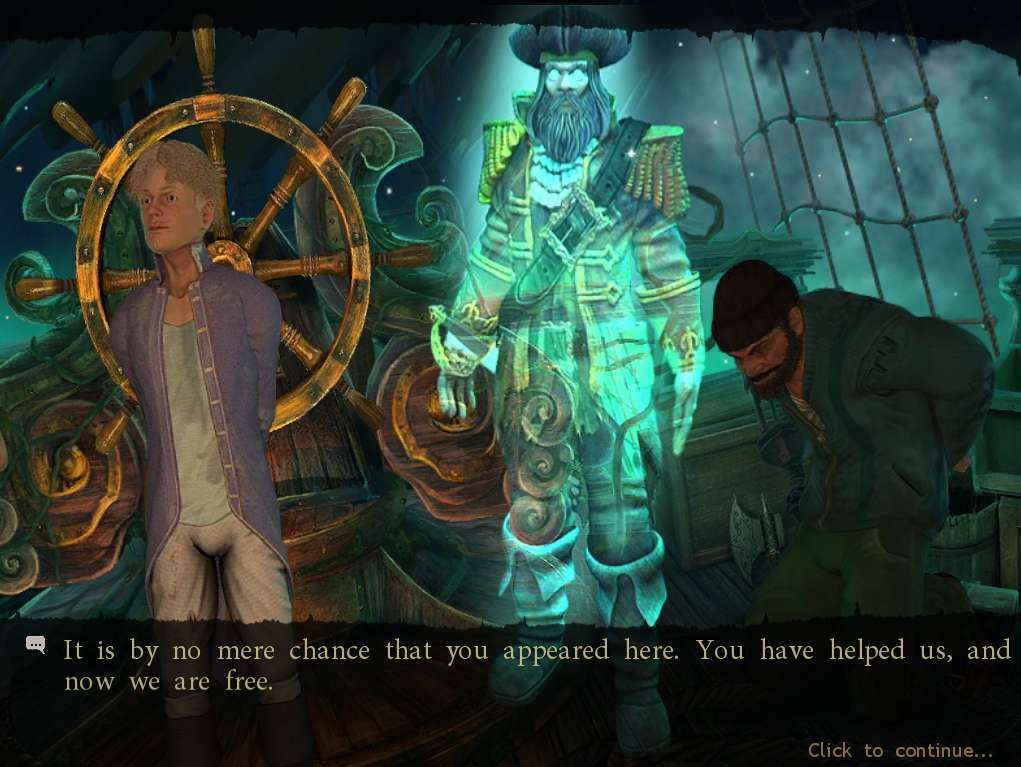
Congratulations – you’ve saved all these poor souls trapped in the ship – as well as your pal Gregory! Watch the final scene play out, then head off and try the bonus chapter!
General Info and Tips
Chapter 1: Entering the Ship
Chapter 2: Freeing the Cabin Boy
Chapter 3: The Treasure Room
Chapter 4: The Exorcism
Chapter 5: The Cure
Chapter 6: The Jacket
Chapter 7: Gregory’s Release
Chapter 8: Preparation
Chapter 9: The Portal
Chapter 10: Trapped
Ask for help in the comments below!
Chapter 1: Entering the Ship
Chapter 2: Freeing the Cabin Boy
Chapter 3: The Treasure Room
Chapter 4: The Exorcism
Chapter 5: The Cure
Chapter 6: The Jacket
Chapter 7: Gregory’s Release
Chapter 8: Preparation
Chapter 9: The Portal
Chapter 10: Trapped
Ask for help in the comments below!