Mayan Prophecies: Ship of Spirits: Chapter 2: Freeing the Cabin Boy
Our Mayan Prophecies Ship of Spirits Walkthrough will help you stay out of trouble as you explore the dangers and mysteries of the ancient Spanish Galleon your boat crashed into. Chock full of valuable information and custom screenshots to help you complete each and every chapter, this comprehensive Mayan Prophecies Walkthrough is a must-have companion to this exciting hidden object adventure game.
General Info and Tips
Chapter 1: Entering the Ship
Chapter 2: Freeing the Cabin Boy
Chapter 3: The Treasure Room
Chapter 4: The Exorcism
Chapter 5: The Cure
Chapter 6: The Jacket
Chapter 7: Gregory’s Release
Chapter 8: Preparation
Chapter 9: The Portal
Chapter 10: Trapped
Ask for help in the comments below!
Chapter 1: Entering the Ship
Chapter 2: Freeing the Cabin Boy
Chapter 3: The Treasure Room
Chapter 4: The Exorcism
Chapter 5: The Cure
Chapter 6: The Jacket
Chapter 7: Gregory’s Release
Chapter 8: Preparation
Chapter 9: The Portal
Chapter 10: Trapped
Ask for help in the comments below!
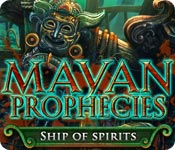
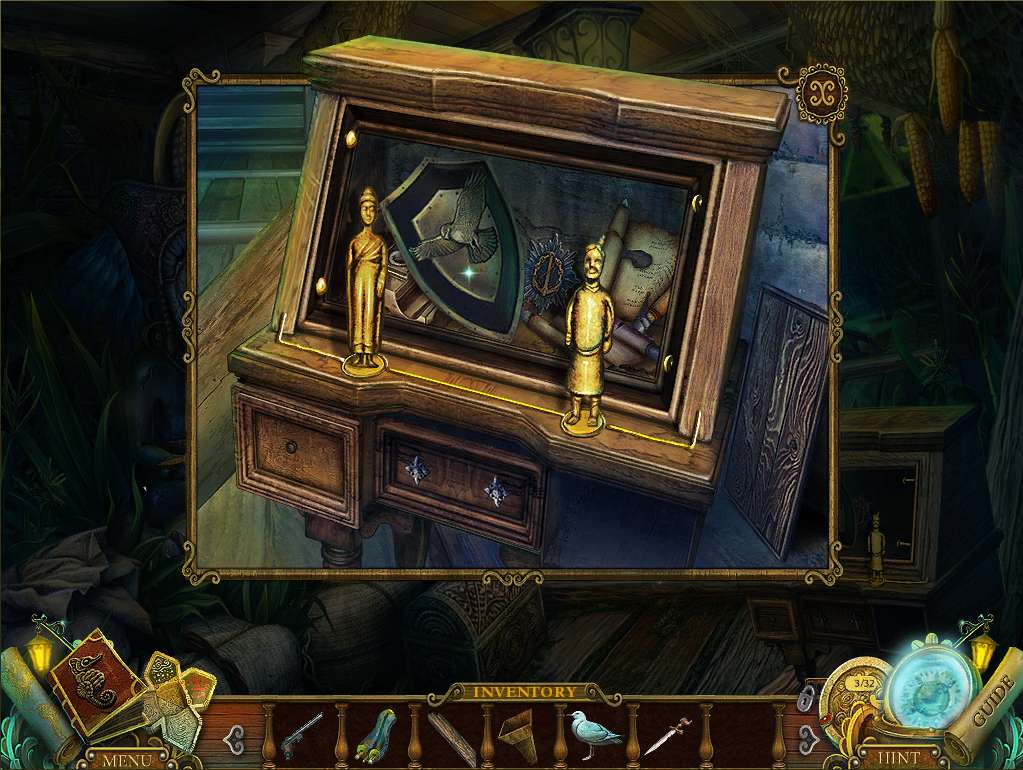
- Pick up the Mayan calendar segment, acquire the artifact section, and pick up the note.
- Next, zoom in on the cabinet to the right and slot in the FLAG from inventory, which will open it.
-
Take the WOLF TOTEM KEY and note the item inside with a combination lock, as well as the plate to one side with special screws.
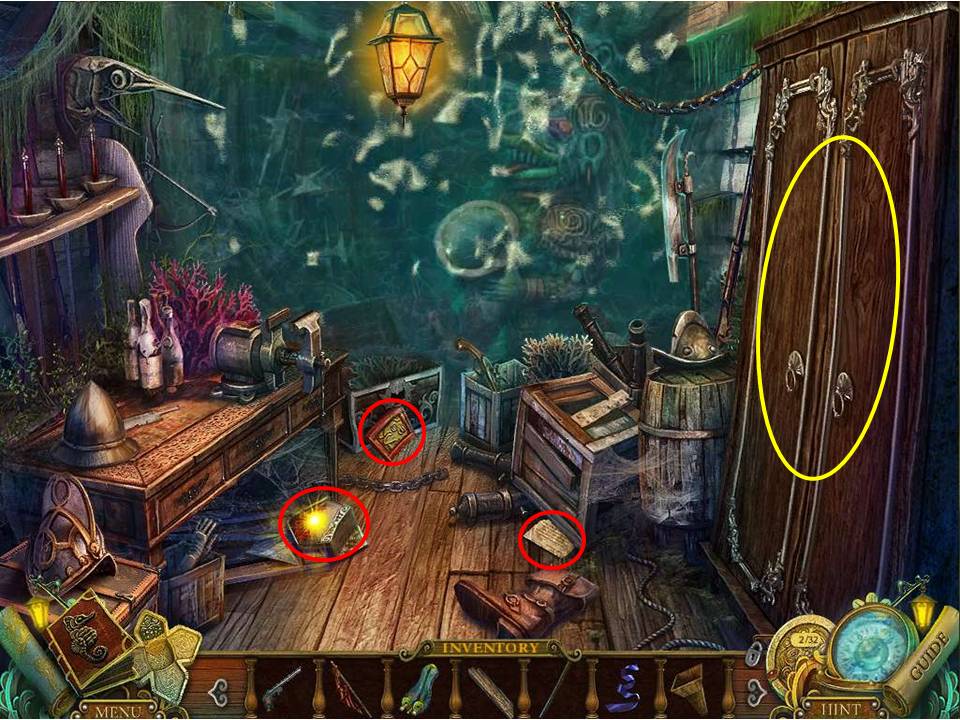
- Return to the Mayan slab and insert the WOLF TOTEM KEY in place.
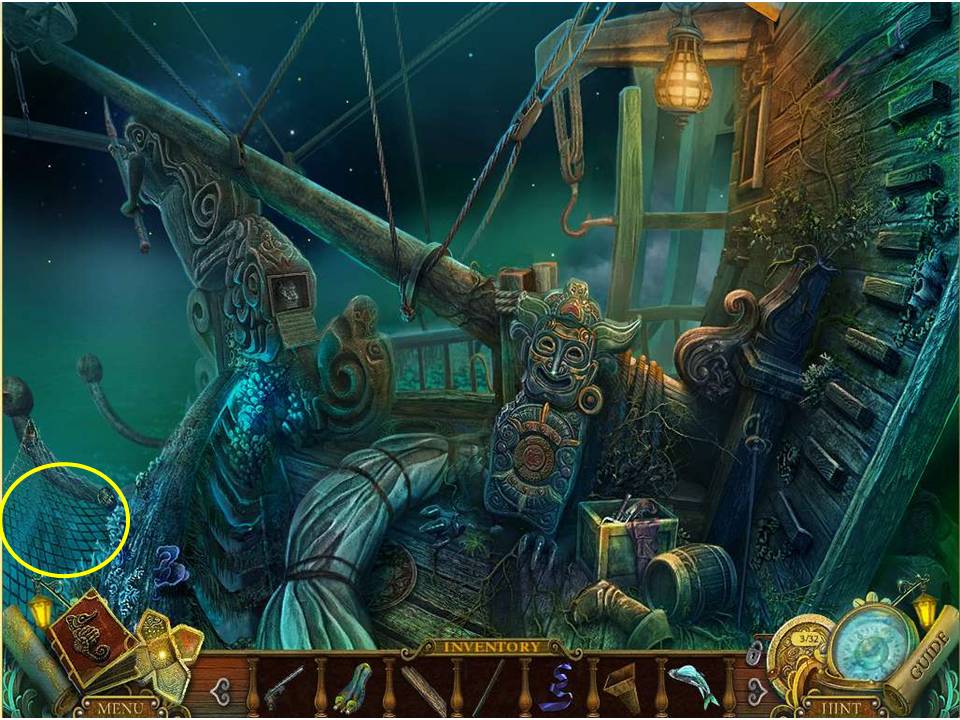
- Take the WEAVING TOOLS that appear from the drawer, and then return to the hold.
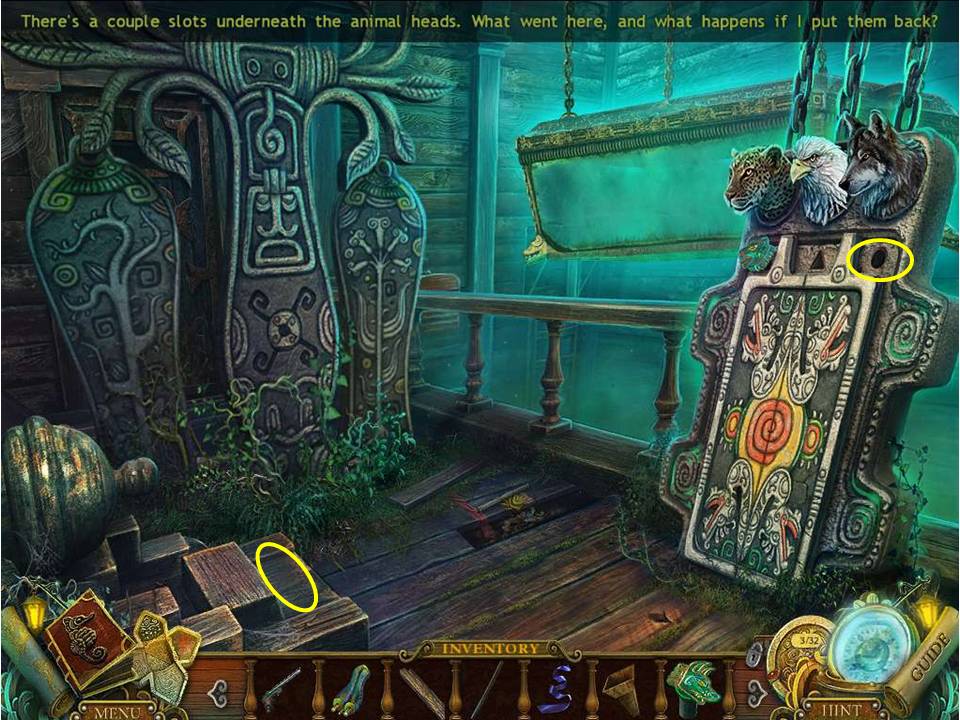
- Take the WEAVING TOOLS from inventory and use them to repair the net.
- When complete, take the completed FISHING NET.
-
Move out on to the prow of the boat.
- Click on the flying fish skipping by, place the FISHING NET on the appropriate holders, and watch the action unfold.
-
Put your catch in inventory and head on up the ladder.

- Okay, time to catch that dratted gull.
- Click on the wooden trough, and use the WOOD BEAM to prop it up.
- Tie the RIBBON to it, and place the FISH on the other end.
- Can the gull resist the temptation? Nope!
-
Once captured, place the GULL in inventory (ouch!) and take the JAGUAR TEETH it’s left behind.
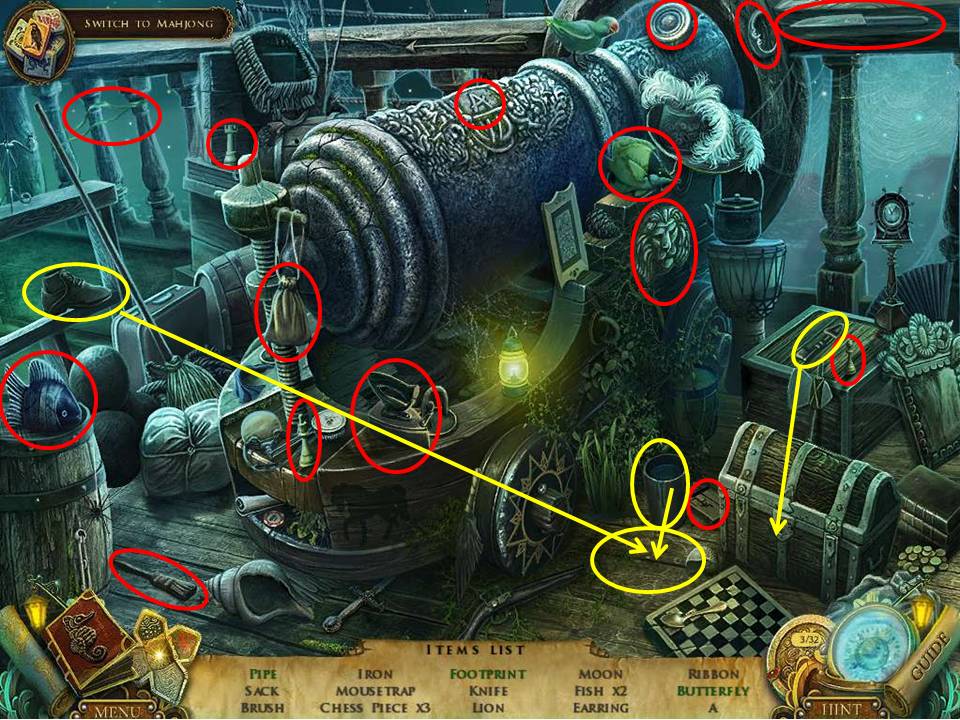
- Zoom in on the HOA puzzle to the right.
- Collect the items circled in red, and go through the multiple moves required for the items circled in yellow.
- Use the key on the crate to open the chest - click on the statue inside to release the hummingbird for capture, pick up the pipe inside, and take the butterfly on the inside of the lid.
- Knock the pot over and drop the shoe in the liquid to create a footprint.
-
Once complete, receive the EARRING and return down the ladder to the bow.
- Zoom in and place the EARRING on the idol.
- Take the SWORD HILT from the idol’s stomach – bet that caused some indigestion!
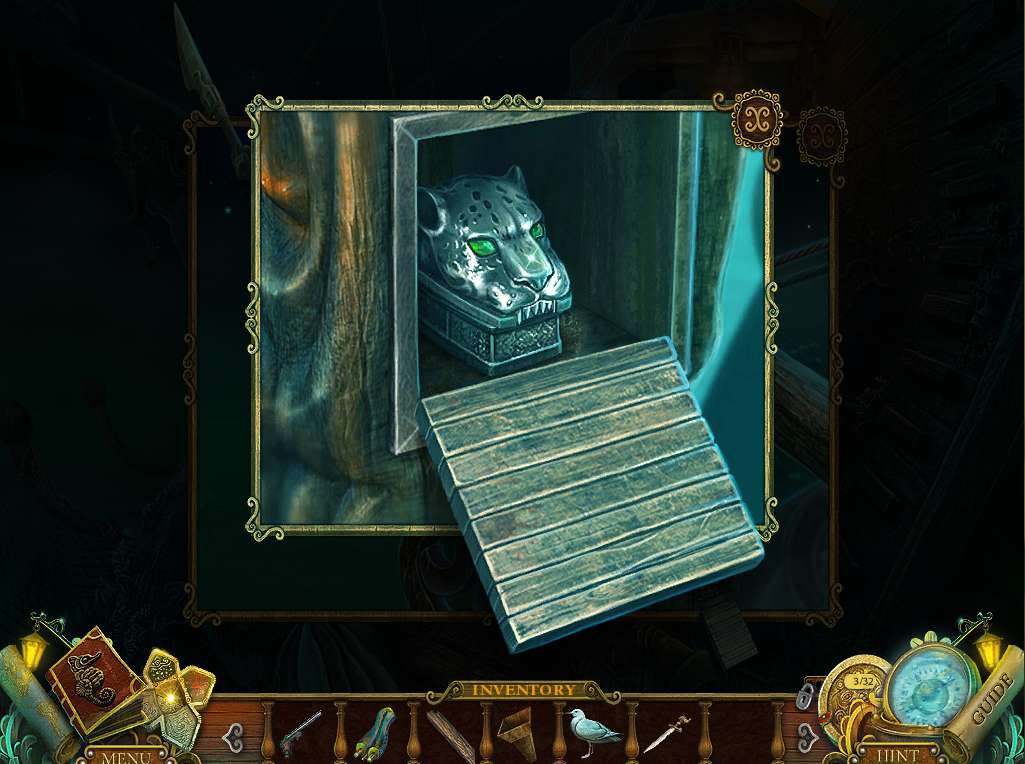
- Next, zoom in on the small compartment at the back of the figurehead and place the JAGUAR TEETH on the jaguar.
- Click on it and take the STATUE inside.
-
Proceed down to the armory.
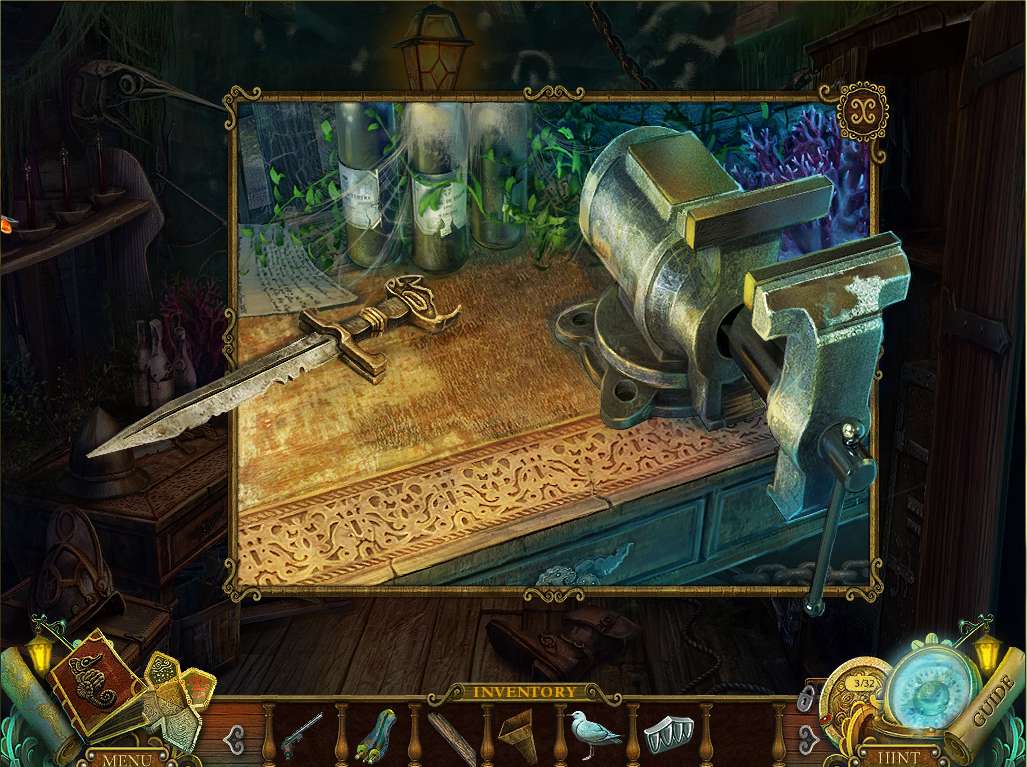
- Zoom in on the desk and combine the SWORD HILT with the blade to give you – wait for it – a SWORD.
-
Head to the galley.
- I've been shot! Ugh wait - a misfire! Phew!
- Open the trap door and follow the bad guy down below. Note the grate opening up in the background.
- Zoom in on the nearby desk and slot the STATUE in place to unlock it.
- Open the lid and take the CAPTAIN’S MEDAL and the SHIELD.
- Try going through the opening and watch in horror as the nasty looking octopus (is there such a thing as a pleasant looking one?) suddenly smashes through the deck and begins to act in menacing fashion towards you.
- Does the sword work against it? No? Does the shield help you progress against it? No. Does trying to get the gull to drop some guano on it repel it? No.
-
Guess you’ll have to retreat to the lower deck.
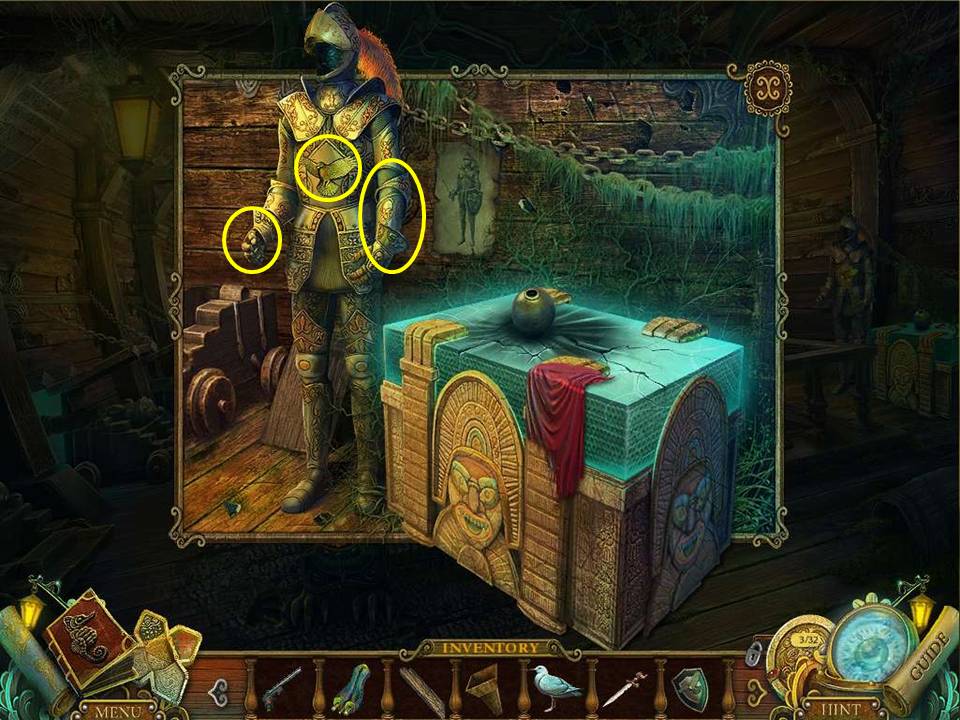
- Zoom in on the knight and place the SWORD and the SHIELD on it.
- Take the calendar piece and the HAWK TOTEM KEY from the chest cavity.
-
Exit and make your way round the room to where the Mayan slab is located.
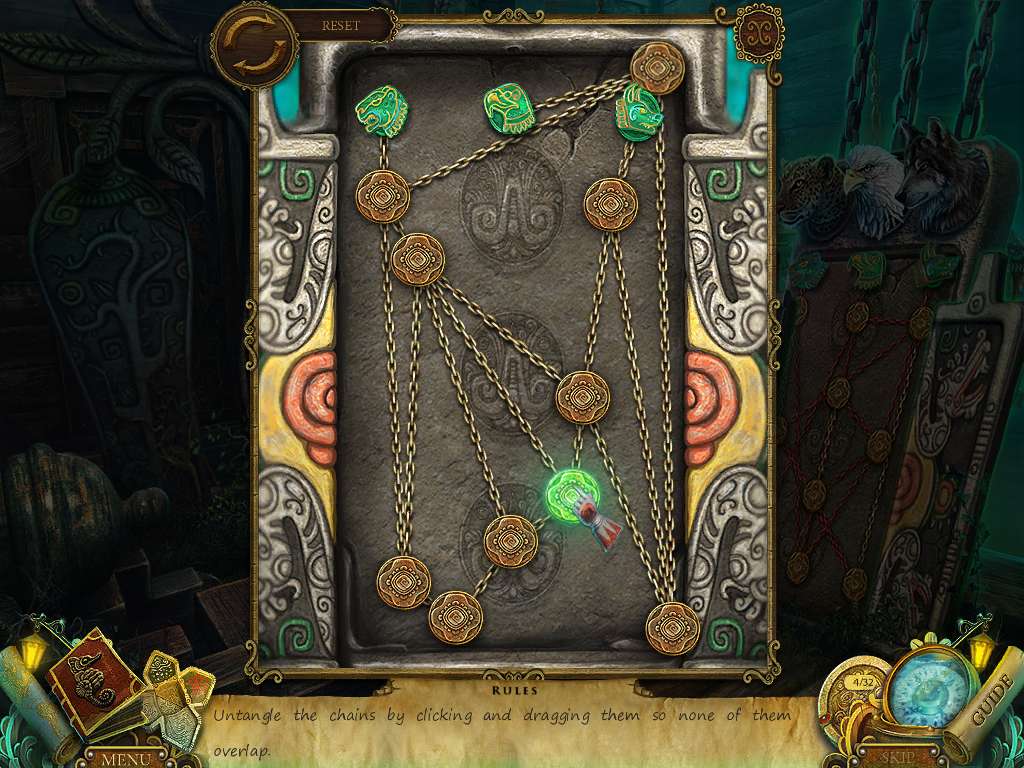
- Place the HAWK TOTEM KEY in the final slot to initiate the next puzzle.
- This is a fairly standard puzzle without a definitive solution – the basic idea is to simply move the chains around until none of them overlap – the color will change to gold for each section that is cleared, and when you strike gold for all the sections you’ll have solved the puzzle.
- The screenshot shows one variation for solving it.
-
When complete, head round to the sarcophagus at the bottom of the steps.

- The boy is free at last! Well, except that he’s turned into the male version of Linda Blair and is possessed, but hey, you can’t have everything, right?
- Take the DISC SEAL from the banister on the left and return to the Mayan slab.
General Info and Tips
Chapter 1: Entering the Ship
Chapter 2: Freeing the Cabin Boy
Chapter 3: The Treasure Room
Chapter 4: The Exorcism
Chapter 5: The Cure
Chapter 6: The Jacket
Chapter 7: Gregory’s Release
Chapter 8: Preparation
Chapter 9: The Portal
Chapter 10: Trapped
Ask for help in the comments below!
Chapter 1: Entering the Ship
Chapter 2: Freeing the Cabin Boy
Chapter 3: The Treasure Room
Chapter 4: The Exorcism
Chapter 5: The Cure
Chapter 6: The Jacket
Chapter 7: Gregory’s Release
Chapter 8: Preparation
Chapter 9: The Portal
Chapter 10: Trapped
Ask for help in the comments below!