
Empress of the Deep 3: Legacy of the Phoenix: Chapter Seven: Silencing the Colossus
Rely on our Empress of the Deep 3 Legacy of the Phoenix Walkthrough, with its detailed, chapter-by-chapter instructions, beautifully marked custom screenshots, and easy-to-understand puzzle solutions to help you find the ingredients to revive the Phoenix and stop the evil colossus from awakening. Help Empress Anna save her lost people from the fate her twin sister has tried to set in motion in this stunning hidden object adventure game.
Chapter One: Fall of the Sky Palace
Chapter Two: The Mysteries of the Scroll Temple
Chapter Three: The First Relic
Chapter Four: The Second Relic
Chapter Five: The Third Relic
Chapter Six: The Last Relic
Chapter Seven: Silencing the Colossus
Chapter Eight: That Which Was Lost
Bonus Chapter
Ask for help in the comments below!
Pandora, inside the body of the Key Master has escaped to the Volcano Fortress. With the final key to unlock the SPIRIT CODEX in her possession, reviving the PHOENIX to stop the COLOSSUS is now out of the question. JACOB hands you the IMPERIAL TIARA, a magical object that you can use to find another way to stop the COLOSSUS.
New Quest: Find the Magic Path
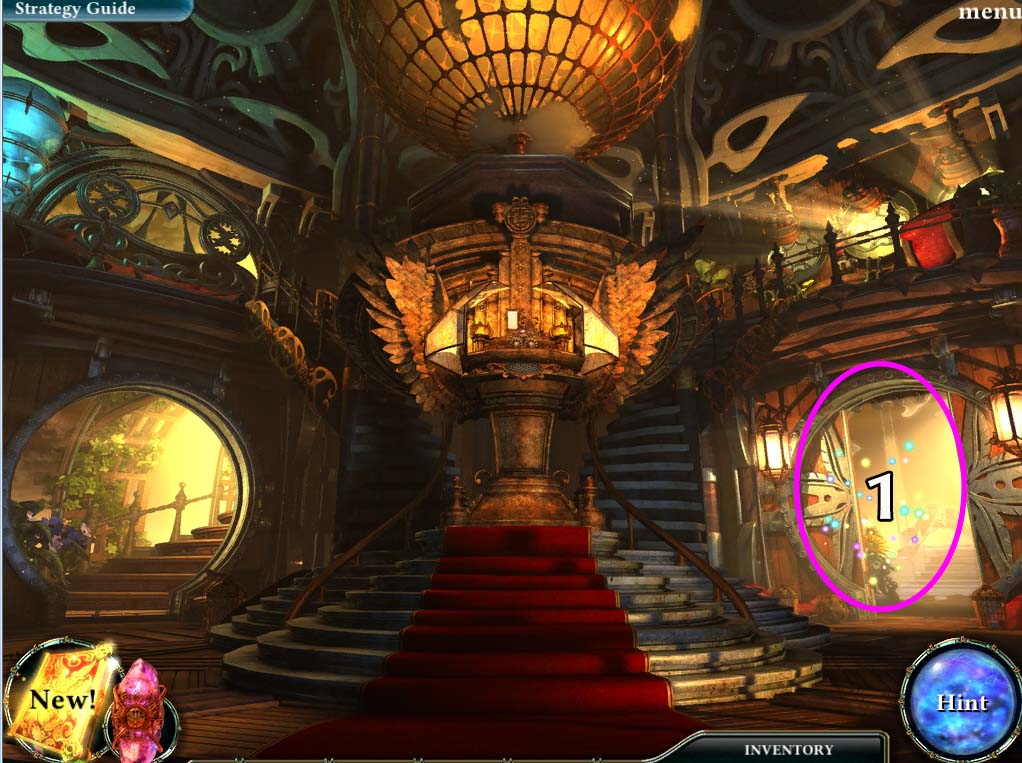
- 1. Head back down the SCROLL TEMPLE. At the area where the SPIRIT CODEX is kept you’ll discover a magic path (circled in violet above).
- Quest: Find the Magic Path: Complete
New Quest: Follow the Magic Path
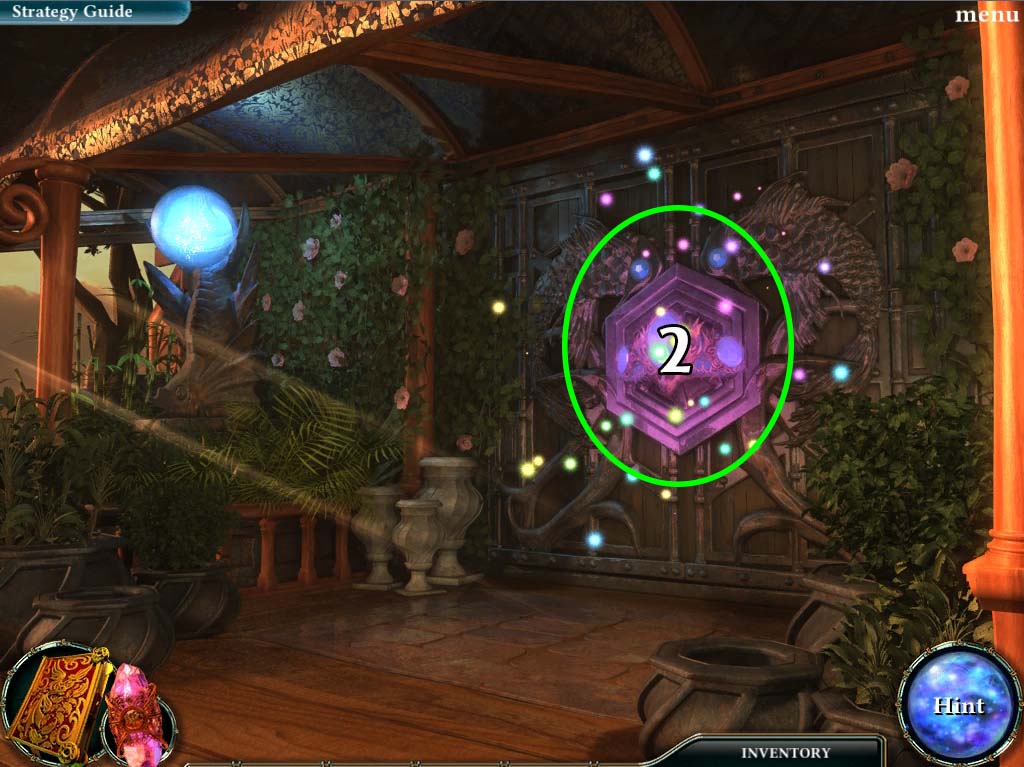
- 2. Following the path will eventually lead you to the COURTYARD area (near the GREENHOUSE and DOCKS).
- The path turns right into the FISHERY MARKET ENTRANCE.
- Examine the FISHERY GATE (circled in green above) and you’ll open the doors.
- Head inside and the SPIRIT AMETHYST will explain what you need to do.
- Quest: Follow the Magic Path: Complete
New Quest: Get the first tiara jewel
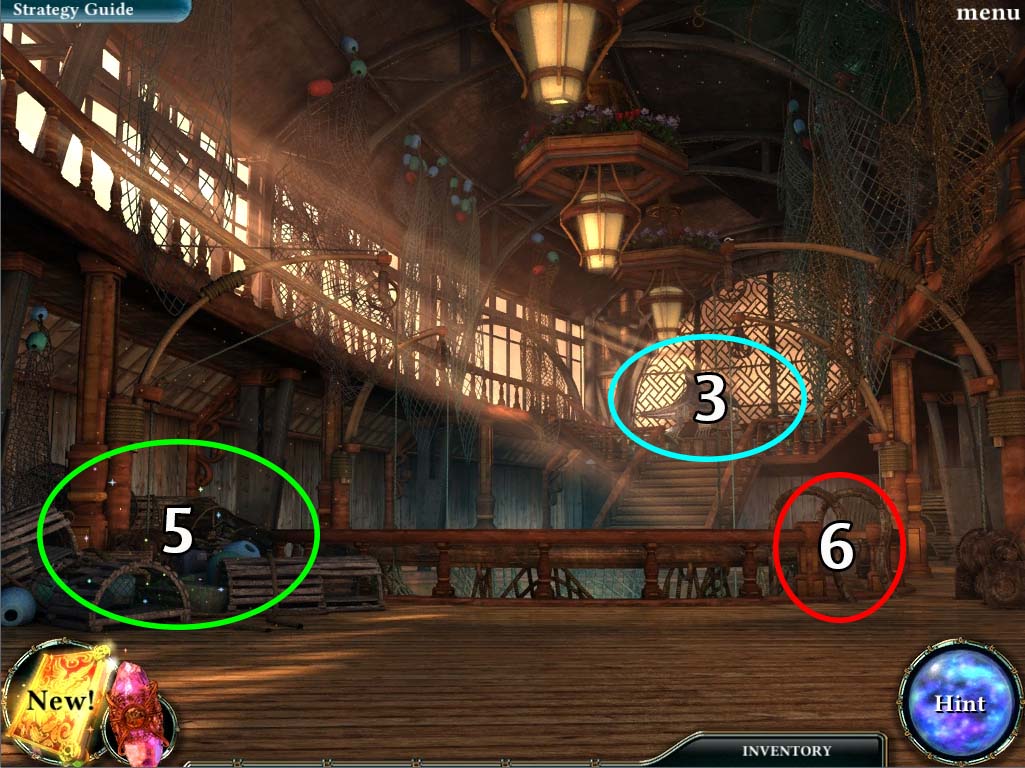
- 3. Investigate the back of the FISHERY MARKET (circled in blue above).
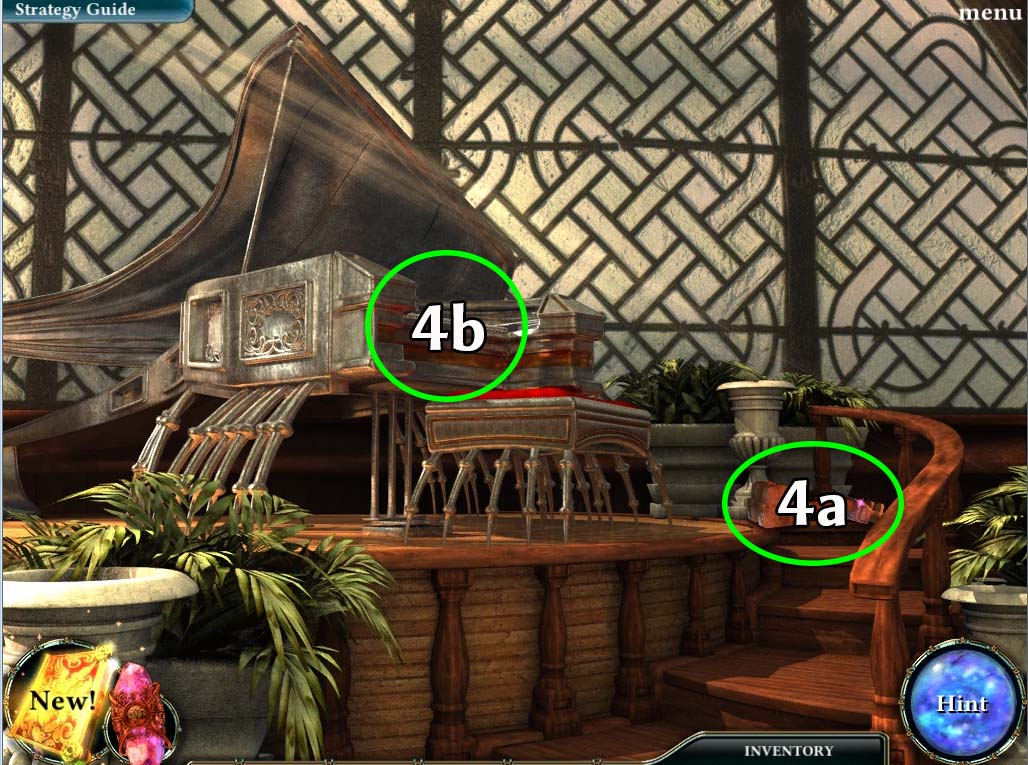
- 4. Grab the METAL BAR (1 of 4) and then investigate the PIANO (both are circled in green in the image above).
- The PIANO will start a mini-game.
PIANO MINI-GAME
- The object of the game is to push a piano key according to a set pattern that will light up when the game begins.
- It starts off easy with just one key and finally ends with 5 keys you need to push in a pattern.
- It is very straightforward, but a solution is shown below:
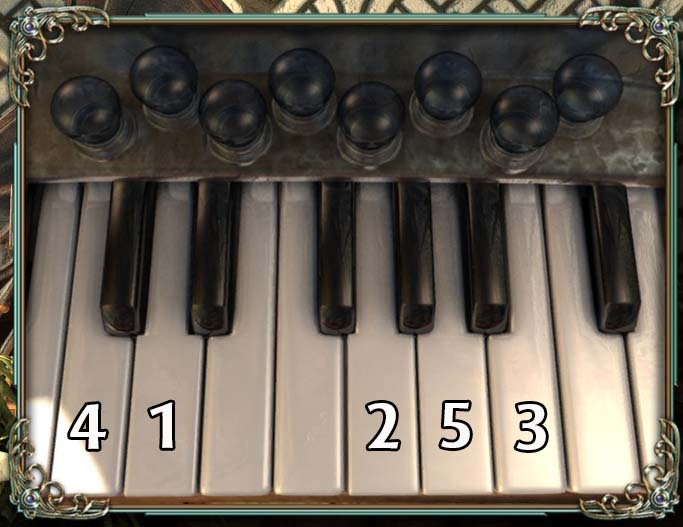
- Play the keys as marked in the pattern below:
- 1
- 1-2
- 1-2-3
- 1-2-3-4
- 1-2-3-4-5
- Once the puzzle is solved, the net that is blocking the way down the hatch is removed. Head back to the FRONT of the FISHERY MARKET.
- 5. Investigate the debris on the left side of the FISHERY MARKET (circled in green on the FISHERY MARKET image above).
- This will start a HIDDEN RELIC PUZZLE.
FISHERY HIDDEN RELIC PUZZLE
- **Note: The objects listed as hidden can change on each playthrough.
- Possible items have been listed below
- White Objects are circled in blue above and are labeled as follows:
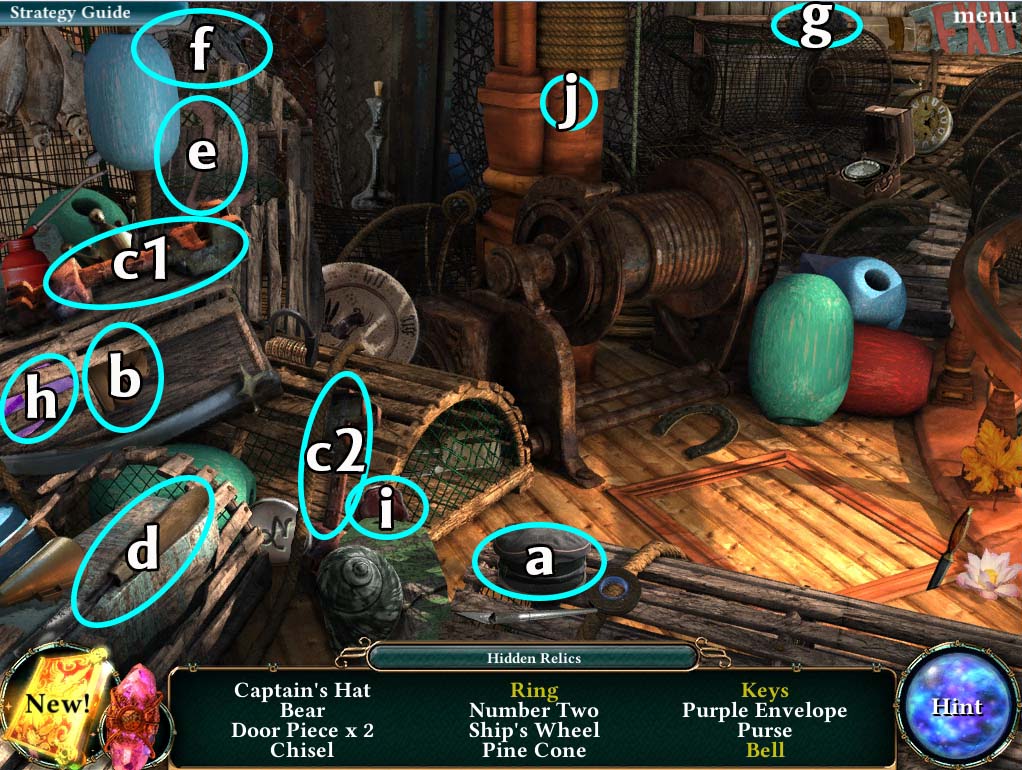
- a. Captain’s hat
- b. Bear
- c. Door Piece x 2
- d. Chisel
- e. Number Two
- f. Ship’s Wheel
- g. Pine Cone
- h. Purple Envelope
- i. Purse
- j. Vandal’s Initial
- The Yellow objects can be obtained by doing the following:
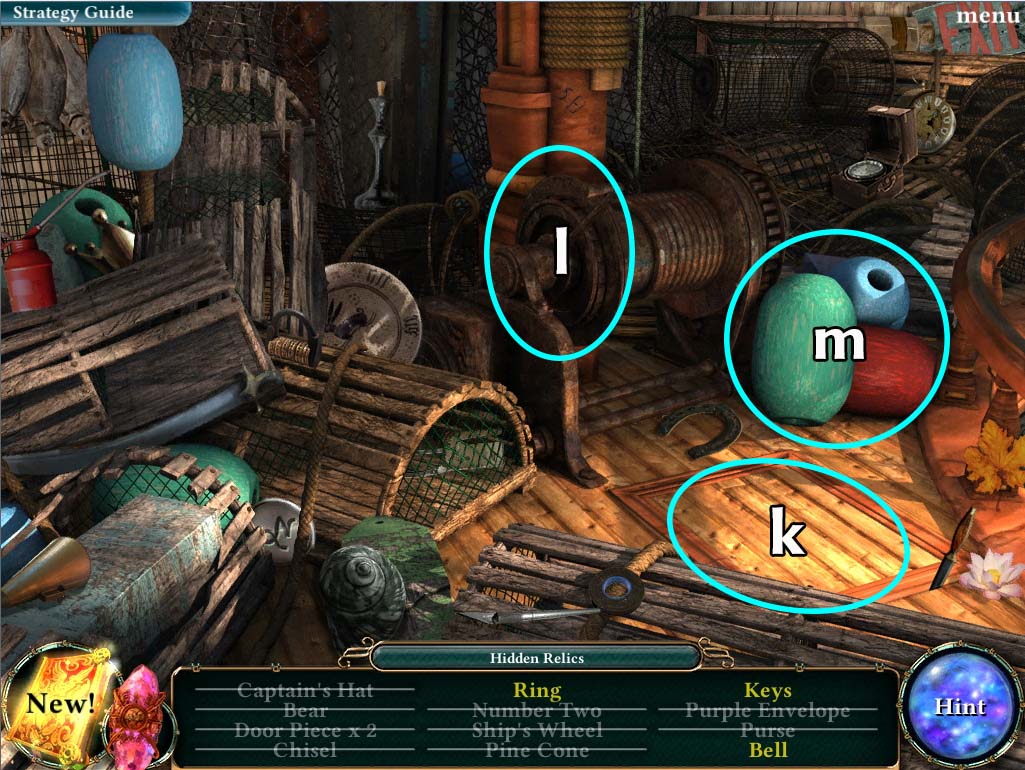
- k. Open the hatch to find the key underneath
- l. Turn the wheel and the ring will drop down
- m. Move the buoys to reveal the bell behind them
- Solving the puzzle rewards you with two METAL BARS (3 of 4) and will also give you another part of PANDORA’S letter.
- 6. Head down the ladder (circled in red in the FISHERY MARKET image above) and you’ll find yourself in front of the HATCH AREA.
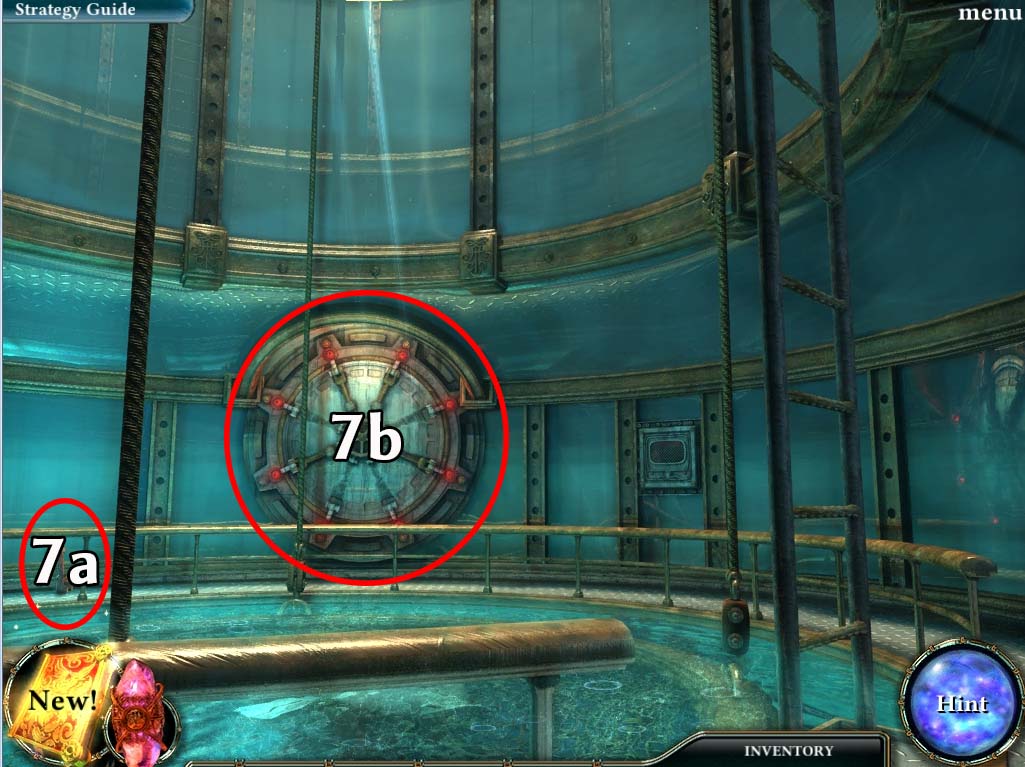
- 7. Grab the final METAL BAR (4 of 4) and investigate the HATCH DOOR (botch circled in red above).
- Place all the metal bars on the hatch and it will turn green.
- Open the hatch and go on through.
- After you pass the tunnel you’ll find yourself inside the WHALE CHAMBER.
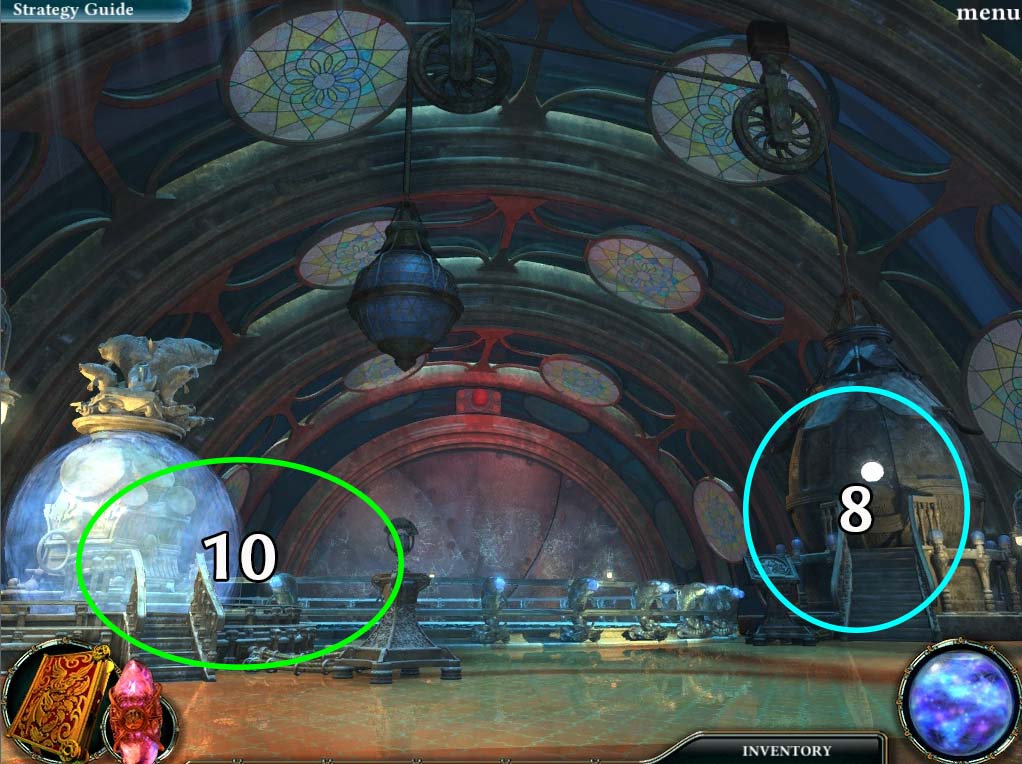
- 8. Investigate the VAULT area (circled in blue in the image above).
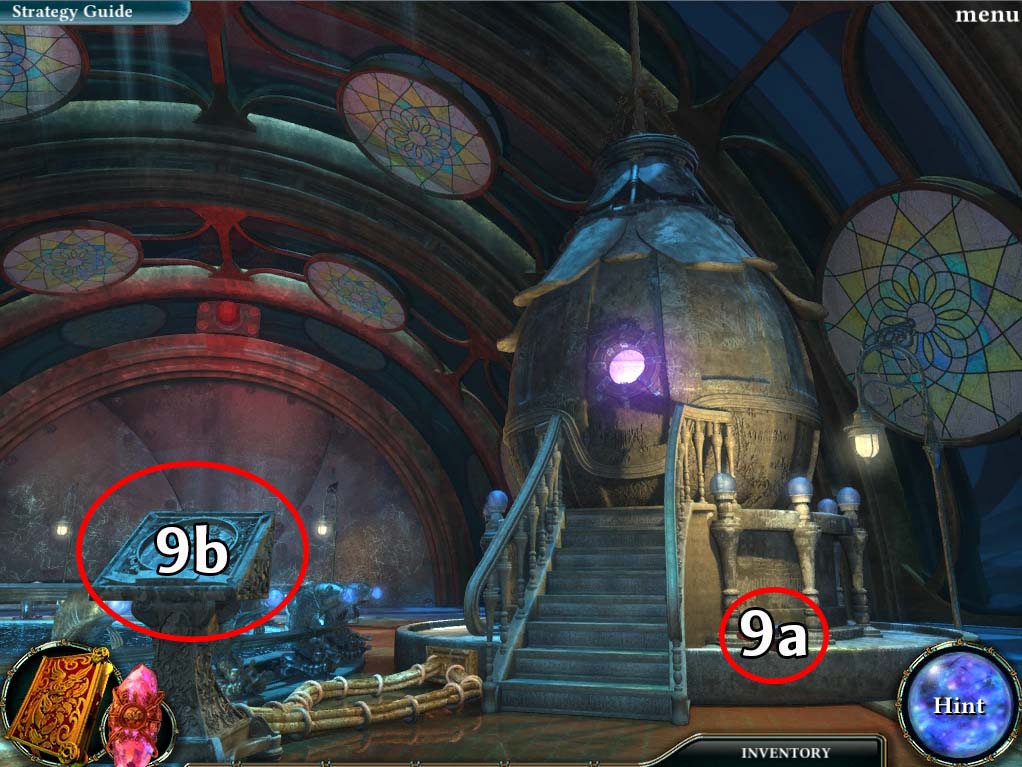
- 9. Grab the LEVER and then investigate the strange panel (both circled in red above).
- The panel will start a mini puzzle.
PANEL MINI-PUZZLE
- The object of this puzzle is to create an image from the jumbled pieces that are in the panel.
- Clicking on two pieces will cause them to swap places.
- The final picture that should be formed by this puzzle is shown below:
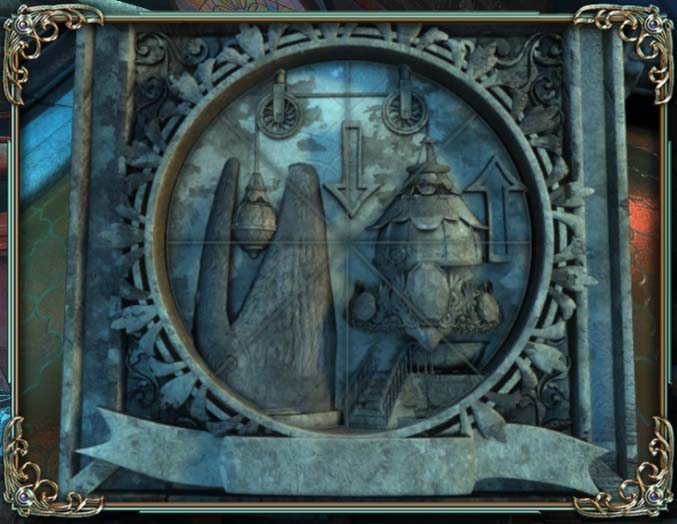
- Once the puzzle is solved, you are given a code word (CORRUPTED) that you will need later.
- Return to the WHALE CHAMBER area.
- 10. Examine the FOUNTAIN area (circled in green in the WHALE CHAMBER image above).
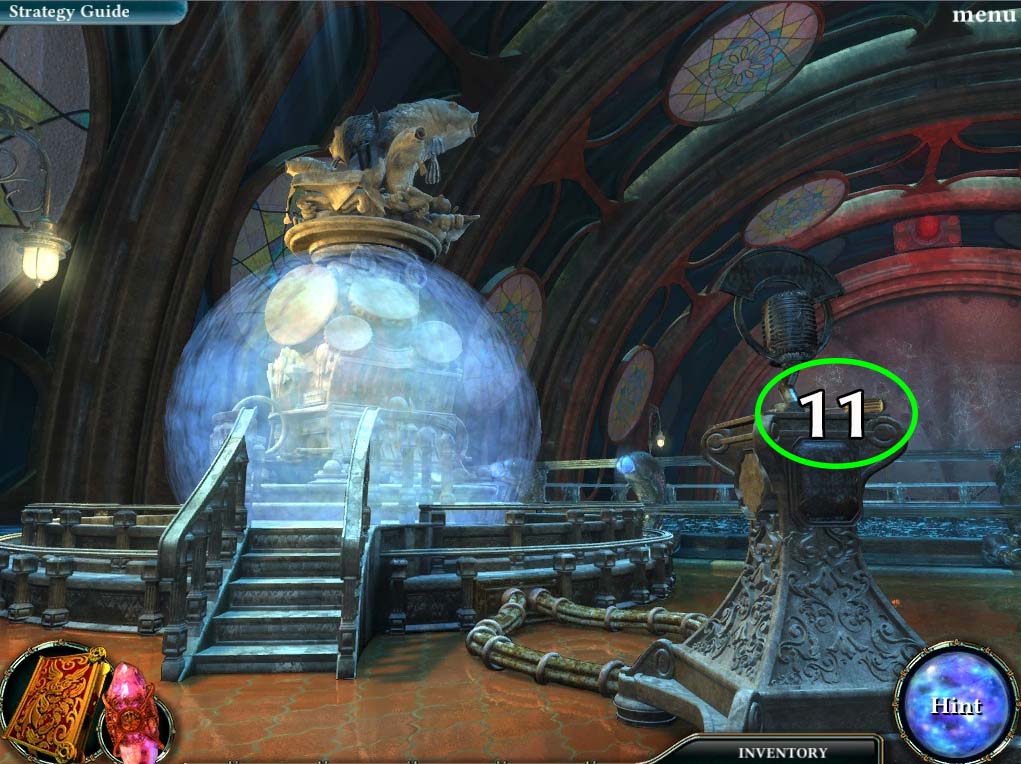
- 11. Take the SCREWDRIVER that is on top of the MICROPHONE STAND.
- Once you have it in your inventory, go back to the HATCH AREA.
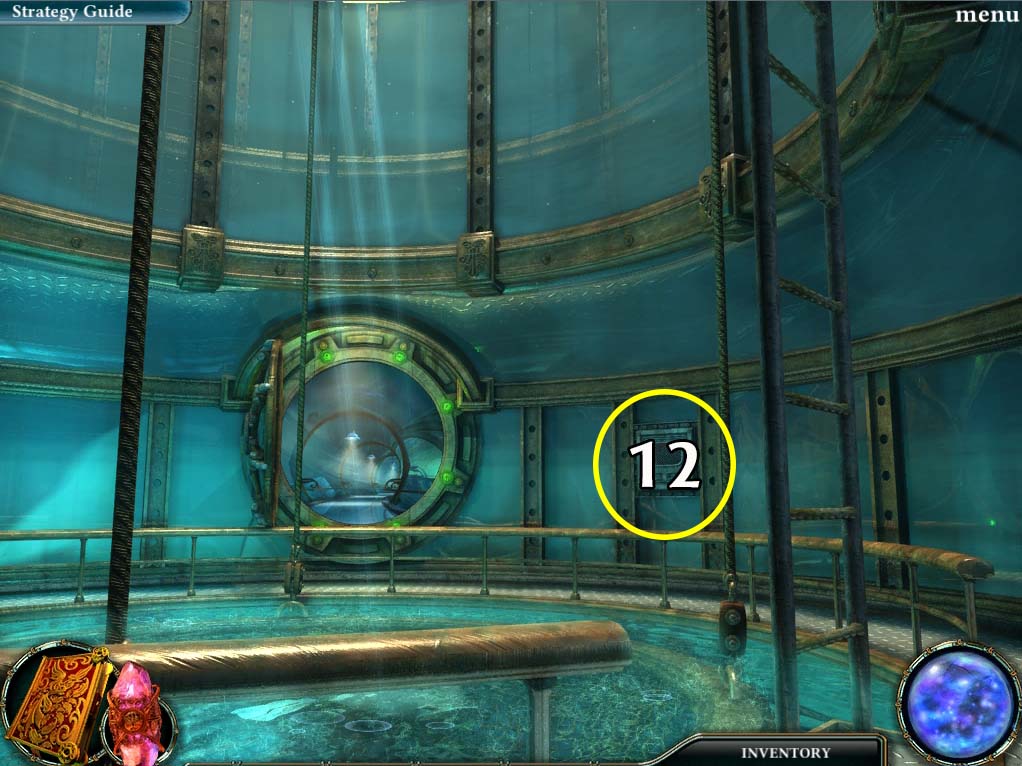
- 12. Investigate the PANEL at the side of the HATCH DOOR.
- 13. Use the SCREWDRIVER on the SCREWS indicated above.
- Once the PANEL is open you get a code word (PANDORA).
- Put the LEVER from your inventory in the slot at the center of the PANEL.
- Turn the LEVER and it will activate the NET behind you.
- There is also a FISH STATUE in the NET that you just raised.
- Take it for your inventory and head back to the WHALE CHAMBER FOUNTAIN.
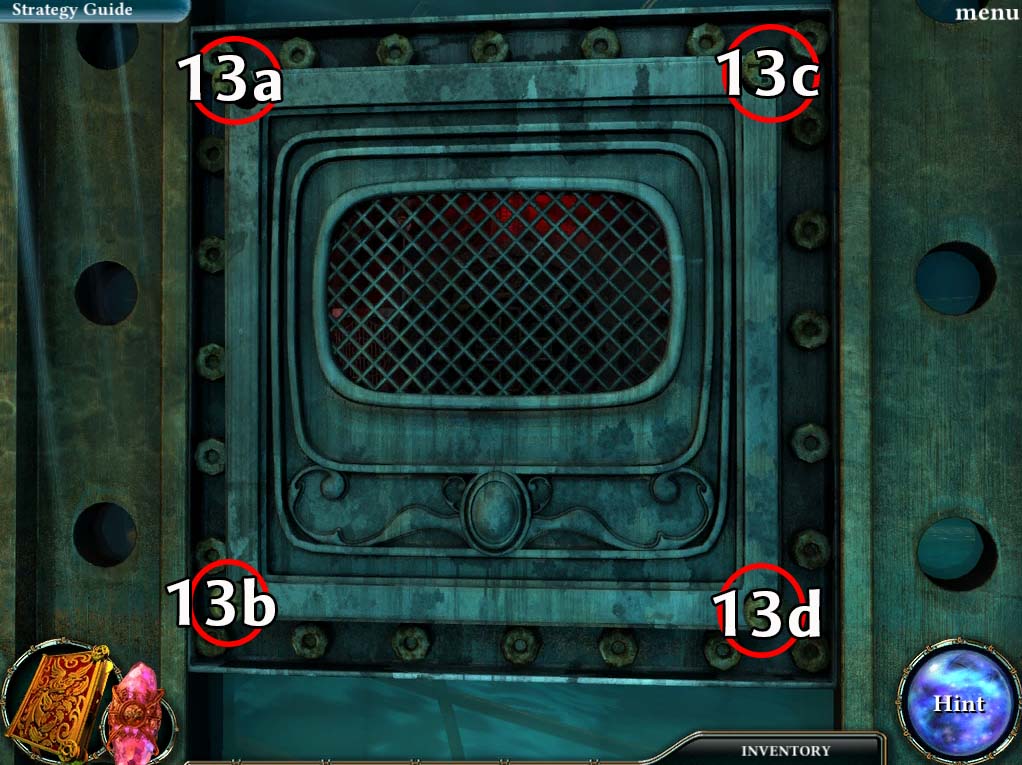
- 14. Place the FISH STATUE on top of the FOUNTAIN (circled in red in the image above).
- This will give you the final code word (COMMUNICATION).
- 15. Use the MICROPHONE. It will ask you for the PASSWORD which you have just discovered.
- Once you speak it the force field that was surrounding the FOUNTAIN disappears.
- 16. Use the BONGO DRUMS on the FOUNTAIN (circled in green above).
- This will start a mini-puzzle similar to the PIANO puzzle at the FISHERY MARKET
BONGO DRUM PUZZLE
- Play the drums that light up in a pattern.
- A solution to the puzzle is shown below:

- Play the following drums in order:
- 1
- 1-2
- 1-2-3
- 1-2-3-4
- 1-2-3-4-1
- After solving the puzzle your friend the BLUE WHALE will pull down the PULLEY revealing the FIRST JEWEL. Take it, and Anna will automatically slot it into her TIARA.
- Quest: Get the first tiara jewel: Complete
New Quest: Find and follow the next Magic Path
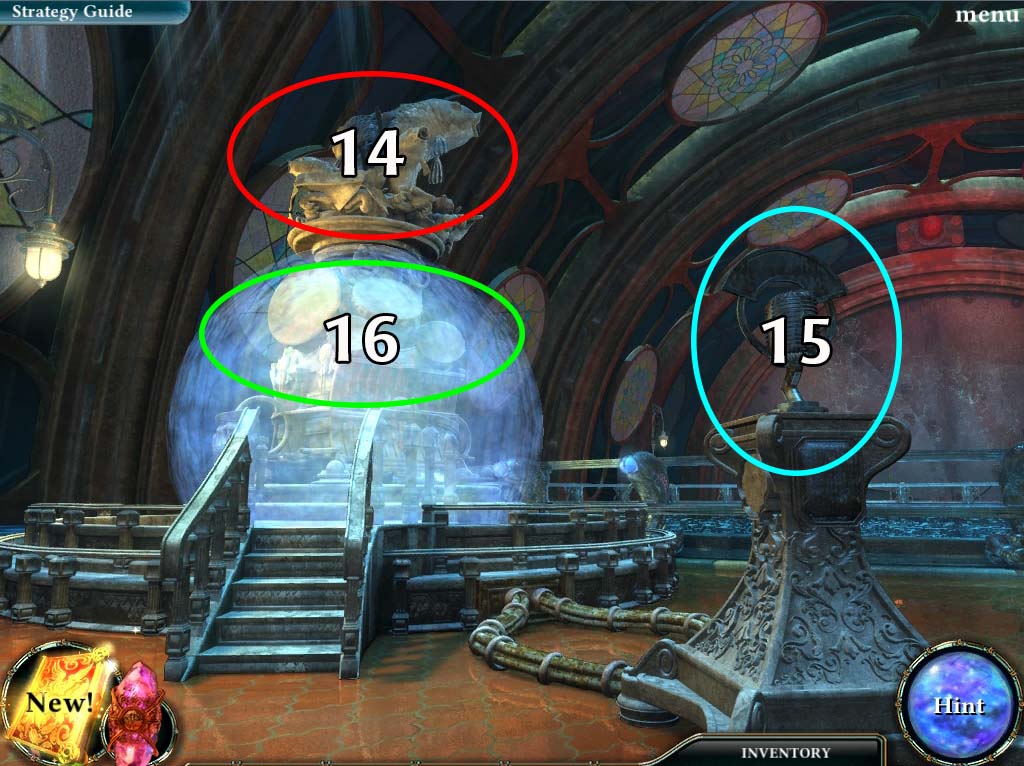
- 17. Head back outside all the way to the FISHERY INTERSECTION. There, you will find the next Magic Path to follow.
- This path will eventually lead you to the LIBRARY and down the LADDER at the BASE OF THE STATUE.
- This is the NURSERY GATE.
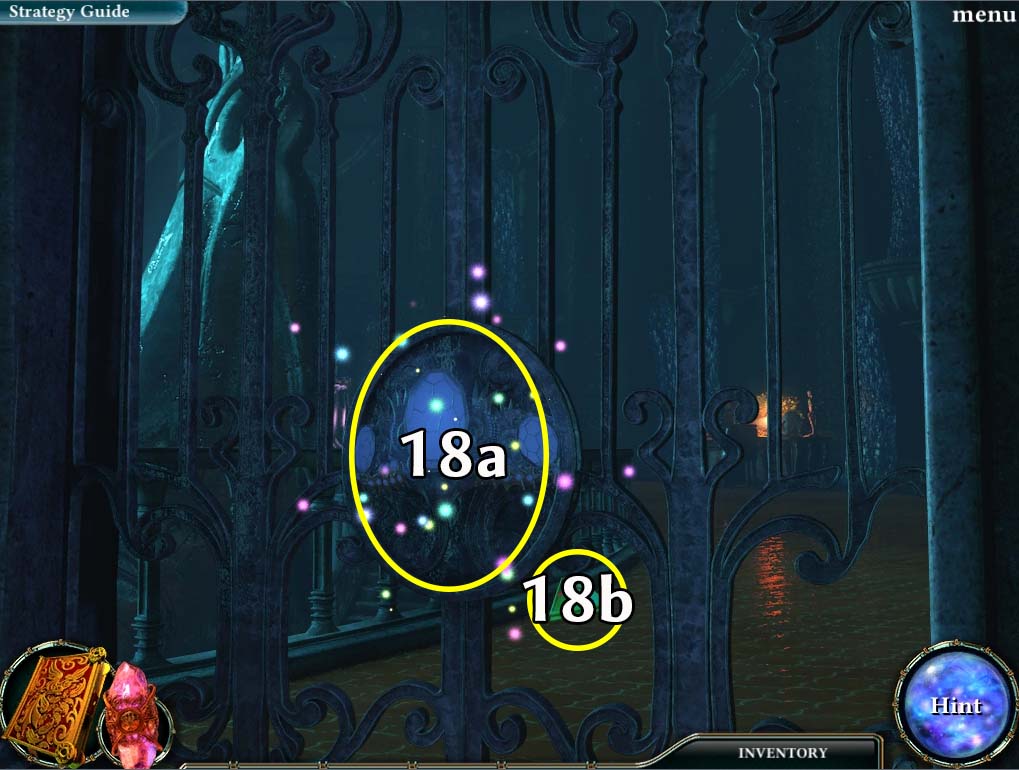
- 18. Use the powers of your TIARA to open the gate.
- Once it’s open, grab the COLORED WEDGE (1 of 4) that you find on the floor (both are circled in yellow above).
- Head inside once you have it in your inventory.
- Quest: Find and follow the next Magic Path: Complete
New Quest: Find the second tiara jewel
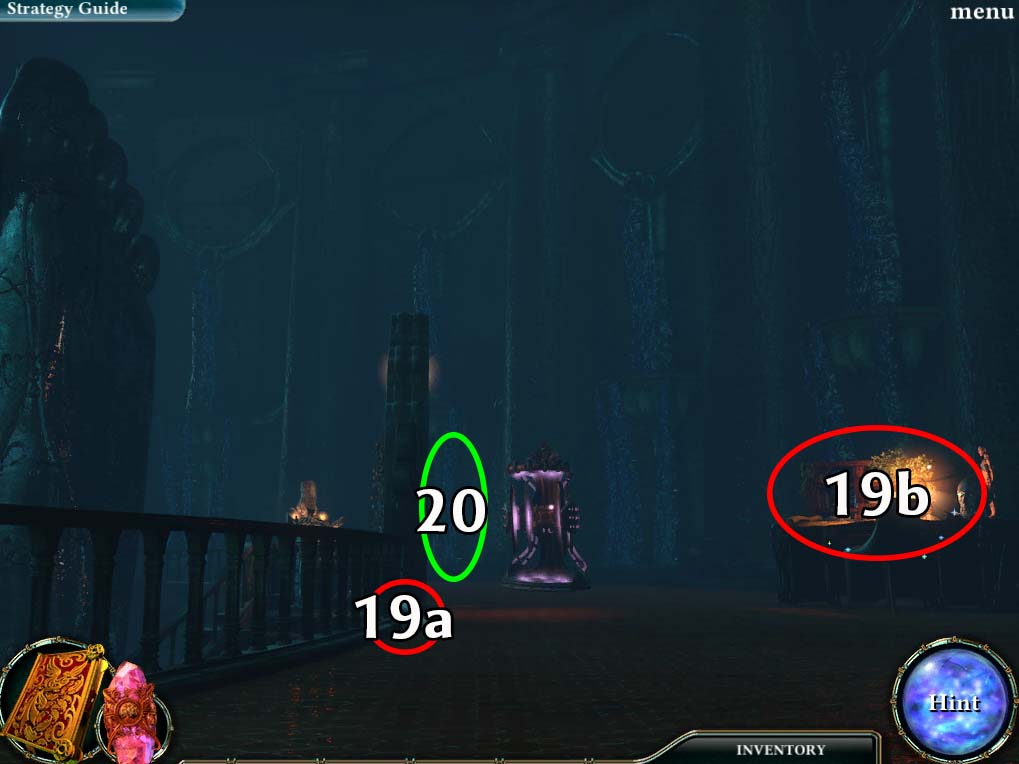
- 19. Take the GLASS TRIANGLE (1 of 3) on the floor and investigate the DESK (both circled in red in the image above).
- This will start a HIDDEN RELIC PUZZLE.
NURSERY HIDDEN RELIC PUZZLE
- **Note: The objects listed as hidden can change on each playthrough.
- Possible items have been listed below
- White Objects are circled in blue above and are labeled as follows:
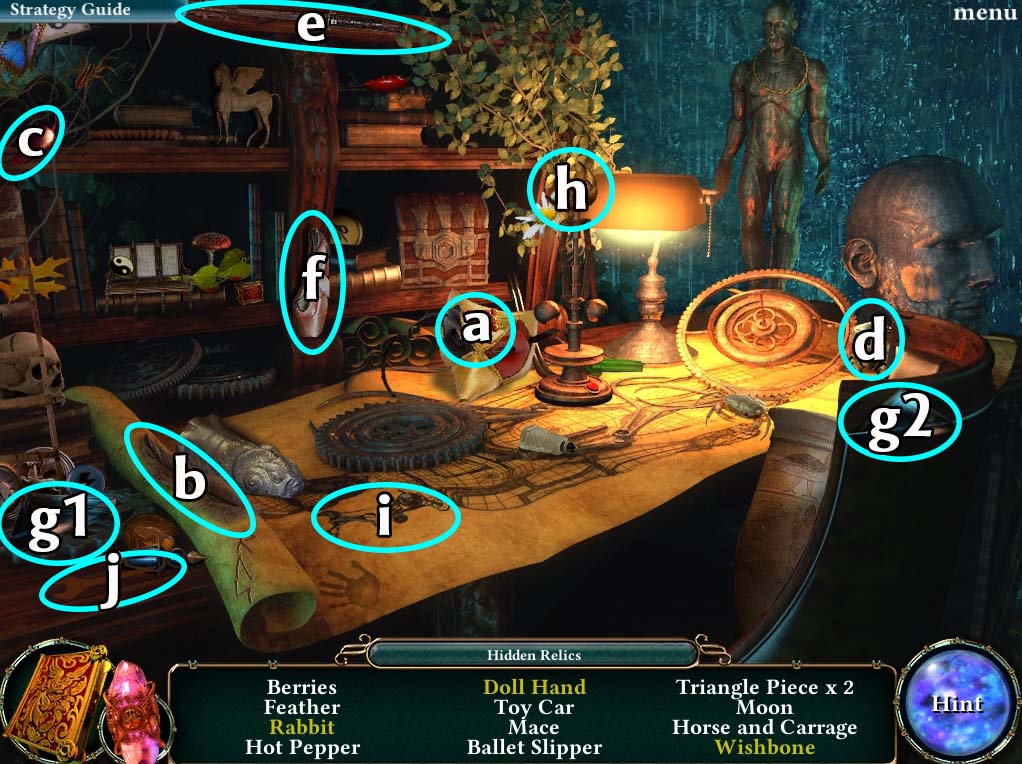
- a. Berries
- b. Feather
- c. Hot Pepper
- d. Toy Car
- e. Mace
- f. Ballet Slipper
- g. Triangle Piece x 2
- h. Moon
- i. Horse and Carriage
- j. Wrench
- Yellow objects can be obtained by doing the following:
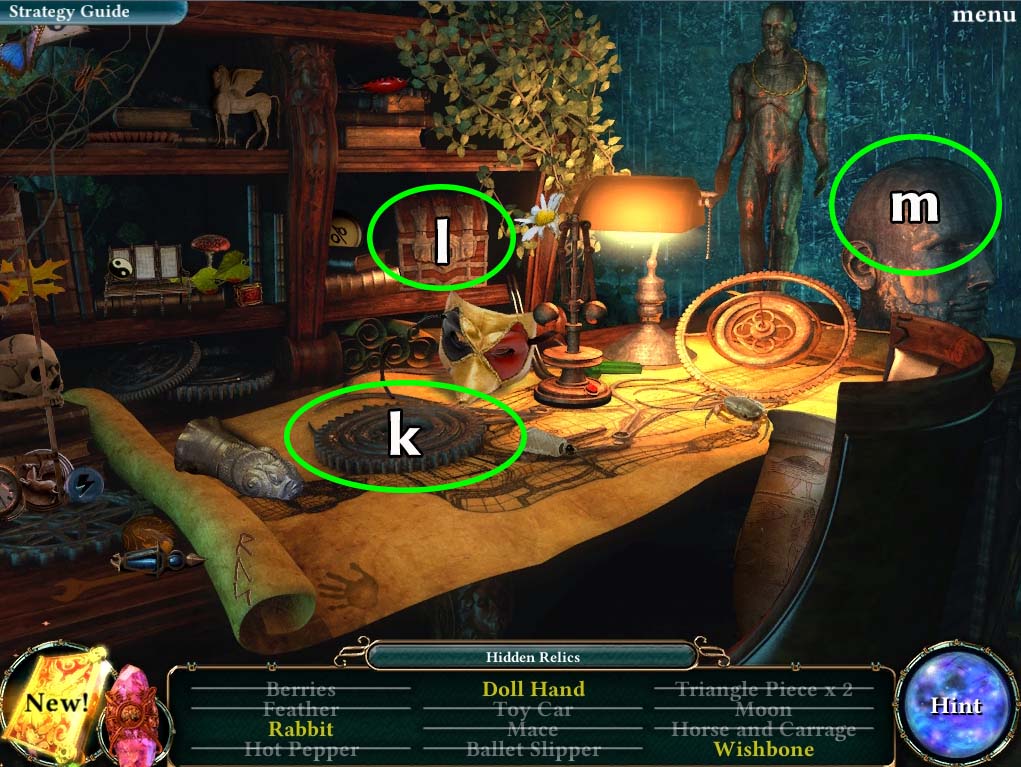
- k. Move the cogs aside to find the wishbone underneath
- l. Open the small chest to find the doll hand inside
- m. Open the statue’s head. The rabbit is on the top of it.
- Solving the puzzle gives you 2 GLASS TRIANGLES (3 of 3).
- 20. Head further into the nursery (circled in green in the NURSERY ENTRANCE image above)
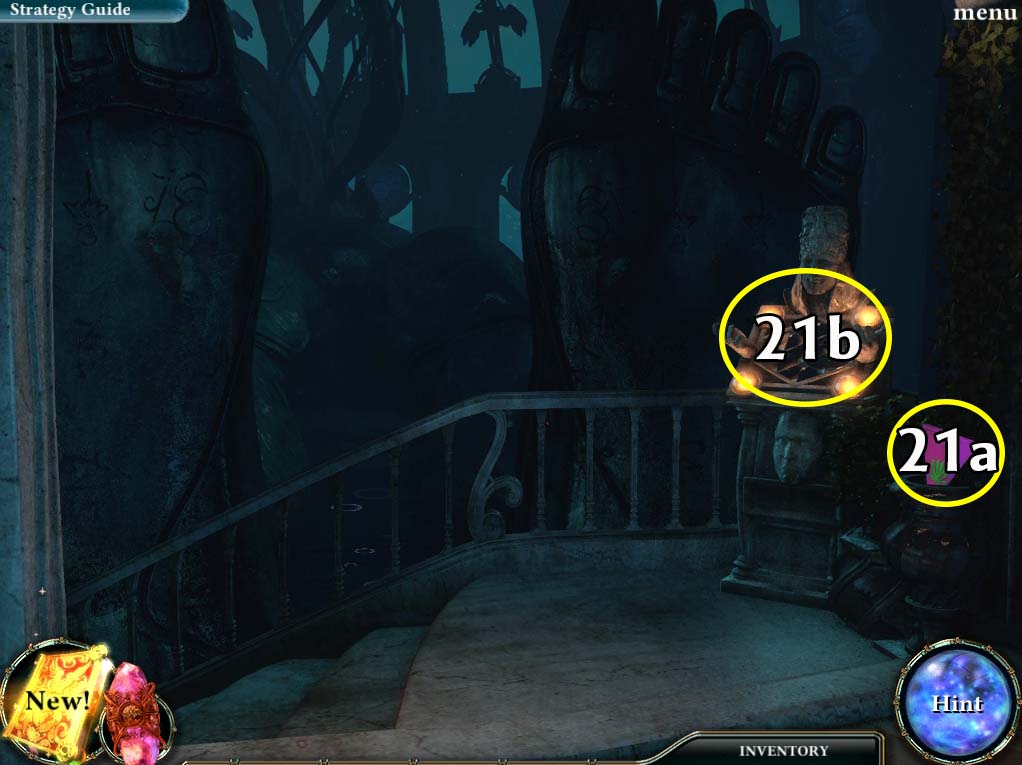
- 21. Grab the COLORED WEDGE (2 of 4) that you find on the floor, and then investigate the statue (both circled in yellow above).
- Use the TRIANGLE PIECES in your inventory to start a new puzzle.
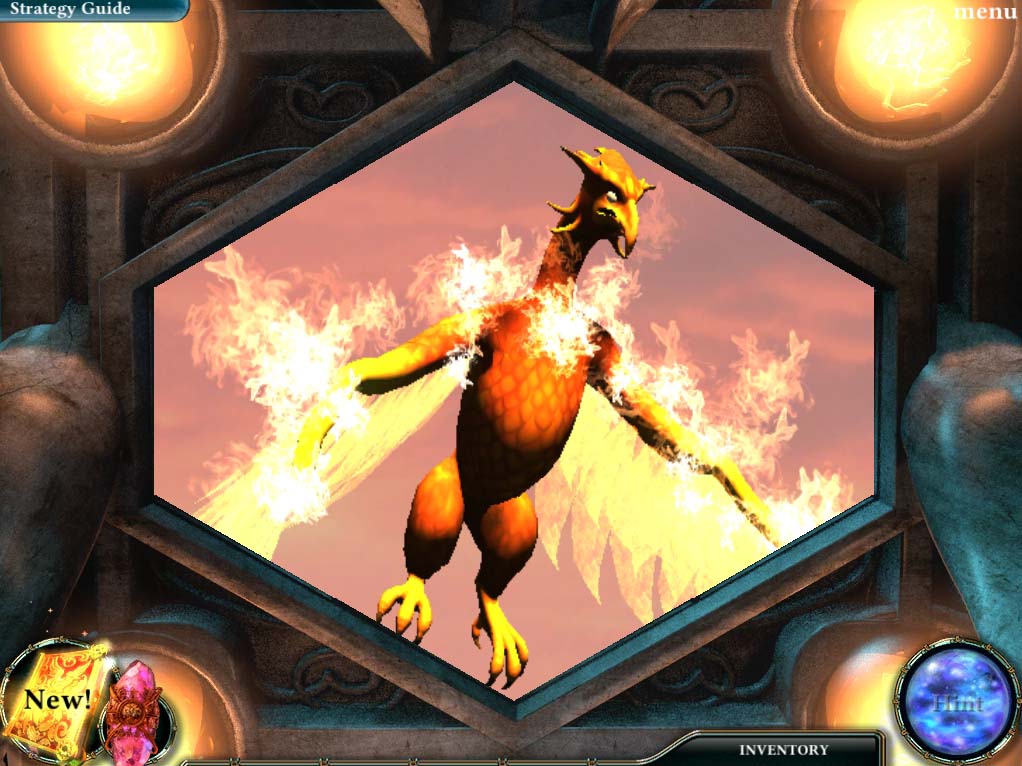
PHOENIX PUZZLE
- The object of this puzzle is to rotate the various triangle pieces until you form the image of the phoenix.
- This puzzle is rather straightforward, and after you solve it you should end up with something similar to this:
- Solving this puzzle will cause the next area to light up. You can now move further into the NURSERY.
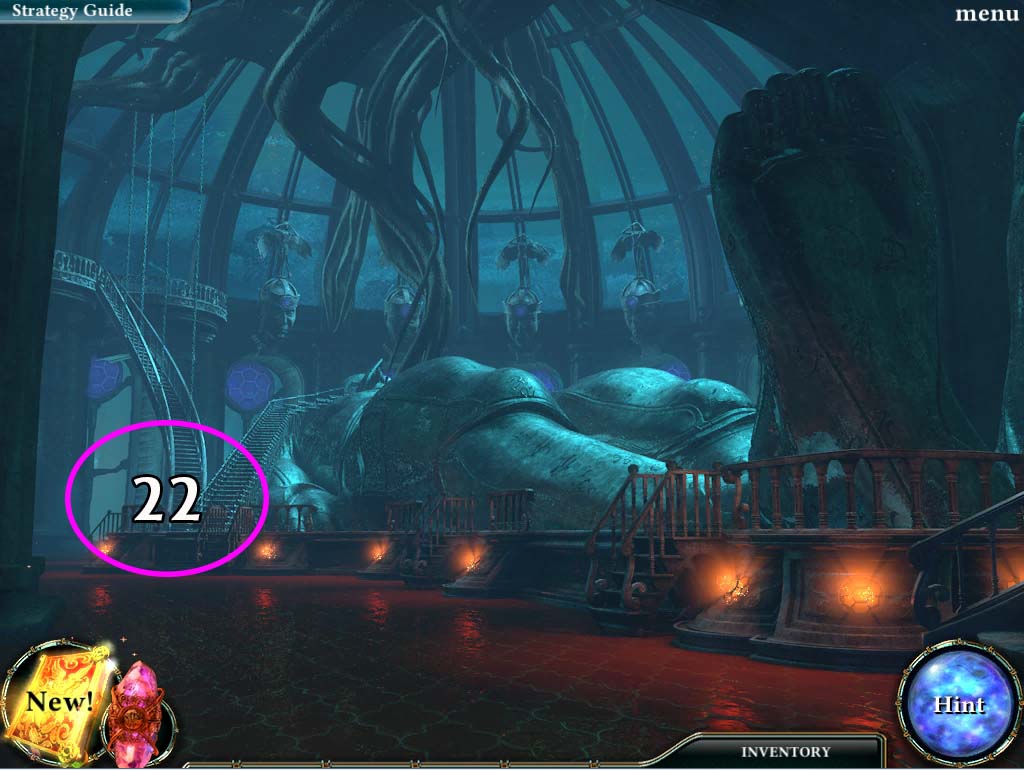
- 22. Go further into the NURSERY (circled in violet in the image above).
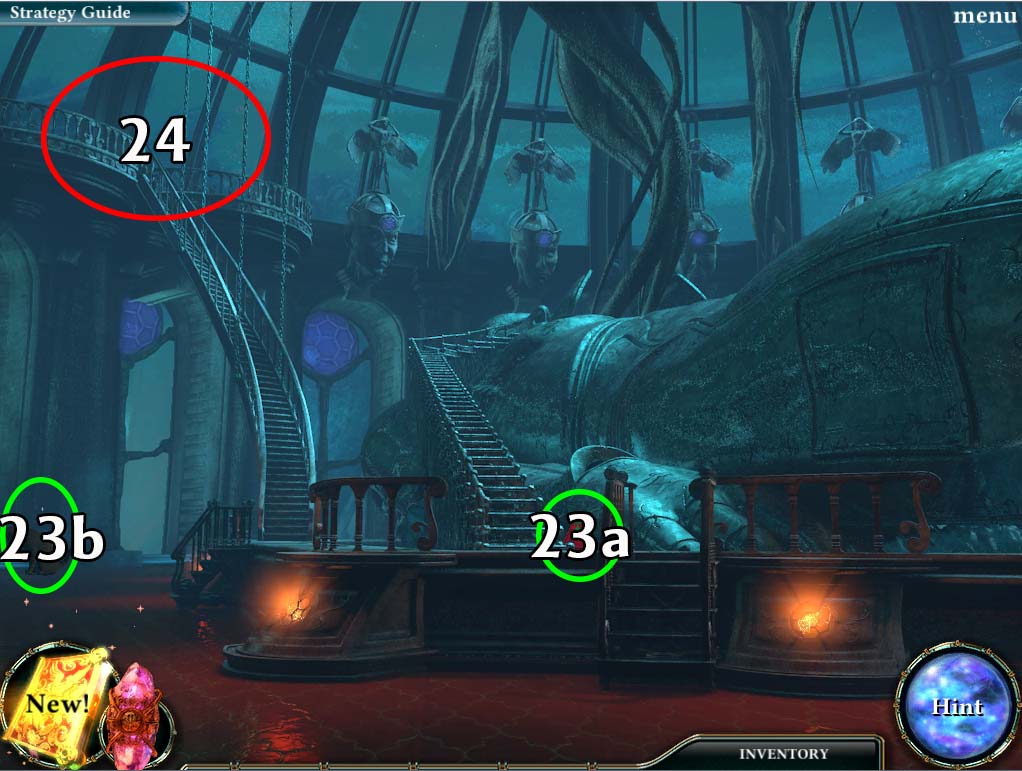
- 23. Grab the COLORED WEDGE (3 of 4) on the side of the sleeping colossus and click the cat on the right. Take the CAT COIN that it leaves behind.
- 24. Go up the STAIRS. This will start a HIDDEN DETAILS PUZZLE.
NURSERY HIDDEN DETAILS PUZZLE
- A solution to the puzzle is detailed below:
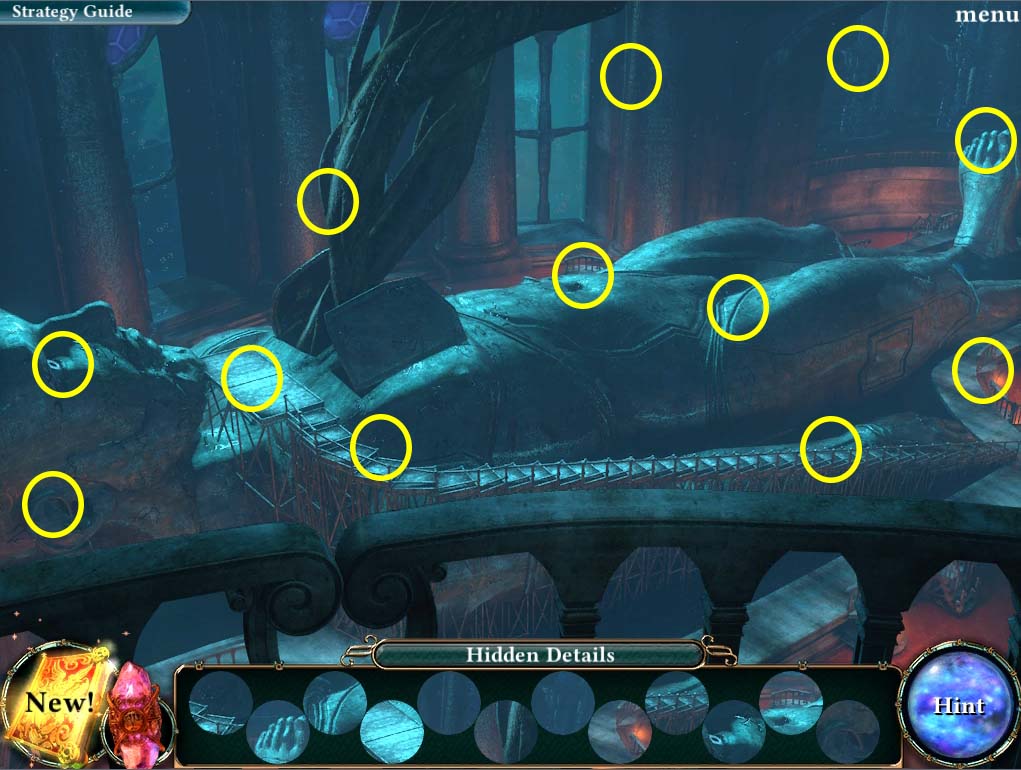
- Solving this puzzle will open a panel at the side of the sleeping colossus.
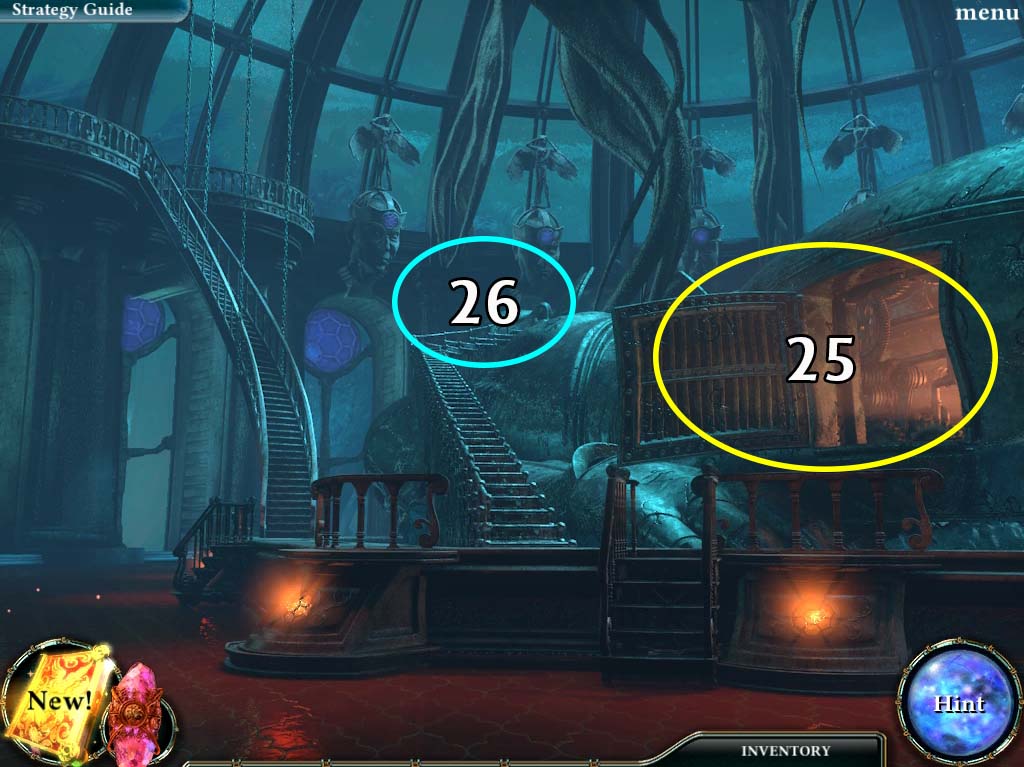
- 25. Investigate the open panel and it will start a MORPHING OBJECTS puzzle.
NURSERY MORPHING OBJECTS PUZZLE
- A solution to this puzzle is detailed below:
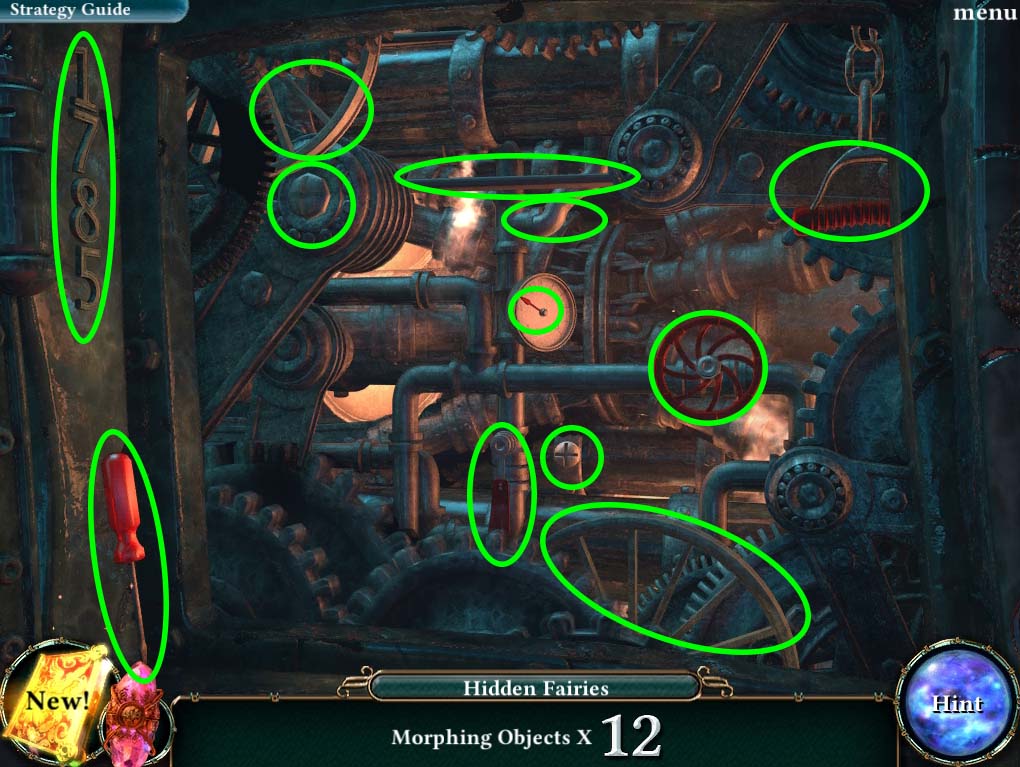
- Solving this puzzle will fully charge your SPIRIT AMETHYST.
- 26. Head to the head of the sleeping colossus (circled in blue on the NURSERY image above).
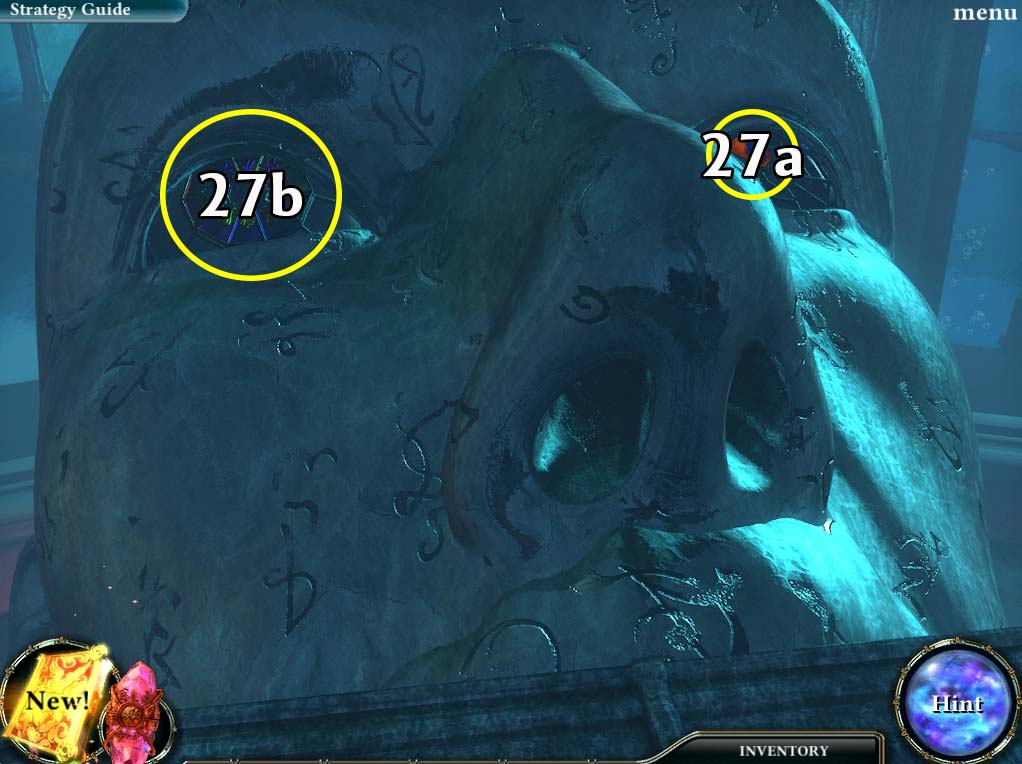
- 27. Take the final COLORED WEDGE (4 of 4) and investigate the other eye of the colossus (both circled in yellow above).
- Place all the COLORED WEDGES in the eye. Use the SPIRIT AMETHYST to activate the wedges and this will start another mini-puzzle.
COLOSSUS EYE MINI PUZZLE
- The object of this puzzle is to light up all of the wedges in the colossus’ eye.
- If you click an unlit wedge it will light up, and if you click a lit wedge it will turn off.
- Wedges that you click will affect the wedges that are beside it as well.
- If the wedge beside the one you click is off, it will turn it on, and if it is on, it will turn it off.
- A simple solution to this puzzle is shown below.
- Click the marked wedges in order from 1 to 5
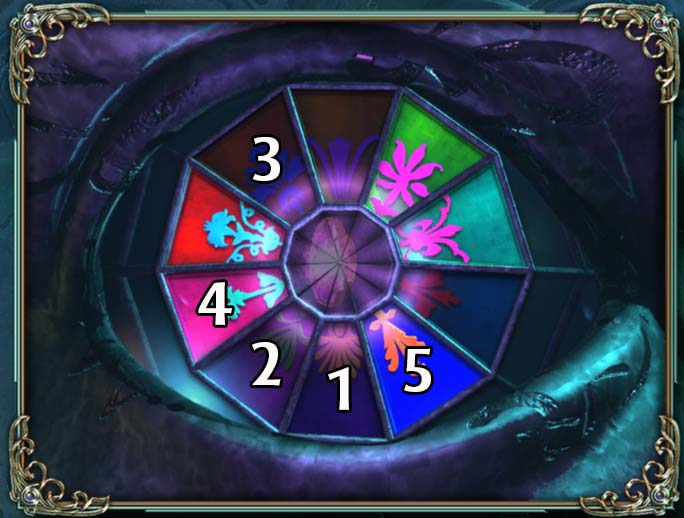
- Solving this puzzle releases THE SECOND JEWEL. Grab it.
- Quest: Find the second tiara jewel: Complete
- As you grab the jewel, the other COLOSSUS stirs from its own slumber.
- Time has run out! With the IMPERIAL TIARA still missing a jewel, the only way to shut down the COLOSSUS is to do so from the inside.
- The final confrontation with both the COLOSSUS and PANDORA are nearly at hand.
New Quest: Quick, get to the Colossus
End of Chapter VII
Chapter One: Fall of the Sky Palace
Chapter Two: The Mysteries of the Scroll Temple
Chapter Three: The First Relic
Chapter Four: The Second Relic
Chapter Five: The Third Relic
Chapter Six: The Last Relic
Chapter Seven: Silencing the Colossus
Chapter Eight: That Which Was Lost
Bonus Chapter
Ask for help in the comments below!