
Empress of the Deep 3: Legacy of the Phoenix: Chapter Five: The Third Relic
Rely on our Empress of the Deep 3 Legacy of the Phoenix Walkthrough, with its detailed, chapter-by-chapter instructions, beautifully marked custom screenshots, and easy-to-understand puzzle solutions to help you find the ingredients to revive the Phoenix and stop the evil colossus from awakening. Help Empress Anna save her lost people from the fate her twin sister has tried to set in motion in this stunning hidden object adventure game.
Chapter One: Fall of the Sky Palace
Chapter Two: The Mysteries of the Scroll Temple
Chapter Three: The First Relic
Chapter Four: The Second Relic
Chapter Five: The Third Relic
Chapter Six: The Last Relic
Chapter Seven: Silencing the Colossus
Chapter Eight: That Which Was Lost
Bonus Chapter
Ask for help in the comments below!
Two of the four relics have been recovered, and each one brings Anna closer to saving her lost people. A new CRYSTAL GYROSCOPE has been given to you and it is time to further explore this mysterious island.
- New Quest: Unlock the next part of the island
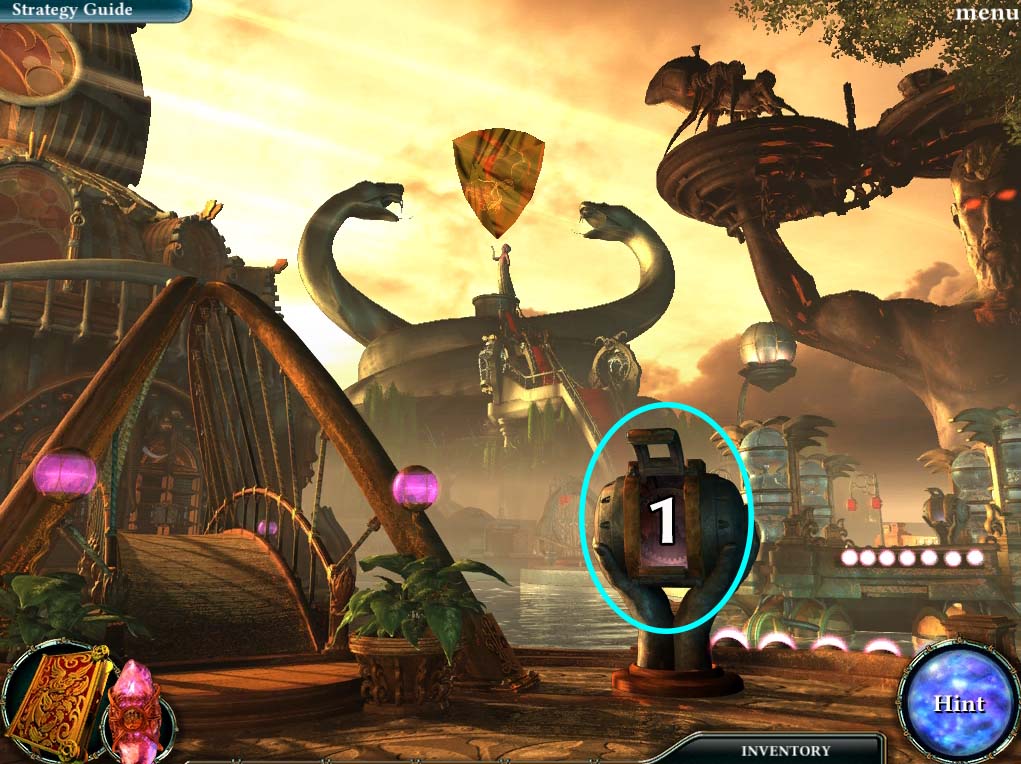
- 1. Head back to the LIBRARY INTERSECTION.
- There is another machine in which you can place the CRYSTAL GYROSCOPE in.
- Once the new bridge materializes, go across it.
- Quest: Unlock the next part of the island: Complete
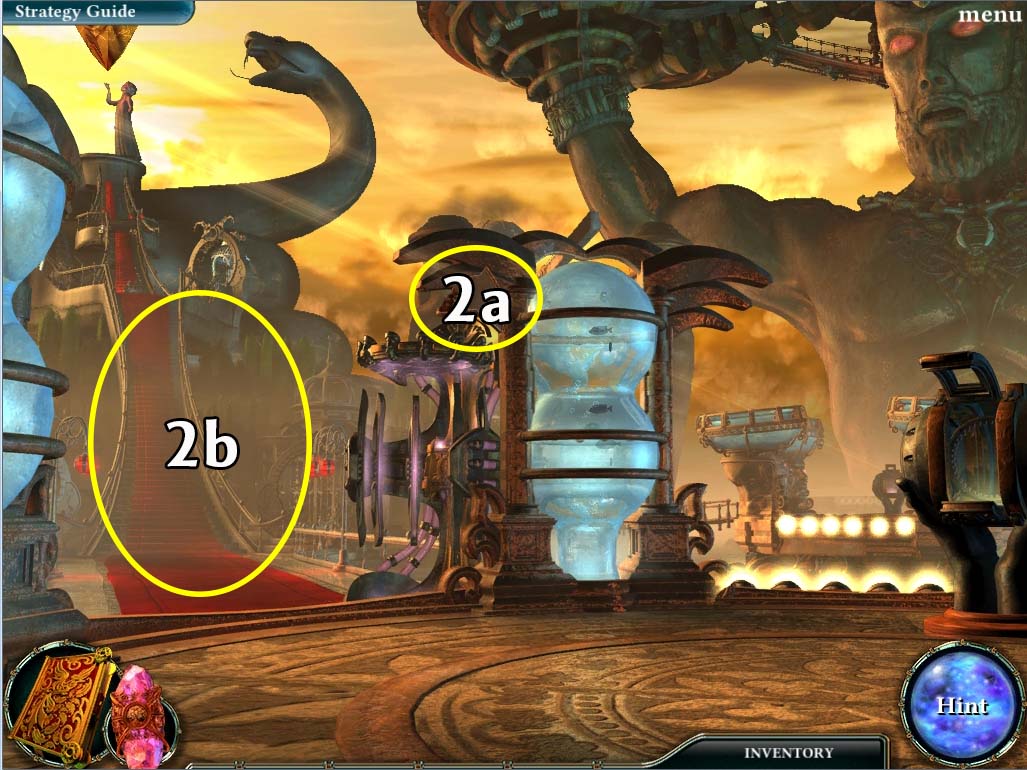
- 2. You find yourself in the SNAKE SHRINE INTERSECTION.
- There is another DISK FRAGMENT (2 of 6), (circled in yellow) here.
- Take it for your inventory and proceed to the SNAKE SHRINE (also circled in yellow in the image above).
- Once inside a short cutscene will start.
- When it ends, head forward to go further into the shrine.
- New Quest: Find a way to rekindle the Magical Ruby

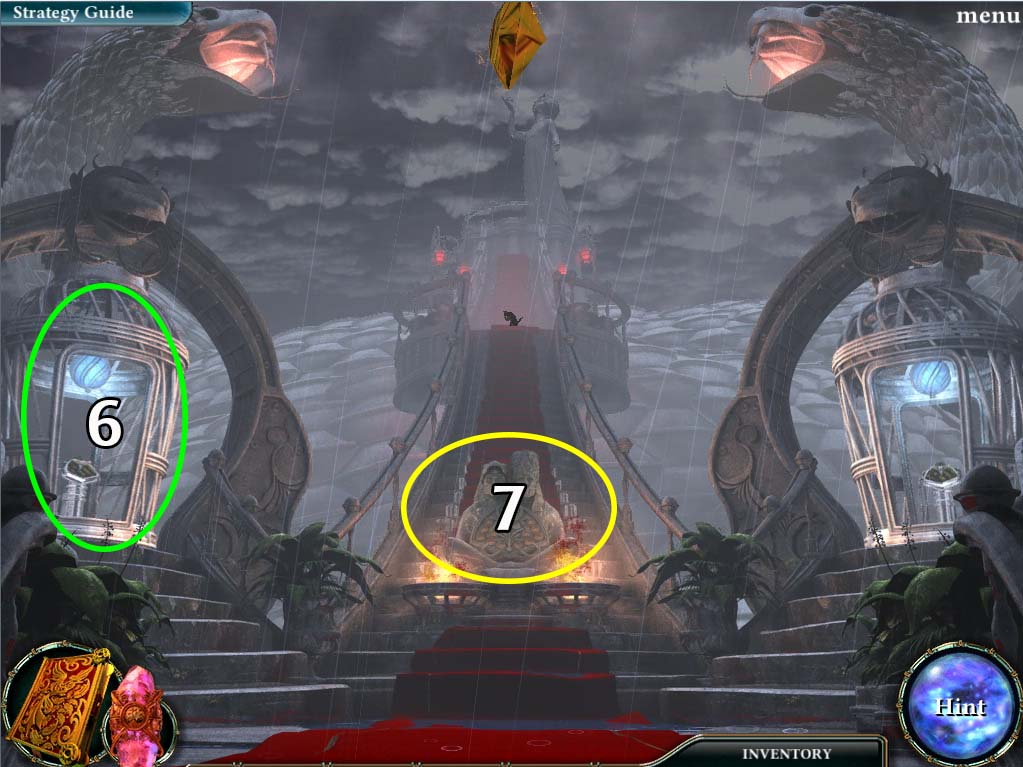
- 3. When you reach the SNAKE SHRINE BASE, head left (area circled in green in the image above).
- There is an item there that we need to get.
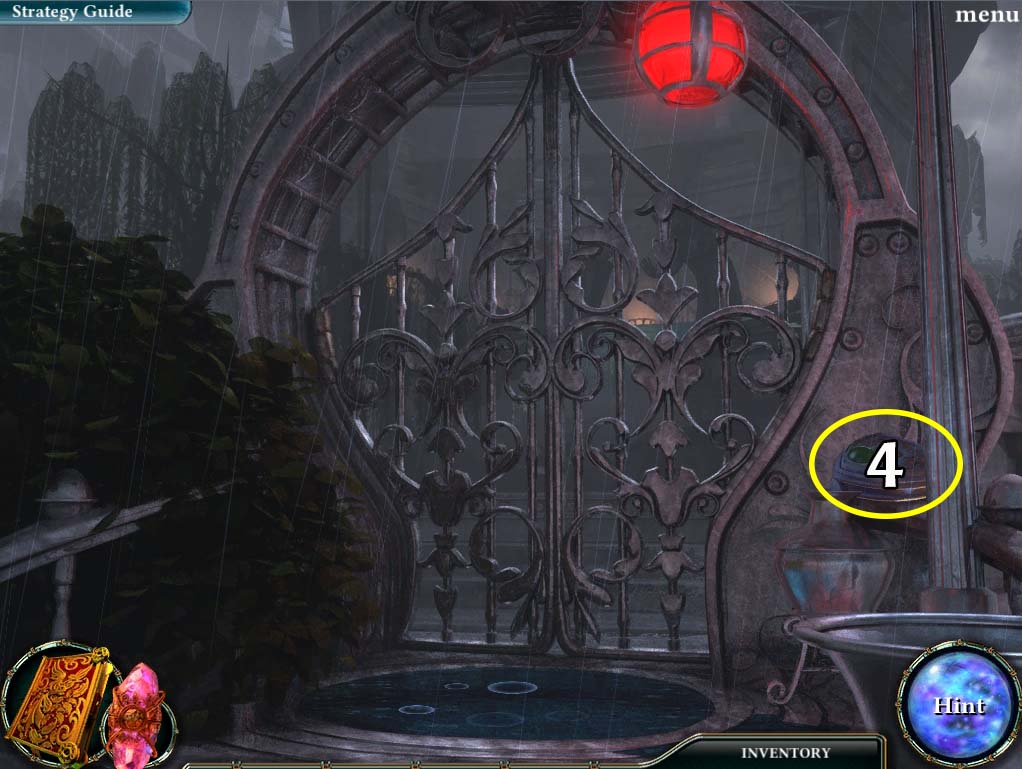
- 4. Take the PLAQUE (circled in yellow in image above).
- Once that is done, head back to the SNAKE SHRINE BASE.
- 5. Head up the STAIRS of the SNAKE SHRINE (circled in yellow in the SNAKE SHRINE BASE image above).
- You’ll find yourself on the STAIRS LANDING.
- 6. Head to the LEFT GONDOLA (circled in green in the image above).
- There should be a BUTTON at the bottom of the gondola switch.
- Take it for your inventory and go back to the STAIRS LANDING area.
- 7. Investigate the CONTROL PANEL (circled in yellow in the image above).
- Take the BUTTON and the PLAQUE from your inventory and place both of them on the CONTROL PANEL.
- The PLAQUE will show which button on the CONTROL PANEL you should push (they will be glowing).
- Pushing these buttons will open the LEFT GATE at the SNAKE SHRINE BASE.
- Head back down the stairs.
- New Quest: Collect and activate the plaques
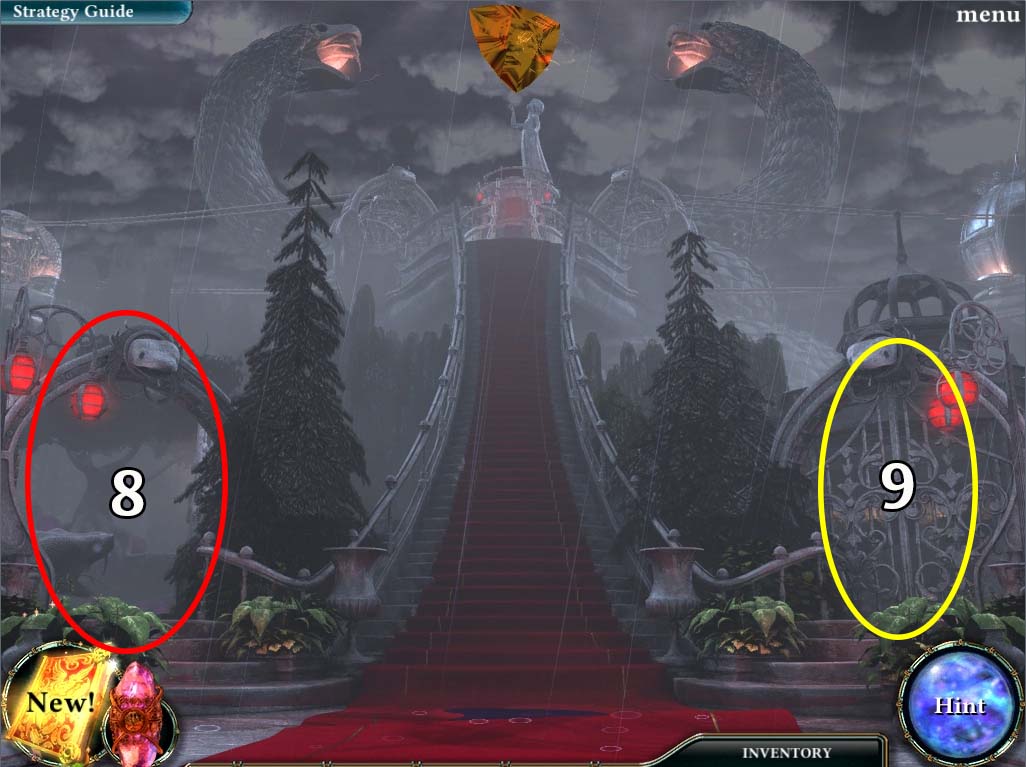
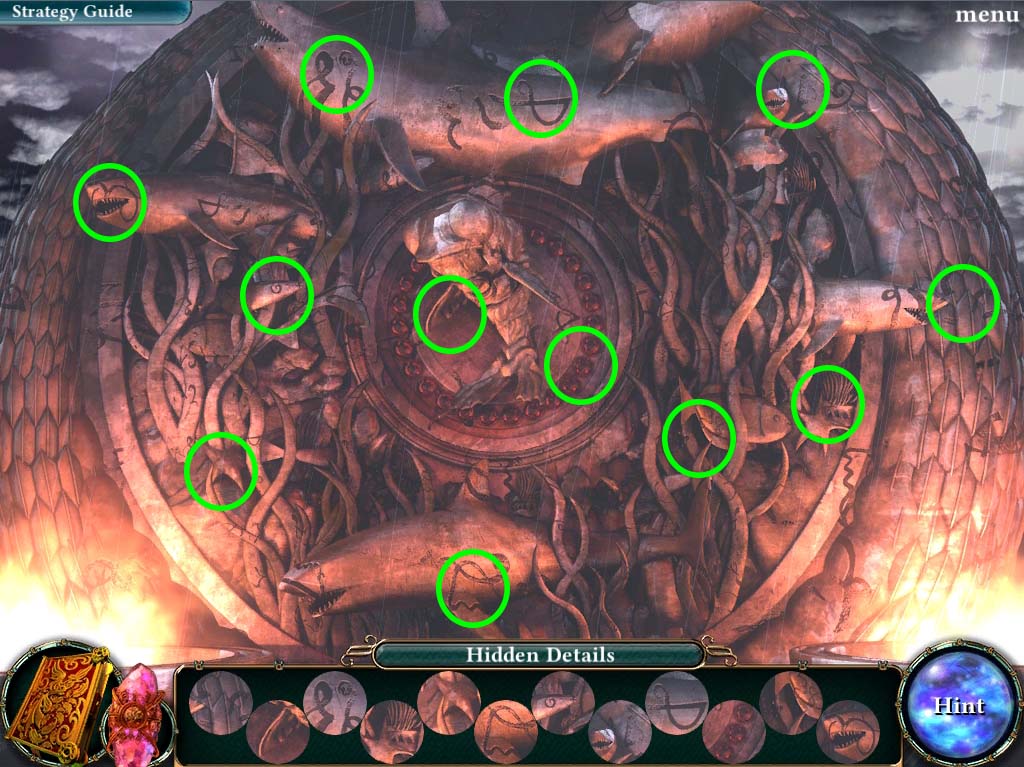
- 8. Enter the LEFT GATE. This will start a HIDDEN DETAILS PUZZLE.
LEFT GATE HIDDEN DETAILS PUZZLE
- As with other hidden details puzzles, a solution is shown below:
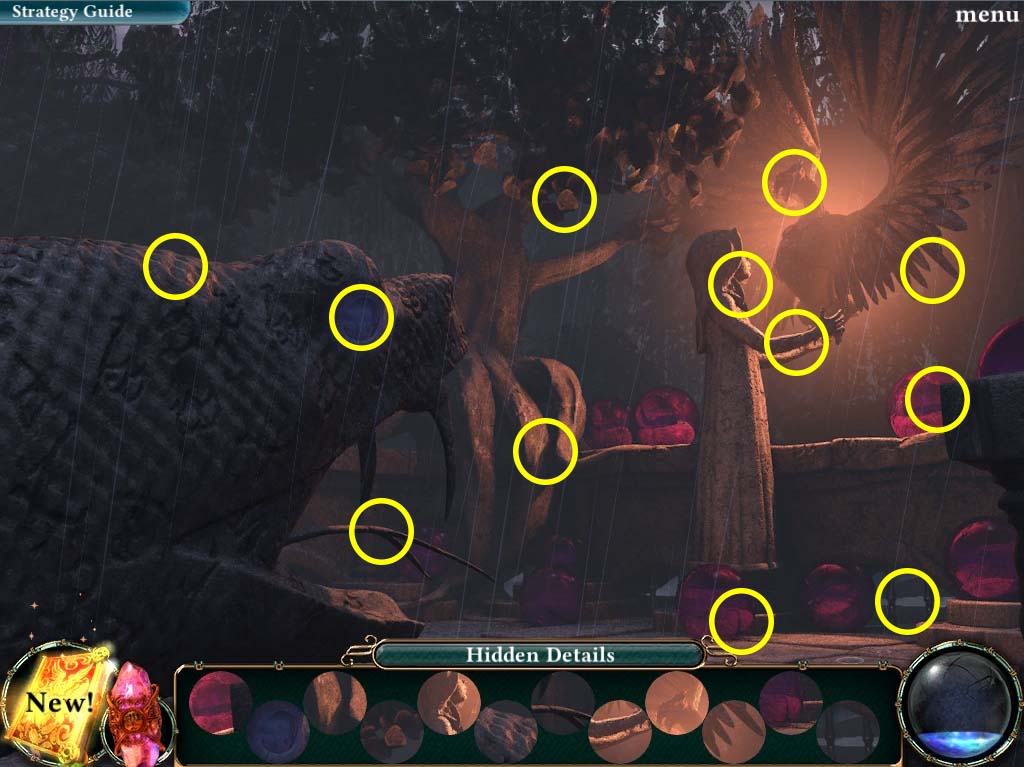
- Solving this puzzle rewards you with another PLAQUE. Head back up the stairs to the SNAKE SHRINE STAIRS LANDING and place it on the CONTROL PANEL. Activate the BUTTONS that are shown on the PLAQUE. This opens the RIGHT GATE.
- 9. Enter the RIGHT GATE (circled in yellow in the SNAKE SHRINE BASE image above). This will start a HIDDEN RELICS puzzle.
RIGHT GATE HIDDEN RELICS PUZZLE
- **Note: The objects listed as hidden can change on each playthrough.
- Possible items have been listed below
- White Objects are circled above and are labeled as follows:
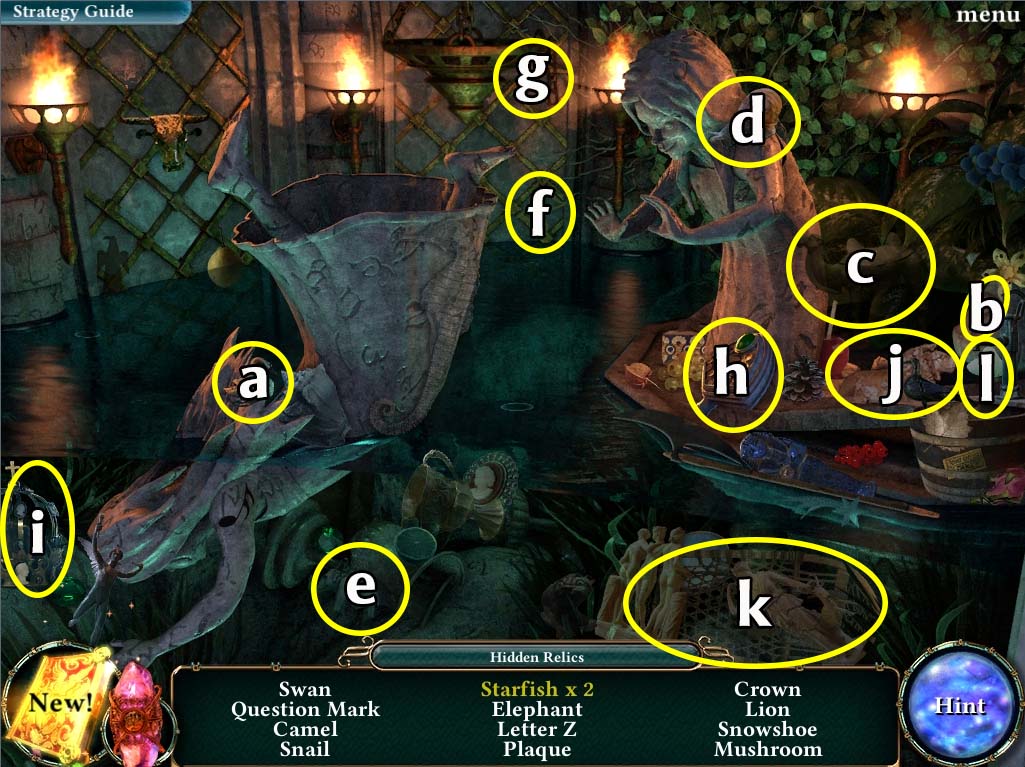
- a. Swan
- b. Question Mark
- c. Camel
- d. Snail
- e. Elephant
- f. Letter Z
- g. Starfish
- h. Plaque
- i. Crown
- j. Lion
- k. Snowshoe
- l. Mushroom
- Yellow objects can be obtained by doing the following:
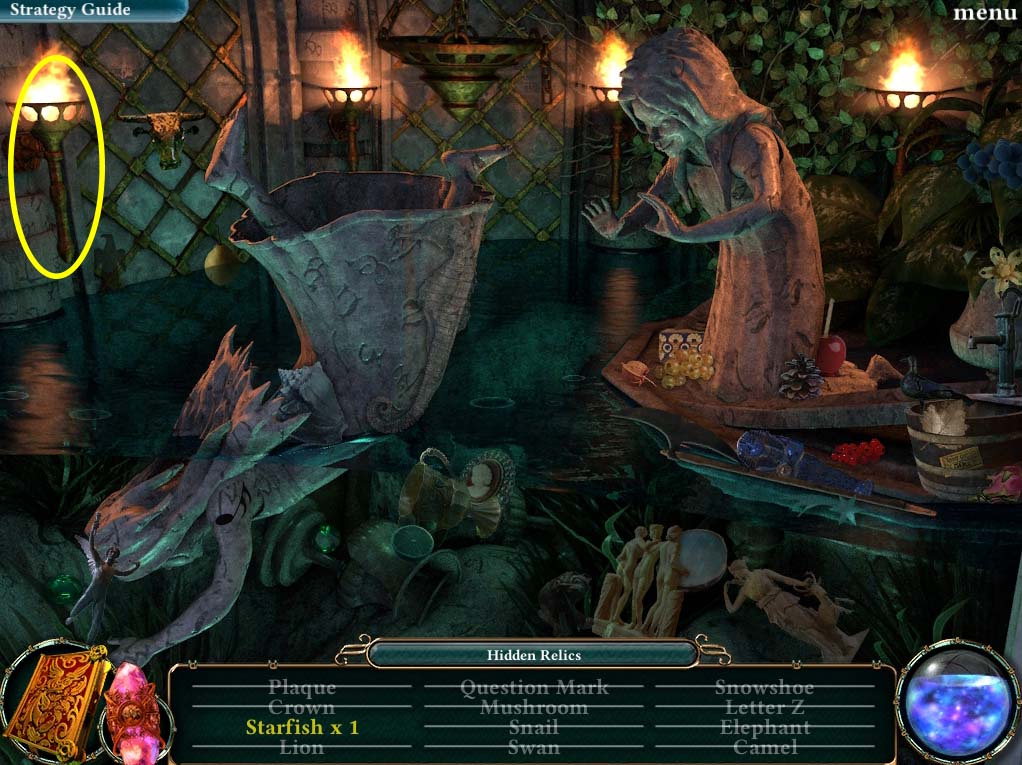
- Turn the torch (circled in yellow in image above) to reveal a starfish behind a secret panel.
- Solving this puzzle rewards you with another PLAQUE for you to use on the CONTROL PANEL in the STAIRS LANDING.
- Activate the related BUTTONS and the LEFT GONDOLA will activate.
- Enter the LEFT GONDOLA and turn the switch.
- This will start another HIDDEN DETAILS PUZZLE.
LEFT GONDOLA HIDDEN DETAILS PUZZLE
A solution to this puzzle is shown below:
- Solving this puzzle will reveal another PLAQUE for you to use.
- Take it and return to the STAIRS LANDING (Use the switch again to move the gondola).
- Place the PLAQUE on the CONTROL PANEL and activate the BUTTONS that appear.
- Once you’re done the RIGHT GONDOLA switch will now be active and using it will start another puzzle.
- This time you will need to collect your SPIRIT AMETHYST”S hidden FAIRIES.
RIGHT GONDOLA MORPHING OBJECTS PUZZLE
- A solution to this puzzle is shown below:
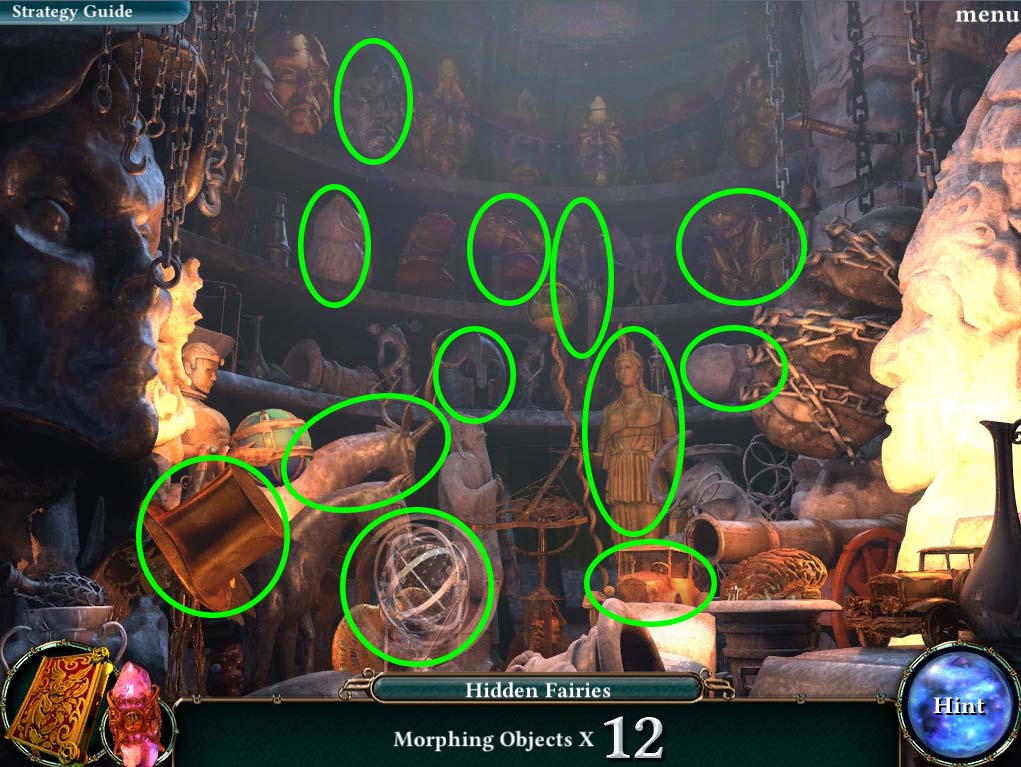
- Solving this puzzle will fully charge your SPIRIT AMETHYST.
- Head back to the STAIRS LANDING and then head up the STAIRS.
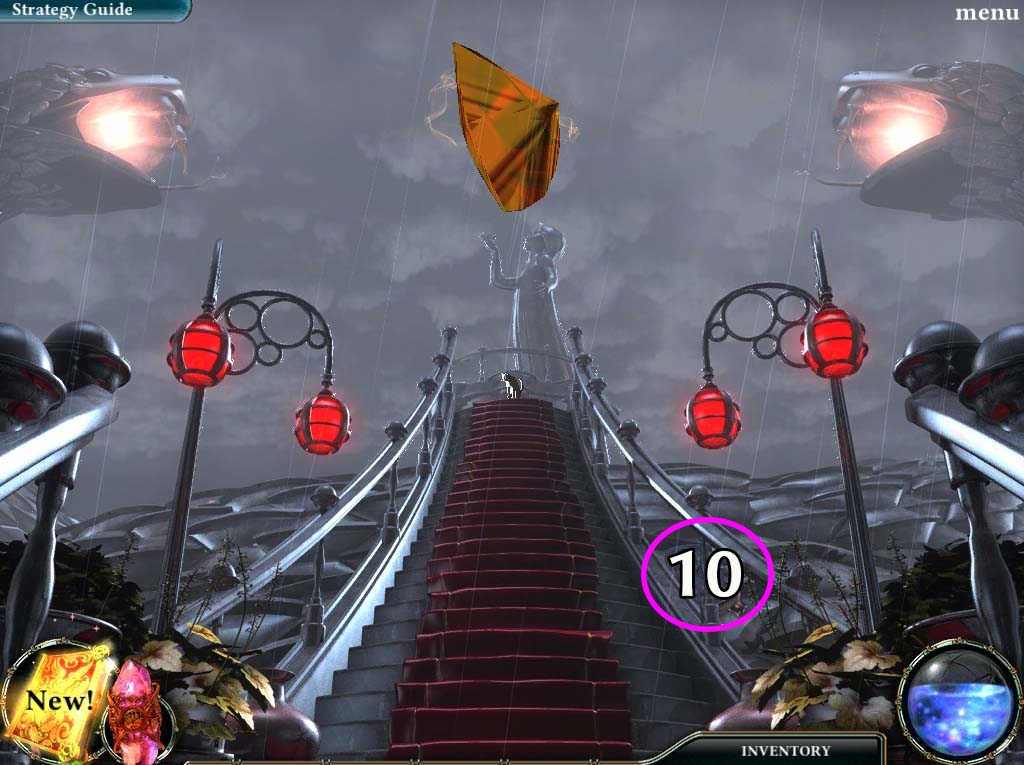
- 10. Grab the PLAQUE that you find on the side of the STAIRS (circled in violet in the image above) and place it in the CONTROL PANEL.
- Activate the BUTTONS to start one of the SNAKE FLAMES.
- This will power the ruby halfway and will also cause another PLAQUE to drop from the snake’s mouth.
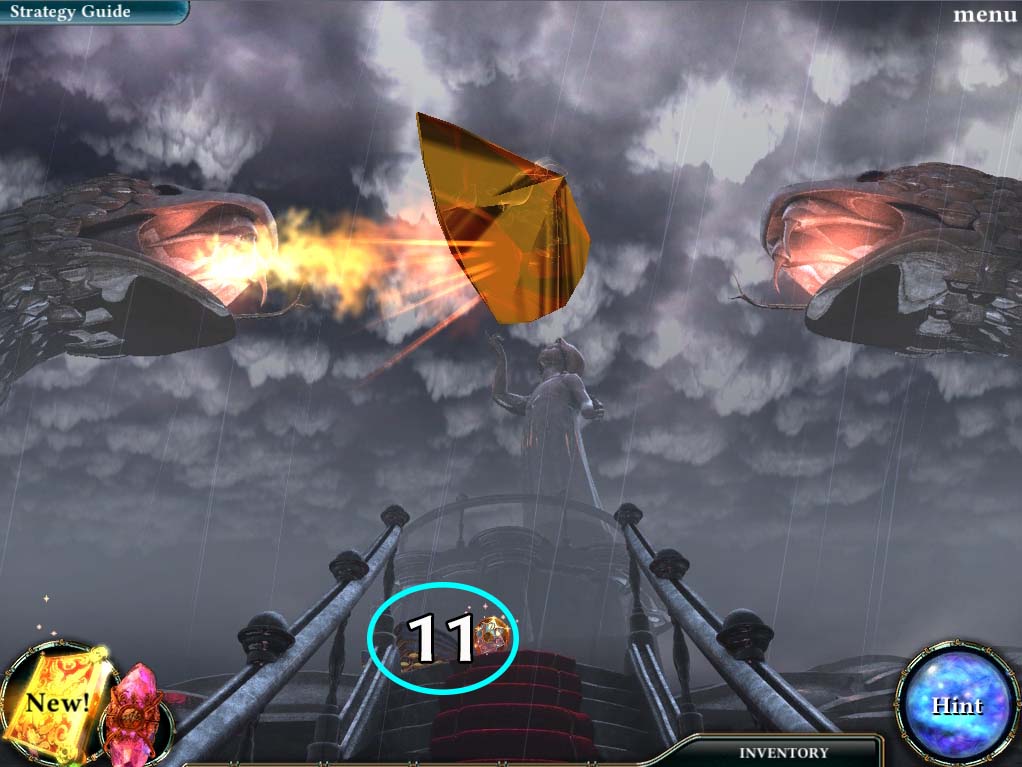
- 11. Head to the SNAKE SHRINE TOP. Here you will find the PLAQUE that was dropped earlier and a CAT COIN that you can use later.
- Pick both up (both are circled in blue above).
- Head back to the CONTROL PANEL and use the final PLAQUE.
- Quest: Collect and activate the plaques
- New Quest: Retrieve the Magic Ruby from the shrine
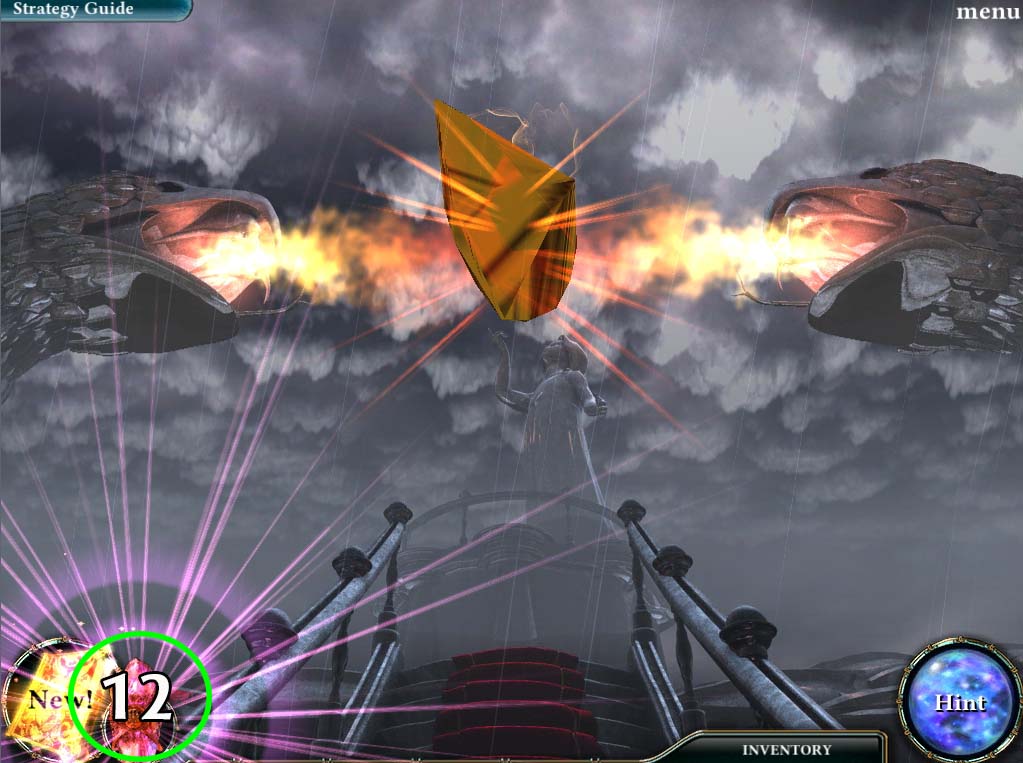
- 12. Head back up to the top of the shrine and activate your SPIRIT AMETHYST.
- This will give you the RUBY HEART (MAGIC RUBY).
- The third relic that you need to revive the PHOENIX.
- Quest: Retrieve the Magic Ruby from the Shrine: Complete
- New Quest: Return to the Key Master
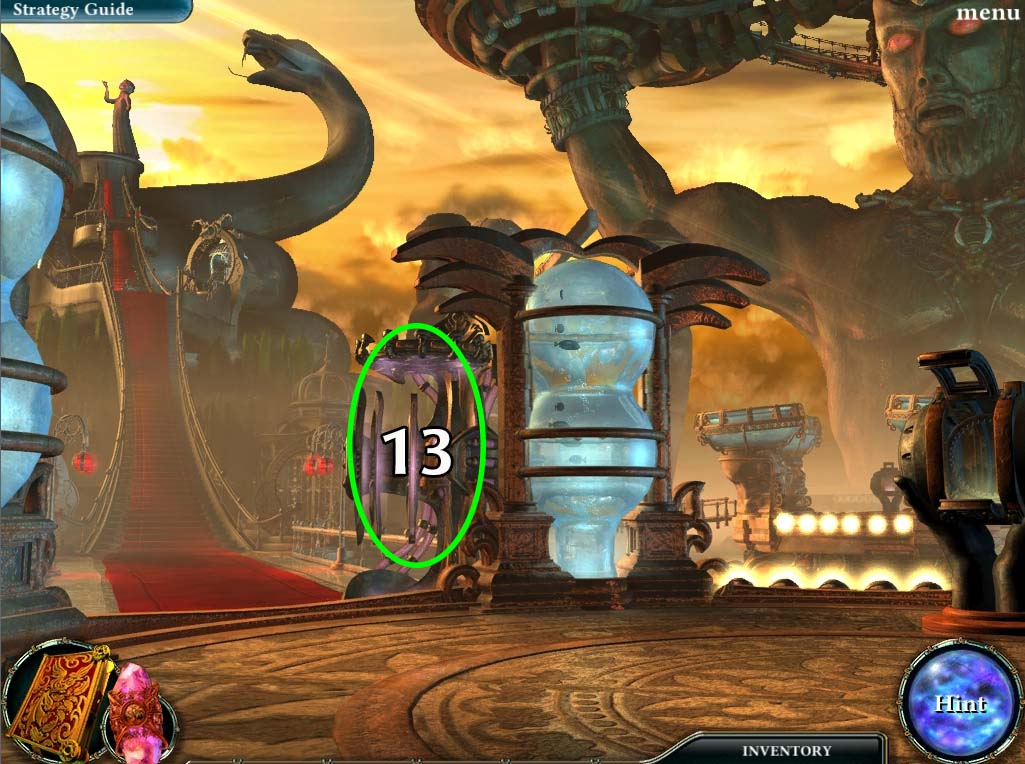
- 13. Head back to the SHRINE INTERSECTION.
- Use the CAT COIN on the transporter (circled in green above) to activate it.
- Use it to get back to the SCROLL TEMPLE.
- Quest: Return to the Key Master: Complete
New Quest: Place the Ruby on the altar
- As with the other relics, unlock the barrier and place the RUBY HEART in its proper place.
Quest: Place the Ruby on the altar: Complete
- Another short cutscene will start. The SPIRIT CODEX will hand you one more CRYSTAL GYROSCOPE and asks you to explore the island further.
End of Chapter V
Chapter One: Fall of the Sky Palace
Chapter Two: The Mysteries of the Scroll Temple
Chapter Three: The First Relic
Chapter Four: The Second Relic
Chapter Five: The Third Relic
Chapter Six: The Last Relic
Chapter Seven: Silencing the Colossus
Chapter Eight: That Which Was Lost
Bonus Chapter
Ask for help in the comments below!