
Empress of the Deep 3: Legacy of the Phoenix: Chapter Four: The Second Relic
Rely on our Empress of the Deep 3 Legacy of the Phoenix Walkthrough, with its detailed, chapter-by-chapter instructions, beautifully marked custom screenshots, and easy-to-understand puzzle solutions to help you find the ingredients to revive the Phoenix and stop the evil colossus from awakening. Help Empress Anna save her lost people from the fate her twin sister has tried to set in motion in this stunning hidden object adventure game.
Chapter One: Fall of the Sky Palace
Chapter Two: The Mysteries of the Scroll Temple
Chapter Three: The First Relic
Chapter Four: The Second Relic
Chapter Five: The Third Relic
Chapter Six: The Last Relic
Chapter Seven: Silencing the Colossus
Chapter Eight: That Which Was Lost
Bonus Chapter
Ask for help in the comments below!
You have found the first relic, and now have another CRYSTAL GYROSCOPE to rematerialize the missing bridge at the FISHERY INTERSECTION. Everything should be going well if not for the Colossus stirring from its sleep. We must help Anna find the other three relics as soon as possible! Head to the FISHERY INTERSECTION.
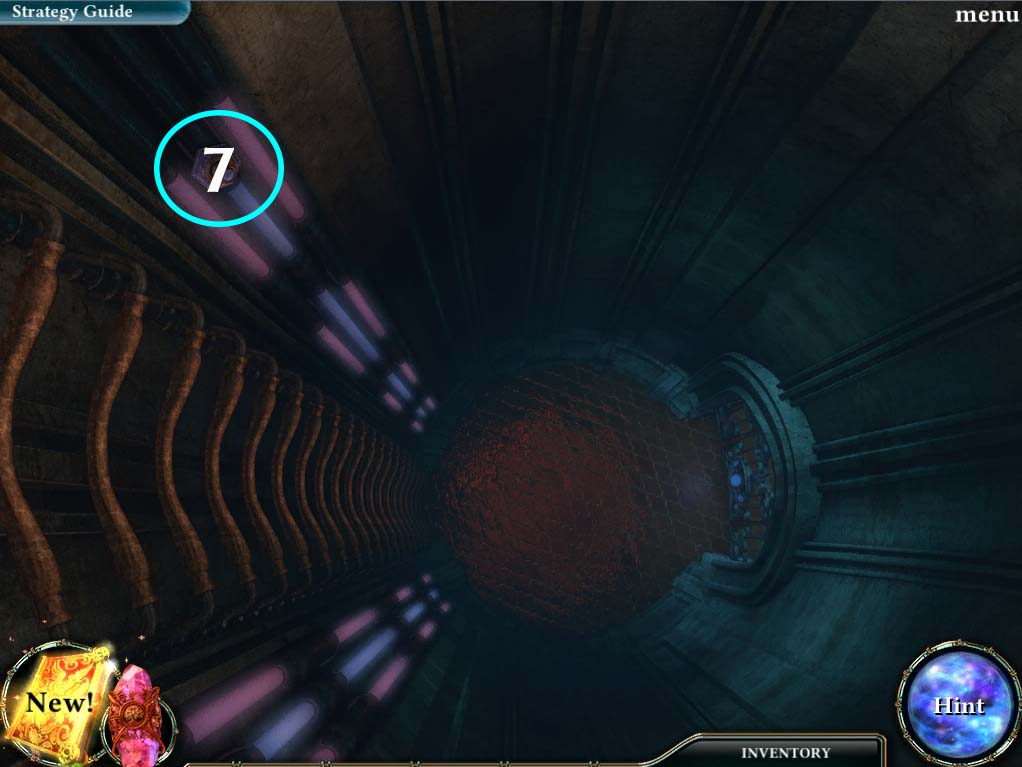
New Quest: Unlock the next part of the island
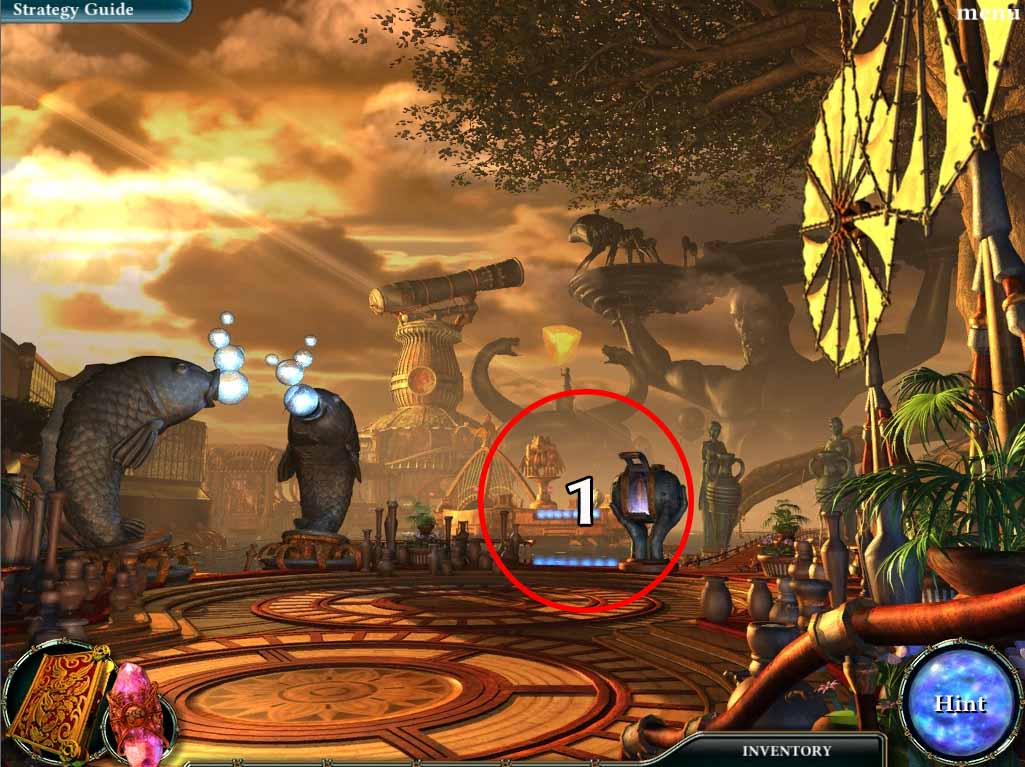
- 1. Head to the area circled in red on the image above.
- 2. Take the CRYSTAL GYROSCOPE from your inventory and place it on the mechanism.
- Once the bridge rematerializes, go across and you’ll find yourself on the LIBRARY INTERSECTION
- Quest: Unlock the next part of the island: Complete
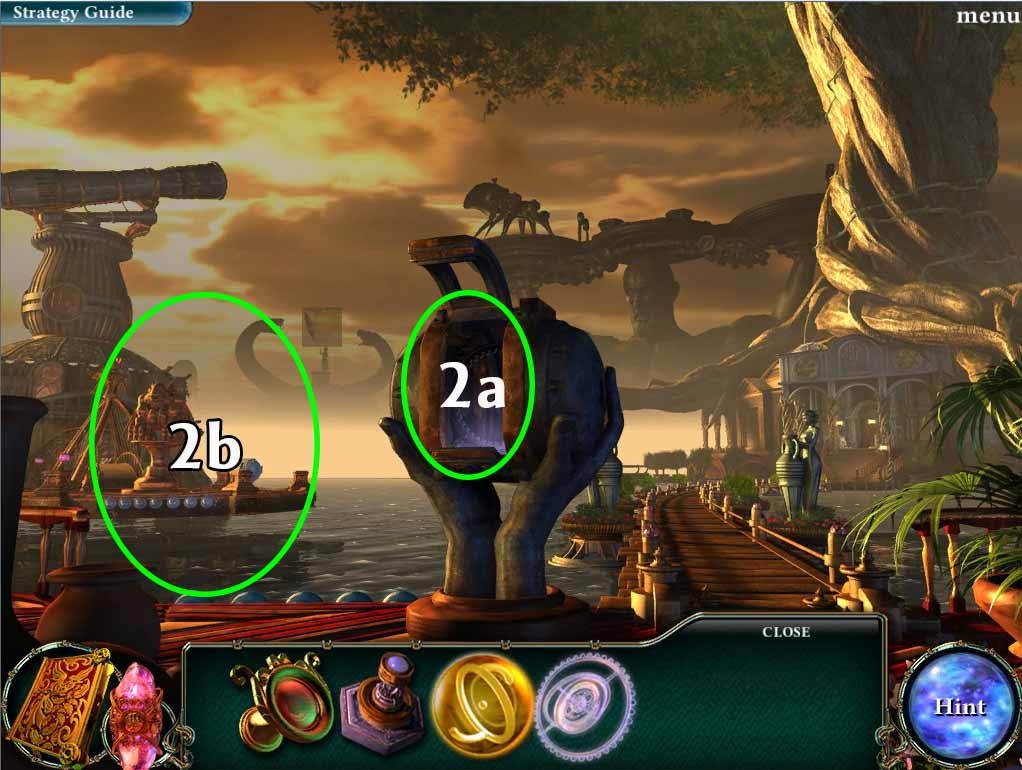
New Quest: Find out where to get the next relic

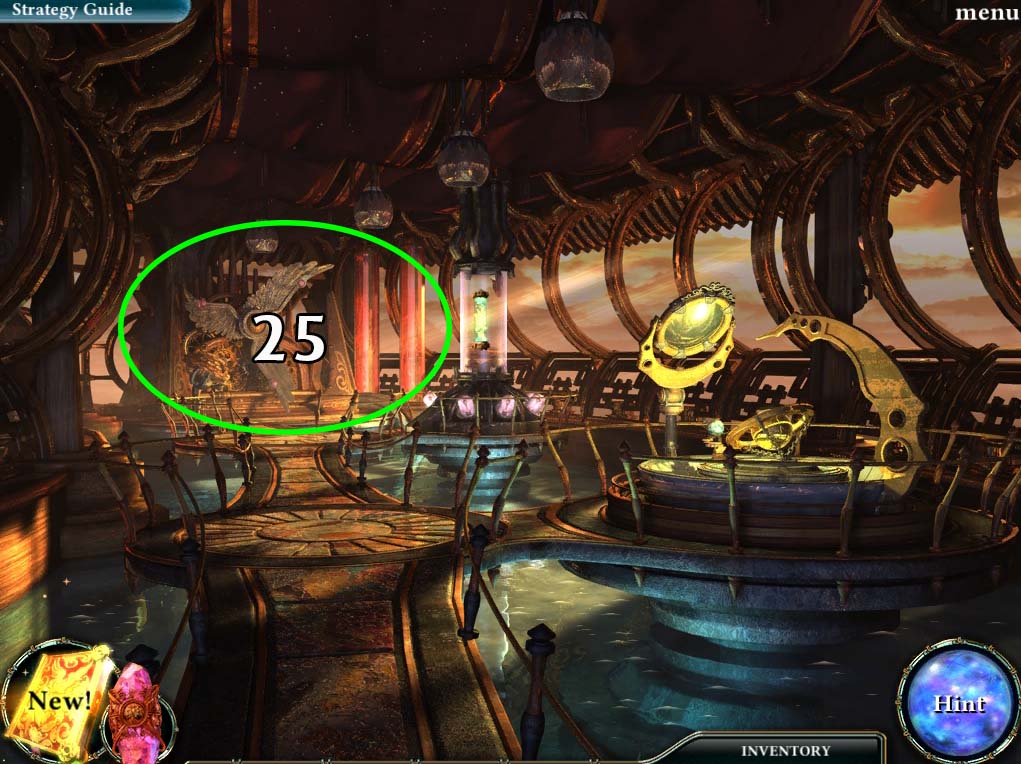
- 3. Proceed to the area circled in yellow above.
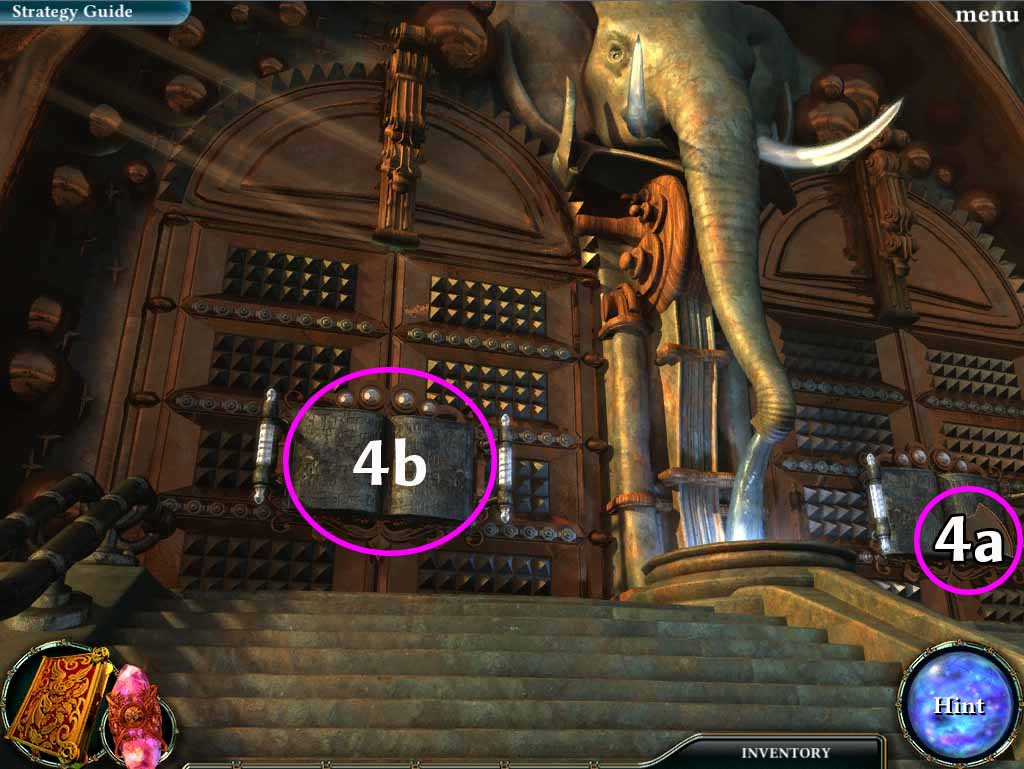
- 4. Take the DISK FRAGMENT (1 of 6) and then open the library doors (both circled in violet above).
- Once the doors are open, go inside.
- Both the Key Master and the statue will inform you of what should be done next.
- Quest: Find out where to get the next relic: Complete
New Quest: Find the three Genetic Essences
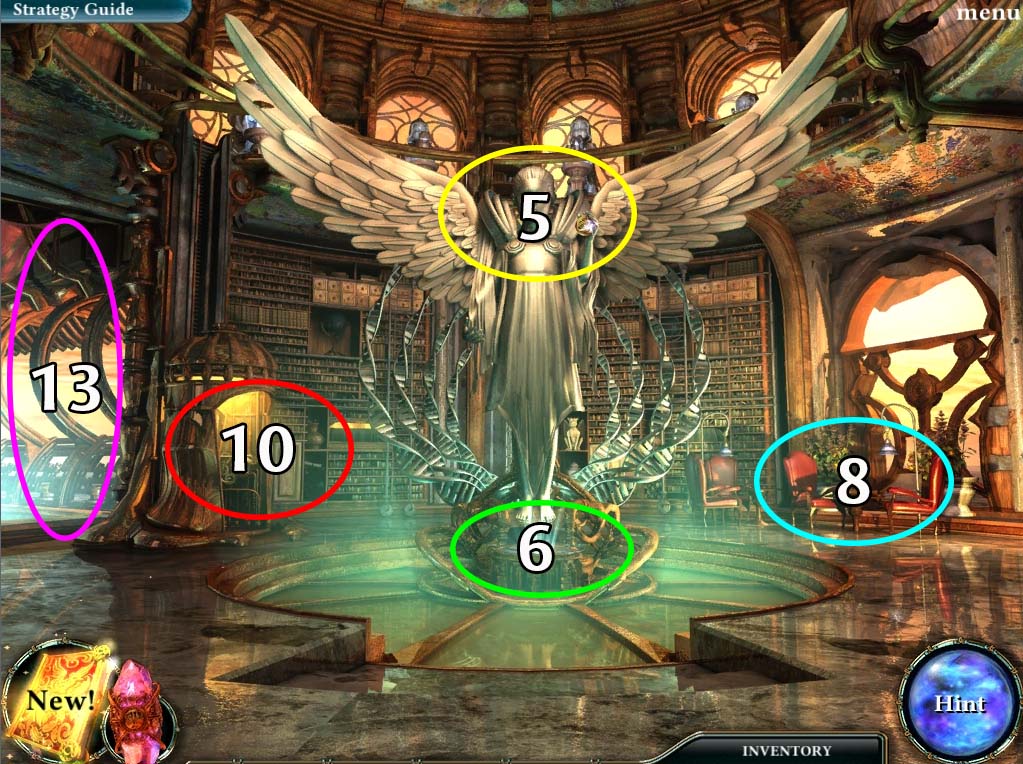
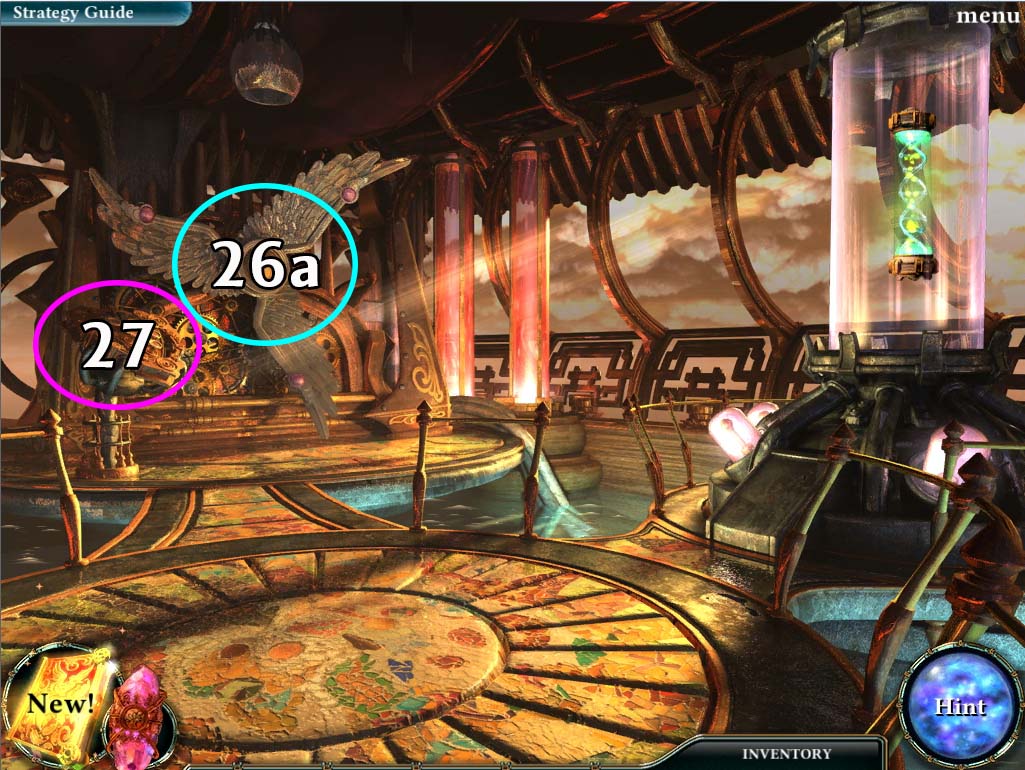
- 5. Inspect the STATUE again (circled in yellow above) and take the YELLOW MARBLE (2 of 3) that it holds in its hand.
- 6. Open the HATCH at the base of the STATUE and take the ladder down.
- 7. Take the GAME PIECE (2 of 4) circled in blue above.
- There is nothing more that you can do in this area for now, as the way forward is still locked.
- Head back up the ladder.
- 8. Inspect the GAMING AREA (circled in blue in the LIBRARY INTERIOR image above).
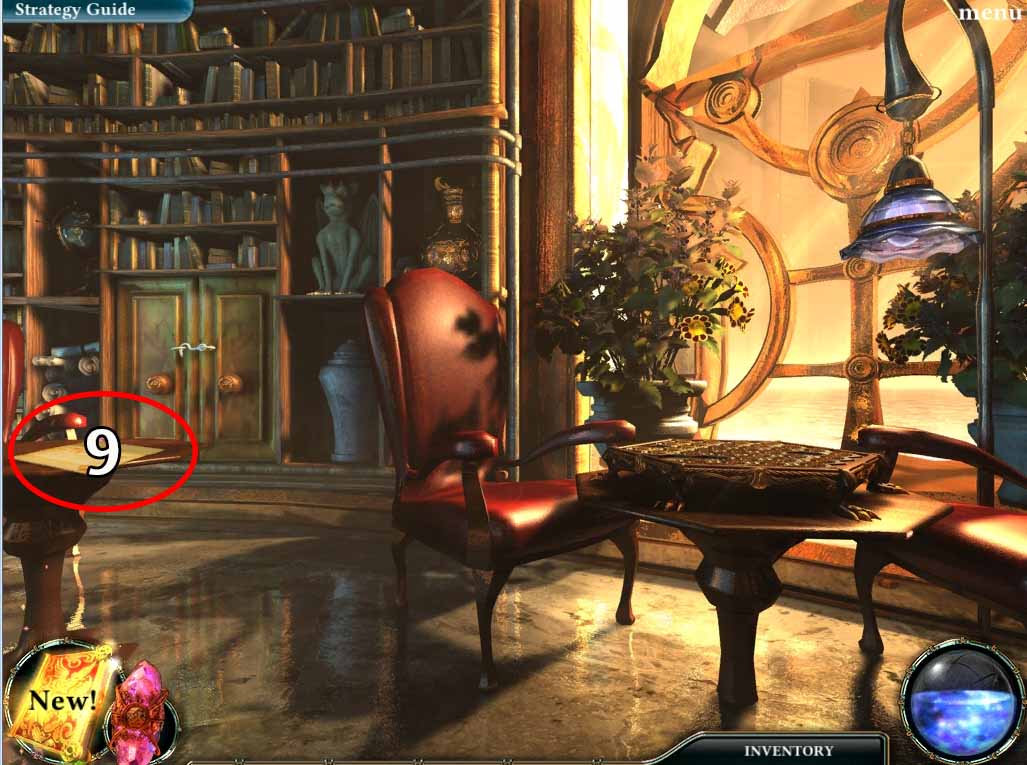
- 9. Take the NOTE that is on the table.
- It will show you a pattern of images that you’ll need to unlock the next puzzle.
- Head back to the LIBRARY INTERIOR area.
- 10. Inspect the ELEVATOR AREA (circled in red in LIBRARY INTERIOR image above).
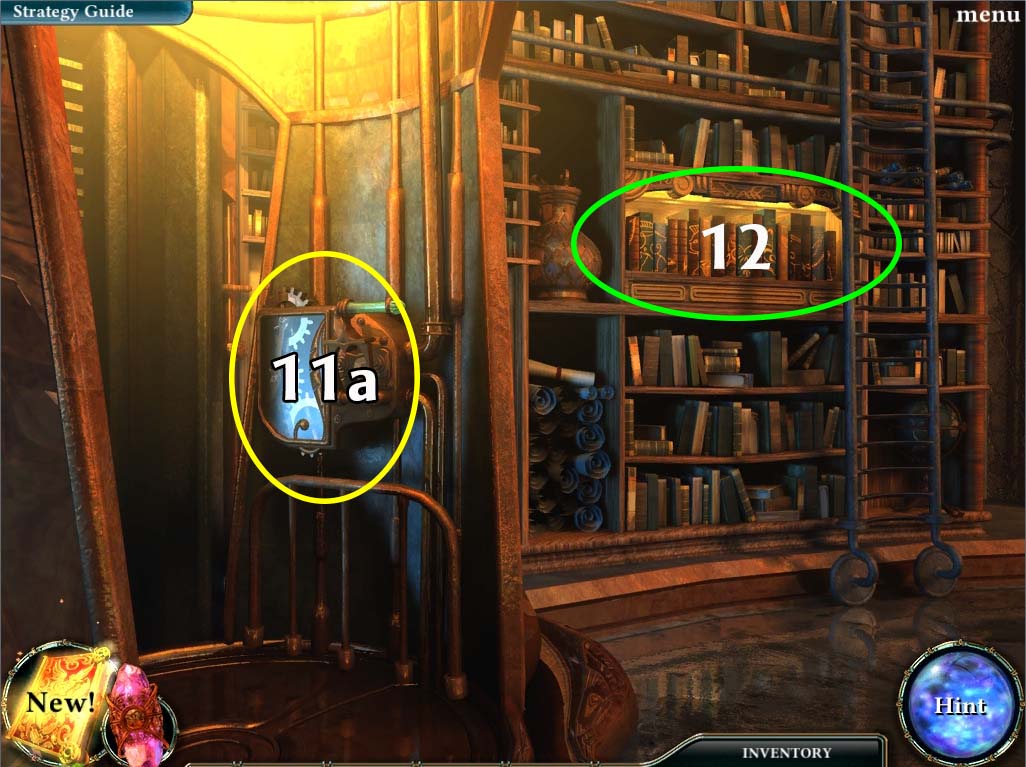
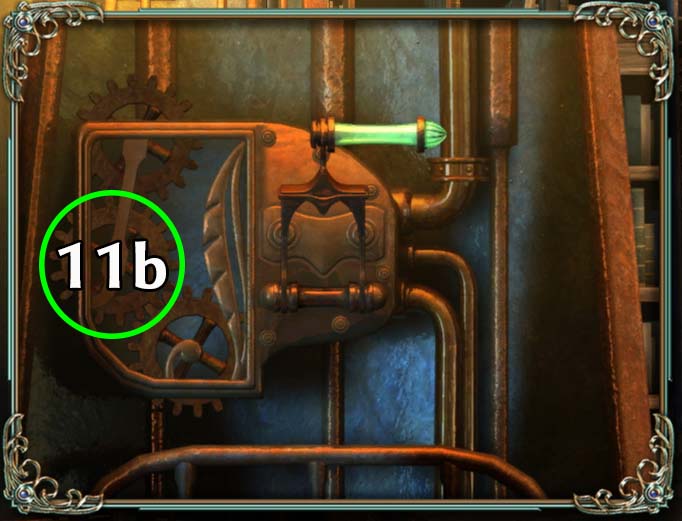
- 11. Check the ELEVATOR SWITCH (circled in blue above).
- There should be a COG that is loose (circled in green in image below) that you can take for your inventory.
- 12. Back at the ELEVATOR AREA check the row of books on the bookshelf (circled in green on the ELEVATOR AREA image above).
- This will start a mini-puzzle that you can solve using the note that you picked up from the GAMING AREA.
BOOKSHELF MINI-PUZZLE
- The object of this puzzle is to arrange the books so that they form an image.
- Clicking a book once selects it, and clicking another book while you have one selected will cause them to change places.
- The solution to the puzzle is on the note that you have in your diary, or alternatively, is shown in the image below:

- Solving this puzzle will give you another COG for your inventory.
- Once you’re done, head back to the LIBRARY INTERIOR area.
- 13. You have all the cogs that you need, but you’re still missing one more component.
- Head down the LIBRARY HALL (circled in violet on the LIBRARY INTERIOR image above).
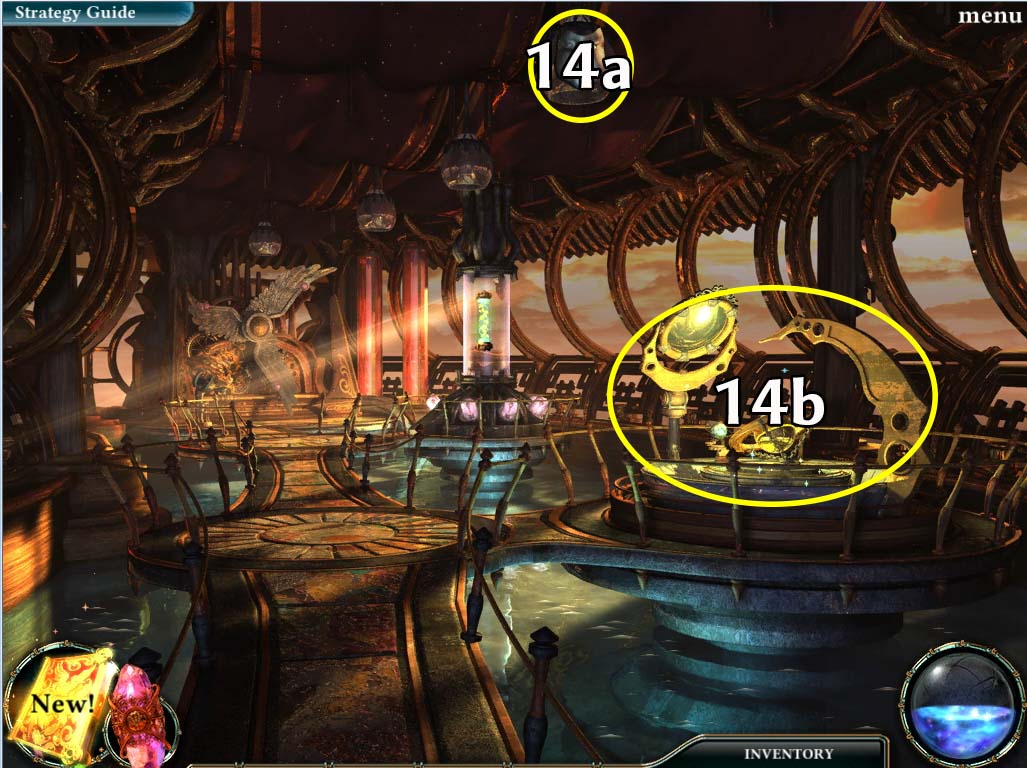
- 14. Take the mask of A FACE that is hanging on the ceiling before investigating the PLANETARY MODEL (both circled in yellow in the image above).
- The PLANETARY MODEL will start a hidden relic puzzle.
LIBRARY HALL HIDDEN RELICS PUZZLE
- **Note: The objects listed as hidden can change on each playthrough.
- Possible items have been listed below
- White Objects are circled in blue above and are labeled as follows:
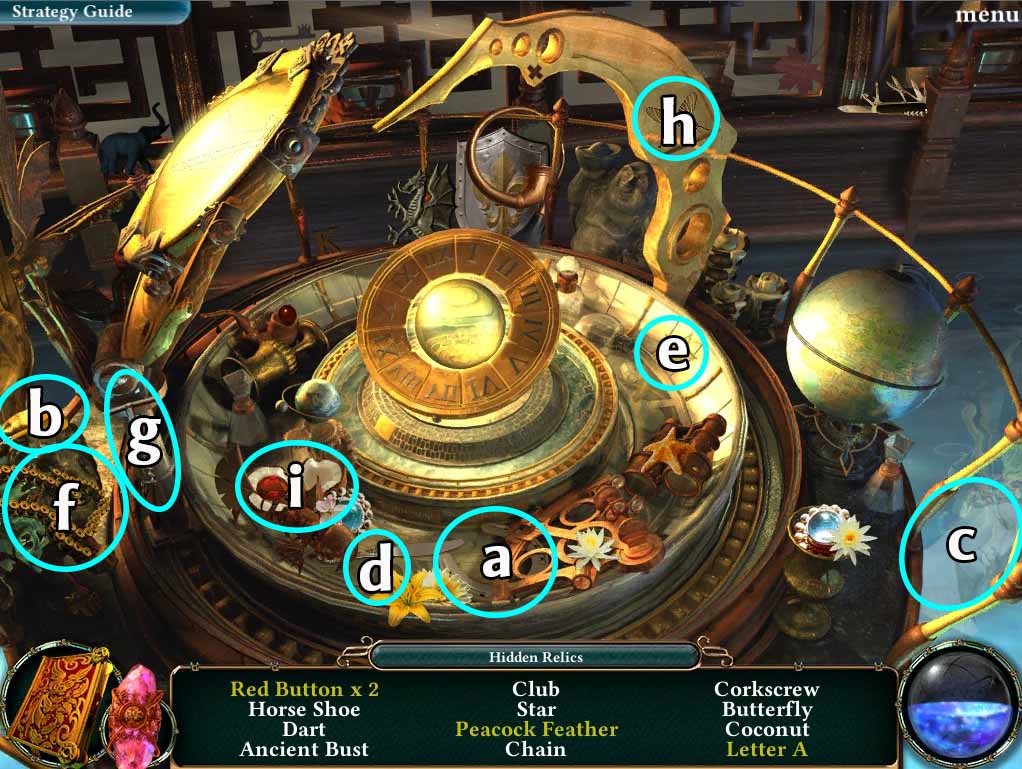
- a. Horse Shoe
- b. Dart
- c. Ancient Bust
- d. Club
- e. Star
- f. Chain
- g. Corkscrew
- h. Butterfly
- i. Coconut
- Yellow objects can be obtained by doing the following:

- j. Open the central planet to find the LETTER A and a RED BUTTON behind it
- k. Move one of the mirrors to find the PEACOCK FEATHER behind it.
- l. Open the globe to find another RED BUTTON and a STAR
- Solving this puzzle will give you a CHAIN and more KEYPAD BUTTONS (3 of 6) for your inventory.
- You now have all the items you need to repair the ELEVATOR.
- Head back to the GAMING AREA to proceed.
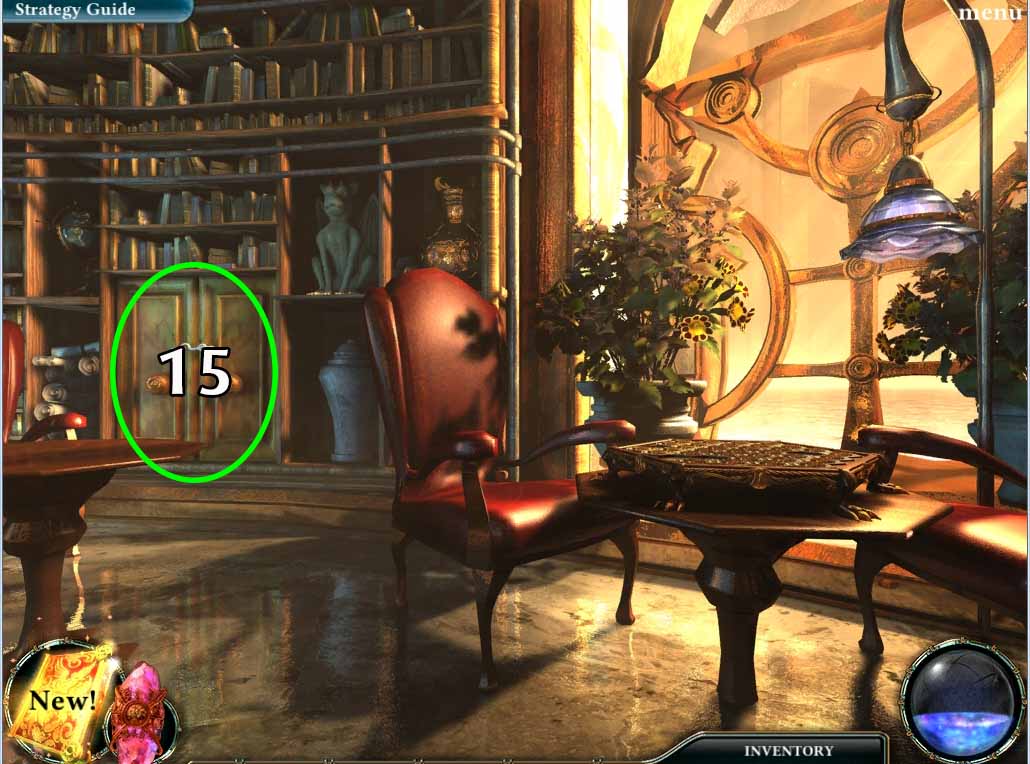
- 15. Check the CABINET (circled in green in the image above) and remove the latch.
- It’s the controls for the ELEVATOR.
- Use the 2 COGS and the CHAIN in your inventory to complete the mechanism.
- There should also be another KEYPAD BUTTON (4 of 6) on the bottom of the mechanism for you to pick up.
- Once you’ve fixed the ELEVATOR, take it to get to the 2nd FLOOR of the LIBRARY.
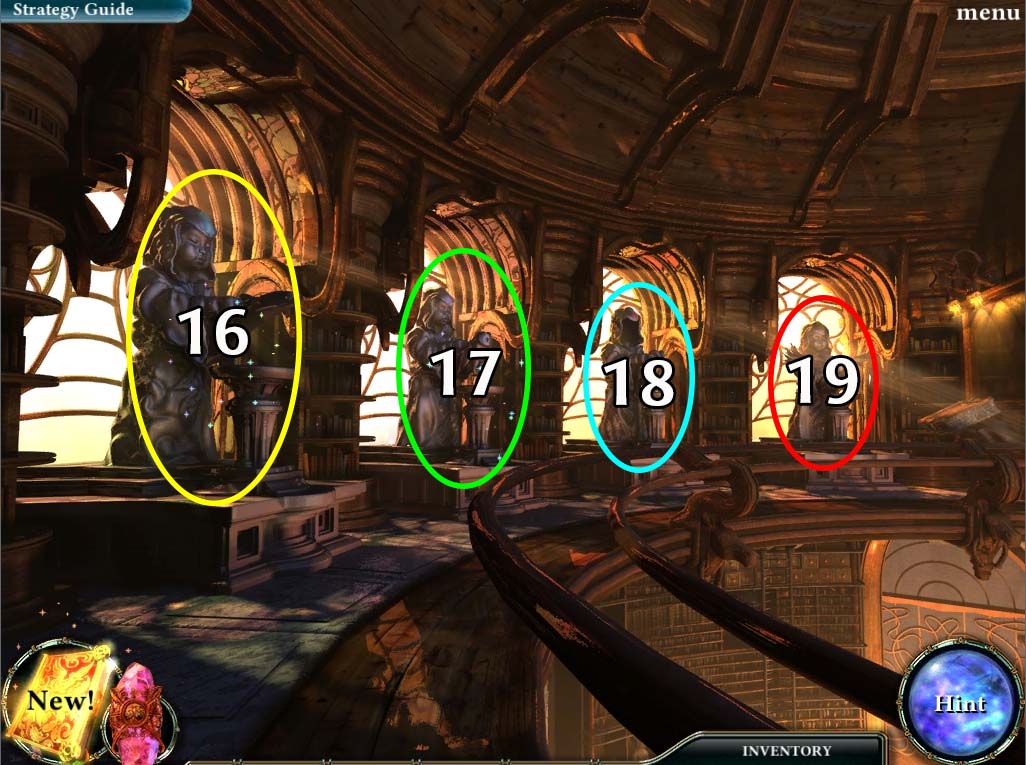
- 16. At the second floor, you’ll find 4 STATUES that you’ll need to activate.
- Let’s tackle each one by one. The first statue (circled in yellow in image above) will start a HIDDEN DETAILS puzzle.
- 1st STATUE HIDDEN DETAILS
- The solution to the puzzle is shown below
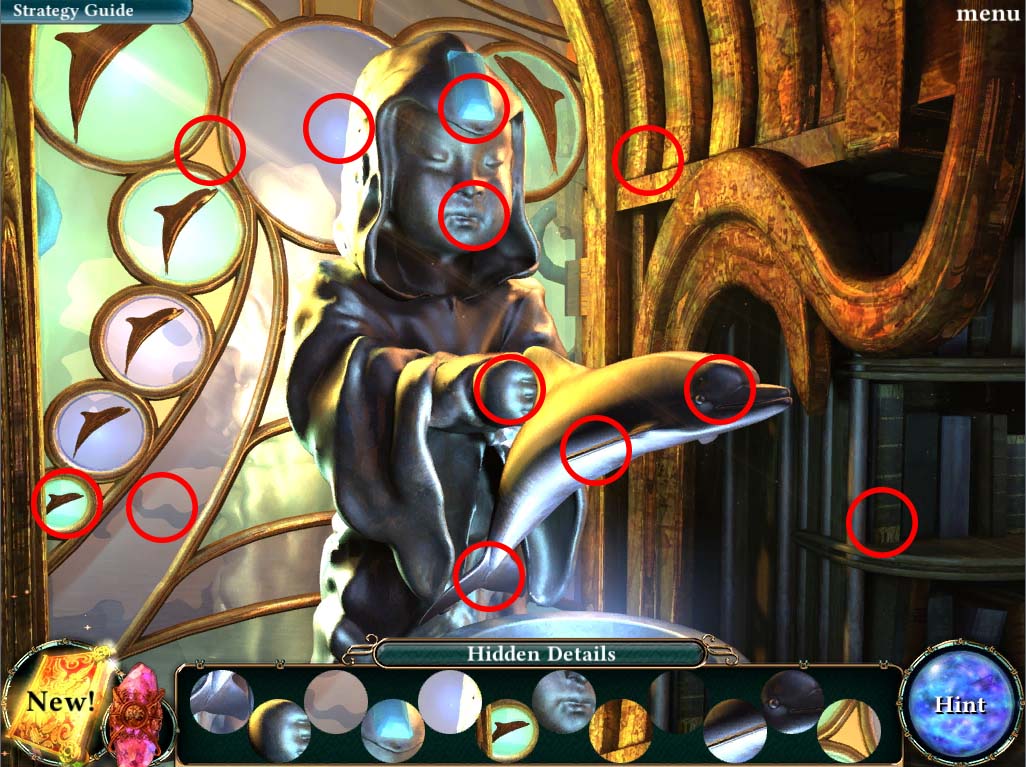
- Solving this puzzle will activate the 1st STATUE
- 17. Investigate the 2nd STATUE (circled in green in the SECOND FLOOR image above).
- This will start a unique variation to the HIDDEN RELICS puzzle
- 2nd STATUE HIDDEN RELICS
- This HIDDEN RELICS PUZZLE requires you to find a certain number of hearts, dolphins and stars.
- The solution is shown below.
- Hearts are circled in green, dolphins are circled in violet and stars are circled in deep blue.
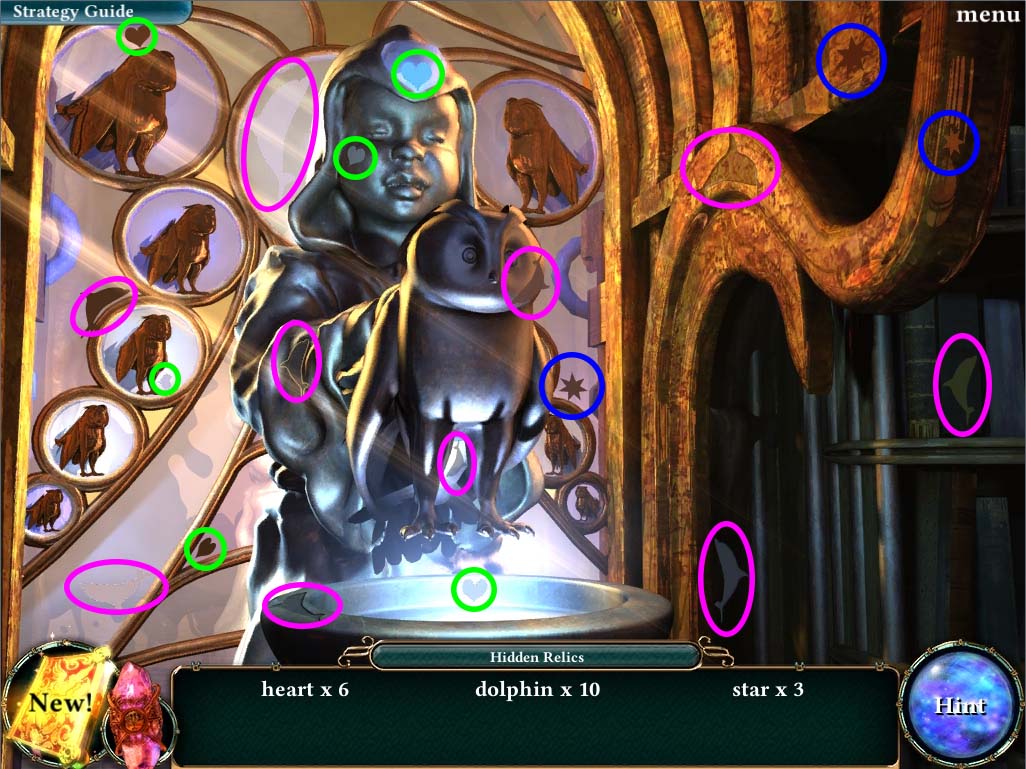
- Solving this puzzle will activate the 2nd STATUE
- 18. Investigate the 3rd STATUE (circled in blue in SECOND FLOOR image above).
- Unlike the other STATUES, this will not start a puzzle.
- Instead, take the mask of A FACE in your inventory and place it on the STATUE.
- This will activate both the 3rd and 4th STATUES.
- 19. Head to the 4th STATUE (circled in red in SECOND FLOOR image above).
- 20. Pick up the GAME PIECE (3 of 4) and activate the 4th STATUE (both circled in blue in image above).
- This will reveal the AIR ESSENCE, one of the 3 genetic essences that you require to get the 2nd RELIC.
- Take it for your inventory.
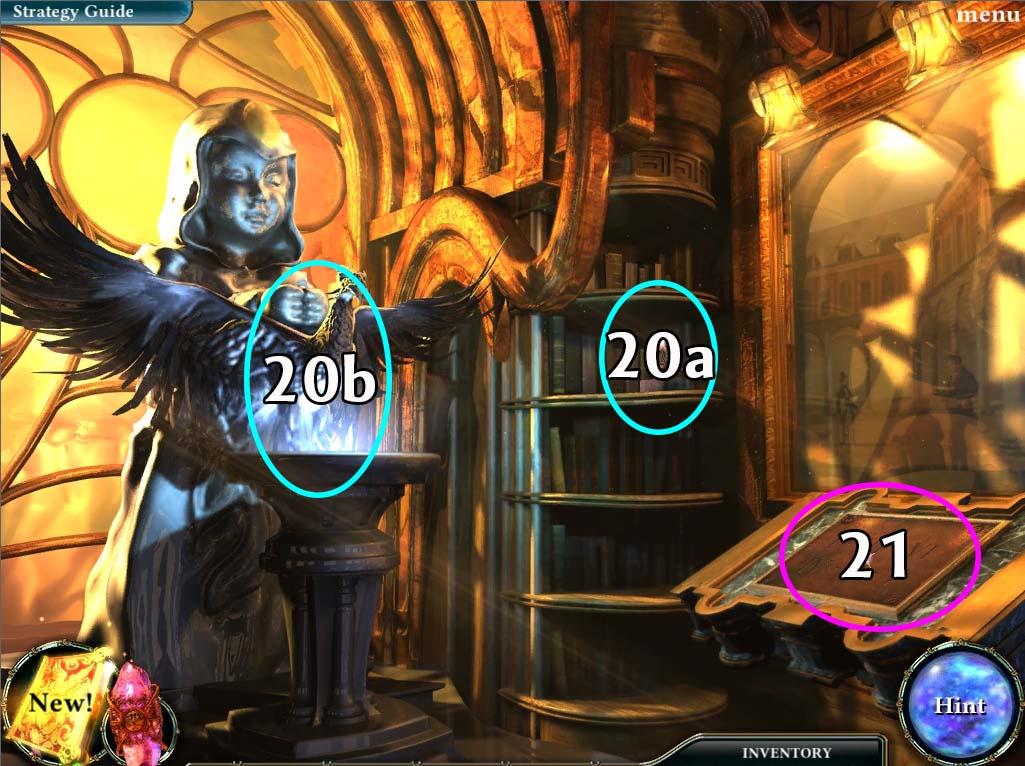
- 21. Investigate the PLAQUE on the side (circled in violet in image above).
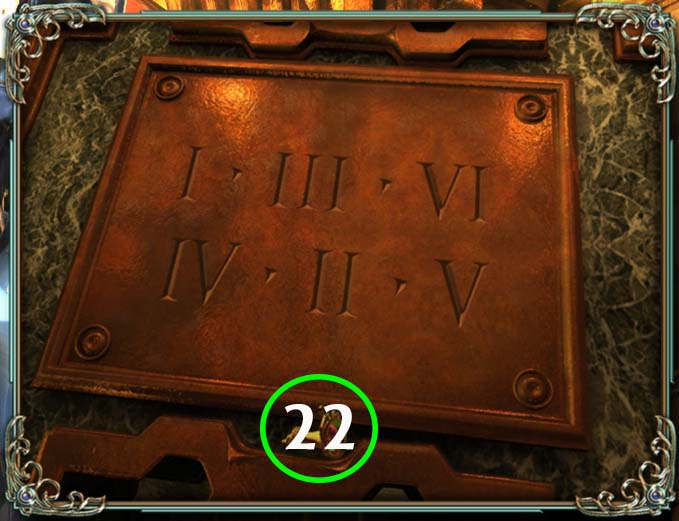
- 22. There will be several roman numerals that ANNA will record in her diary.
- These numerals will be important for a puzzle later on. While you’re here, pick up the KEYPAD BUTTON (5 of 6), (circled in green in image above) for your inventory.
- You’ve taken all you need in this area for now.
- Head back down the ELEVATOR and go to the GAMING AREA.
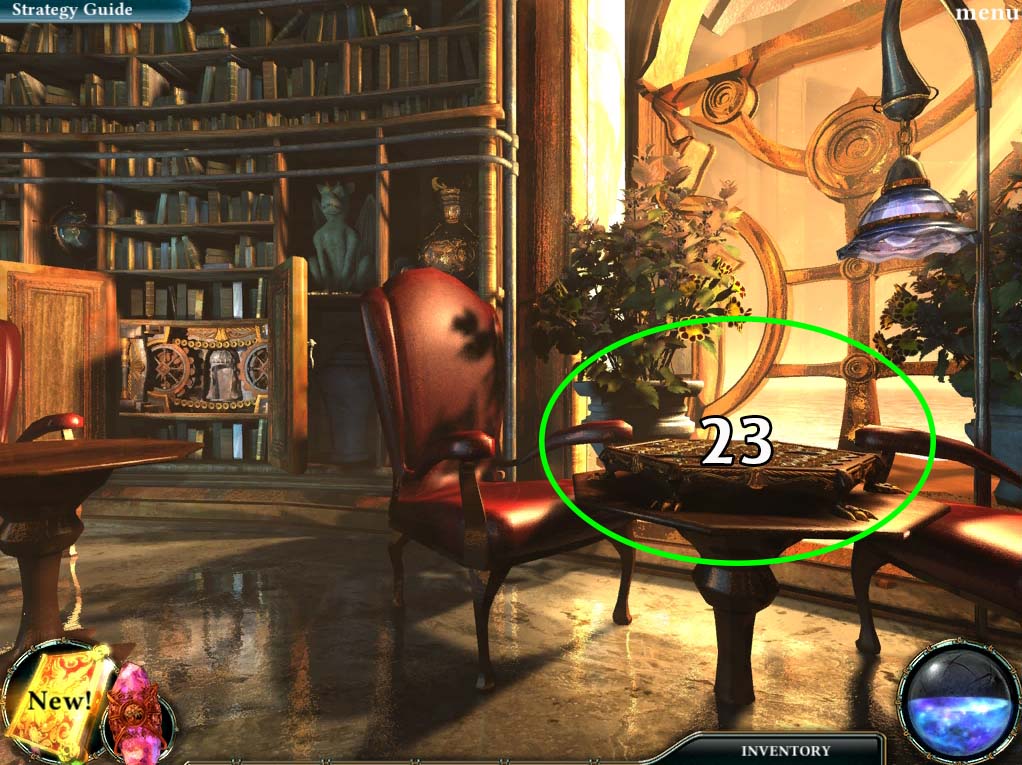
- 23. Investigate the GAME BOARD (circled in green in image above).
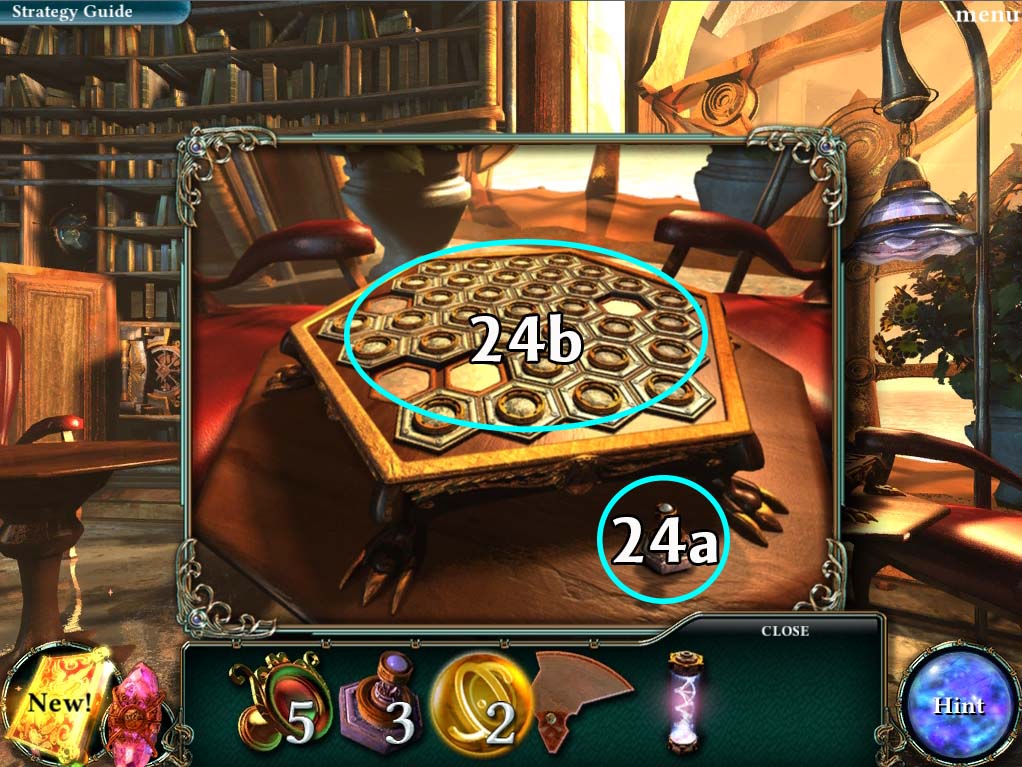
- 24. Take the final GAME PIECE (4 of 4) and then place the pieces on top of the GAME BOARD.
- This will start a mini-game.
GAME BOARD PUZZLE
- The object of this game is to rotate the different pieces so that they eventually light up the entire board.
- Each piece will light up the board differently.
- The pieces circled in deep blue in the image below will light up to 2 circles away in front of in a cone, and the pieces circled in green will light up all circles in front of it in a straight line.
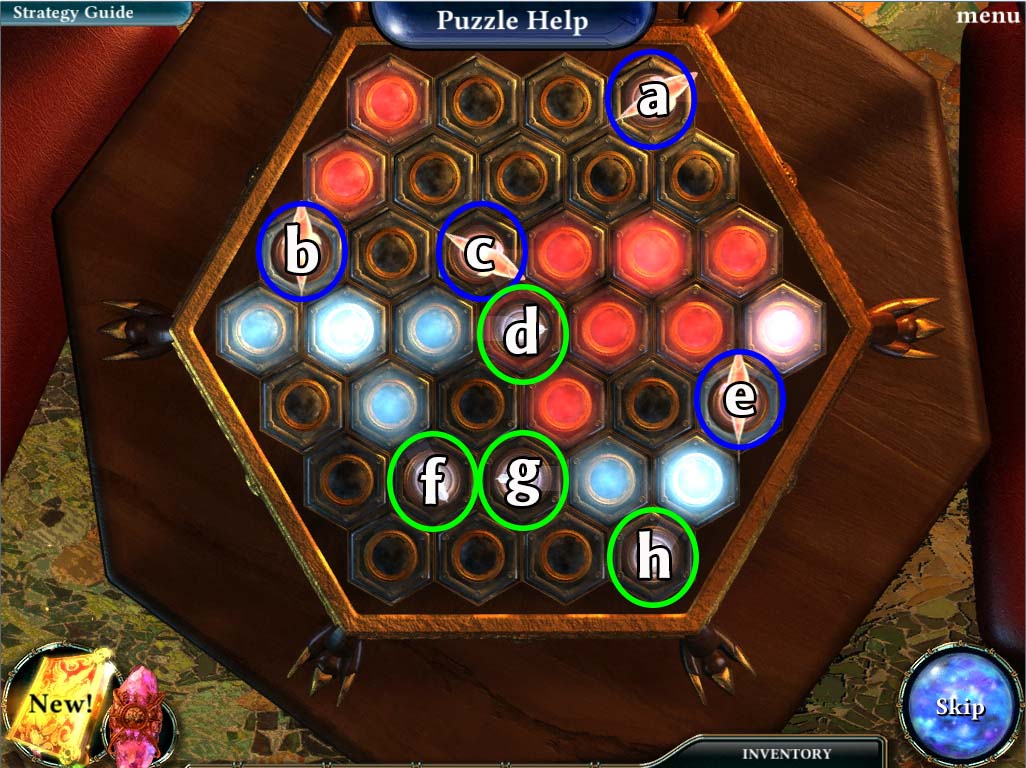
- The solution to the puzzle is shown below:
- a. 4 clicks from position shown above
- b. 3 clicks from position shown above
- c. 2 clicks from position shown above
- d. 3 clicks from position shown above
- e. 2 clicks from position shown above
- f. 1 clicks from position shown above
- g. 2 clicks from position shown above
- h. 2 clicks from position shown above
- After this is done, the puzzle should look like this:
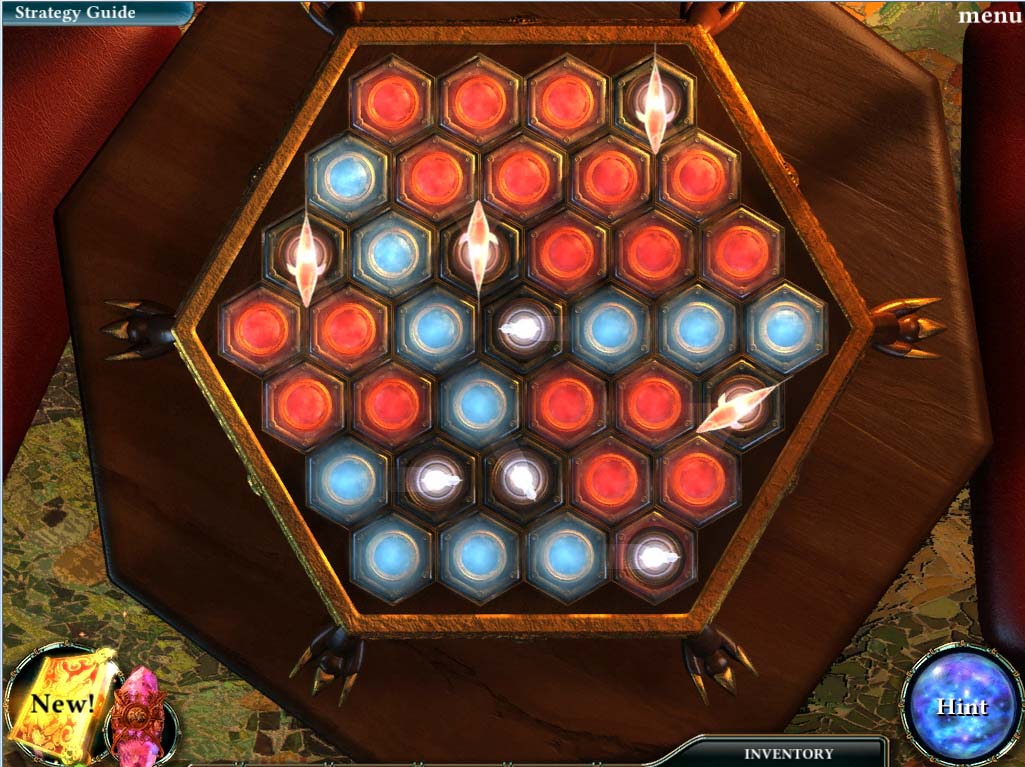
- After you solve the puzzle, the center of the board will open revealing the 2nd genetic essence, the WATER ESSENCE.
- Take it for your inventory.
- Head back down the LIBRARY HALL once you’re through.
- 25. Investigate the area circled in green in the image above.
- The final genetic essence you need is in plain view but is protected by a force field.
- We’ll need to remove it.
- 26. Investigate the STRANGE MACHINE (circled in blue above) and you should find the last KEYPAD BUTTON (6 of 6), circled in blue in image below) that you need.
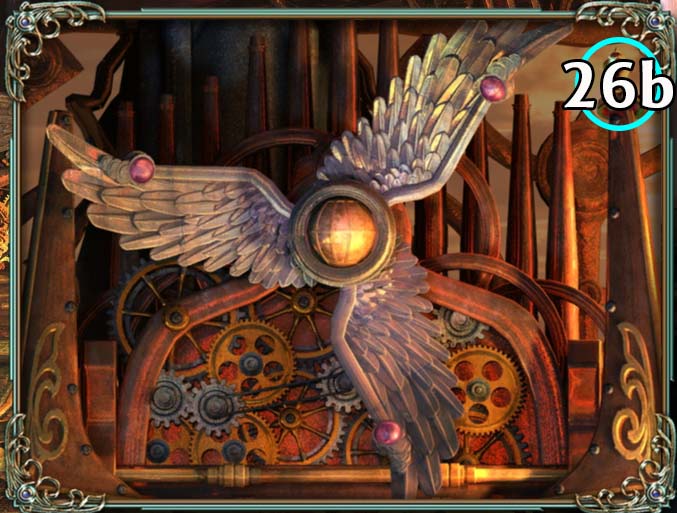
- 27. Investigate the MACHINE KEYPAD (circled in violet in the LIBRARY HALL MACHINE image above).
- Place all the KEYPAD BUTTONS in your inventory to activate the machine.
- This will activate a mini-puzzle.
KEYPAD MINI PUZZLE
- The object of this puzzle is to push the keypads in a specific order.
- Anna has recorded the order in her diary.
- Alternatively, the solution is shown in the image below.
- Click the buttons in order from 1 to 6.
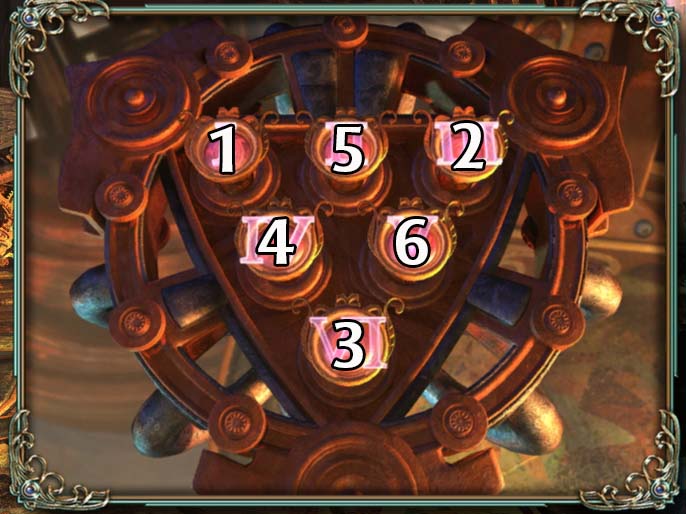
- Solving this puzzle will activate the machine (and another puzzle).
- Once you are done, investigate the machine itself.
- JACOB will speak to you briefly and another unique take on the HIDDEN RELIC PUZZLE will start.
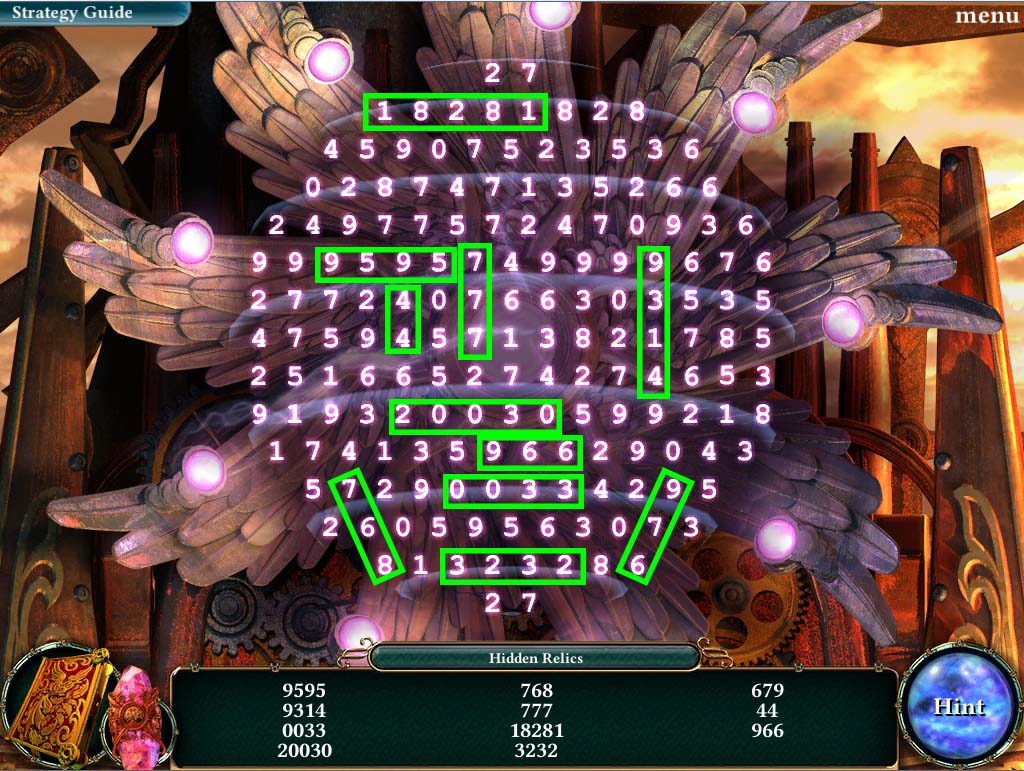
MACHINE HIDDEN RELIC PUZZLE
- Find the numbers hidden in the strange puzzle.
- The numbers can be horizontal, vertical, or diagonal.
- The solution to this puzzle is shown below:
- Once the puzzle is solved the final genetic essence, the EARTH ESSENCE can now be picked up. Take it and head back to the STATUE at the LIBRARY INTERIOR. Place the three genetic essences between the statue’s hands and you will be given the second relic, the TEARS OF THE INNOCENT
- Quest: Find the three genetic essences: Complete
New Quest: Return to the Key Master
- Head back to the SCROLL TEMPLE and talk to the Key Master. There is no transporter nearby (except for the one in the COURTYARD) so you’ll have to walk all the way there. He will give you another magical key for your efforts.
- Quest: Return to the Key Master: Complete
New Quest: Place the tears on the altar
- Do the same thing as you did with the ENCHANTED SAP. Unlock the barrier and place the TEARS OF THE INNOCENT in its proper place.
- Quest: Place the tears on the altar: Complete
- A short cutscene will start. The SPIRIT CODEX hints that your people are closer than you might think. It will give you another CRYSTAL GYROSCOPE. It’s time to uncover more of this secret.
New Quest: Unlock the next part of the island
End of Chapter IV
Chapter One: Fall of the Sky Palace
Chapter Two: The Mysteries of the Scroll Temple
Chapter Three: The First Relic
Chapter Four: The Second Relic
Chapter Five: The Third Relic
Chapter Six: The Last Relic
Chapter Seven: Silencing the Colossus
Chapter Eight: That Which Was Lost
Bonus Chapter
Ask for help in the comments below!