
Empress of the Deep 3: Legacy of the Phoenix: Chapter Three: The First Relic
Rely on our Empress of the Deep 3 Legacy of the Phoenix Walkthrough, with its detailed, chapter-by-chapter instructions, beautifully marked custom screenshots, and easy-to-understand puzzle solutions to help you find the ingredients to revive the Phoenix and stop the evil colossus from awakening. Help Empress Anna save her lost people from the fate her twin sister has tried to set in motion in this stunning hidden object adventure game.
Chapter One: Fall of the Sky Palace
Chapter Two: The Mysteries of the Scroll Temple
Chapter Three: The First Relic
Chapter Four: The Second Relic
Chapter Five: The Third Relic
Chapter Six: The Last Relic
Chapter Seven: Silencing the Colossus
Chapter Eight: That Which Was Lost
Bonus Chapter
Ask for help in the comments below!
With the gate that leads out of the Scroll Temple finally open, the way is now clear for Empress Anna to explore the other parts of the island. She has acquired the Spirit Amethyst when she opened the Spirit Codex, but has inadvertently released the Codex’s fairies all across the island itself. She must find draw upon the power of these fairies and find the four relics if she is to save her lost people.
New quest: Find the Sacred Greenhouse
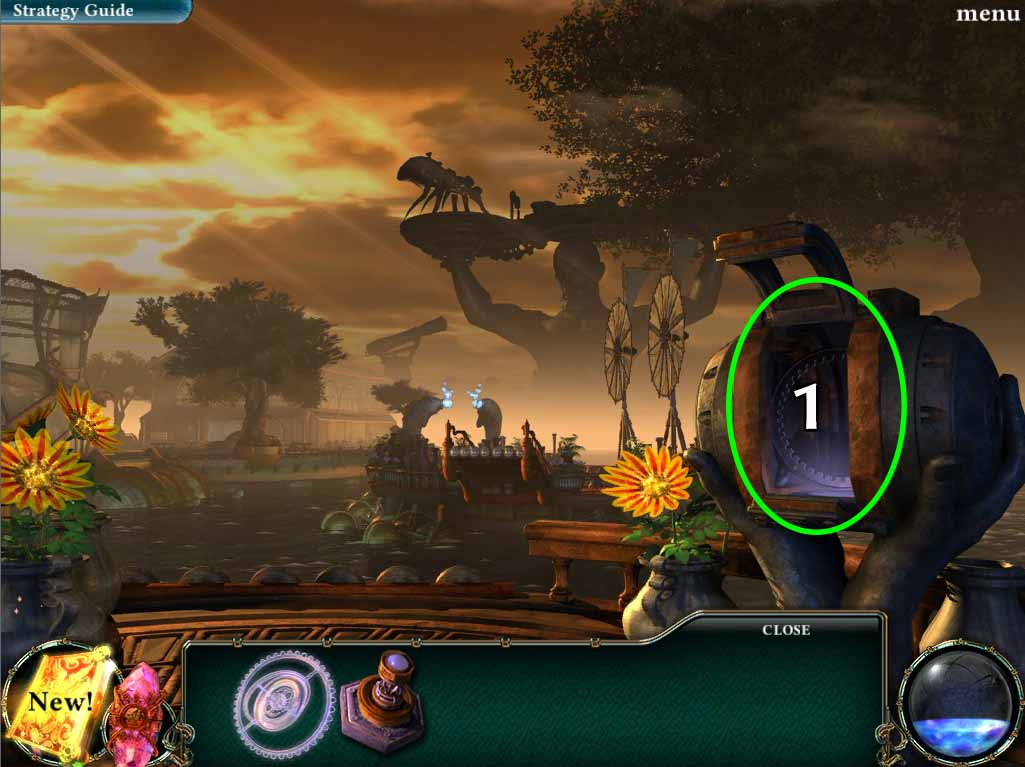
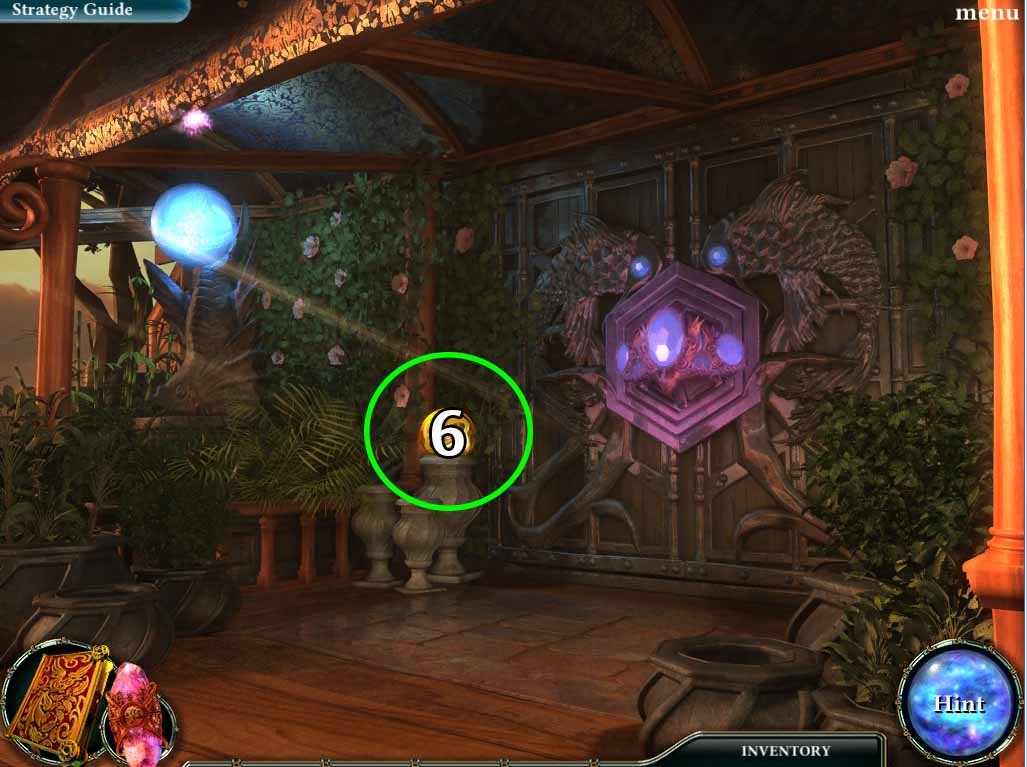
- 1. Once you step outside the Scroll Temple, you find yourself in front of a path with a missing bridge.
- Use the CRYSTAL GYROSCOPE in your inventory and place it in the mechanism circled in green above to reform the bridge.
- Once the bridge materializes, go across it and you’ll find yourself in the FISHERY INTERSECTION.
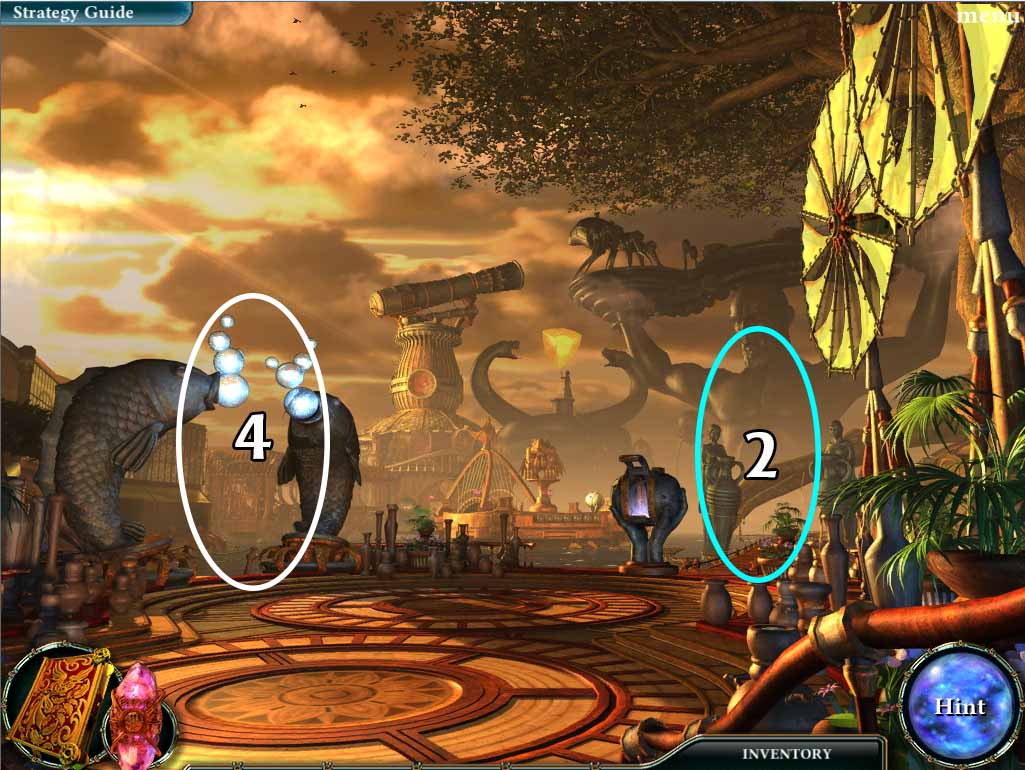
- 2. Before we head to the SACRED GREENHOUSE, we should take the time to collect several AMETYST FAIRIES.
- Head forward to the area circled in blue above and grab the FAIRY (1 of 6) and keep going straight until you get to the FOOT OF THE TREE.
- Take the Fairy here as well (2 of 6).
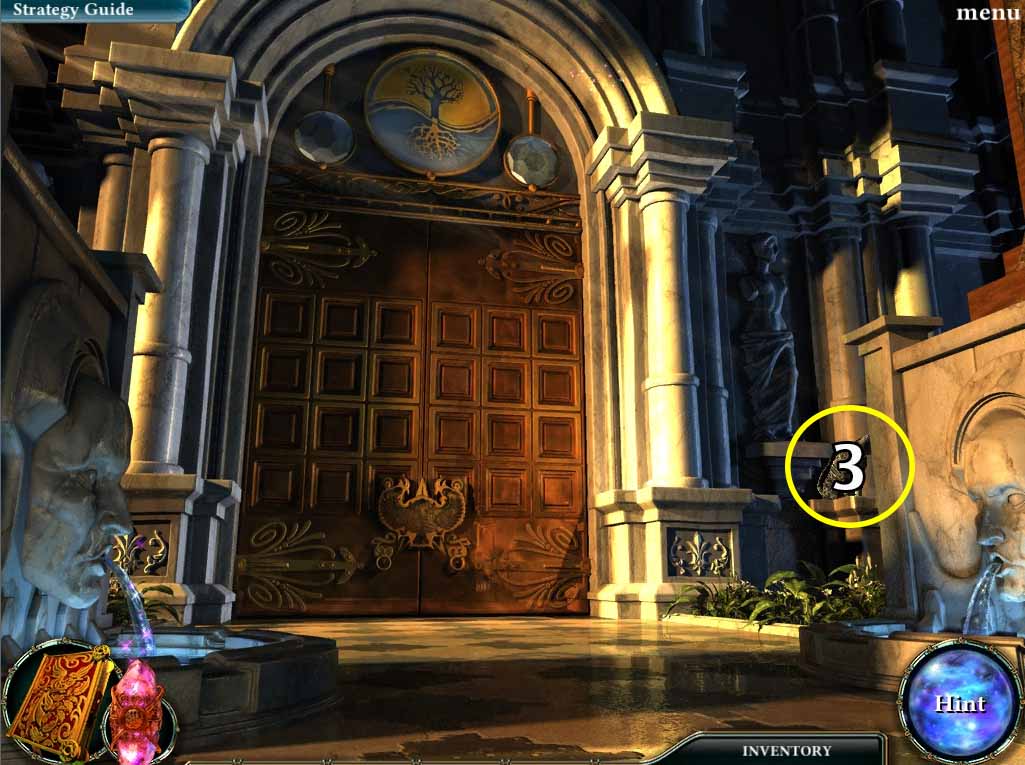
- 3. While you’re at the FOOT OF THE TREE, check out the cat sitting at the side (circled in yellow in image above).
- It’ll drop a CAT COIN for your inventory.
- Head back to the FISHERY INTERSECTION.
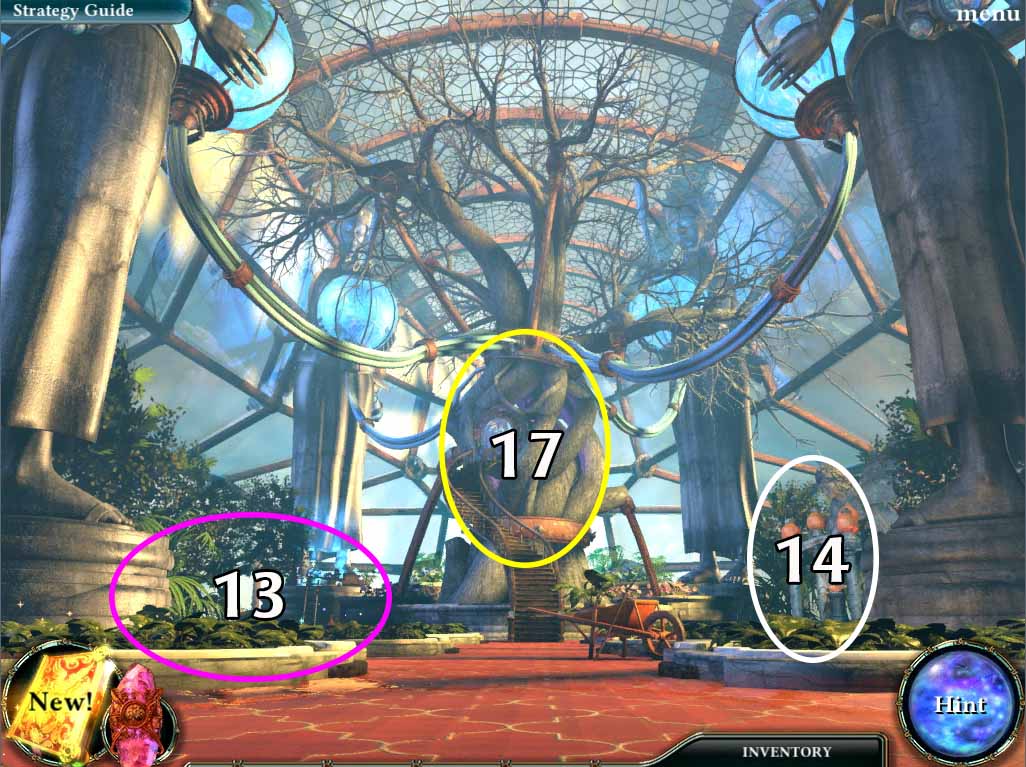
- 4. Head to the area circled in white in the FISHERY INTERSECTION image above, and you’ll find yourself in the COURTYARD.
- Grab the Fairy (3 of 6).
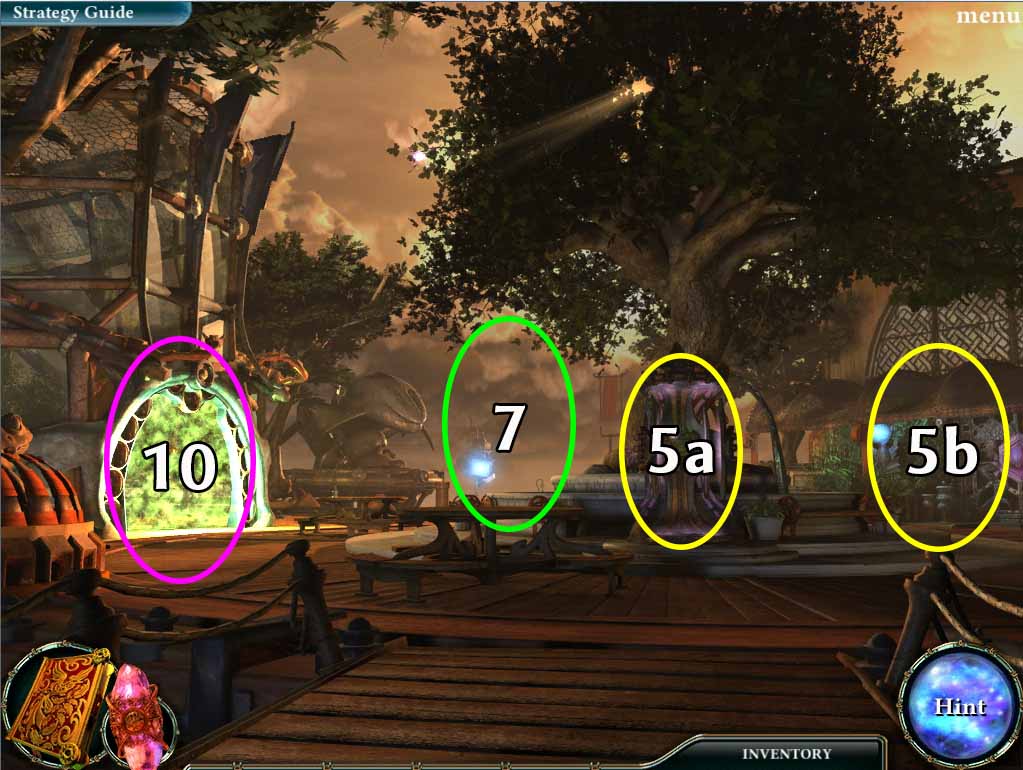
- 5. Use the CAT COIN in your inventory to activate the TRANSPORTER, and then head to the FISHERY ENTRANCE (both circled in yellow in the image above).
- 6. At the FISHERY ENTRANCE you’ll find another FAIRY (4 of 6) and a YELLOW MARBLE (1 of 3) for your inventory (circled in green above).
- Head back to the COURTYARD.
- 7. Go straight towards the DOCKS (circled in green in COURTYARD image above) and take the FAIRY here as well (5 of 6).
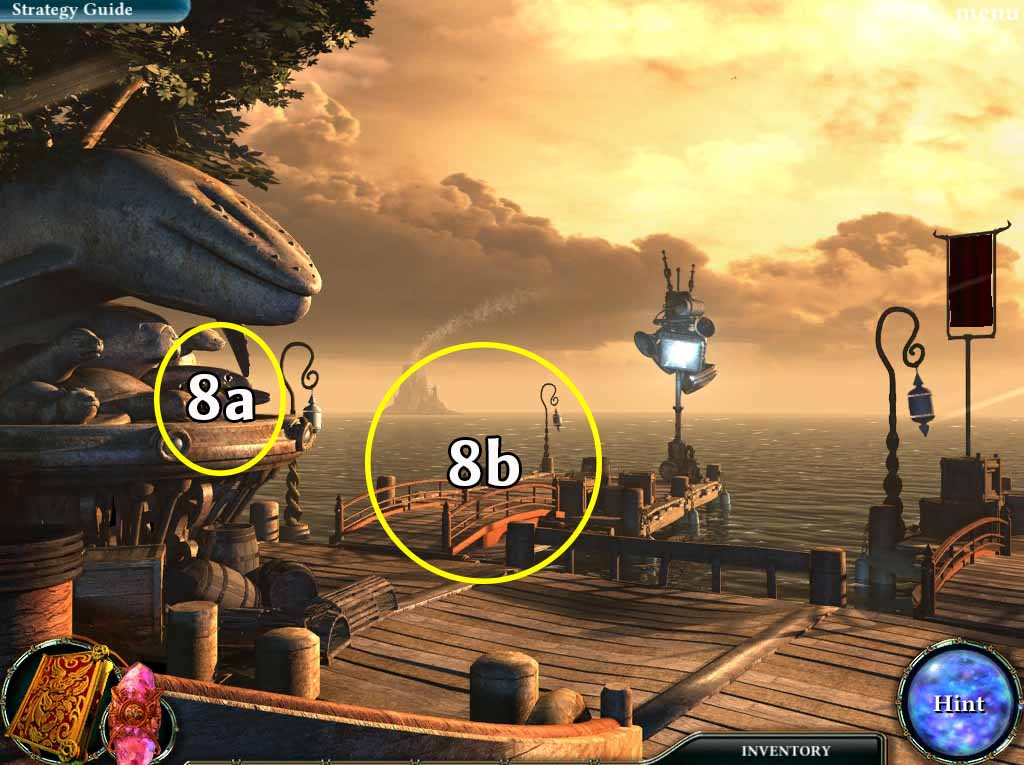
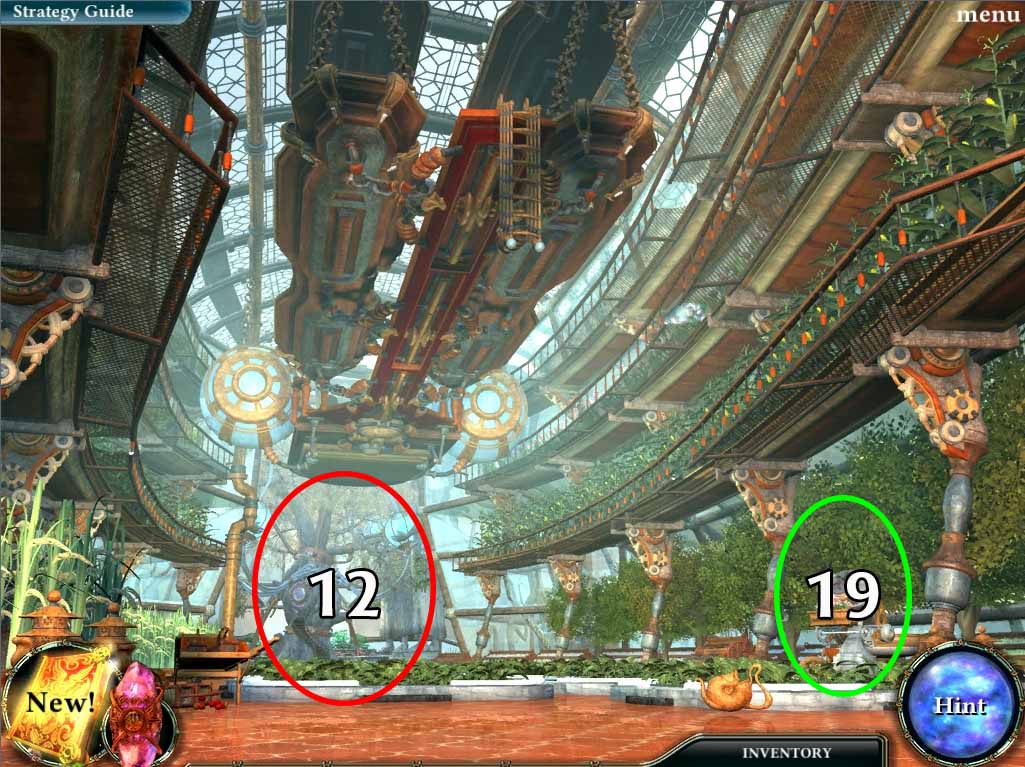
- 8. Take the KEYPAD BUTTON (1 of 6) and head straight towards the pier (both circled in yellow on image above).
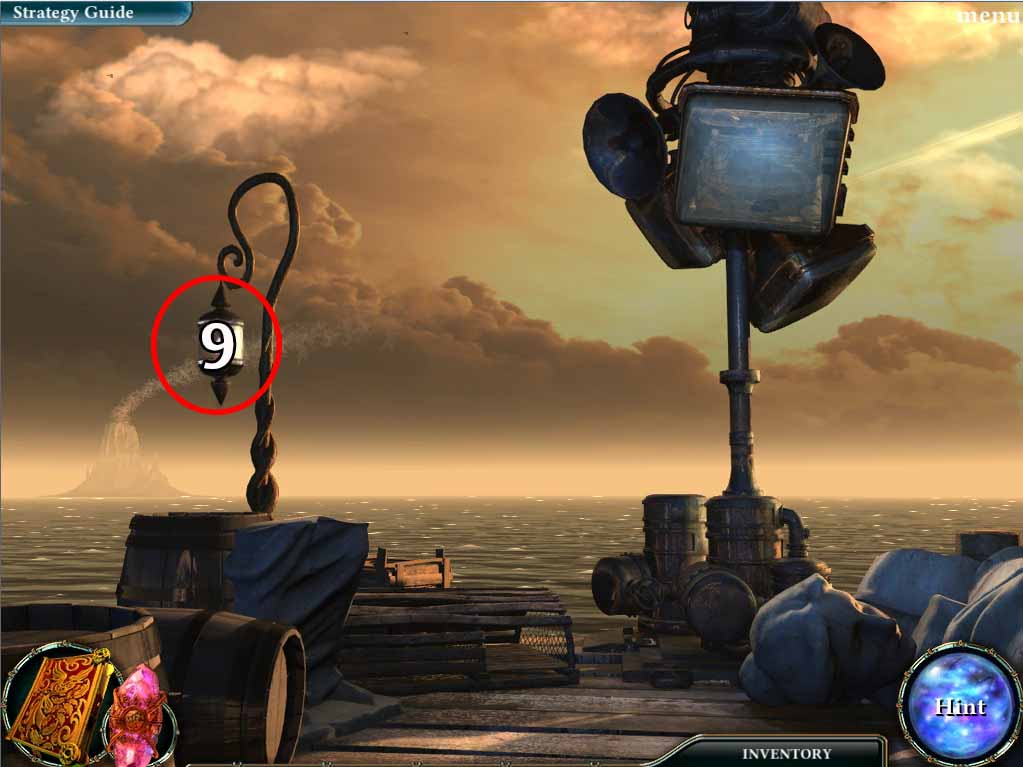
- 9. Take the final FAIRY (6 of 6) trapped in the lantern (circled in red in the image above).
- Your SPIRIT AMETHYST is now fully charged.
- Head back to the COURTYARD.
- 10. Go to the entrance of the SACRED GREENHOUSE (circled in violet in the COURTYARD image above).
- Quest: Find the Sacred Greenhouse: Complete
New Quest: Disable the force field
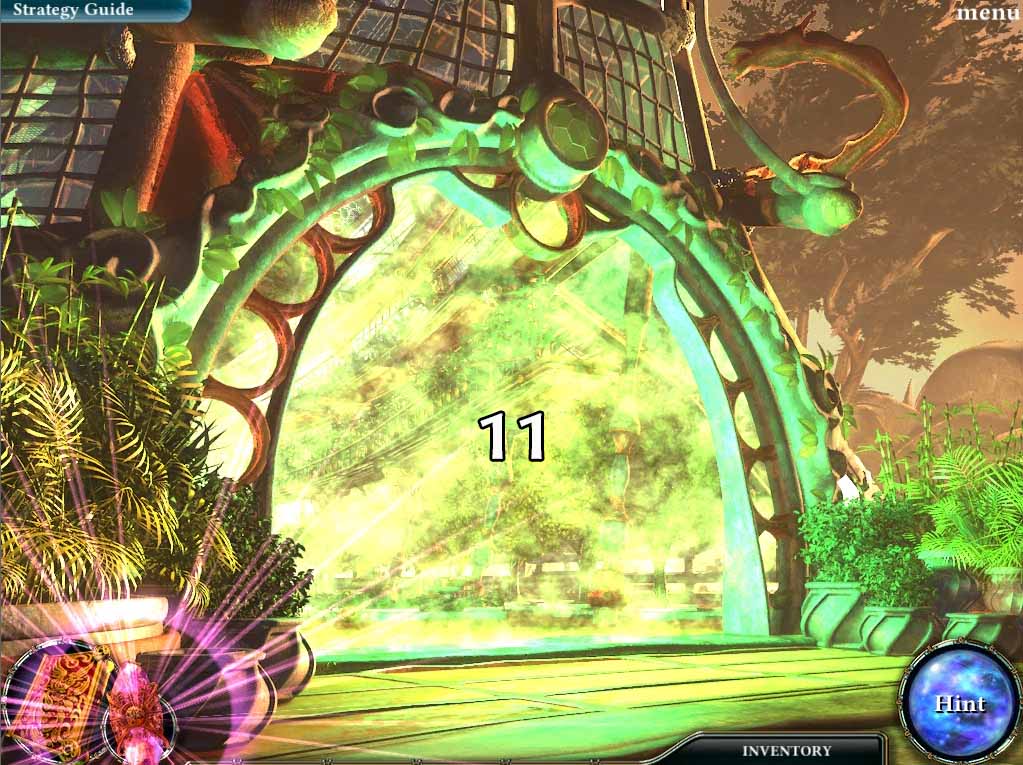
- 11. Use the SPIRIT AMETYST to disable the force field and clear your way into the SACRED GREENHOUSE.
- Once the force field is down.
- Go in and you’ll find yourself in the GREENHOUSE ENTRANCE.
- Quest: Disable the force field: Complete
- 12. We need to recharge the SPIRIT AMETHYST.
- Head to the area circled in red in the image above.
- 13. Investigate the area circled in violet to start the MORPHING OBJECT PUZZLE
GREENHOUSE MORPHING OBJECT PUZZLE
- The object of this puzzle is to find the FAIRIES that have transformed into objects.
- Each FAIRY cannot maintain a transformation for a long time and will change into another object.
- Find all morphing objects to reveal the FAIRIES.
- A solution to the puzzle is below:
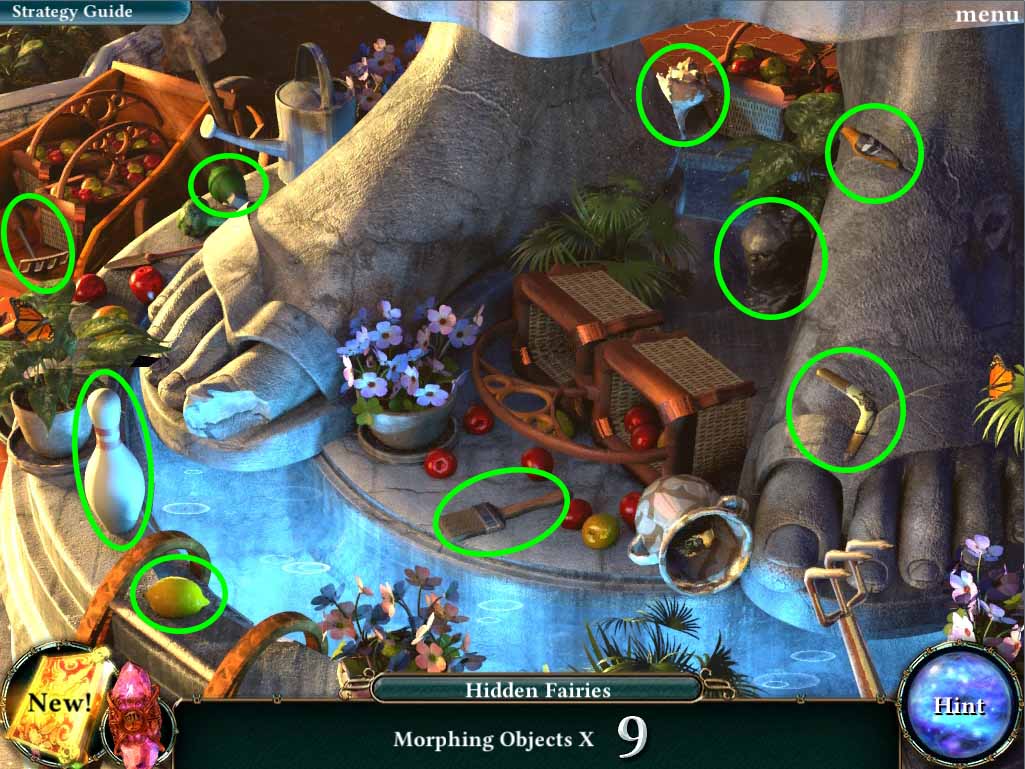
- Once you solve this puzzle your SPIRIT AMETHYST should be fully charged.
- 14. Head to the area circled in white on the GREENHOUSE image above
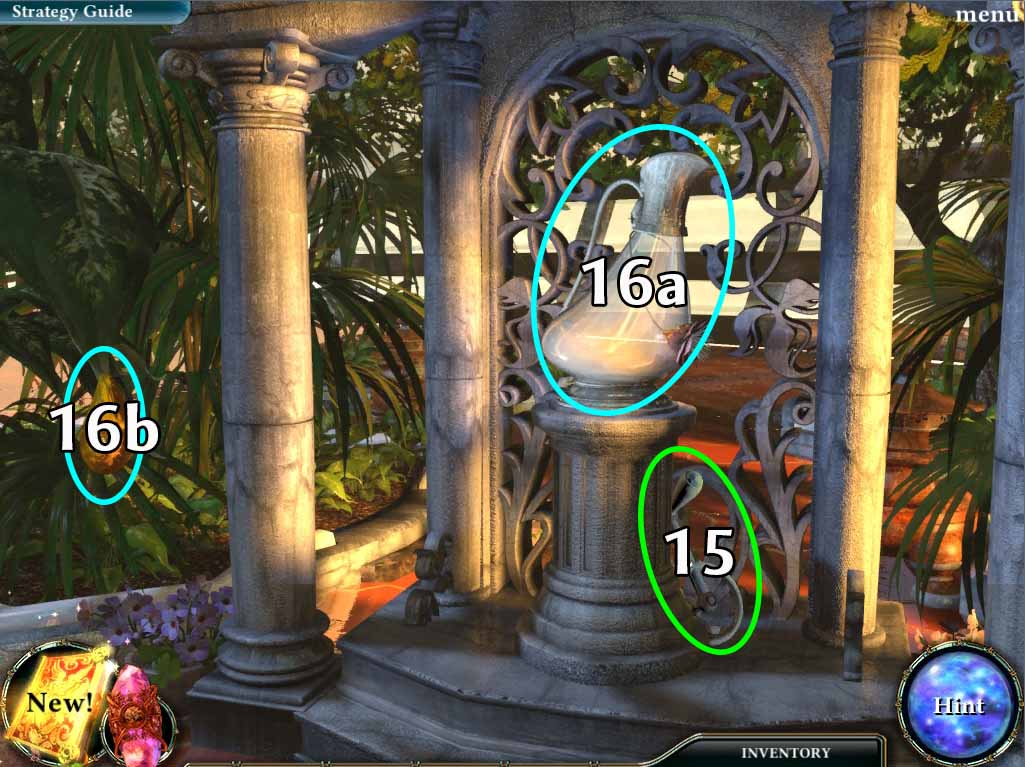
- 15. Take the METAL CRANK (circled in green in image above).
- 16. Take the EMPTY JAR and then use it to take the DROP OF SAP (1 of 4) that is on the leaf (both circled in blue above). Go back to the GREENHOUSE area.
- 17. Investigate the GREENHOUSE TREE (circled in yellow in GREENHOUSE image above).
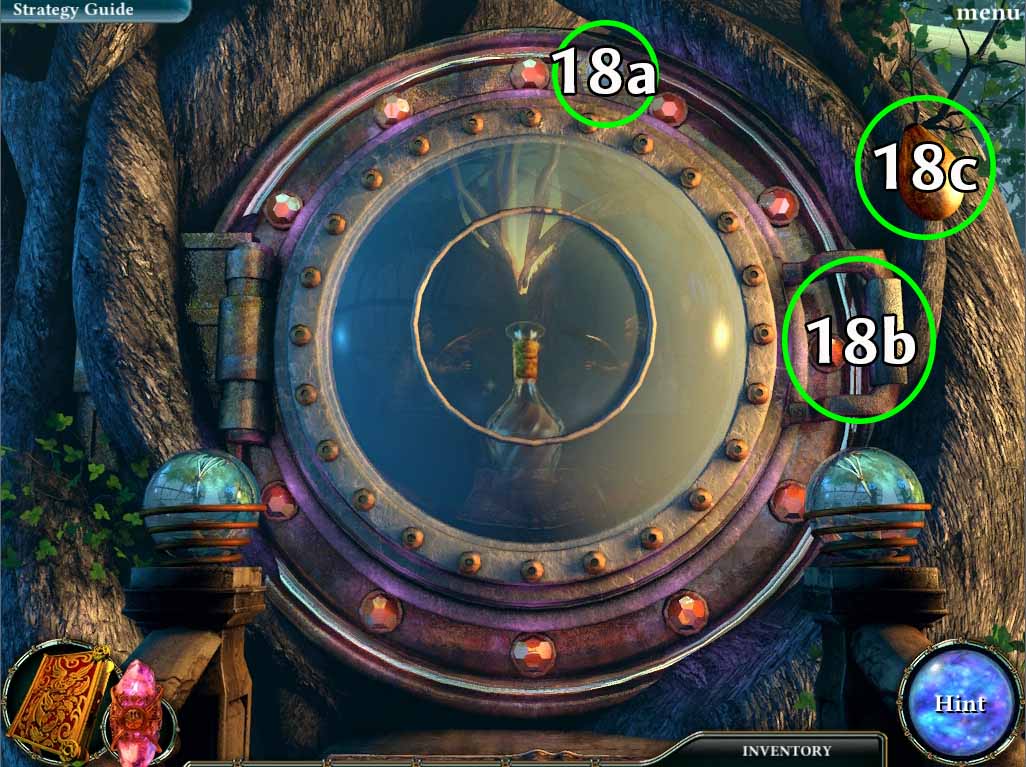
- 18. Take the HEXAGON TUBE (1 of 4) and then open the hatch.
- After this, take the DROP OF SAP (2 of 4).
- Once you’re done head back to the GREENHOUSE ENTRANCE.
- Quest: Restore the Greenhouse Tree
- 19. Check the area circled in green on the GREENHOUSE ENTRANCE image above.
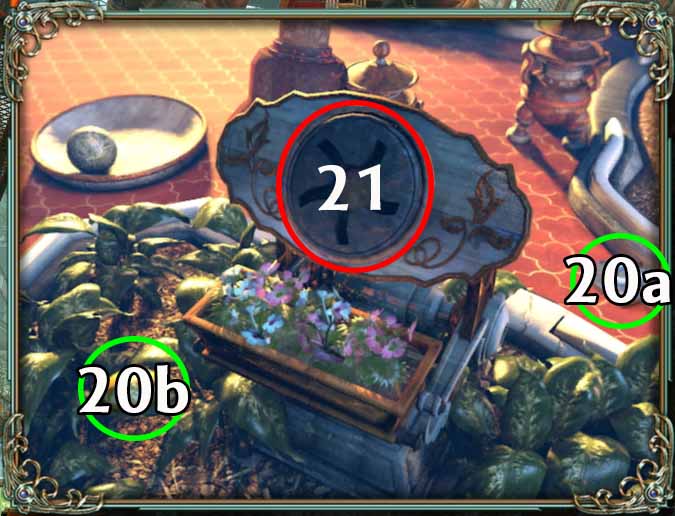
- 20. Take the HEXAGON TUBE (2 of 4) and the DROP OF SAP (3 of 4) (both circled in green above).
- 21. Use the METAL CRANK in your inventory on the area circled in red above.
- Turn the crank to lower the ladder.
- Once it’s fully lowered, climb up and you’ll find yourself on the GREENHOUSE PLATFORM.
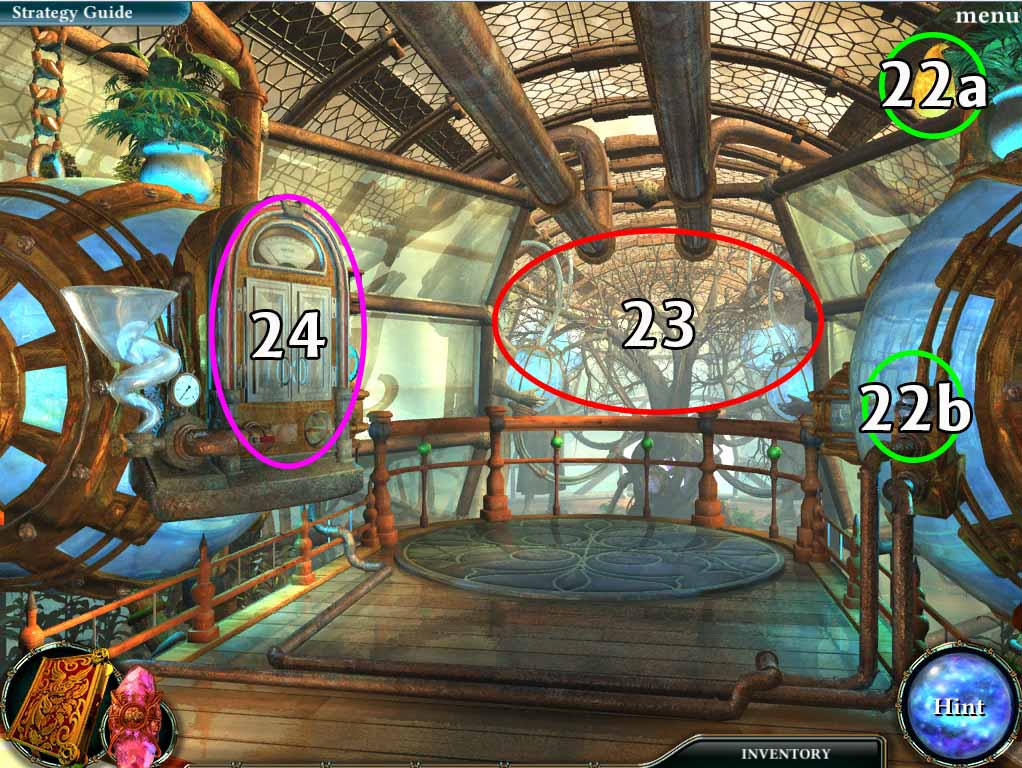
- 22. Take the HEXAGON TUBE (3 of 4) and the DROP OF SAP (4 of 4) (both circled in green above).
- 23. Investigate the area circled in red in the image above.
- Activate the SPIRIT AMETHYST and this will start a HIDDEN DETAILS PUZZLE.
GREENHOUSE HIDDEN DETAILS PUZZLE
- A solution for the puzzle is shown below:
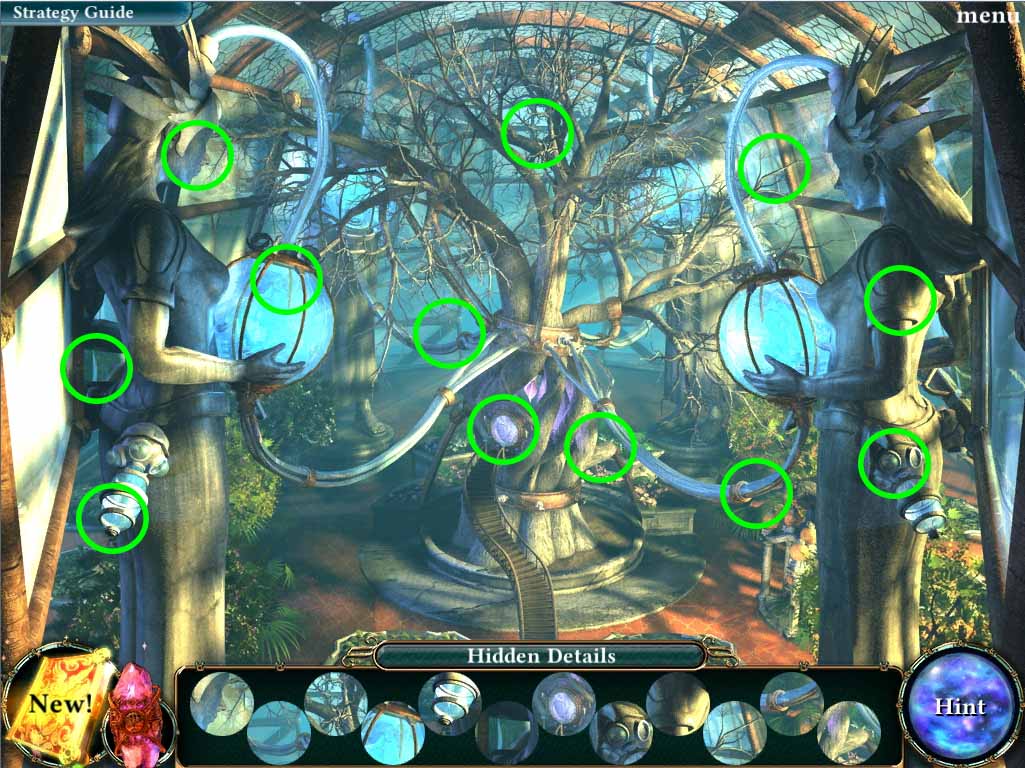
- Once you solve the puzzle you will be rewarded with the last HEXAGON TUBE (4 of 4).
- 24. Investigate the mechanism circled in violet in the GREENHOUSE PLATFORM image above.
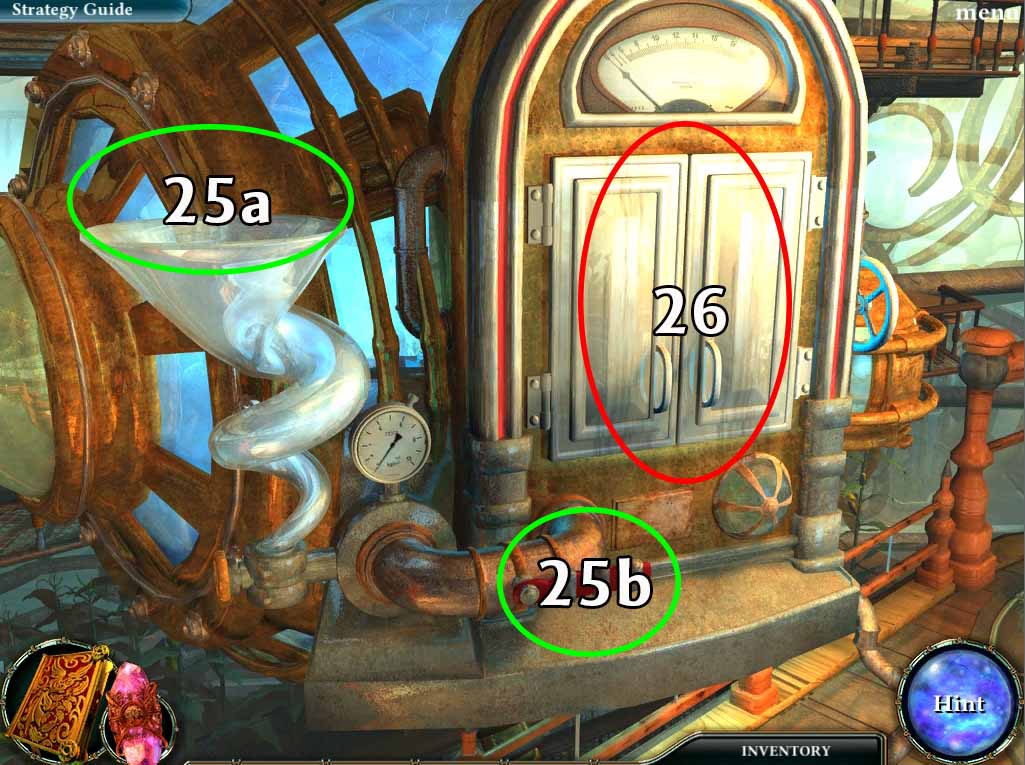
- 25. Pour the JAR OF SAP on the funnel and then turn the valve (both circled in green above)
- 26. The mechanism will automatically open and reveal a series of tubes.
- Use the 4 HEXAGON TUBES in your inventory to complete the mechanism and start the TUBE PUZZLE.
TUBE PUZZLE
- The object of this puzzle is to make sure that the sap flows to all 4 different vents on the machine.
- You can rotate each tube individually to create a path.
- A solution to the puzzle is shown below:

- Once you solve the puzzle, a short cutscene will start showing the Greenhouse Tree coming back to life.
- Quest: Restore the Greenhouse Tree: Complete
New Quest: Retrieve the sap from the tree
- Go back to the GREENHOUSE TREE AREA (The place where you saw the decanter, and retrieve the ENCHANTED SAP.
- Quest: Retrieve the sap from the tree: Complete
New Quest: Return to the Key Master
- Head back to the SCROLL TEMPLE and talk to the Key Master (you can use the transporter at the COURTYARD to get there faster). He will give you a new magical key.
- Quest: Return to the Key Master: Complete
New Quest Unlock the first scroll altar barrier
- Head back to the SPIRIT CODEX and use the key on the lock that is glowing.
- Quest: Unlock the first scroll altar barrier
New Quest: Place the sap on the altar
- This is quite straightforward. Take the ENCHANTED SAP from your inventory and place it on the altar.
- Quest: Place the sap on the altar: Complete
- A short cutscene will begin once you place the sap and your amulet begins to change. The Colossus itself begins to wake and the SPIRIT CODEX gives you a new CRYSTAL GYROSCOPE to help you further explore the island.
New Quest: Unlock the next part of the island
End of Chapter 3 Empress of the Deep.
Chapter One: Fall of the Sky Palace
Chapter Two: The Mysteries of the Scroll Temple
Chapter Three: The First Relic
Chapter Four: The Second Relic
Chapter Five: The Third Relic
Chapter Six: The Last Relic
Chapter Seven: Silencing the Colossus
Chapter Eight: That Which Was Lost
Bonus Chapter
Ask for help in the comments below!