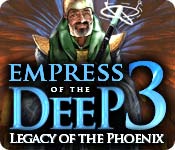
Empress of the Deep 3: Legacy of the Phoenix: Bonus Chapter
Rely on our Empress of the Deep 3 Legacy of the Phoenix Walkthrough, with its detailed, chapter-by-chapter instructions, beautifully marked custom screenshots, and easy-to-understand puzzle solutions to help you find the ingredients to revive the Phoenix and stop the evil colossus from awakening. Help Empress Anna save her lost people from the fate her twin sister has tried to set in motion in this stunning hidden object adventure game.
Chapter One: Fall of the Sky Palace
Chapter Two: The Mysteries of the Scroll Temple
Chapter Three: The First Relic
Chapter Four: The Second Relic
Chapter Five: The Third Relic
Chapter Six: The Last Relic
Chapter Seven: Silencing the Colossus
Chapter Eight: That Which Was Lost
Bonus Chapter
Ask for help in the comments below!
The COLOSSUS has been stopped, and PANDORA, once your greatest enemy has abandoned her ways and is once again your dearest twin sister. Your people have been restored and everything, at least for now, seems peaceful.
The island may be tranquil, but it still holds several mysteries that are left unsolved. The ZEM TOWER remains locked, and it is up to you to reveal its secrets.
**NOTE: The following quests are available for those who own the Empress of the Deep 3: Legacy of the Phoenix Collector’s Edition.
- To begin the BONUS CONTENT, Select the BONUST CONTENT BUTTON on the Game title screen.
-
JACOB gives a brief explanation and then hands you a MAGIC CONCH SHELL.
Quest: At the end of a pier
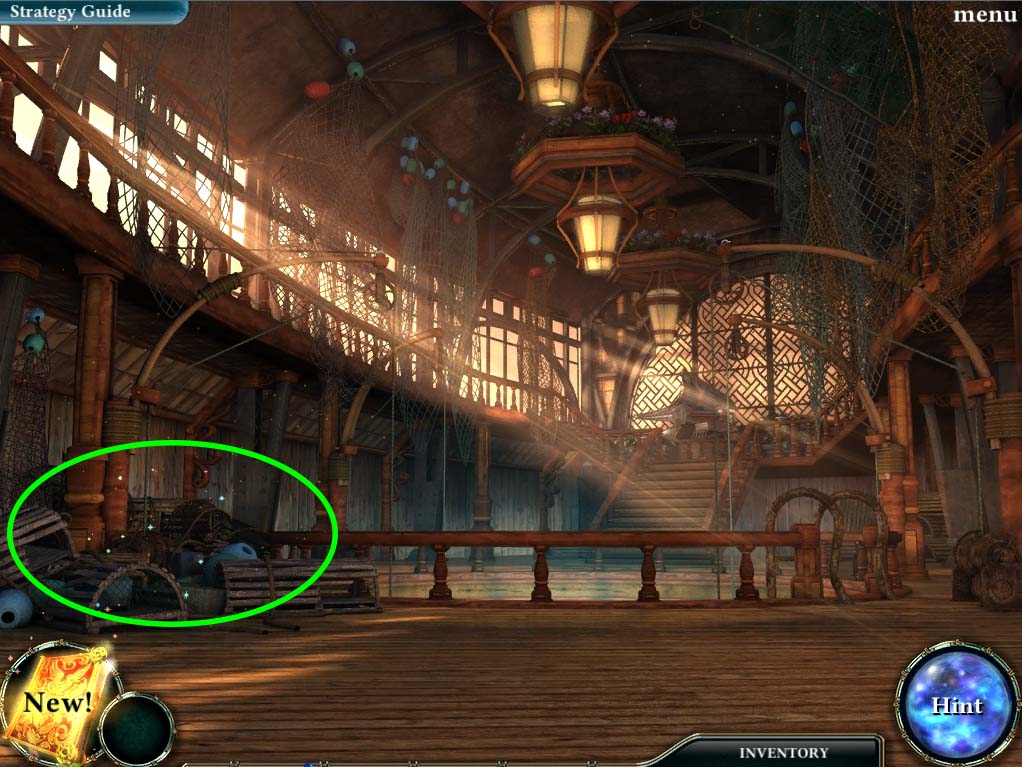
- Take the nearest teleporter and head to the DOCKS

- 1. Head to the end of the PIER (move forward to the area circled in blue above)

- 2. JACOB will ask you to call the WHALE with your MAGIC CONCH SHELL.
- Wait until the WHALE breaches the water and then use the CONCH.
- It will call the WHALE to you and it will drop a big SPHERE.
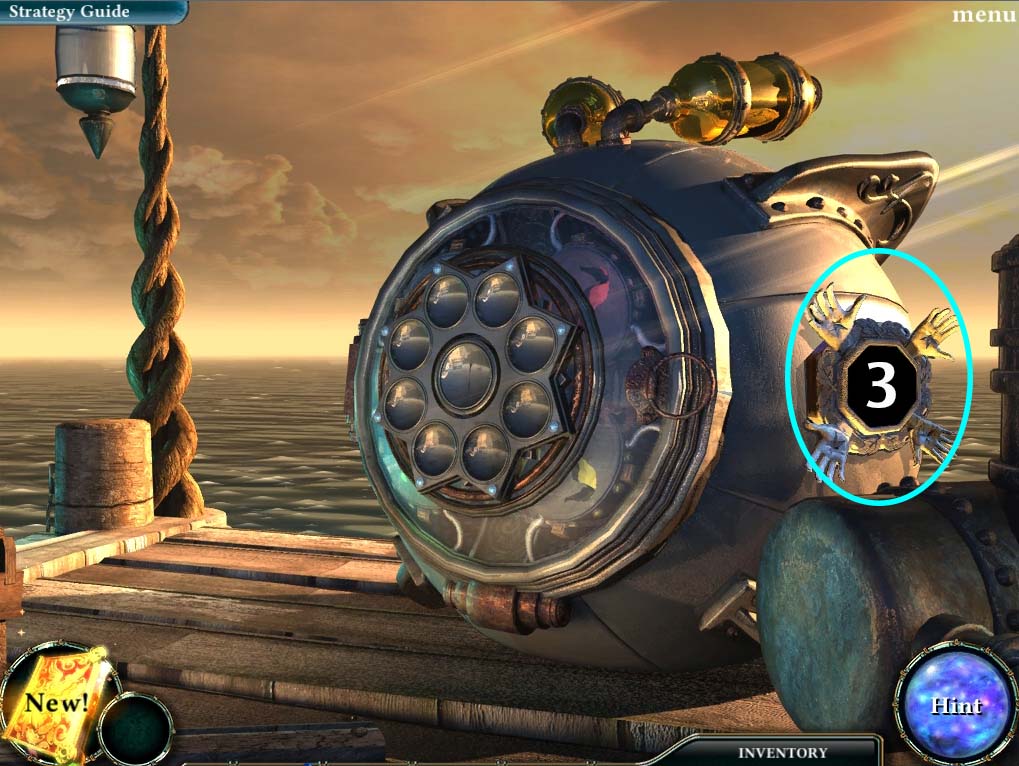
- 3. Investigate the panel at the side of the SPHERE (circled in blue in the image above).
- It will show you four locations that have RED CRYSTALS that you can use to open the SPHERE.
- Each RED CRYSTAL cab be found by solving a HIDDEN RELIC PUZZLE
-
You can travel to these locations in any order:
THE SCROLL TEMPLE PATIO
-
The solution to the puzzle is shown below:
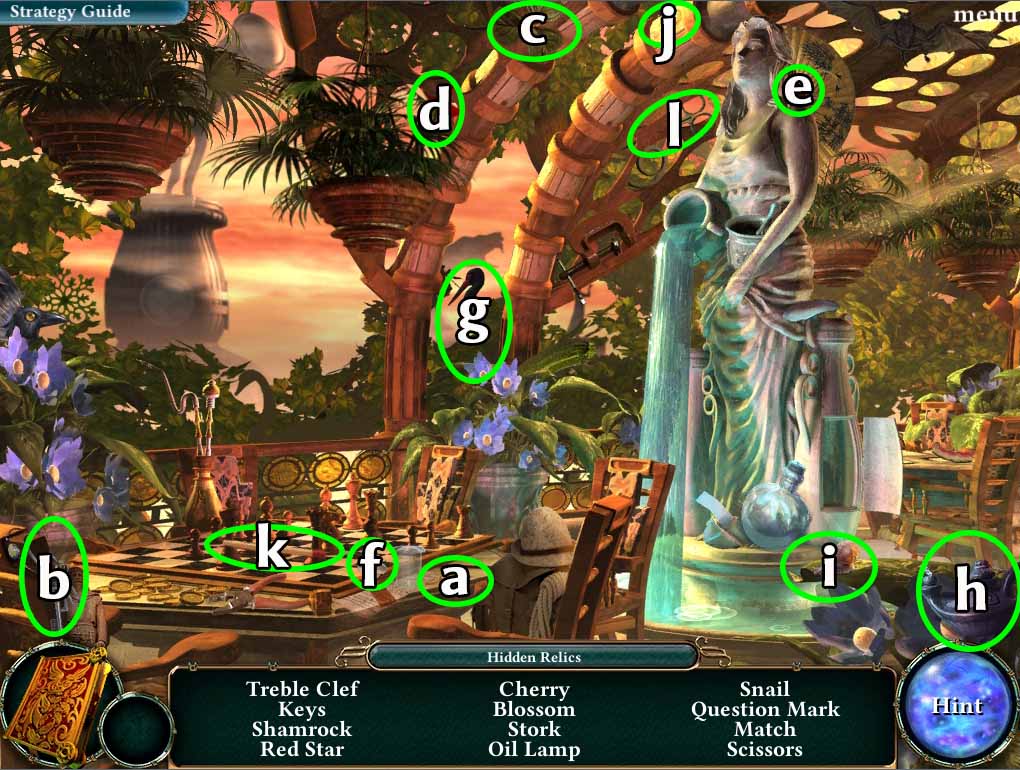
- a. Treble Clef
- b. Keys
- c. Shamrock
- d. Red Star
- e. Cherry
- f. Blossom
- g. Stork
- h. Oil Lamp
- i. Snail
- j. Question Mark
- k. Match
- l. Scissors
THE FISHERY MARKET
- The solution to the puzzle is shown below:
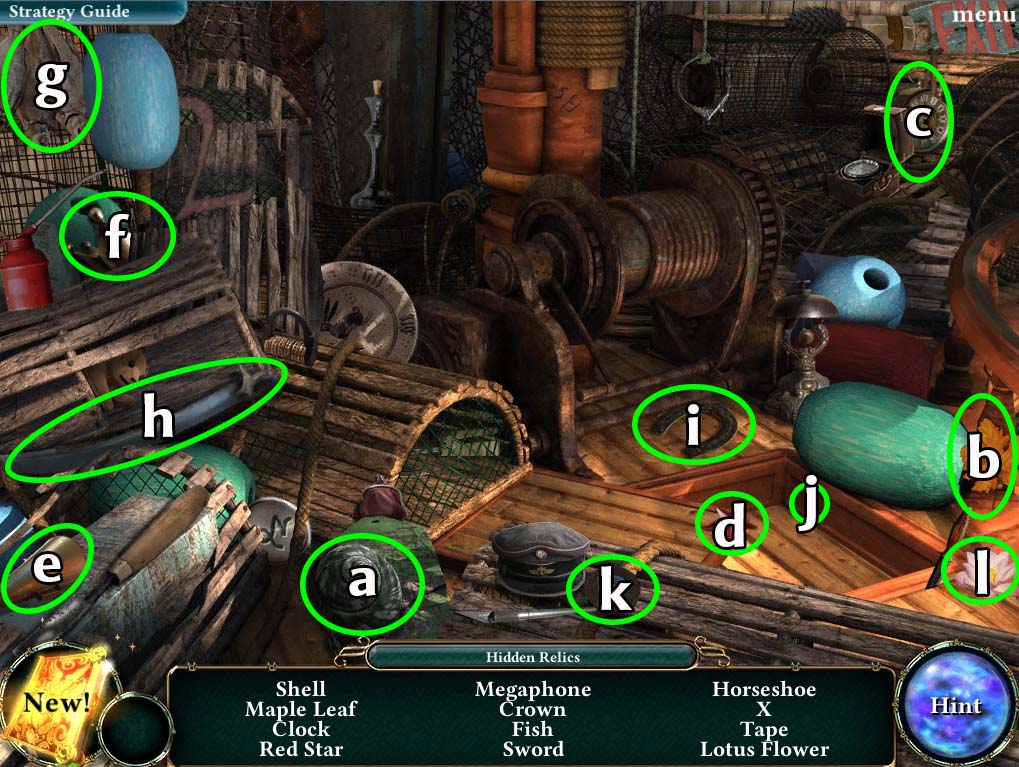
- a. Shell
- b. Maple Leaf
- c. Clock
- d. Red Star
- e. Megaphone
- f. Crown
- g. Fish
- h. Sword
- i. Horseshoe
- j. X
- k. Tape
- l. Lotus Flower
THE SNAKE SHRINE RIGHT GATE

- The solution to the puzzle is shown below:
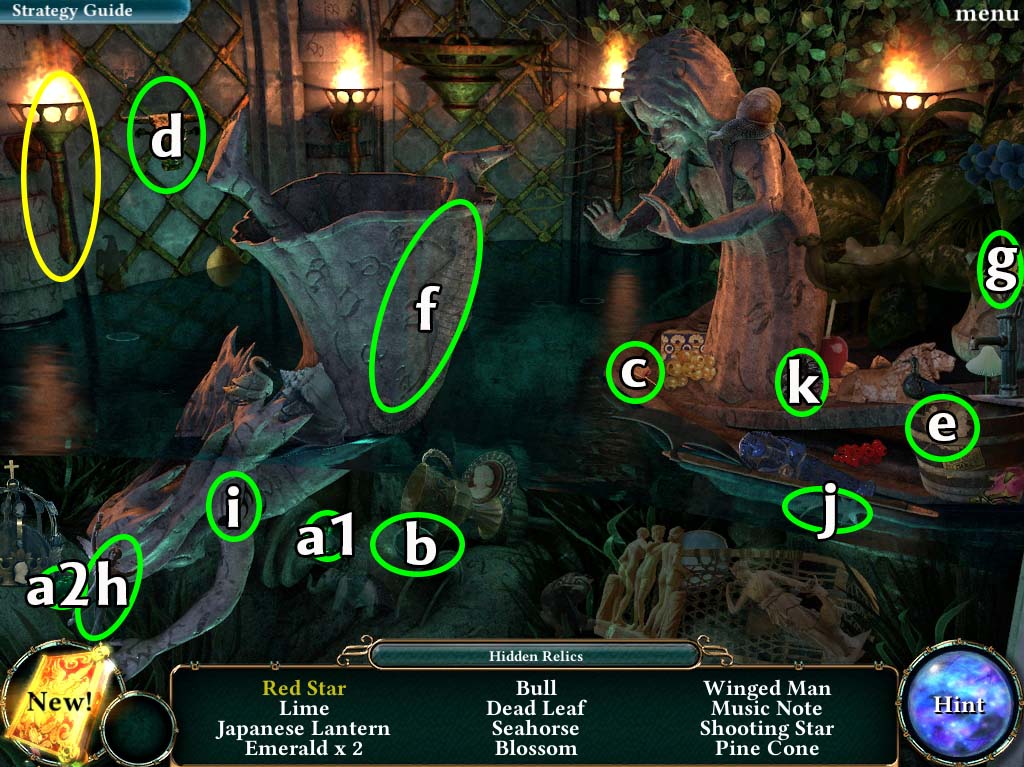
- a. Emerald x 2
- b. Lime
- c. Japanese Lantern
- d. Bull
- e. Dead Leaf
- f. Seahorse
- g. Blossom
- h. Winged Man
- i. Music Note
- j. Shooting Star
- k. Pine Cone
- To find the RED STAR, turn the torch (circled in yellow above) to reveal it.
THE JUNK YARD SHELF
- The solution to the puzzle is shown below:
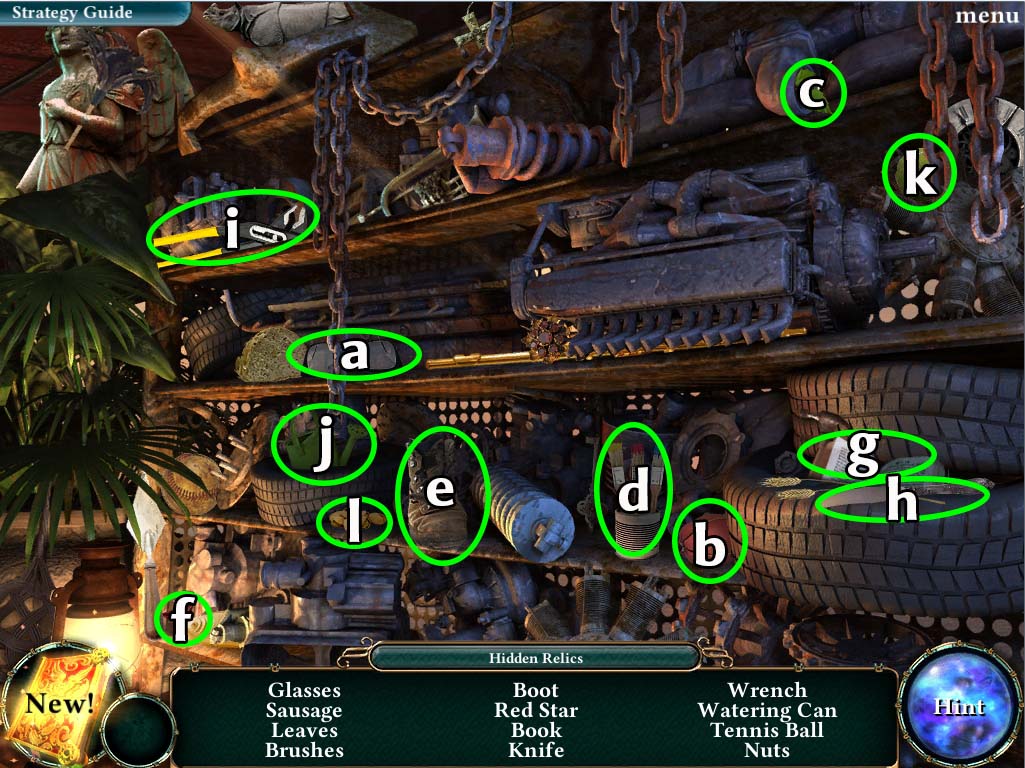
- a. Glasses
- b. Sausage
- c. Leaves
- d. Brushes
- e. Boot
- f. Red Star
- g. Book
- h. Knife
- i. Wrench
- j. Watering Can
- k. Tennis Ball
- l. Nuts
- With all 4 RED STARS in your possession, head back to the DOCKS and place the RED STARS on the SPHERE.
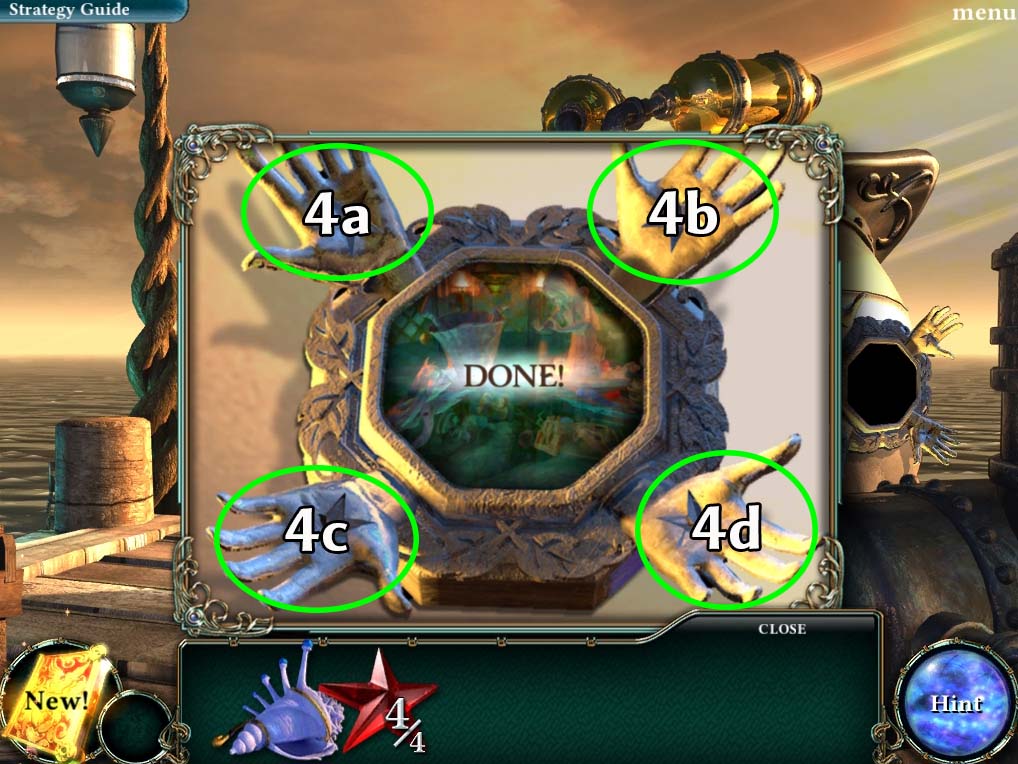
- 4. Each RED STAR should be placed in the hands of the SPHERE (circled in green above). This will cause it to open.
- Quest: At the end of the pier: Complete
- New Quest: Find the Crystal Seahorses
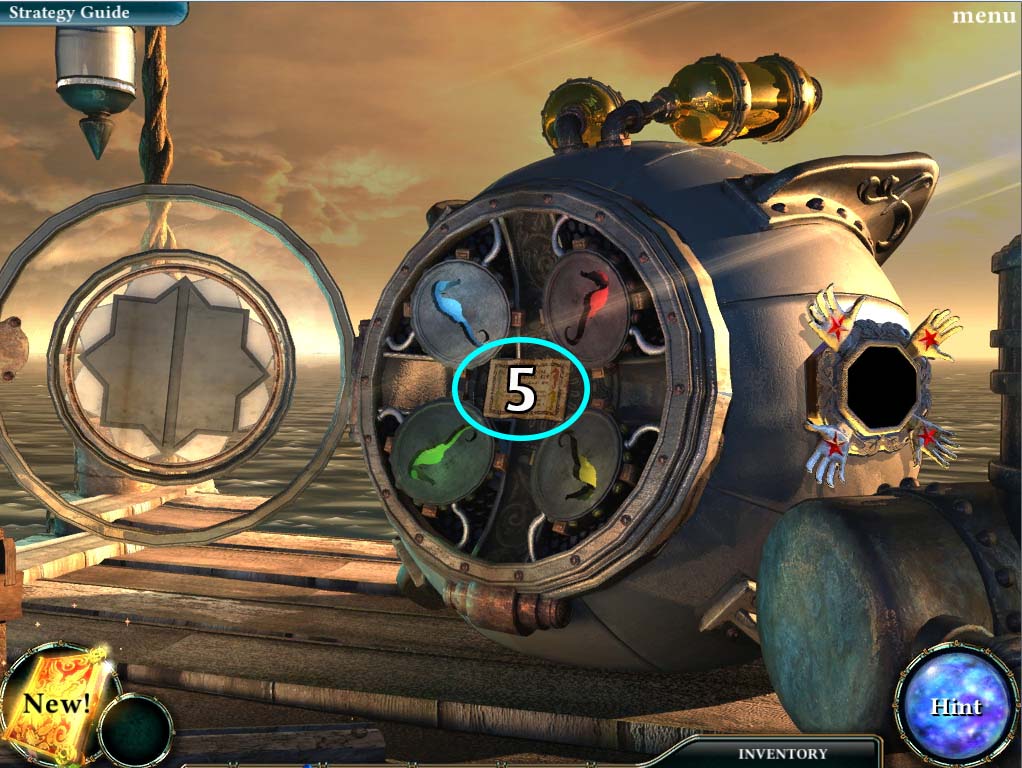
- 5. Take the NOTE (circled in blue above) that you find in the SPHERE, they are clues to the whereabouts of 4 SEAHORSES that you need to finally unlock the SPHERE.
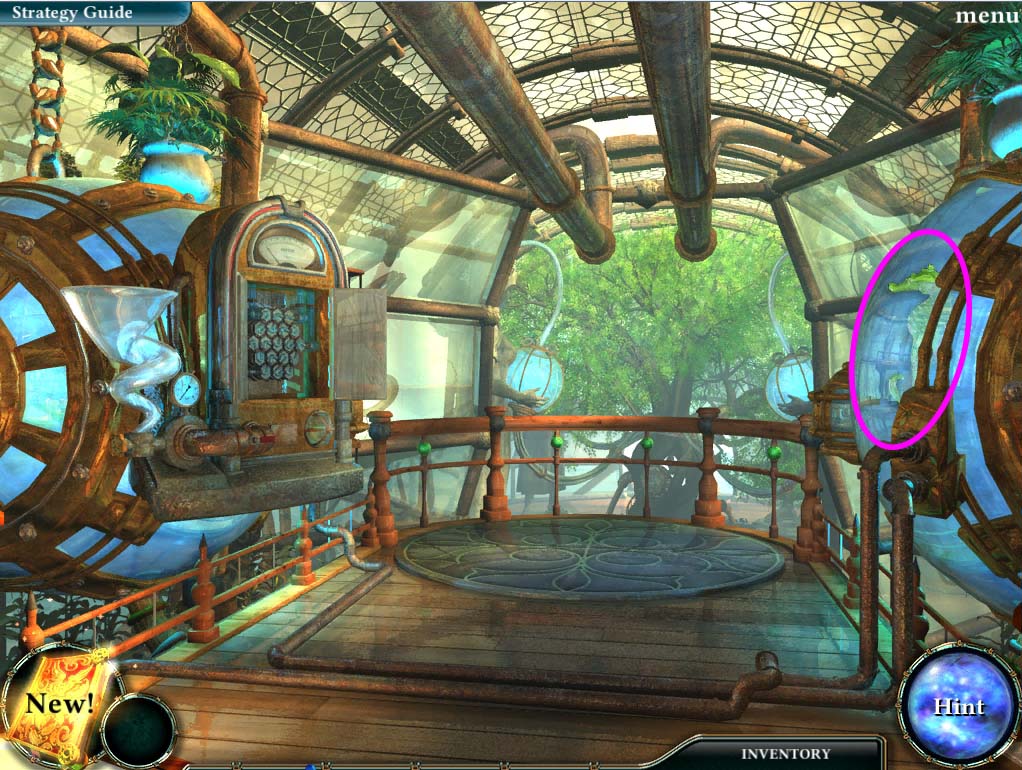
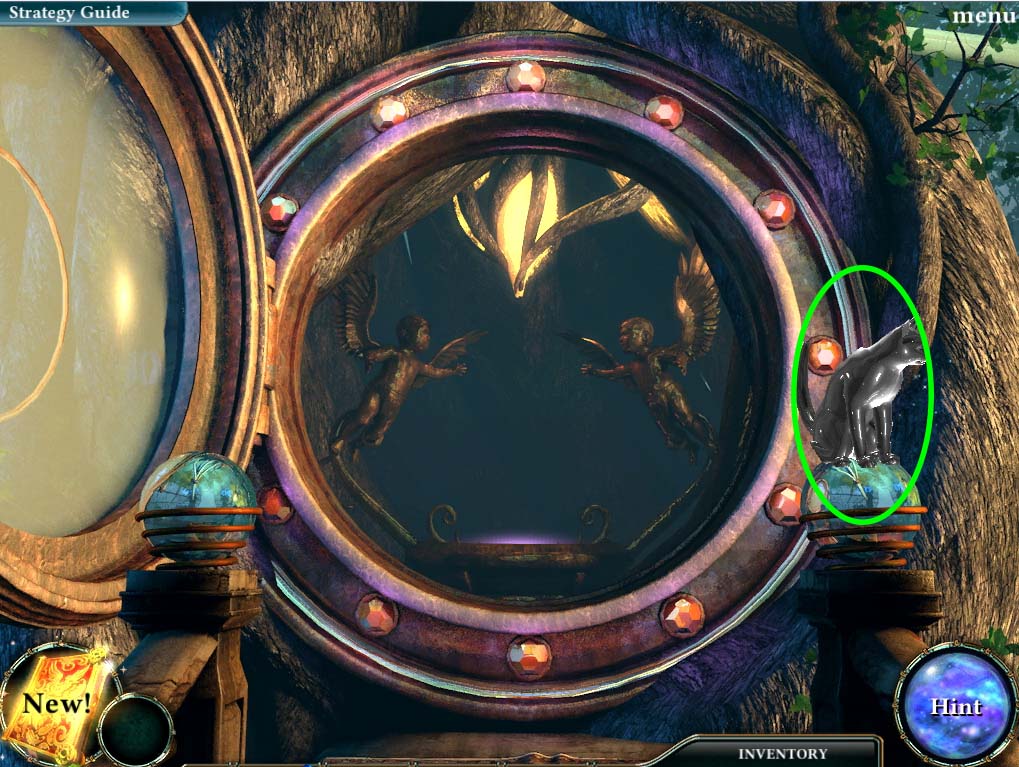
- The locations of the SEAHORSES are as follows: (circled in violet in the images below, and in any order)
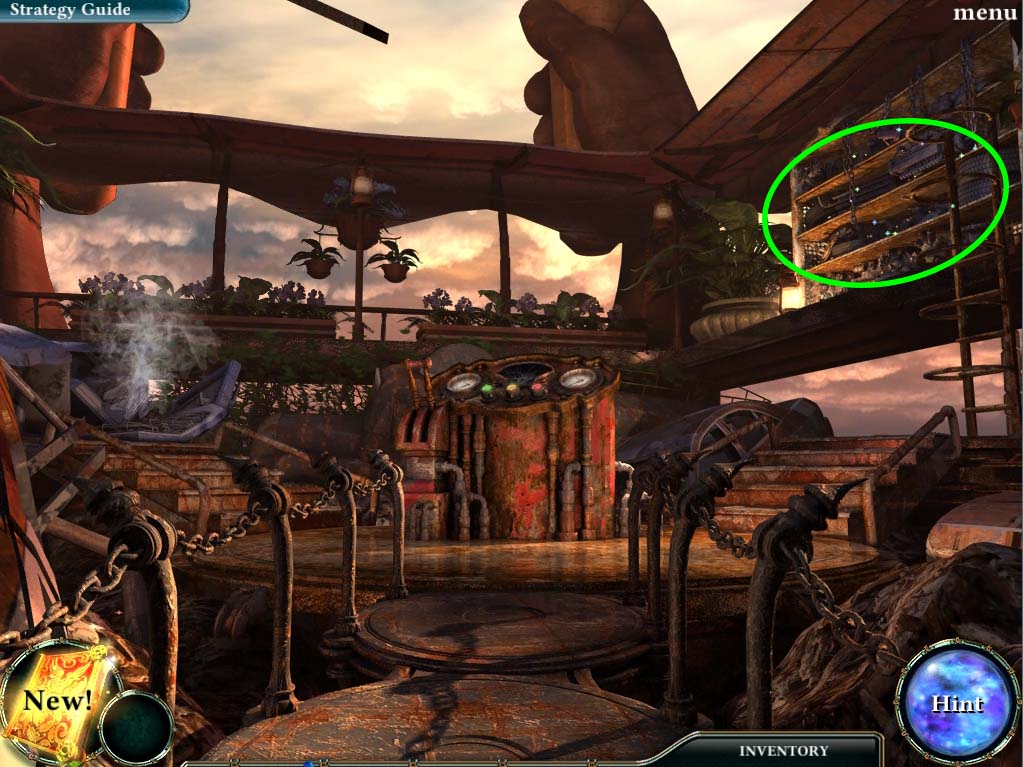
- At the PLATFORM in the GREENHOUSE:
The SECOND FLOOR of the LIBRARY

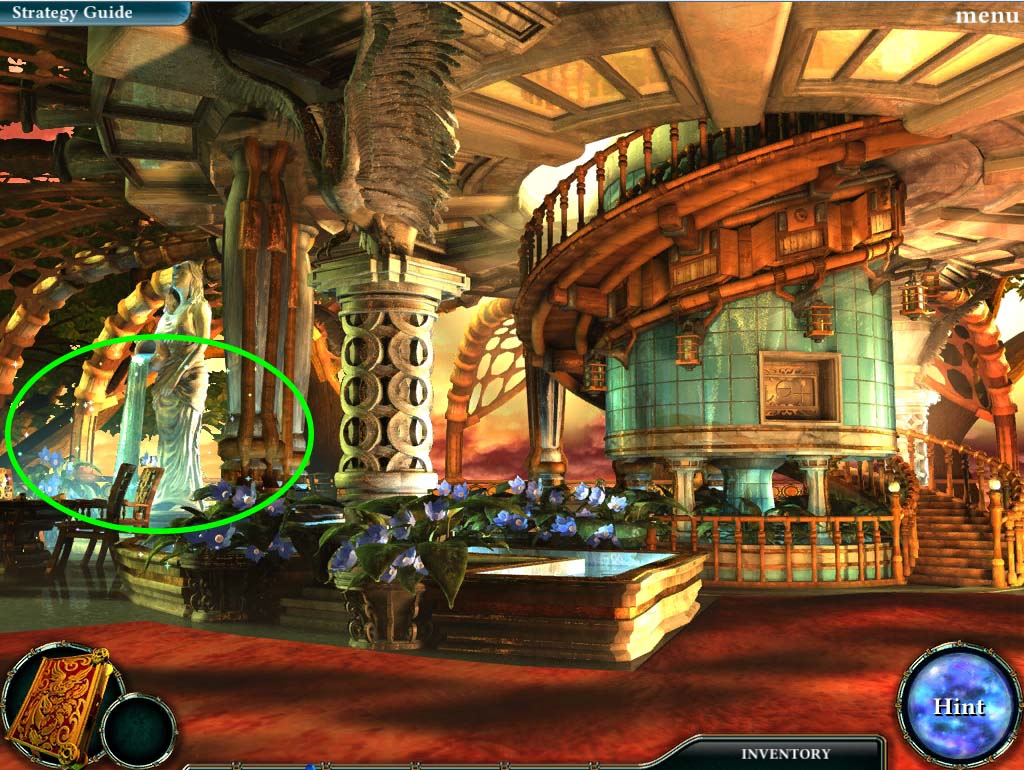
- At the ROOF of the NURSERY under the STATUE at the LIBRARY
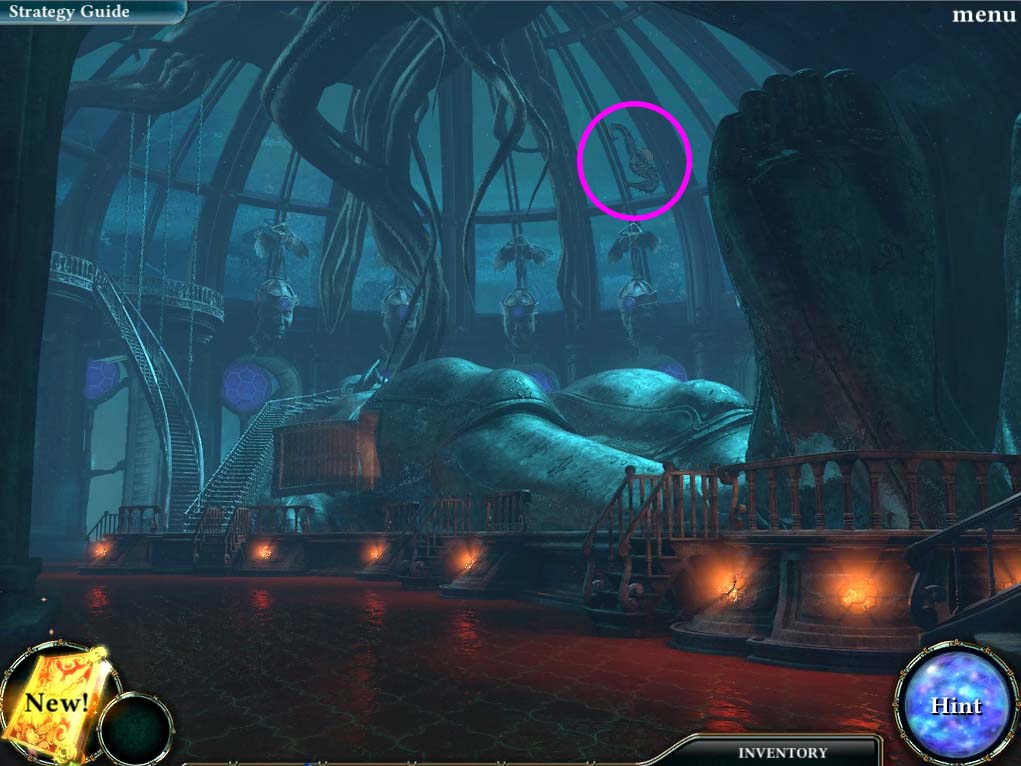
- On the SPIDER STATUE near the ARCHWAY on the COLOSSUS PLATFORM

- Quest: Find the Crystal Seahorses: Complete
- With all the CRYSTAL SEAHORSES in your possession, head back to the SPHERE.
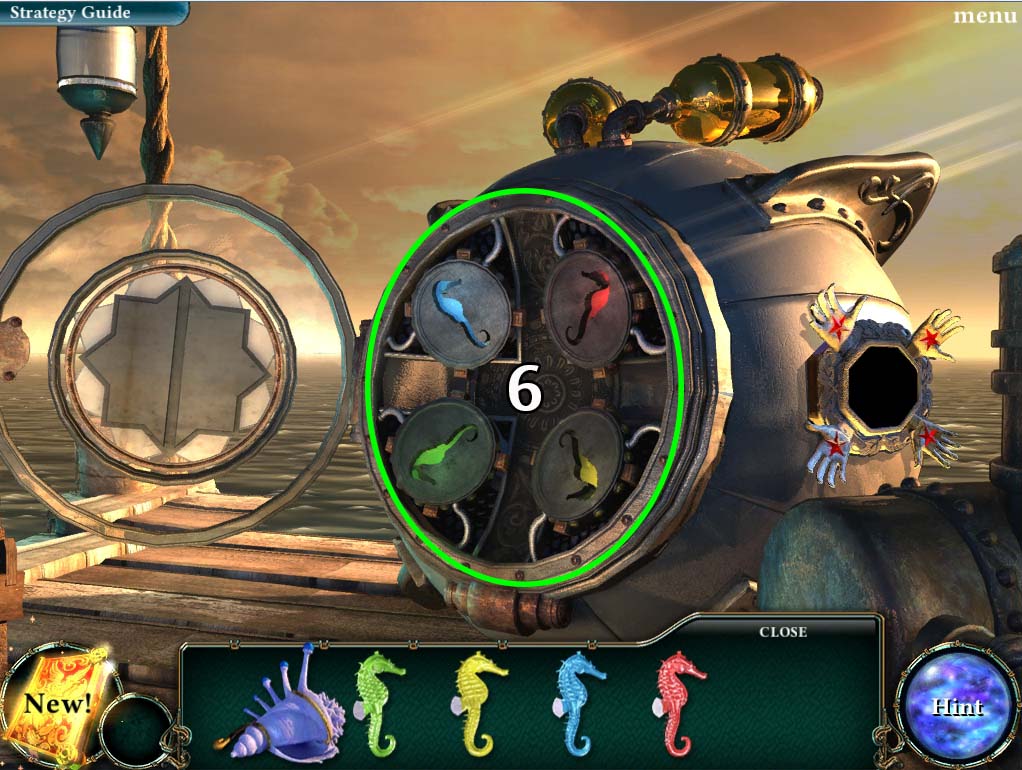
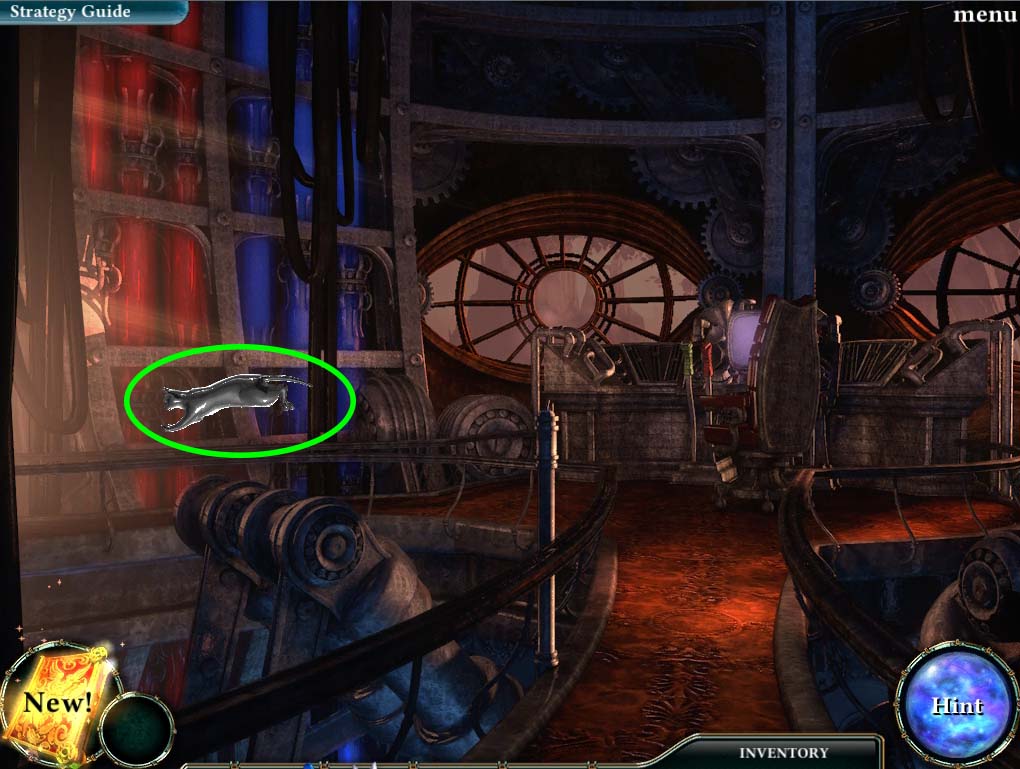
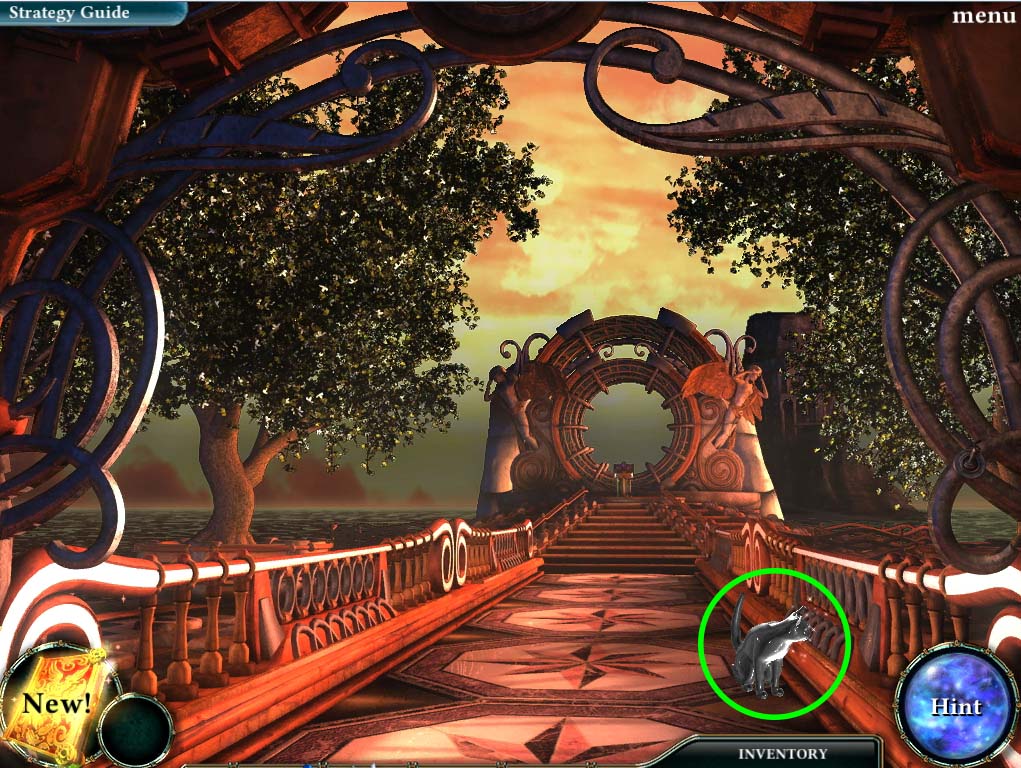
- 6. Place the CRYSTAL SEAHORSES in their appropriate slots in the sphere (circled in green above) and this will cause the SPHERE to open. The CATS that come out all run away though, and it’s up to you to catch them.
- New Quest: Catch the CAT STATUES
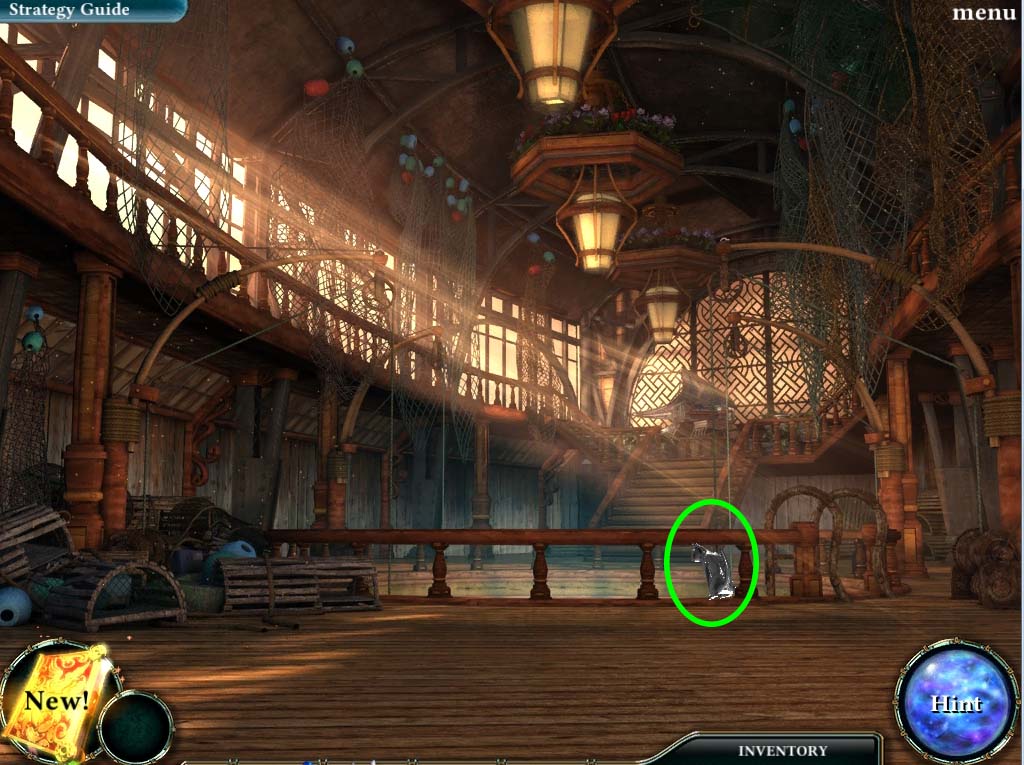
- The CAT STATUES can all be found in four specific locations (in any order):
- **Note: The CAT STATUES will try to run away when they see you. Click on them before they do so.
The GREENHOUSE:

Or
The FISHERY MARKET
Or

The LIBRARY

Or
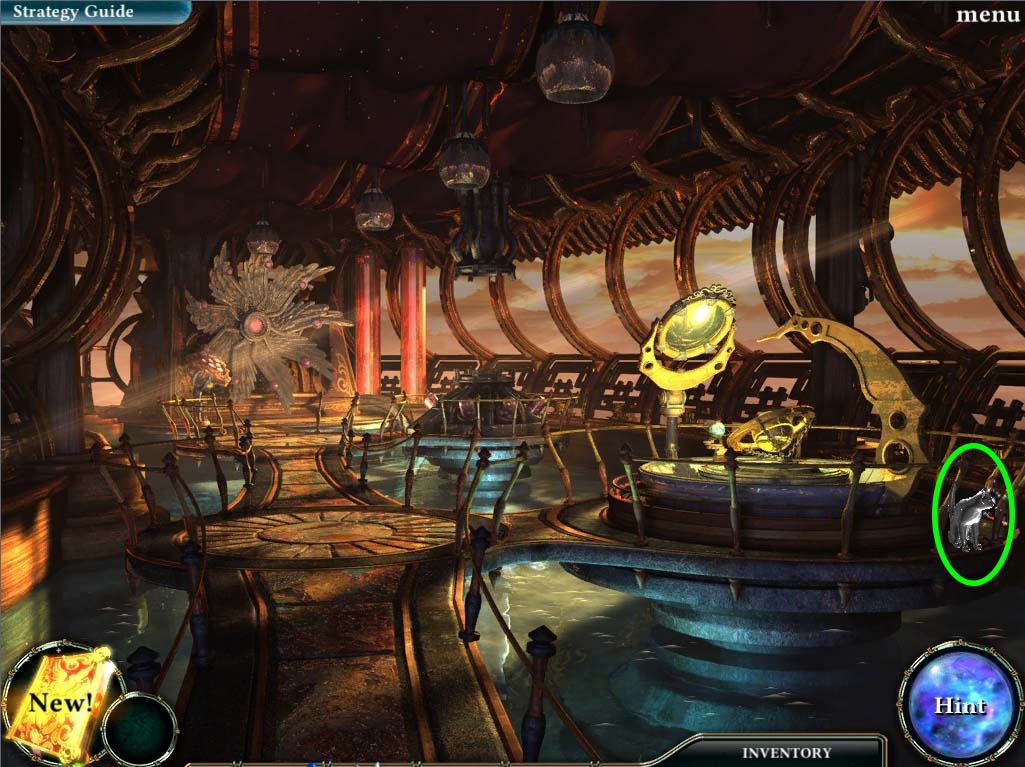
The COLOSSUS
Or
- Quest: Catch the cat statues: Complete
- Once you have all the CAT STATUES head to the TOWER OF ZEM (at the intersection in front of the SCROLL TEMPLE)
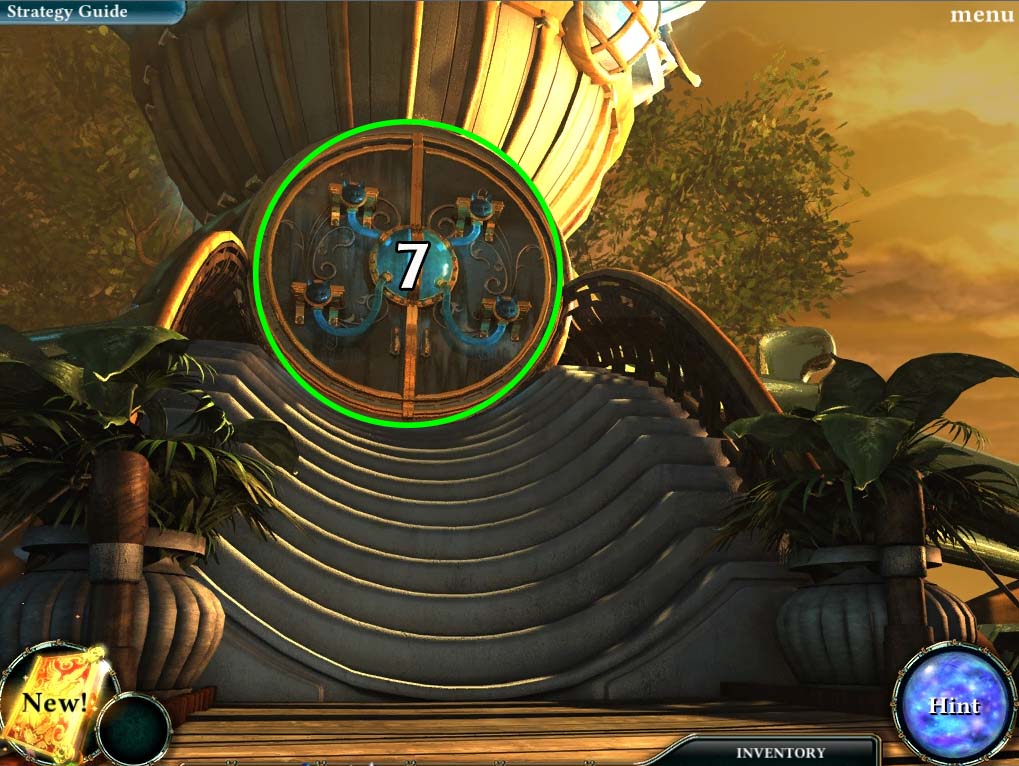
- 7. Investigate the TOWER GATE and place the CAT STATUES on the PEDESTALS.
- Once the gates pen, head inside.
New Quest: Find a way to the top of the Tower of Zem
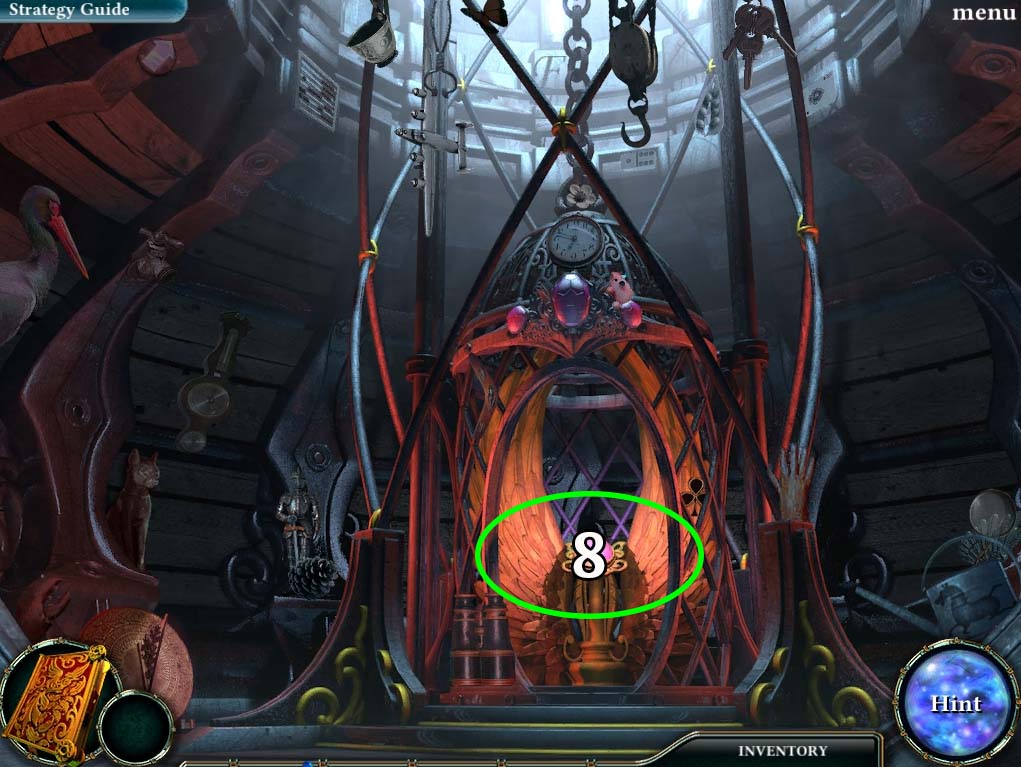
- 8. Investigate the ELEVATOR and click on the ELEVATOR BUTTON.
- This will start a HIDDEN RELICS PUZZLE.
TOWER ELEVATOR HIDDEN RELIC PUZZLE
- The Solution to this puzzle is detailed below:
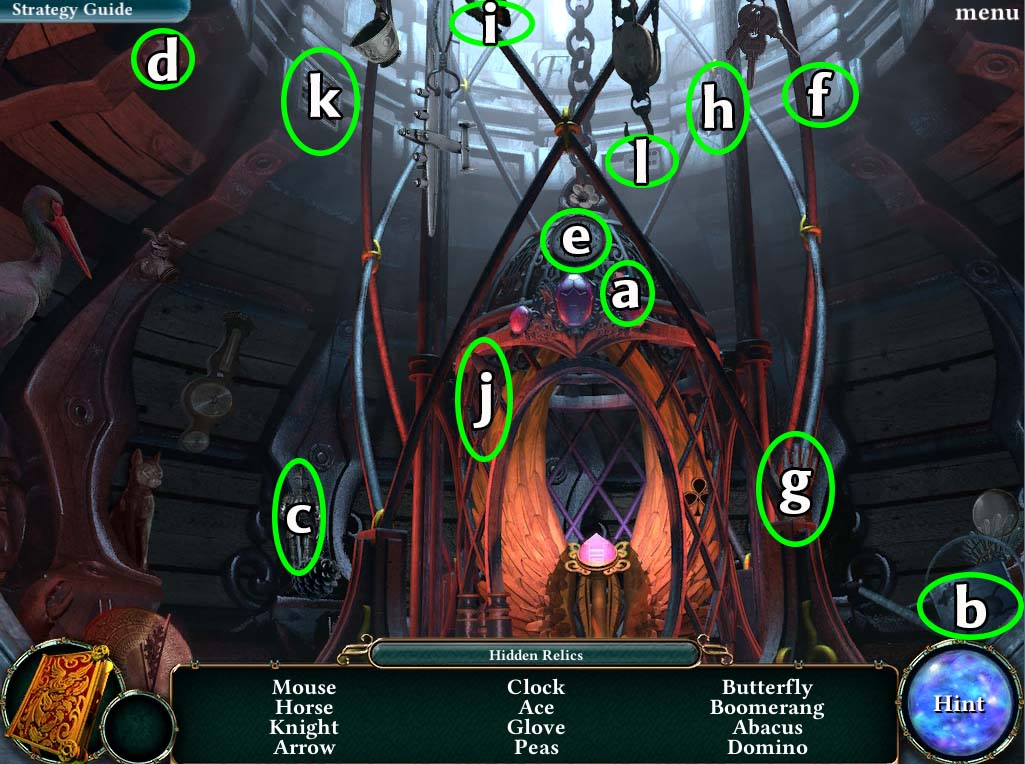
- a. Mouse
- b. Horse
- c. Knight
- d. Arrow
- e. Clock
- f. Ace
- g. Glove
- h. Peas
- i. Butterfly
- j. Boomerang
- k. Abacus
- l. Domino
- Solving this puzzle rewards you with a PURPLE BUTTON.
- Use it on the ELEVATOR to activate it and use it to head up the tower.
- Go past the TROPHY ROOM and go to the TOWER OF ZEM GATE.
- This will start the final HIDDEN RELIC PUZZLE to open the tower.
ZEM TOWER GATE HIDDEN RELIC PUZZLE
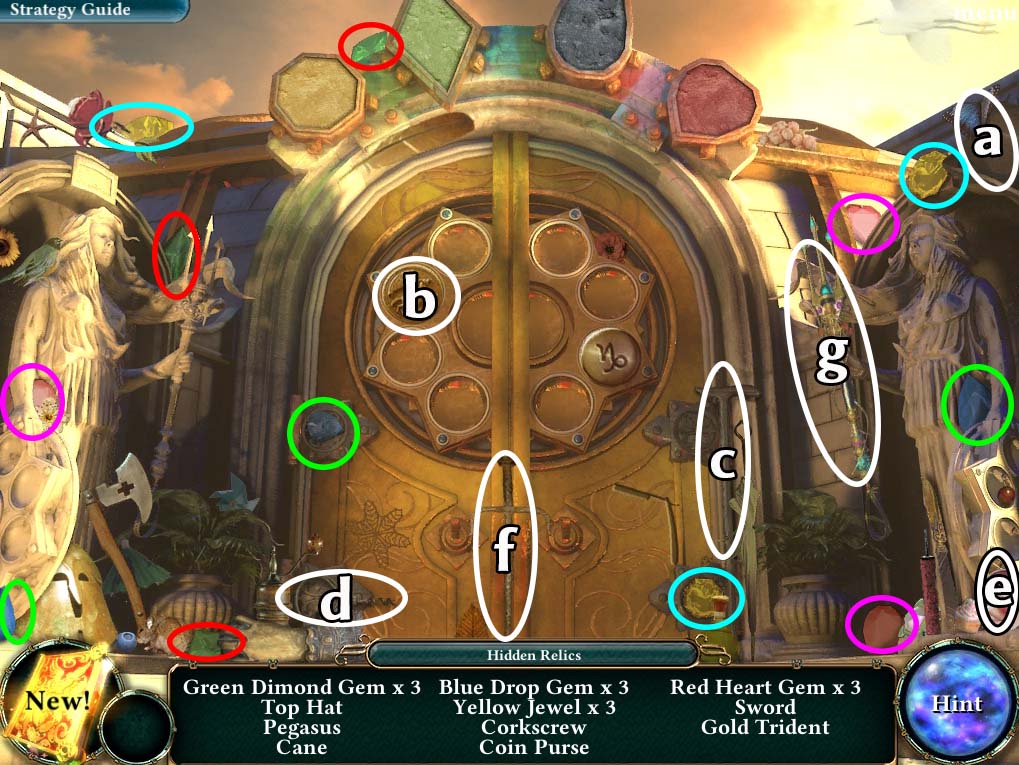
- Green Diamond Gem: circled in red
- Blue Drop Gem: circled in green
- Red Heart Gem: circled in violet
- Yellow Jewel: circled in blue
- a. Top Hat
- b. Pegasus
- c. Cane
- d. Corkscrew
- e. Coin Purse
- f. Sword
- g. Gold Trident
- Solving the puzzle rewards you with THE JEWELS OF ZEM and THE ROYAL SCEPTER
- Place the JEWELS on top of the GATE and the ROYAL SCEPTER at the HANDLE of the GATE as shown in the image below:
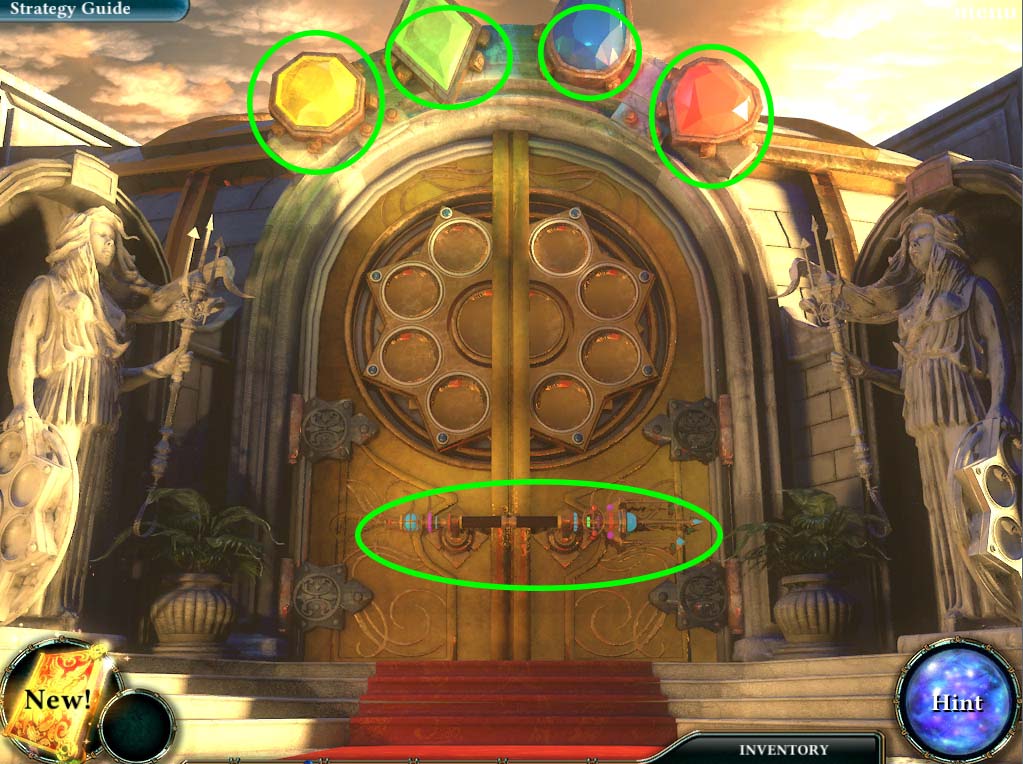
- The gate will open and you can step inside.
- JACOB shall show you the ZEM TABLE in which you can play a game of ZEM.
- Detailed instructions for playing are given to you once you start a game.
End of Chapter IX
Chapter One: Fall of the Sky Palace
Chapter Two: The Mysteries of the Scroll Temple
Chapter Three: The First Relic
Chapter Four: The Second Relic
Chapter Five: The Third Relic
Chapter Six: The Last Relic
Chapter Seven: Silencing the Colossus
Chapter Eight: That Which Was Lost
Bonus Chapter
Ask for help in the comments below!