
Tales of Terror: Crimson Dawn: Chapter Five
Our Tales of Terror Crimson Dawn Walkthrough comes fully equipped and ready to help you combat what goes bump in the night in this spooky hidden object game. Filled with custom screenshots, marked clearly so you can see all the key items and locations you need to investigate, as well as detailed instructions on how you can save your brother, Jason, this Tales of Terror Walkthrough is a must have companion as you brave the terrors of the night.
General Info and Tips
Chapter One
Chapter Two
Chapter Three
Chapter Four
Chapter Five
Chapter Six
Ask for help in the comments below!
Chapter One
Chapter Two
Chapter Three
Chapter Four
Chapter Five
Chapter Six
Ask for help in the comments below!
- Enter the doors on the left and walk left to the greenhouse.
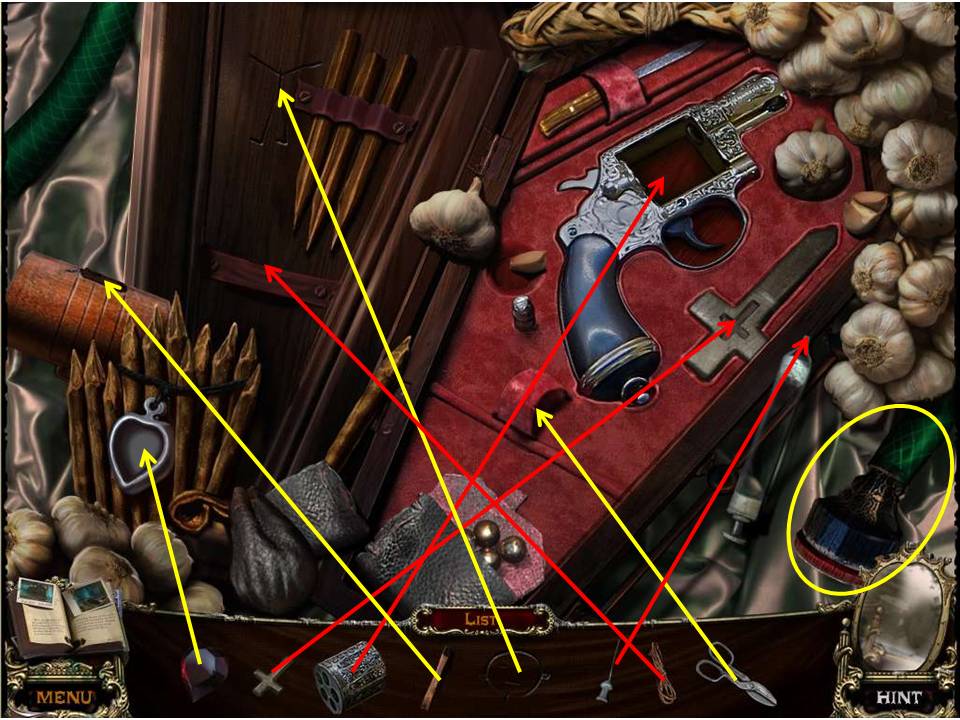
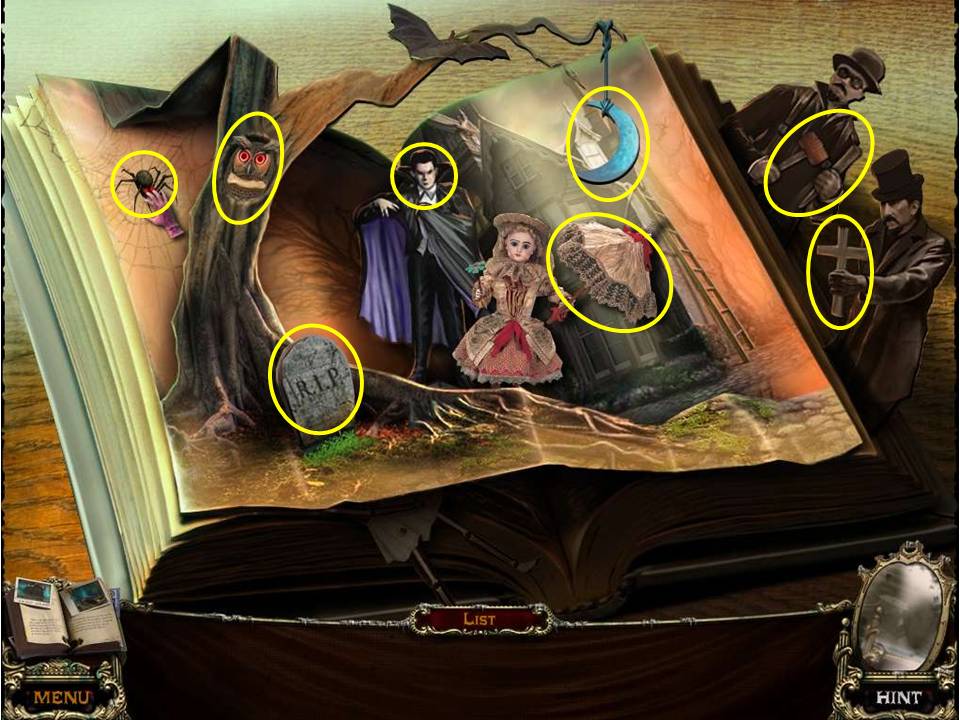
- Play the HOA by the skeleton.
- Find the items listed.
- Match the items from the list with their pairs.
- Take the HOSE.
-
Exit to the room next door with the portraits.
- Zoom into the carving of the vampire.
- Put the two GLASS EYES in place in the sockets.
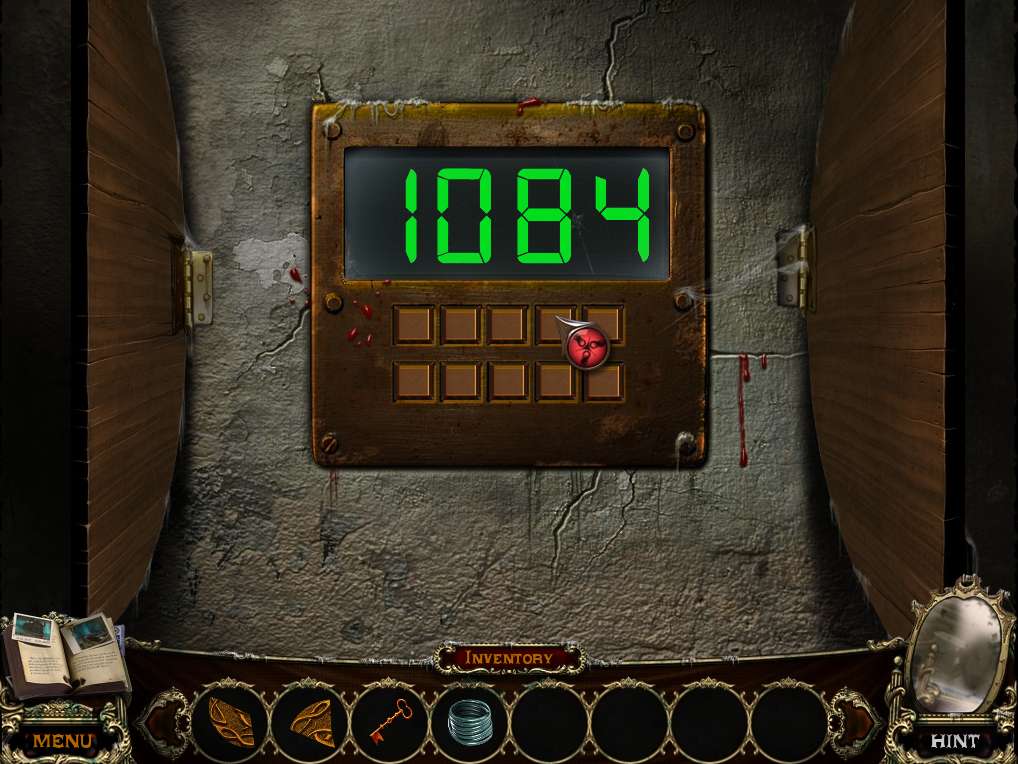
- Click the figure’s chest to open the panels.
- Enter the code (1084) found earlier by pressing the buttons.
- The buttons are mixed and could be randomized.
- Try the 2nd, 3rd, and 4th buttons on the second row for 108 and the 4th key on the first row for 4.
-
Enter the room.
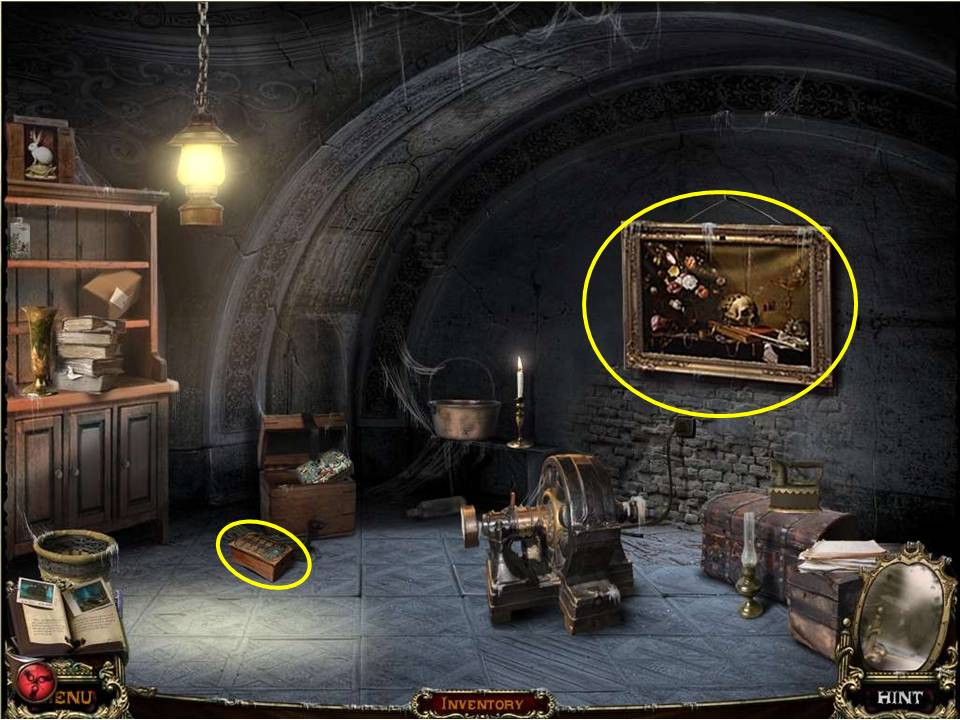
- Zoom into the painting.
- Take it down.
- Take the brass KEY.
-
Zoom in on the puzzle on the floor.
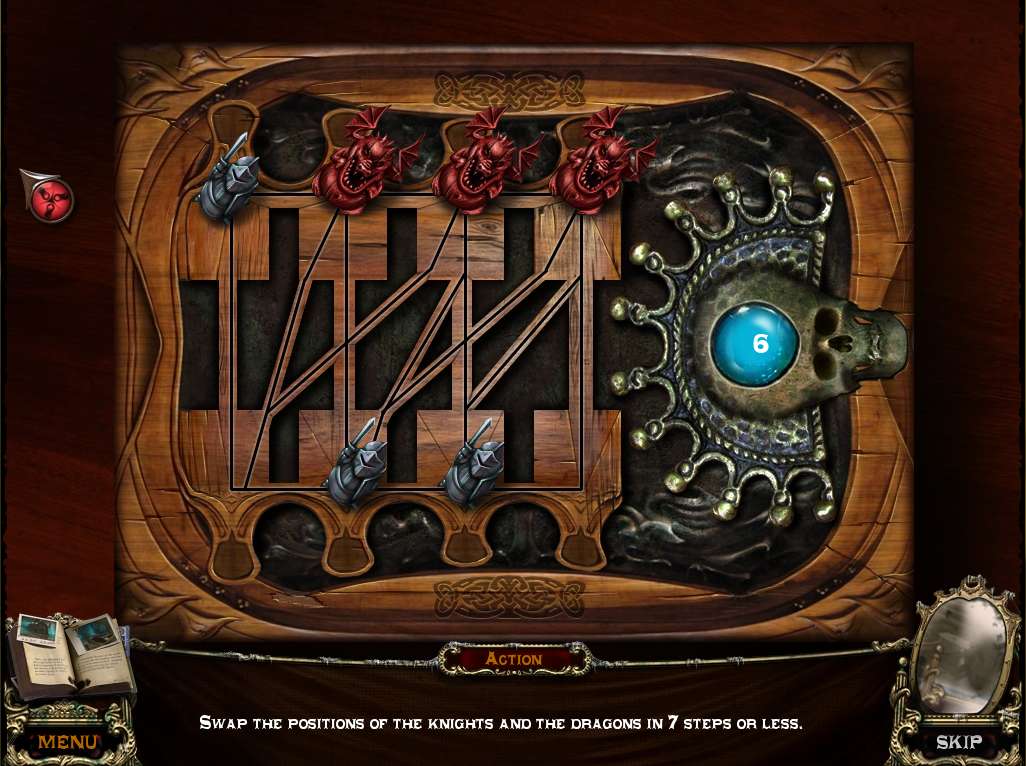
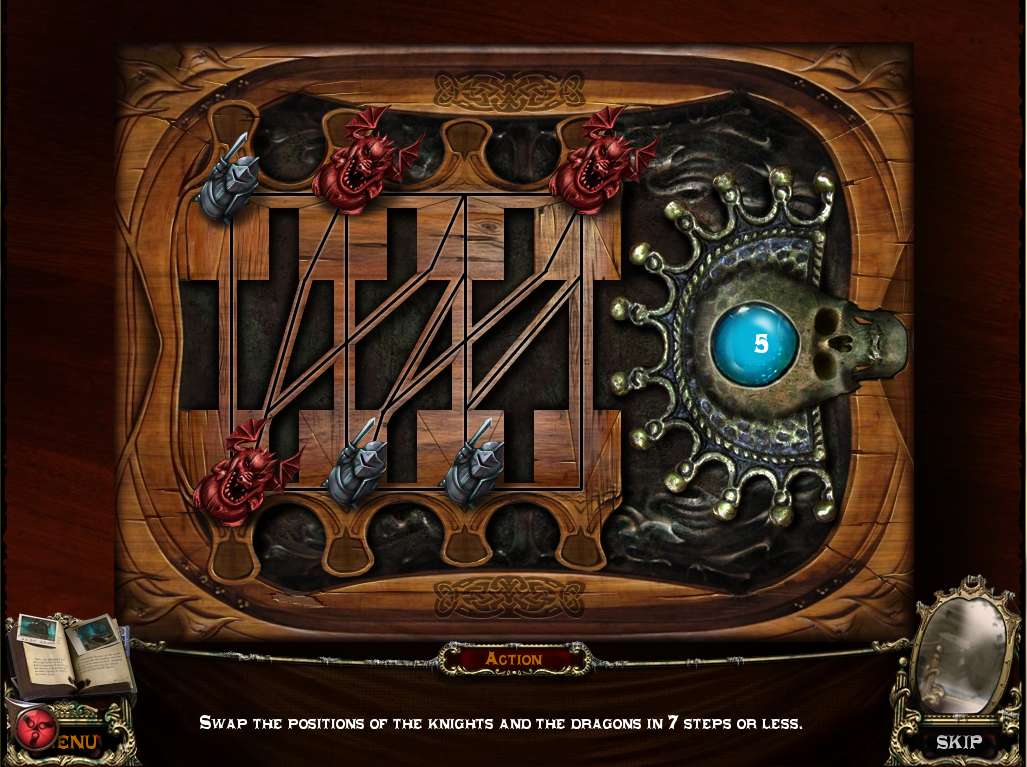
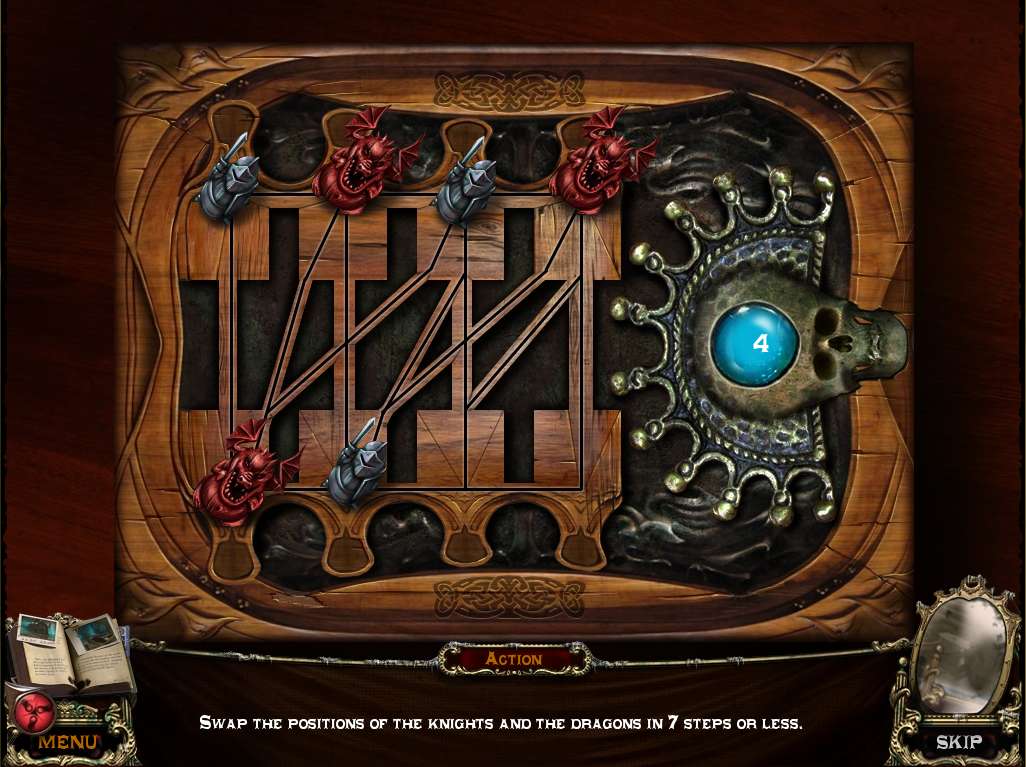
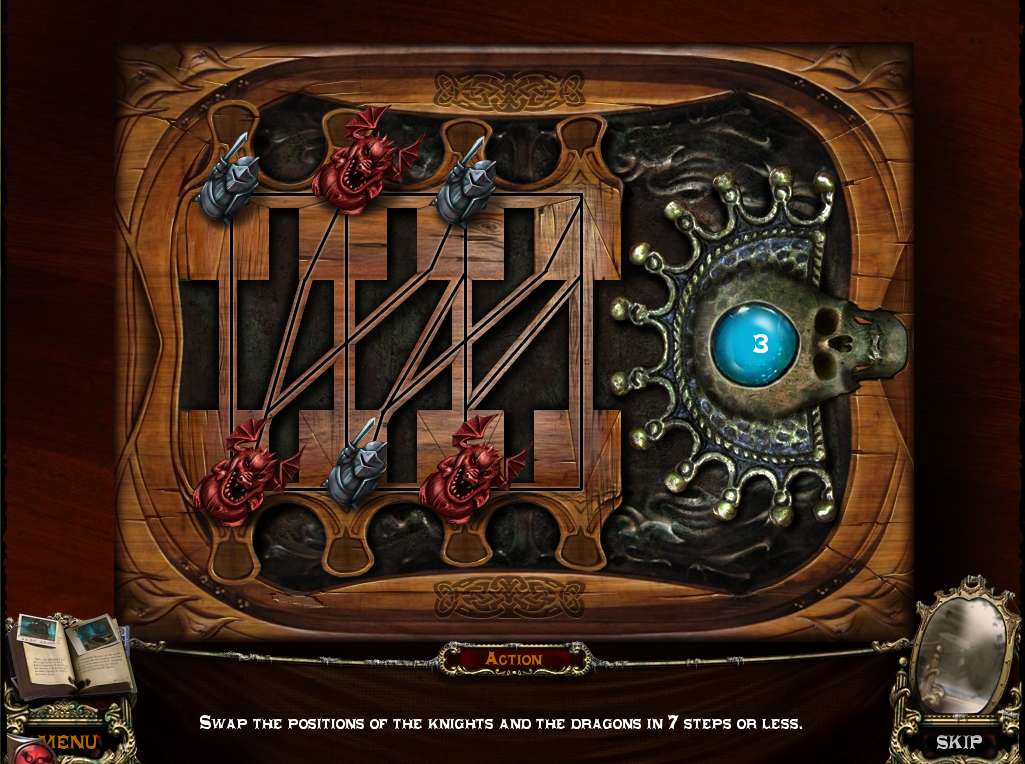
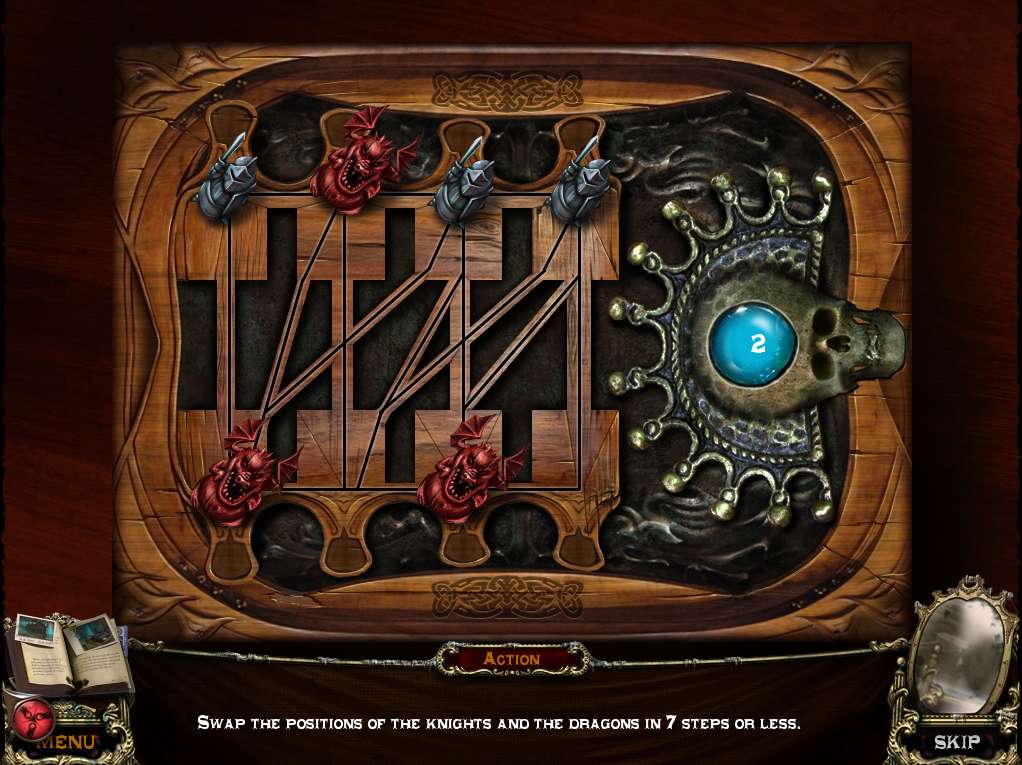

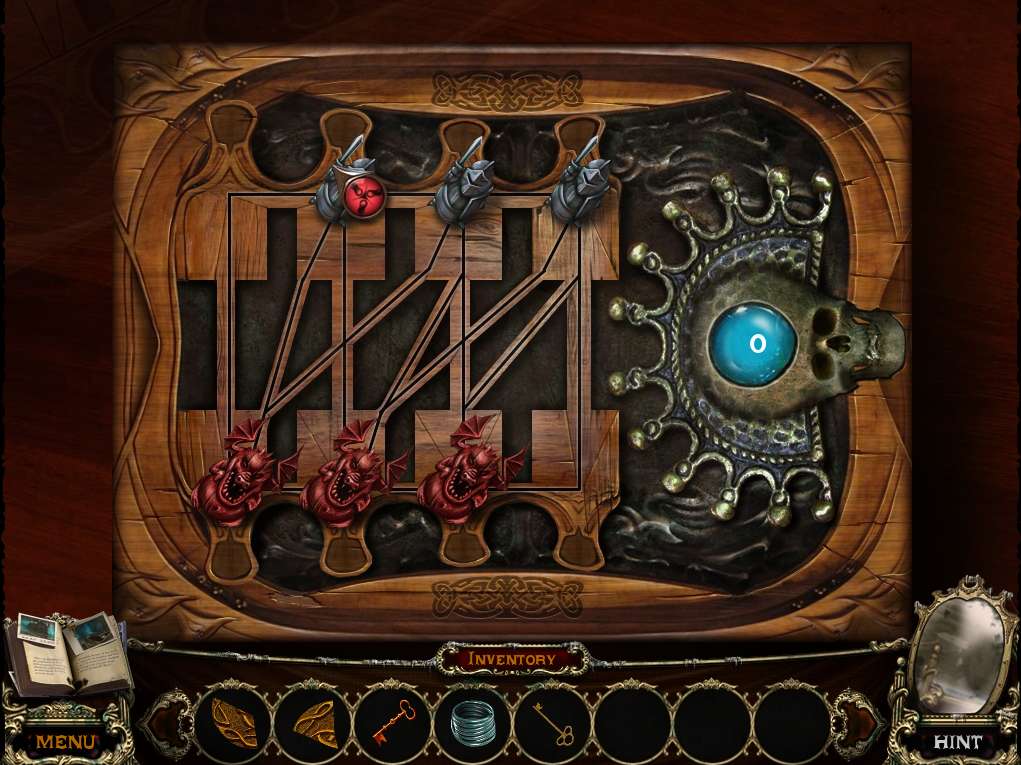
- The object of the puzzle is to swap the positions of the knights and the dragons in seven steps or fewer.
- There are a number of options, and the fun with this one is that you get to start again if you exceed 7 moves, so you can play around with it knowing that if all else fails you can still look to the screenshots to guide you through if need be.
- When complete, take SAGITTARIUS.
-
Then exit back to the mansion’s foyer.

- Go upstairs and use the KEY on the left door.
-
Zoom in on the table to initiate the next puzzle
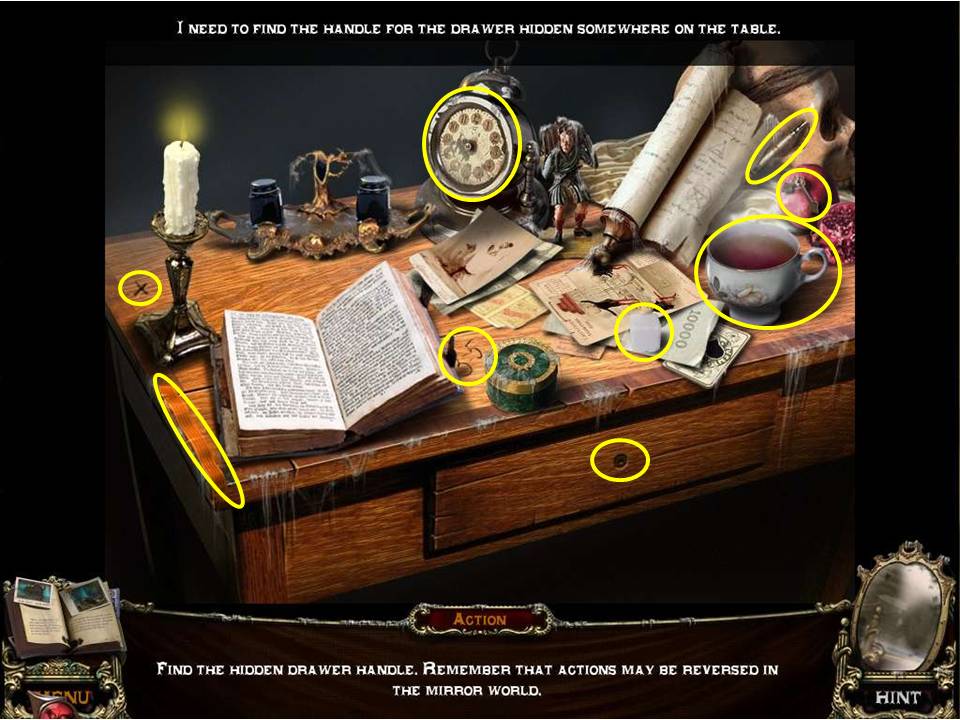
- The object of the puzzle is to find the hidden drawer handle.
- Note that actions may be reversed in this mirrored world.
-
Perform the following actions to solve the puzzle –
- Put the bookmark in the book.
- Put the pen in the inkwell.
- Put the sugarcube in the teacup.
- Put the clock hands on the clock.
- Move the plus sign to the equations.
- Place the knob on the drawer.
-
Take the VALVE and TOP.
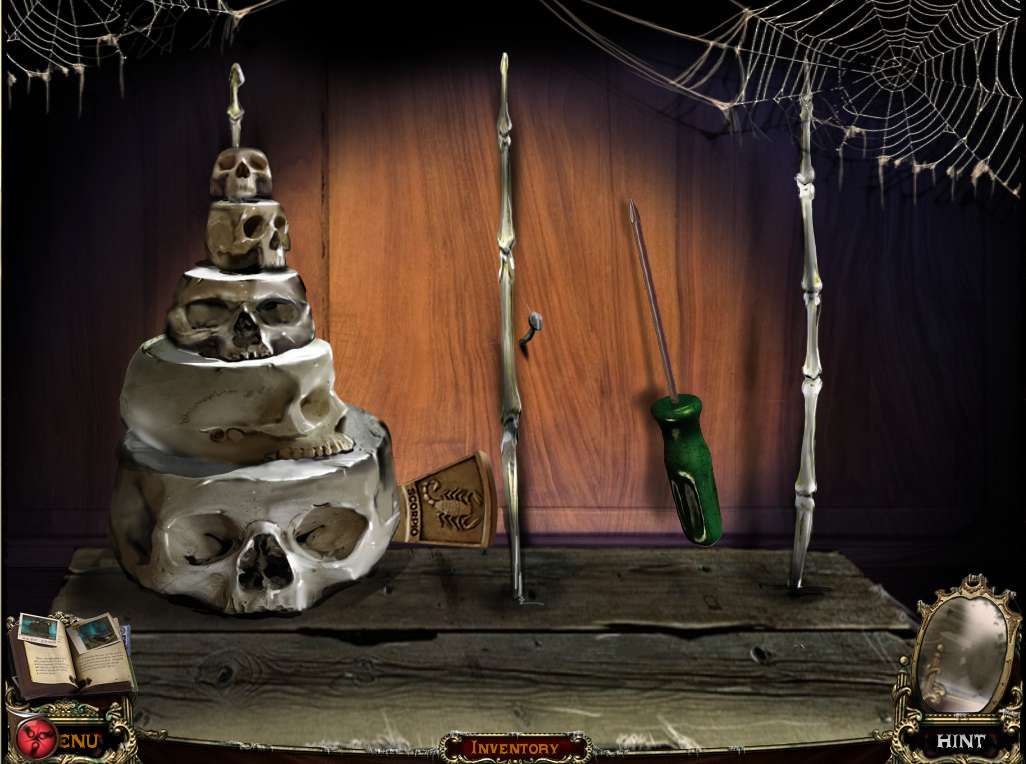
- Zoom in on the cabinet to play the tower puzzle again, this time in the opposite direction, moving them from left to right.
- Numbering the skull pieces 1 to 5 in order of size and the pegs A to C from left to right, here’s the solution -1 – A, 2 – B, 1 – B, 3 – A, 1 – C, 2 – A, 1 – A, 4 – B, 1 – B, 2 – C, 1 – C, 3 – B, 1 – A, 2 – B, 1 – B, 5 – A, 1 – C, 2 – A, 1 – A, 3 – C, 1 – B, 2 – C, 1 – C, 4 – A, 1 – A, 2 – B, 1 – B, 3 - A, 1 – C, 2 – A, 1 – A.
- When finished take SCORPIO and the SCREWDRIVER.
-
Exit out to the front of the house.
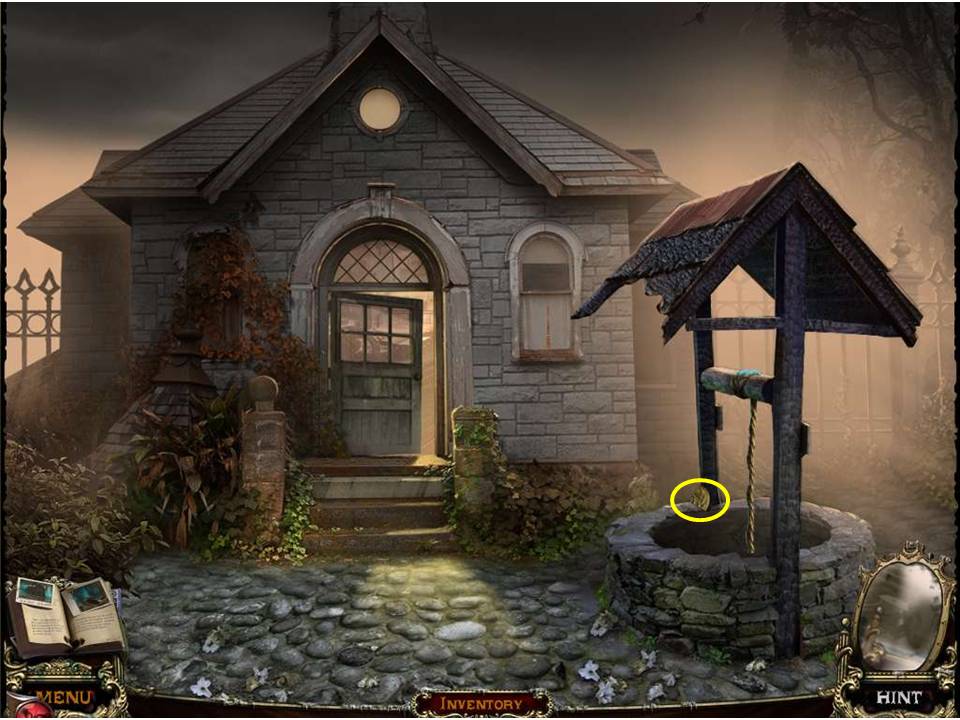
- Go the cottage and zoom into the well.
- Take the AMULET PIECE.
-
Go down into the well.
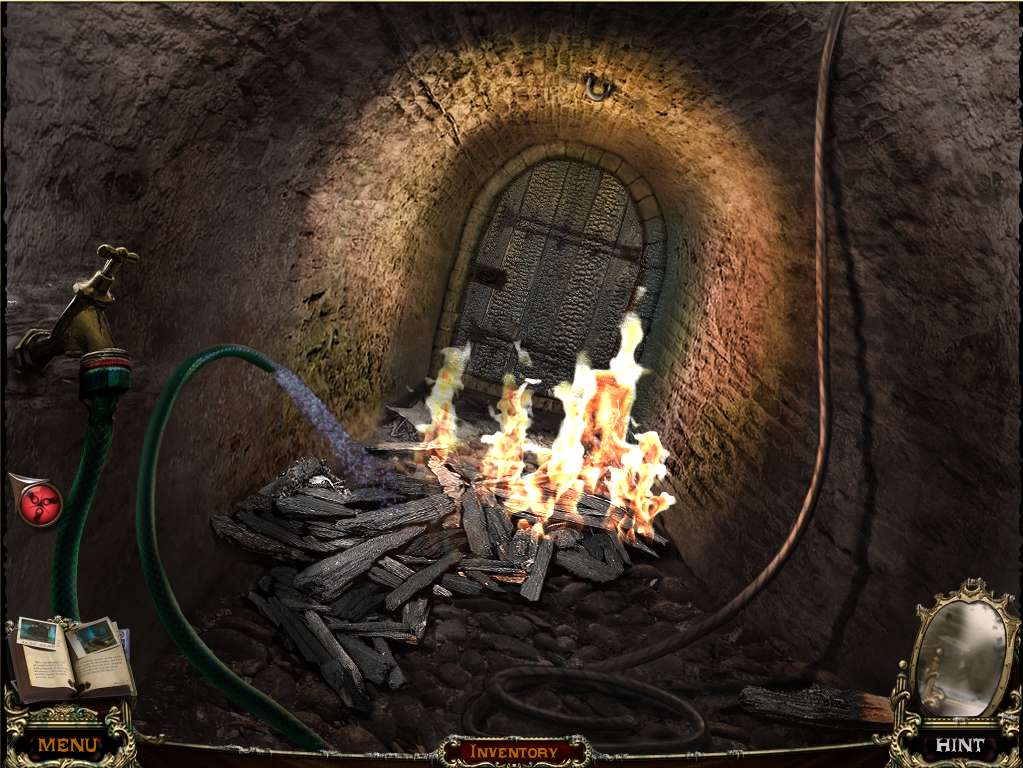
- Wow – talk about jumping into the fire!
- Zoom in on the tap and attach the HOSE and VALVE.
- Once the fire is out walk forward through the door and untie the figure in the chair.
-
Take the AMULET PIECE and exit back through the well.
- Enter the cottage (okay, how come no mirrored guard bleeding to death – or given that this is a mirror world, maybe the blood went back into his head wound and he’s now fit and healthy?)
-
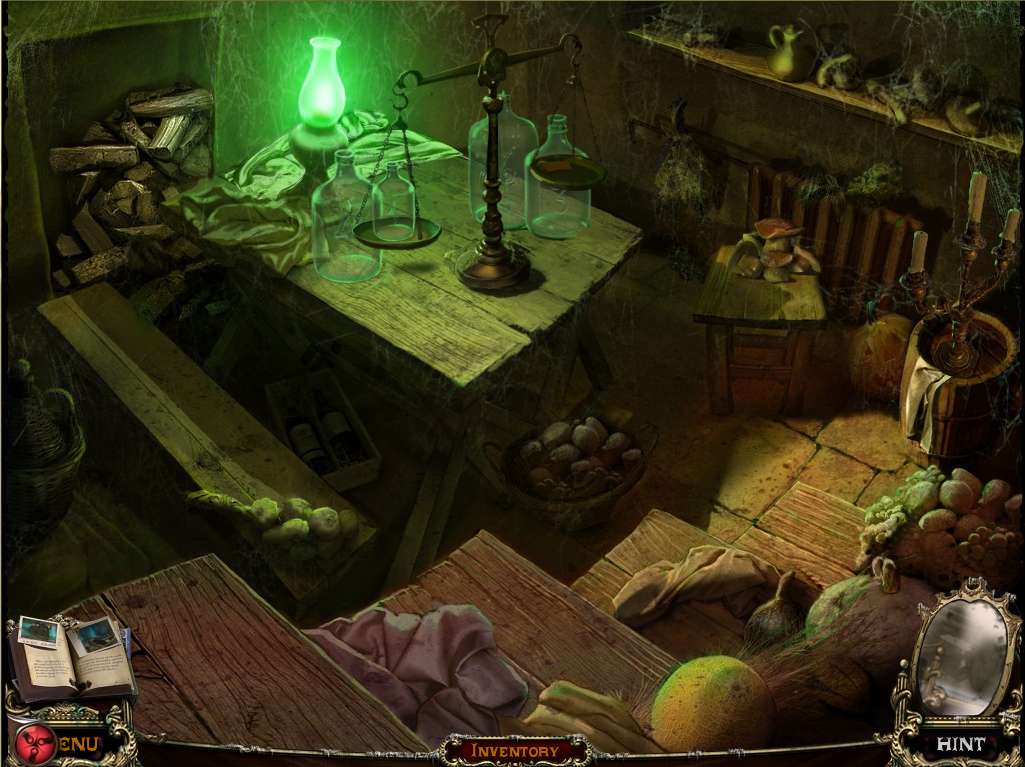
Go down through the trapdoor to the cellar and zoom in on the table to initiate the next puzzle.

- The object of the puzzle is to place the jars on the scale to balance the two sides.
- See screenshot for solution.
-
When finished, take the CANCER zodiac symbol from the right side.
- Exit the cottage and head to the mansion exterior.
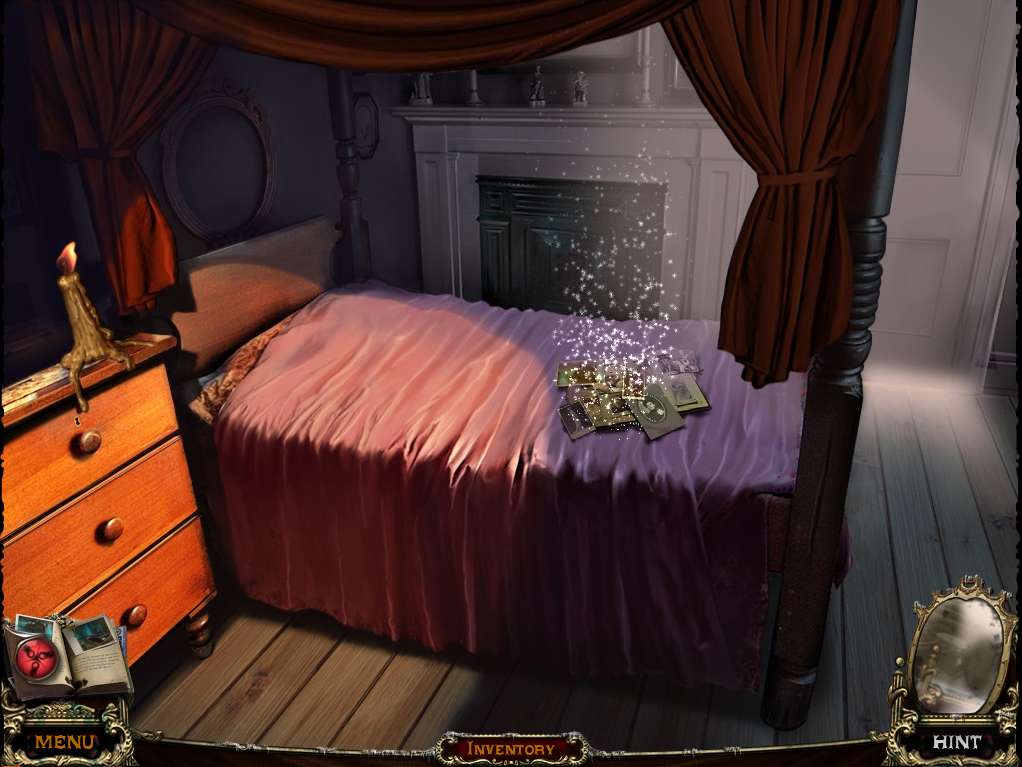
- Go up the ladder on the left into the bedroom.
-
Zoom in on the pictures on the bed to initiate the next puzzle.
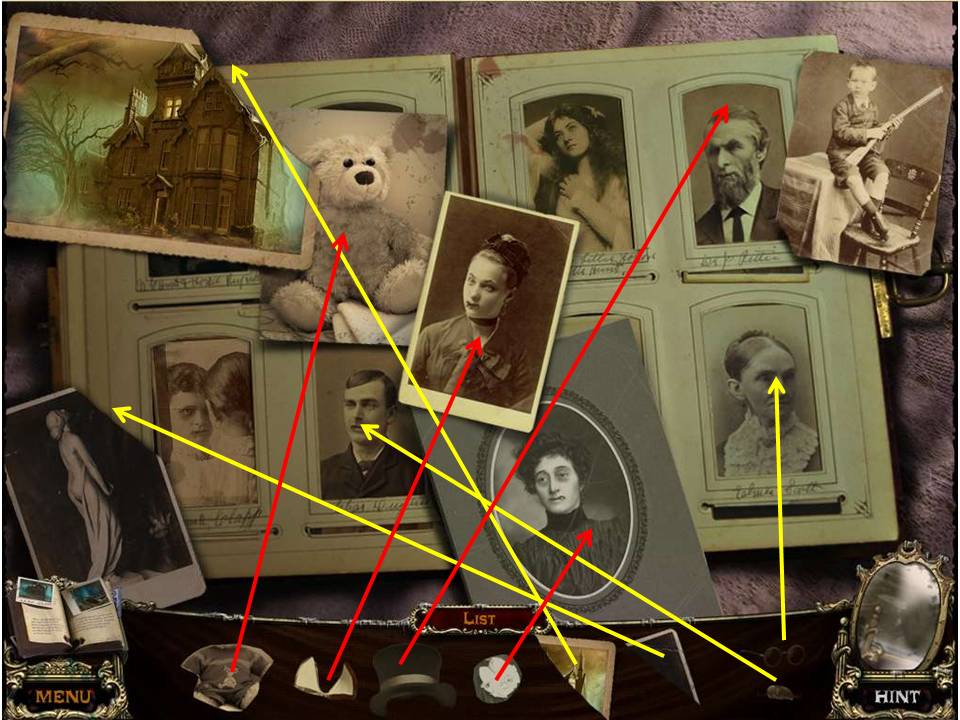
- Great, looks like the Dracula family album!
- Place the items from inventory into the appropriate places on the album.
-
When finished take the GEMINI zodiac symbol and exit, heading round to the entrance for the mansion – why can’t you just act like a normal human being, open the bedroom door, and go down that way?
- Enter the mansion and go upstairs, heading through the door on the left.
- Zoom in on the zodiac plaque on the wall and place the four missing zodiac pieces from inventory on it to unlock it.
-
Take the KEY inside and head through the opening to the left.
-
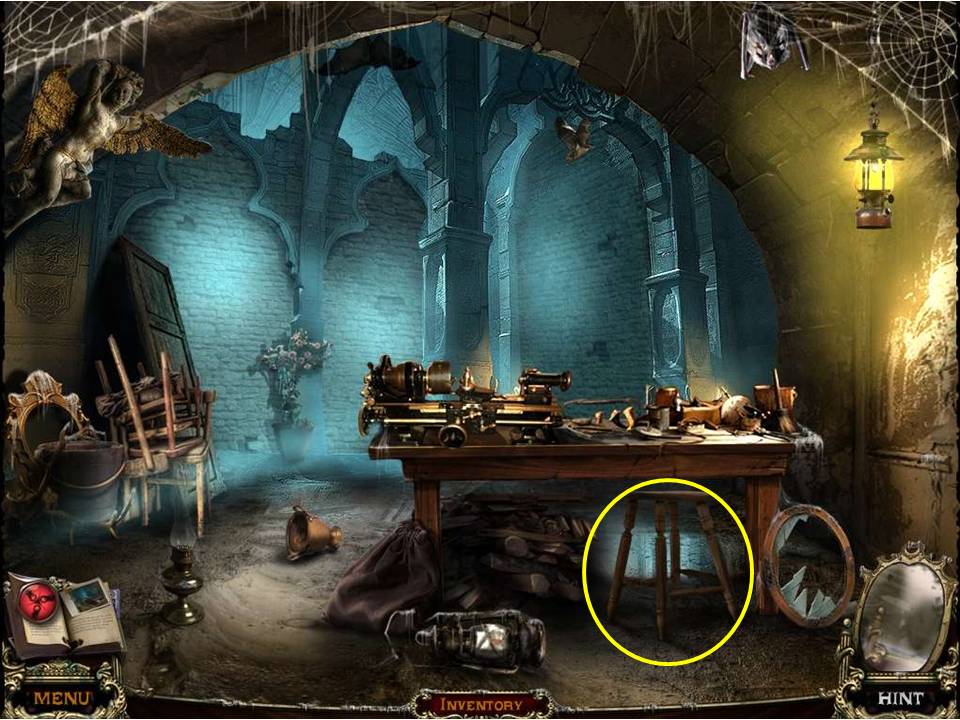
Take the STOOL, and exit to the room with the fireplace.
- Put the STOOL in front of the fireplace and step up to retrieve the TAPE on the shelf above.
-
Get down and return to the room on the left.
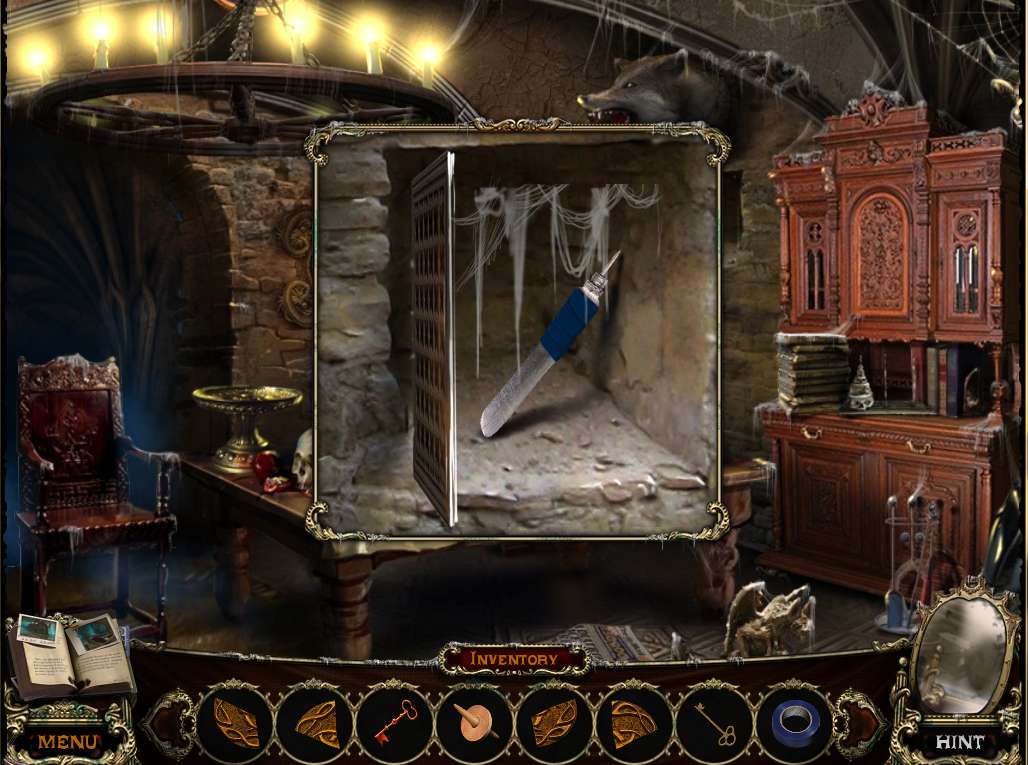
- Zoom in on the grate underneath the boar’s head and use the SCREWDRIVER to open it.
- Try and take the KNIFE blade inside – oh, you can’t!
- No, you apparently have to wrap the TAPE around it to save cutting yourself.
- Question – how do you put the tape around the blade without handling it – osmosis?
-
Once you’ve managed to acquire the blade without severing your fingers, head back out to the fireplace room and use the other KEY from inventory to open the door to the right.
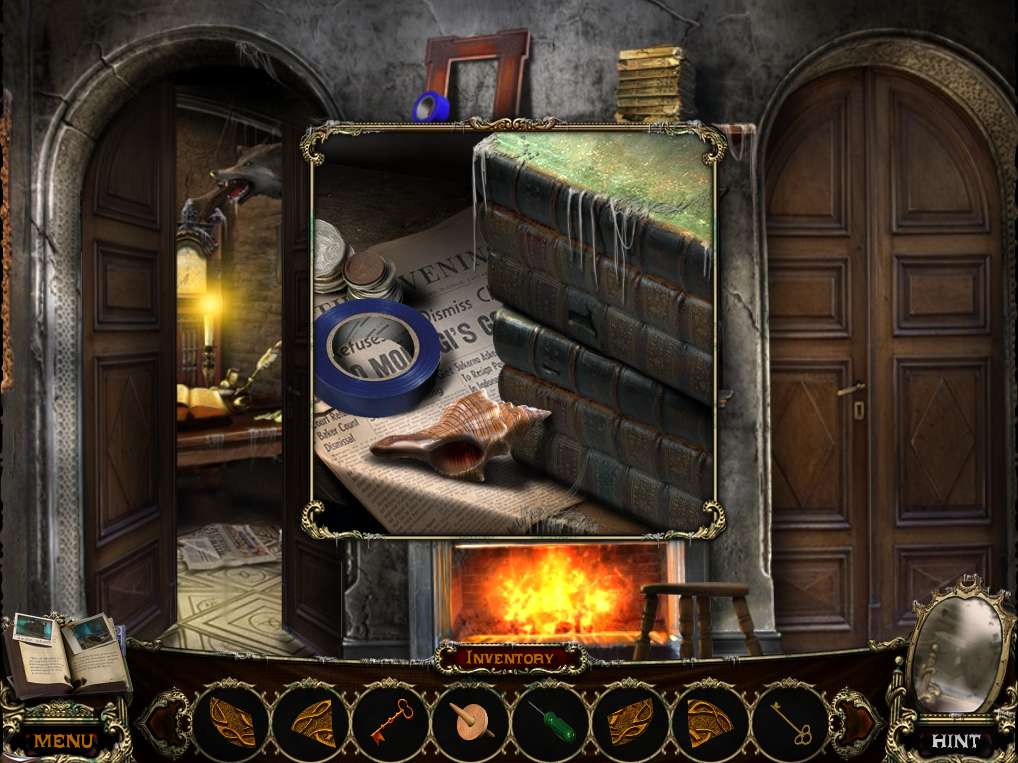
- Zoom in on the desk to initiate the next puzzle.
- The object is to match the items from inventory to the appropriate places on the book.
- Note the screenshot for the solution.
-
When complete, take the GLUE in ‘Jonathan Harker’s’ hand and exit the room.
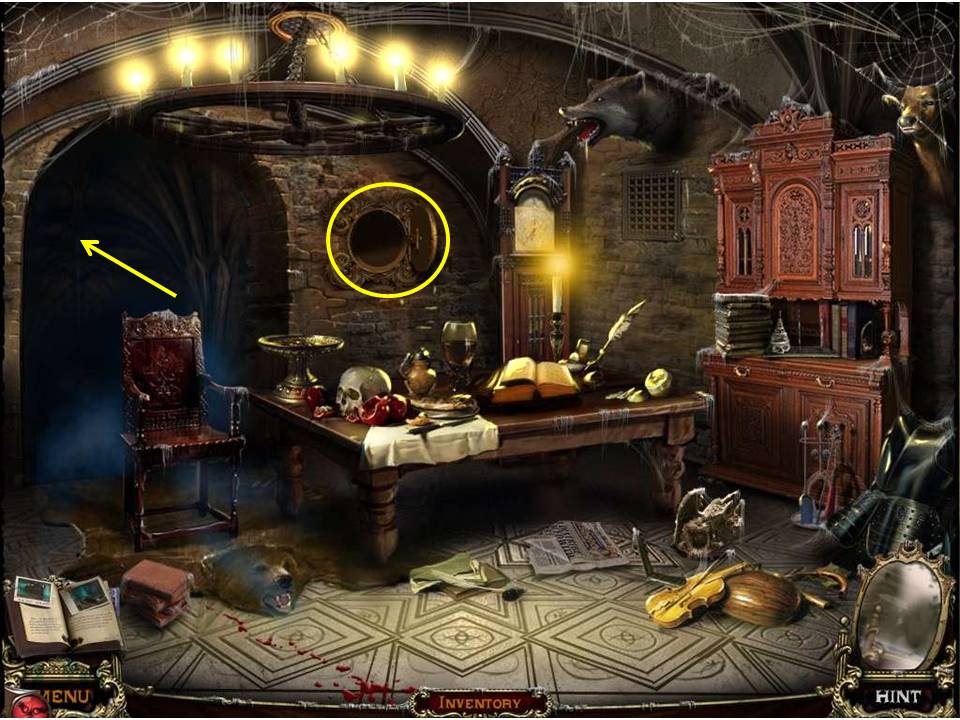
- Go down to the mansion’s foyer and, head through the doors on the left, and through the doorway underneath the vampire carving.
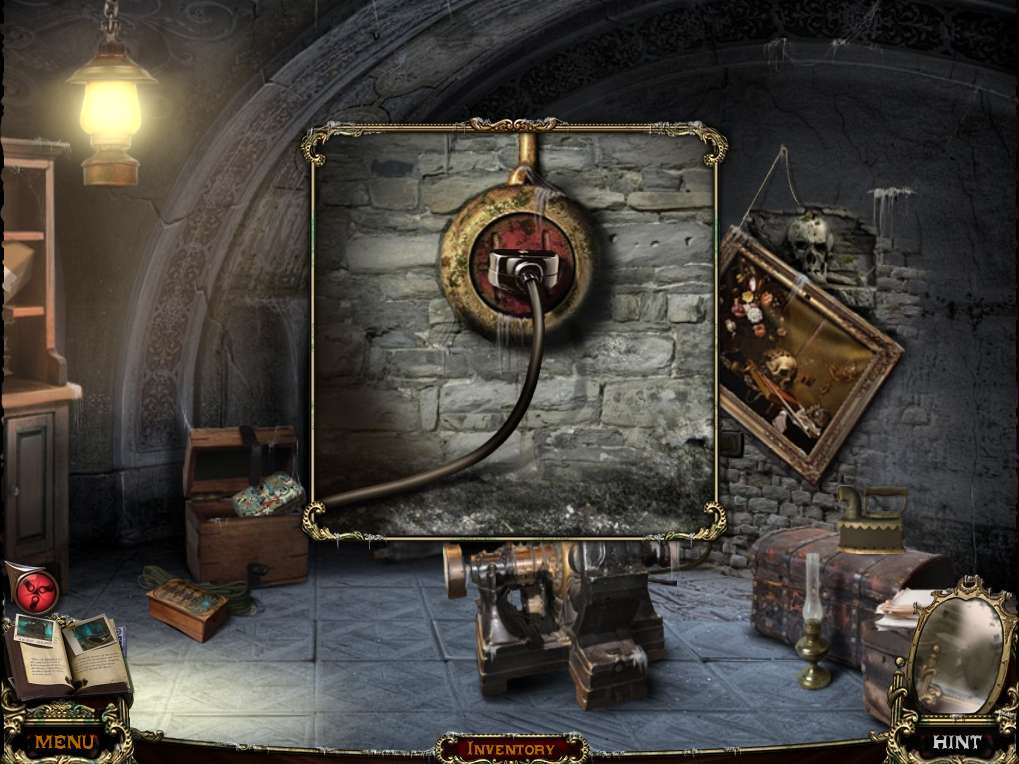
- Zoom in on the area below the painting and pull out the plug.
- Use the KNIFE to cut the PLUG away and slot it into inventory.
- Exit the room back to the foyer, go upstairs, and head through the door to the left of the fireplace.
-
Go through the opening on the left to the workshop.
- Zoom in on the table and note the instructions there, as well as the bare wire.
- Place the PLUG on the table, and use the TAPE to attach it to the wire (miracle tape!
- No need to strip the wires back at all! Guess with the five tons of other stuff in inventory there wasn’t space for a pair of wire strippers?)
- Plug it into the nearby outlet and switch on the tool.
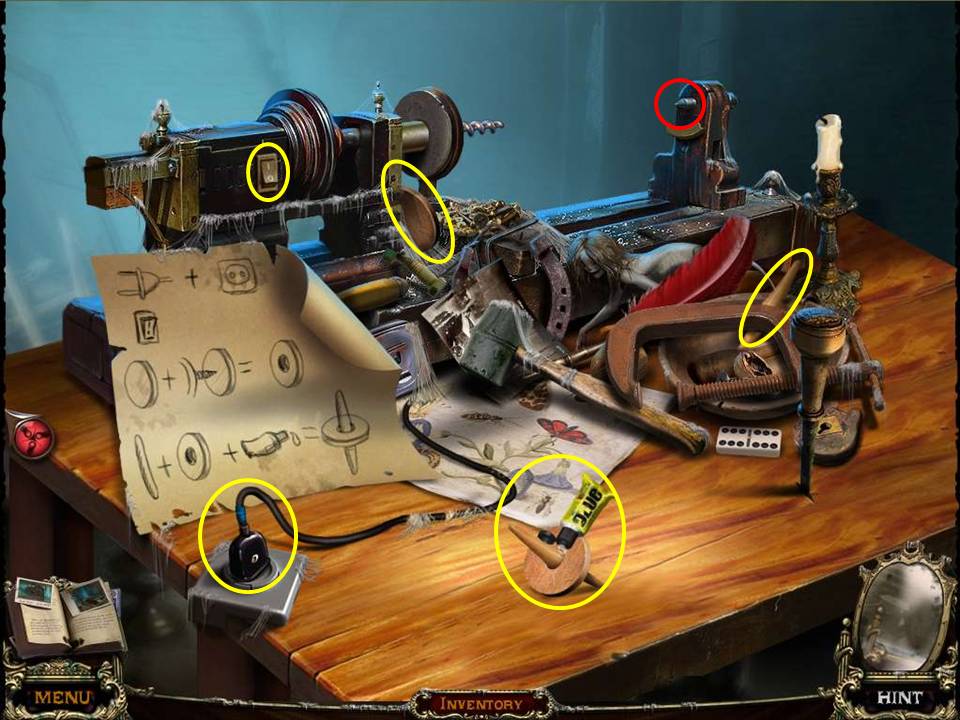
- The object is to make yourself three tops, using the discs and pegs scattered on the table, as well as the GLUE to put the finishing touches to your work.
- Place each disk on the place marked in red, then slot a peg through the hole, and add glue to bond it altogether.
- Repeat the process twice.
-
The screenshot shows the second of the tops being completed. When finished, head back downstairs to the foyer.

- Zoom in on the ritual symbol on the floor.
- Place the four tops on it.
- You’re out!
General Info and Tips
Chapter One
Chapter Two
Chapter Three
Chapter Four
Chapter Five
Chapter Six
Ask for help in the comments below!
Chapter One
Chapter Two
Chapter Three
Chapter Four
Chapter Five
Chapter Six
Ask for help in the comments below!