
Tales of Terror: Crimson Dawn: Chapter Four
Our Tales of Terror Crimson Dawn Walkthrough comes fully equipped and ready to help you combat what goes bump in the night in this spooky hidden object game. Filled with custom screenshots, marked clearly so you can see all the key items and locations you need to investigate, as well as detailed instructions on how you can save your brother, Jason, this Tales of Terror Walkthrough is a must have companion as you brave the terrors of the night.
General Info and Tips
Chapter One
Chapter Two
Chapter Three
Chapter Four
Chapter Five
Chapter Six
Ask for help in the comments below!
Chapter One
Chapter Two
Chapter Three
Chapter Four
Chapter Five
Chapter Six
Ask for help in the comments below!
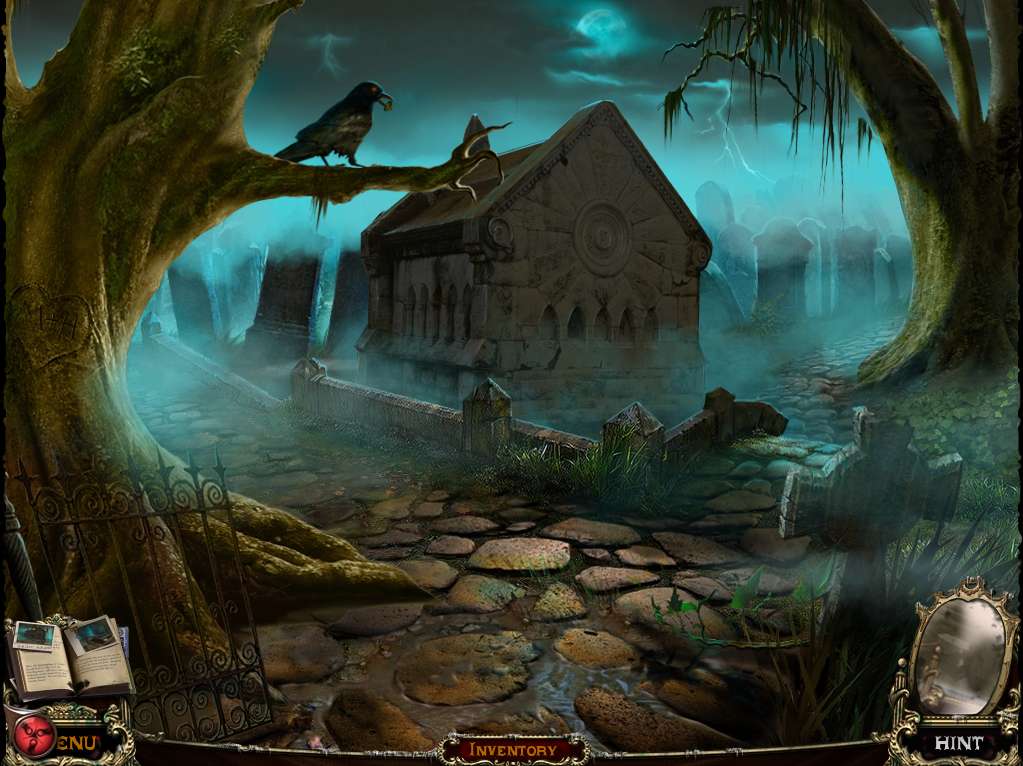
- Zoom into the raven.
- Give him the CHEESE.
- Take the AMULET PIECE from where it falls on the branch.
-
Walk left.
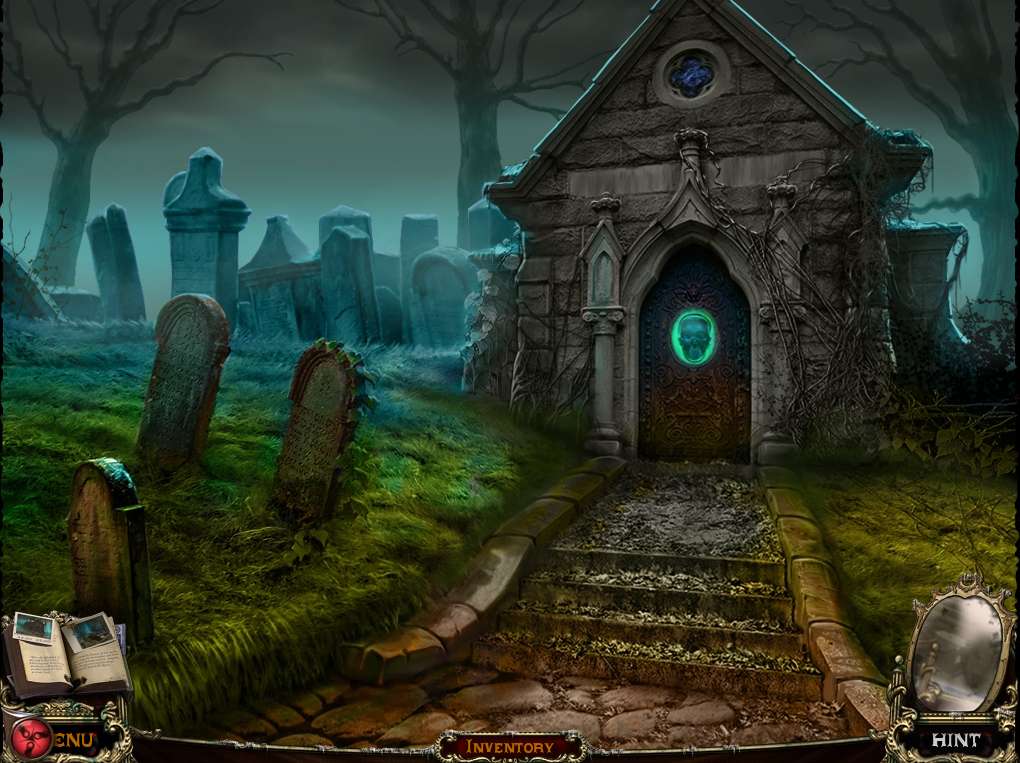
- Take the fourth SKULL on the door.
- Return to the raven and take the path to the right.
-
Zoom into the broken tombstone for a puzzle.
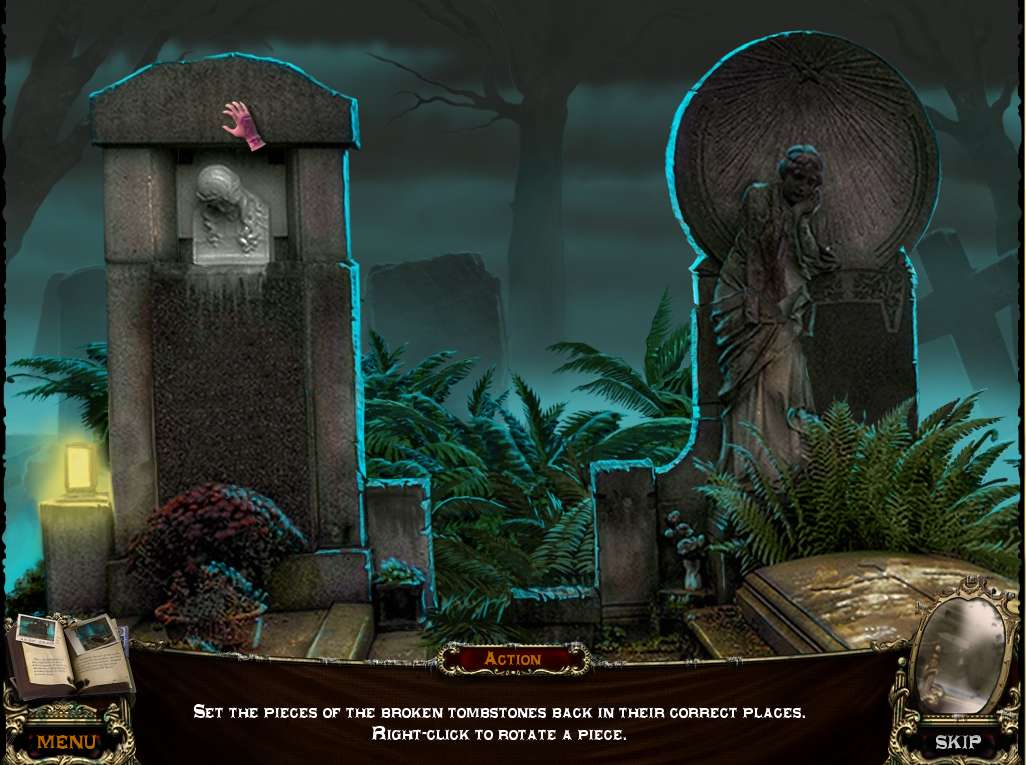
- The object of the puzzle is to set the pieces of the broken tombstone back in their correct places.
- Right click to rotate a piece.
- Left click to place the piece.
- See screenshot for solution.
-
When finished, the ghost will give you the fourth PUZZLE FRAGMENT.
- Return to the mansion.
- Go up the stairs on the left and enter the study on the right.
-
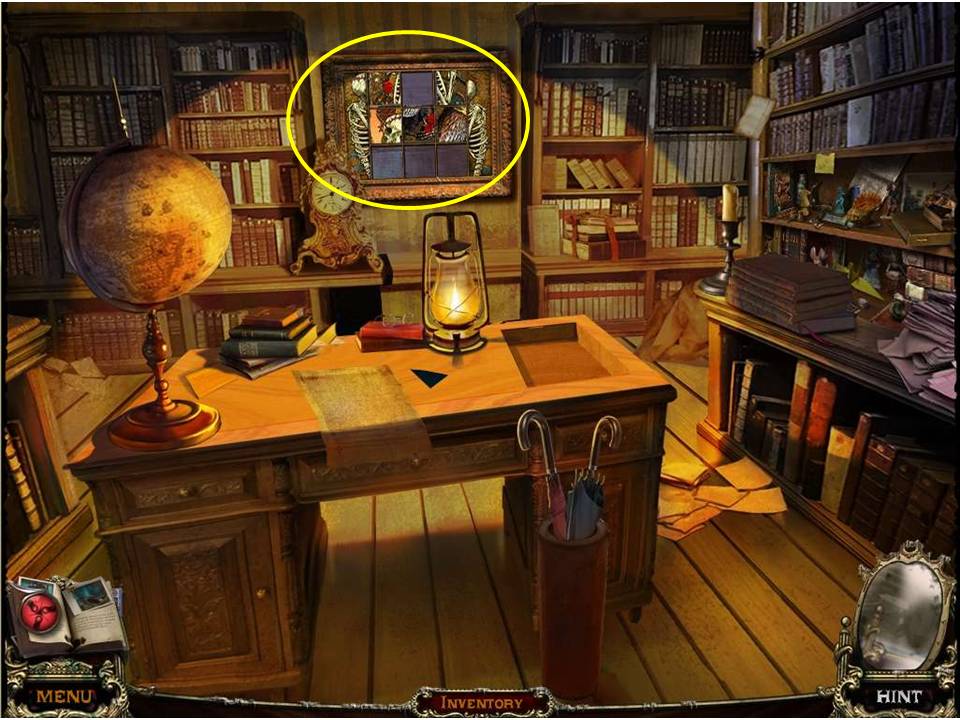
Place the four PUZZLE FRAGMENTS on the back wall to initiate a puzzle.
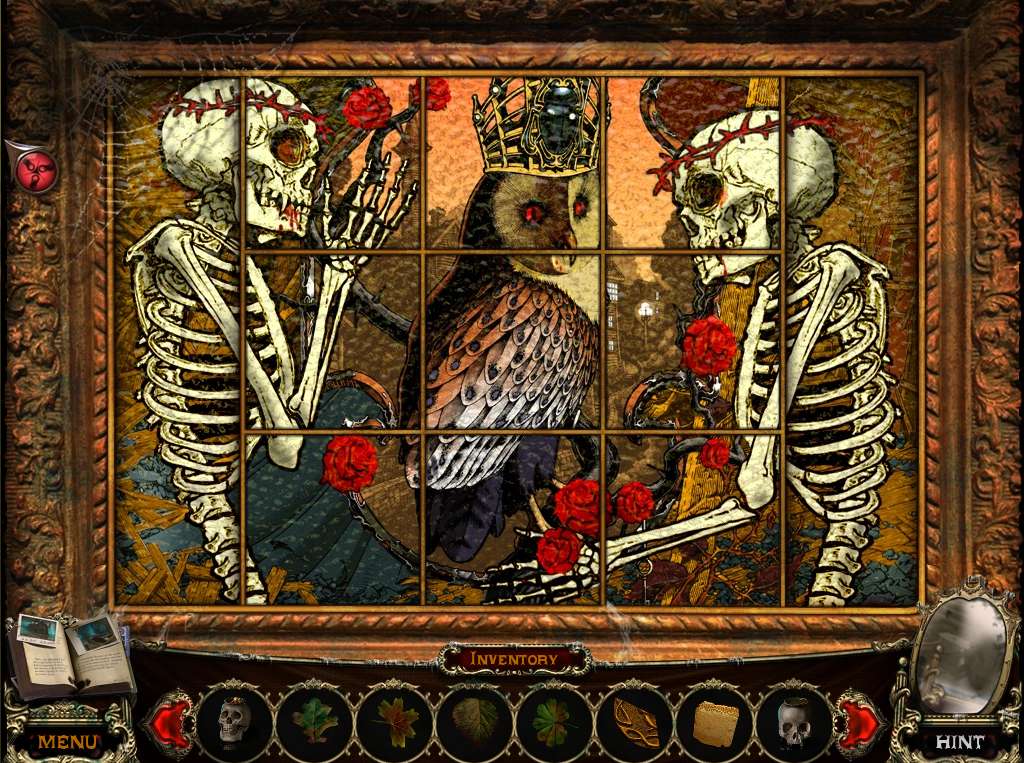
- The object of the puzzle is to create the correct picture by clicking picture fragments to swap their positions.
- Use the skeletons on either side of the fragments as a guise, or simply use the screenshot for the solution.
-
Walk forward through the opening once complete and initiate the HOA by the table.
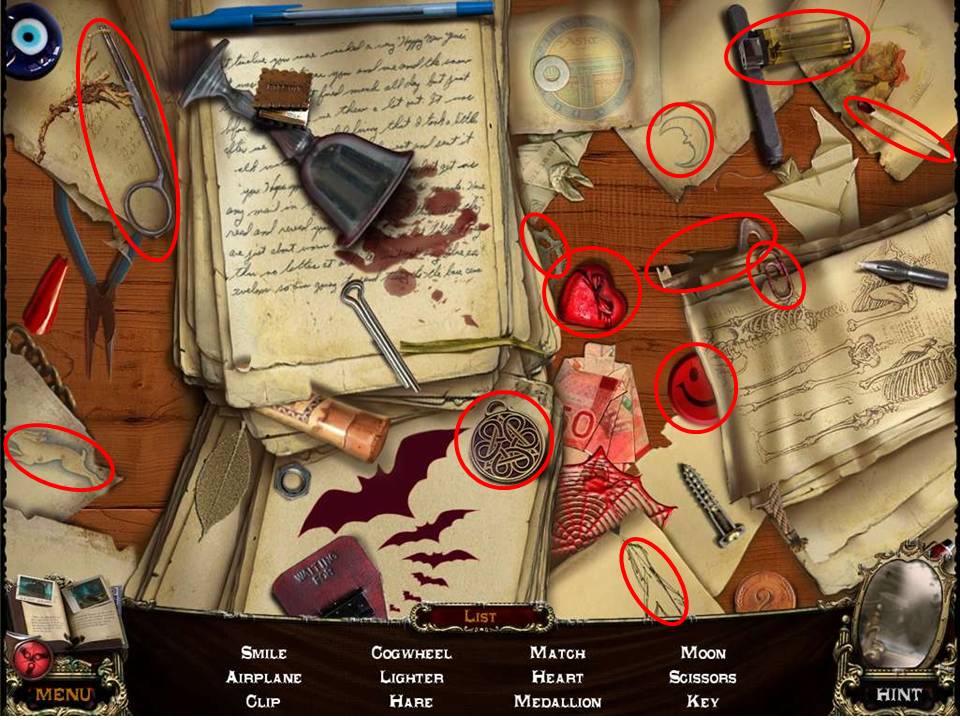
- Find the items listed.
- Receive the LIGHTER.
-
Open the cabinet door on the right and zoom in to initiate a puzzle.
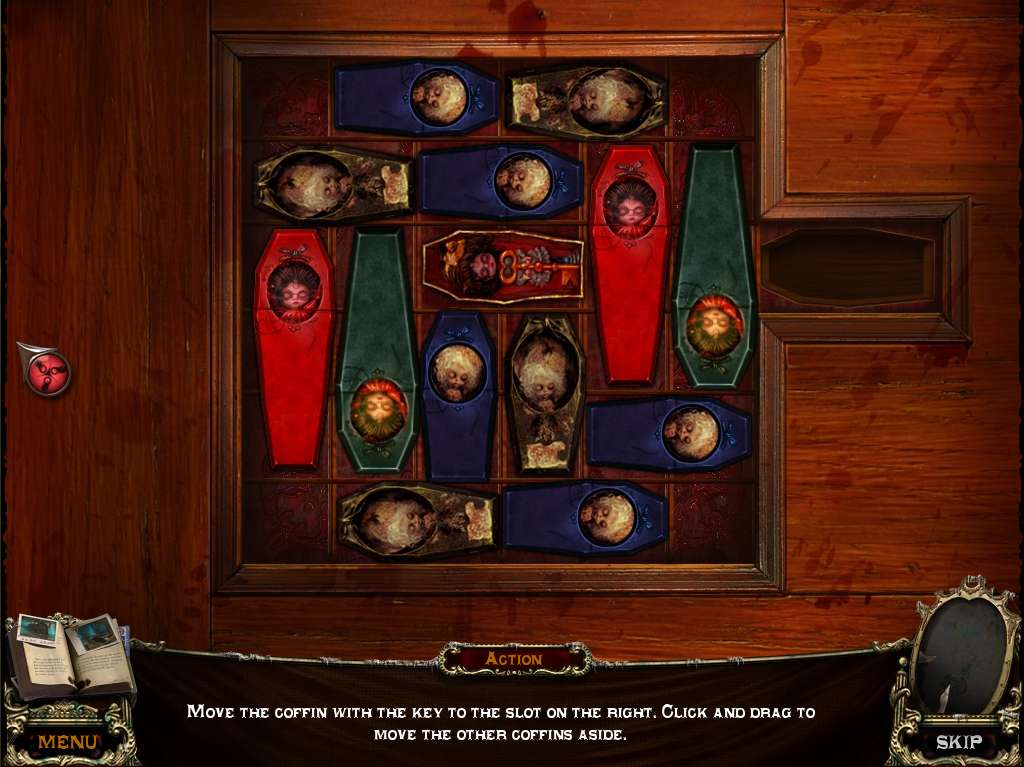
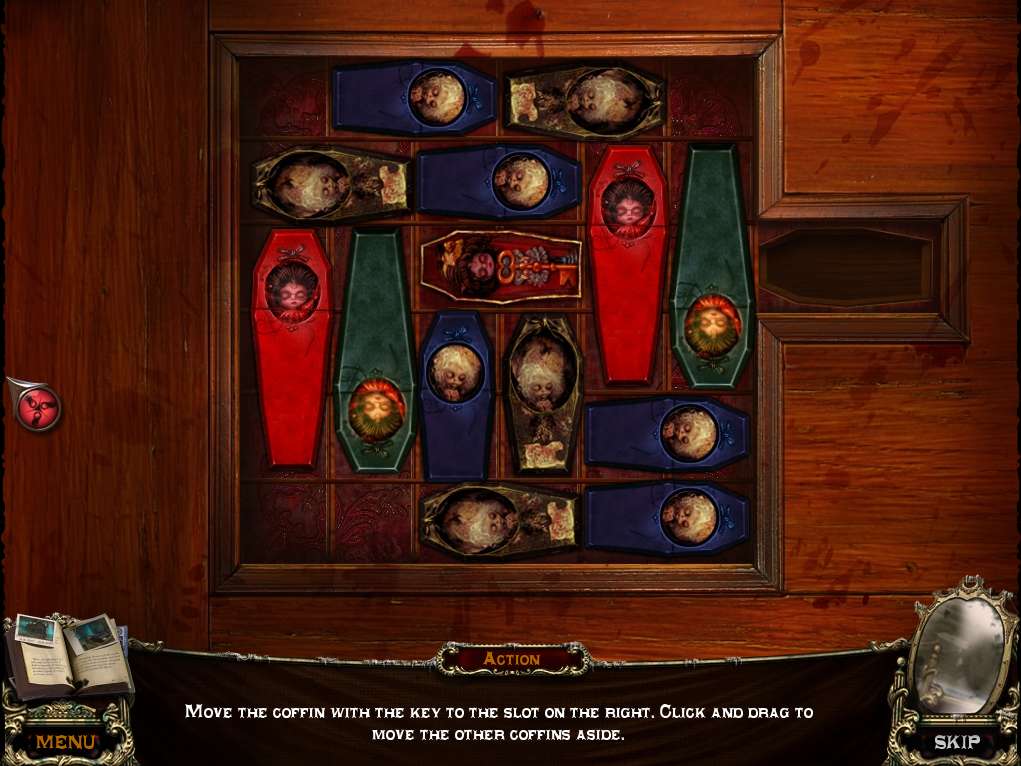
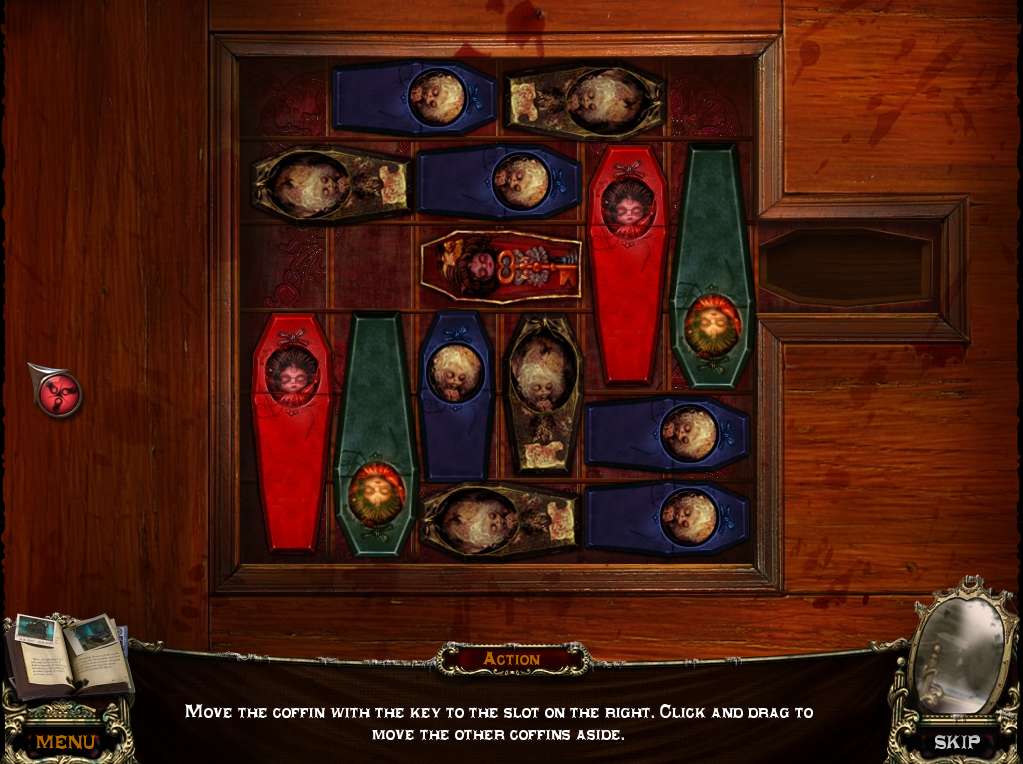
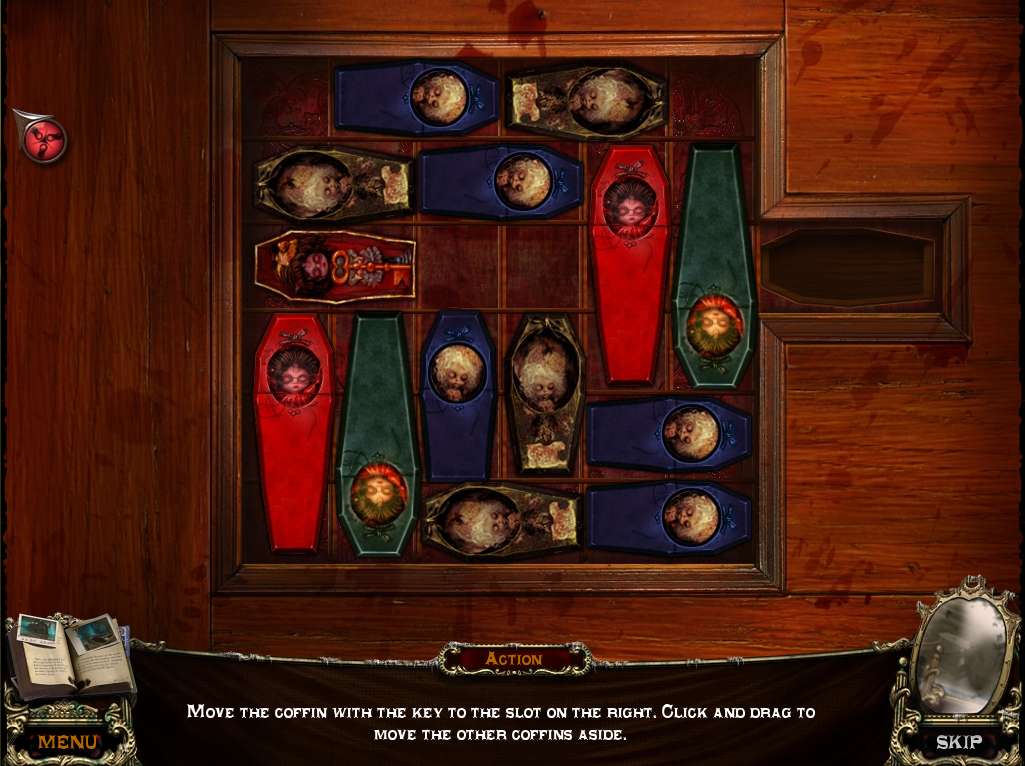
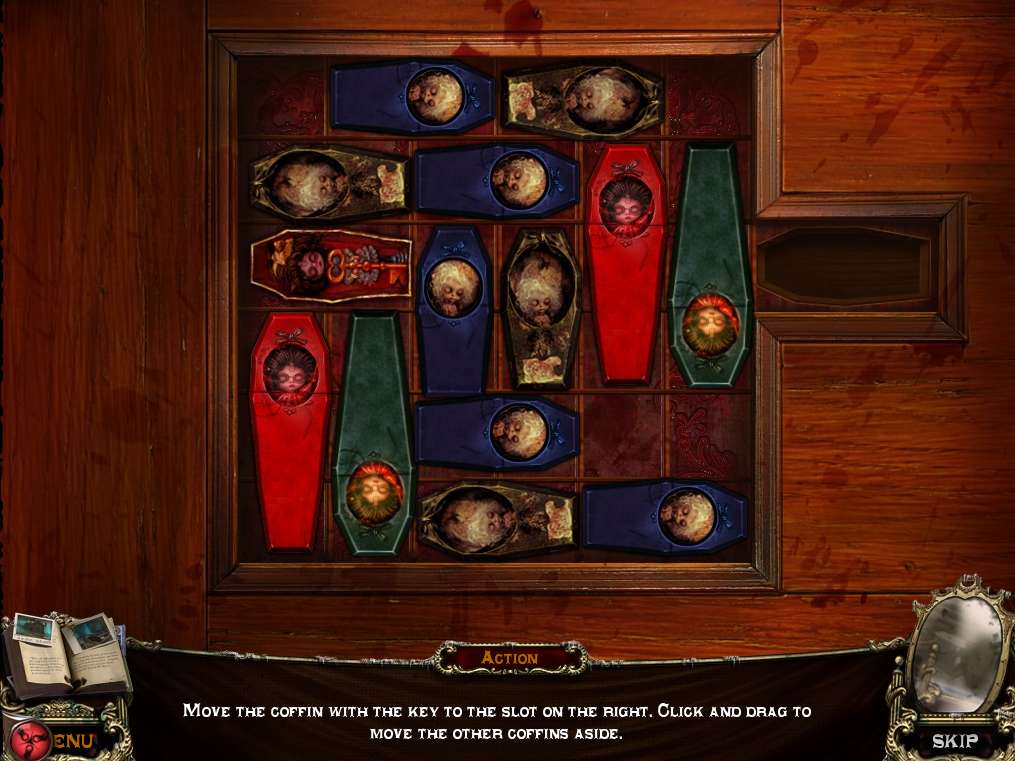
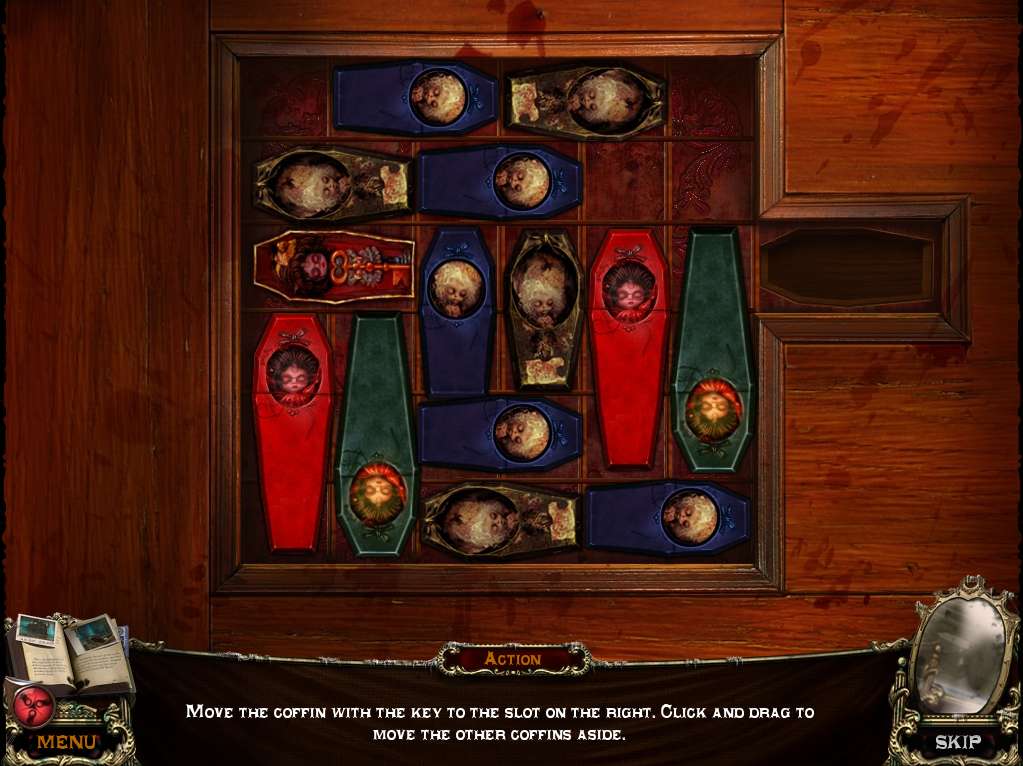
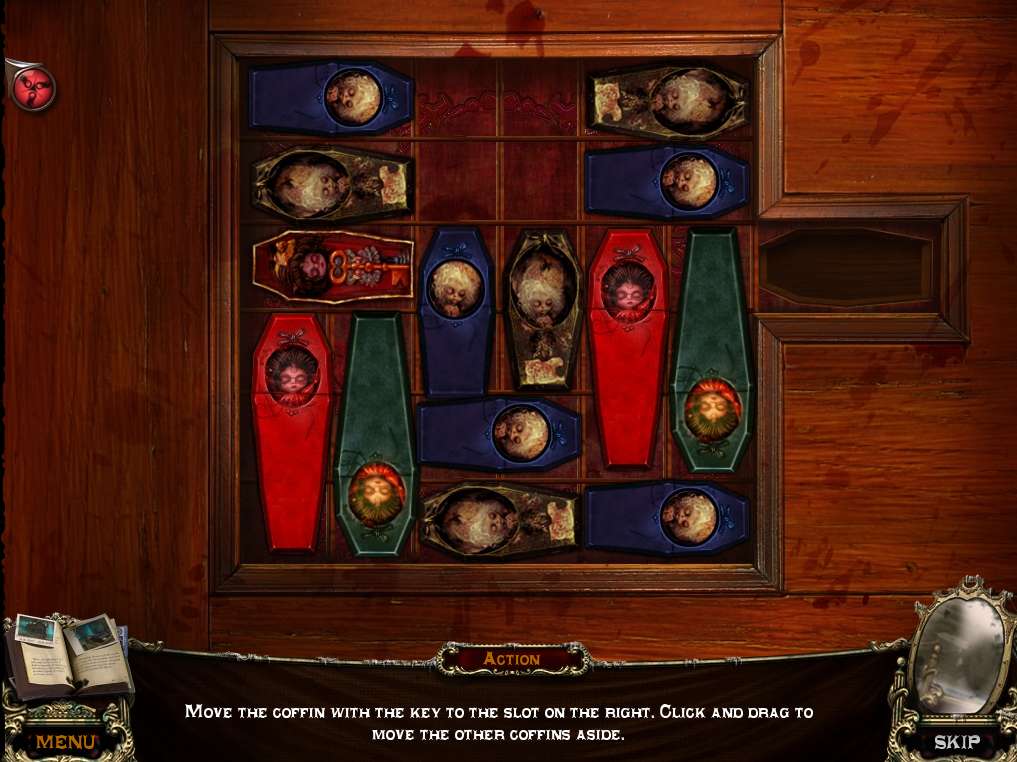

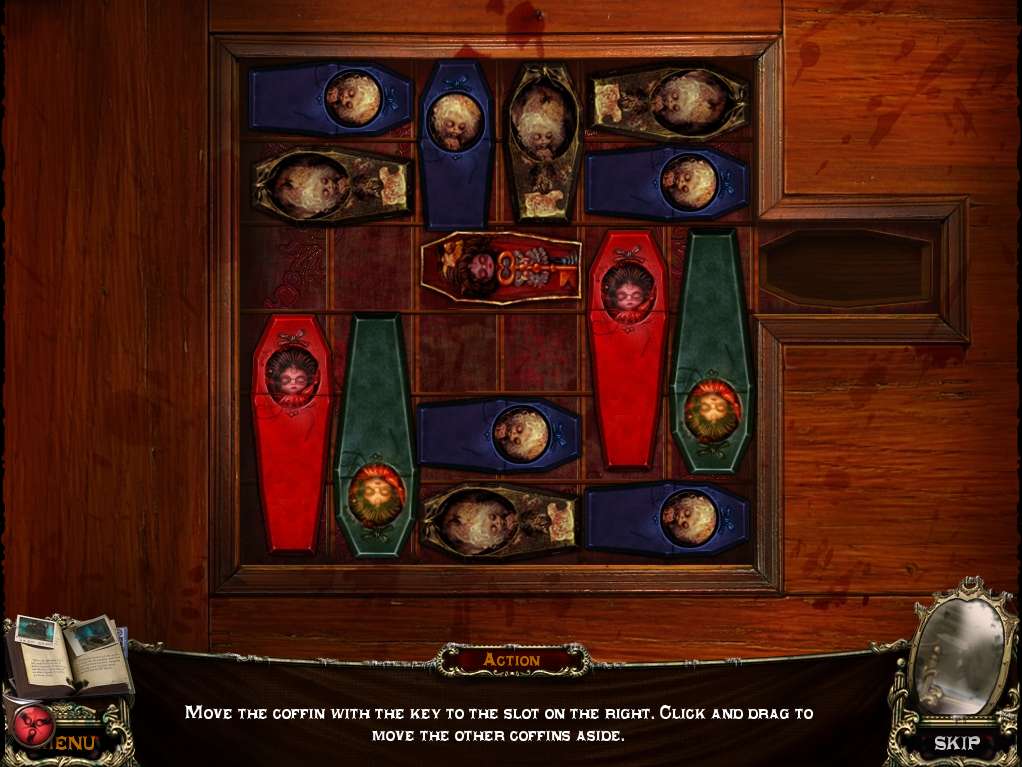
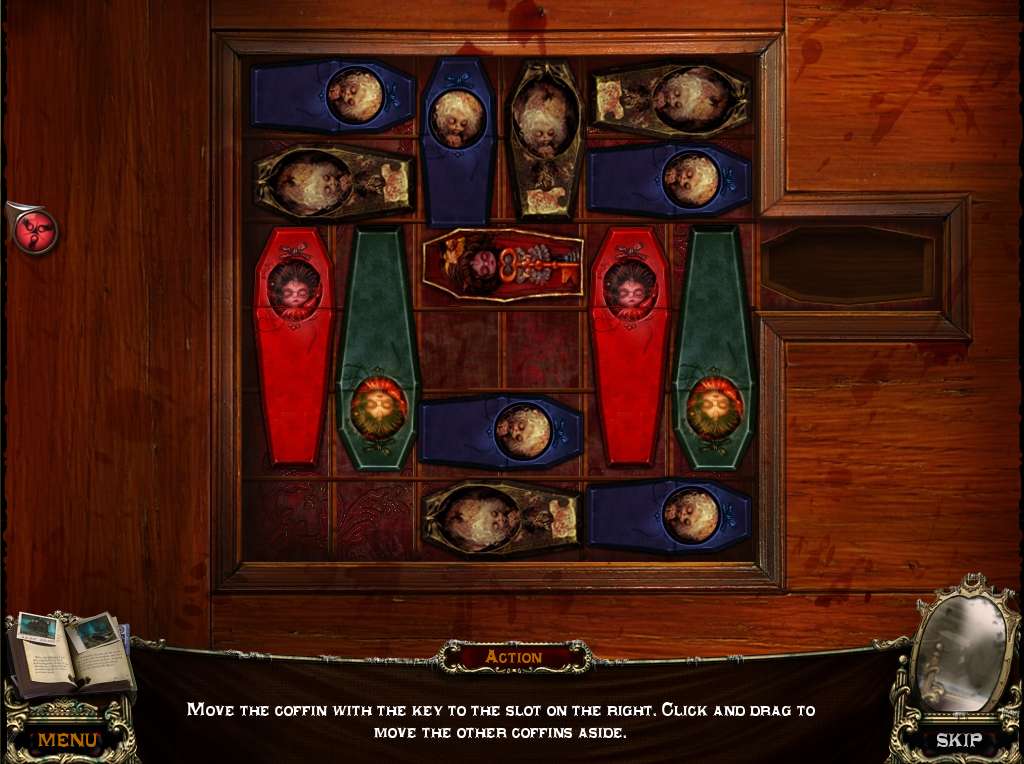
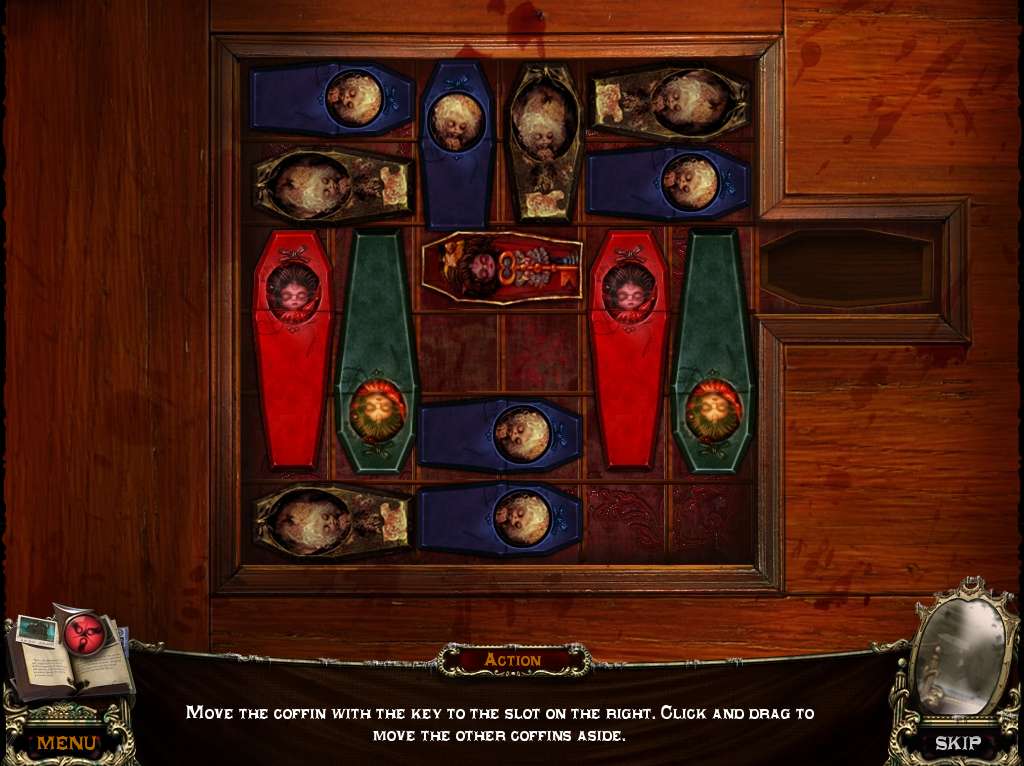
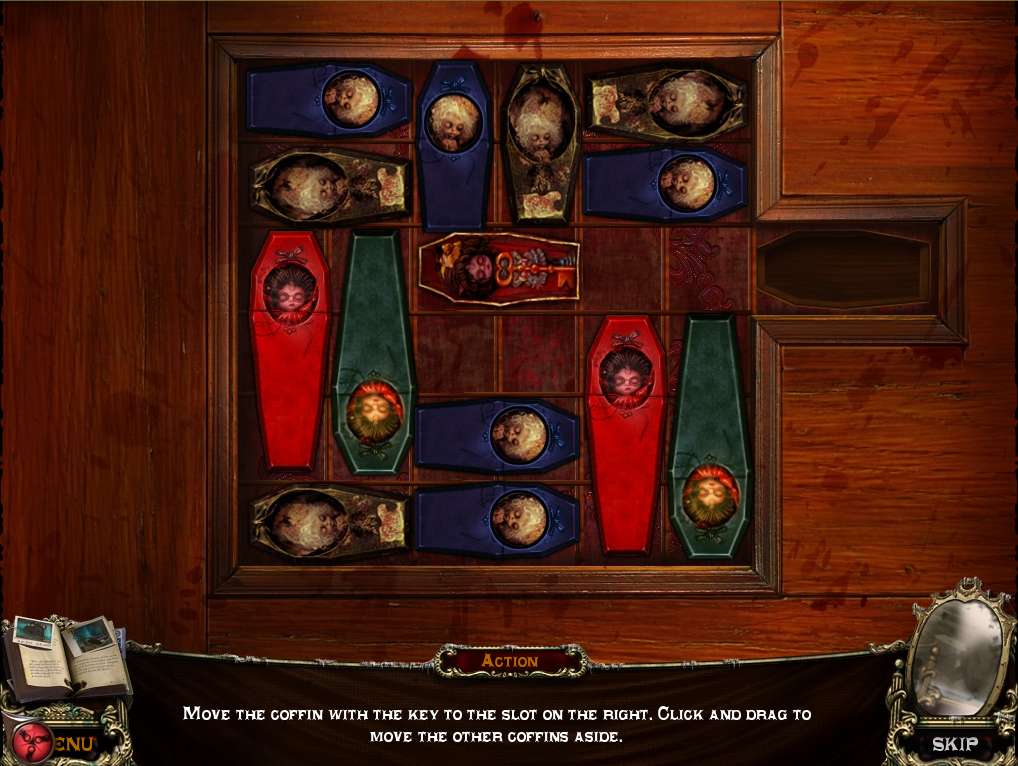

- The object of the puzzle is to move the coffin with the key to the slot on the right.
- Note that the coffins only move lengthways, which makes this puzzle a bit of a toughie!
- Click and drag to move the coffins.
- See screenshots for solution.
- Take the KEY.
-
Exit the hidden room and study and enter the door to the left of the fireplace.
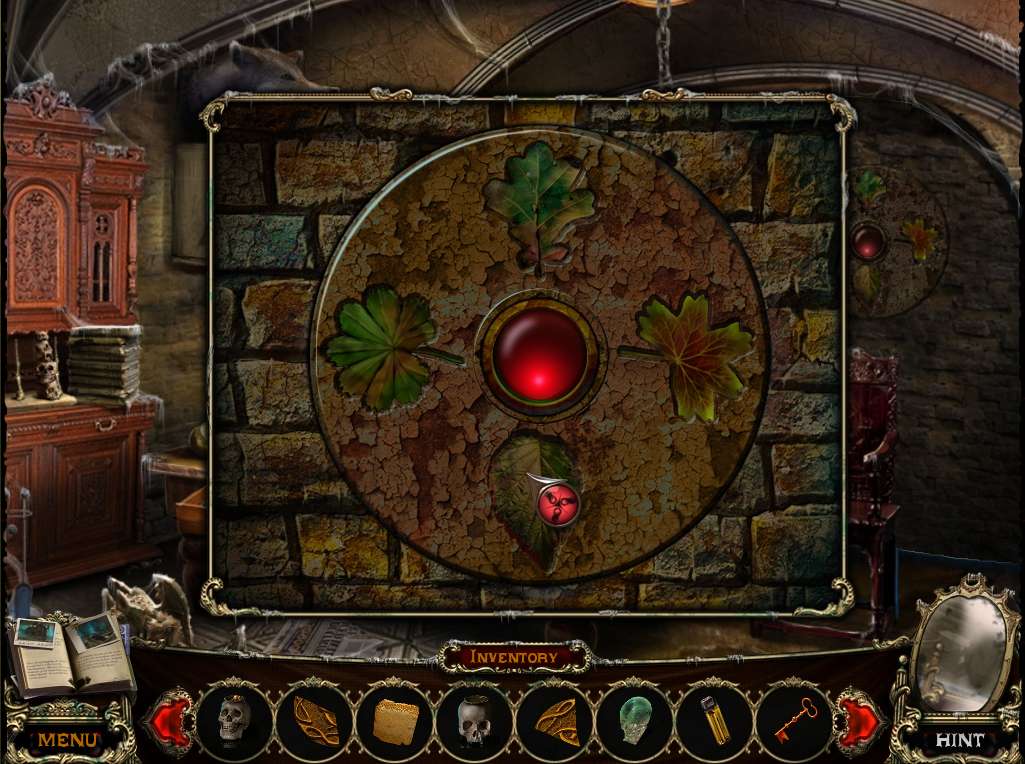
- Zoom into the wall decoration.
- Put the four LEAVES into the matching indentations.
- Click the red button in the center.
-
Walk forward through the opening.

- Take the fifth SKULL.
-
Zoom into the table for a puzzle.
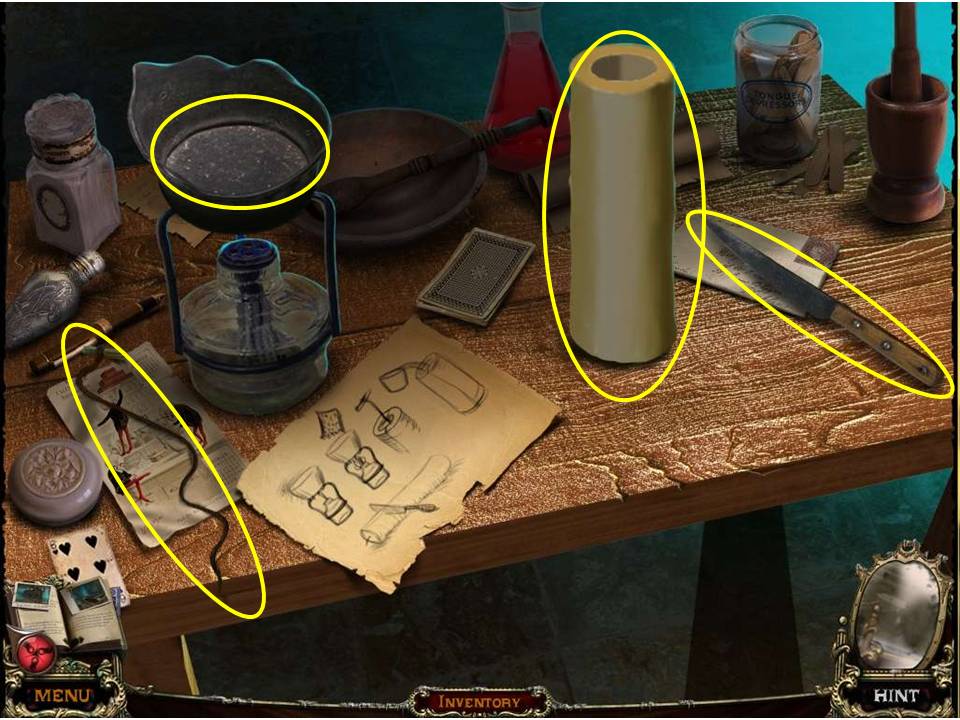
- Use the LIGHTER on the burner.
- Put the BEESWAX in the pan.
- Put the wick in the mold.
- Pour the melted beeswax into the mold.
- Use the knife on the candle.
- Take the CANDLES.
-
Exit downstairs to the mansion’s foyer.
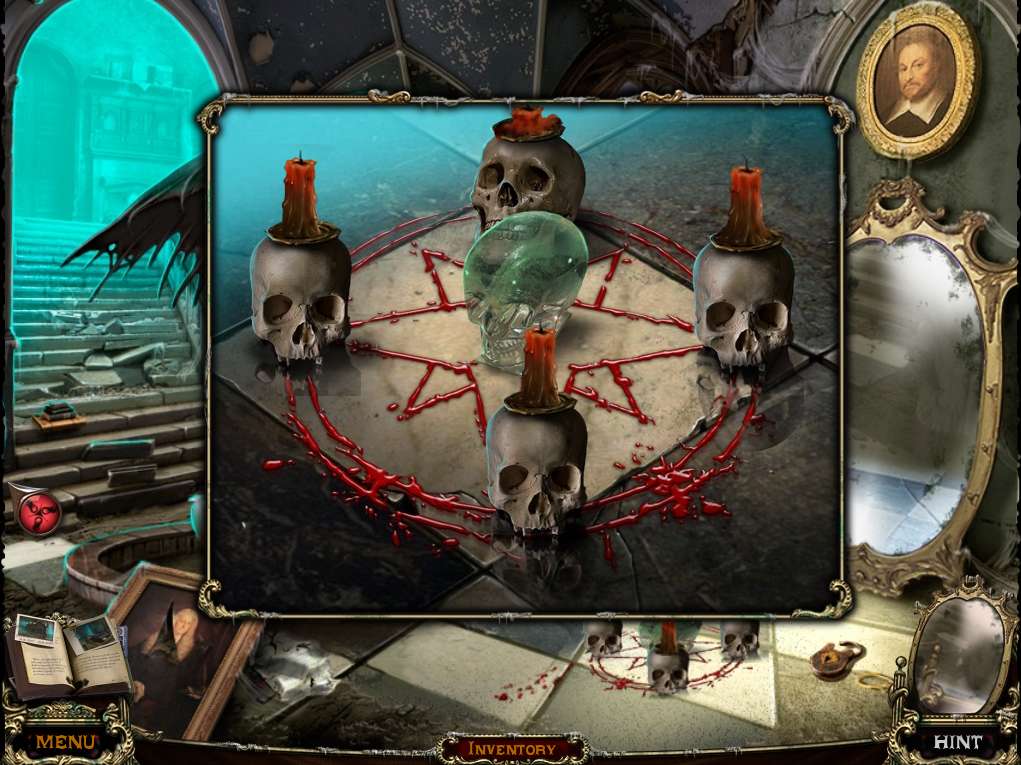
- Zoom into the ritual symbol on the floor.
- Put the five SKULLS on the symbol.
- Place the CANDLES on the skulls.
- Light the candles with the LIGHTER.
- After the dramatic moment when the world spins, zoom back into the ritual symbol on the floor and pick up the GLASS EYE.
- Zoom into the paper by the painting on the floor and note the code.
- Take the other GLASS EYE.
General Info and Tips
Chapter One
Chapter Two
Chapter Three
Chapter Four
Chapter Five
Chapter Six
Ask for help in the comments below!
Chapter One
Chapter Two
Chapter Three
Chapter Four
Chapter Five
Chapter Six
Ask for help in the comments below!