
Tales of Terror: Crimson Dawn: Chapter Two
Our Tales of Terror Crimson Dawn Walkthrough comes fully equipped and ready to help you combat what goes bump in the night in this spooky hidden object game. Filled with custom screenshots, marked clearly so you can see all the key items and locations you need to investigate, as well as detailed instructions on how you can save your brother, Jason, this Tales of Terror Walkthrough is a must have companion as you brave the terrors of the night.
General Info and Tips
Chapter One
Chapter Two
Chapter Three
Chapter Four
Chapter Five
Chapter Six
Ask for help in the comments below!
Chapter One
Chapter Two
Chapter Three
Chapter Four
Chapter Five
Chapter Six
Ask for help in the comments below!
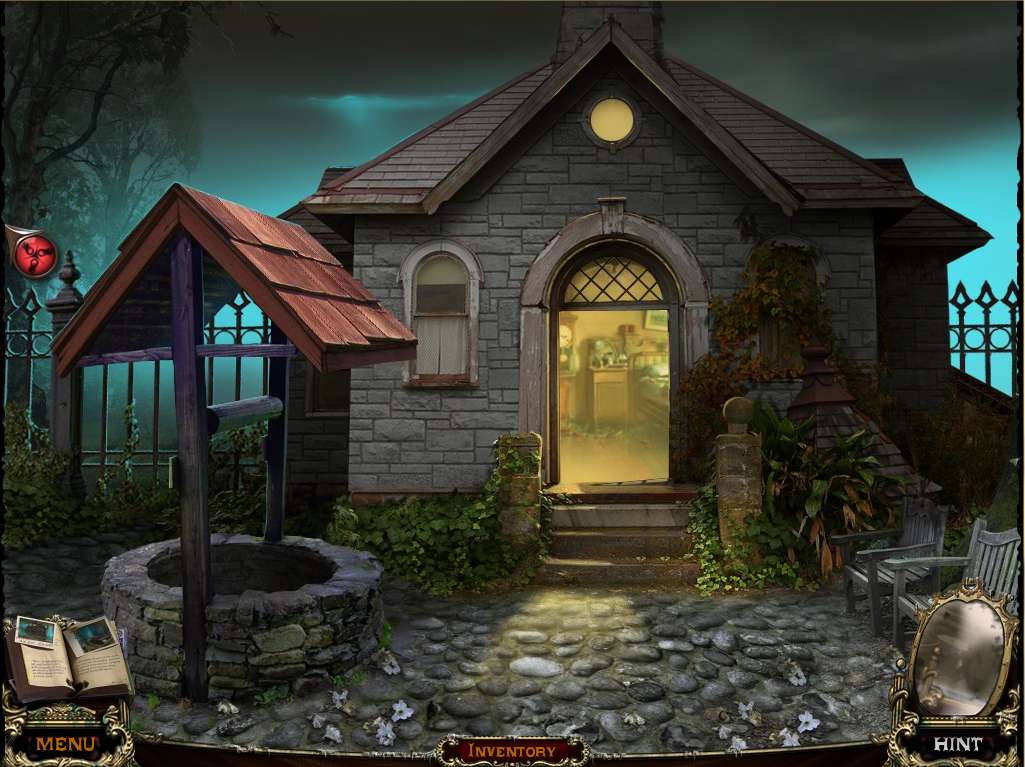
- Enter the gate.
- Walk left toward the well.
- Zoom into the well.
- Take the SYMBOL.
- Pull down the door – damn termites – this MUST be set in Florida!
-
Enter the cottage.
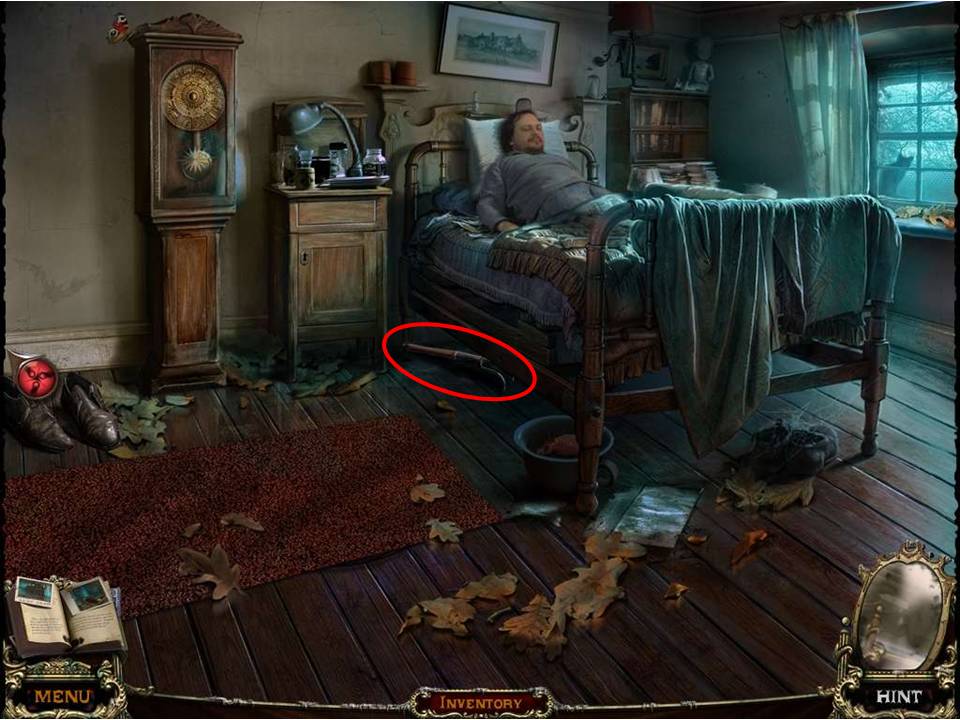
- Give the wounded guard the FERMENTED JUICE.
- Take the HAND RAKE under the bed – the guy is asking me to help him, and I’m stealing his gardening tools – nice!
-
Exit and zoom in on the HOA by the bench to initiate it.

- Find the items listed.
- Place the shoe on the dirt to get the Footprint.
- Use the rag on the paint to get the Wing.
- Use the paperclip on the cuffs to get the Handcuffs.
-
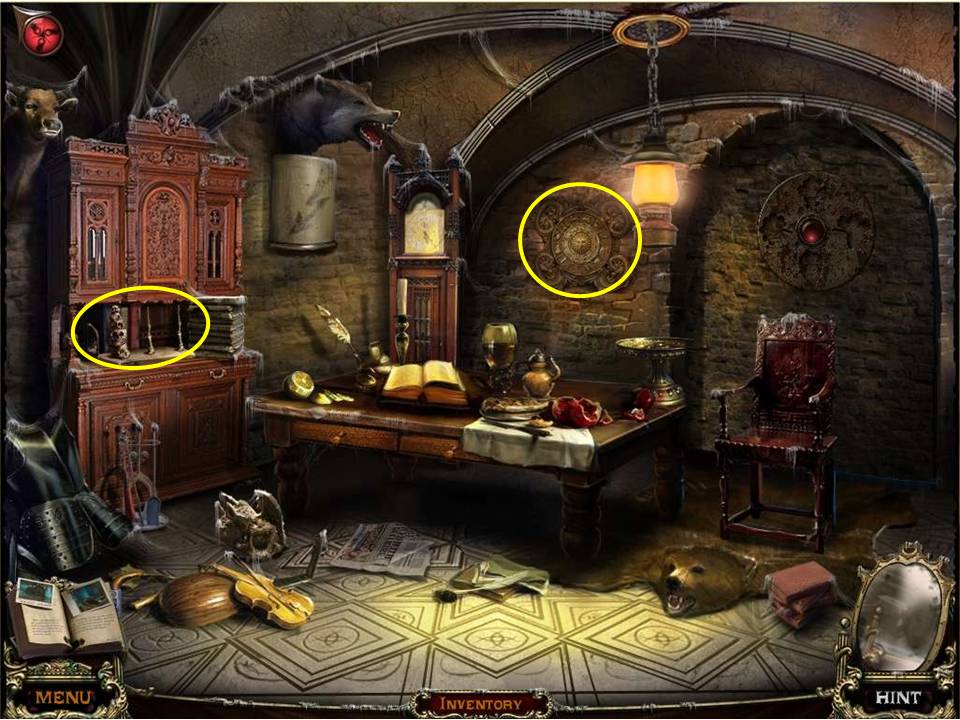
Receive the KEY. Enter the cottage.
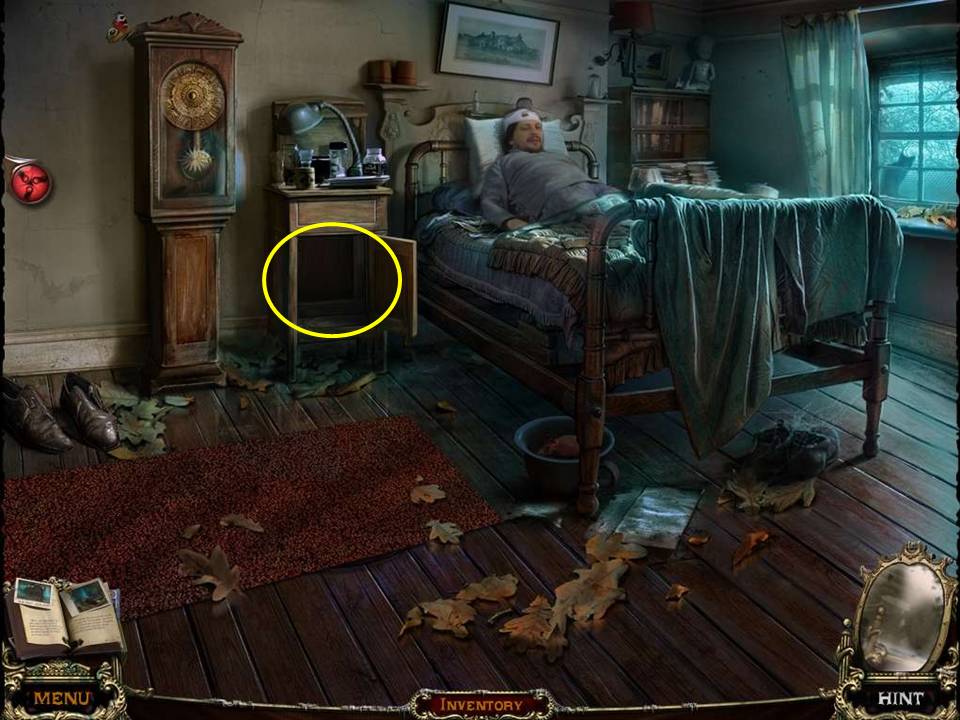
- Zoom into the cabinet.
- Insert the KEY in the lock.
- Take the BANDAGE and the TAPE.
- BANDAGE the injured guard.
- He will give you the third SKULL.
-
Return to the main house.
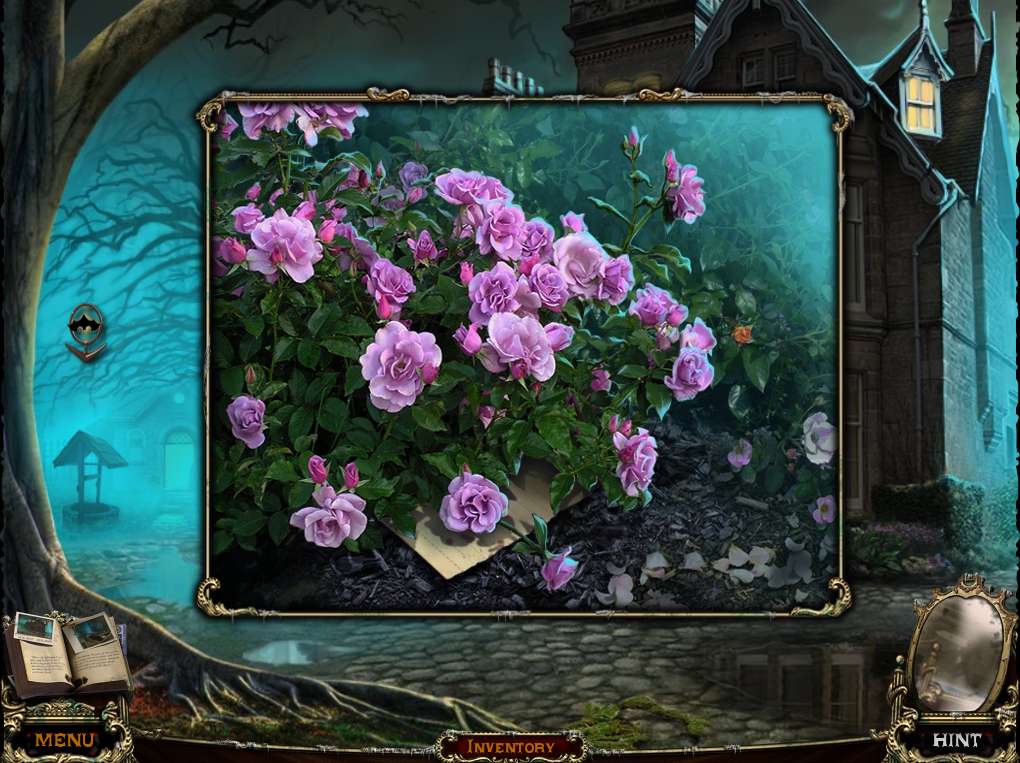
- Zoom into the bushes.
- HAND RAKE the ground to move aside the flowers.
- Place the LETTER PIECE next to the piece on the ground.
- TAPE the torn letter and take it.
- Retrieve the second WOLF COIN behind the note.
- Zoom into the front door.
-
Place the three SKULLS on the board to initiate a puzzle.
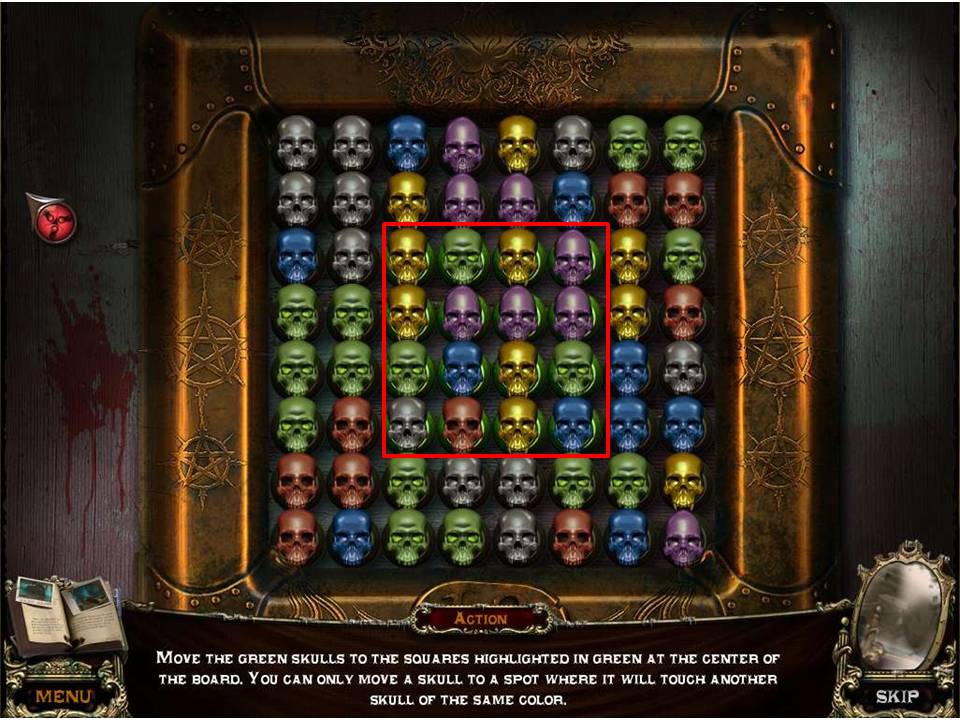
- The object of the game is to move the green skulls to the squares highlighted in green at the center of the board – the area has been highlighted in red on the screenshot.
- Note that the screenshot doesn’t show the final outcome of course, just the area where all the green skulls have to end up.
- You can only move a skull to a spot where it will touch another skull of the same color.
- Click two adjacent skulls to swap positions.
- There is no clear cut solution but the method is fairly simple, which is to basically ignore all the other colors and just concentrate on bunching the green skulls together so that you can use them to leapfrog each other towards the green square in the middle, noting of course NOT to leave any green skulls isolated during the process, or you won’t be able to move them.
- Any isolated green skulls may require you to send out a little line of ‘feeder’ green skulls from the main group to help bring them in.
-
When complete the door will open and allow you to enter the mansion.
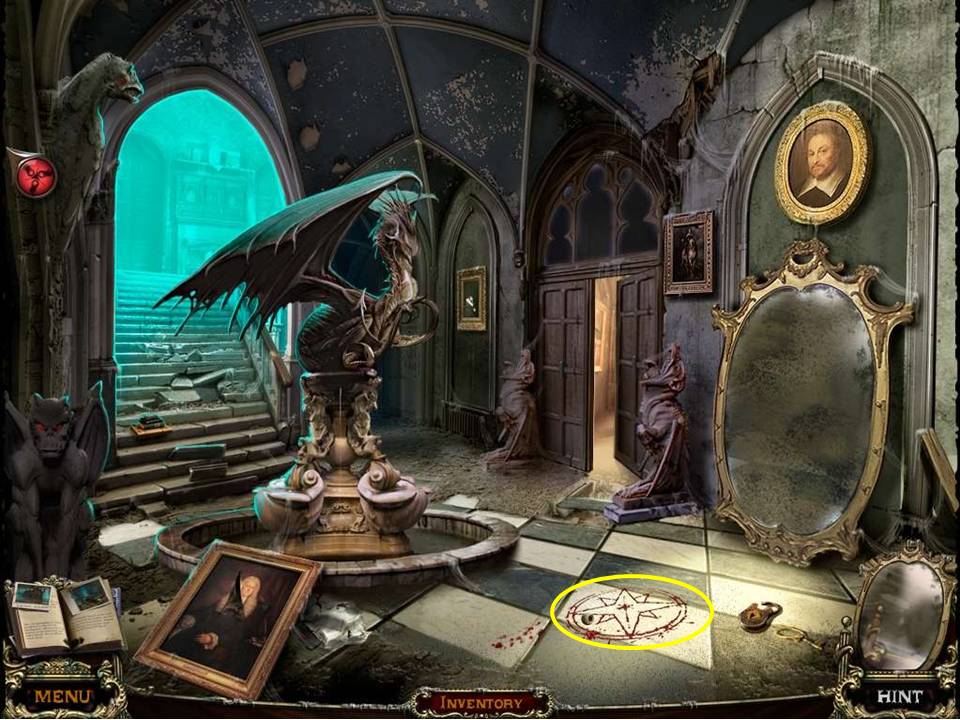
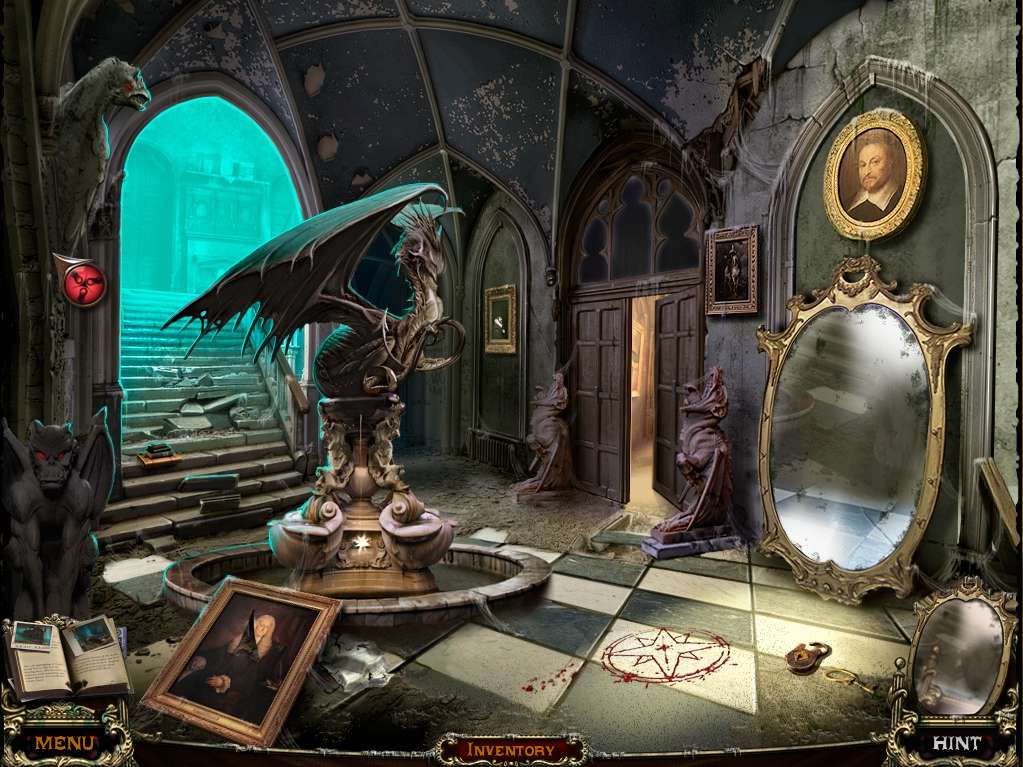
- Zoom into the ritual symbol (drawn in blood?) on the floor and take the first GLASS EYE.
- Note the stairs at left.
- Enter the doors on the right.
-
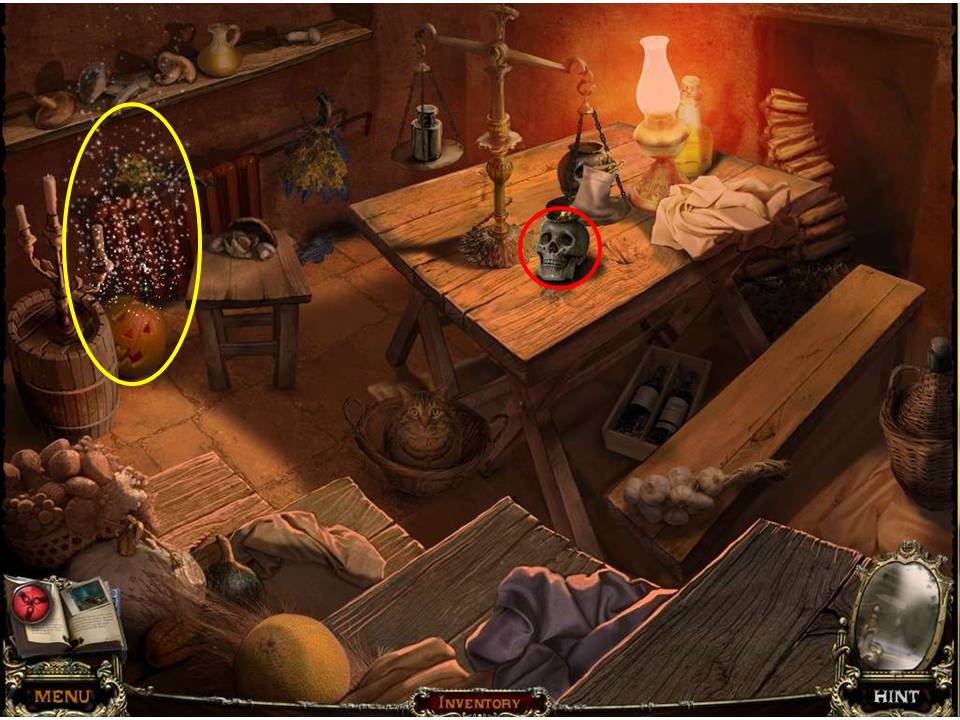
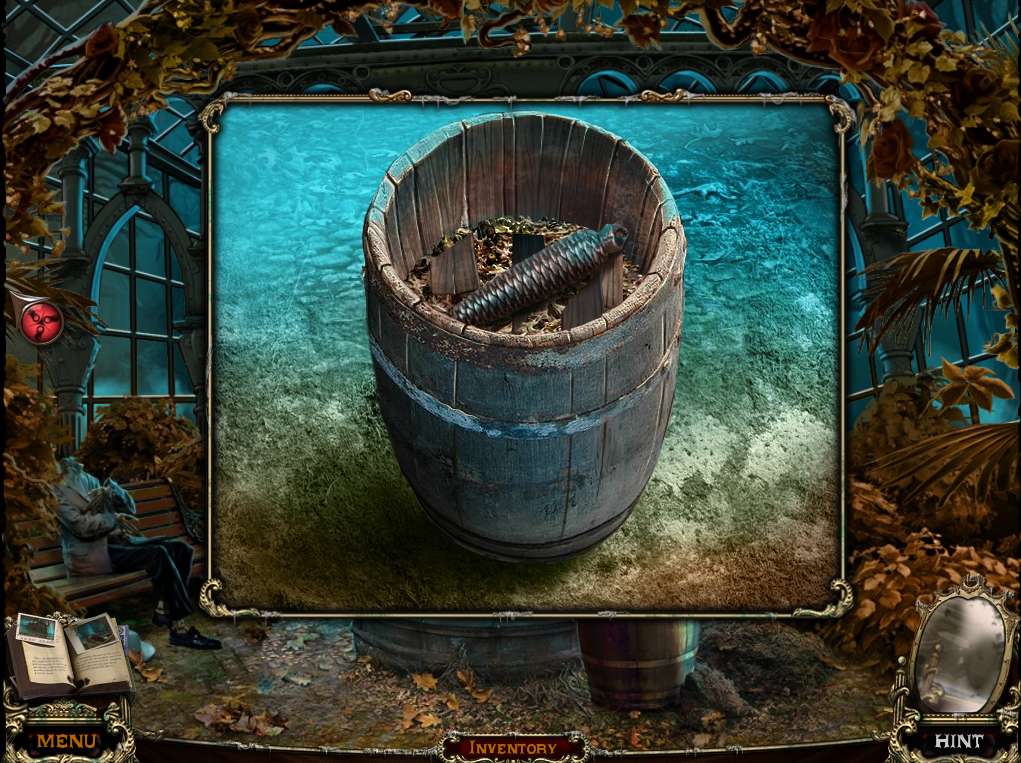
Walk right to the greenhouse.
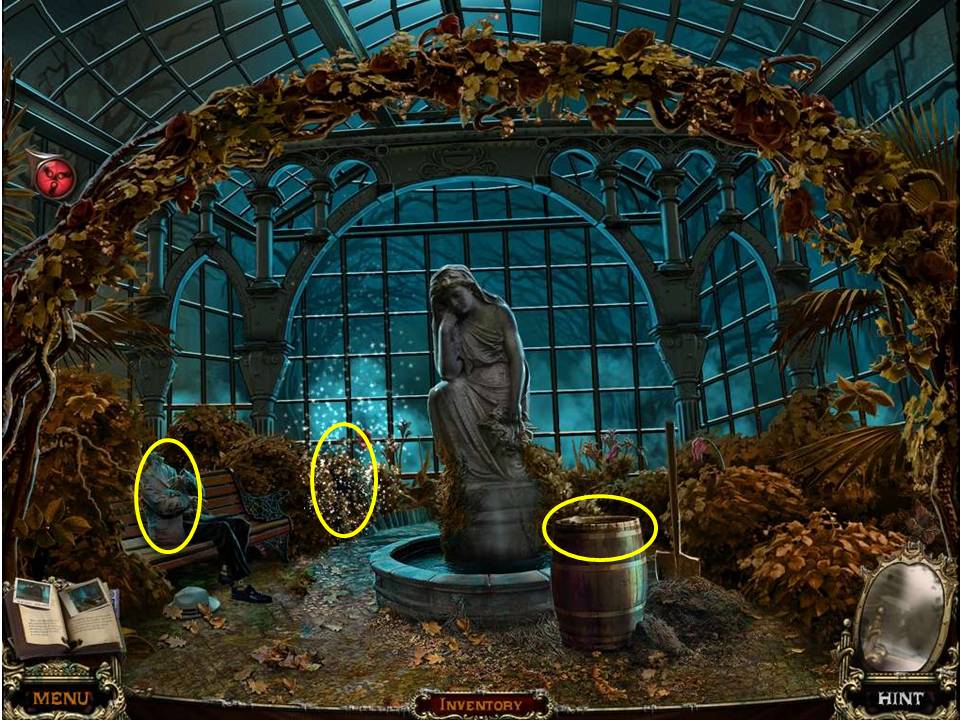
- Zoom into the barrel.
- Take the EYE.
- Zoom into the skeleton.
- Take the first SKULL.
-
Play the HOA at the back of the scene.
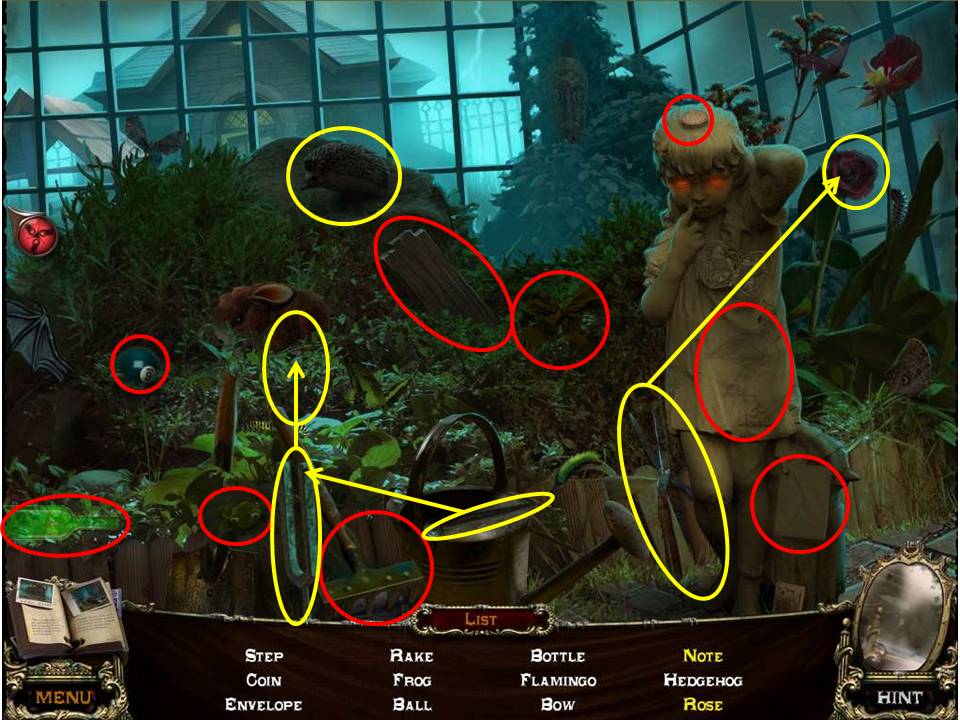
- Find the items listed.
- Move the hat to get the Hedgehog.
- Clip the bush to get the Rose.
- Use the drumstick on the tuning fork to get the Note that rises up.
- Receive the STEP.
- Exit outside to see gunshots being fired inside the cottage.
-
Proceed there.
- Zoom into the guard’s hand – poor guy, can’t really seem to win on this, can he?
- Take the KEY.
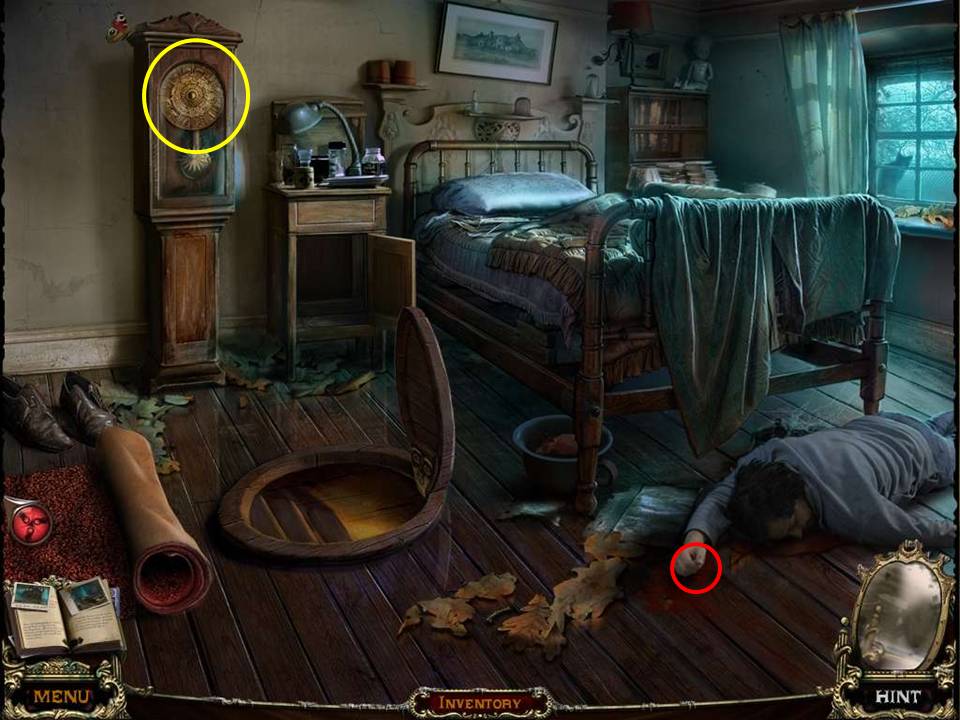
- Zoom into the clock.
- Insert the key in the lock.
- Note the position of the three hands, which will be noted in your journal.
- Take the CLOCK HANDS.
- Open the trapdoor - in a bedroom?
- Imagine the damage if you had to go to the bathroom in the middle of the night and had left it open!
-
Go down to the cellar.
- Take the second SKULL.
-
Play the HOA by the pumpkin on the left.
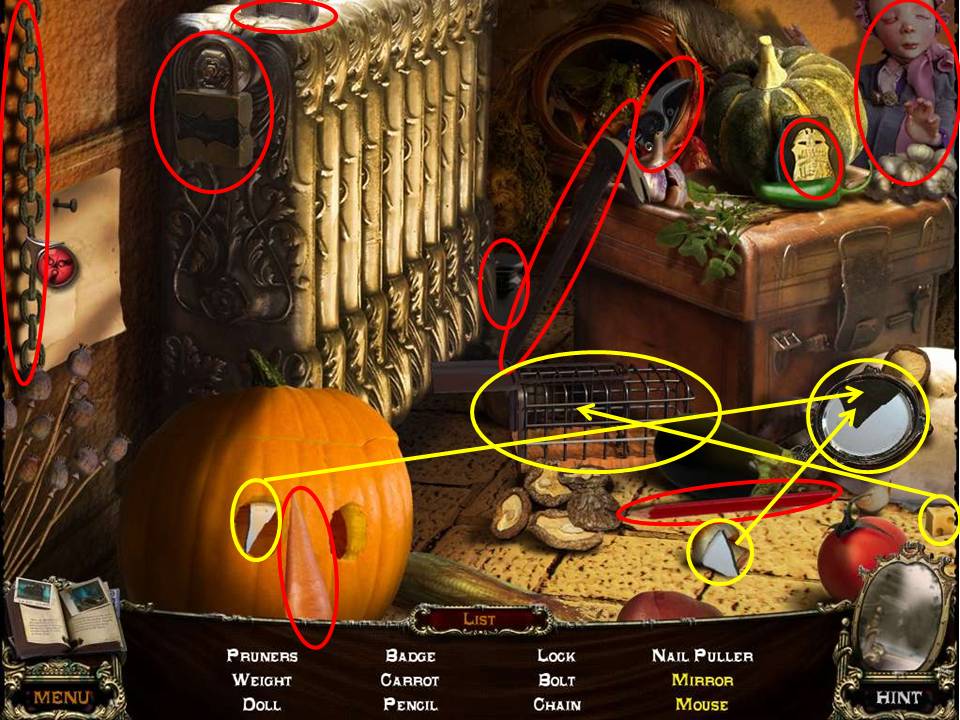
- Find the items listed.
- Place the two mirror pieces into the frame to get the Mirror.
- Bait the trap with the cheese to get the Mouse.
- Receive the PRUNER.
-
Exit back out to the front of the mansion and go down to the right.
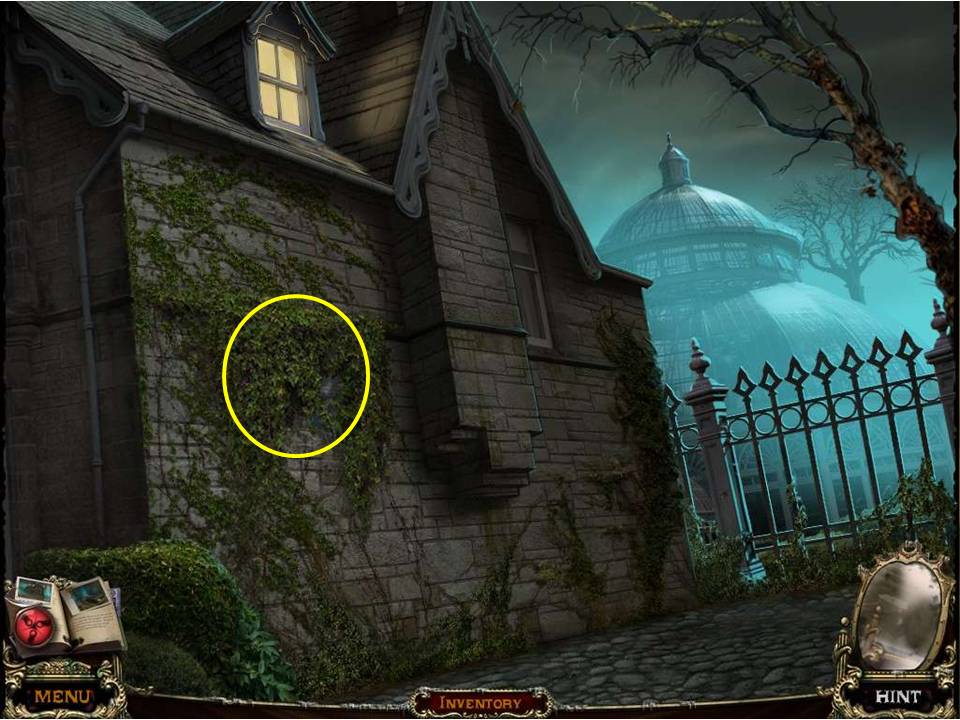
- Zoom into the side of the house.
- Clip the vines with the PRUNER.
- Note the diagram.
- Take the HAMMER.
-
Exit and return to the interior of the mansion.
- Go through the door on the right.
- Walk right to the greenhouse.
- Zoom into the barrel.
- HAMMER the lid.
-
Take the weight.
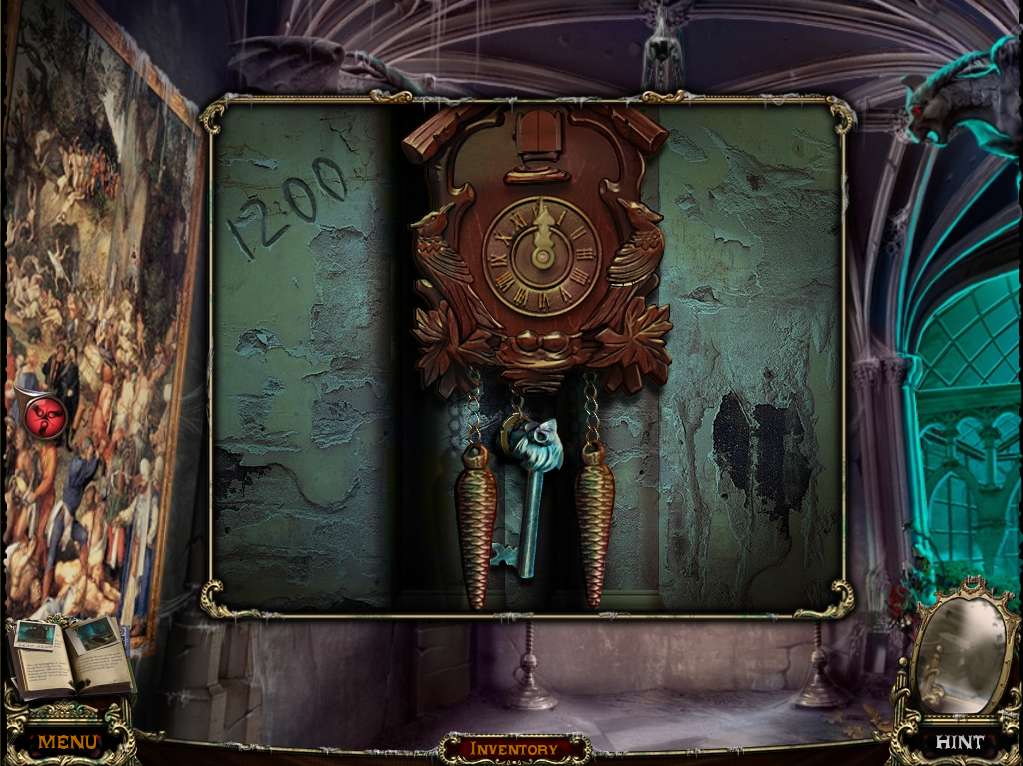
- Click down once to return to the room with the paintings.
- Zoom into the clock on the left wall.
- Hang the WEIGHT on the chain.
- Put the CLOCK HANDS on the clock face.
- Set the hands to 12:00 as per the writing on the wall on the left.
- Take the KEY.
-
Exit to the mansion’s foyer and take the steps to the left.
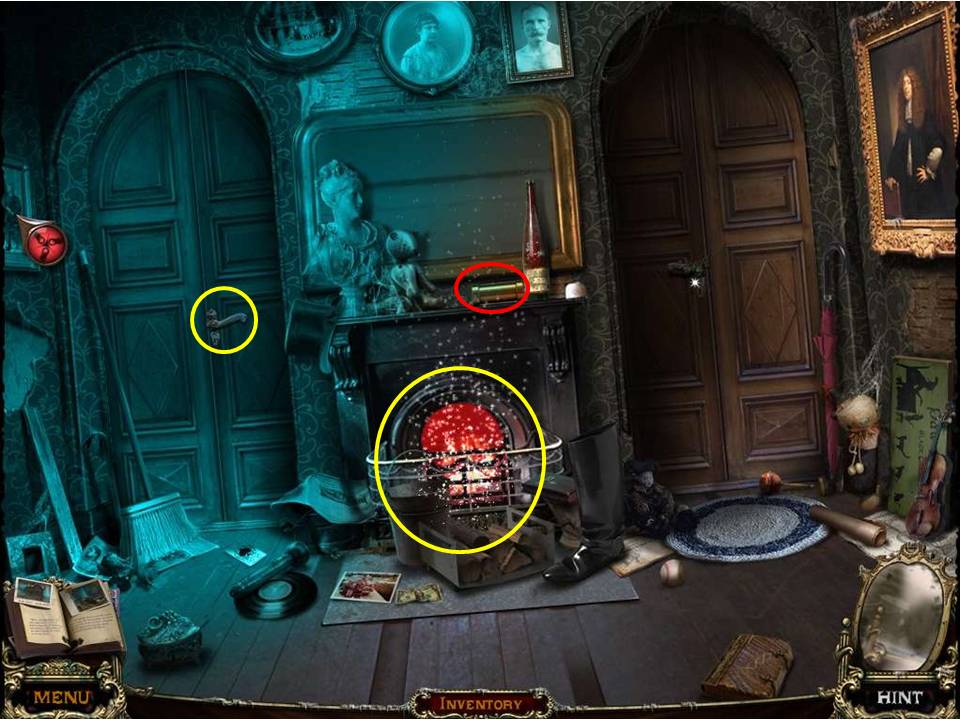
- Zoom into the door on the left.
- Use the KEY in the lock.
- Take the first PIPE sitting on the mantelpiece.
-
Play the HOA by the fireplace.
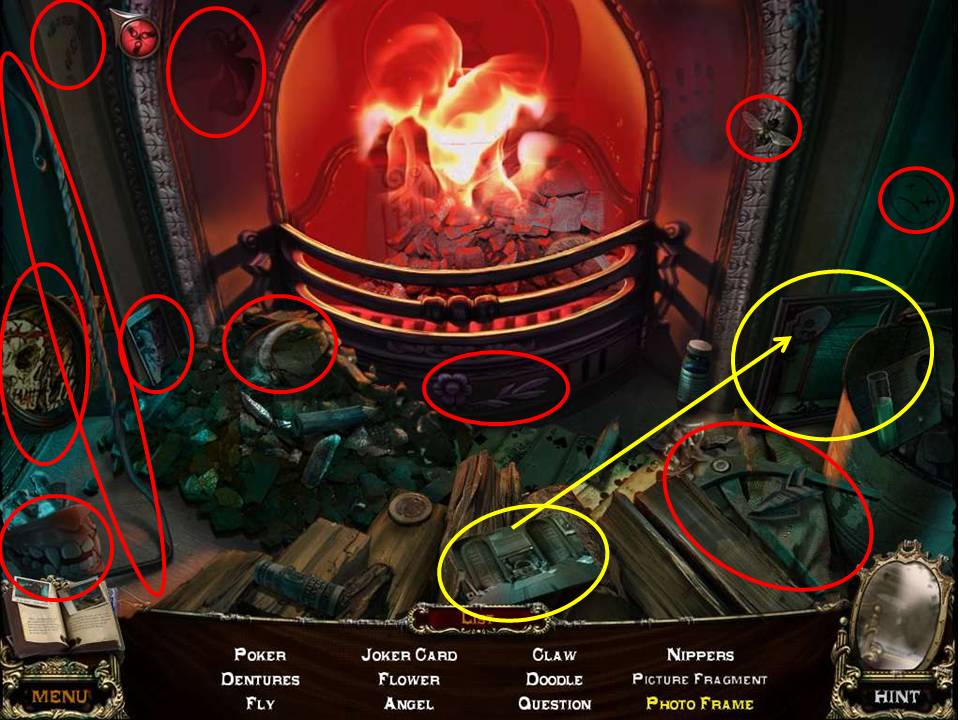
- Find the items listed.
- Place the photo in the frame to get the Photo Frame.
- Receive the first PUZZLE FRAGMENT.
-
Enter the door on the left.
- Zoom into the zodiac device on the wall.
- Click the three signs that you noted on the clock in the cottage. (See journal for a reminder.)
- Take the BELT inside.
-
Zoom into the cabinet to initiate a puzzle.
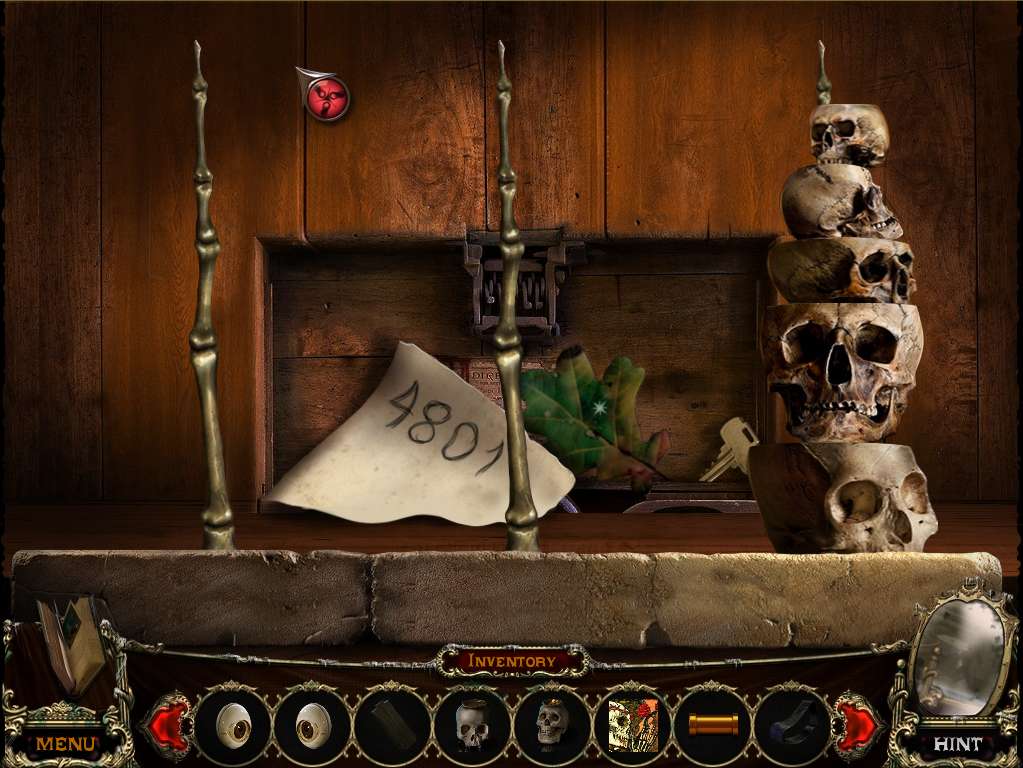
- The object of the puzzle is to move the skulls from left to right, one skull at a time.
- This is a simplified version of the classic ‘Tower of Hanoi’ puzzle.
- No larger skull can be placed on a smaller skull.
- See screenshot for solution. Numbering the skull pieces 1 to 5 in order of size and the pegs A to C from left to right, here’s the solution -
- 1 – C, 2 – B, 1 – B, 3 – C, 1 – A, 2 – C, 1 – C, 4 – B, 1 – B, 2 – A, 1 – A, 3 – B, 1 – C, 2 – B, 1 – B, 5 – C, 1 – A, 2 – C, 1 – C, 3 – A, 1 – B, 2 – A, 1 – A, 4 – C, 1 – C, 2 – B, 1 – B, 3 - C, 1 – A, 2 – C, 1 – C.
- Note the code.
- Take the first LEAF and KEY.
- Zoom into the drawer.
- Use the KEY on the lock.
-
Take the RAG and the second LEAF.
- Exit downstairs to the foyer and zoom into the mirror.
- Wipe the mirror with the RAG.
-
Go forward through the doors into the adjacent room with the artwork on the walls.
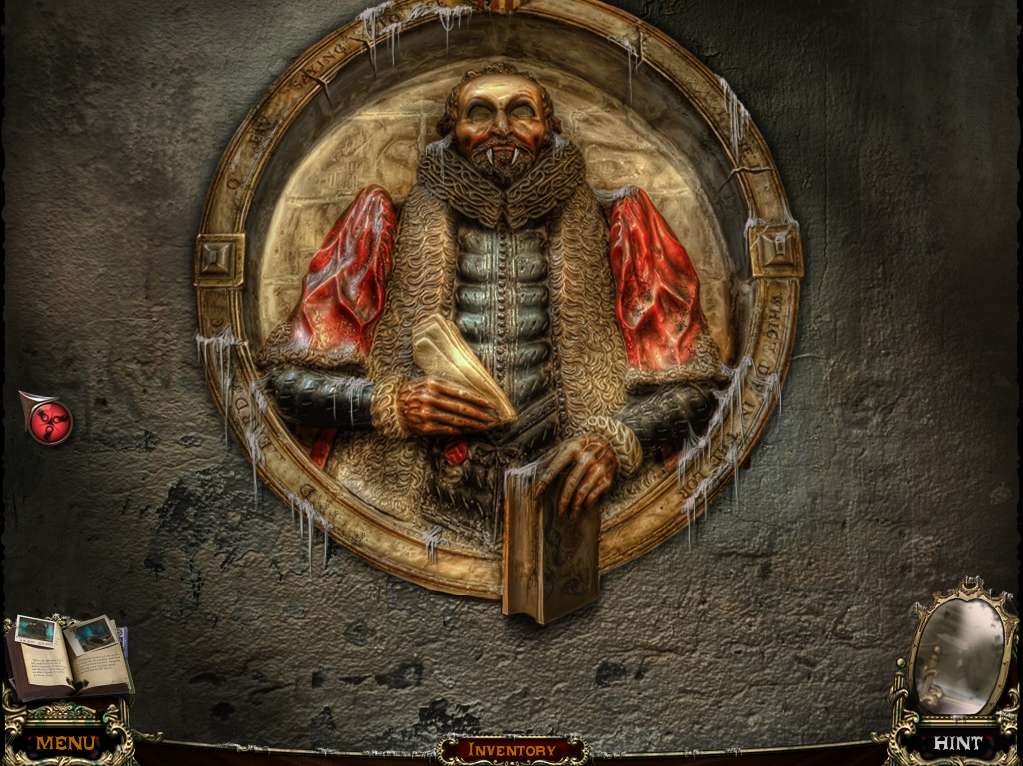
- Zoom into the carving directly in front with the fangs – nice!
- Put the two GLASS EYES into the sockets – ugh, I think he looked less crazed without them!
- Click on the figure’s chest to open the panels.
- Click the buttons per the code on the piece of paper stuck to the wall – great security system, right?
- The buttons are mixed and could be randomized, but if not than the 4 is exactly where it normally would be, 4th from left on the top row, the 8 is directly underneath, the 0 is to the left of the 8, and the 1 is directly to the left of the 0.
- Walk forward if you dare!
General Info and Tips
Chapter One
Chapter Two
Chapter Three
Chapter Four
Chapter Five
Chapter Six
Ask for help in the comments below!
Chapter One
Chapter Two
Chapter Three
Chapter Four
Chapter Five
Chapter Six
Ask for help in the comments below!