Tales of Terror: Crimson Dawn: Chapter Three
Our Tales of Terror Crimson Dawn Walkthrough comes fully equipped and ready to help you combat what goes bump in the night in this spooky hidden object game. Filled with custom screenshots, marked clearly so you can see all the key items and locations you need to investigate, as well as detailed instructions on how you can save your brother, Jason, this Tales of Terror Walkthrough is a must have companion as you brave the terrors of the night.
General Info and Tips
Chapter One
Chapter Two
Chapter Three
Chapter Four
Chapter Five
Chapter Six
Ask for help in the comments below!
Chapter One
Chapter Two
Chapter Three
Chapter Four
Chapter Five
Chapter Six
Ask for help in the comments below!
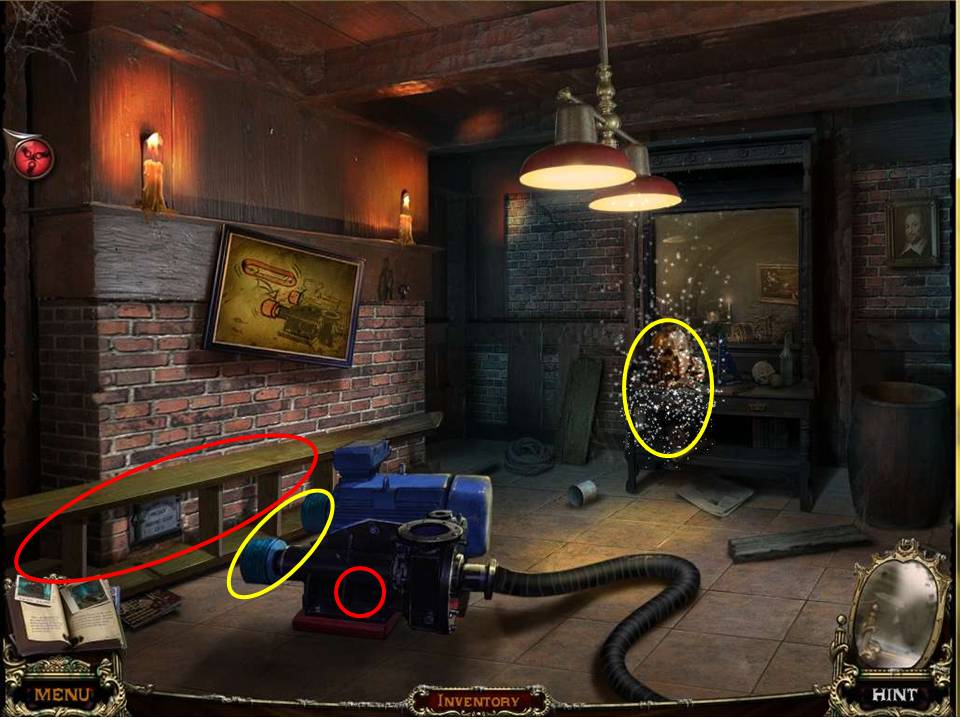
- Take the LADDER.
- Zoom into the pump.
- Take the third LEAF.
- Put the BELT on the pump.
-
Play the HOA by the table.
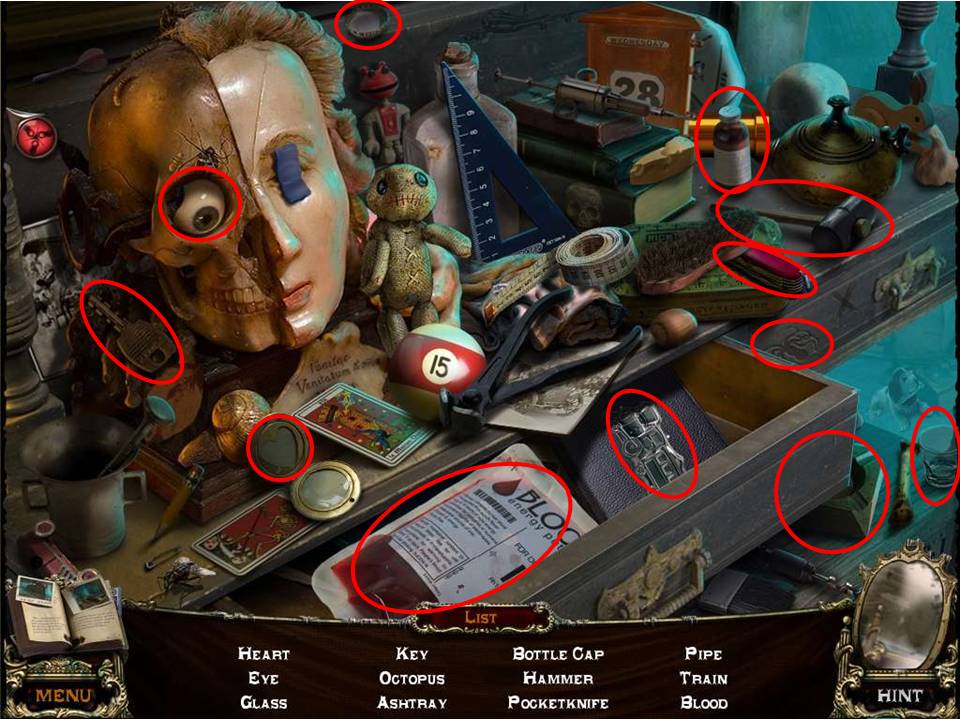
- Find the items listed.
- Open the drawer to get the Train and Blood.
- Receive the second PIPE.
-
Return to the mansion foyer.
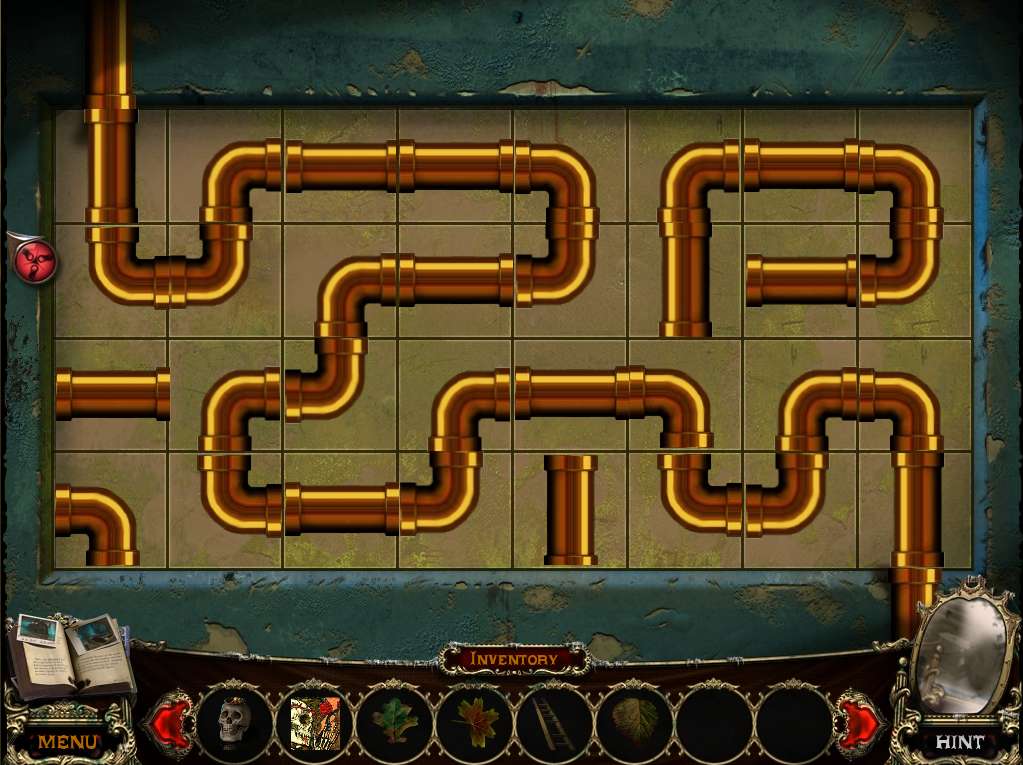
- Zoom into the base of the fountain and place the two PIPES on the grid to initiate a puzzle.
- The object of the puzzle is to rotate the pipes to direct the water from left to right.
- To do this, you click on a pipe piece to rotate it in place – you won’t need all the pieces to complete the process.
- See screenshot for solution.
-
When finished return to the greenhouse.
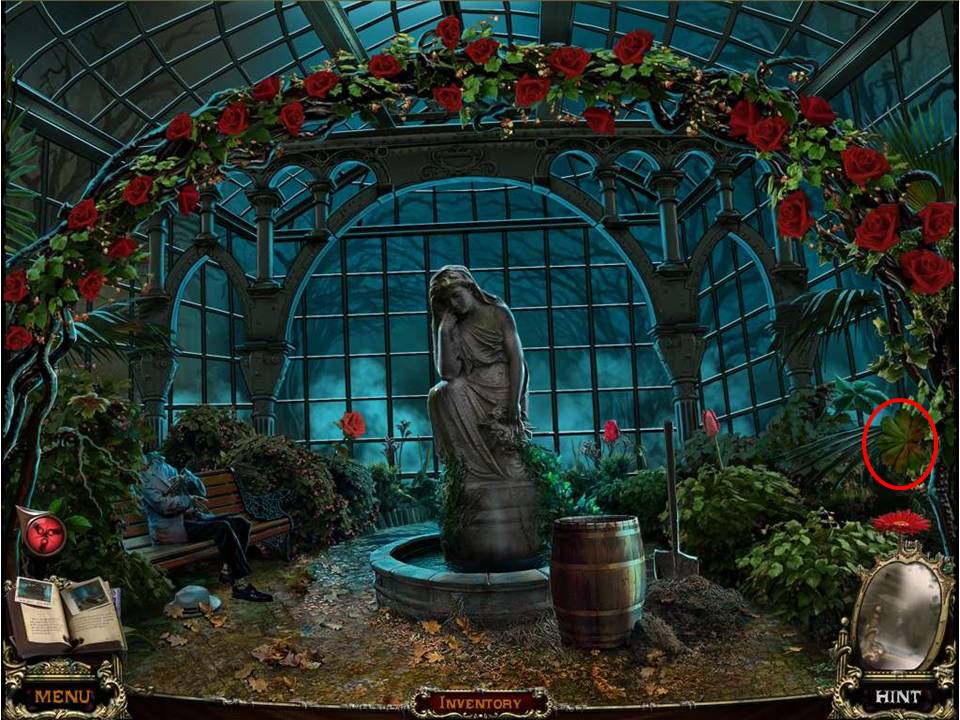
- Take the fourth LEAF on the far right.
-
Exit the mansion via the front and walk right to the side of the house.
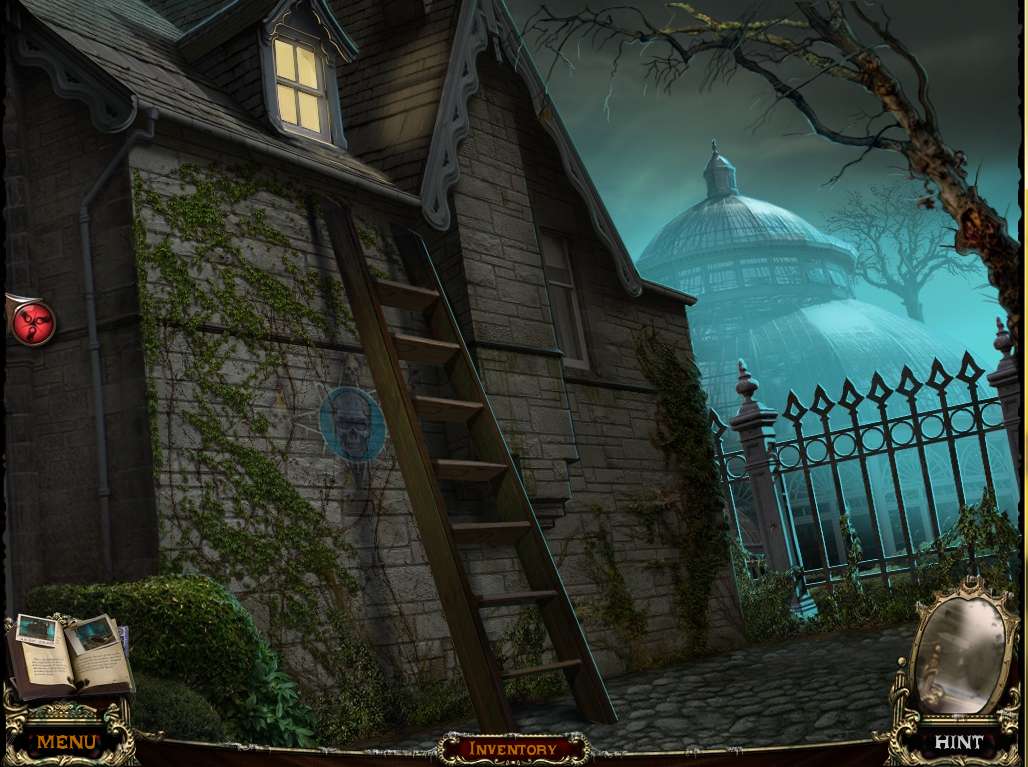
- Put the LADDER against the side of the house.
- Insert the STEP in the LADDER.
-
Go through the second floor window.
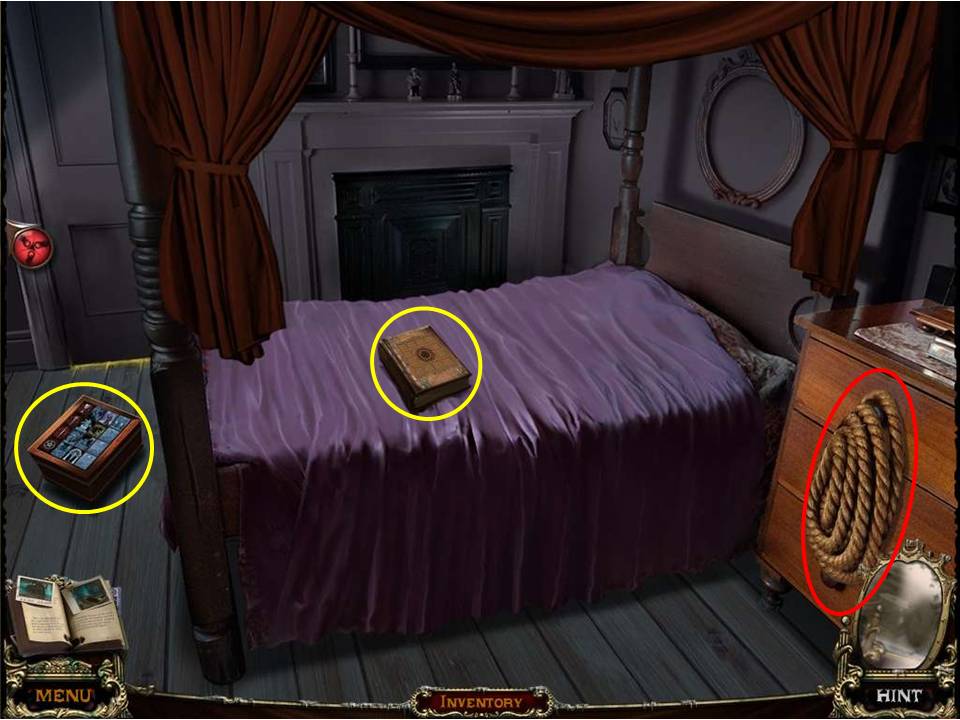
- Take the ROPE.
- Note the book on the bed.
-
Select the puzzle on the floor to the left of the footboard.
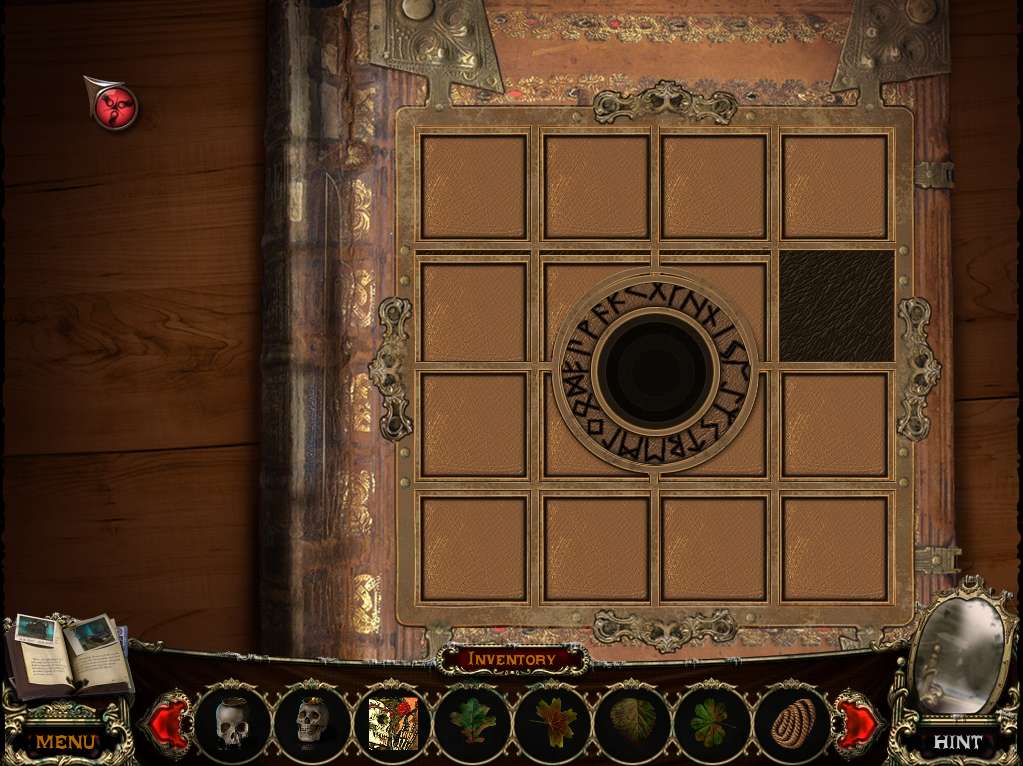
- If you’ve played the old sliding puzzle of putting letters or numbers in order you’ll get the idea with this.
- The basic idea is to use the empty square to move pieces around the board, the specific object being to simply take the four semi-circle pieces and make a full circle around the center, as noted in the screenshot. If you need an actual solution, note the following sequence, working on the basis that the squares are numbered in the typical order of left to right - 3-7-6-2-1-5-6-2-1-5-9-10-14-13-9-10-11-12-15-16-14-10-11-15.
-
When complete you’ll note that you need a key to open the book.

- Exit the book and zoom in on the box on the floor to initiate the next puzzle.
- The object is to place the cards according to the clues indicated on both the left side of the box and across the top.
- Click two cards to swap their positions.
- When finished, take the second PUZZLE FRAGMENT.
- Exit the room via the window, and head to the well in front of the cottage.
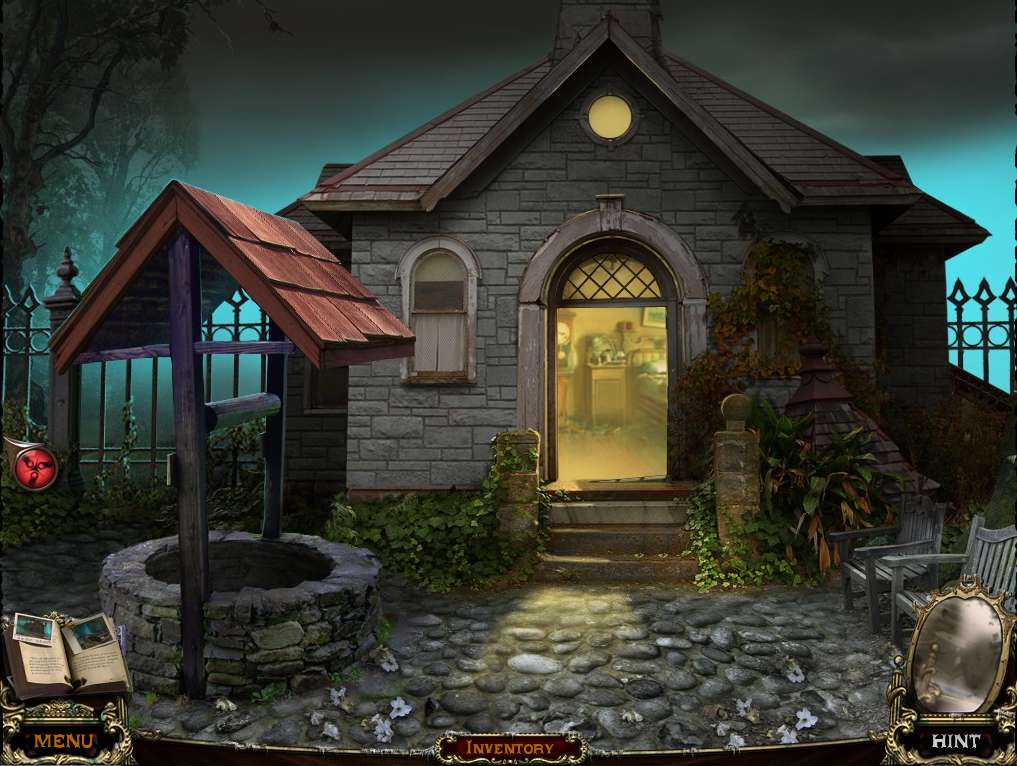
- Zoom into the well.
- Use the rope on the crosspiece.
-
Descend into the well.

- Open the door and go forward.
- Take the KEY from Jason’s left hand.
- Return up the well and head back to the right side of the house and up the ladder.
- Place the key on the book to unlock it.
-
Turn the page to take the other KEY hidden inside.
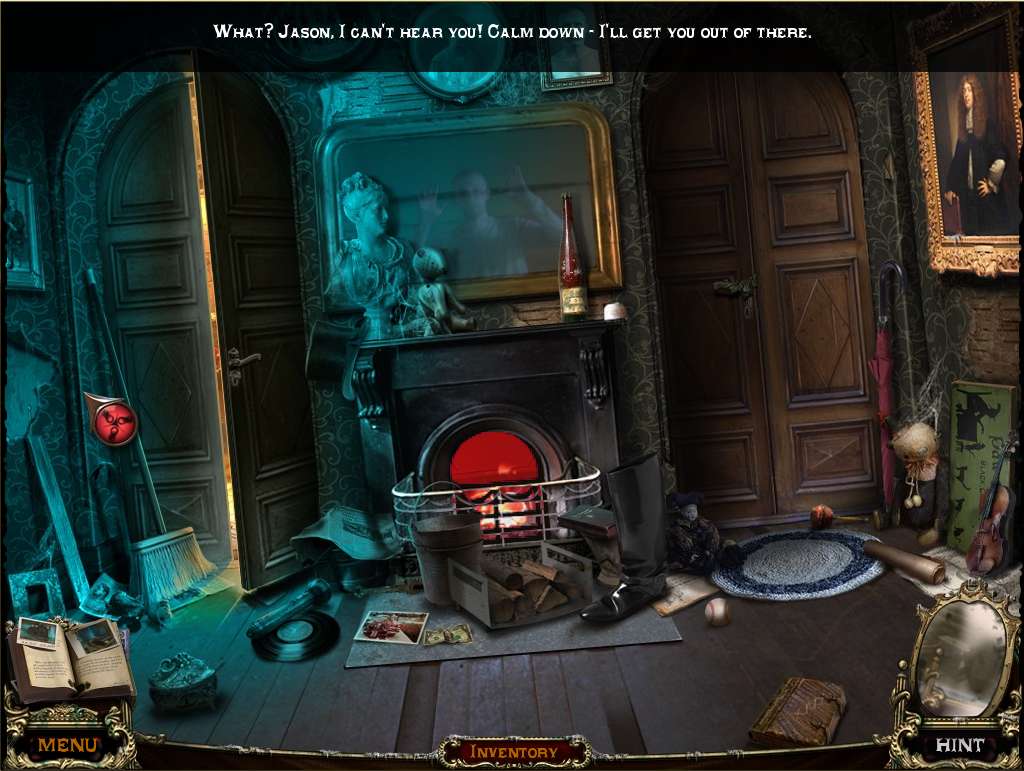
- Exit via the ladder and enter the mansion.
- Head up the stairs to the left and use the KEY to unlock the door on the right.
-
Enter in.
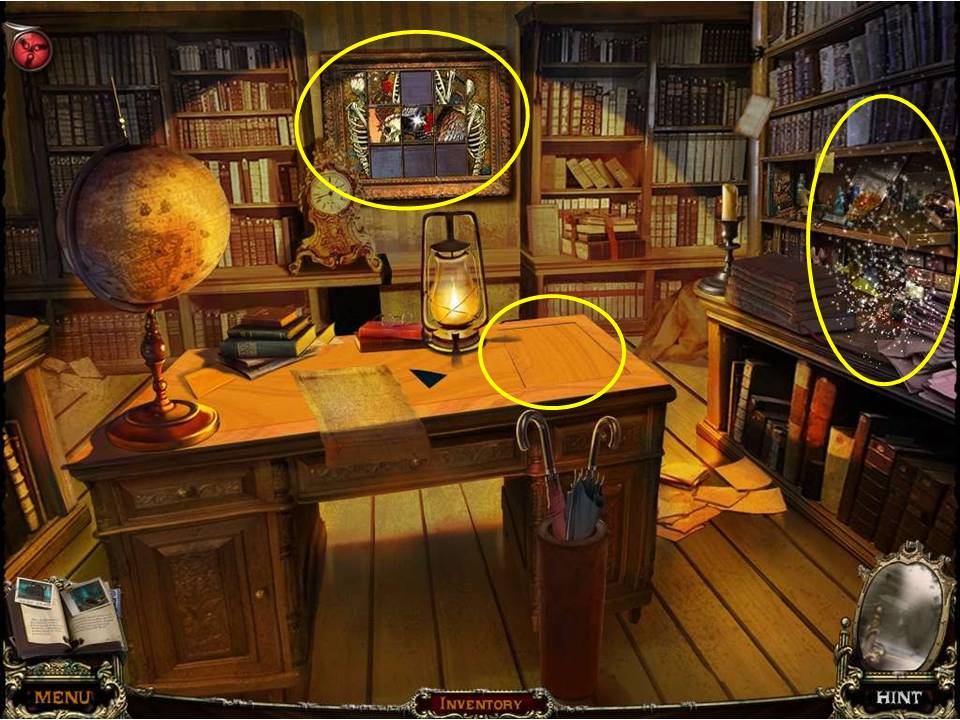
- Note the puzzles on the back wall and desk.
-
Play the HOA by the shelves.
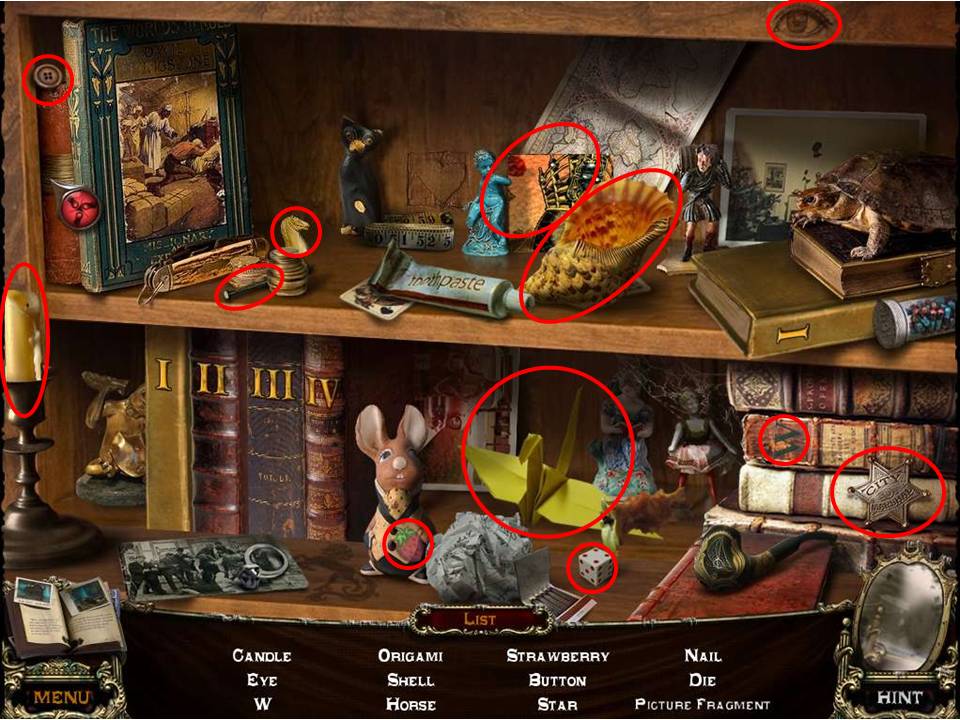
- Find the items listed.
- Receive the third PUZZLE FRAGMENT.
-
When finished, play the puzzle on the desk.
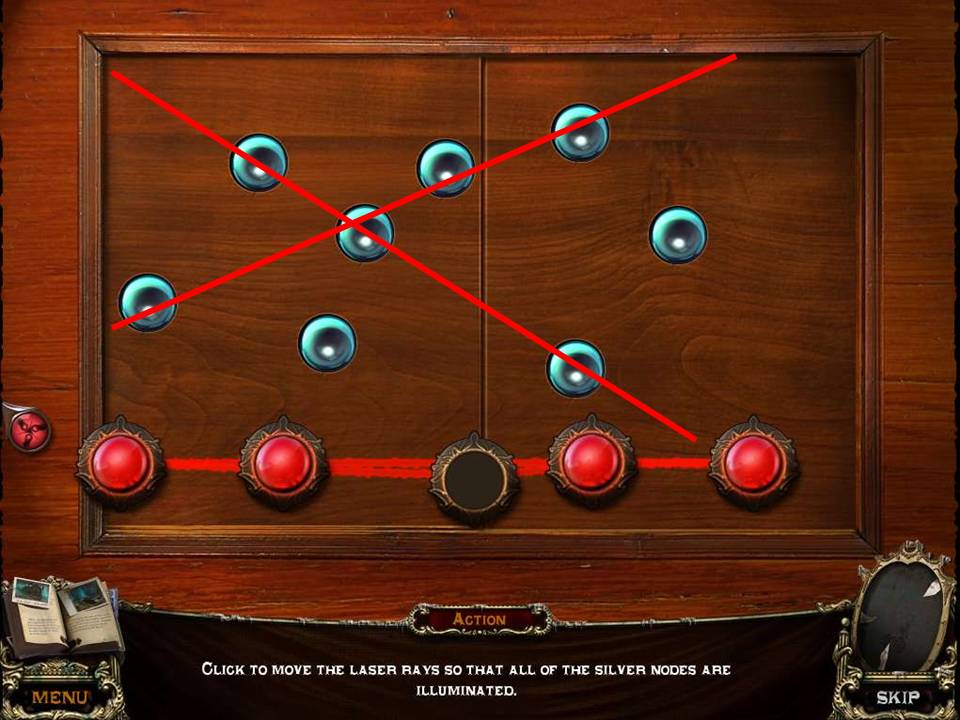
- The object of the puzzle is to move the laser rays so that all of the silver nodes are illuminated.
- Please note that one disk does not move.
- See screenshot, which shows the two key intersects – adjusting the remaining disks to account for the remaining couple of nodes is then pretty easy.
-
Turn the page and take the third WOLF COIN.
- Reverse your way completely back to the shed – seems like weeks ago that you were here, right?
- Enter the shed.
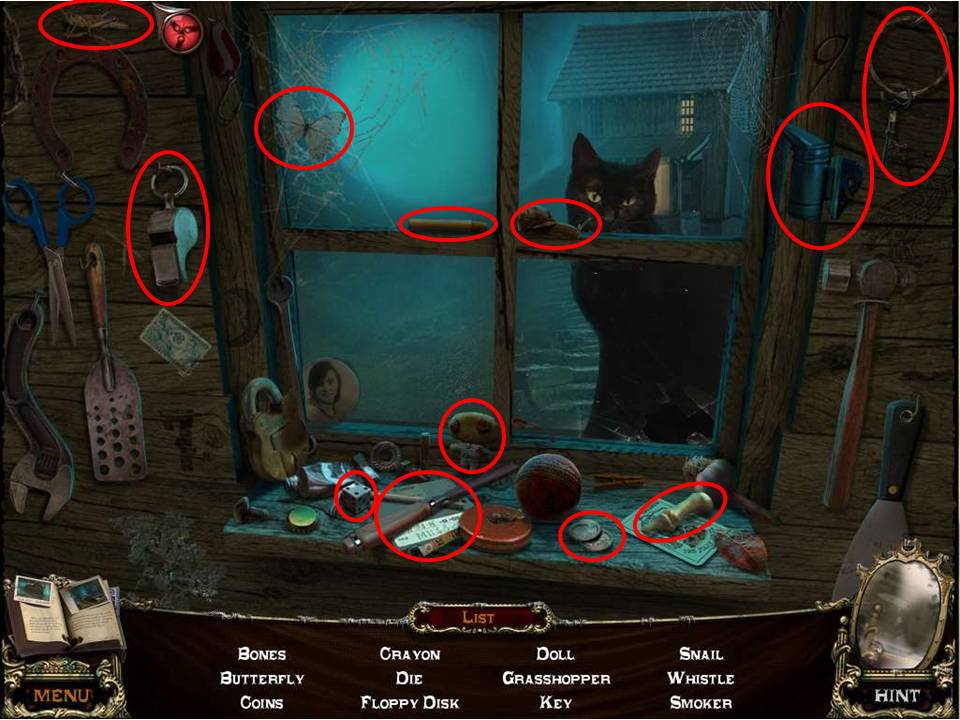
- Play the HOA by the window.
- Find the items listed.
- Receive the SMOKER.
- Go outside.
-
What is it with this cat always lurking in windows?
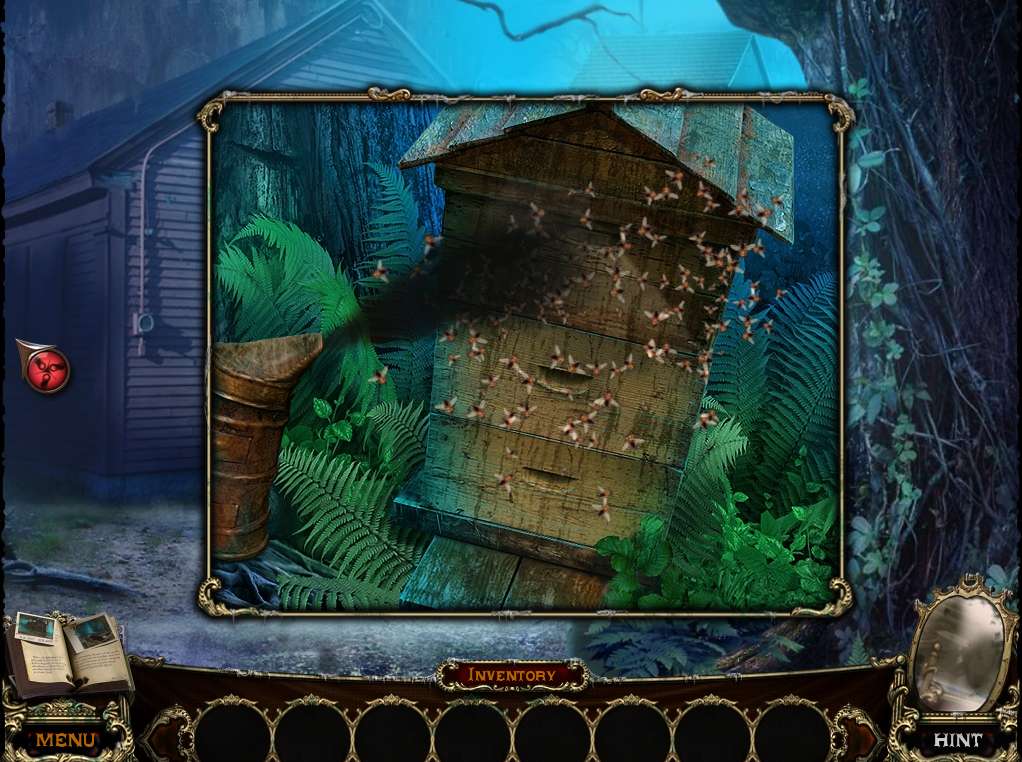
- Use the SMOKER on the beehive.
-
Take the BEESWAX.
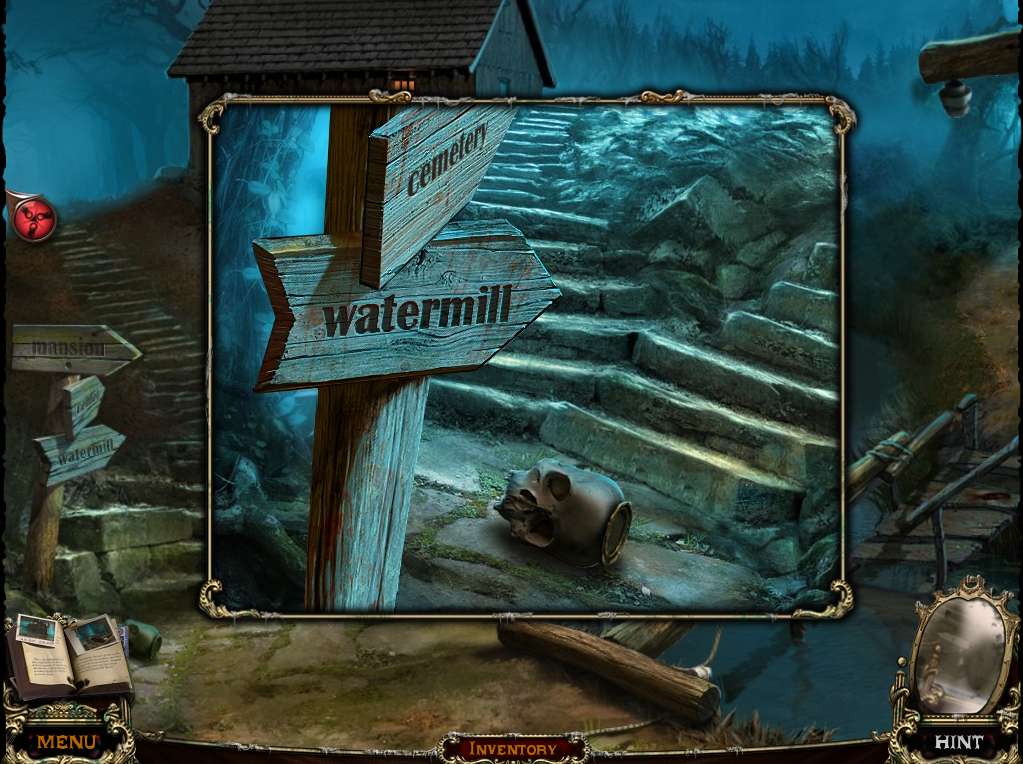
- Walk forward towards the creek.
- Zoom into sign base.
- Take the third SKULL.
- Enter the watermill.
-
Play the HOA at the back left.
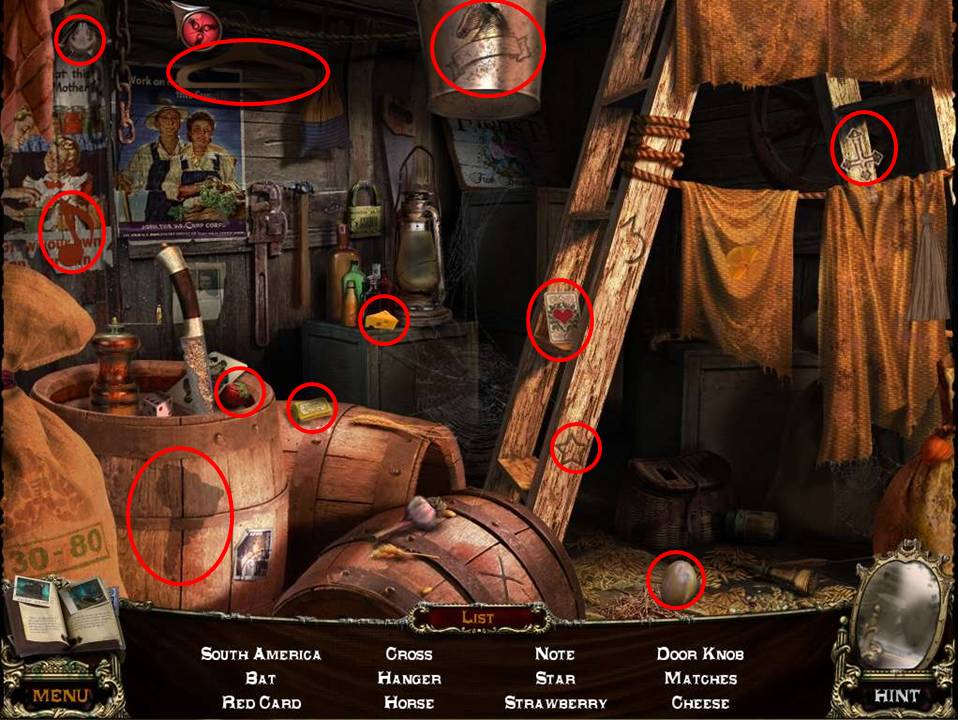
- Find the items listed.
- Receive the CHEESE.
-
Exit the mill and head left to the cemetery gate.
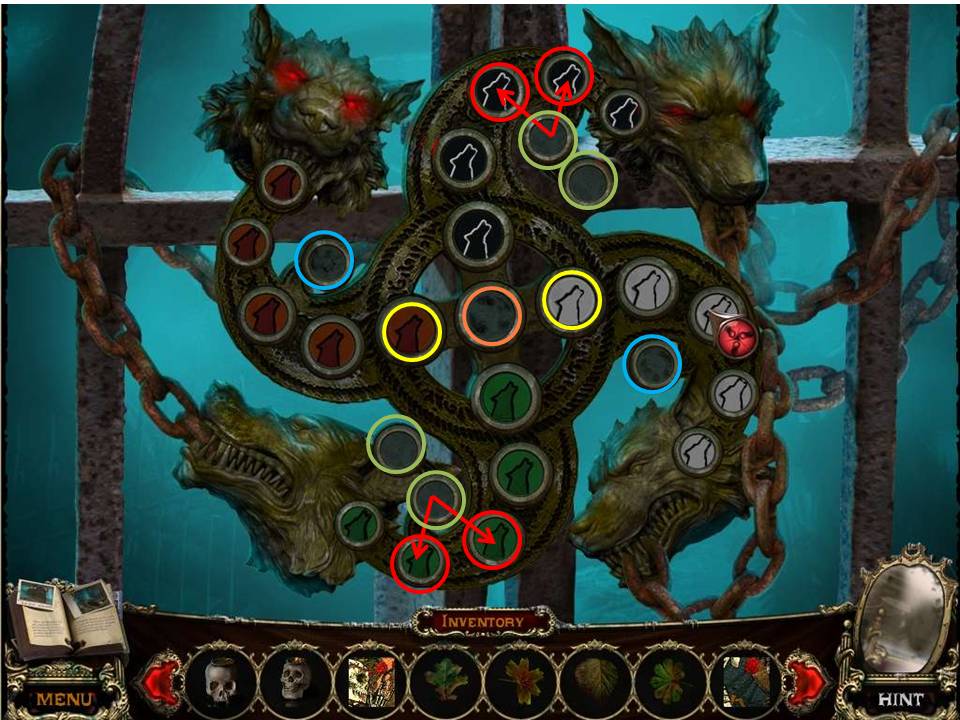
- Place the three WOLF COINS to initiate a puzzle.
- The object of the puzzle is to move the wolf heads to the coins of the same color.
- See the screenshot for the final appearance.
- The easiest way to solve this is in two stages.
- You’ll note that the red and white areas have one resting place each, whereas black and green have two.
- So better to reserve the two colors with the most resting space (black and green) for last when you’ll need the wiggle room.
- So start by using the resting spaces, plus the spare spaces towards back and green, to swap the red and white pieces to their appropriate areas – this should be pretty easy to accomplish. That then leaves the black and green pieces to move.
- There’s a little bit of tooing and froing involved, but the way to work it is this –
- - Pack all the red and white pieces as far in to their respective areas as possible by using the spare spaces (circled in blue) to hold one of each piece. This will then leave the spaces circled in yellow empty to help in the transfer of the other two colors.
- - Note that the two circles marked in red at either end are both accessible from the nearest holding space. This is a very useful way of maneuvering two different colored pieces around each other towards the end.
- - The third useful tool to use is the intersection (marked in orange) because it presents you with a key way of also swapping colors around. How? Let’s say you’ve stashed a couple of the green pieces on the two vacant areas marked in yellow. You then move a couple of black pieces up towards their home base, passing the intersection. Well, once you’re past that intersection, one or both of the green pieces (depending on what stage you’re at) can exit from the holding areas marked in yellow and move down towards their green zone. The black pieces can then reverse back to the intersection and take their place in the yellow holding areas. It sounds a little convoluted, but this passing, swapping and reversing at the intersection is the key to eventually solving the puzzle.
- This isn’t hard, just tedious, so use the points mentioned above and you’ll have it done in no time.
- Once complete, go through the gate into – the cemetery!!
General Info and Tips
Chapter One
Chapter Two
Chapter Three
Chapter Four
Chapter Five
Chapter Six
Ask for help in the comments below!
Chapter One
Chapter Two
Chapter Three
Chapter Four
Chapter Five
Chapter Six
Ask for help in the comments below!
