
Riddles of Fate: Memento Mori: Chapter One: Paris
Our Riddles of Fate: Memento Mori Walkthrough will be a valuable tool as you attempt to hunt down several dangerous criminals for Death who threaten the very existence of the world! Turn to our detailed instructions, our custom marked screenshots, and our simple puzzle solutions whenever your run into a wall in your search or don't know where to turn next! We'll step you through every obstacle and every puzzle to ensure the world survives another day!

- Speak to the Death.
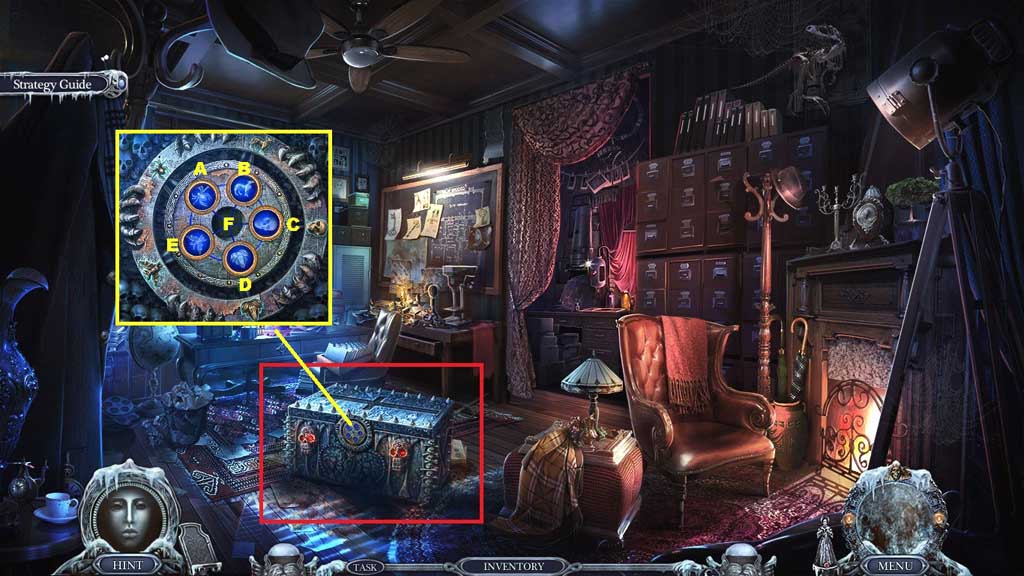
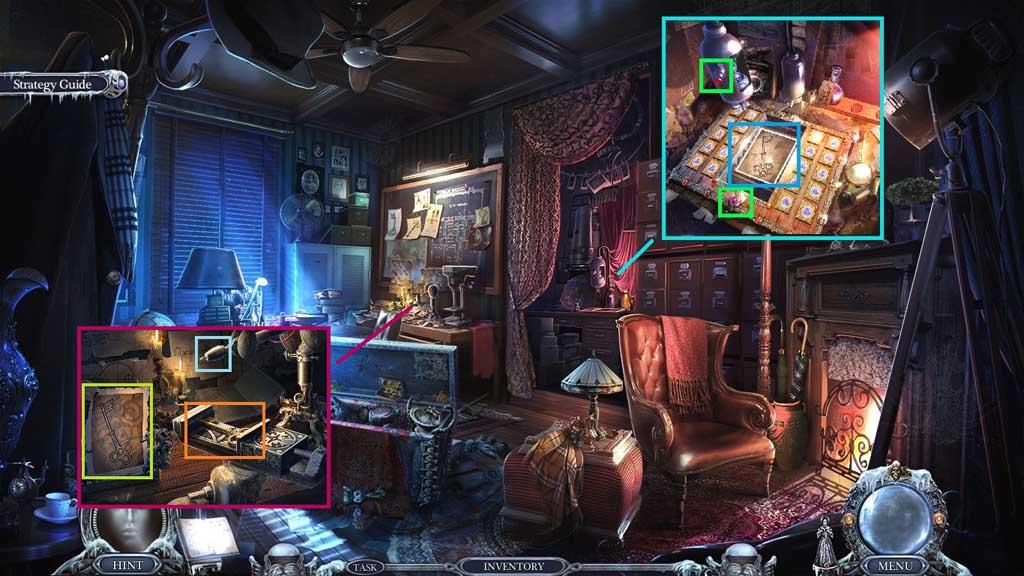
- Zoom into the chest to trigger a mini game.
- Solve the game by aligning the token symbols with the outer rim.
- Use the following solution to solve: B – A – E – E – C – B – A – E
- Click the hidden objects area.

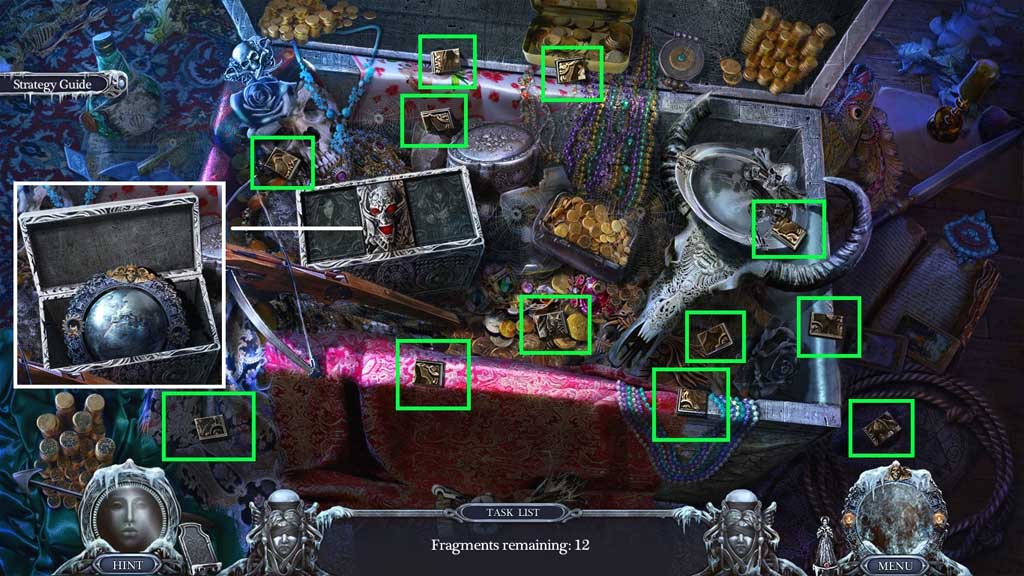
- Find the items.
- Select the spear head and attach it to the shaft; collect the spear.
- Select the pin and place it into the doll; collect the voodoo doll.
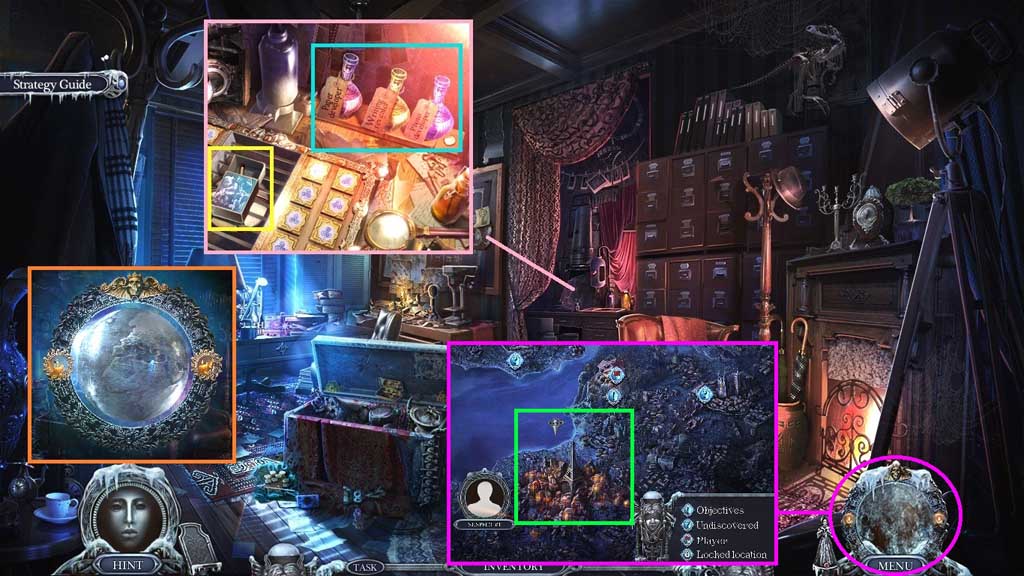
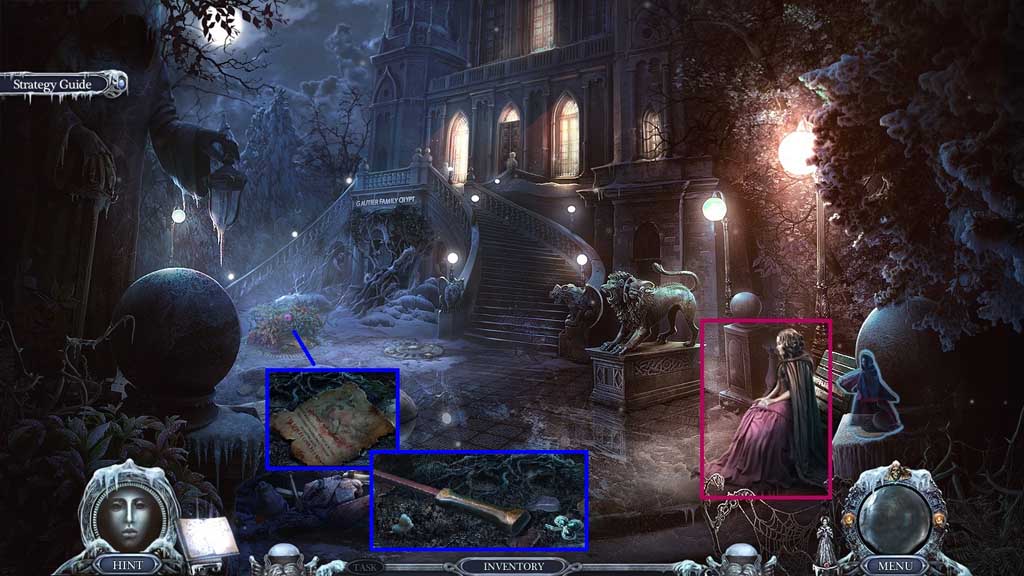
- Collect death’s sphere.
- Collect the empty bottle and the matches.
- Zoom into Death’s sphere in the inventory and use the matches to defrost it.
- Click the sphere.
- Use the map prompts to get to Main Street in Paris.
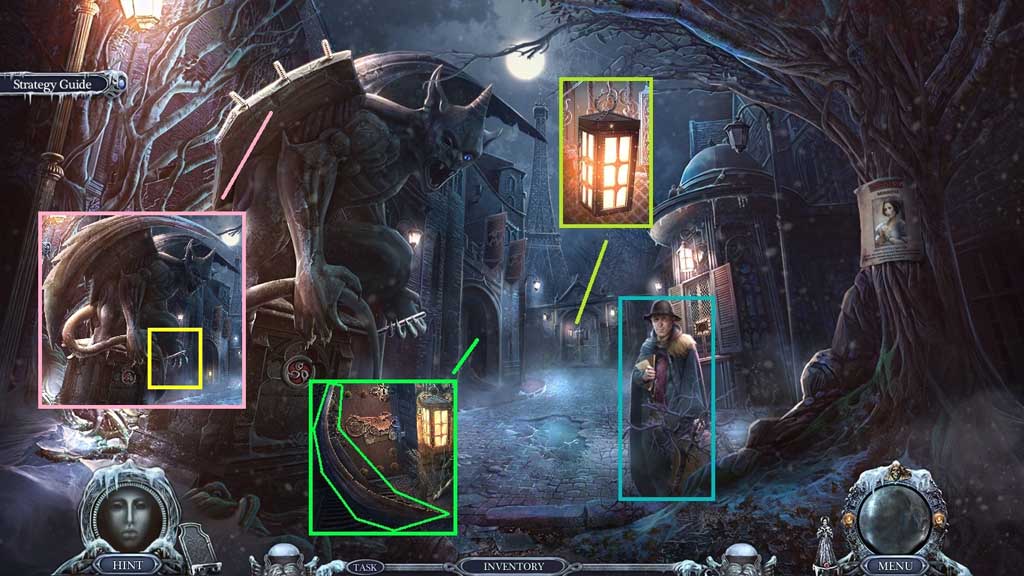
- Speak to Gerard.
- Collect the lantern and use it to illuminate the door way.
- Collect the wing tip and place it onto the statue; collect the bolt.
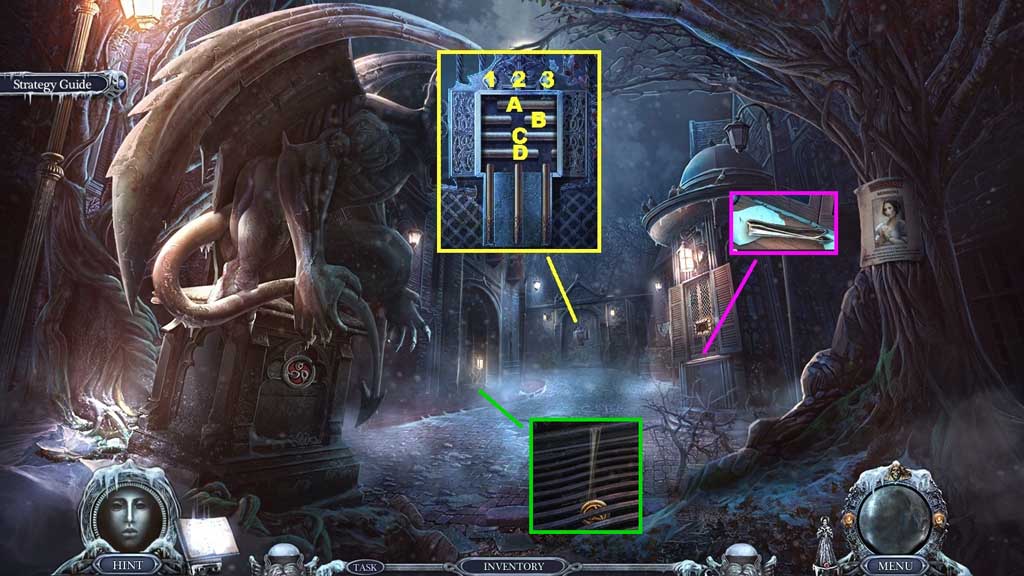
- Place the bolt into the lock to trigger a mini game.
- Solve the game by aligning the bolts so the vertical bolts can move into the slots freely.
- Use the following solution to solve: A1 – A3 – B1 – B3 – A3 – A1 – B3 – B2 – D3 – D2 – D2 – D1 – A3 – A1 – B3 – B1
- Collect the tweezers and use them to collect the coin.
- Move ahead.
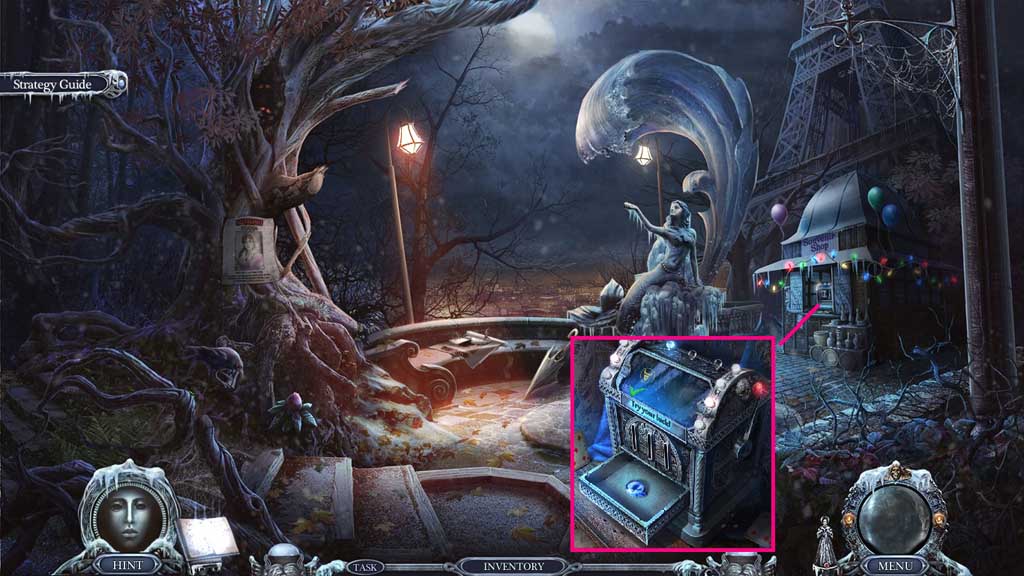
- Insert the coin and click the lever.
- Collect the blue eye.
- Move down once.
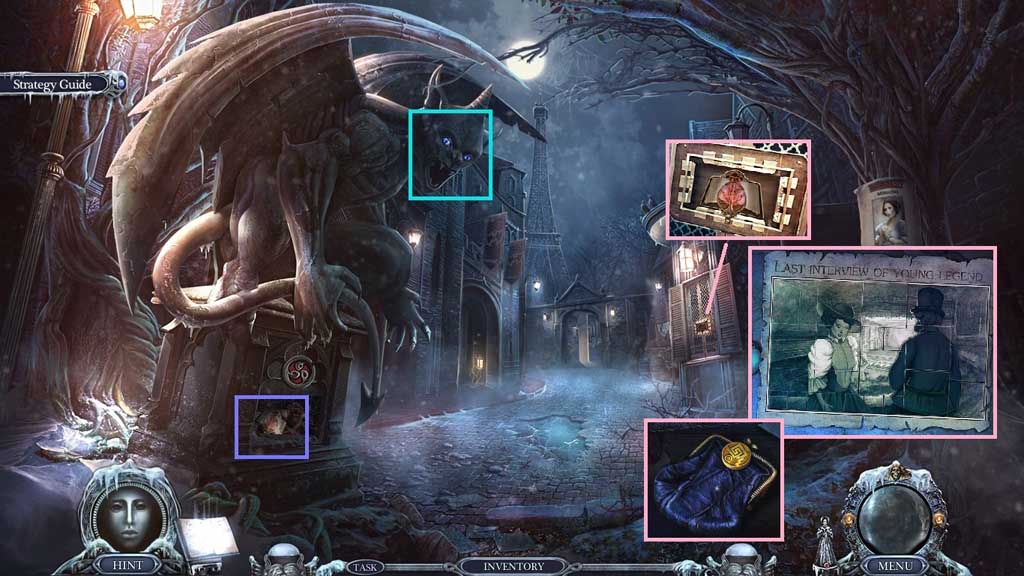
- Insert the blue eye; collect the book trinket and insert it into the groove.
- Insert the puzzle pieces to trigger a mini game.
- Solve the game by adjusting the squares and completing the image.
- Click the puzzle.
- Collect the coin and Zoe’s purse.
- Move ahead.

- Insert the coin and click the lever.
- Collect the fertilizer and use it on the flower.
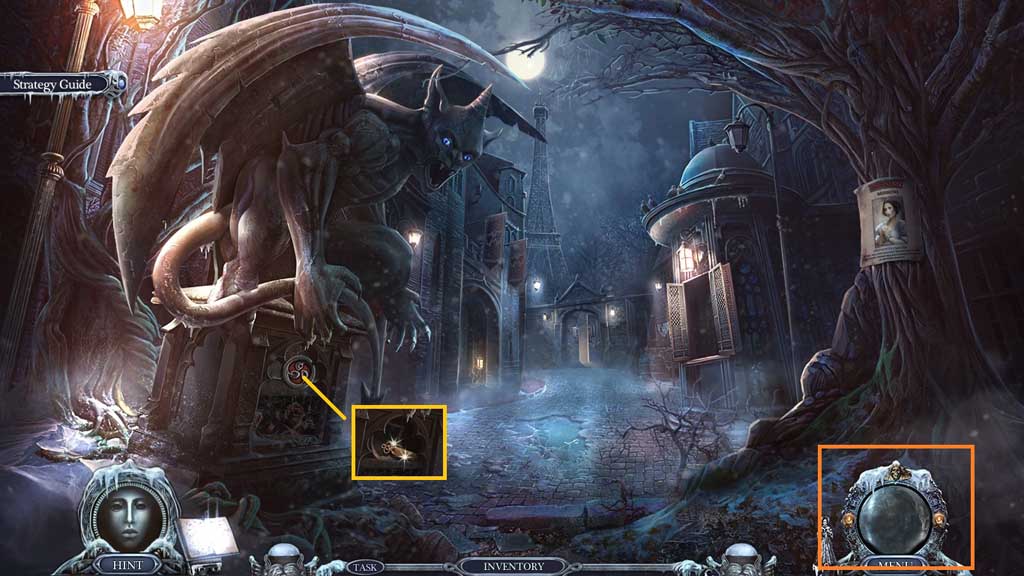
- Collect the stone amulet.
- Move down once.
- Select the stone amulet to insert into the slot.
- Collect the dummy key and the undeveloped photo.
- Click Death’s sphere to move to your house.
- Place the undeveloped photo onto the rack.
- Click the buttons.
- Collect the key sketch and place it into the holder and the dummy key into the mold.
- Click the needle 2x’s.
- Collect the yard key.
- Move to Main Street.

- Insert the yard key and click it once.
- Enter the doorway.
- Give Zoe her purse.
- Collect the diary page.
- Collect the net handle and the shamrock symbol.
- Move to Tower Park.
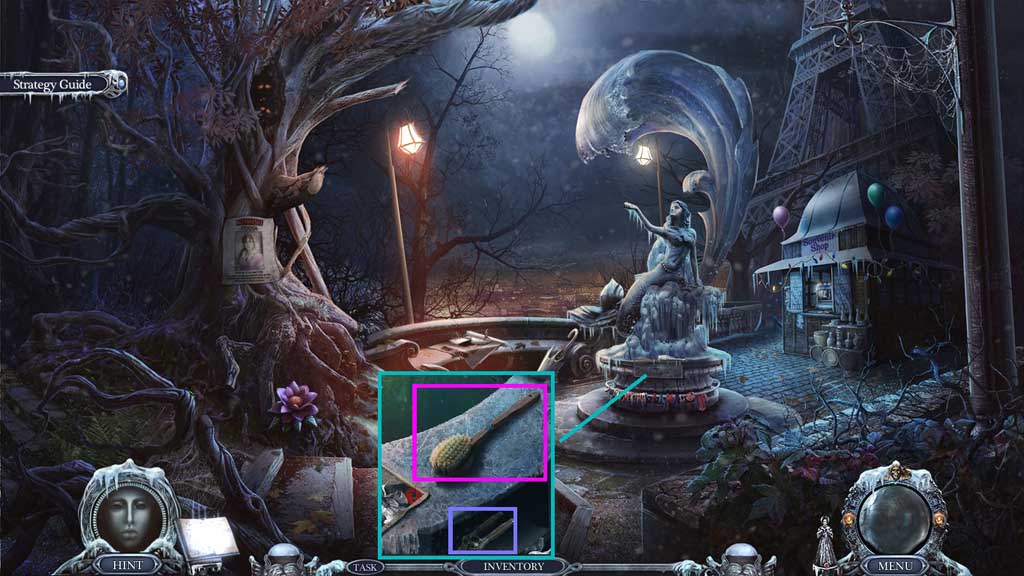
- Collect the broken brush.
- Insert the shamrock symbol; collect the pruners.
- Move to the Mansion Yard.
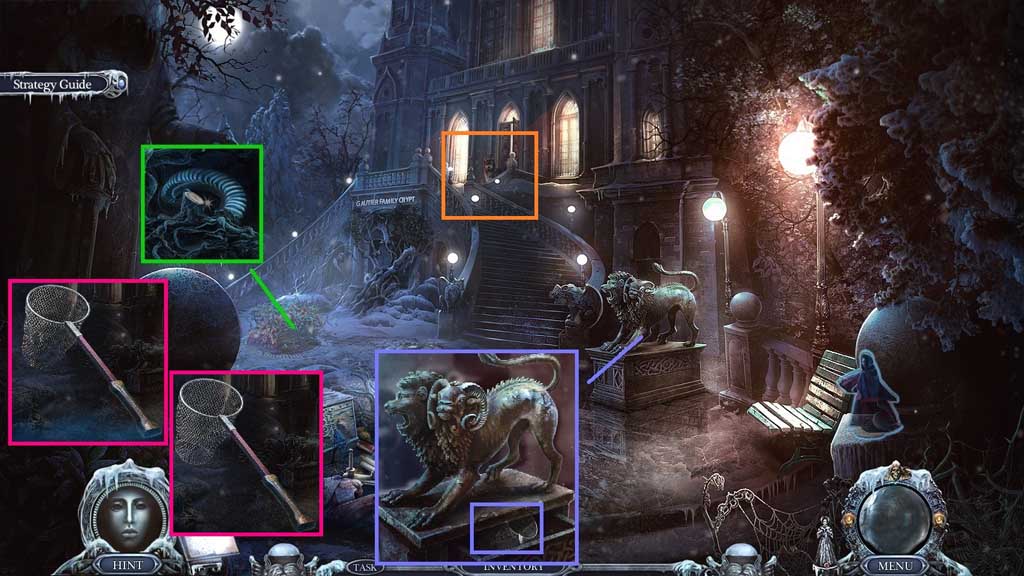
- Select the pruners to trim the vines; collect the horn and place it onto the statue.
- Collect the broken net and attach the net handle onto it.
- Click the net.
- Zoom into the wolf dog; collect the net and use on the broken net.
- Collect the net.
- Move to Tower Park.
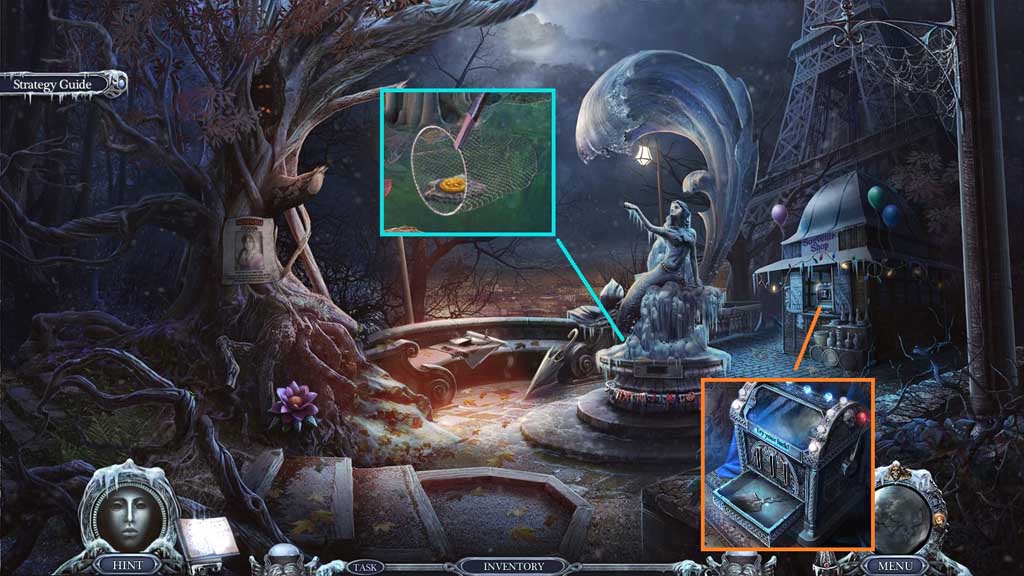
- Select the net to collect the coin.
- Insert the coin and click the lever.
- Collect the shovel.
- Move to the Mansion Yard.

- Select the shovel to uncover and collect the bone.
- Give the wolf dog the bone.
- Enter the Front Hall.

- Speak to Leonard.
- Collect the corkscrew and the skull handle.
- Move down once.

- Click the vines 2x’s.
- Attach the skull handle.
- Enter the Family Crypt.