
Twilight Phenomena: The Lodgers of House 13: Chapter Twelve: The Ritual
Our Twilight Phenomena: The Lodgers of House 13 Walkthrough will help you save yourself and humanity in this exciting adventure puzzle game. You should have known things were too good to be true when you found a beautiful mansion in the country with a crazy cheap rental price. Now, you've found yourself being stalked by a monster and trapped inside House 13. Can you escape with your head and stop this monstrosity? With our Twilight Phenomena: The Lodgers of House 13 Walkthrough, you can! We made sure to pack it full of detailed information, tons of helpful screenshots and puzzle solutions so you won't have any problem escaping the clutches of House 13.
Chapter One: House 13
Chapter Two: Exploring the Forbidden Wing
Chapter Three: The Landlord
Chapter Four: The Second Story
Chapter Five: Captured!
Chapter Six: The Bomb Shelter
Chapter Seven: The Garage
Chapter Eight: The Cage
Chapter Nine: The Tree
Chapter Ten: The Dove House
Chapter Eleven: The Greenhouse
Chapter Twelve: The Ritual
Ask for help in the comments below!
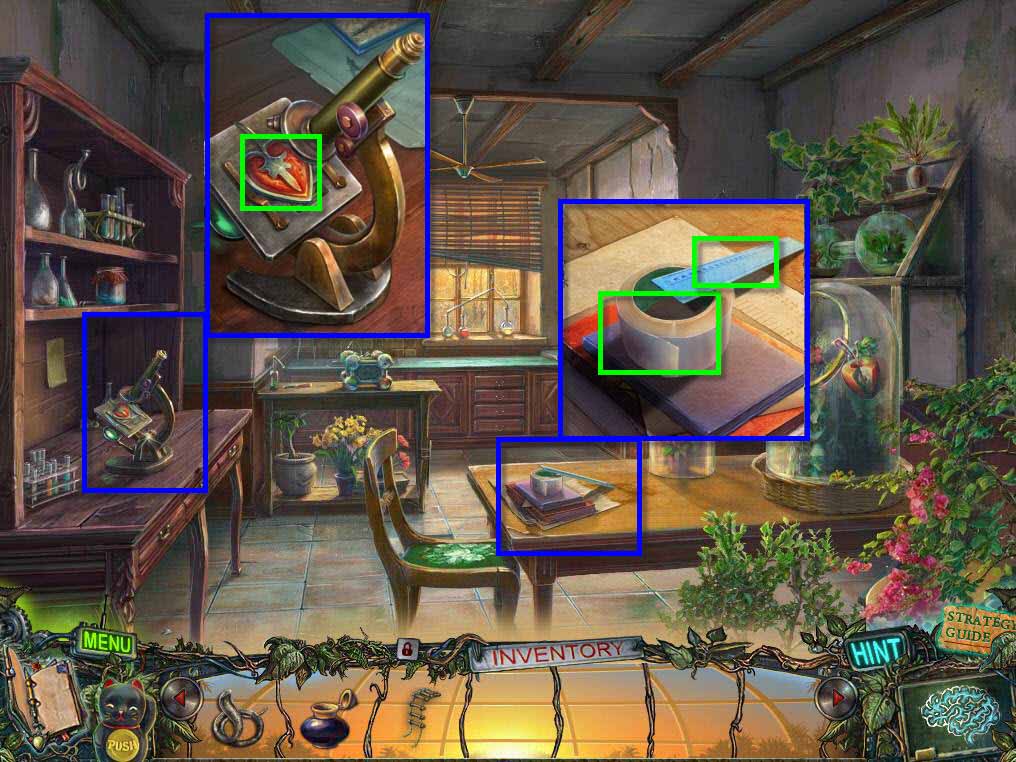
- Click on the table to zoom in.
- Take the RULER and the CLEAR TAPE.
- Click to zoom in on the desk.
- Take the HEART.
-
Go back one screen.
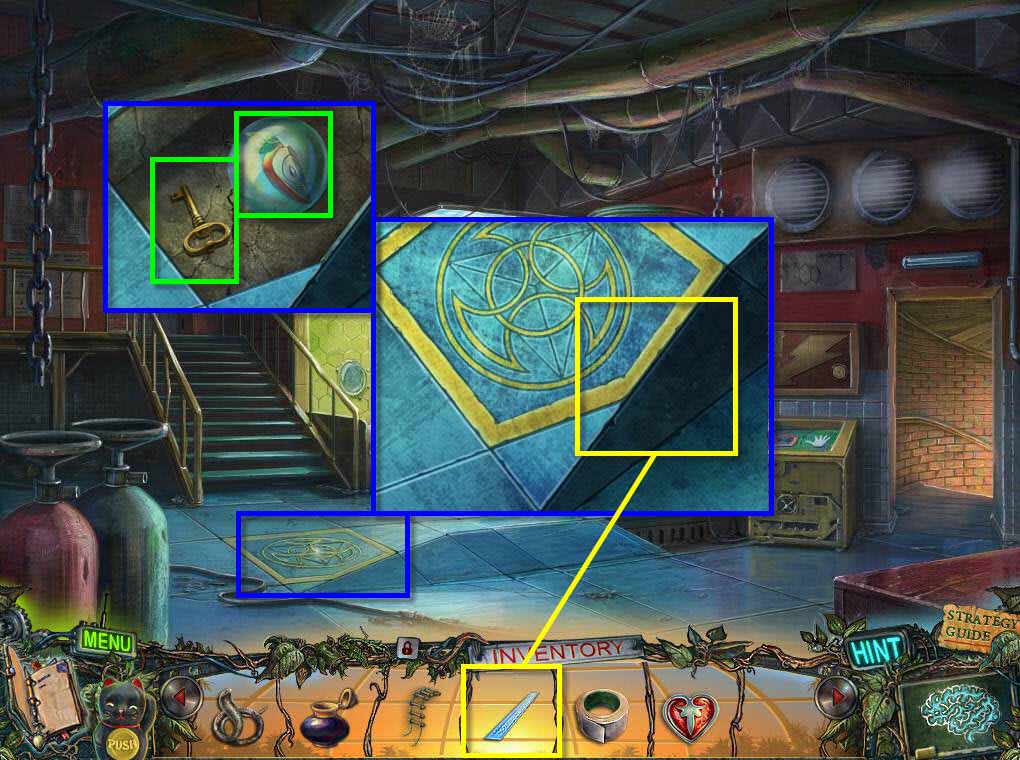
- Click on the tile to zoom in.
- Use the RULER on the tile.
- Take the APPLE and the KEY.
-
Go through the door on the right.
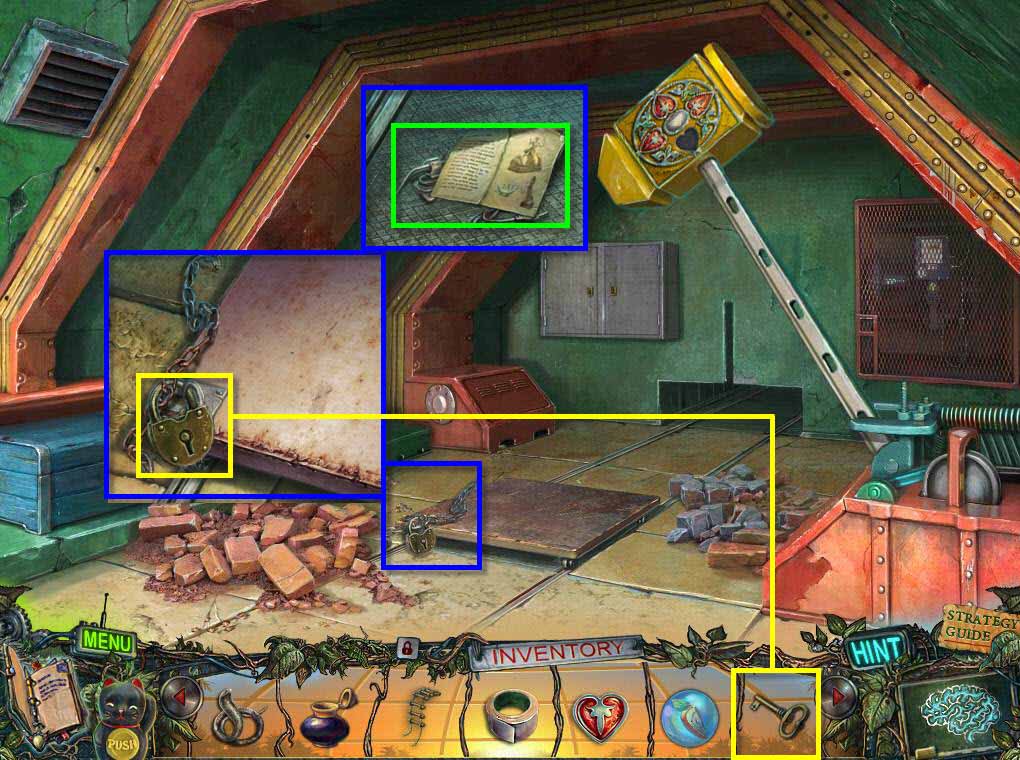
- Click on the padlock to zoom in.
- Use the KEY on the padlock.
- Click on the key twice and then click on the hatch door to open it.
- Take the NOTE and the SOLDERING IRON.
-
Go back two screens.
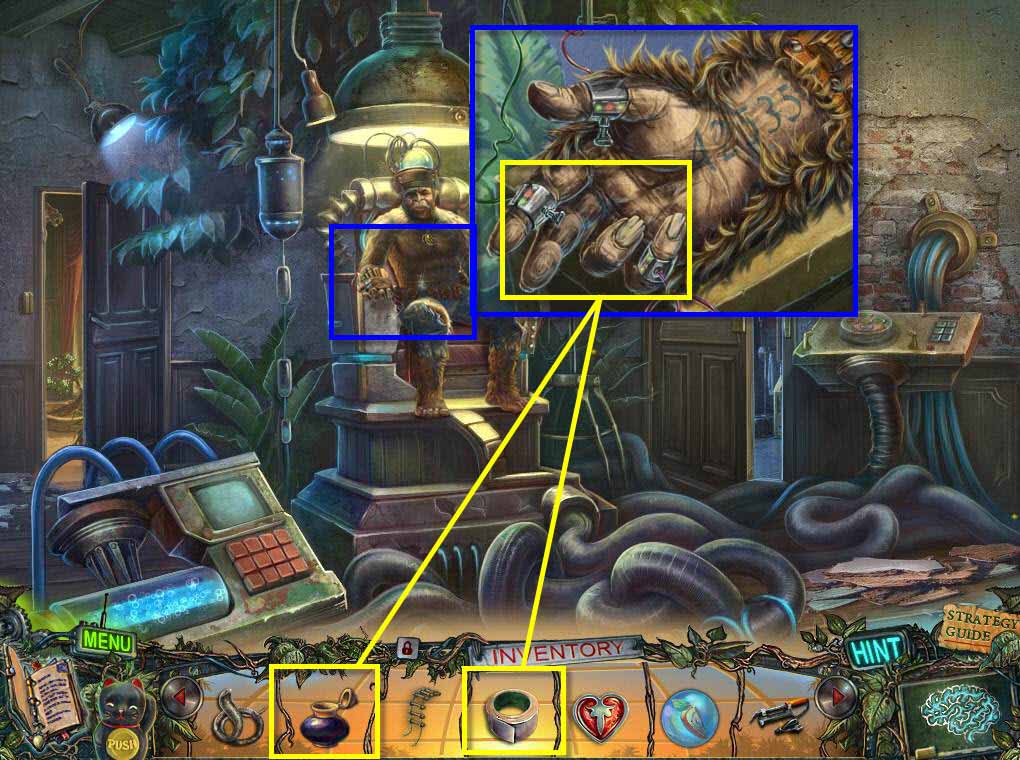
- Click on the ape man to zoom in.
- Use the INKPOT on his fingers.
- Use the CLEAR TAPE on his fingers.
- Take the FINGERPRINTS.
-
Go through the door on the right.
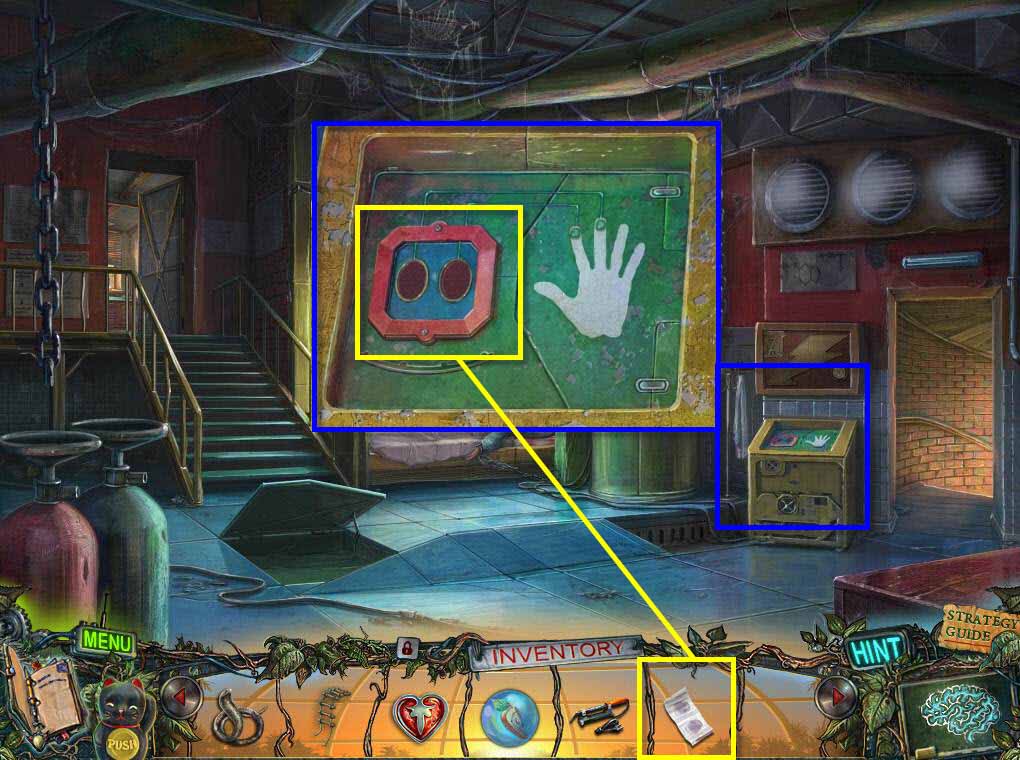
- Click on the machine to zoom in.
- Use the FINGERPRINTS on the scanner.
-
Click on Dizzy to talk to her.
- Click on the pillow to zoom in.
- Take the CIRCUIT BOARD PART.
-
Go back one screen and then through the right door.
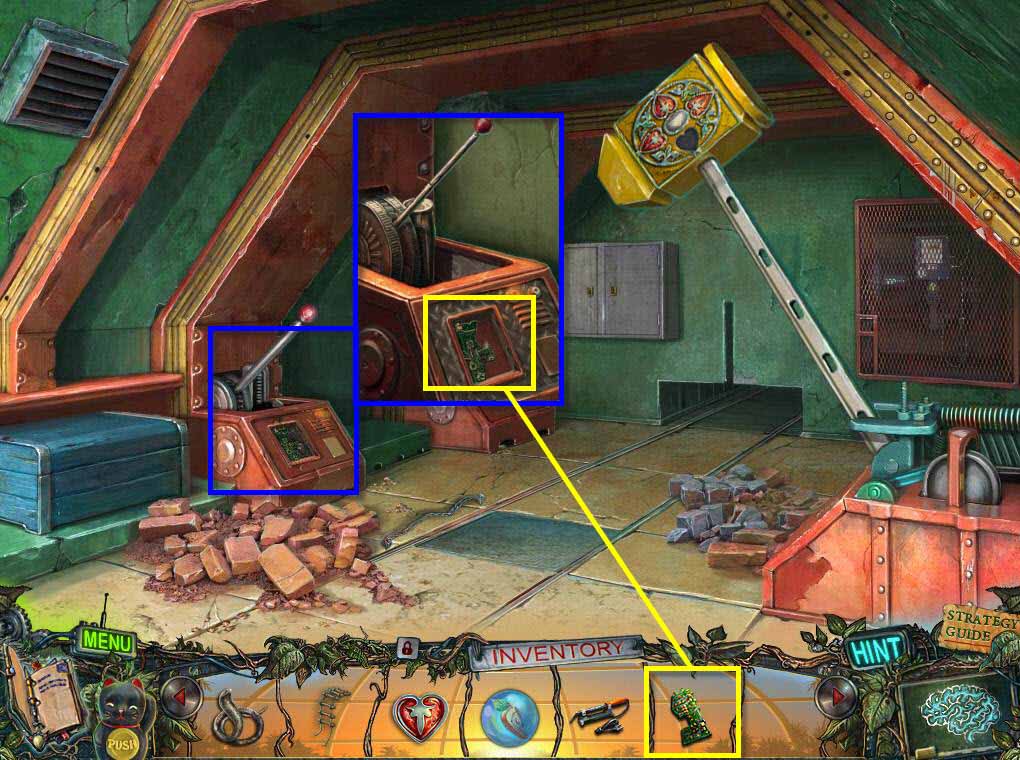
- Click on the machine to zoom in.
- Use the CIRCUIT BOARD PART on the circuit board.
- Take the BROKEN CIRCUIT BOARD.
-
Go back one screen and then go through the door at the top of the stairs.
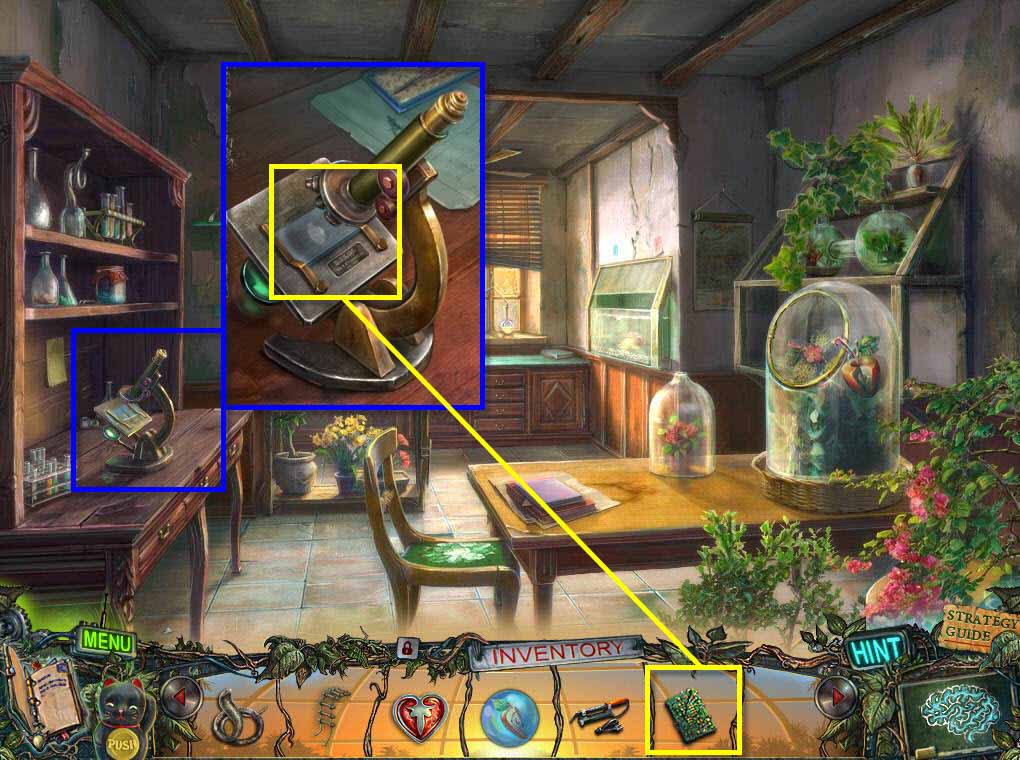
- Click on the microscope to zoom in.
- Use the BROKEN CIRCUIT BOARD on the microscope.
-
Click on the microscope to look at the circuit board.
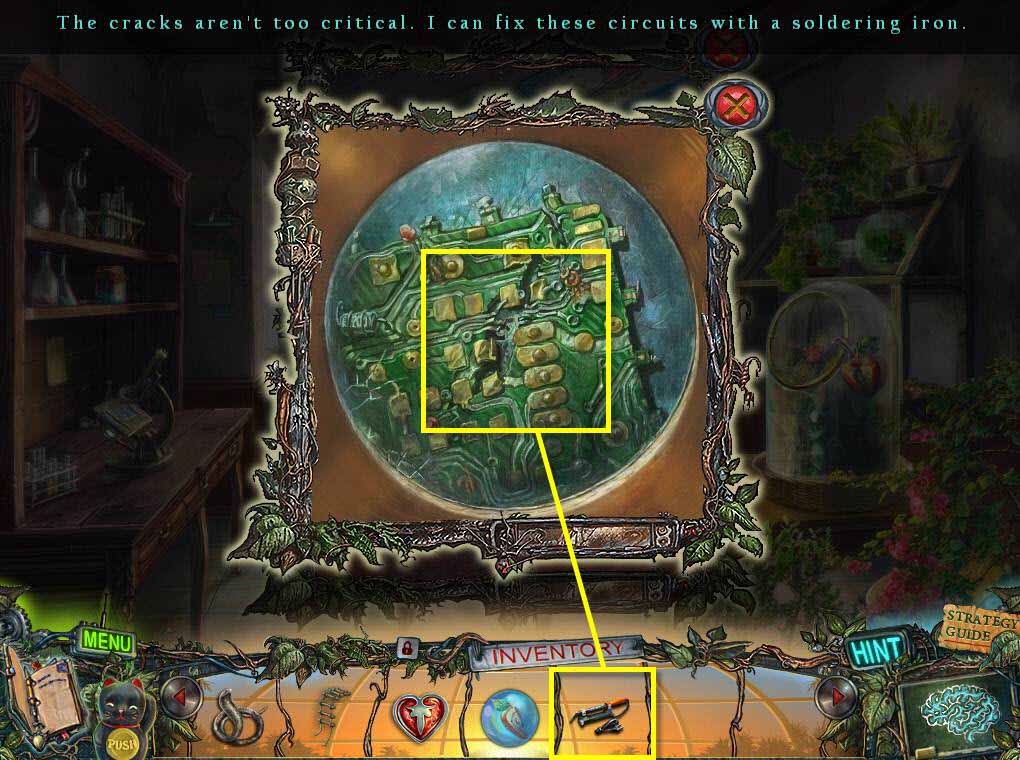
- Use the SOLDERING IRON on the broken circuit board.
- Take the CIRCUIT BOARD.
-
Go back one screen and then through the right door again.
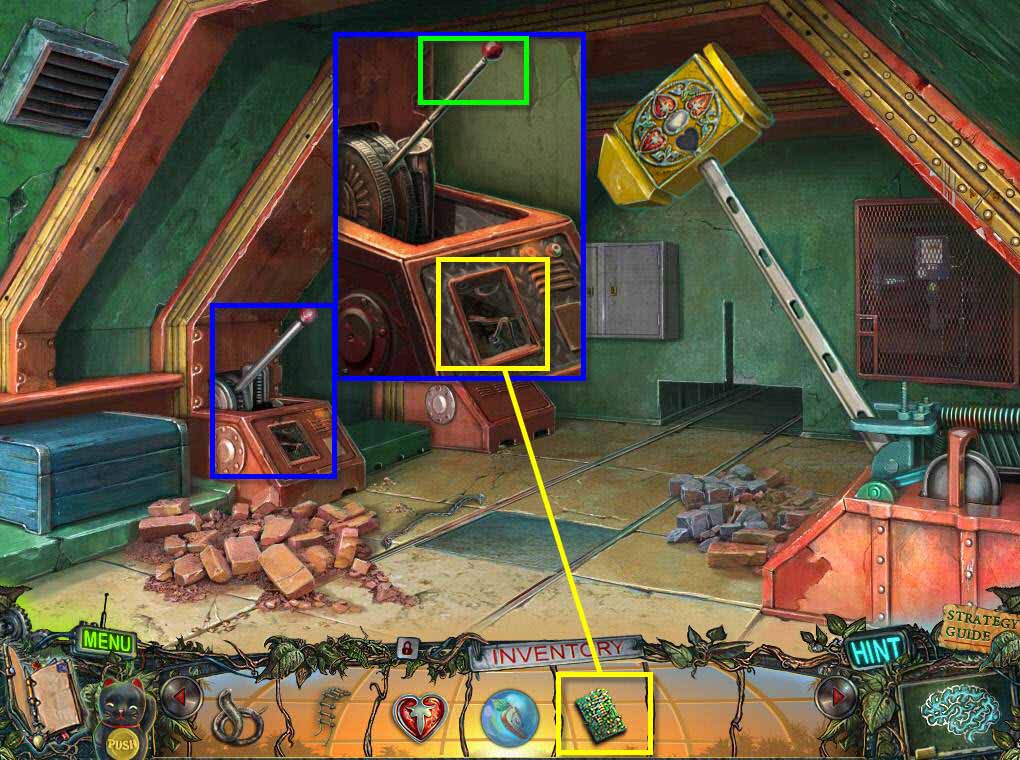
- Click on the machine to zoom in.
- Use the CIRCUIT BOARD on the empty slot.
-
Click on the lever to make the hammer fall.
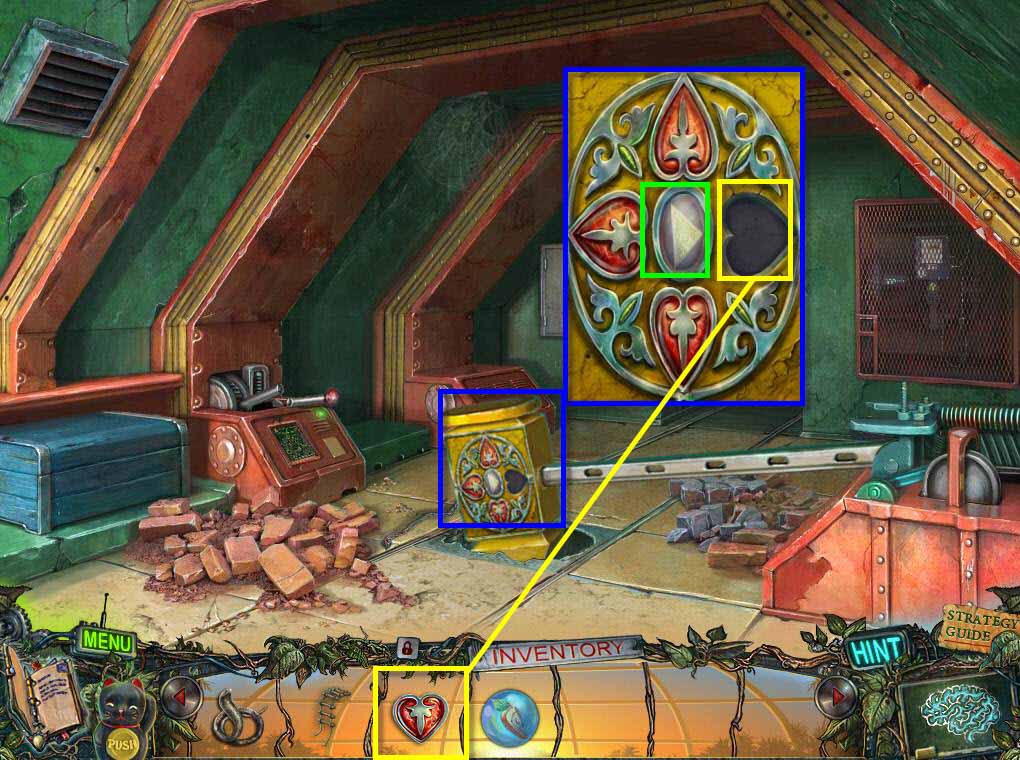
- Click on the area where the hammer fell to zoom in.
- Click on the hammer to zoom in again.
- Use the HEART on the hammer.
- Take the TRIANGLE.
-
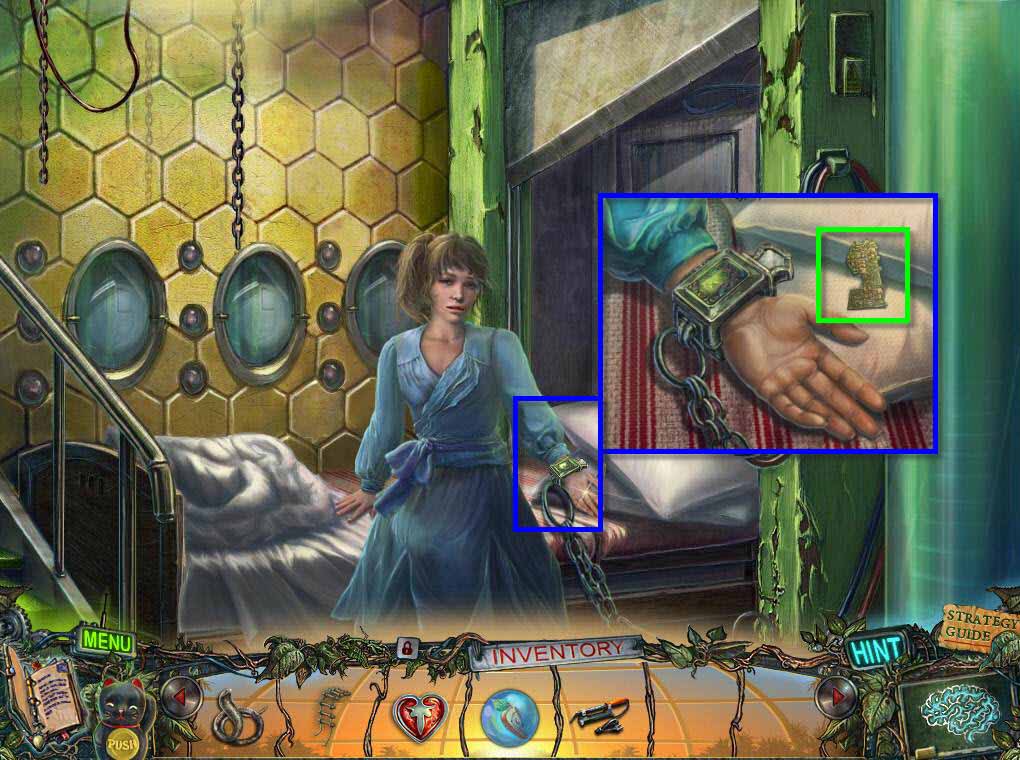
Go back one screen and click on Dizzy to zoom in on her.
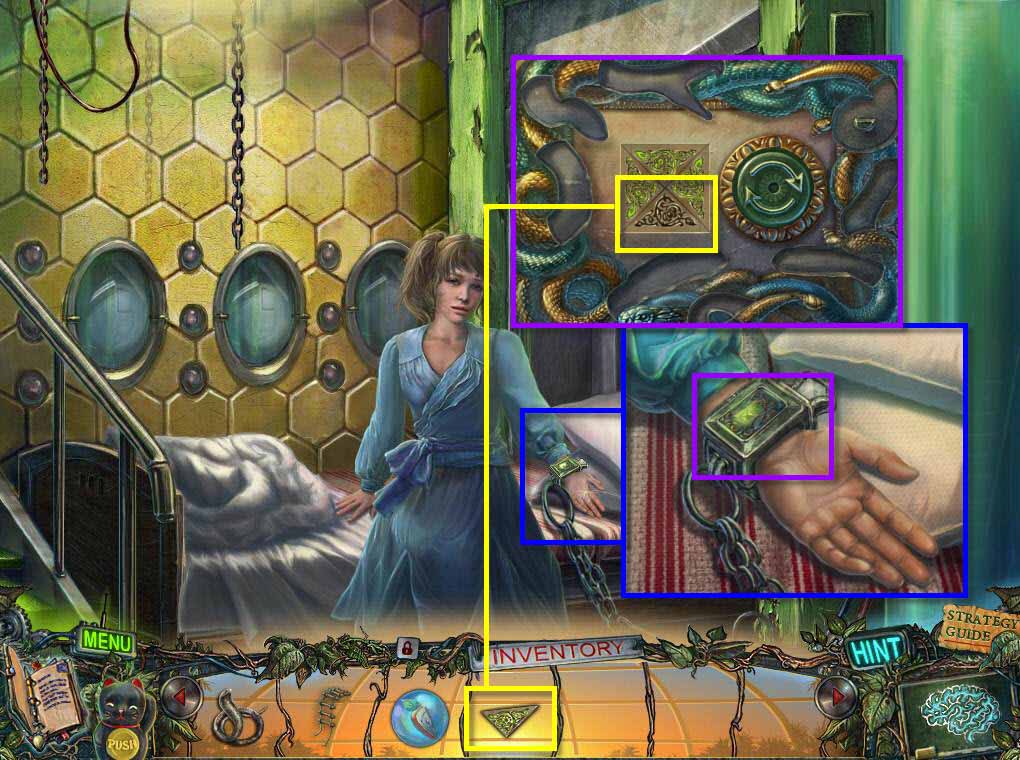
- Click Dizzy's wrist to zoom in.
- Click on the chain to zoom in further.
- Use the TRIANGLE on the chain.
-
This will activate a puzzle.
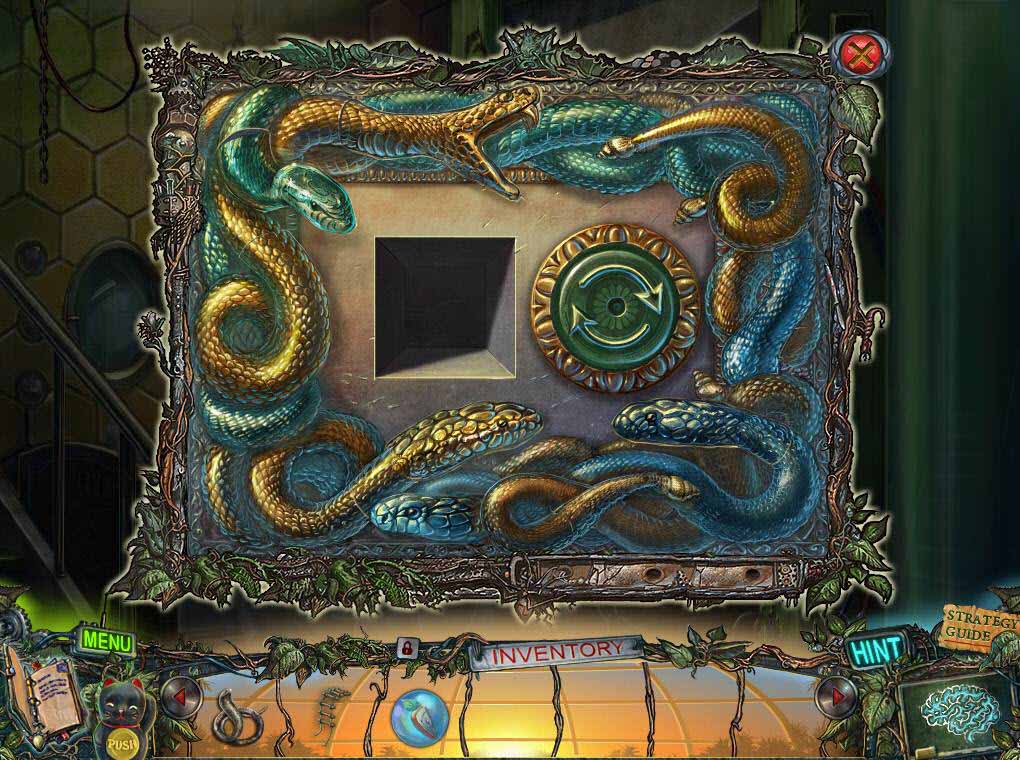
- The goal of the puzzle is to complete the snake.
- Click on each piece and the click on the arrows and it will rotate that piece.
- Then place the piece in the correct spot.
- See the screen shot for the solution.
- Click on the chain when you are done and Dizzy will be free.
- Click on Dizzy to talk to her.
-
Click on the bed to zoom in.
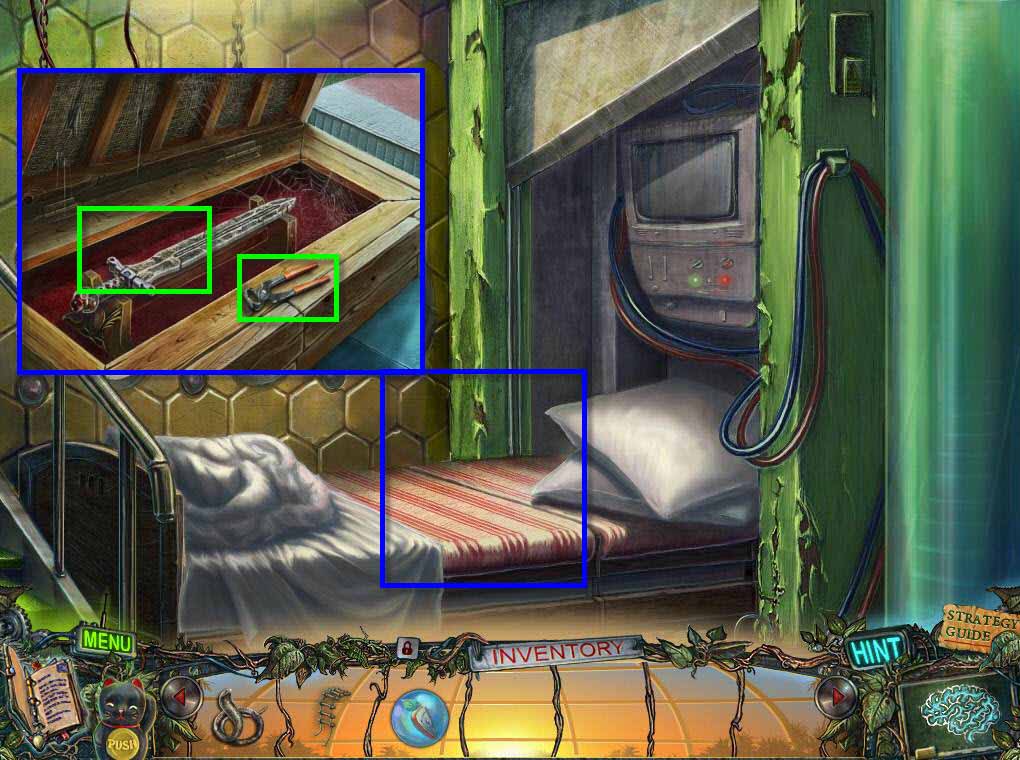
- Click on the middle part of the bed to left it.
- Click to zoom in on the area under the bed.
- Take the PLIERS and the STONE SWORD.
-
Go through the door on the right again.
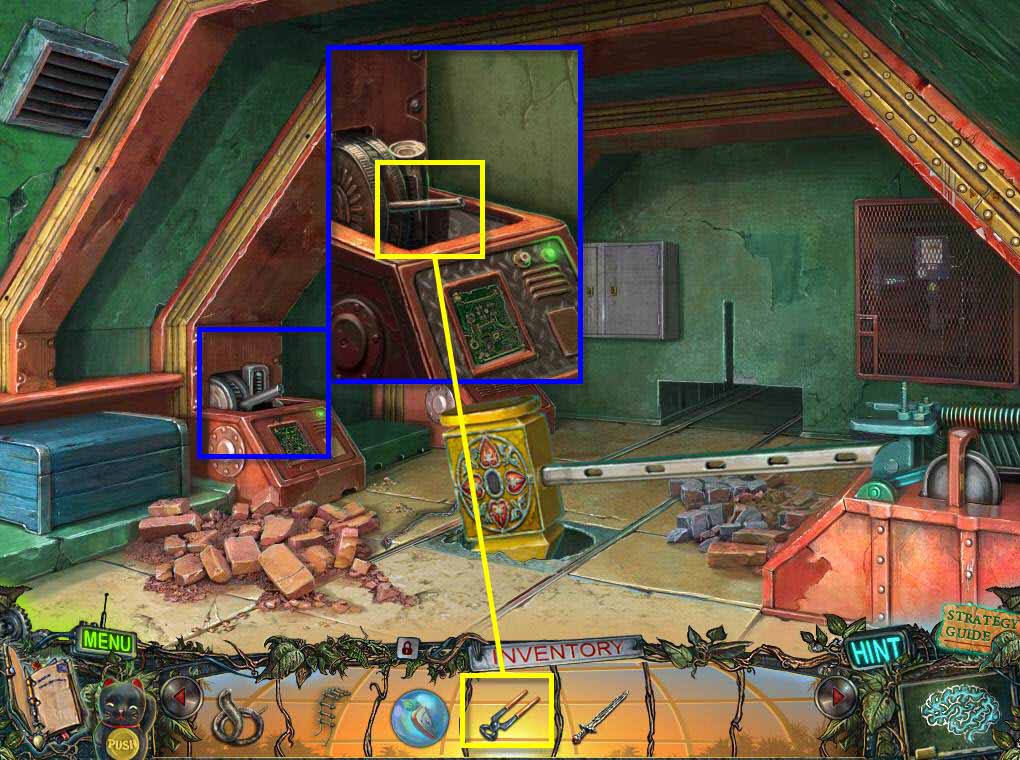
- Click on the machine to zoom in.
-
Use the PLIERS on the lever.
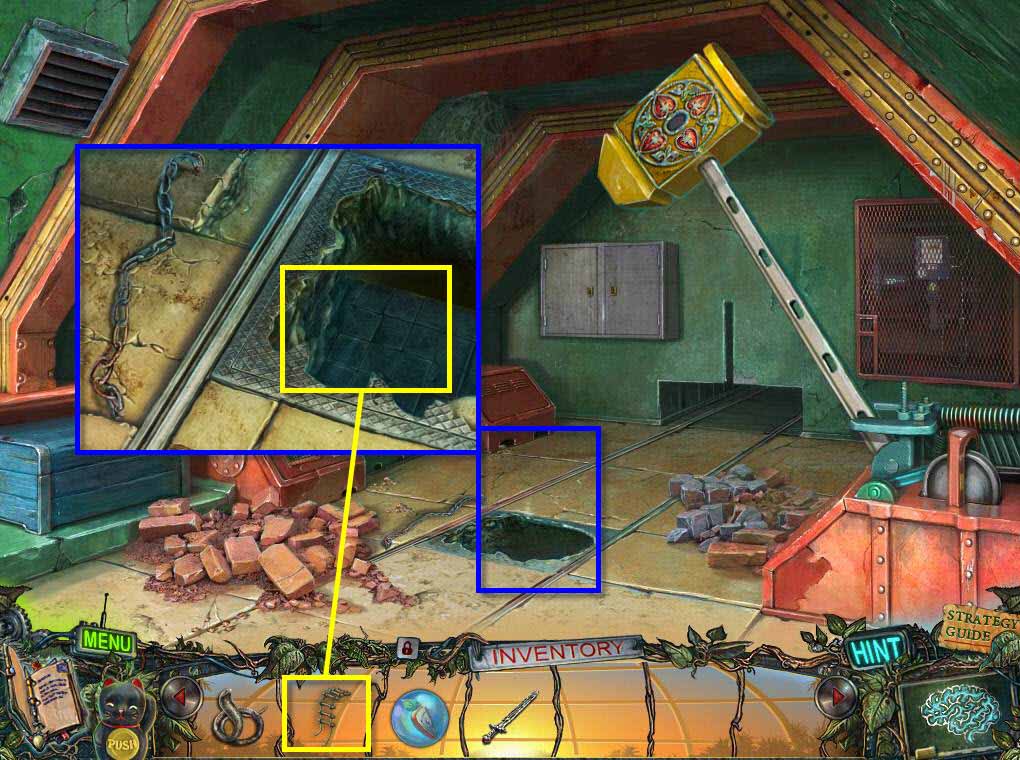
- Click on the hole in the floor to zoom in.
- Use the ROPE LADDER on the hole.
-
Go down the hole.
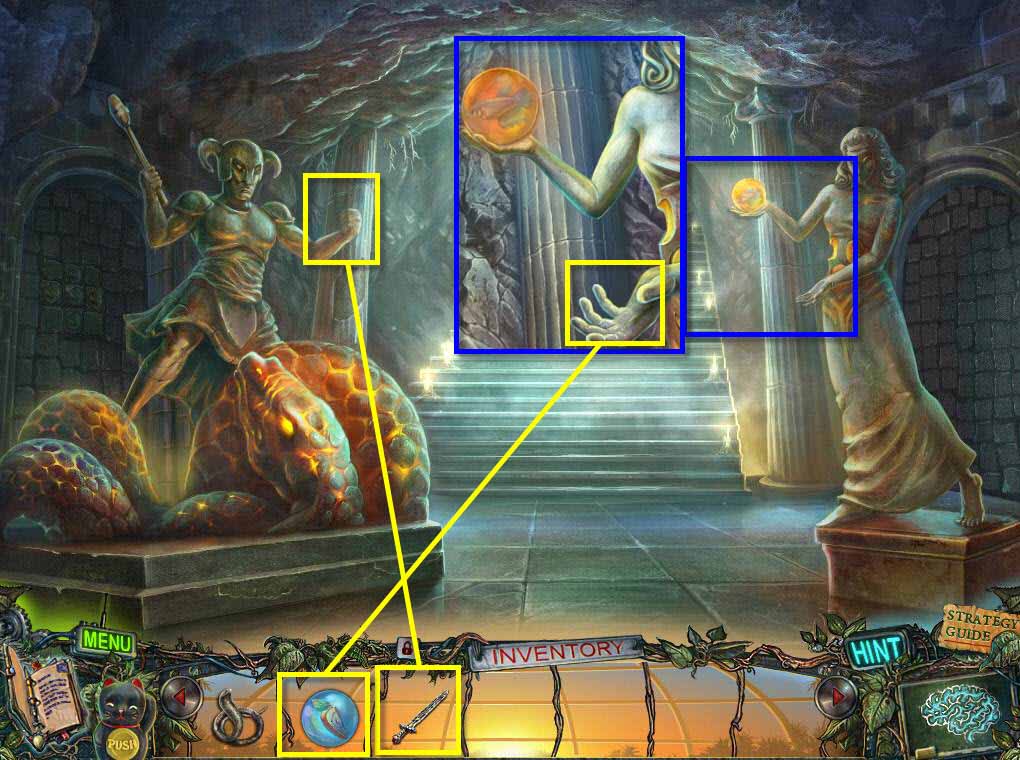
- Use the STONE SWORD on the fighter's hand on the left.
- Click on the statue of the woman on the right.
- Use the APPLE in her outstretched hand.
-
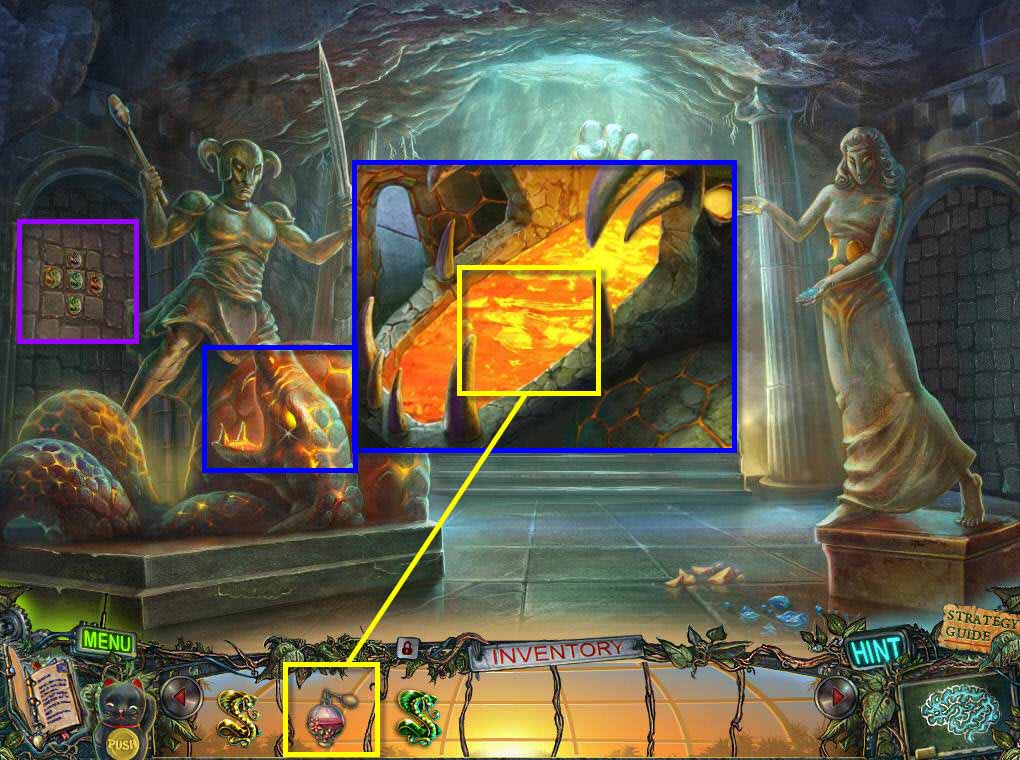
Take the FISH and the APPLE SLICE.
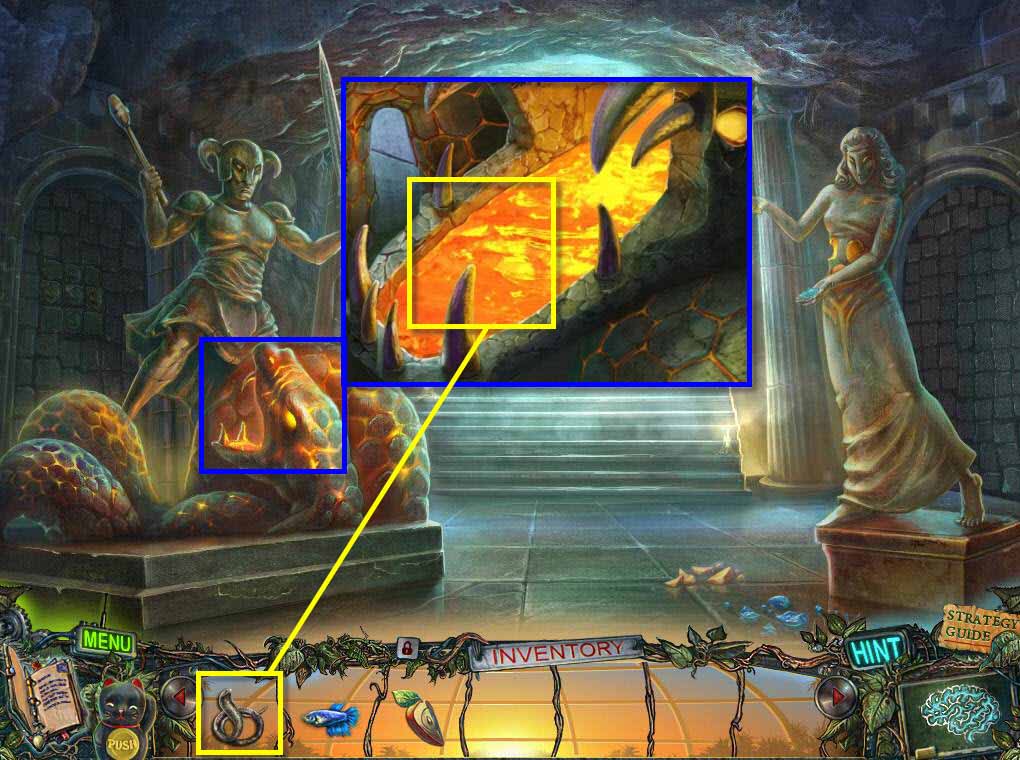
- Click on the now open mouth of the snake to zoom in.
- Use the STONE COBRA on the boiling gold.
- You will receive the GOLD COBRA.
-
Go back two screens and the through the left door on the top of the stairs.
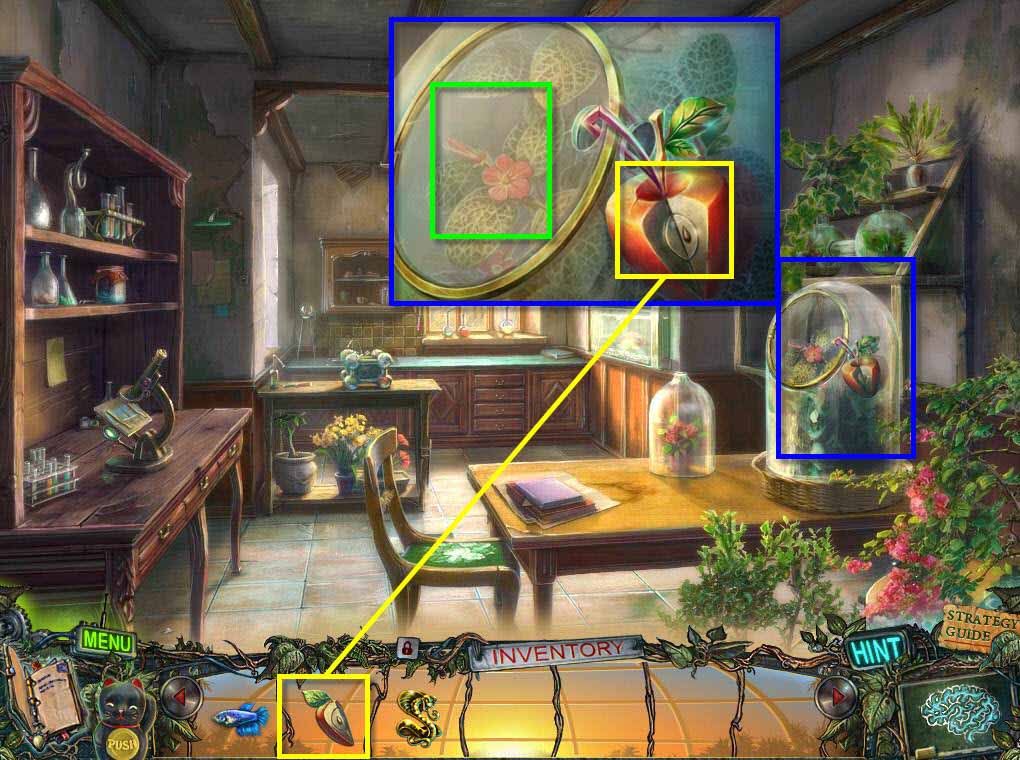
- Click on the glass dome on the right to zoom in.
- Use the APPLE SLICE on the apple.
- Click on the apple and then open the glass dome.
-
Zoom in to start a puzzle.
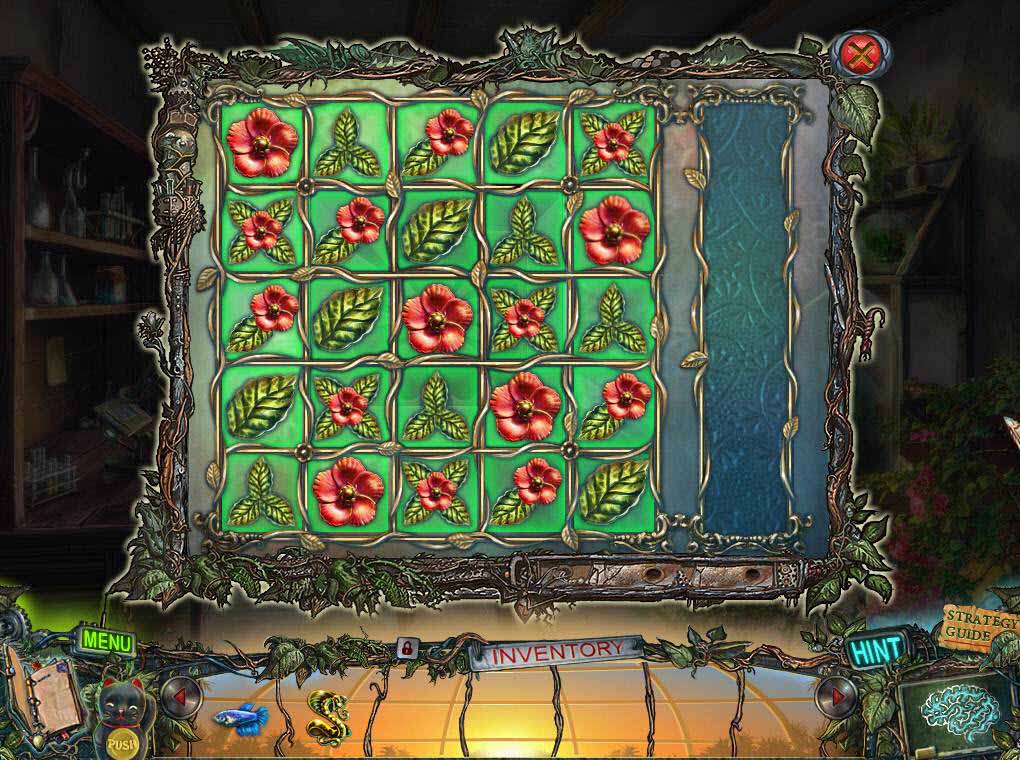
- The goal of the puzzle is to not have any flowers repeated in a column or row.
- See the screenshot for the solution.
-
Take the IRON MONKEY.
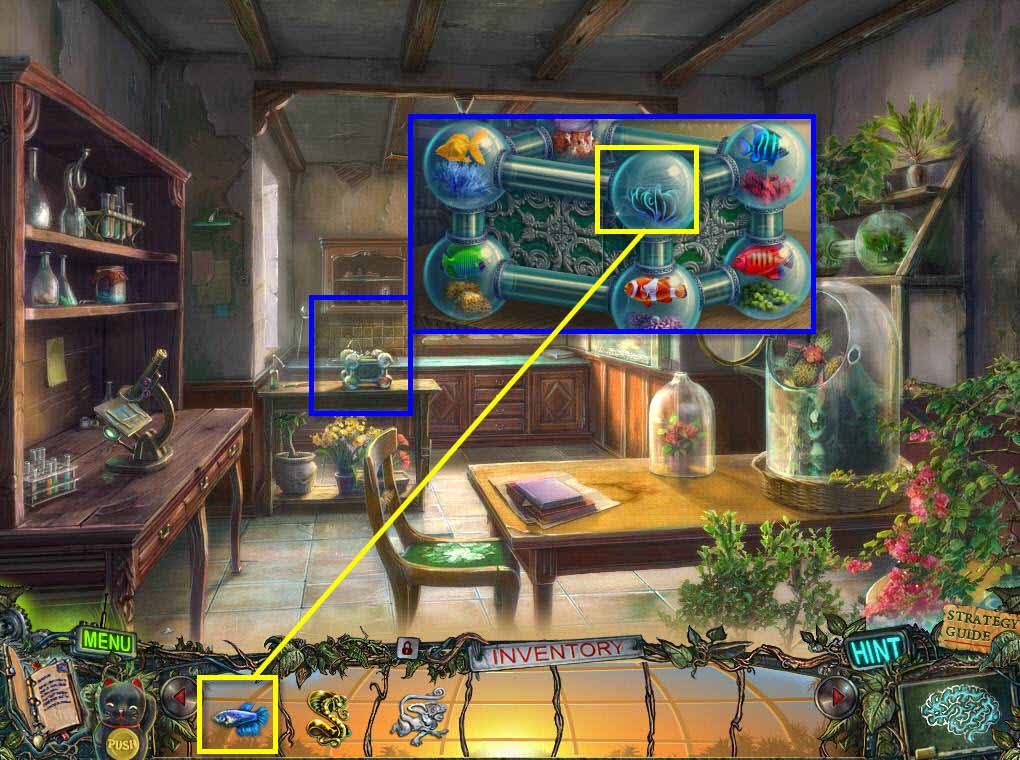
- Click on the fish tank on the counter to zoom in.
- Use the FISH on the fish tank.
-
This will start a puzzle.
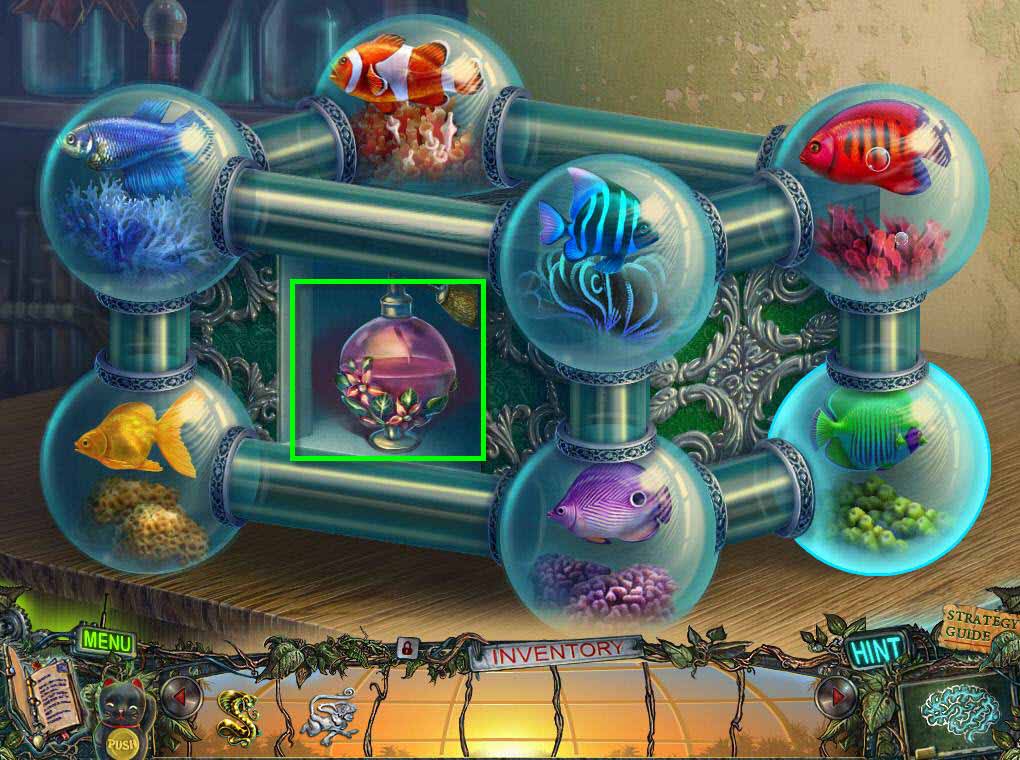
- The goal of the puzzle is to get each fish in the right bowl.
- You need to match the fish color to the coral in the bowl.
- Click on two fish that are next to each other to swap them.
- See the screenshot for the solution.
- Take the AROMATIC OIL when you are done.
-
Go back one screen, then to the right, and then down the hole in the floor to the ritual room.

- Click on the statue of the hand to zoom in.
- Use the IRON MONKEY on the statue.
-
Take the GREEN COBRA.
- Click on the snake head to zoom in.
- Use the AROMATIC OIL on the gold.
- Click on the wall to zoom in and see a clue.
-
Go back three screens to the room with the Ape man in it.
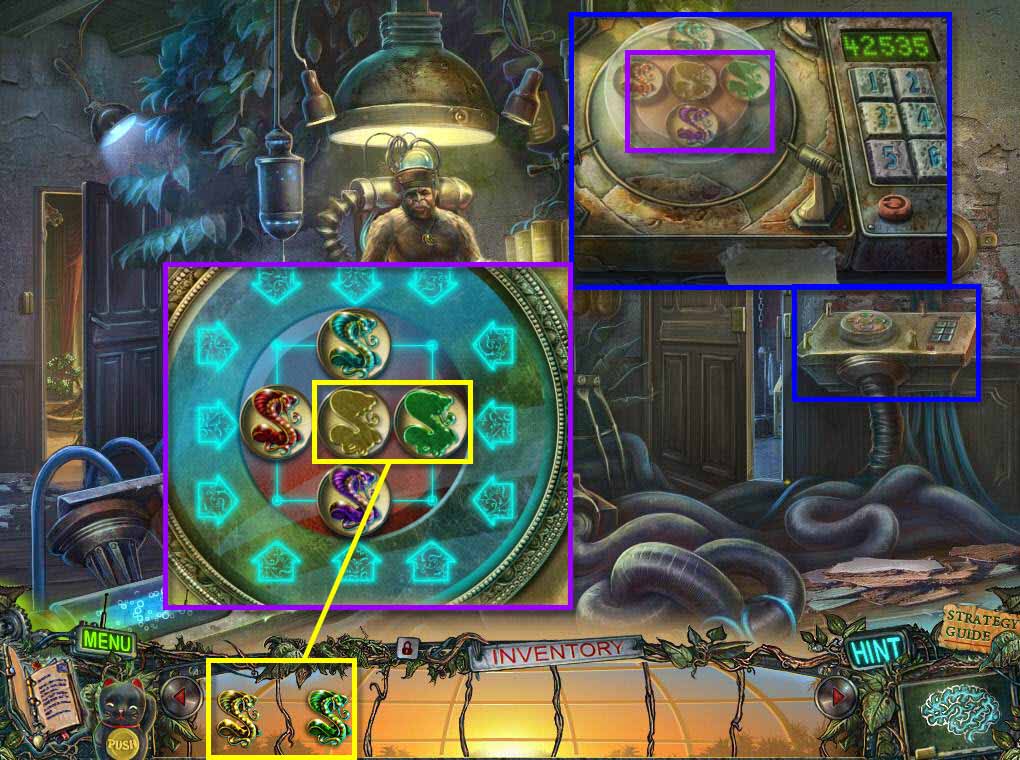
- Click on the controls on the right to zoom in.
- Click on the area with the cobras to zoom in again.
- Use the GOLD COBRA and the GREEN COBRA on the empty slots.
-
This will activate a puzzle.
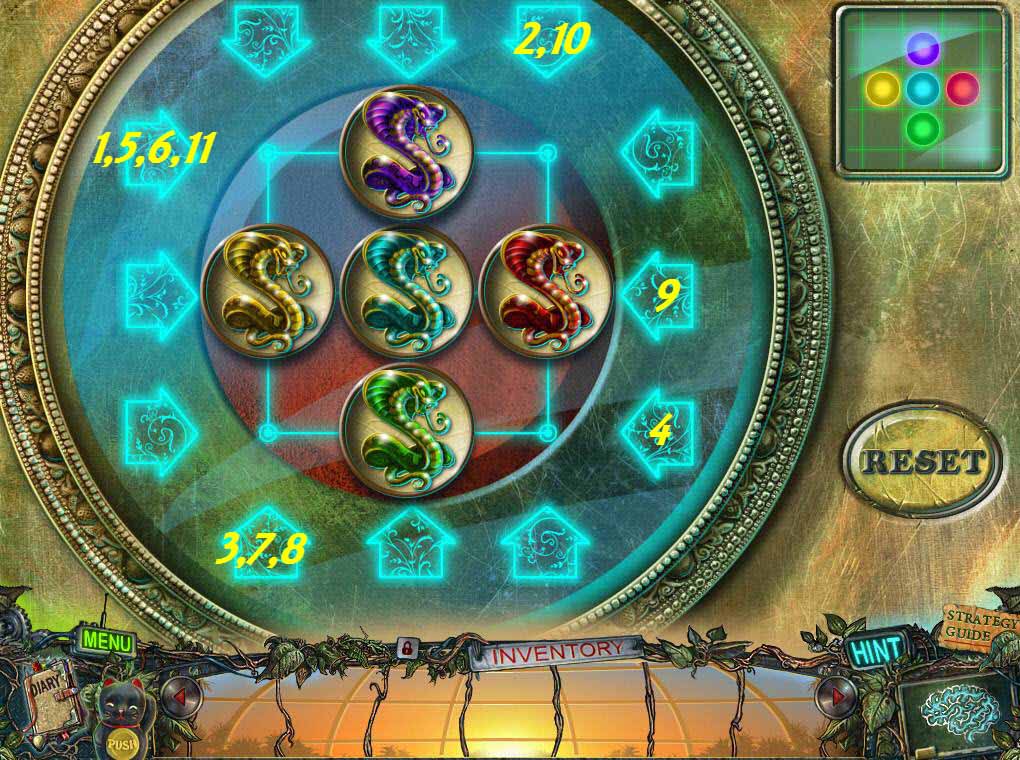
- The goal of the puzzle is to get the cobras in the right place by sliding them along using the arrows.
- Use the hint in the upper right as a guide for where the cobras belong.
- See the screenshot for the correct arrows to push and what order (1 -11)
- Once you are done, click on the red button.
Congratulations! You've completed Twilight Phenomena: The Lodgers of House 13. For those of you who have the collector's version, you can now access the bonus section.
Chapter One: House 13
Chapter Two: Exploring the Forbidden Wing
Chapter Three: The Landlord
Chapter Four: The Second Story
Chapter Five: Captured!
Chapter Six: The Bomb Shelter
Chapter Seven: The Garage
Chapter Eight: The Cage
Chapter Nine: The Tree
Chapter Ten: The Dove House
Chapter Eleven: The Greenhouse
Chapter Twelve: The Ritual
Ask for help in the comments below!