
Twilight Phenomena: The Lodgers of House 13: Chapter One: House 13
Our Twilight Phenomena: The Lodgers of House 13 Walkthrough will help you save yourself and humanity in this exciting adventure puzzle game. You should have known things were too good to be true when you found a beautiful mansion in the country with a crazy cheap rental price. Now, you've found yourself being stalked by a monster and trapped inside House 13. Can you escape with your head and stop this monstrosity? With our Twilight Phenomena: The Lodgers of House 13 Walkthrough, you can! We made sure to pack it full of detailed information, tons of helpful screenshots and puzzle solutions so you won't have any problem escaping the clutches of House 13.
General Info and Tips
Chapter One: House 13
Chapter Two: Exploring the Forbidden Wing
Chapter Three: The Landlord
Chapter Four: The Second Story
Chapter Five: Captured!
Chapter Six: The Bomb Shelter
Chapter Seven: The Garage
Chapter Eight: The Cage
Chapter Nine: The Tree
Chapter Ten: The Dove House
Chapter Eleven: The Greenhouse
Chapter Twelve: The Ritual
Ask for help in the comments below!
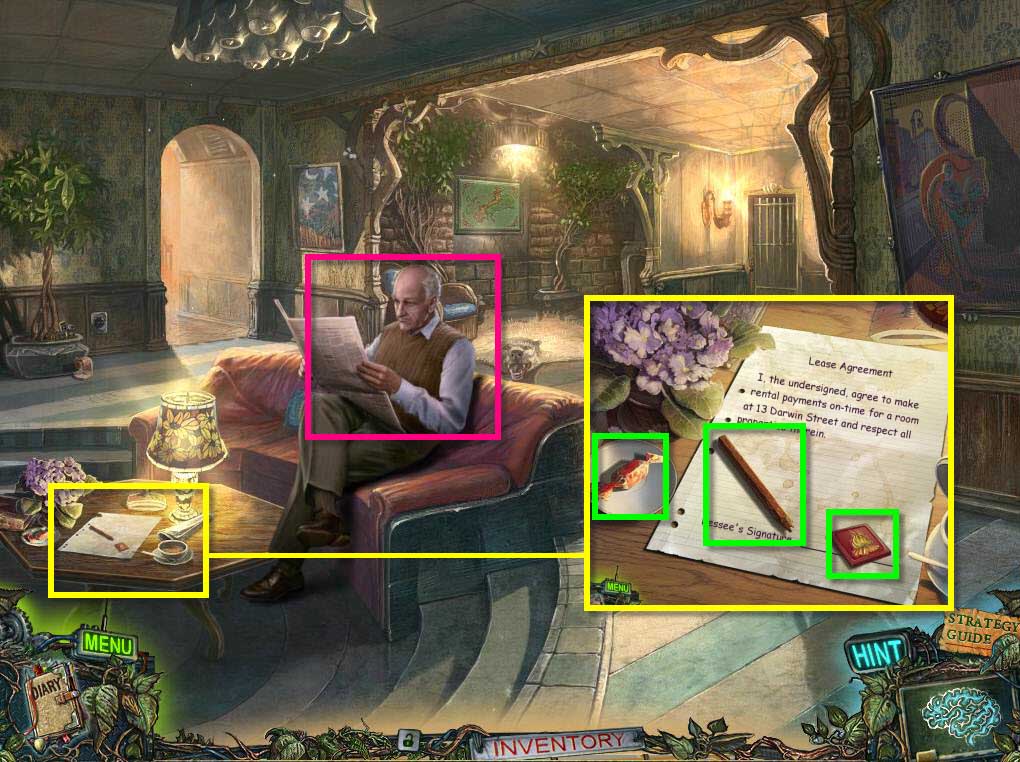
- Click to talk to the owner.
- Click on the table to zoom in.
- Take the BROKEN PENCIL and the BONFIRE EMBLEM.
-
Eat the chocolate for fun. Yum!

- Click on the pod on the right to zoom in.
- Take the DRY FLOWERS.
- Click on the left corner by the plant to zoom in.
- Take the LIGHTER.
- Use the BROKEN PENCIL on the pencil sharpener.
-
Take the PENCIL.
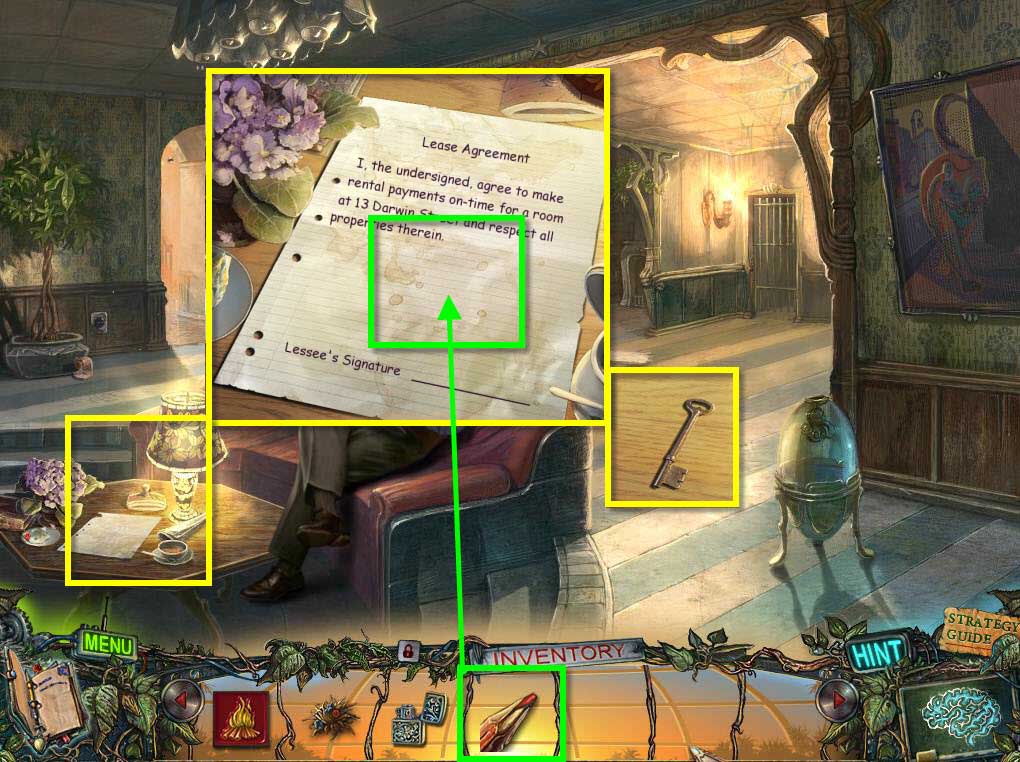
- Click to zoom back into the table.
- Use the PENCIL on the lease to sign it.
- Take the ROOM KEY.
-
Go through the doorway on the left.
- Click on the table on the left to zoom in.
- Take the paper about the cat hologram.
- Use the LIGHTER on the candle.
- Click on the upstairs door to zoom in.
- Use the ROOM KEY on the lock.
-
Enter the room.
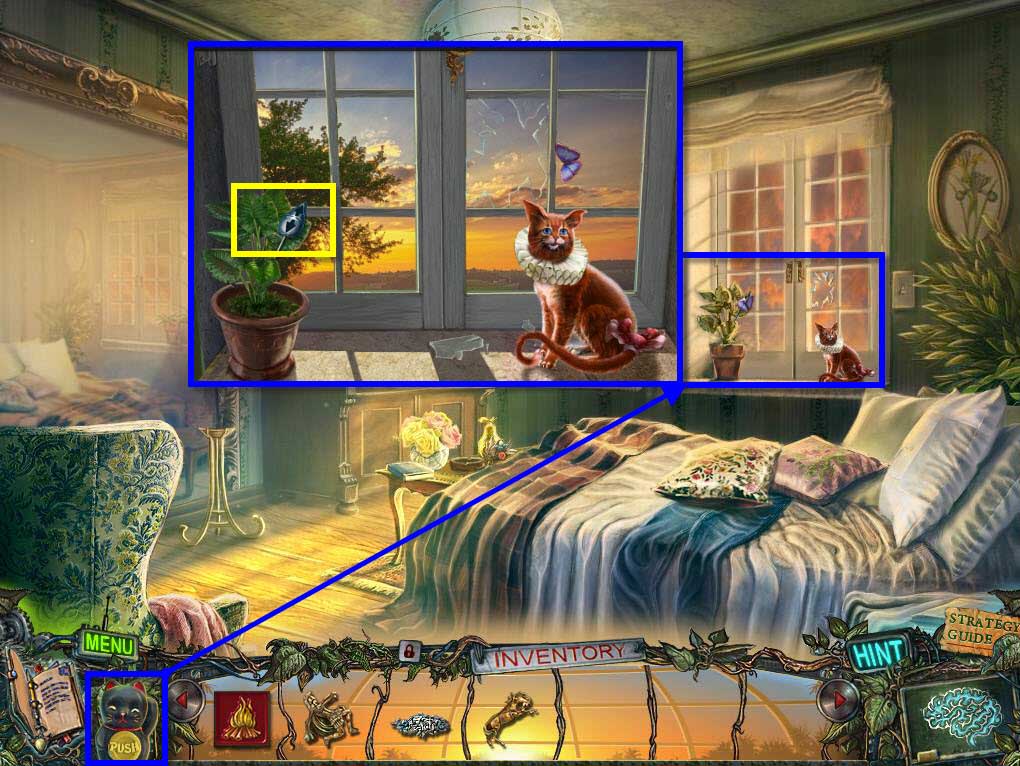
- Click on the window to raise the blind.
- Click to zoom in on the window.
- Watch the cut scene.
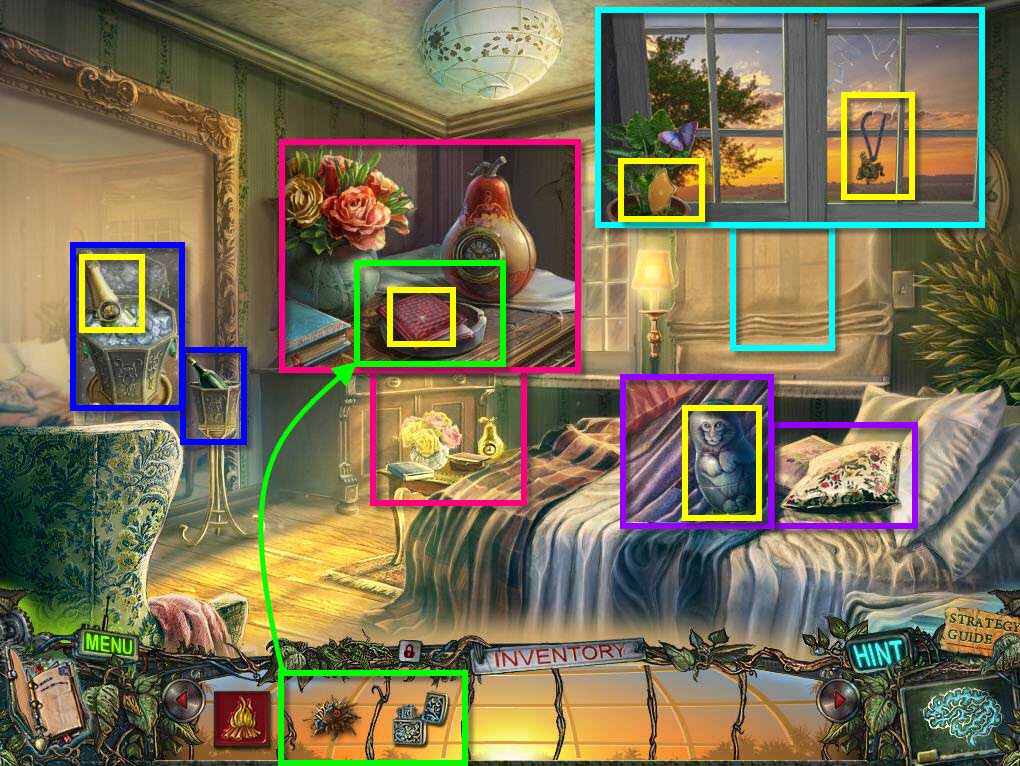
- Take the METAL GLADIATOR.
- Take the STAINED GLASS.
- Click on the pillow on the bed to move it.
- Take the MONKEY.
- Click on the champagne bucket to zoom in.
- Take the CHAMPAGNE.
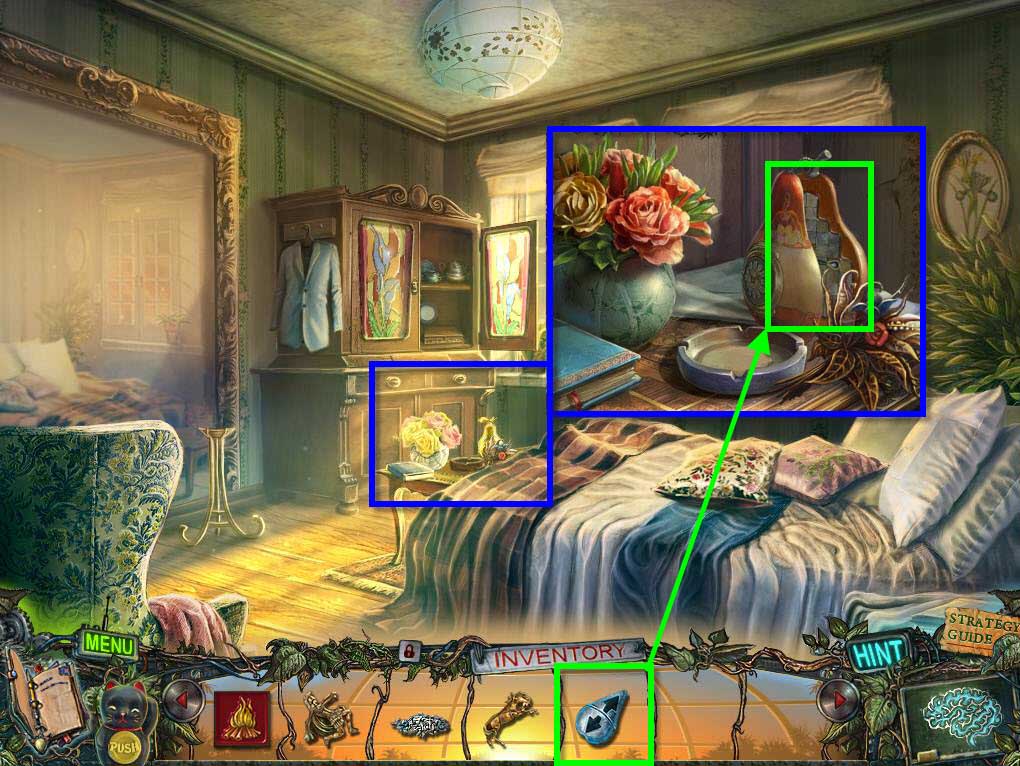
- Click on the table by the bed to zoom in.
- Take the Passport.
- Use the DRY FLOWERS on the ashtray.
- Use the LIGHTER on the flowers.
- Take the ASHES.
-
Go back downstairs.
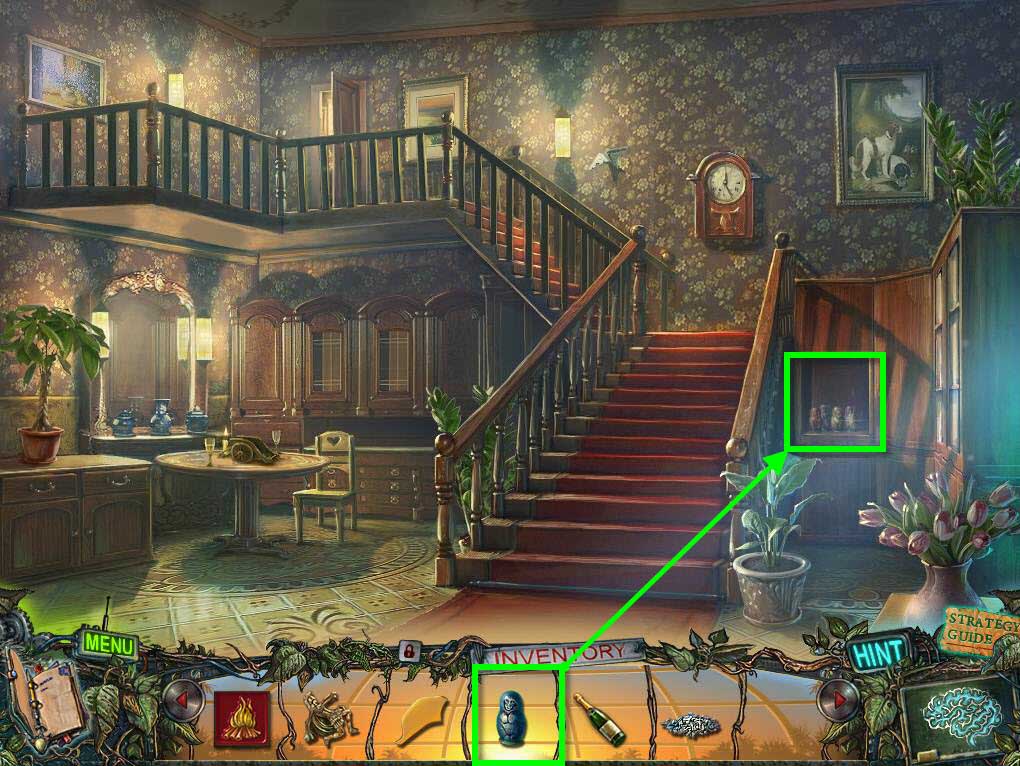
- Click on the niche on the right.
- Place the MONKEY by the other statues.
-
This will start a mini-game.
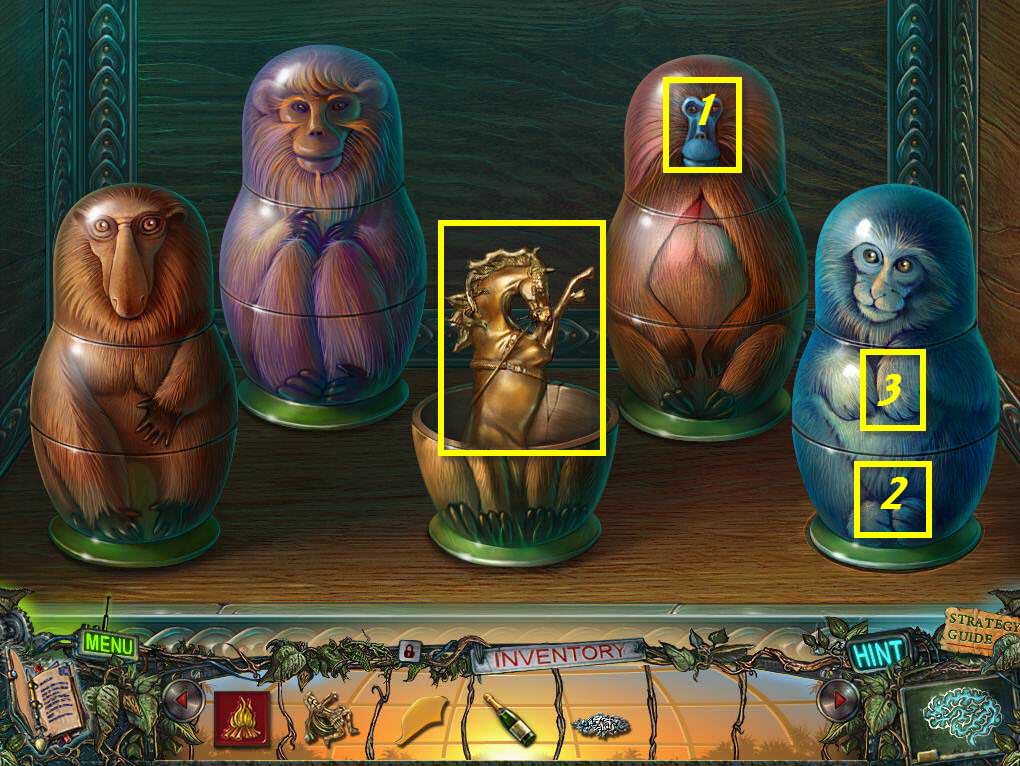
- The goal of the game is to get each of the monkey statues facing forward.
- When you move one section, multiple sections are affected.
- See the screenshot for the solution. It only takes 3 moves to complete.
-
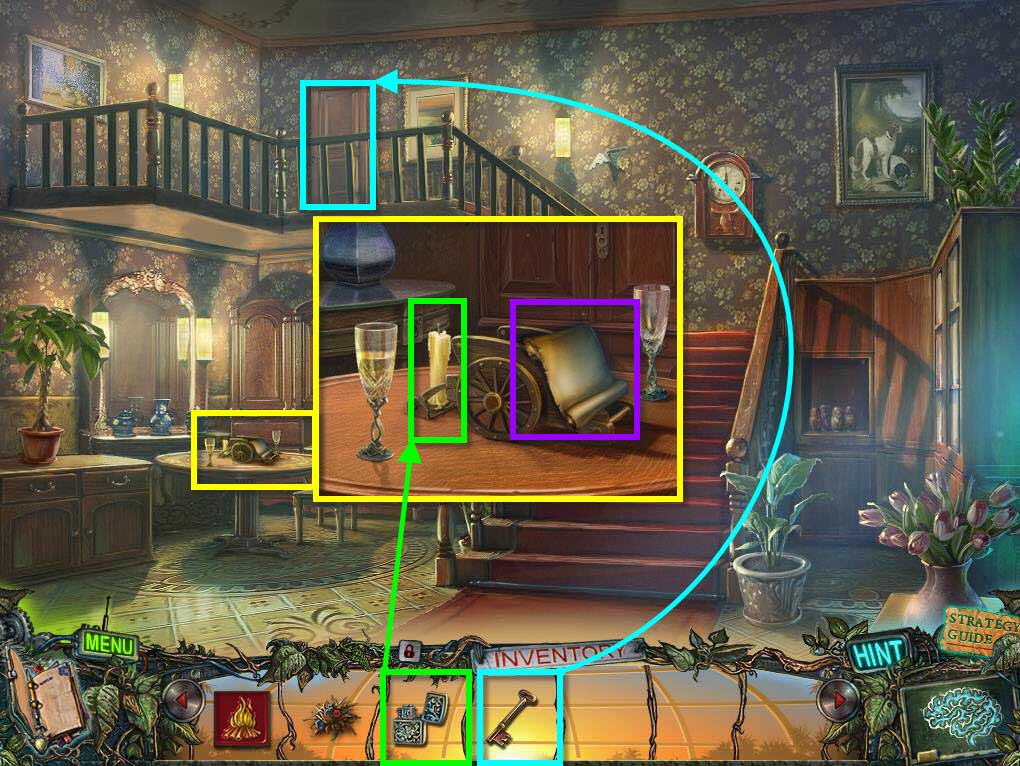
Take the METAL HORSE.
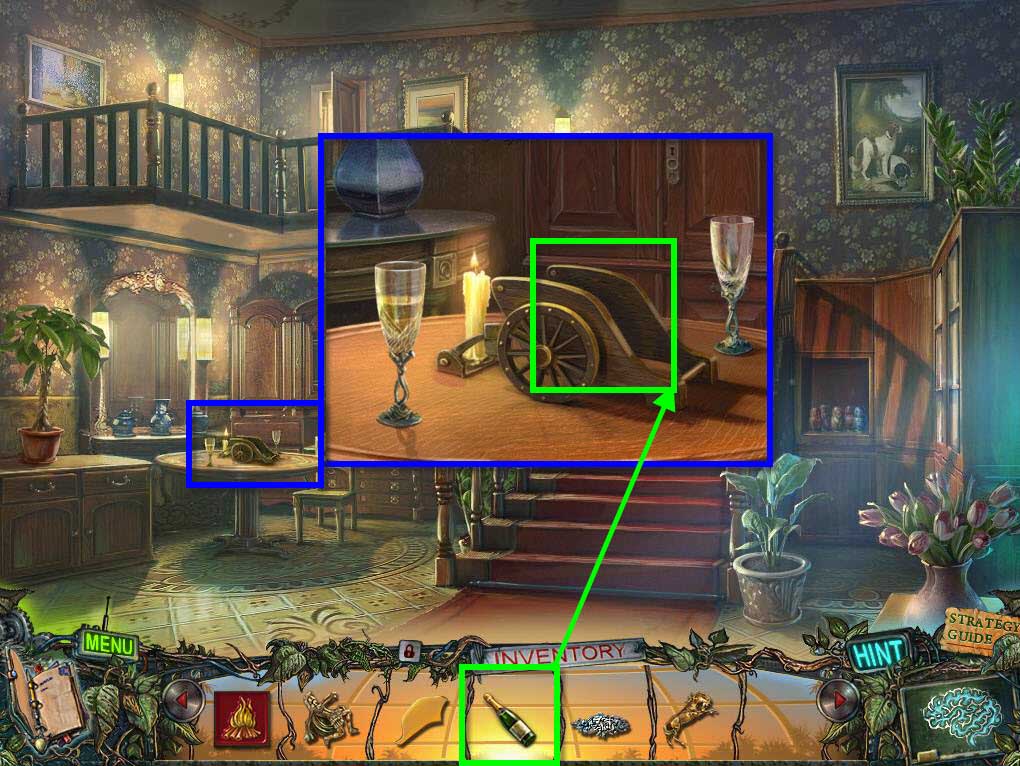
- Click to zoom in on the table.
-
Place the CHAMPAGNE in the holder.
- Click back on the table.
- Take the OPENED CHAMPAGNE.
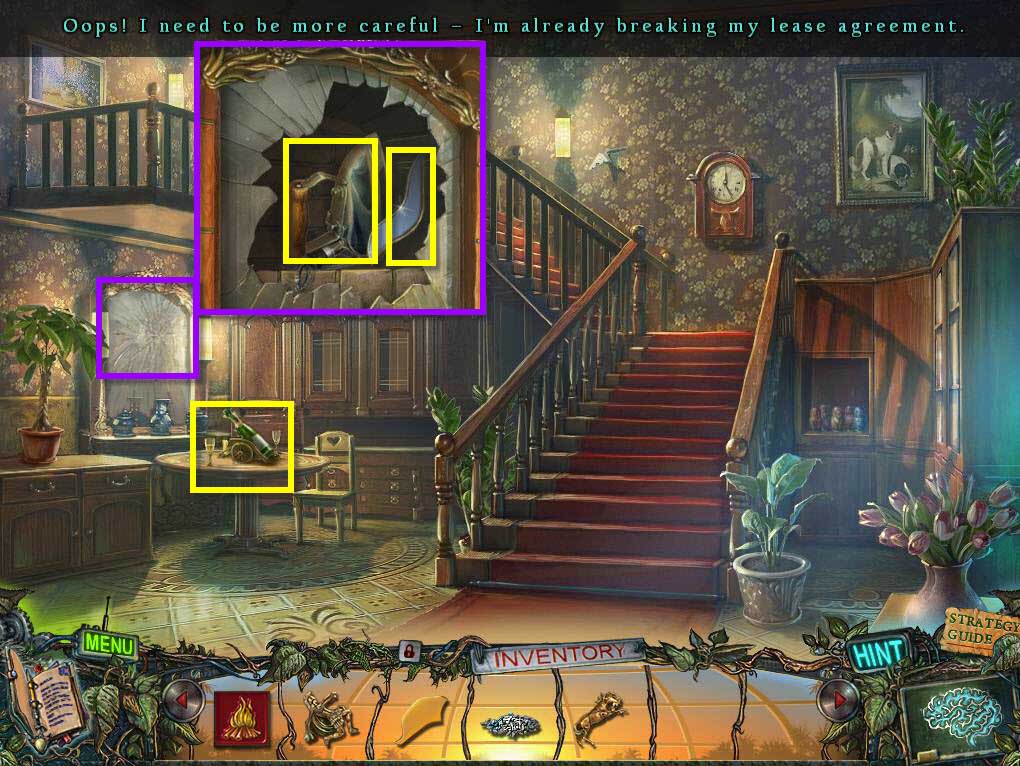
- Click on the broken mirror.
- Click on the glass.
- Take the IRON and the STAINED GLASS.
-
Go back one screen.
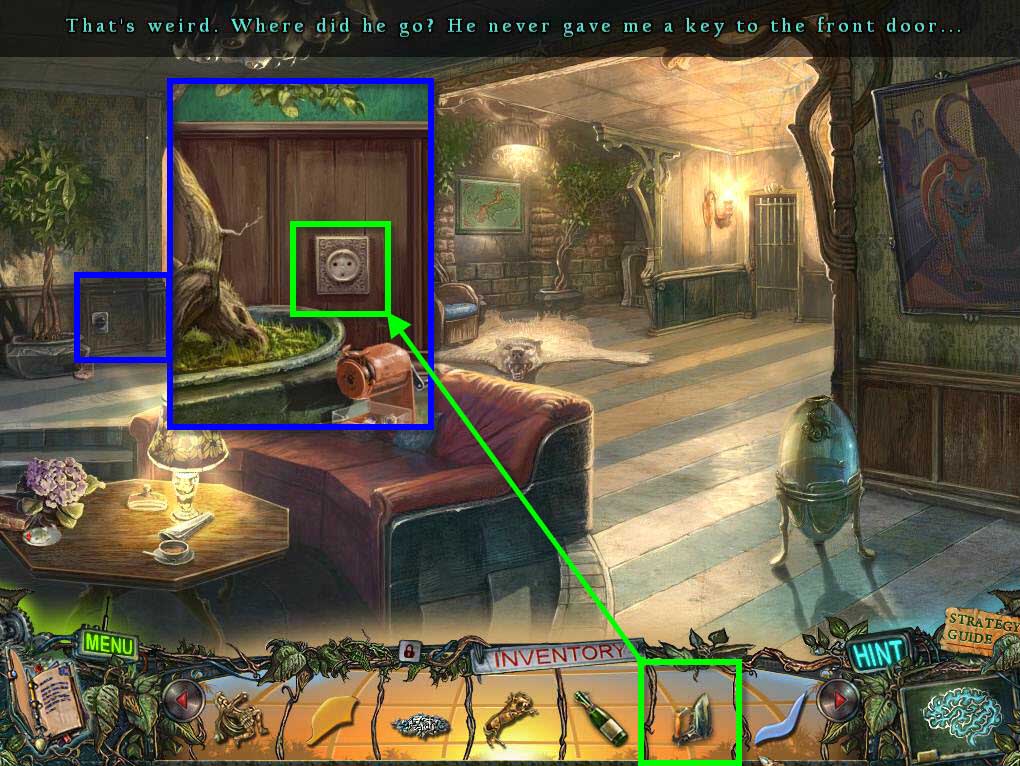
- Click on the outlet area by the plant.
- Use the IRON on the outlet.
- Take the HOT IRON.
-
Go back to your room.
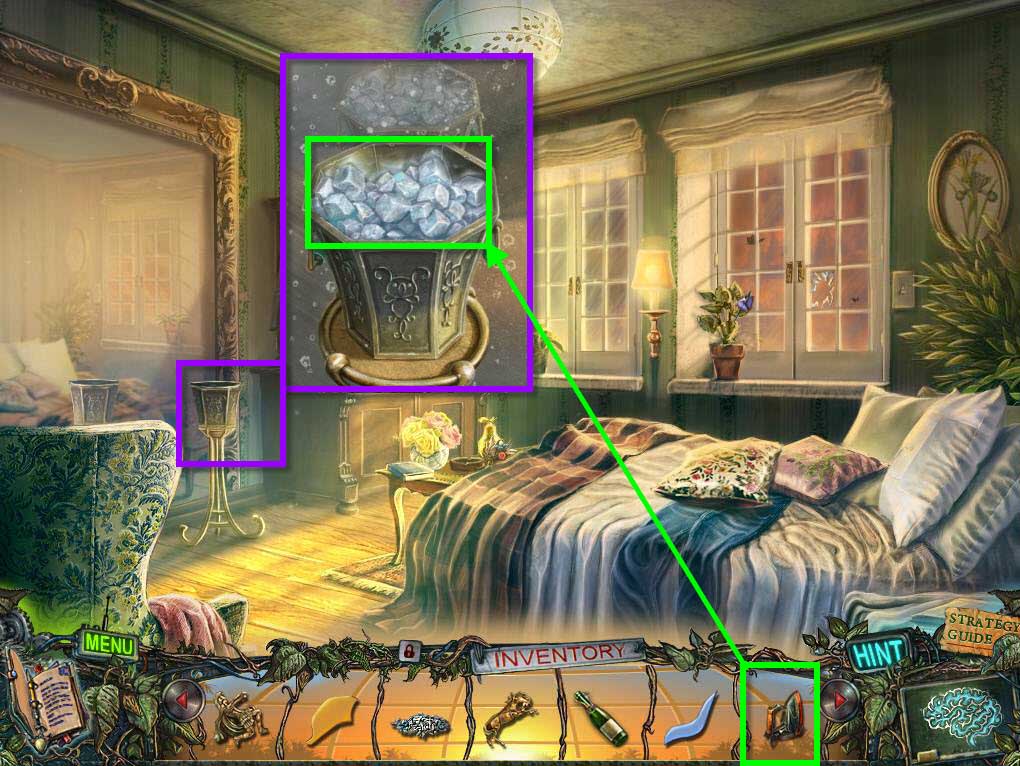
- Click on the bucket of ice.
- Use the HOT IRON on the ice to melt it.
- Take the WATER.
-
Go back 2 screens to the main living area of the house.
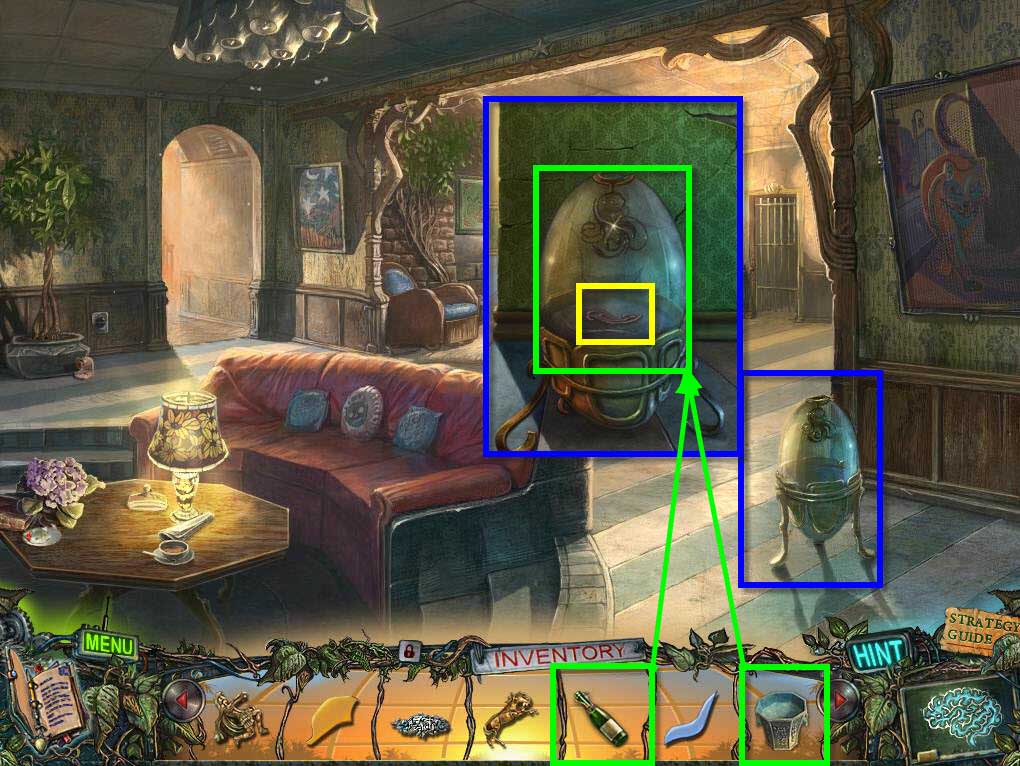
- Click on the pod to zoom in.
- Use the WATER and the OPENED CHAMPAGNE on the pod to fill it.
- Take the WOODEN CAT.
-
Go back to your room.
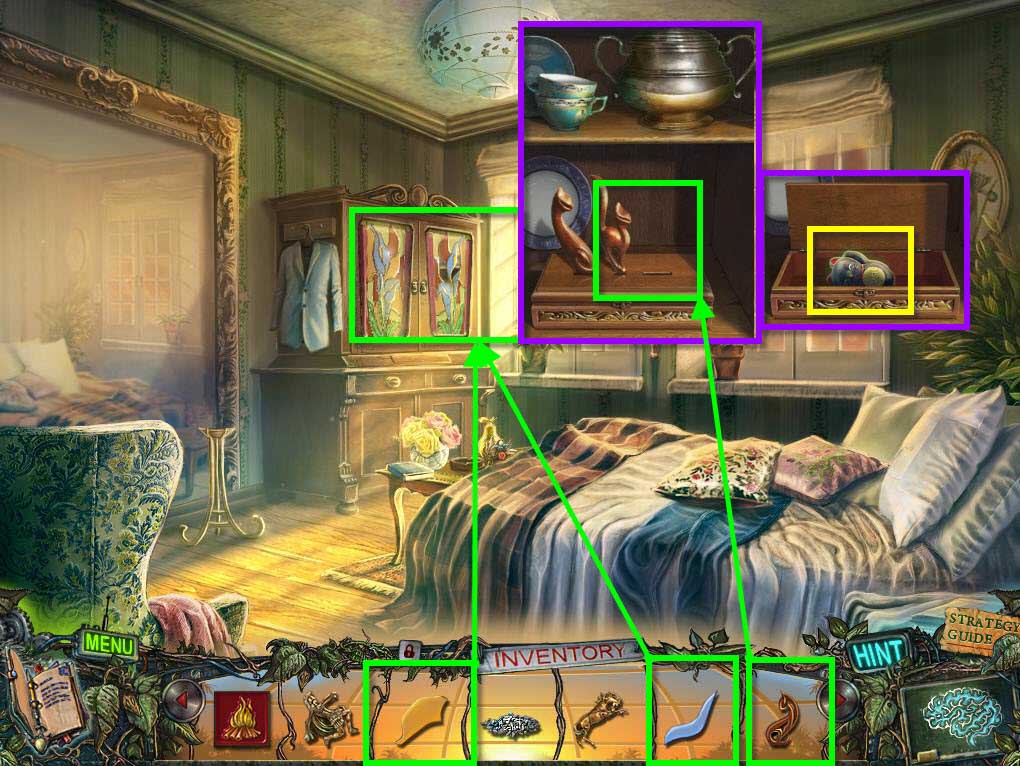
- Click on the wardrobe to zoom in.
- Use the 2 STAINED GLASS pieces on the wardrobe door.
- Once the wardrobe is open, use the WOODEN CAT on the box with the other cats.
- Click to open the box.
-
Take the REMOTE CONTROL.
- Click on the cat hologram.
- Click on the window to zoom in.
-
Take the SEED BUTTON.
- Click on the table to zoom in.
- Click on the pear clock to open it.
- Click to zoom in on it.
- Use the SEED BUTTON on the clock.
-
This will start a mini-game.
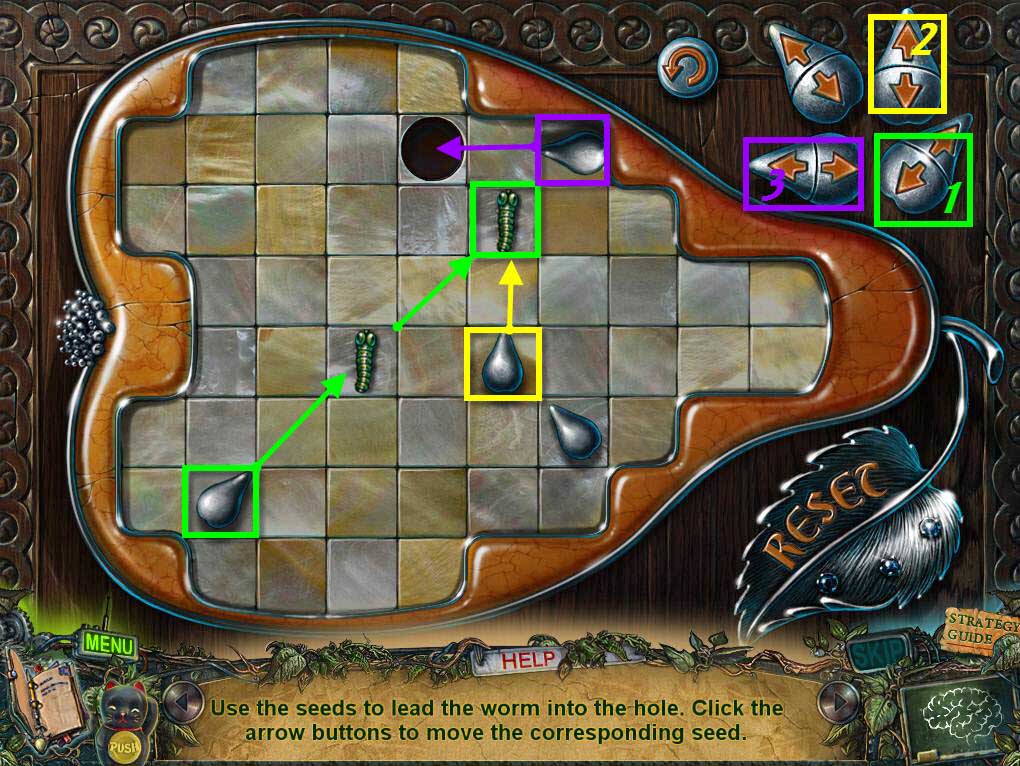
- The goal of the game is to get the worm in the hole by clicking on the right seeds in the right hand corner.
- See the screenshot for the solution.
- Click on 1, three times.
- Click on 2, twice.
- Click on 3, once.
- Take the WORM and the GOLDEN SYMBOL.
-
Go back 2 screens to the main room.
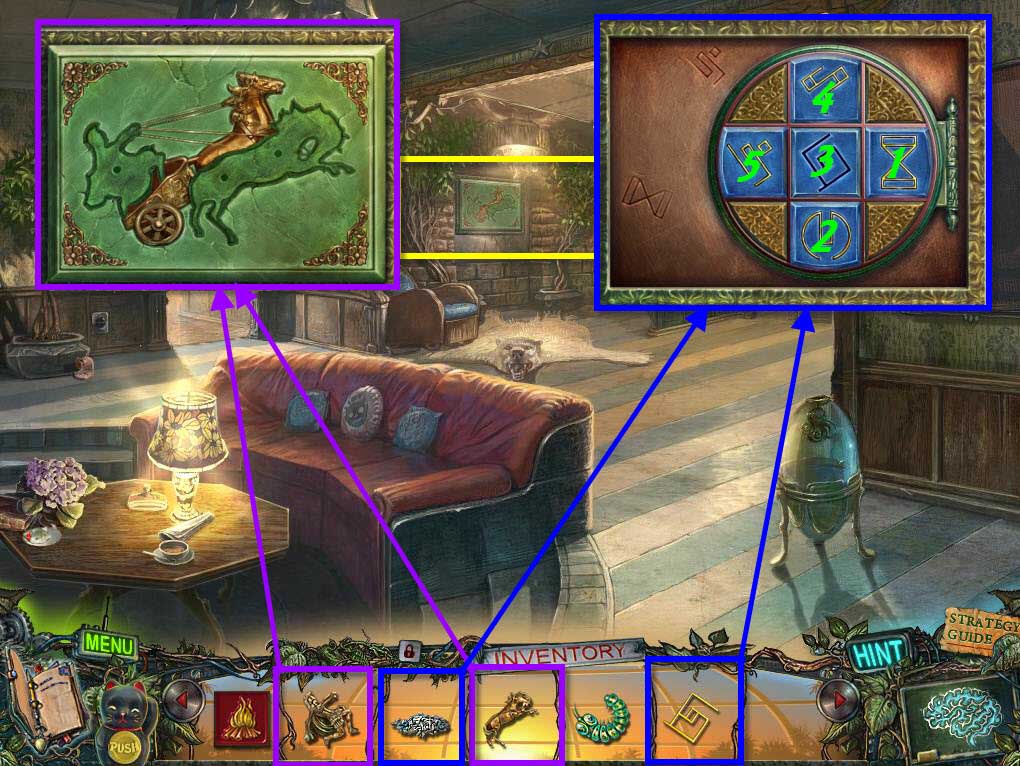
- Click on the picture on the wall.
- Use the METAL GLADIATOR and the METAL HORSE on the picture to complete it.
- This will reveal another panel.
- Use the GOLDEN SYMBOL on the panel.
- Use the ASHES on the side of the panel to reveal the code.
- Click on the tiles in the correct order.
- See the screenshot for the solution.
- Take the BRONZE LEAF and click on the handle to open the door.
-
Go through the door.
General Info and Tips
Chapter One: House 13
Chapter Two: Exploring the Forbidden Wing
Chapter Three: The Landlord
Chapter Four: The Second Story
Chapter Five: Captured!
Chapter Six: The Bomb Shelter
Chapter Seven: The Garage
Chapter Eight: The Cage
Chapter Nine: The Tree
Chapter Ten: The Dove House
Chapter Eleven: The Greenhouse
Chapter Twelve: The Ritual
Ask for help in the comments below!
Chapter One: House 13
Chapter Two: Exploring the Forbidden Wing
Chapter Three: The Landlord
Chapter Four: The Second Story
Chapter Five: Captured!
Chapter Six: The Bomb Shelter
Chapter Seven: The Garage
Chapter Eight: The Cage
Chapter Nine: The Tree
Chapter Ten: The Dove House
Chapter Eleven: The Greenhouse
Chapter Twelve: The Ritual
Ask for help in the comments below!