The Mirror Mysteries: Forgotten Kingdoms: Chapter Two: The City in the Sky
Our The Mirror Mysteries: Forgotten Kingdoms Walkthrough will be your guide as you travel through worlds in your quest to defeat the evil magic mirror. When a woman approaches you and asks for you to help save her brother from an evil mirror, your first response is to suggest she seek a more mental kind of help. But when your curiously forces you to take the case you soon discover that the powerful mirror is indeed real, and it’s not just Tommy that’s in danger of being destroyed. Use our helpful hints, insider tips, and custom screenshots to travel through the looking glass and into new and amazing worlds as you race to defeat the magic mirror.

- First off, check out the magazine on the floor, at A, and you’ll see that you’re now in Sky World. It’s like a world in the sky! Crazy, right?
- Head over to the glowing lights at B to start the next HOS.

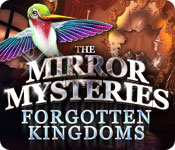
- 1 – Lightbulb; 2 – Post (like the ones at the bank); 3 – Ticket; 4 – Sun Emblem; 5 – Clock Face
- You’ll need to use the light bulb on the spotlight to illuminate the last piece of the clock first.
- Once the clock is working, a slot will open, revealing a piece of the sun emblem. Using the post will unlock the last piece.
- When you finally get to use the emblem, the ticket booth will unlock, giving you access to not only the last piece of your ticket, but also the funniest cut-scene yet.
- That owl is great, easily Oscar-winning performance. I only wonder how an night-blind owl made it so far in life? Don’t they normally hunt at night? I’m digressing…
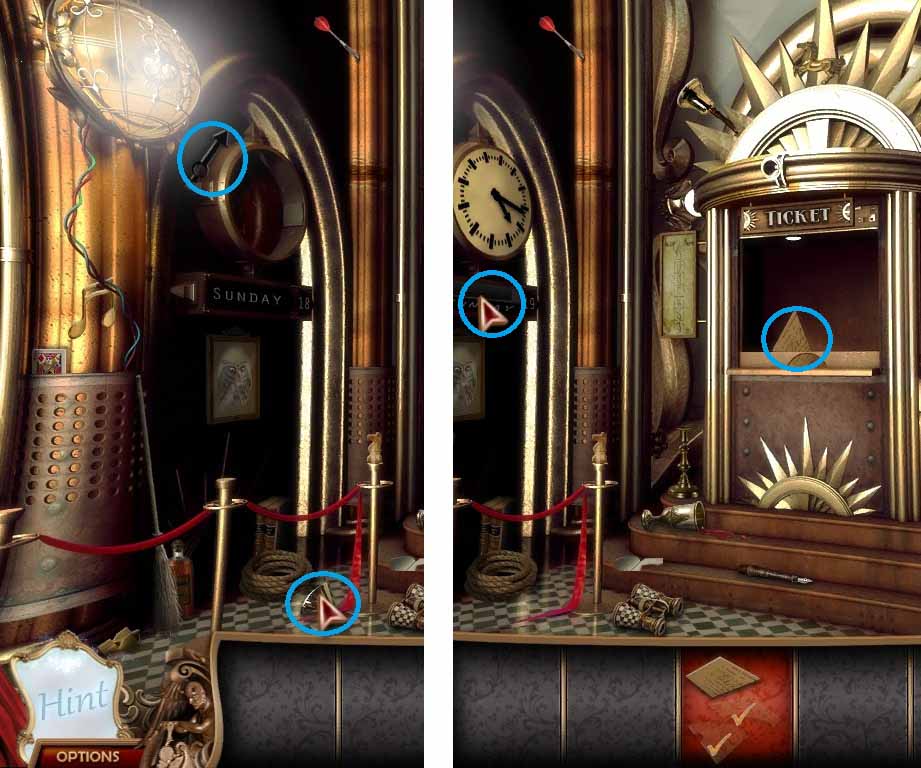
- Collect your first two shards at A and B, then click on C to get a good look at the elevator.
- Pick up the stone monkey head (D) and then click on C again to ride the lift.
- You can’t cross the bridge yet, so don’t worry about it for now.
- You can grab the 2 shards (A & B) and then head for the door to move on.
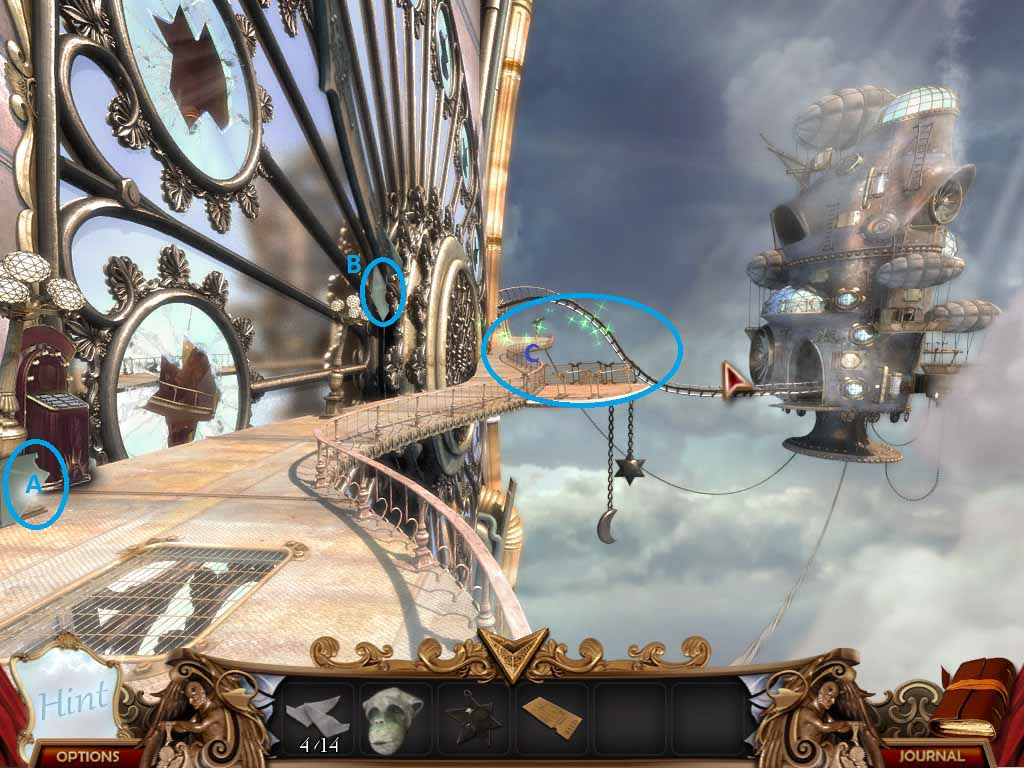
- Two more shards are waiting for you at A & B.
- Click on C to start the next HOS
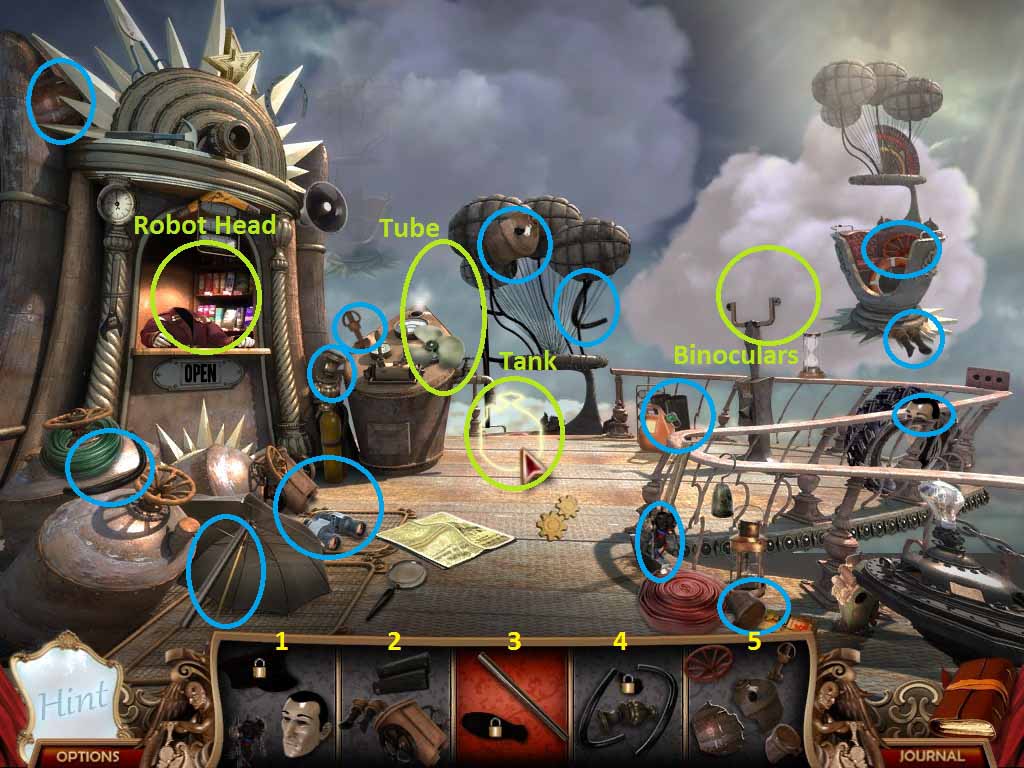
- 1 – Robot Head; 2 – Binoculars; 3 – Lever; 4 – Tubing; 5 – Helium Tank
- Start by collecting the binoculars and use them. The newspaper will burn up revealing the robot’s hat.
- Use the robot’s completed head to unlock the last piece of tubing.
- When you collect the tubing and the helium tank, use them together to inflate the balloons. This will let you get the last piece of the lever.
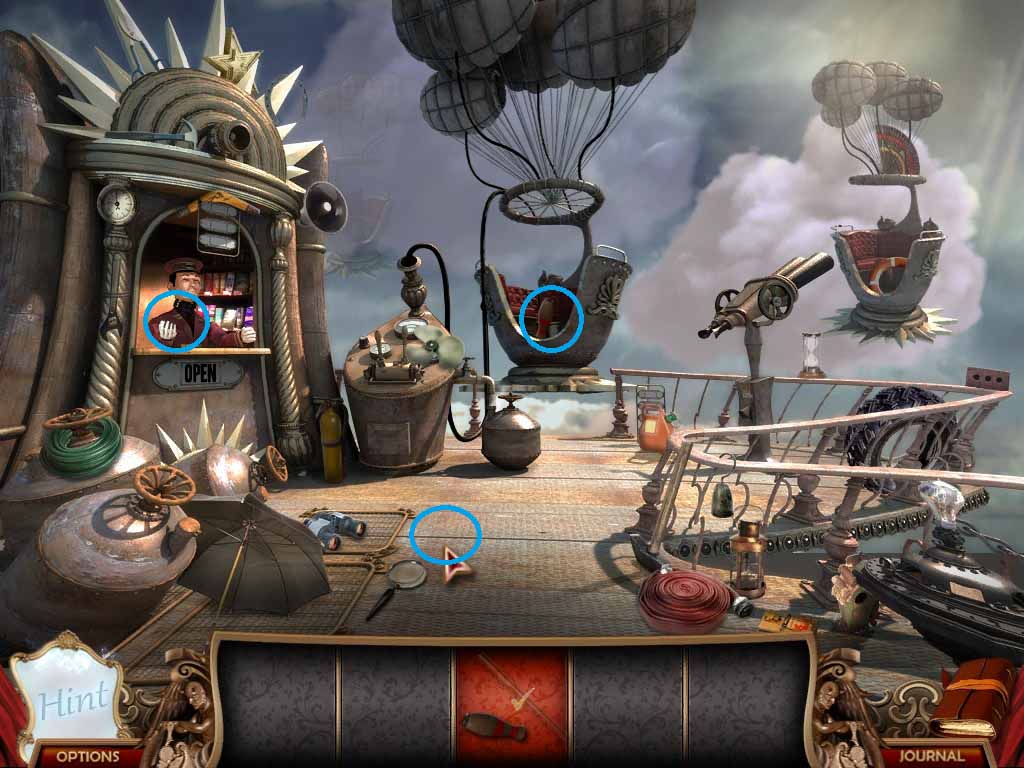
- If you were curious and poked around back after the elevator, you’ll know exactly where to use this.
- Head back to the bridge.
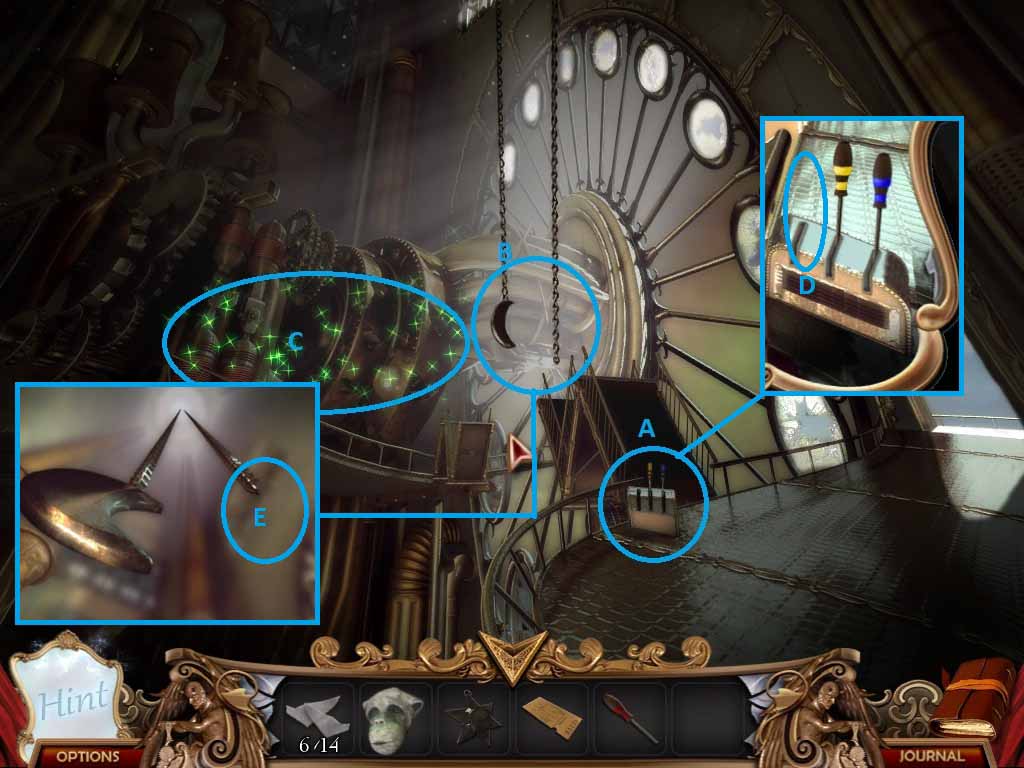
- Your job is to get the bridge down so that you can move on, so start by clicking on A to zoom into the control panel.
- Use the red lever at D to fix the panel.
- Now you need to pull the levers in order to lower the bridge. Feel free to play around, as you’ll eventually hit it just by messing around. If you’re in a rush, just hit the blue lever, then the red one.
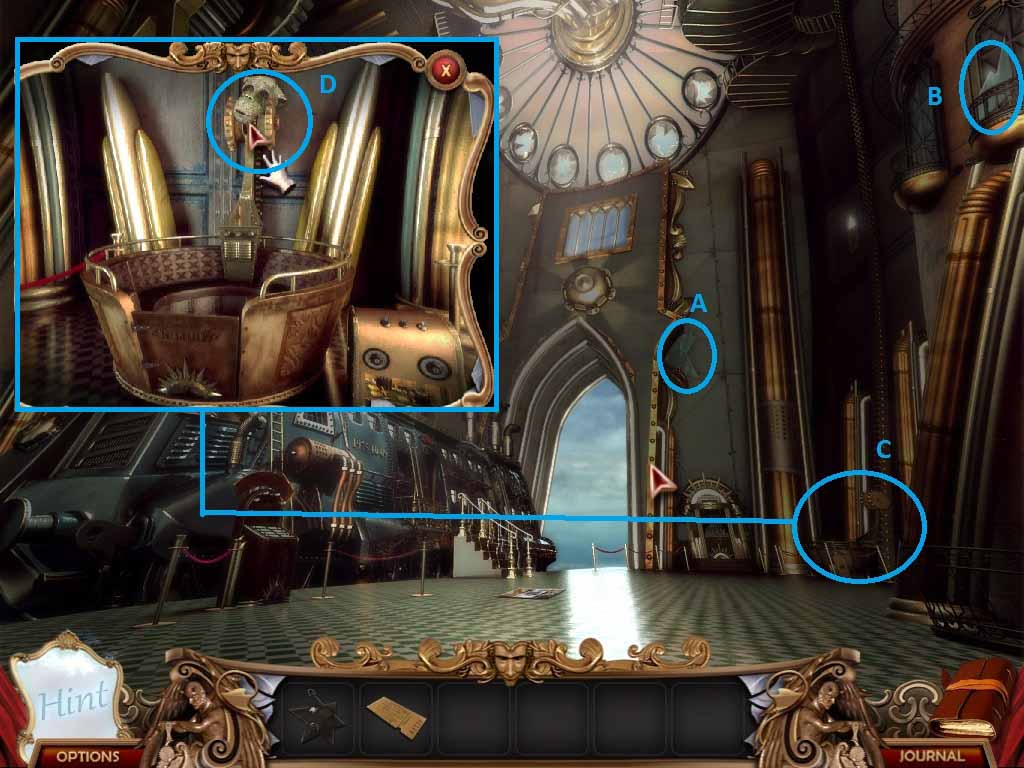
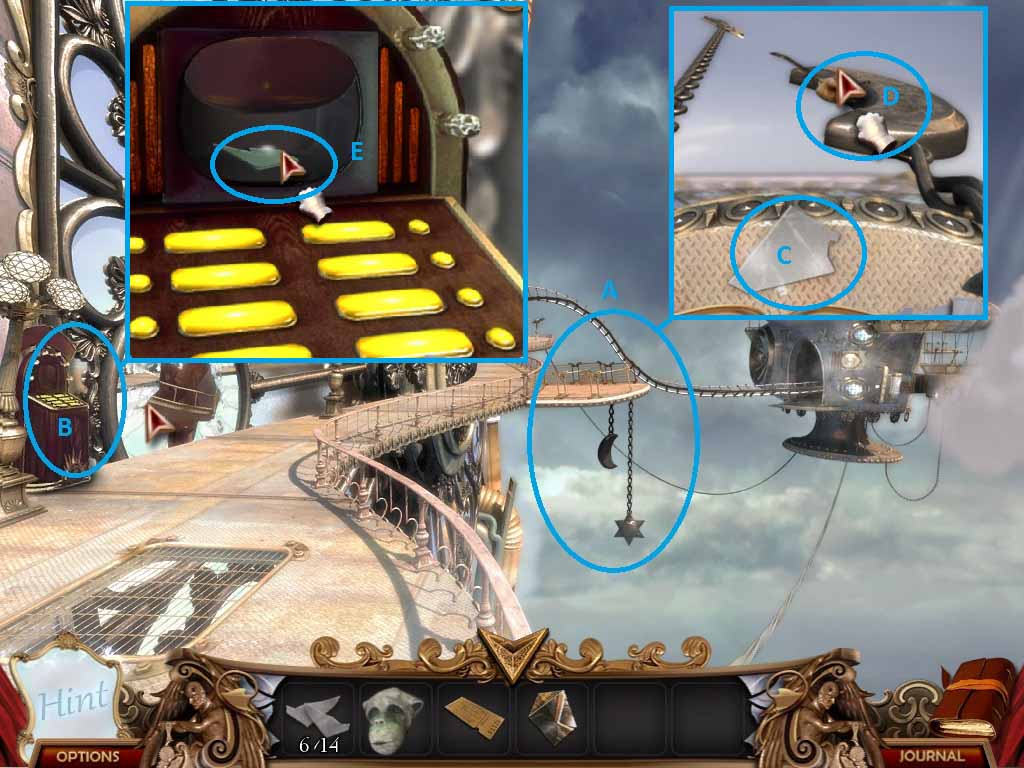
- Before moving onto the next HOS (C), zoom into B.
- Place the sun weight on the other chain at E to counterbalance the moon.
- The chains will shift, with no obvious effect. Trust me, it helped. Now you’re ready for the next HOS.
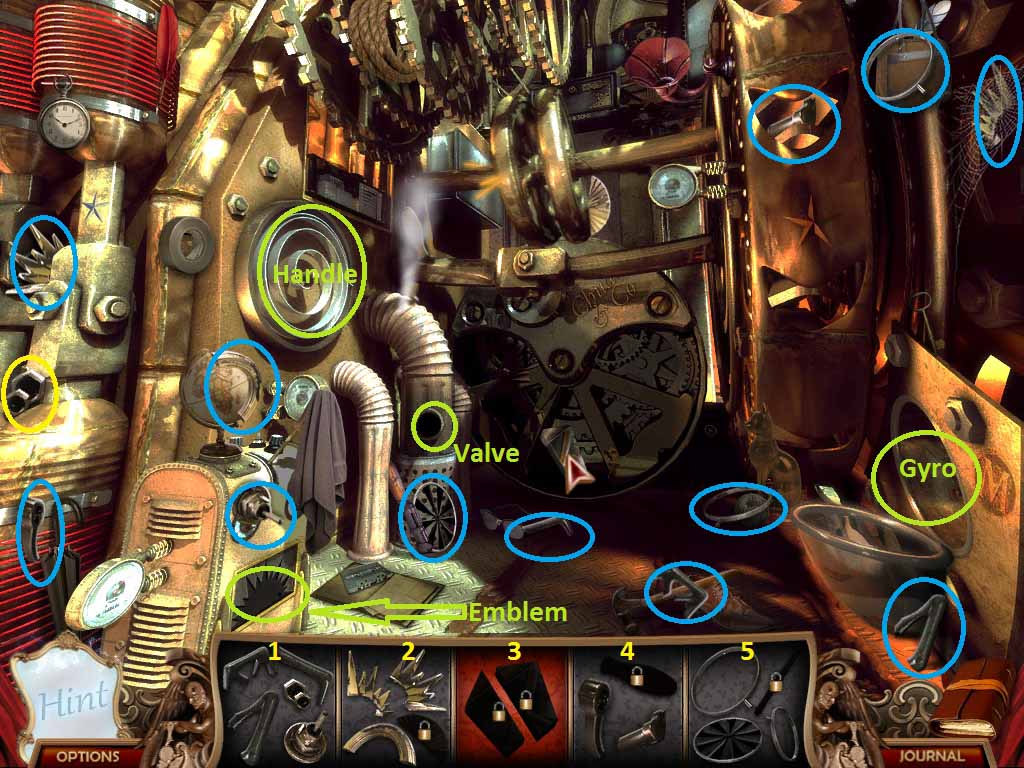
- 1 – Valve; 2 – Emblem; 3 – Prism; 4 – Handle; 5 - Gyro
- The only part you can complete at first is the valve. Use it on the pipe to unlock the last piece of the handle.
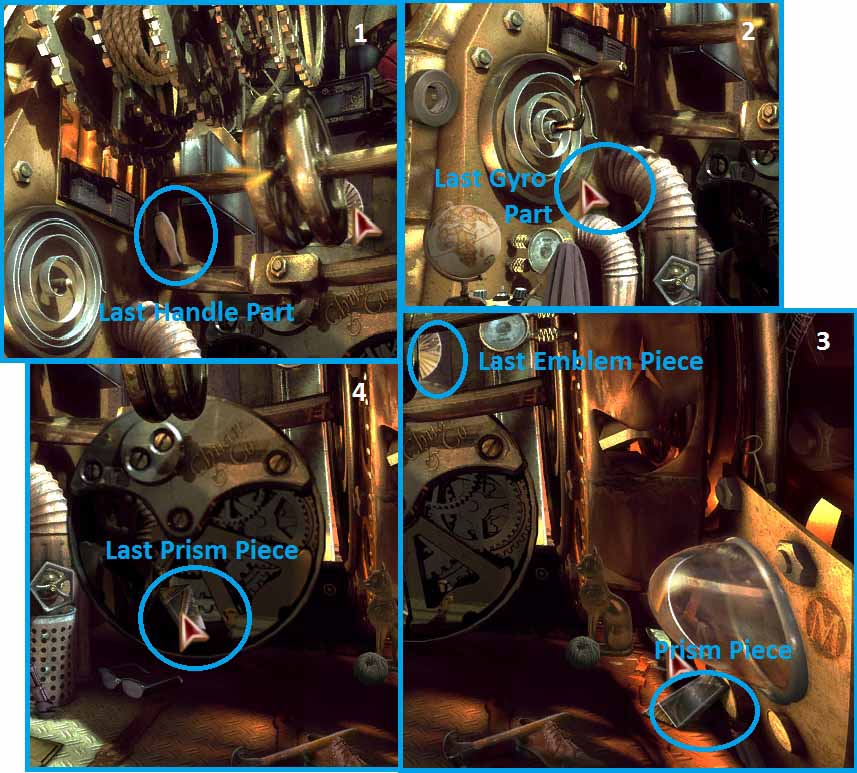
- Use the handle to unlock the last gyro piece.
- Using the gyro will stabilize the stop the wheels from rocking uncontrollably and let you complete the emblem, as well as giving you the first piece of the prism.
- Using the emblem will freeze the gears and let you grab the last piece of the prism.
- Head back out on the balcony and a message will tell you that the info booth is operational. Check out the sky walk first by going to A.
- Grab another mirror shard at C, and the oil can at D.
- Next, head to B and click on the control panel to check out an advertisement about goggles. If you remember, the owl was raving about needing his goggles to see properly…
- After the clip, the screen will slide up and reveal another mirror shard at E.
- Head back to the platform where you started the chapter, where the train is.
- When you get to the platform, head into the train.
- Once you’re in the train car, click on the lights at the end of the aisle to start an HOS.
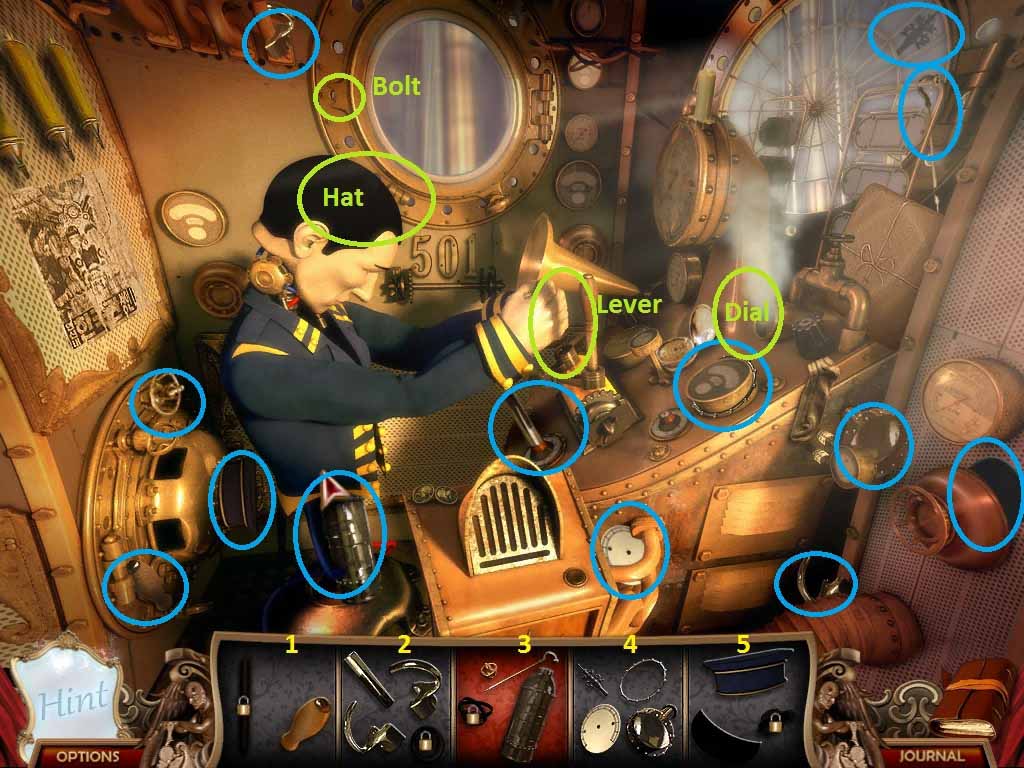
- 1 – Lever; 2 – Window Bolt; 3 – Fire Extinguisher; 4 – Dial; 5 – Conductor’s Hat
- Start by collecting the dial and using it on the control panel. This will unlock the last piece of the window bolt.
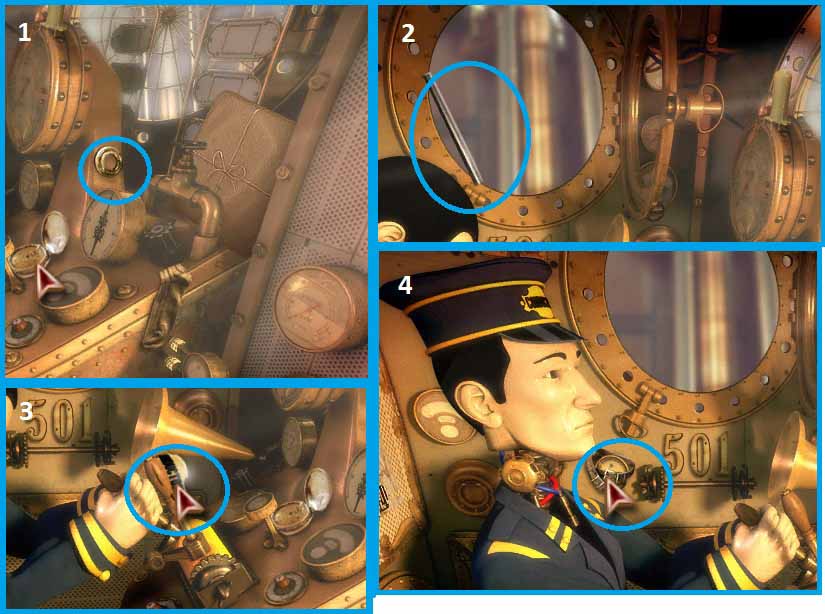
- Use the window bolt and the window will open, revealing a piece of the lever.
- Complete the lever and place it in the conductor’s hand. When he pulls down, collect the last piece of his hat.
- And voila! You have the last piece of the fire extinguisher and you can move on with your mission.
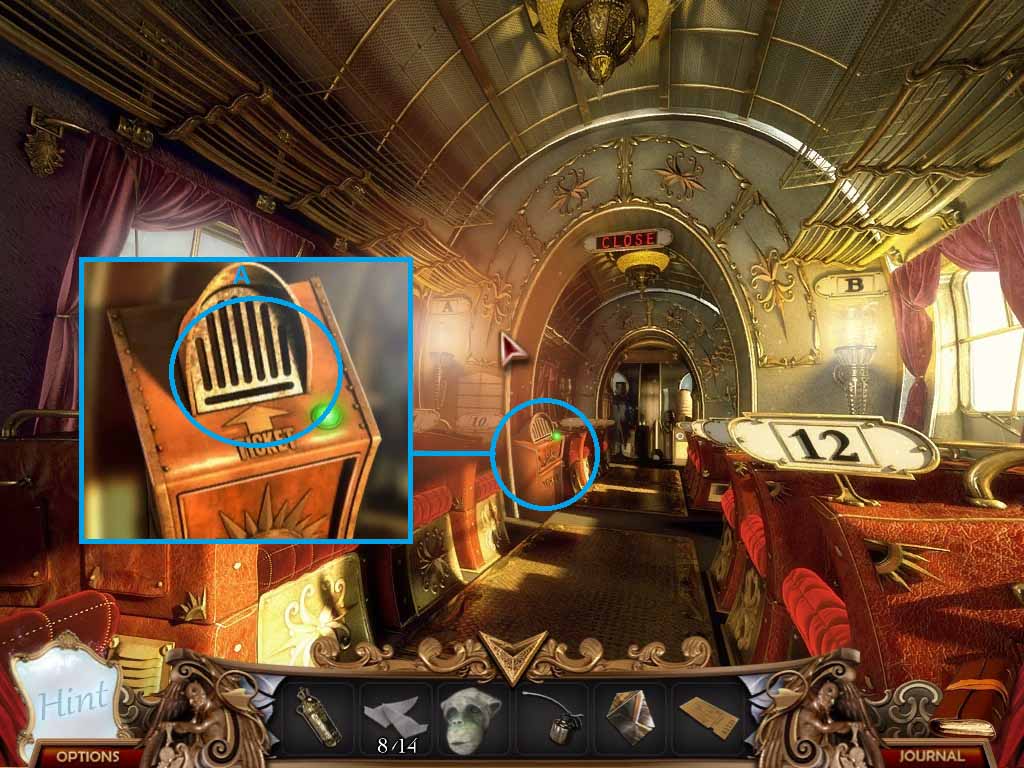
- Back in the train car, click on the ticket station and use your ticket at A to start the train.
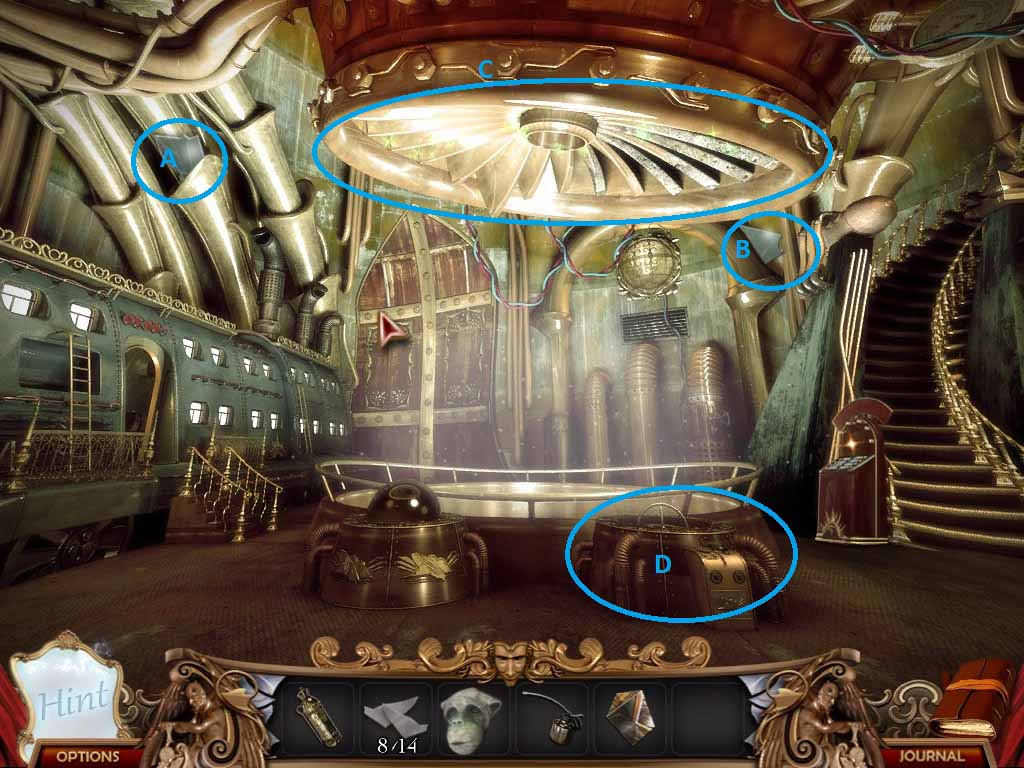
- After you emerge into the exhaust room, grab the next two shards at A and B.
- Before you click on the next HOS at C, take a quick look at D.
- The gyroscope is part of a puzzle that you’ll come to in just a second.
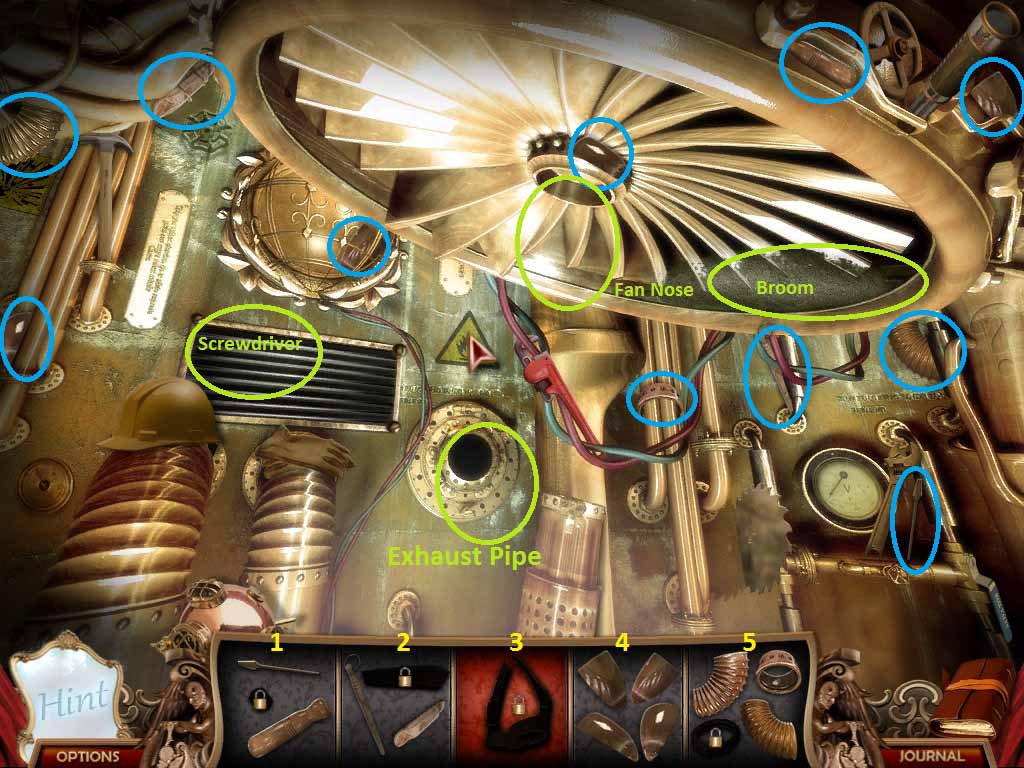
- 1 – Screwdriver; 2 – Broom; 3 – Goggles; 4 – Fan Nose; 5 – Exhaust Pipe
- Start off by collecting the fan nose and placing it on the exhaust fan.
- This will unlock the last piece of the screwdriver.
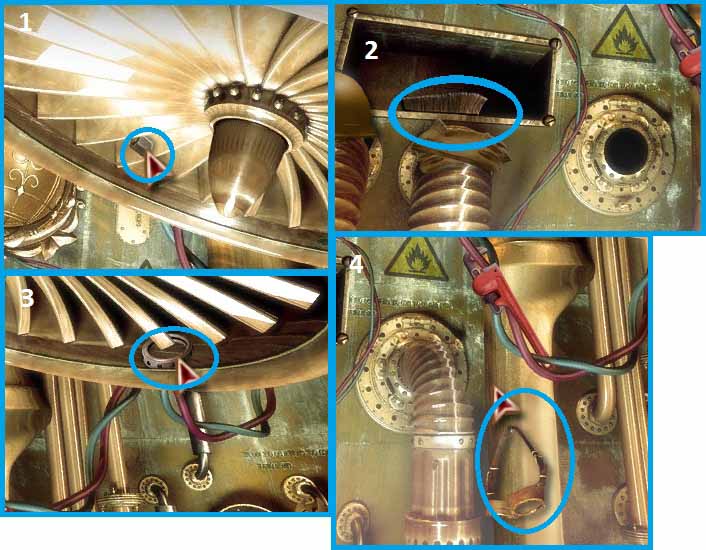
- Use the screwdriver to open the grate, then grab the last piece of the broom.
- Use the broom to clean off the fan and reveal the last piece of the exhaust pipe.
- Lastly, use the pipe and you’ll unlock the goggles to finish the HOS.
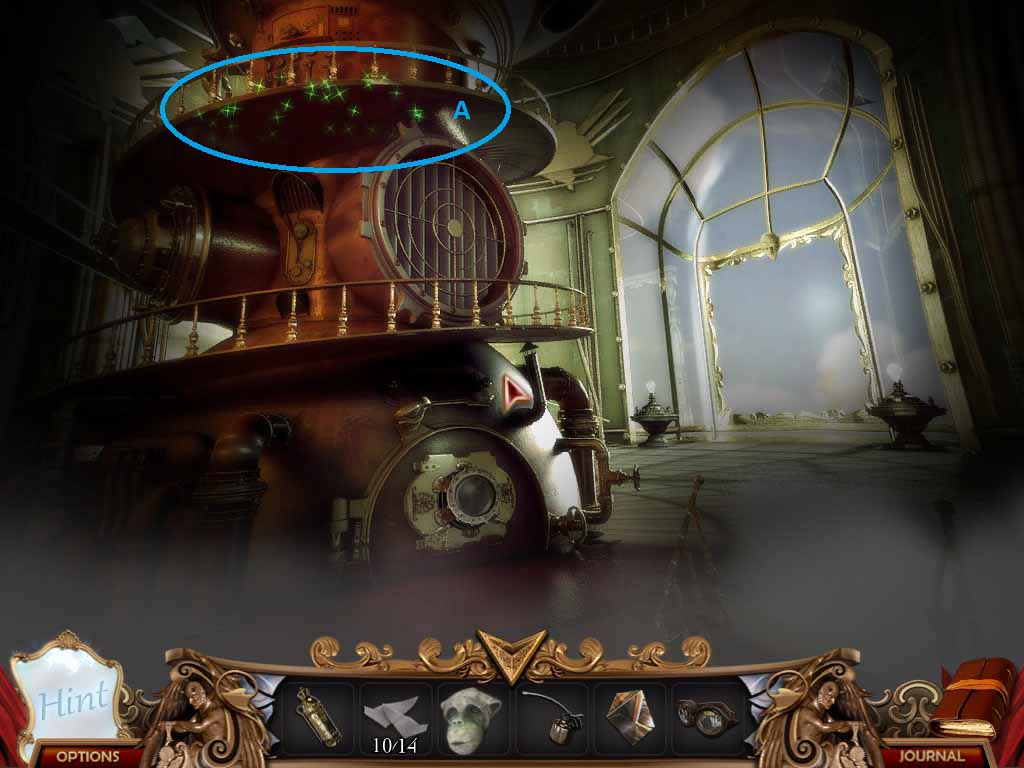
- Head up the stairs to reach the furnace room.
- Start the HOS at A and if you notice something strange about the pain of glass at the end of the room… that would because there is something strange about it, but you can’t do anything about it yet.
- You can also grab the two shards at B and C
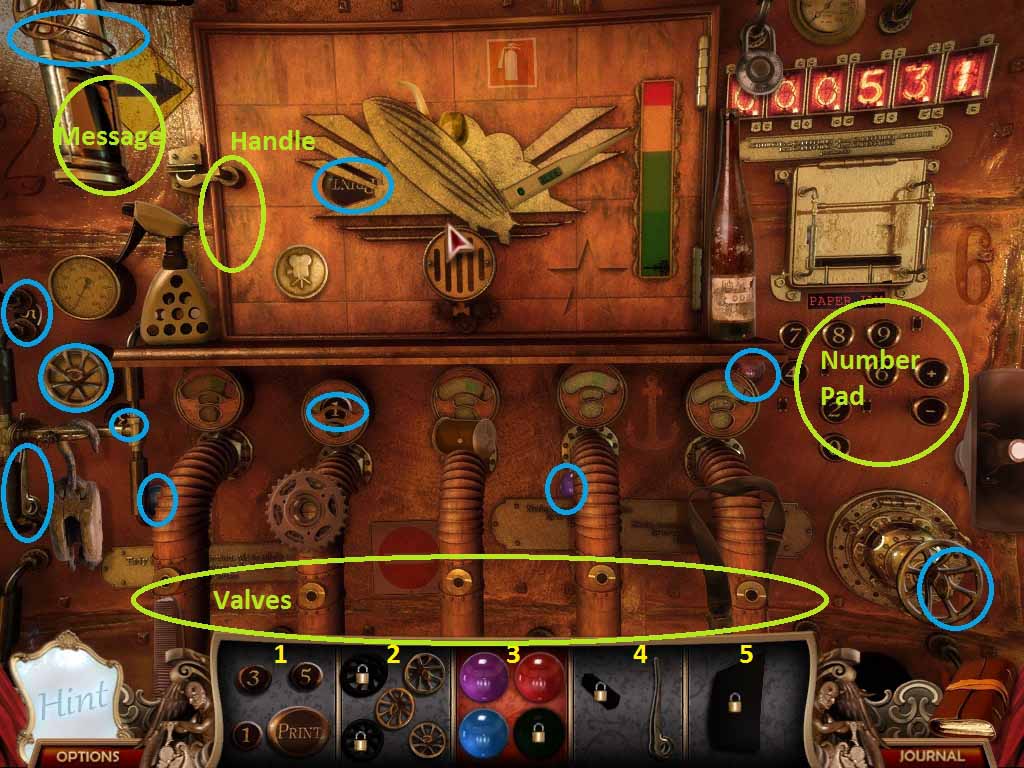
- 1 – Number Keys; 2 – Valves; 3 – Colored Marbles; 4 – Handle; 5 – Message
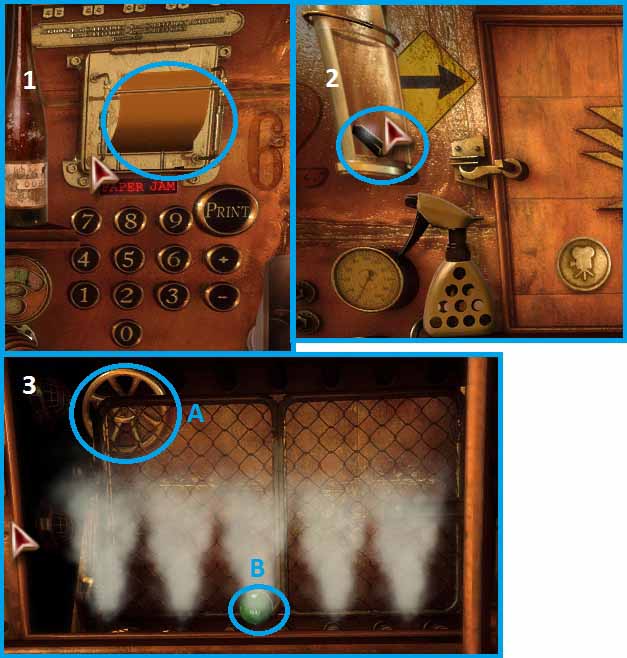
- As the numbers are the only set you can collect completely at first, start with them so you can finish the number pad.
- This will unlock the message, which you can send immediately. Behind it, you’ll find another one of the valves, putting you another ½ step closer to completing the set.
- After you send the message, the last piece of the handle will drop down through the tube.
- When you add the handle, a compartment will open (see 3).
- You won’t be able to reach the last marble (B) at first, on account of all that hot steam blasting out of the furnace, but you will be able to grab the last valve (A).
- Once you add the valves, you will be able to kill the flow of steam and reach the last piece.
- Head back to the exhaust room and click on the gyroscope, the one at D that you noted before.
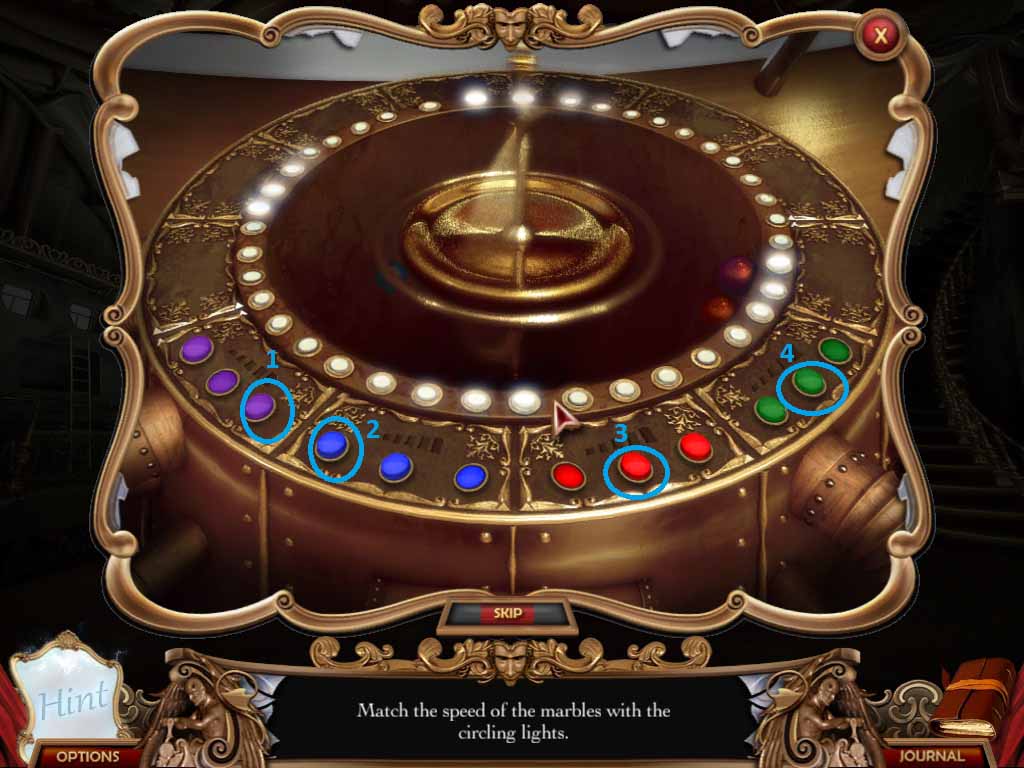
- Use the marbles on the device and the balls will start spinning like a roulette wheel.
- Use the colored buttons to change the speed of the marbles and synchronize the gyroscope. The solution is circled above.
- One you complete the puzzle, a cut-scene will show the fan and furnace firing up, and the electricity will surge back on.
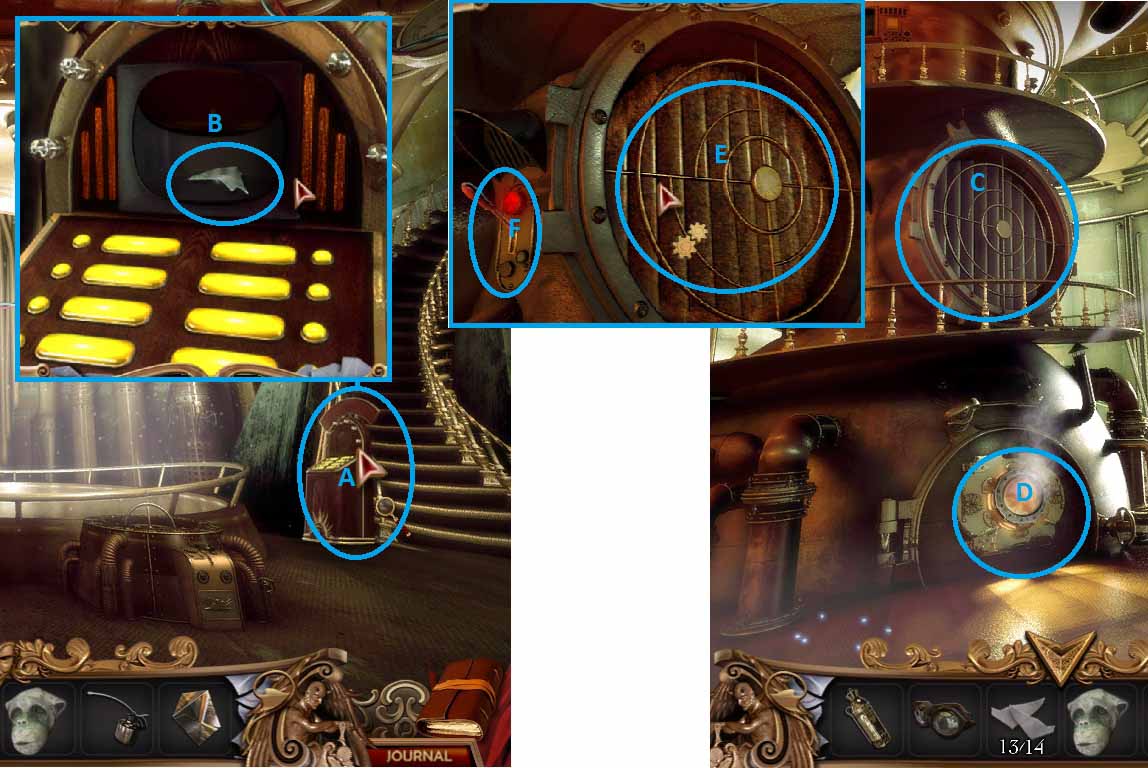
- Check out the information kiosk at A that’s now powered on. Click on the keypad and another advertisement will come up.
- Once the clip is over, the monitor will open up again, revealing another shard at B.
- Head back up the stairs into the furnace room and click on the grate (C)
- Use the oil can on the grate at E to clean off the run, then crank the handle (F) to fire up the furnace.
- The fire in the furnace is now blazing (D); good thing you have that fire extinguisher, right?
- Use the extinguisher to put out the flames and cold vapor will start shooting out of the grate and freeze on that suspicious looking center panel. There’s still nothing you can do about it, but soon enough.
- Head downstairs and back onto the train. Once on the train, head back to the train platform (where you started the chapter)
- Hint: To get back to the platform, use the arrow at the bottom of the screen, right above your inventory bar. If you mouse over the end of the car, the arrow that pops up will just take you right back to the furnace room.
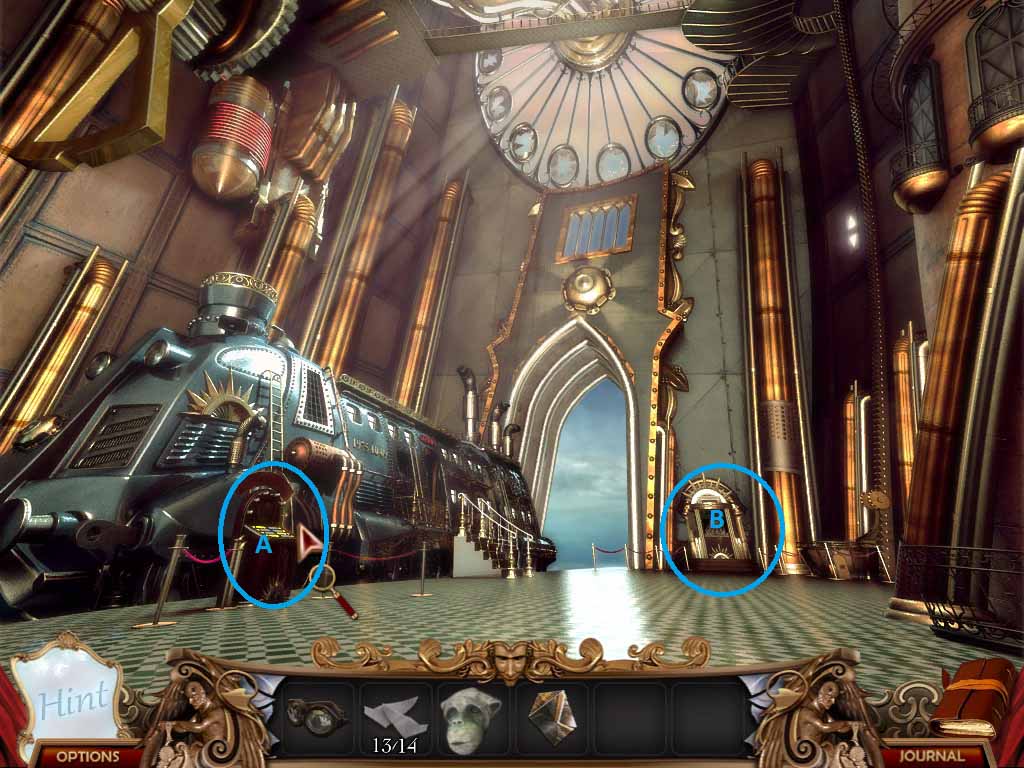
- Once you’re back at the platform, check out the kiosk (A) for another video (this time about Sky Trains) and receive the last shard.
- As usual, click the keypad to start and the screen will drop down once the video is over to reveal the last shard.
- Once you’ve done that, head to B and give Mr. Owl his goggles back.
- He’ll reward you with a magical frame to help get you back home.
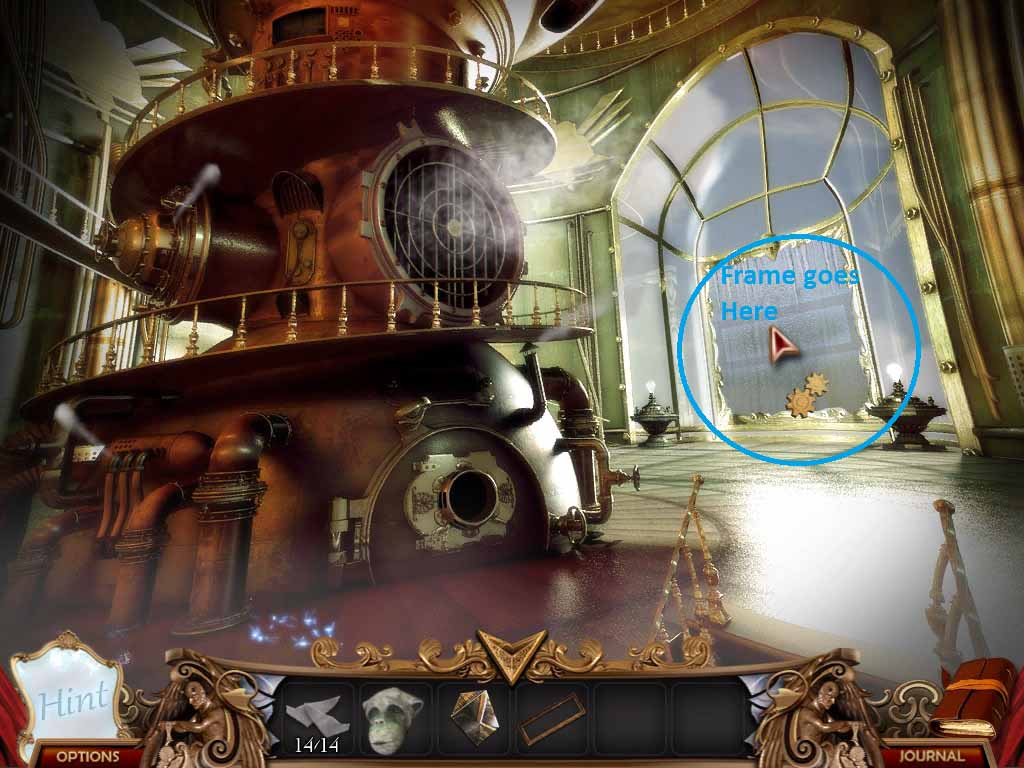
- Head back to the furnace room via the train.
- No sense waiting around here in Sky World any longer… use the frame on the glass and you’ll pop out back in the library, much to the mirror’s chagrin.
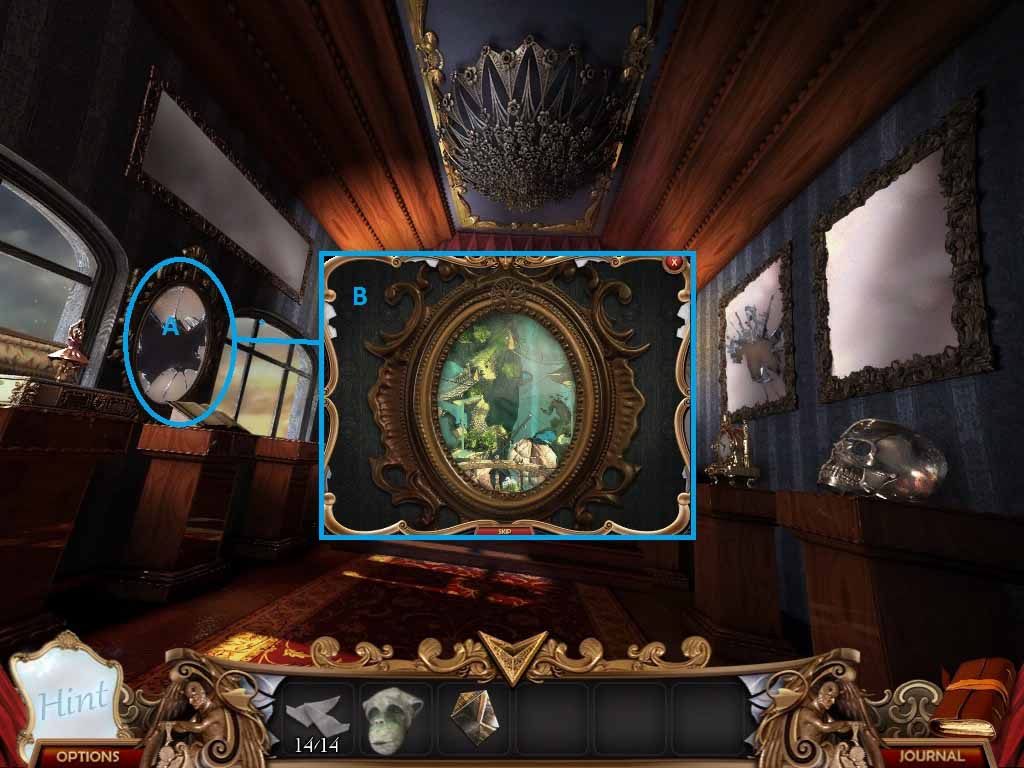
- Click on the round, broken mirror on the left of the screen, marked A. This one is tougher than the first, on account of it being round, and you having more pieces to set. The insert (B) is a picture of it completed.
- You should get through it, there’s no time limit to contend with. If you’re stuck try looking at the borders of the shapes to see what looks like a fit. It’s not terribly difficult in that there are rarely more than 1 piece that even look appropriate for any one piece.
- Once you’ve finished, click on the mirror at the end of the hall (not the glowing one you just finished, the big, evil one that keeps insulting you) and you’ll fall through the next rabbit hole into chapter 3.