Spirits of Mystery: The Dark Minotaur: Chapter Five: The Castle
Our Spirits of Mystery The Dark Minotaur Walkthrough will help you in your search-and-rescue mission to find the princess's missing magical animal friends. An evil witch Mortis and her henchman Isa wish to harness the animals' extraordinary powers to summon a dark beast to the land. Equipped with the detailed instructions, custom screenshots, and puzzle solutions found in our Spirits of Mystery Walkthrough, you'll have no problem thwarting their devious plans.
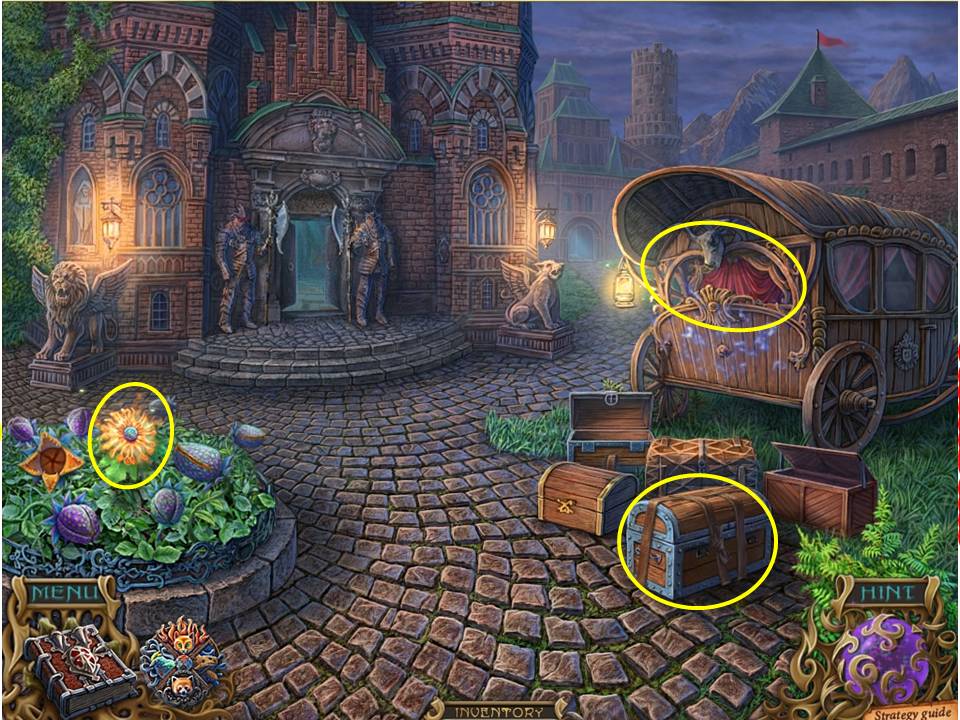
- Watch the scene with Isa play out, then take the next batch of MAGIC POWDER he offers up, as well as the KEY.
- Note the door, which will obviously need the two halves of the MONSTER HEAD to open.
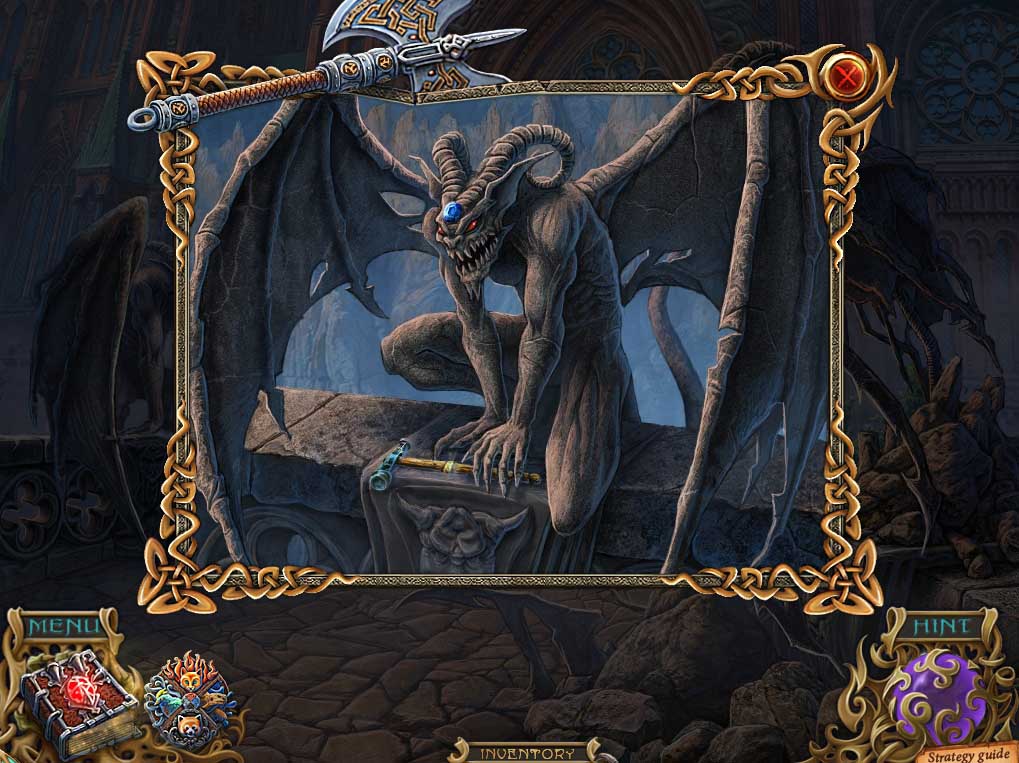
- Zoom in on the gargoyle to the right, and place the DIAMOND on its forehead.
- It will spread its wings and reveal a HAMMER for you to add to the collection.
- Head back down to the entrance and use the MAGIC POWDER as you did before on the small portal to the left.
-
Go through it once it opens.
- Once back across the chasm walk back to Arton, talk to him, and hand him the FEATHER.
- He will hand you a MEDAL to use on a teleportation device.
- Go back into the cavern under the hotel, and climb the ladder on the right back up into room 8.
-
Click on the cupboard in the back corner to initiate the next HOA puzzle.
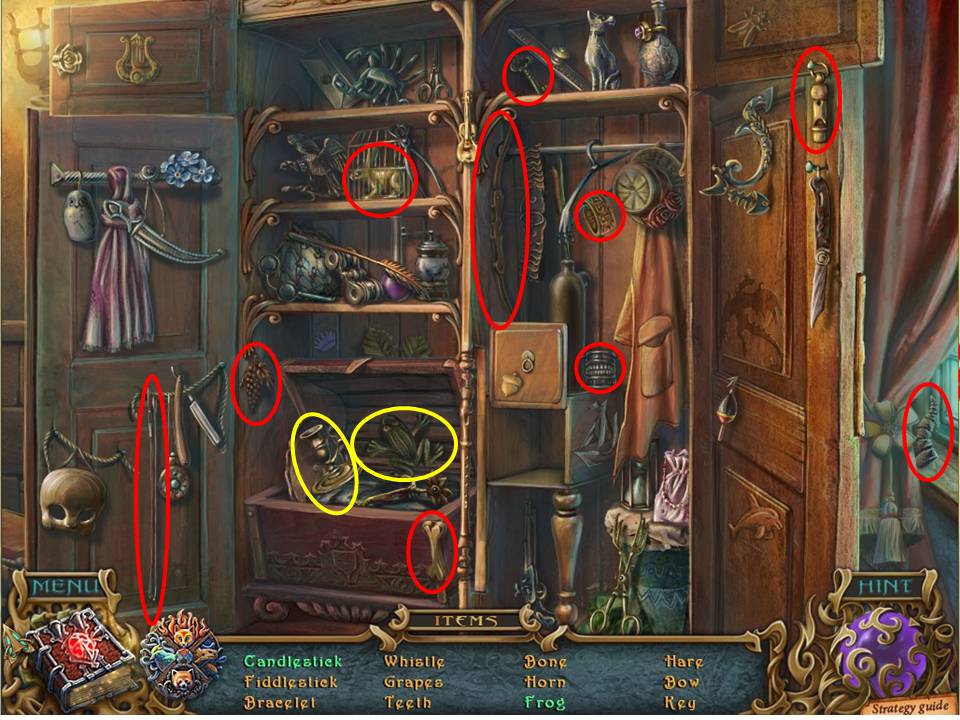
- Collect all the items circled in red.
- The chest to the left will need to be opened to retrieve the candleholder and frog inside.
-
When complete you will receive a HORN.
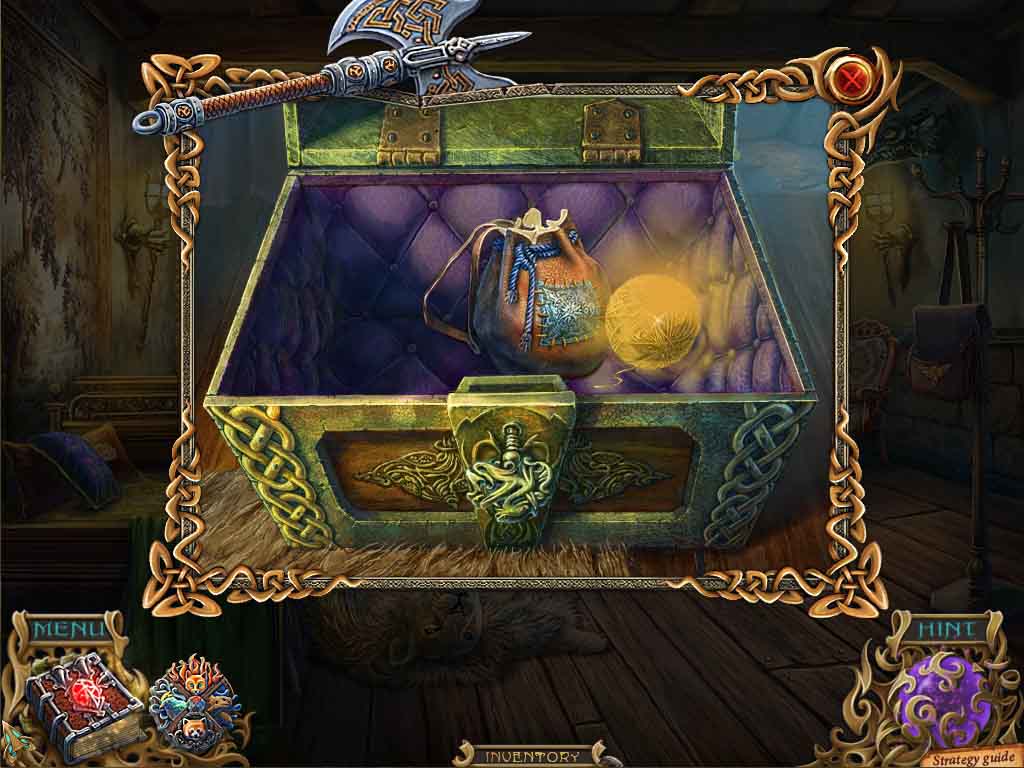
- Zoom in on the chest at the back of the room and put the HORN in place, then use the KEY to open it up.
-
Retrieve ISA’S YARN BALL from inside, as well as another bag of MAGIC POWDER – it seems like Isa has an endless supply of this stuff!
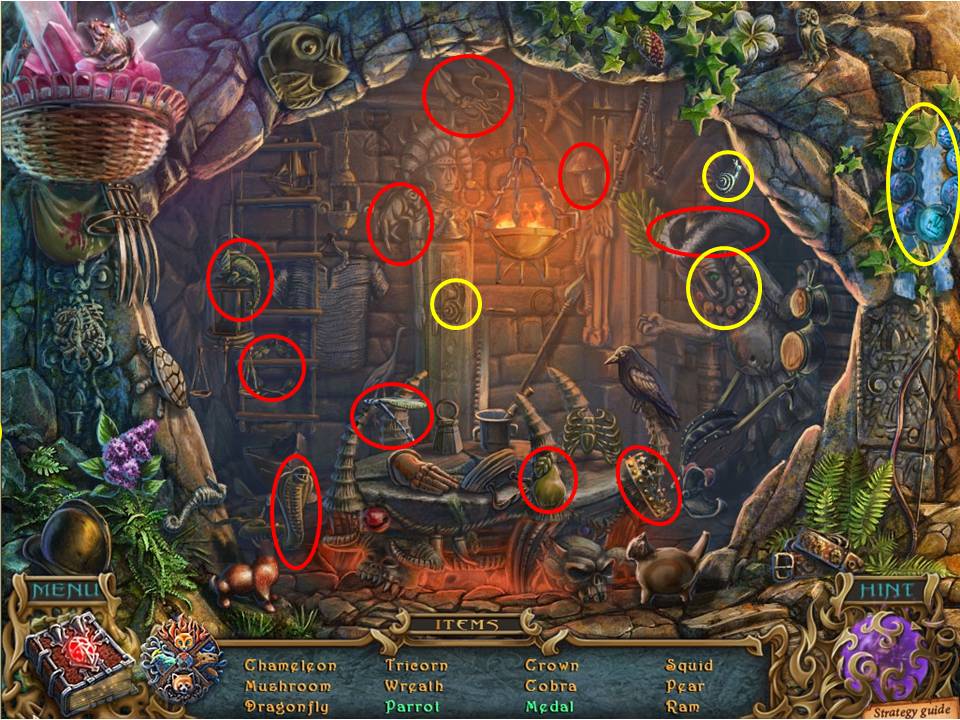
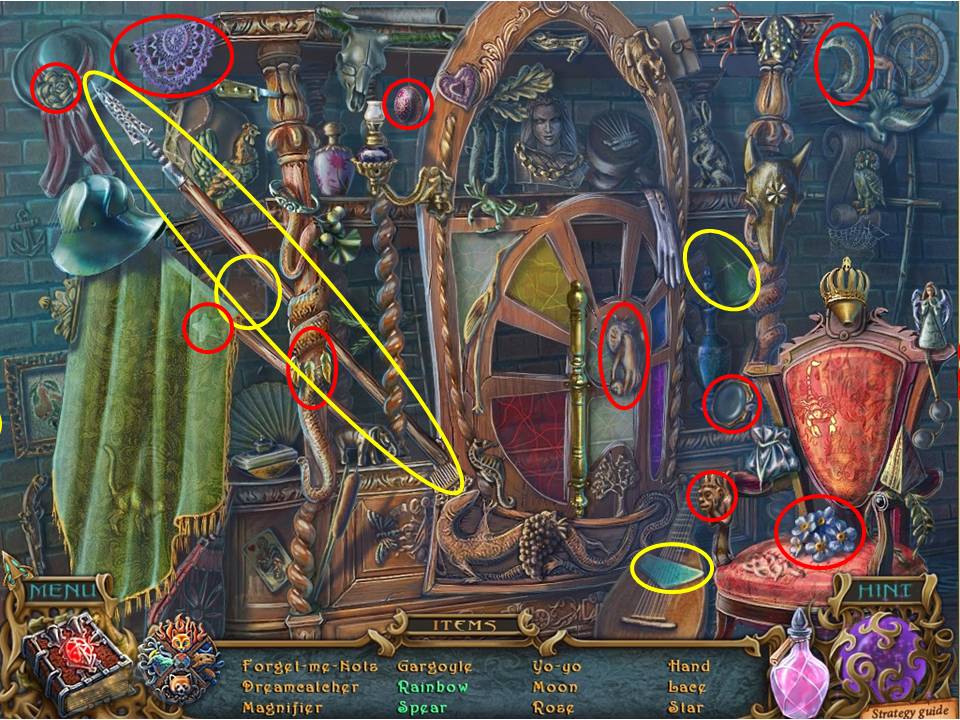
- Collect all the items circled in red. Items in yellow require multiple moves.
- Move the snail to the matching recess on the case in order to open and retrieve the parrot inside.
- Take the necklace on the right and place it round the nearby statue in order to obtain the medal.
- Once the puzzle is completed, you’ll be handed the second MEDAL.
-
Go forward to the grove and branch left to get back to the chasm.
- Zoom in on the portal and place the two MEDALS on the portal to initiate the next puzzle.
- The aim is to line up the five circular areas in their correct positions using the three red buttons.
- Numbering them 1 to 3 from the left, here’s the correct sequence to make it all fall into place – 3, 2,1,2,3.
- Zoom into the portal and place some MAGIC POWDER on it to whisk you back over to the other side.
- Zero in on the flashing area to the right to initiate the next HOA puzzle.
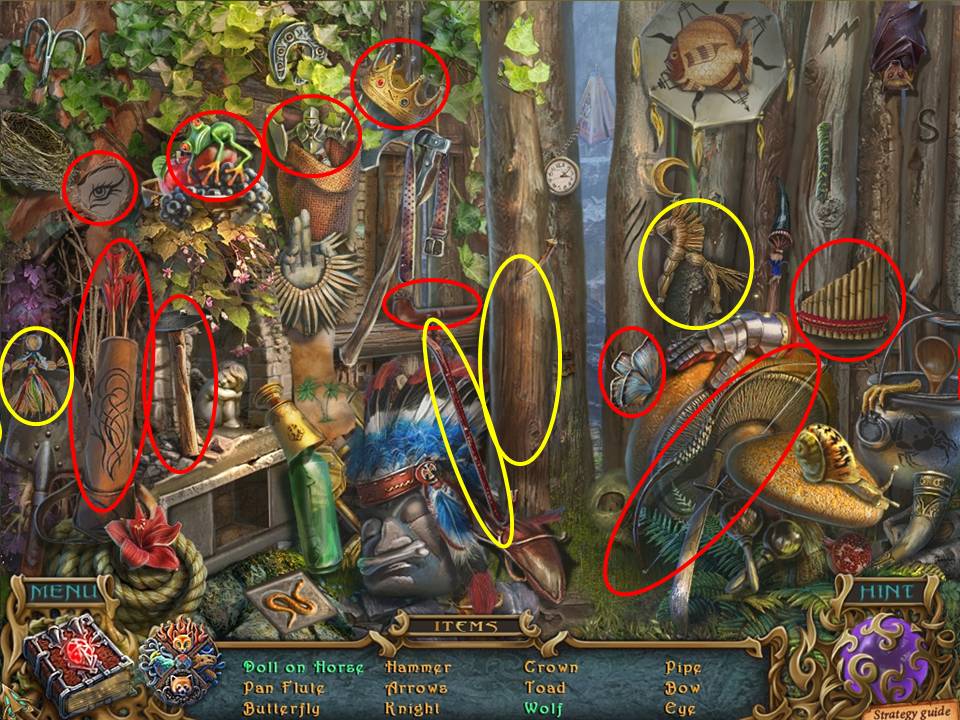
- Collect all the items circled in red, noting that those circled in yellow will require multiple moves.
- Move the doll across to the horse, use the crowbar to lever across the tree trunk at back to reveal the wolf skulking behind it.
-
When complete take the MONSTER HEAD 2/2 and head up to the castle.

- Place the remaining MONSTER HEAD in place to initiate the door puzzle.
- The aim is to press the heads in the correct sequence in order to open the door.
- It’s actually easy enough if you want to play around with it, because each head will light up as you press them in the correct order.
- Get it wrong, and you have to start from scratch – by process of elimination you’ll soon figure it out. If you want the shortcut, look at the screenshot for the solution.
-
Once complete, enter the castle.
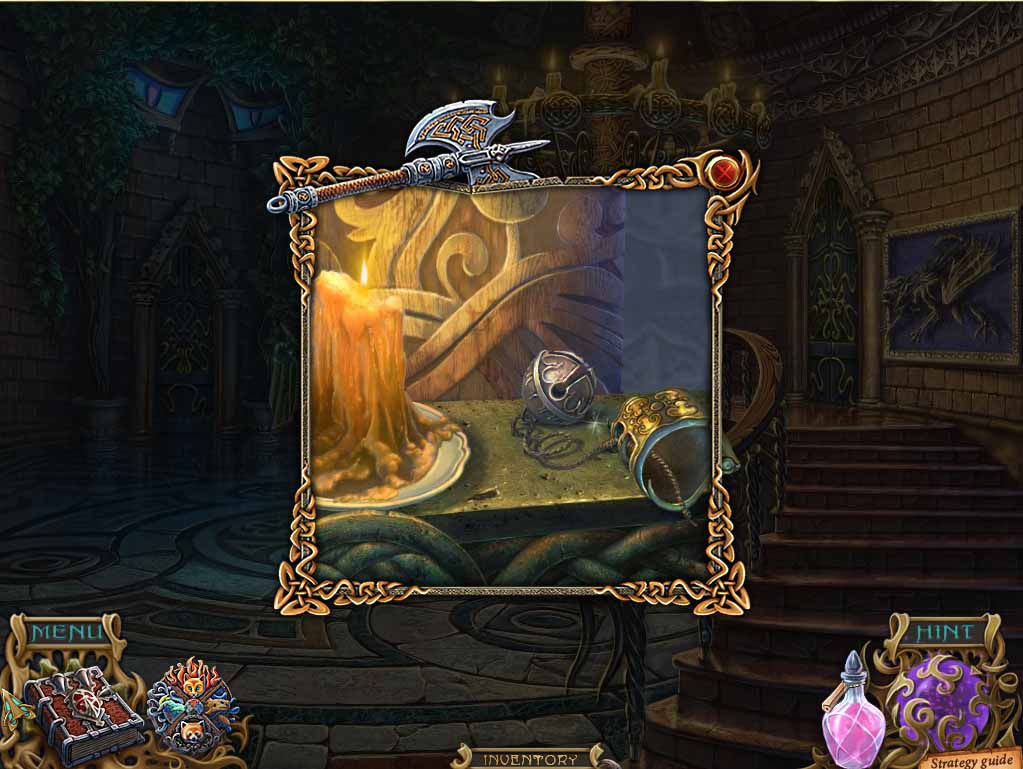
- Note the magic flower to the left surrounded by nasty little protectors.
- Note also the chest with the strap that needs to be cut.
-
Click on the wagon to initiate the next HOA puzzle.

- Collect the items circled in red on the screenshot, and note the items circled in yellow that need multiple moves.
- Open the circular box to obtain the pig and bottle, and use the knife to cut the cloth and take the compass inside.
-
Once complete, take the STONE FEATHER.
- Try entering the doorway ahead and note that the sentries won’t let you enter.
- So head to the right.
-
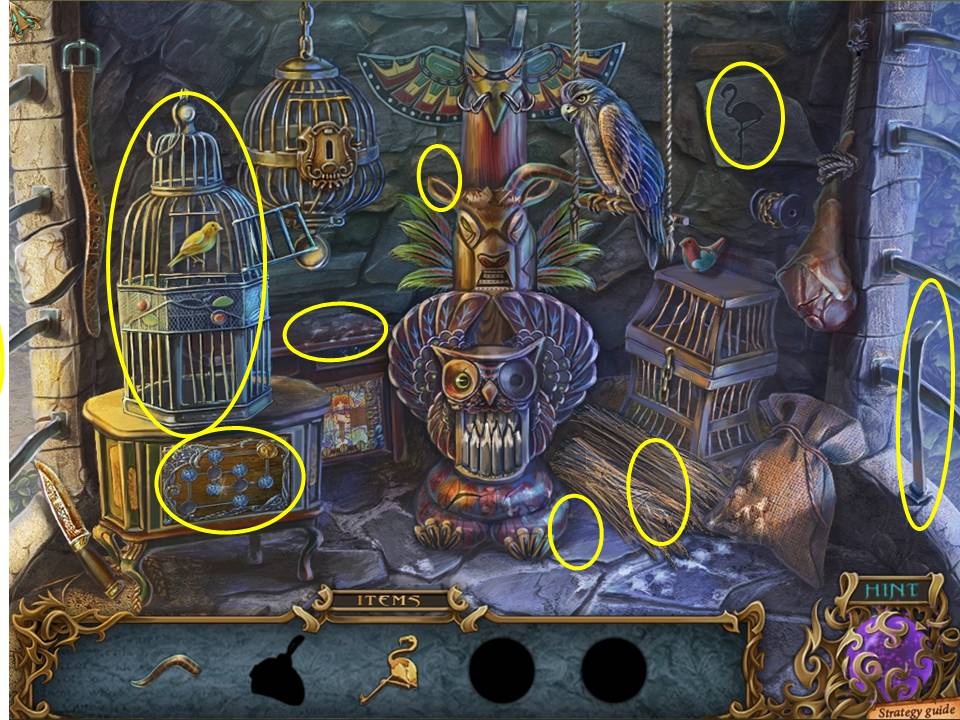
Zoom into the cage on the right to initiate the next sequential HOA puzzle. Here’s the sequence –
- Remove the cover from the cage
- Pick up the horn lying on the branches to the right.
- Pick up the feathers lying on the cabinet to the left rear
- Take the pelican lying in the same place
- Place the pelican in the matching recess on the wall to the right.
- Take the Bird with fire breath
- Place the horn on the deer head on the totem
- Collect the Hawks cap just to the right of the totem
- Place it on the Hawks head and watch the canary fly away – collect the chip in its cage
- Use the bird with fire breath as an oxy cutter to remove the lever from the window
- Use the lever on the loose rock to the left and take the other chip hiding behind it
-
Place the two chips on the chest under the birdcage to initiate the next puzzle
- The aim of this puzzle is to move the gold chip from one end of the board to the appropriate slot in the top right hand corner in order to unlock the mechanism.
- Use the video for the solution.
-
Once opened, take the PIN inside.
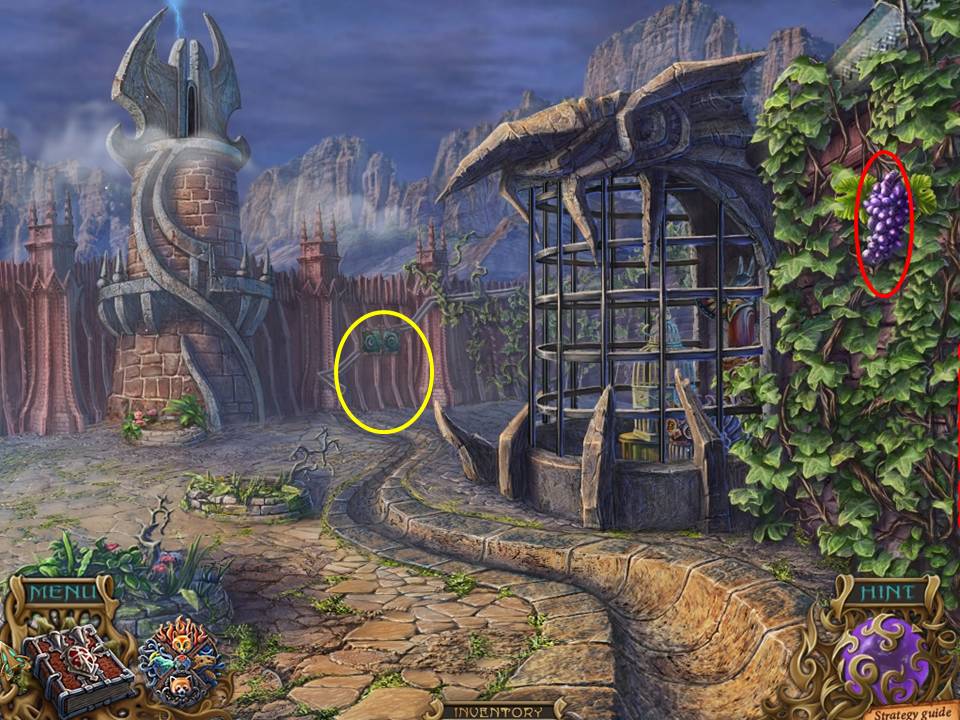
- Zoom in on the GRAPES up on the right and take them.
-
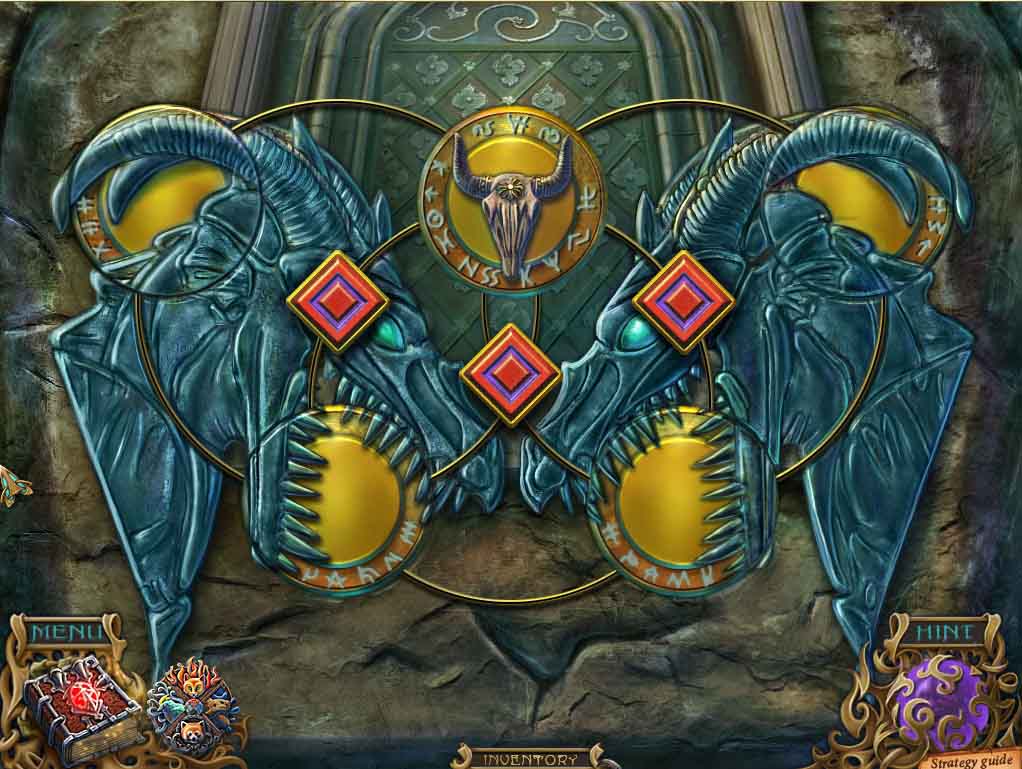
Next zoom in on the gates in the background to initiate the next puzzle.
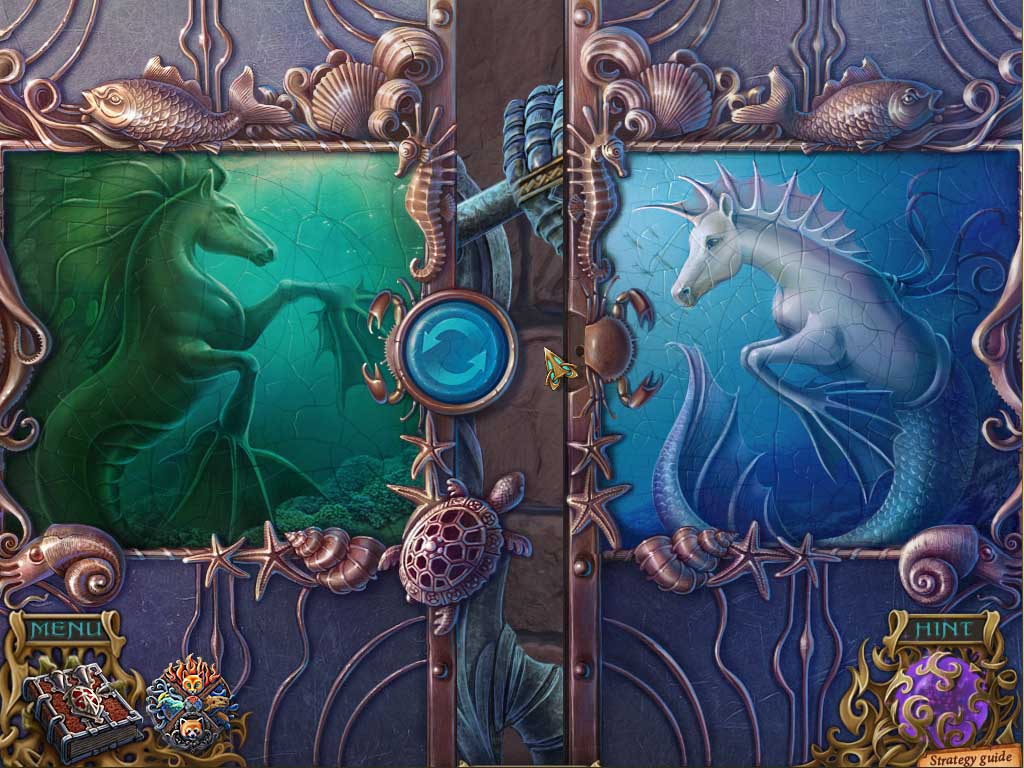
- There are two parts to this puzzle. The first part is simple enough. There’s a green picture of a horse-like creature on the left, and a blue version on the right. Note how each side is divided into rings, and each one has rings that belong to the other side color-wise.
- Click on each pair of rings of matching size that need to be swapped over (there are two pairs in total) and use the button in the middle to swap them over.
- Next comes the tricky part. You can actually rotate each ring with the cursor, but certain rings will actually rotate other rings as well. The object of course is to rotate them all so that you correct their orientation in order to complete the pictures.
- Here’s the sequence for the green picture on the left, noting that you have to line up the outer ring with the matching lines. Rotate the rings in this order, working on the basis that 1 is the outer ring, 2 the second ring, and so on – 4, 2, 3, 4, 1, and 3. For the blue picture, here’s the sequence – 1, 2, 3, 4, 1, and 3. You may need a little bit of fine tuning to get it right.
-
Once complete, the pictures will slide apart and reveal a suit of armor GLOVE – take it.
- Dip the JUG in the flowing water (near the flower bed – other areas don’t work) and head back to the castle gates.
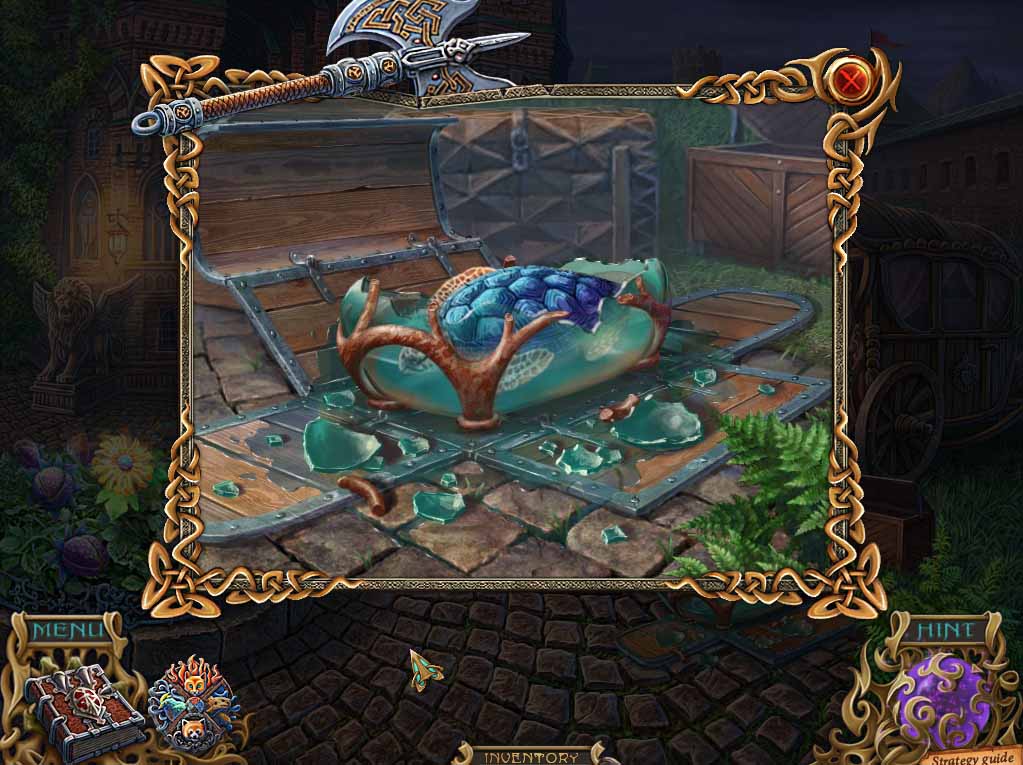
- Use the JUG OF WATER on the straps of the chest, at which point they’ll slide aside and open the chest, revealing Albert the turtle trapped inside a glass case.
- Use the HAMMER to release him, at which point he’ll disappear into the menagerie.
- Feed him the SEAWEED, at which point he’ll give you the 2nd STONE FEATHER.
- Next use the GLOVE to retrieve the MAGIC FLOWER from the garden bed.
-
Time to go back and see Hanna.
- Hand Hanna the MAGIC FLOWER and take the invisibility potion she hands you.
-
Head back down to the castle and use your invisibility to waltz past the two guards.
- Zoom into the HOA puzzle in the background.
- Collect all the items circled in red on the screenshot.
- Remove the curtain from the spear on the left to collect it.
- Assemble the three different panes of colored glass on the frame.
- When finished take the rainbow.
-
On completion of the puzzle take the SPEAR.
- Zoom in on the frame hanging on the wall to the left.
- Use the HAMMER to snap off the OBSIDIAN CLAW.
- Zero in on the chandelier and use the PIN to appropriate the BELL.
-
Next, head through the door on the left.
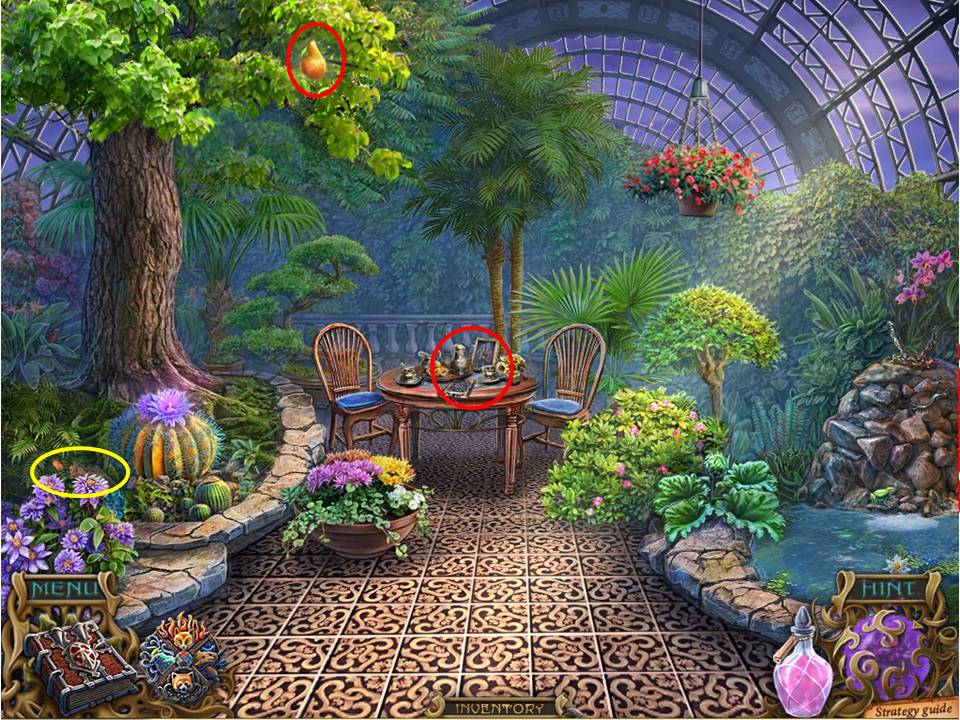
- Zoom in on the cactus-like plant on the left – use the SPEAR to pick up the item just to the left, which will turn the spear into a FRUIT PICKER.
- Use the FRUIT PICKER to pluck the MAGIC GROWTH PEAR from the tree above.
- Take a close look at the table, glance through the book, and take the picture of Isa and Mortis.
-
Exit back to the hall and go through the central door.
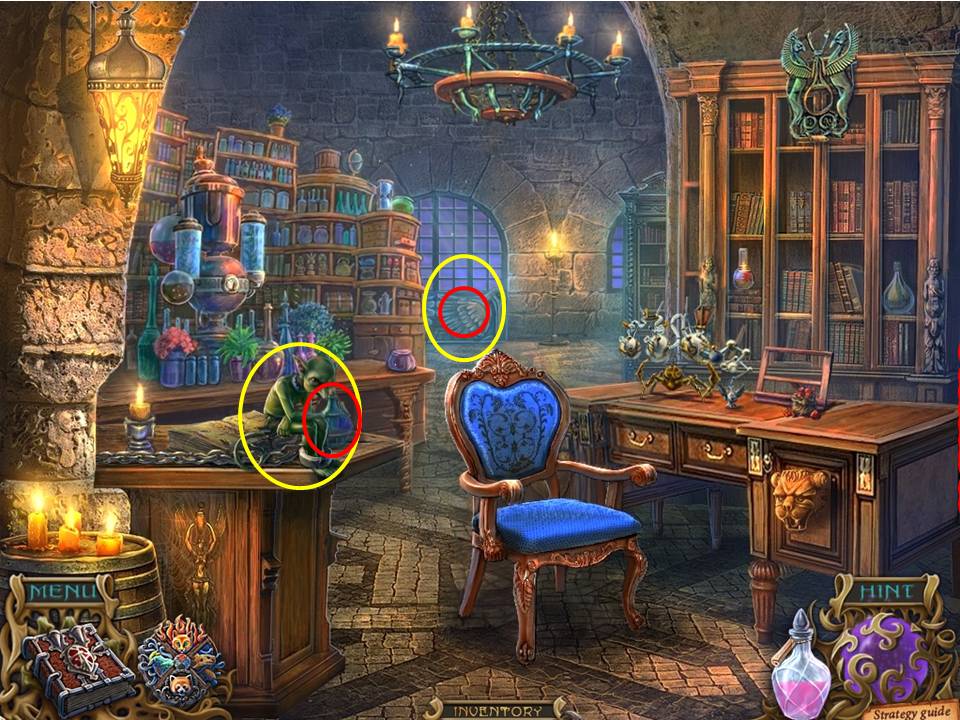
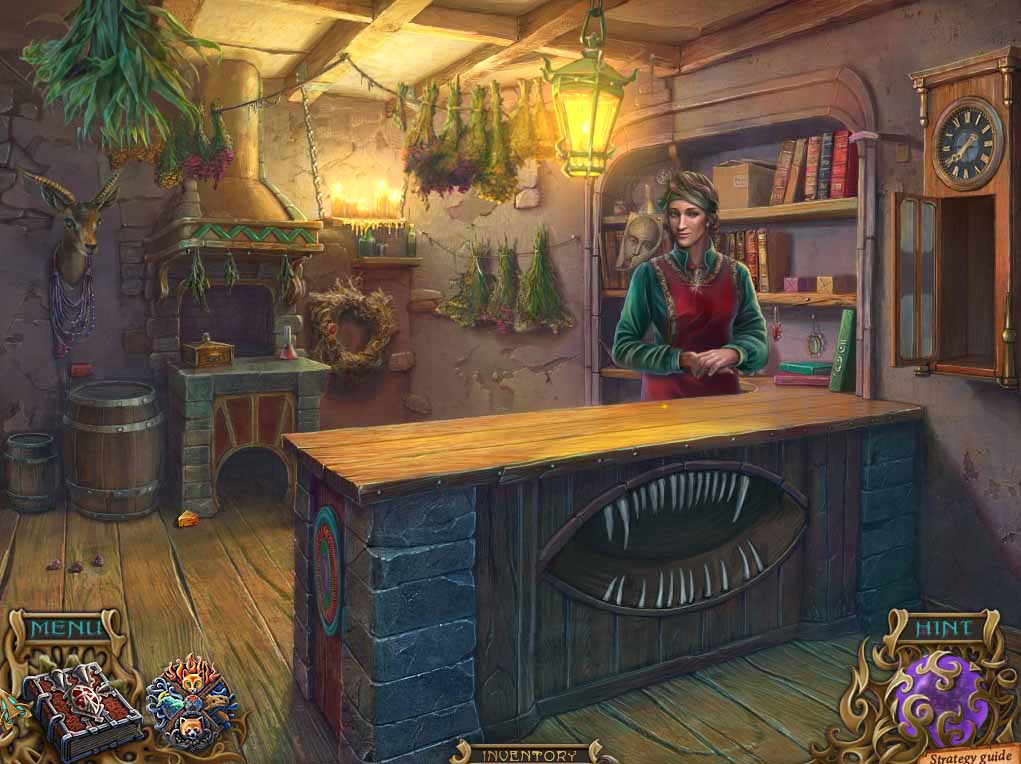
- Talk to the goblin, who’ll get nasty because he’s a little famished.
- Hand him the MAGIC GROWTH PEAR, at which point he’ll cheer up and hand you a DOMINO as he disappears.
- Look at the potion book on the desk, then take the BOTTLE.
- Zero in on the wings by the window in the background, place the two STONE FEATHERS in place, and take the TWEEZERS when the two wings part.
-
Head out and enter the room to the right at the top of the steps.
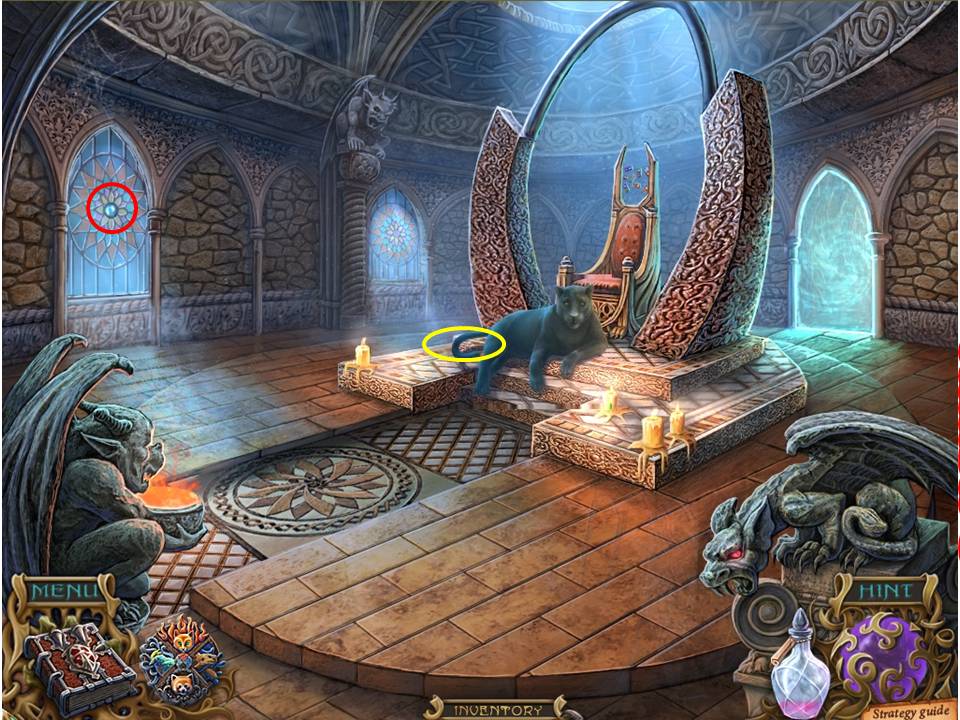
- Zoom in on the panther and place the BELL on its tail – how do you manage that without the big cat tearing you to pieces in indignation at such an affront? Instead, it will look at you like ‘oh sweet, what a nice accessory to warn everyone I’m coming. Thanks!
- After it wonders away, pour the POT OF MILK into the dish to obtain a CUP WITH MILK.
- Also help yourself to the HORN lying at the base of the throne.
- Exit the close-up, and zero in on the window to the left.
- Use the OBSIDIAN CLAW to remove the LENS.
-
Zoom in on the throne to commence the next puzzle.
- Place the DOMINO from inventory into the puzzle to initiate it.
- The aim is to line up the dominoes so that either the pictures match up, or the colors surrounding them, with the provision that red-colored squares have to go on the ends colored in red.
- There a couple of layouts that fit the requirement, but only one seems to work in terms of keeping the game happy – the one shown in the screenshot is the correct one.
- When complete the throne will ‘power up’ and turn off the force field guarding the archway behind the throne.
- Proceed through it.
- As you enter in the invisibility potion will run out, and you’ll be urged to head out and get some more.
- Trying to proceed forward will initiate an alarm system of electric eyes.
-
Exit out and head back to the conservatory.
- Zoom in on the cactus, use the OBSIDIAN CLAW to cut into it, then gather the oozing liquid inside the BOTTLE to obtain some ACID.
-
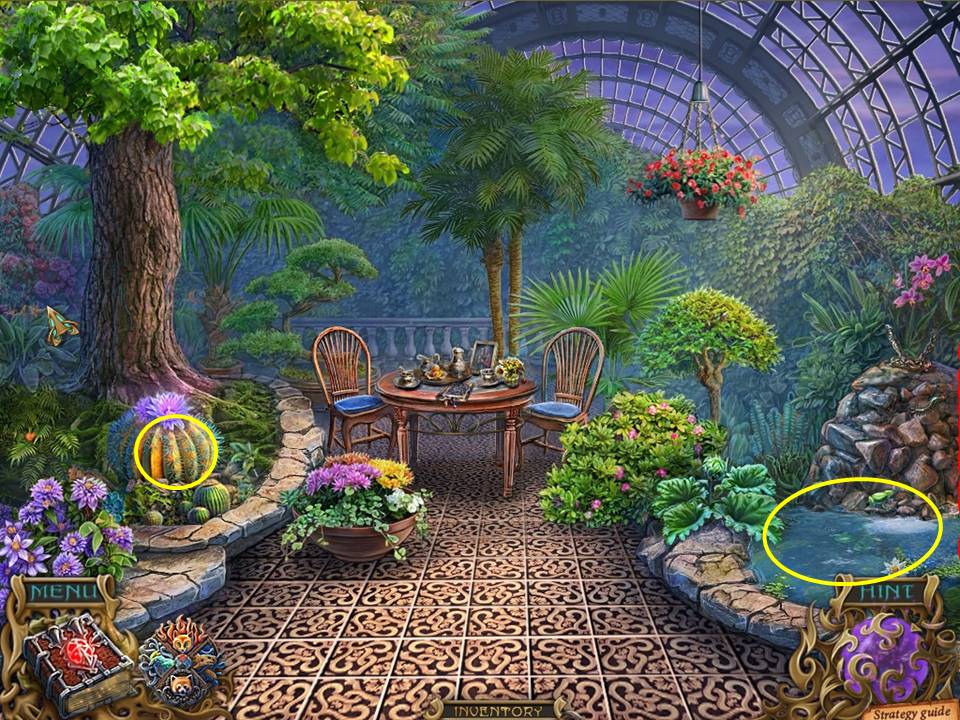
Next, zero in on the pool to the right to play the next puzzle.
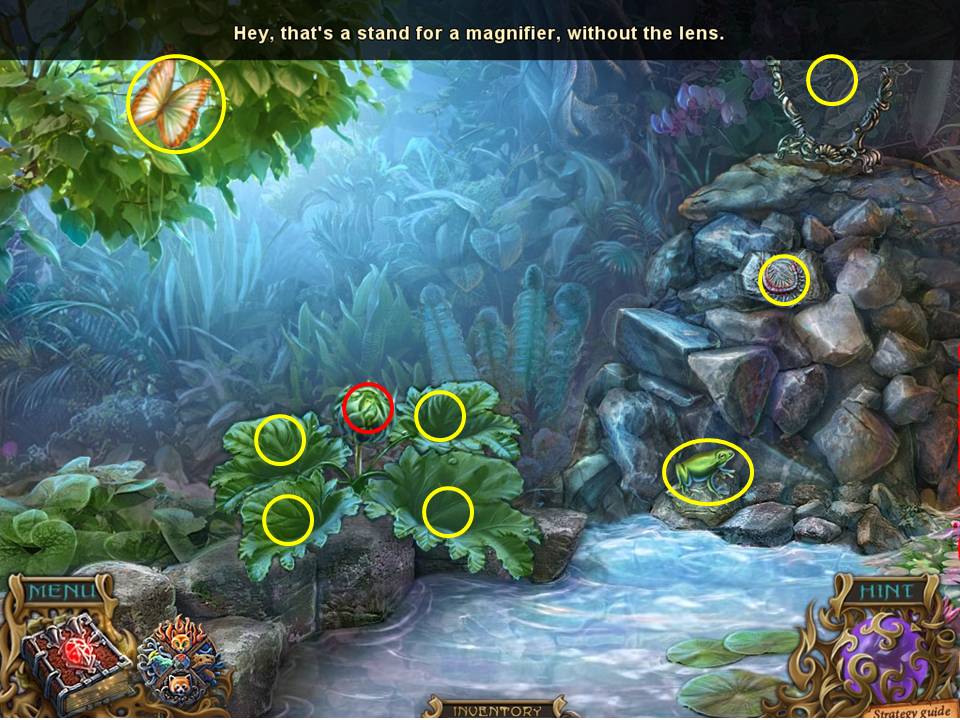
- Put the LENS in place on frame to the top right, then touch the patterned stone below, which will fall away and set a flow of water tumbling down into the pool.
- Click on the butterfly which will flutter away and send a beam of sunlight onto the lens, then click on the frog which will jump away and splash the plant to the left.
- Finish off by clicking on the lens to redirect the beam of light down, and click on all four leaves surrounding the flower bulb to tilt them up and focus the light.
- Presto, the bulb will sprout up and out will pop the flower!
- Zoom back in on the flower, and use the TWEEZERS to pluck a SEED from it.
-
Head off to see Hanna again!
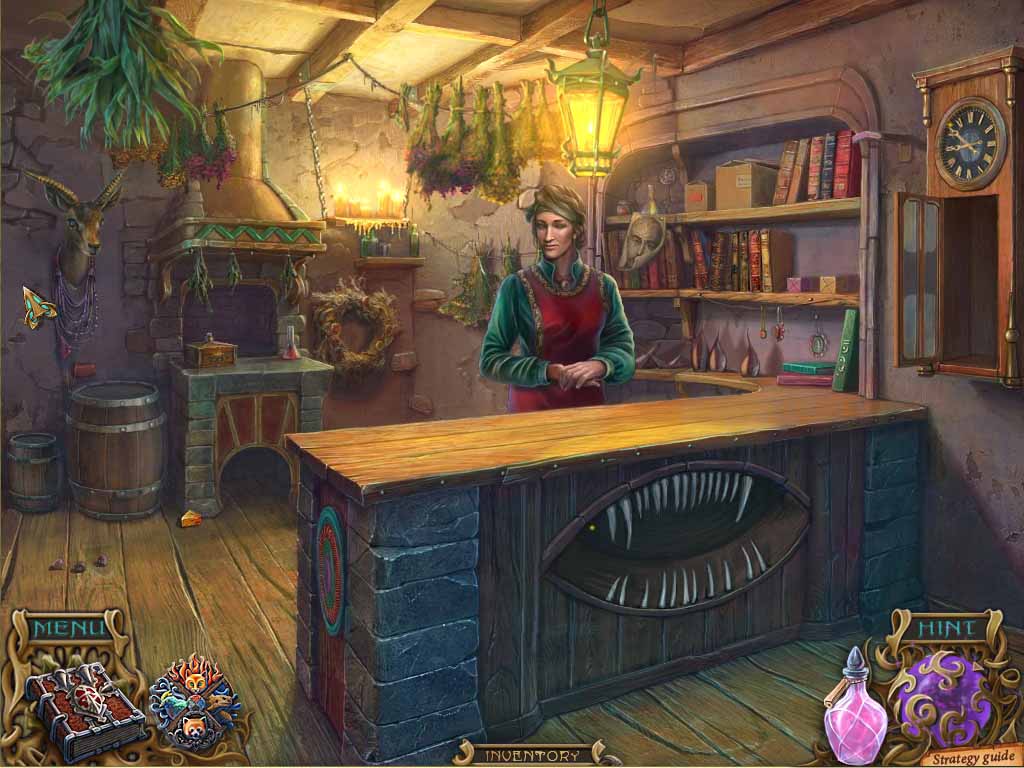
- Take the next bottle of invisibility potion from Hanna, and take the BOOK from the shelf that she suggests.
- Head back to the throne room, back through archway behind the throne, and enter the heavy wooden door to the right.