
Spirits of Mystery: The Dark Minotaur: Chapter Two: The Village
Our Spirits of Mystery The Dark Minotaur Walkthrough will help you in your search-and-rescue mission to find the princess's missing magical animal friends. An evil witch Mortis and her henchman Isa wish to harness the animals' extraordinary powers to summon a dark beast to the land. Equipped with the detailed instructions, custom screenshots, and puzzle solutions found in our Spirits of Mystery Walkthrough, you'll have no problem thwarting their devious plans.
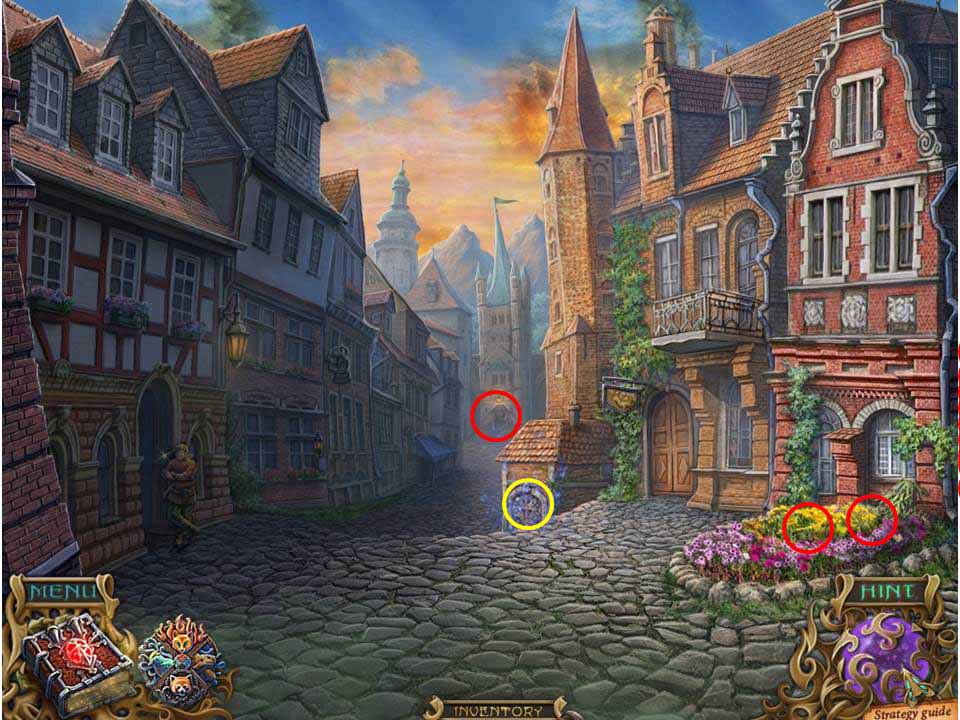
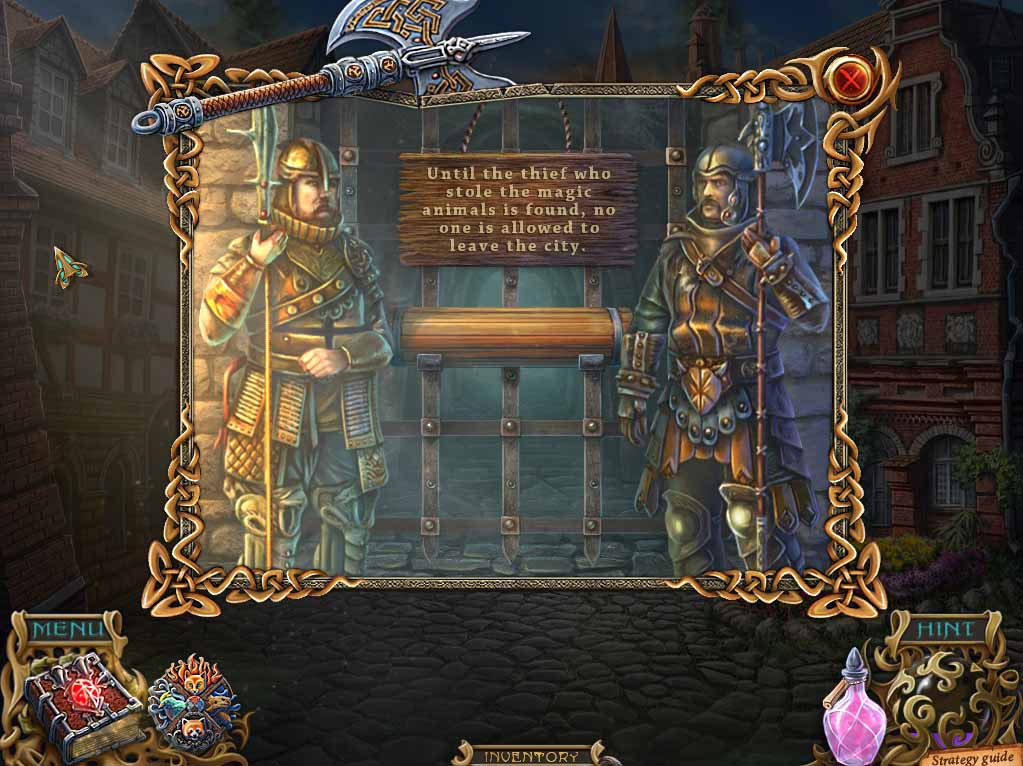
- Talk to the individual standing over on the left. He’ll refuse you entry to the archway behind him.
- Click on the gate in the distance and take the SCARF lodged in the framework.
- Zoom in on the flowerbed to the right and pick up the BAMBOO and the WELL CRANK.
-
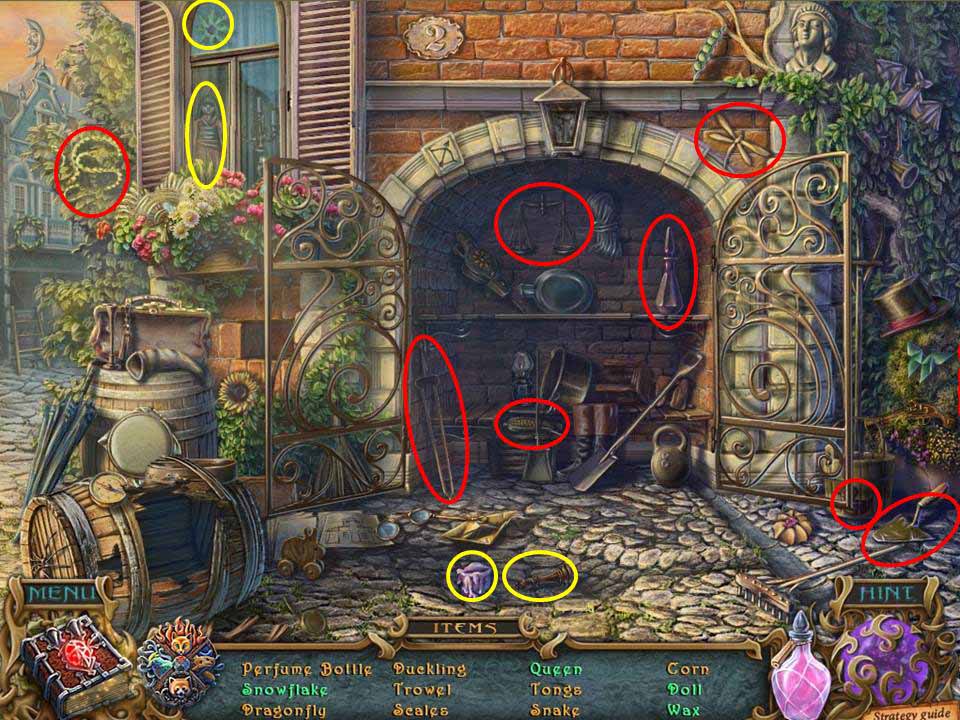
Finally zoom in on the small gate in the center of the scene, adjacent to the cobbled street, to initiate the next HOA puzzle.
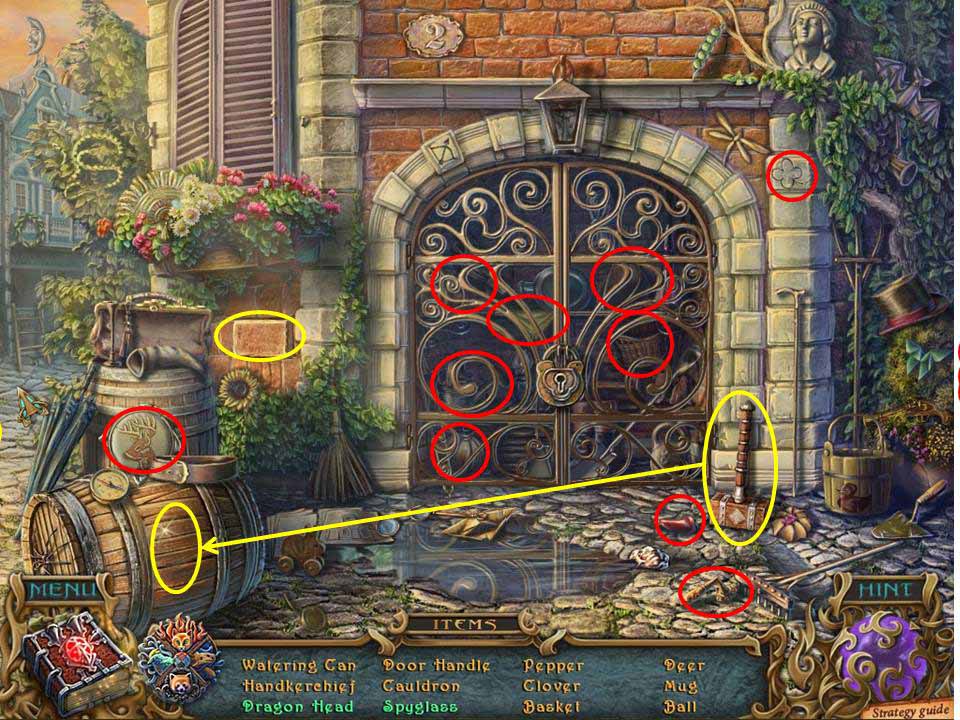
- Collect the items circled in red on the screenshot, while those marked in yellow require multiple moves to acquire.
- Note that when you break open the barrel with the mallet to acquire the spyglass inside, a small key will also be in evidence at the back of the barrel.
- Use it to open the gates so you can access the other items inside circled in red.
-
When complete take the DRAGON HEAD, exit out, and head through the doorway just to the right.
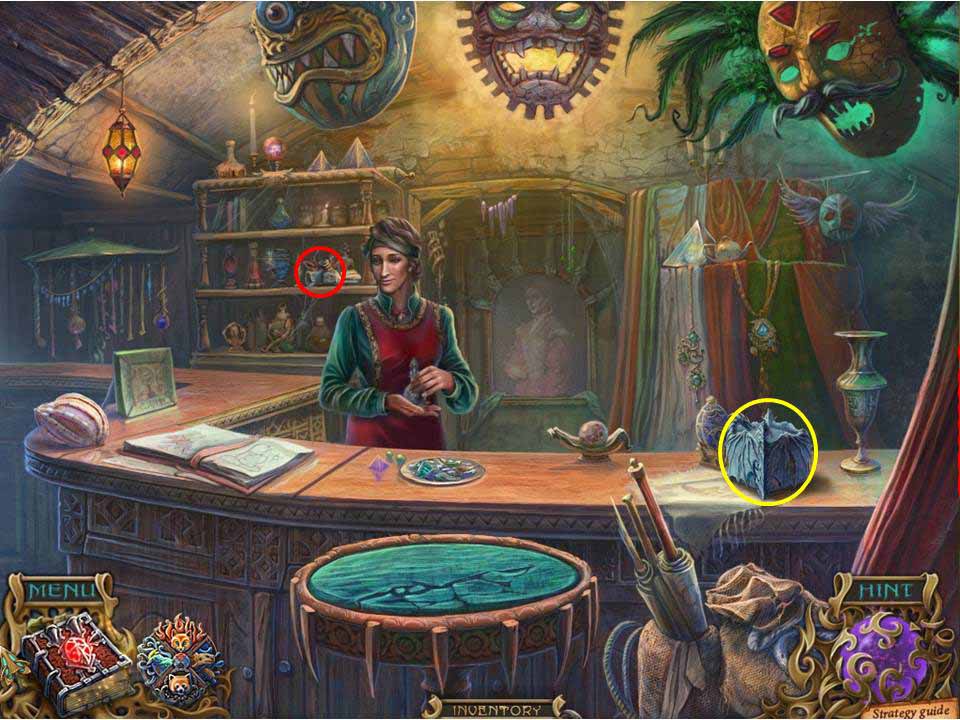
- Talk to Hanna and take her advice to look closely at the portrait.
- Next glance at the shelves to the left behind Hanna and take the BAG OF LUMINOUS FUNGI SPORES - now there’s a mouthful!
- Note also that the scroll needs a seal to open it.
-
Next zoom in on the box to the right on the counter and place the DRAGON HEAD on the corner to the right, which will initiate the next HOA puzzle.
- This HOA puzzle is somewhat unique in that it involves two areas to deal with, rather than just one.
-
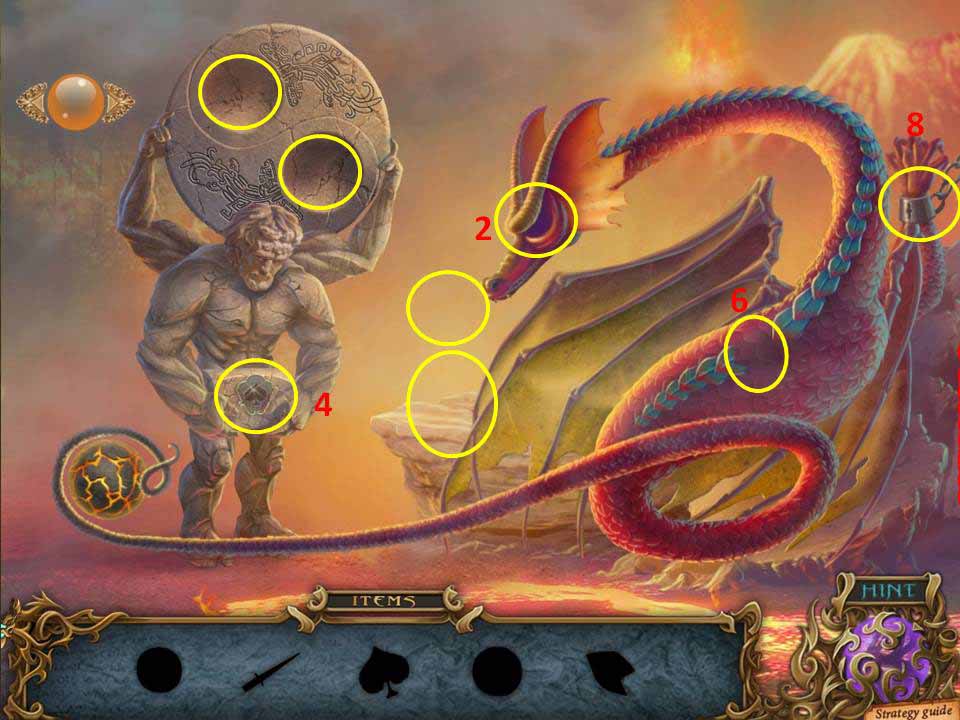
Note the screen shots for the location of the objects and follow the instructions below –
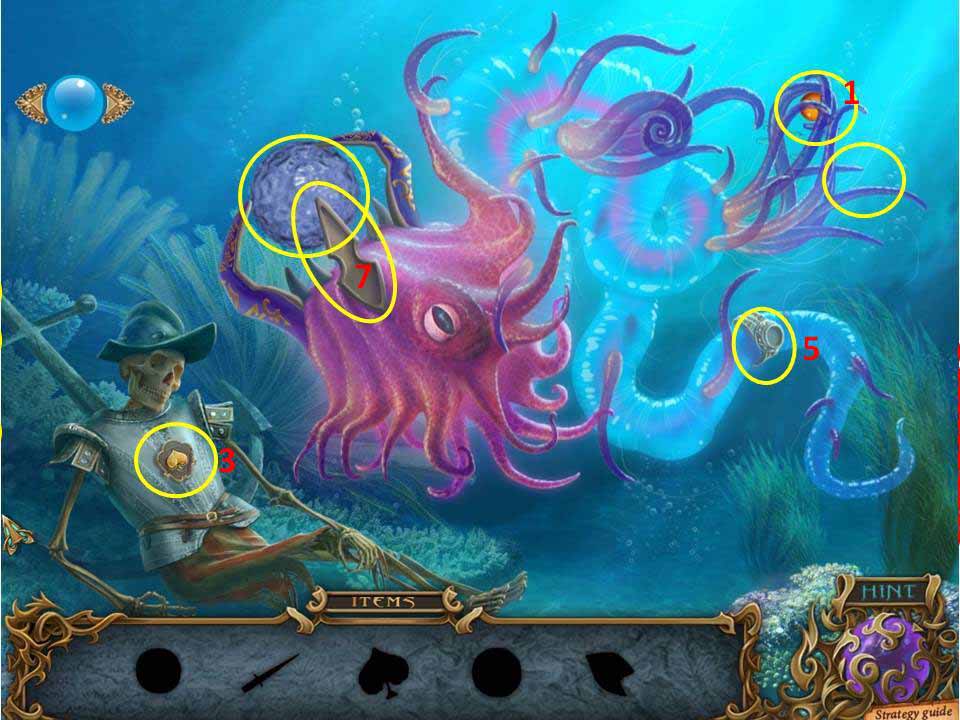
- 1) Scene 1 - Take the EYE OF THE DRAGON from the squid’s tentacles on the right
- 2) Scene 2 – Place the EYE OF THE DRAGON in the dragon’s eye socket, then take the DAGGER that appears in its mouth
- 3) Scene 1 – Use the dagger to prize the SPADE away from the skeleton’s chest armor.
- 4) Scene 2 - Place the SPADE in the matching recess of the box being held by the statue. When it opens, take the PEARL inside.
- 5) Scene 1 – Set the PEARL on the ring located on the large tentacle to the right. When done a tentacle above will shift and reveal a DRAGON SCALE .
- 6) Scene 2 – Place the DRAGON SCALE in the appropriate spot on the dragon’s back, at which point it will shift one of its wings and reveal a WATER DRAGON TOOTH.
- 7) Scene 1 – Put the WATER DRAGON TOOTH in place on the pink squid (water dragon?) to the left. The skeleton will then raise its left hand to reveal a KEY. Take the WATER SPHERE as well
-
8) Scene 2 – Use the KEY to unlock the shackle holding the dragon, who will then express his gratitude by belching out a stream of flaming dragon’s breath! Take the FIRE SPHERE that heats up as a result. Place both SPHERES in the appropriate slots above the statue and take the SEAL that appears.
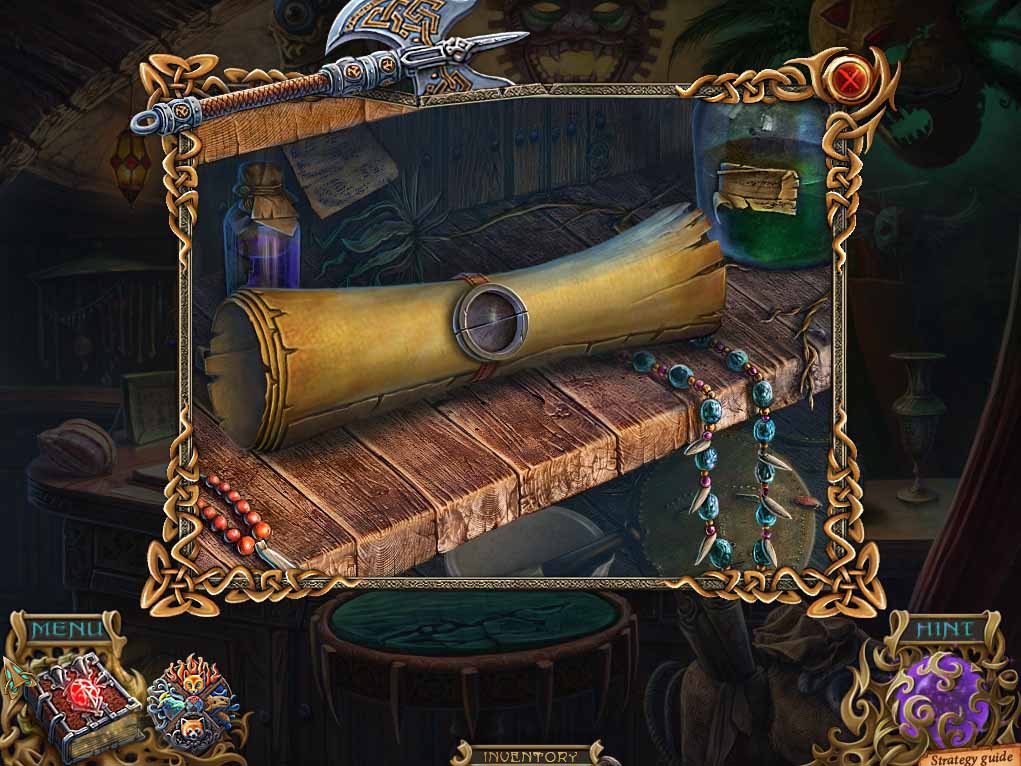
- Zoom in on the scroll again behind Hanna and place the SEAL on it.
- Once open, read the contents, which will clue you up on your mission statement.
-
Hanna will then offer up a bottle of INVISIBILTY POTION for you to use at need. Me thinks that annoying guy refusing to let you pass through the archway is in for a surprise!
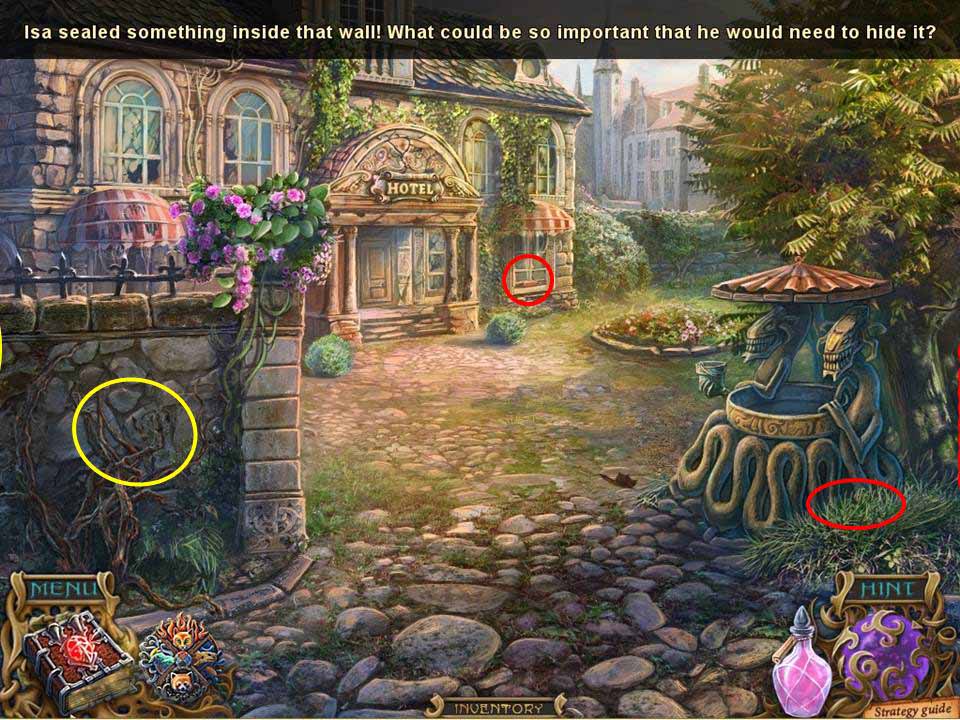
- Sneak past the guy (can you give him a kick up the butt while you’re passing through?) and watch the scene play out of Isa bricking something up inside the nearby wall. You’ll need to find something to speed up the growth of the ivy in order to access it.
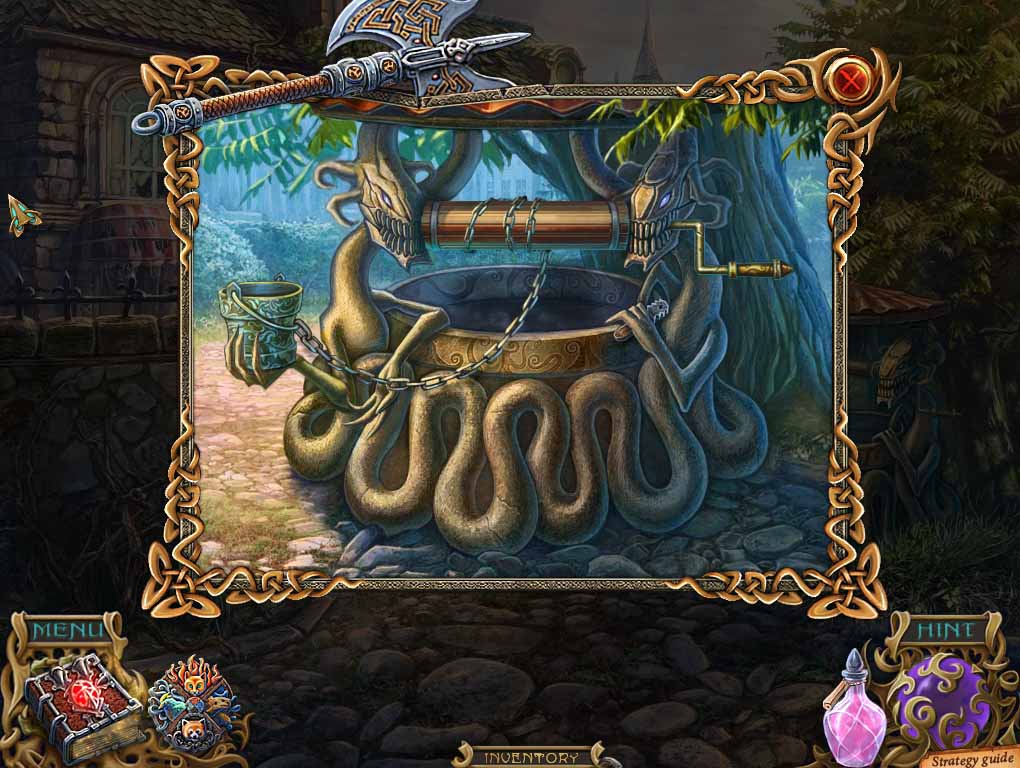
- Zero in on the well to the right and take the FIREWOOD on offer at its base, noting the glass cutter and bucket in the hands of the two weird-looking creatures either side.
- Take a look at the door for the building ahead and note the fact some of the lock parts are missing.
-
Next, zoom in on the window to the right and take the PLIERS sitting on the sill, then use the SCARF to clean the glass, showing something sitting inside the room.
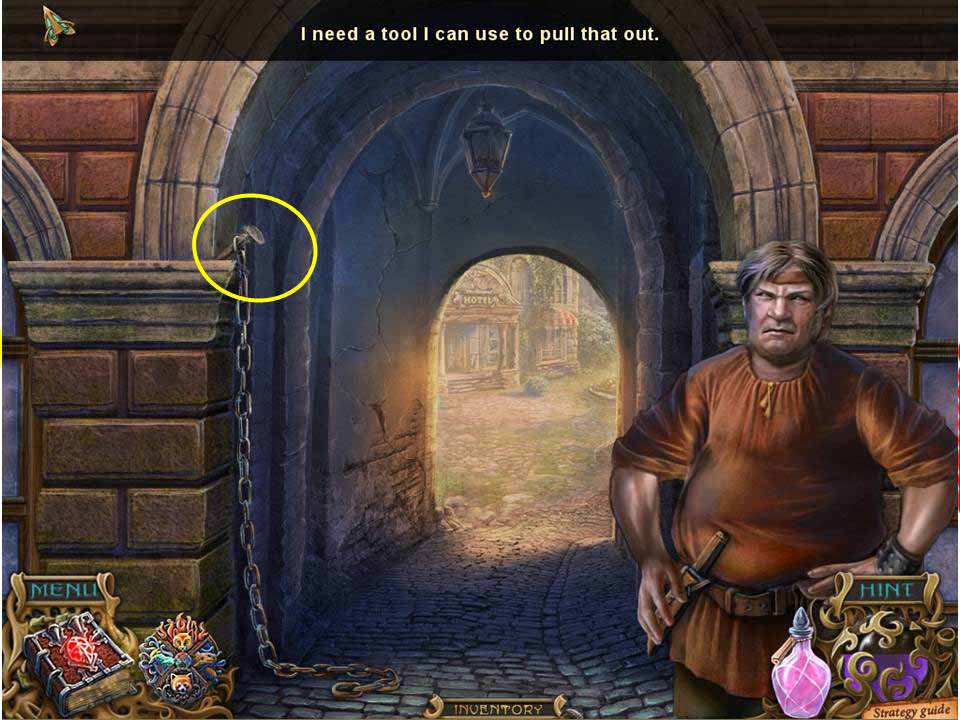
- Return to the guard by the archway, and use the PLIERS to extract the CHAIN from the wall to the left. You’d think the guy on the right would notice a chain mysteriously coming out of the wall and floating off, right?
-
Exit back out to the cobbled street.
- Return to the guarded gate in the background and retrieve the SHAFT from between the two guards.
-
Return through the archway to the well.
-
Place the SHAFT between the two figures, then the CHAIN. Put the WELL CRANK in place and click on the bucket to retrieve some water. At the same time the GLASS CUTTER will be released to your possession. Use it to cut the pane of glass cleaned earlier and retrieve the TAPE and YELLOW BUTTON inside. Place the BUTTON on the lock and exit back out to the main street of the village.
- Zoom in on the open gate near the centre of the scene and collect the items circled in the screenshot, noting that those in yellow require multiple moves.
- Note that the gates can be opened and closed to retrieve specific items.
-
When finished, take the CANDLE WAX 1/3 and return to Hanna’s shop.
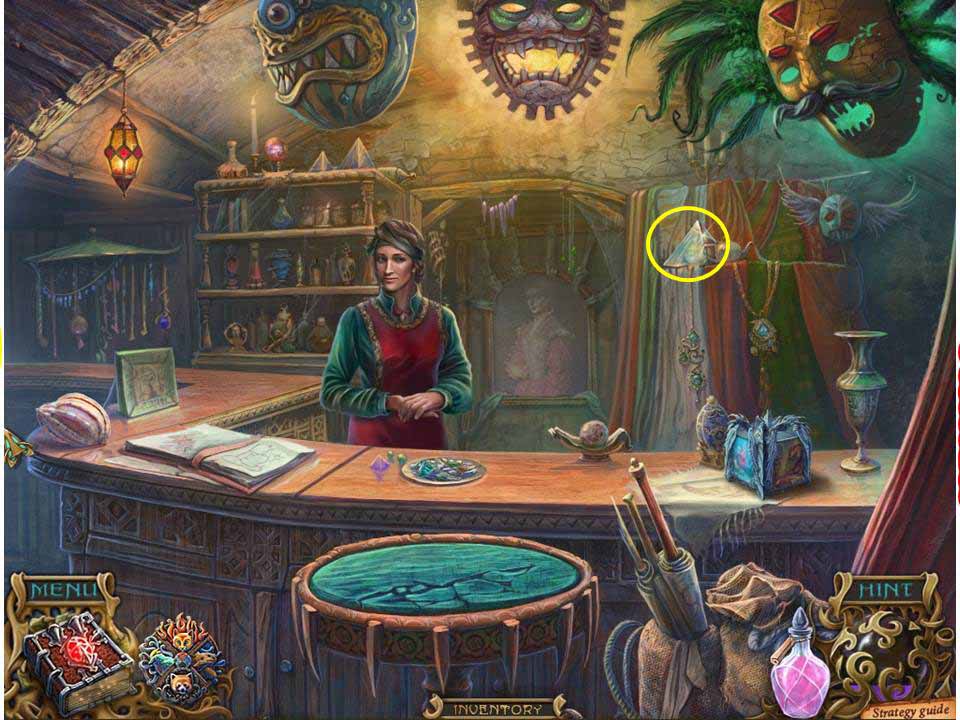
- Approach Hanna, talk to her briefly, then zoom in on the glass pyramid sitting on the shelf to the right of the door.
- Use the GLASS CUTTER again to cut a hole in the pyramid and grab the MAGIC FERTILIZER inside.
-
Return through the archway.

- Take the MAGIC FERTILZER and dump it into the bucket of water to dilute it, then collect the BUCKET WITH FERTILIZER and pour it on the vine.
-
When it grows and breaks open the wall, zoom in on the chest inside to initiate the next puzzle.
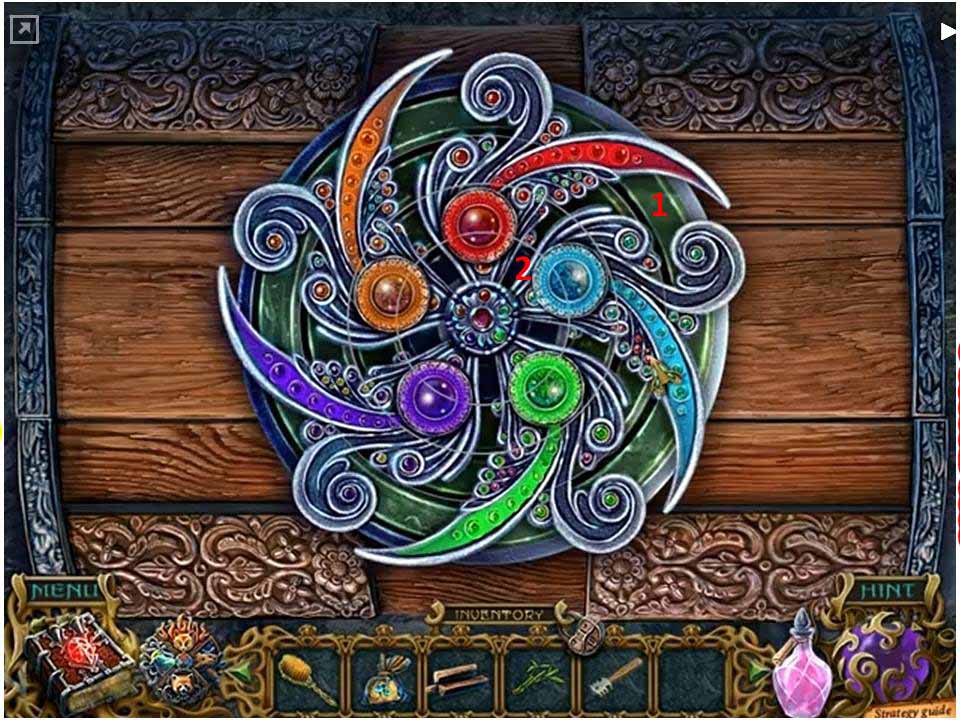
- The aim is to align the four rings on the puzzle so that all the elements are perfectly in place, noting that most of the rings, when turned, interact with the other rings, so it’s not just a simple case of turning each one independently to make it all work.
- In actual fact, to solve the puzzle you only need to turn two of the moving components, the outer ring and the centre circle.
- Note the screenshot, which shows the puzzle in its complete form.
- So to start, move the outer ring around in a counterclockwise direction so that the swirl with the small red ball is more or less in the 12 o’clock position.
- Next, rotate the inner circle so that the five colored spheres line up perfectly. Note that this puzzle can be very finicky in terms of placement, so you may have to nudge the outer ring a little one way or the other, then retune the inner circle, to make the puzzle happy!
-
Once done the lock will light up slide open to reveal Chester, who’s really, really frightened.
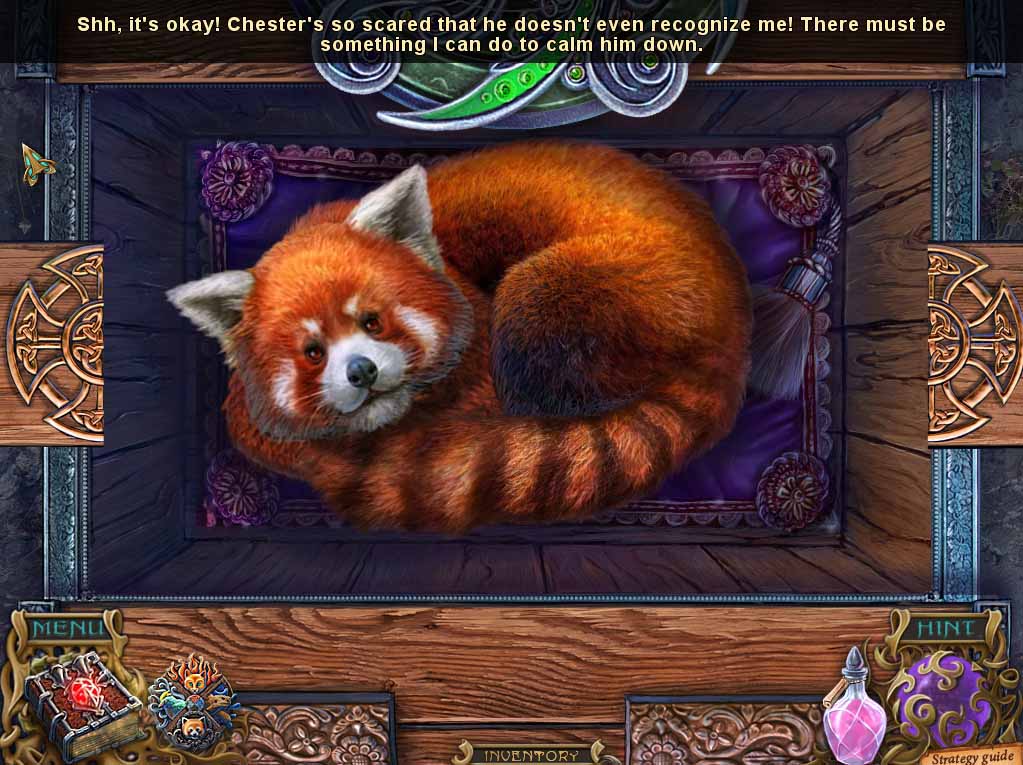
- So what do you do to calm down a frightened pet? Me, I’d offer up a tidbit of food, some soothing words, maybe a gentle pat if the animal will let you near. But Chester? No. Chester likes to be brushed when he’s agitated! I guess he also turns his nose up at anything but Lobster Thermidor.
- So give him a good brush, after which he’ll disappear into the amulet’s mini-menagerie.
- You’ll also note that there’s a KEY TO ROOM NUMBER 8 in the chest. You need to feed the animals to keep them happy and helpful, so finish off by clicking on the amulet in order to give Chester the BAMBOO from inventory.
- He’ll say thank you by giving you a GREEN BUTTON.
-
Head over to the hotel in the background, zoom in on the door, and insert the GREEN BUTTON in the recess to initiate the next puzzle.

- The solution to this one is easy enough – the instructions are laid out for you on the left .
- Great lock, this is going to make you feel REALLY secure at night! Here’s the sequence to make it clearer (and note, by saying ‘right arrow’ I mean the one pointing to the right, not the one on the right) – green button, right arrow, blue button, right arrow, yellow button, left arrow, orange button, right arrow.
- You’ll know you’re on the right track because each step will be highlighted with a tick when you get it right.
- When done, enter inside.