
PuppetShow: Destiny Undone: Chapter Two: Riding the Tram
Rely on our PuppetShow Destiny Undone Walkthrough during your investigation of the missing Master of Puppets. Consult our expert instructions, custom screenshots, and detailed solutions to all the puzzles you'll encounter during gameplay in order to track down the Master of Puppets and save him from his ultimate destiny.
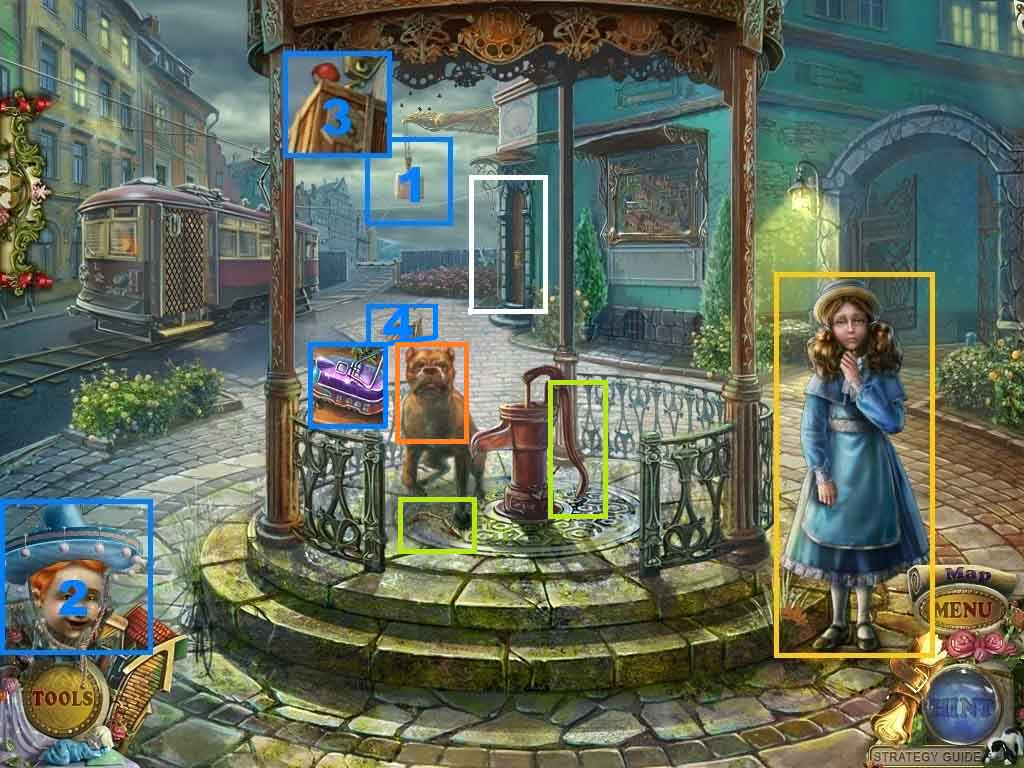
- Click Felicia.
- Click the box; use the puppet helper on the box.
- Click the fallen box; collect the violet tram.
- Click the doorway.
- Click the dog.
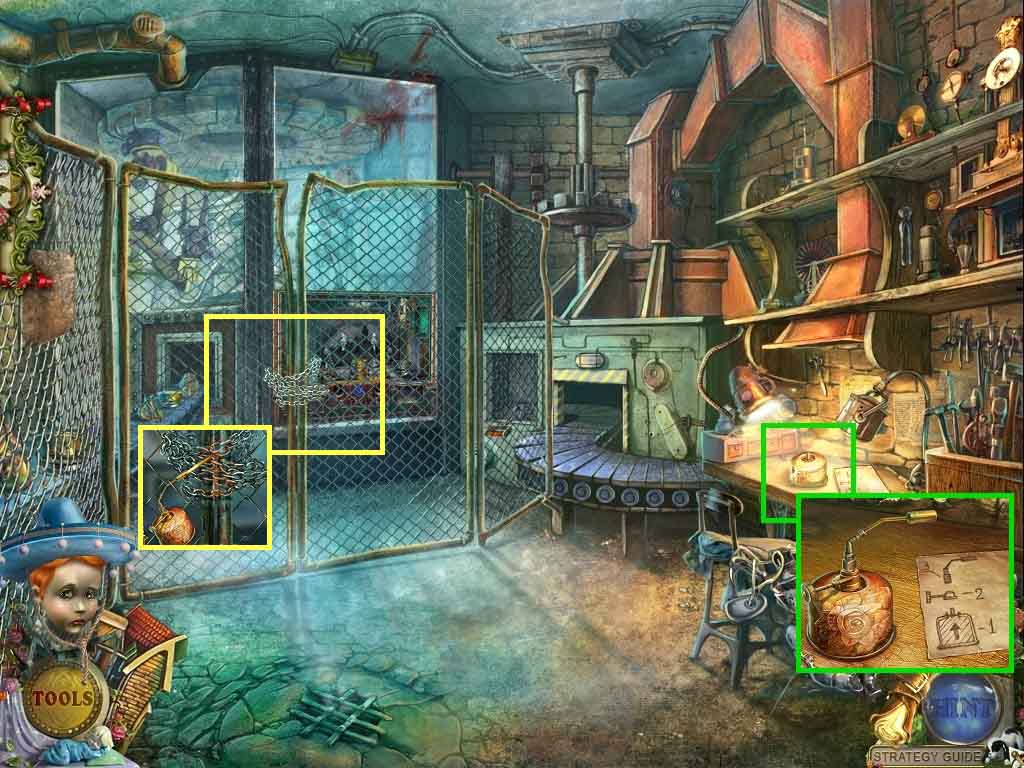
- Click the handle and collect the gas burner part.
- Move through the gate.
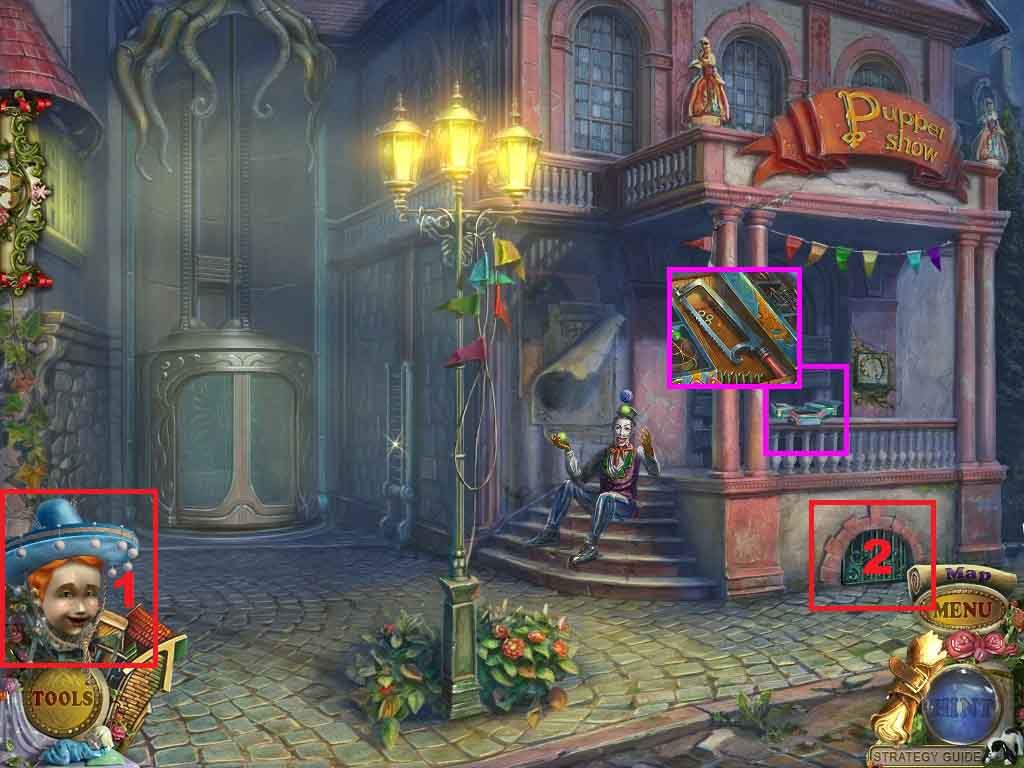
- Click the toolbox; collect the saw.
- Click the grate and use the puppet helper on it.
- Click the lever and trigger a hidden objects area.
- Find the items.
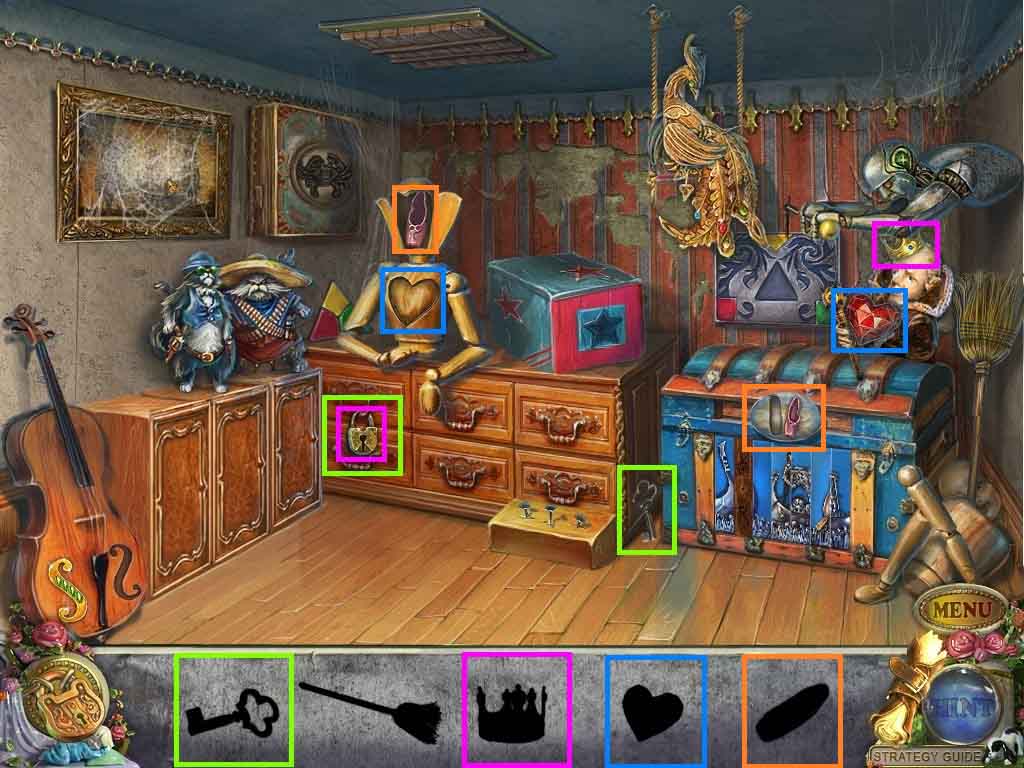
- Insert the key into the lock; collect the crown.
- Place the crown onto the head; collect the heart.
- Insert the heart into the slot; collect the pointe.
- Insert the pointe into the slot; collect the violin bow.
- Play the cello using the violin bow; collect the crab.
- Insert the crab into the slot; collect the cat.
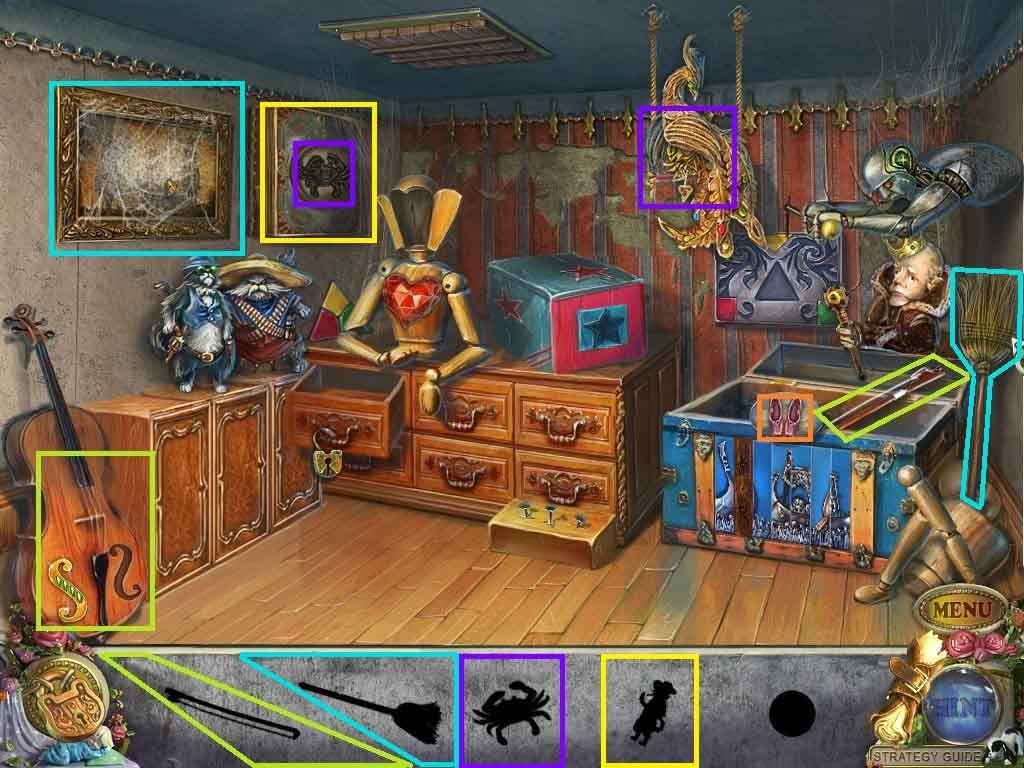
- Click the picture; use the broom to clear the cobwebs.
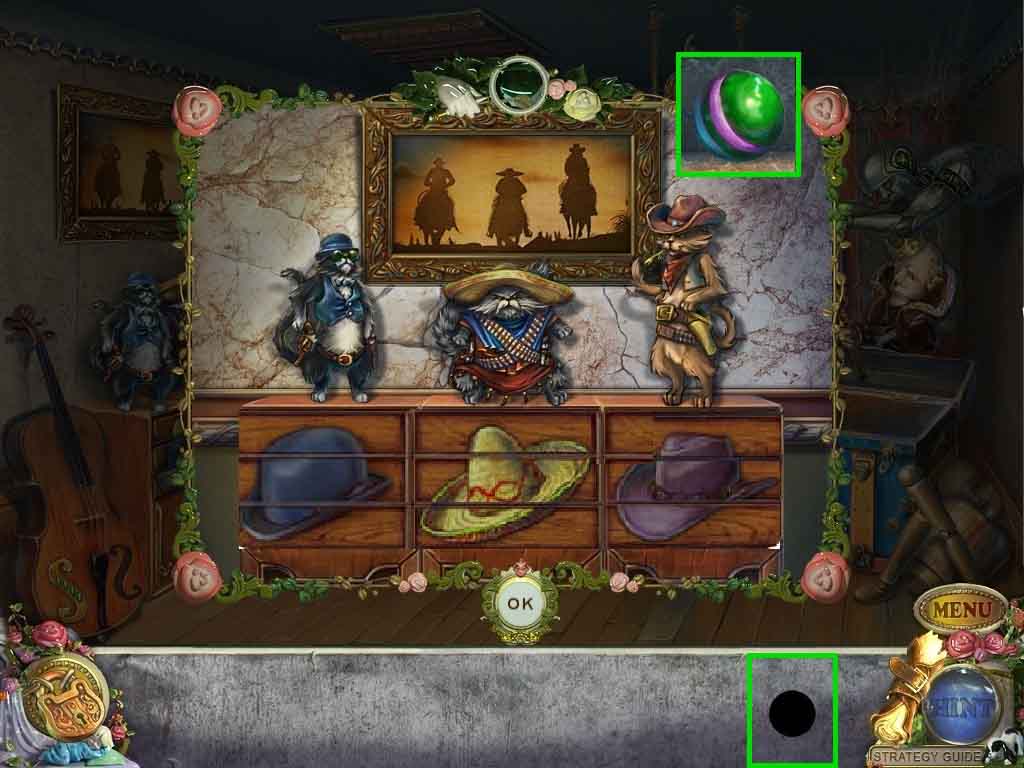
- Place the cat down.
- Arrange the cats according to the clues.
- Click the hat parts around to create a completed picture of the hats correctly arranged.
- Collect the juggling ball.
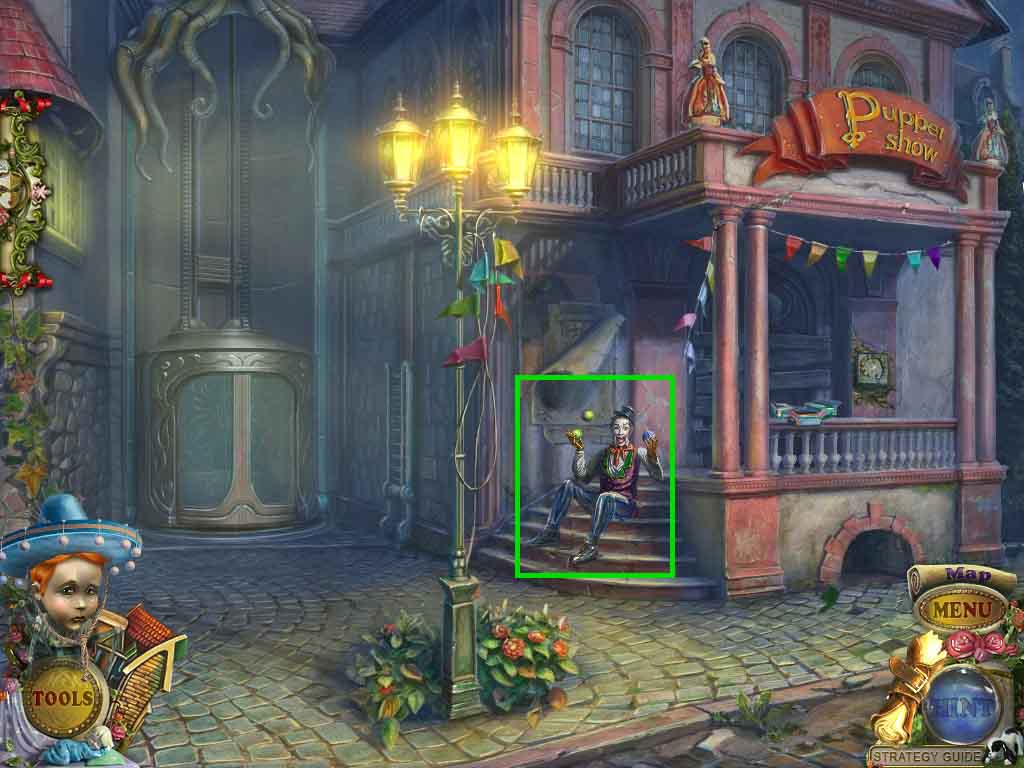
- Click the juggler and hand him the juggling ball; collect the button.
- Move down one time.
- Click the doorway.
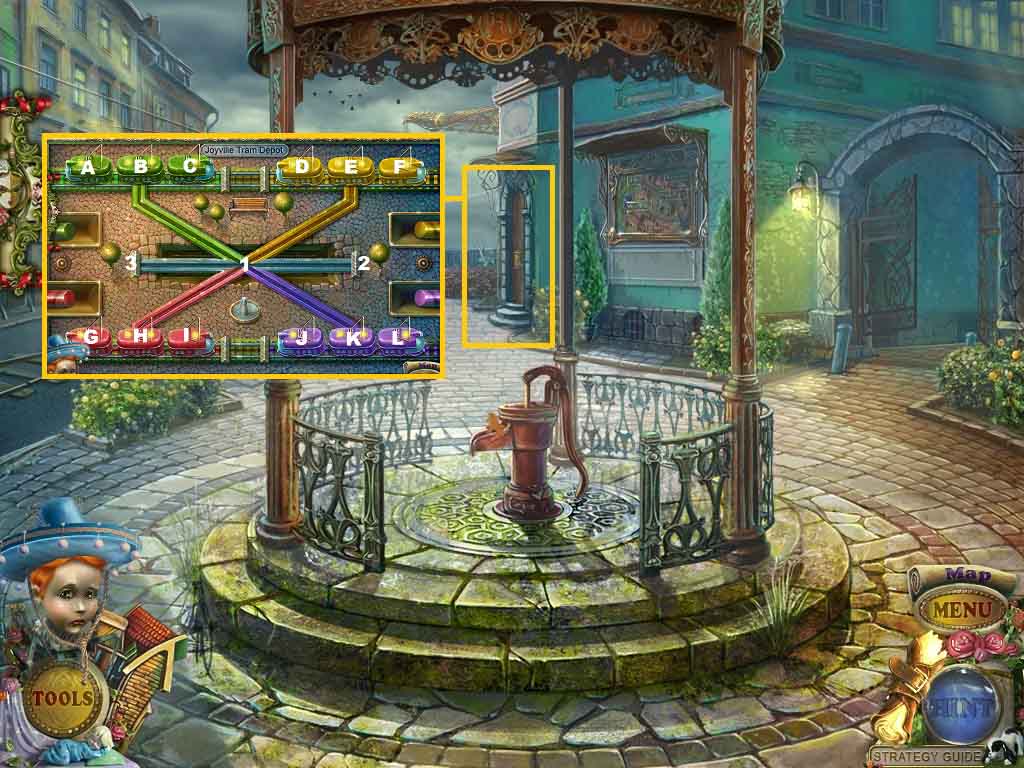
- Insert the violet and green trams to trigger a puzzle.
- Arrange the trams onto tracks of the same color.
- Solve as follows:
- (K-1) (1-2) (J-K) (K-1) (1-3) (E-1) (1-K) (K-J) (B-1) (1-E) (A-B) (B-1) (1-K) (3-1) (1-B) (B-A) (C-B) (B-1) (1-3) (H-1) (1-B) (1-3) (H-1) (1-B) (H-1) (1-B) (I-H) (H-1) (B-C) (1-B) (3-1) (1-H) (H-I) (B-1) (1-3) (C-B) (B-1) (1-H) (3-1) (F-E) (E-1) (1-K) (H-1) (1-E) (E-F) (D-E) (E-1) (1-H) (2-1) (1-E) (E-D) (H-1) (1-2)(G-H) (H-1) (1-E) (2-1) (1-H) (H-G) (I-H) (H-1) (1-2) (K-1) (1-H) (H-1) (3-1) (1-H) (L-K) (K-1) (1-3) (2-1) (1-K) (K-L) (J-K) (K-1) (1-2) (E-1) (1-K) (K-J) (2-1) (1-K) (F-E) (E-1) (1-2) (3-1) (1-E) (E-F) (2-1) (1-E).
- Move through the door.

- Click the beltline.
- Use the puppet helper to collect the gas burner part.
- Click the table; collect the puppet and the hat pattern.
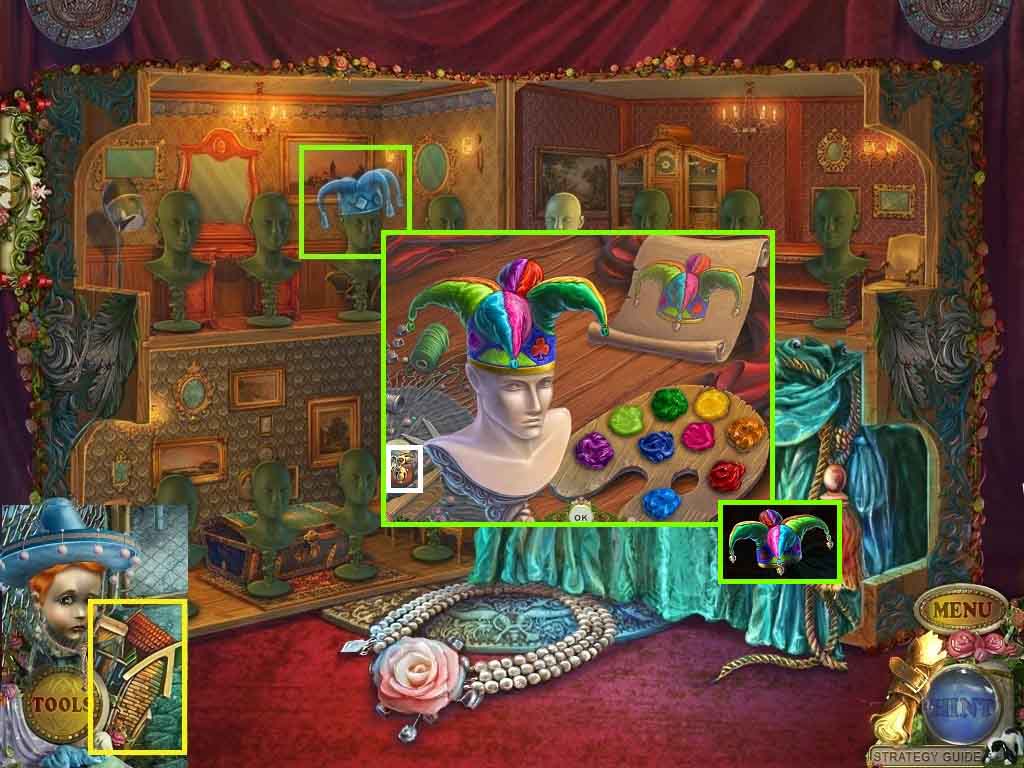
- Click the puppet house.
- Click the fool’s hat to trigger a puzzle.
- Complete the hat according to the picture.
- Once the hat is painted; add the bells to the hat.
- Collect the fool’s hat; leave the puppet house.
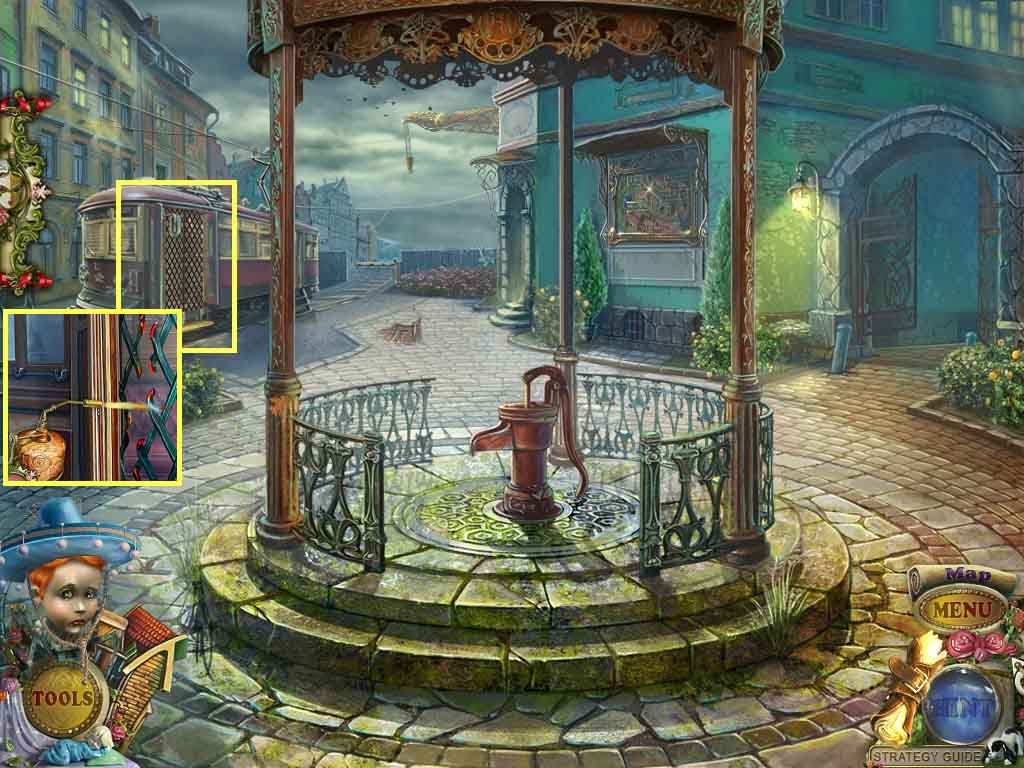
- Click the burner.
- Insert the 2 gas burner parts and collect the gas burner.
- Click the chain and use the gas burner on it.
- Move down once.
- Click the grating.
- Use the gas burner on it; click the grating.
- Go into the tram.
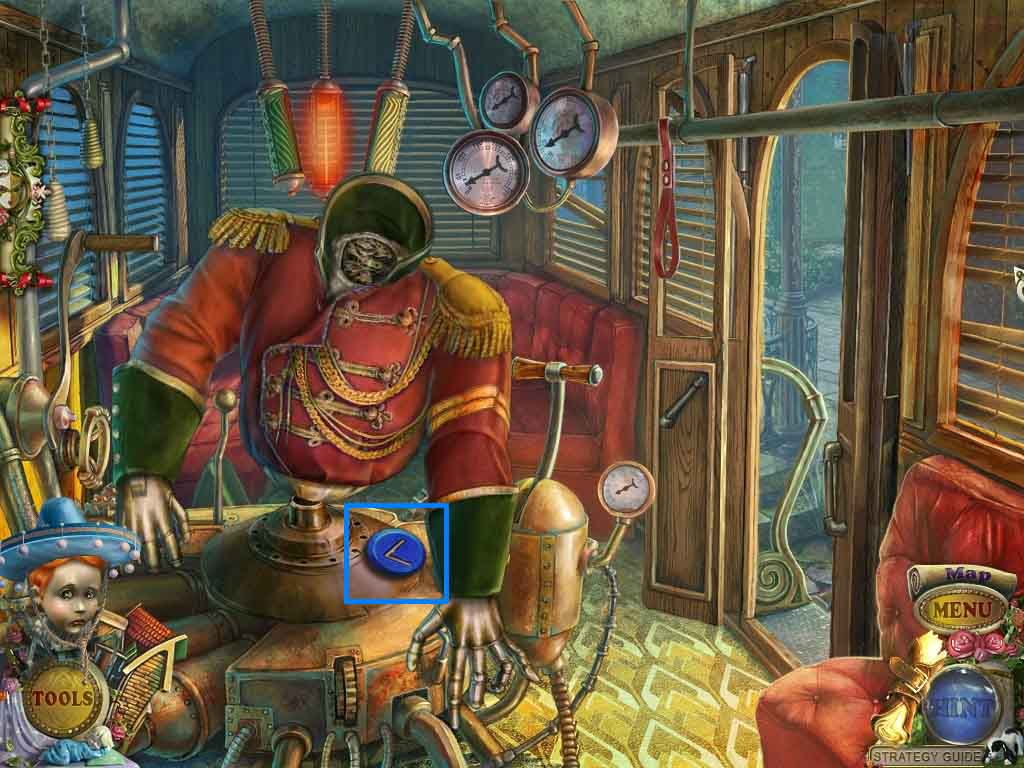
- Collect the button.
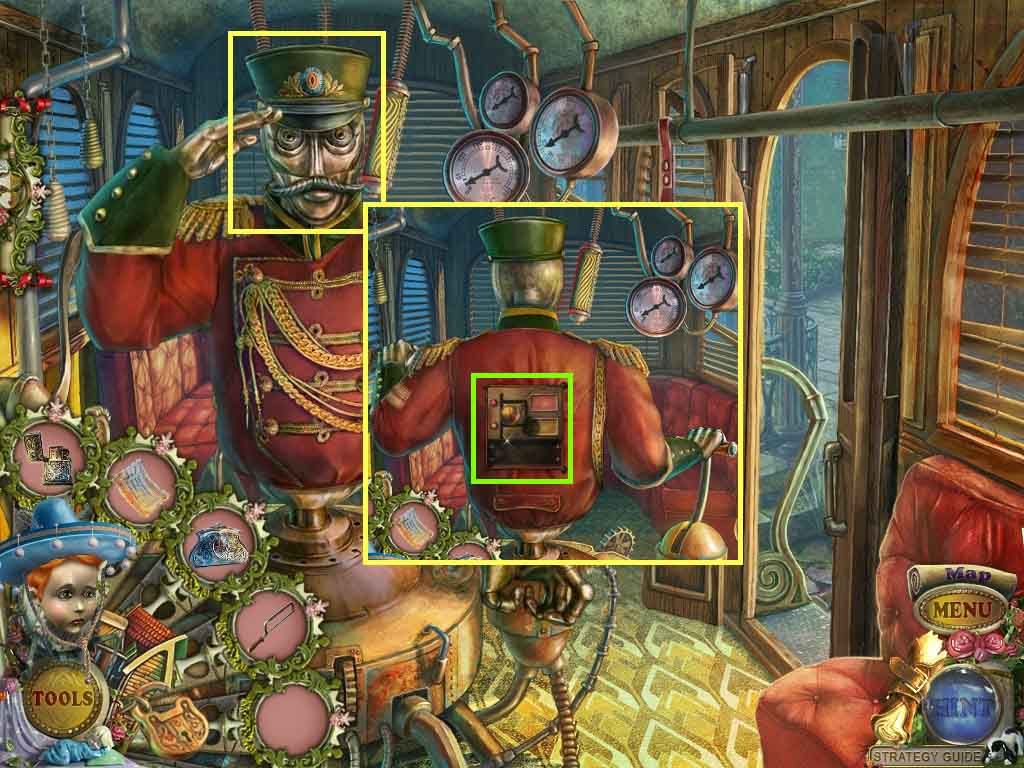
- Move to the workshop.

- Click the mechanism and insert the 2 buttons to trigger a puzzle.
- Click the buttons to assemble the head.
- Solve as follows:
- A – B – C – B – C – B – A - B – C – C –B – A – B
- Collect the head.
- Move to the tram.
- Put the head onto the puppet.
- Click the controls.
- Click the lever.
- Leave the tram when it stops.