
Twisted Lands: Origin: Chapter 6: The Greenhouse
Our Twisted Lands Origin Walkthrough will guide you through this stunning prequel to the Twisted games. Join the detective as your search for the missing Theresa, the daughter of your friend, quickly goes from bad to worse. We've made sure to include tons of screenshots with key areas and items marked clearly as well as step-by-step instructions on what to do from the moment you find yourself seasick and stuck by yourself on a ship being tossed by the elements off the shore of the island of Tormente.
General Info and Tips
Chapter 1: Fork in the Road
Chapter 2: The Town
Chapter 3: The Cemetery
Chapter 4: The Hospital
Chapter 5: The Mansion
Chapter 6: The Greenhouse
Ask for help in the comments below!
Chapter 1: Fork in the Road
Chapter 2: The Town
Chapter 3: The Cemetery
Chapter 4: The Hospital
Chapter 5: The Mansion
Chapter 6: The Greenhouse
Ask for help in the comments below!
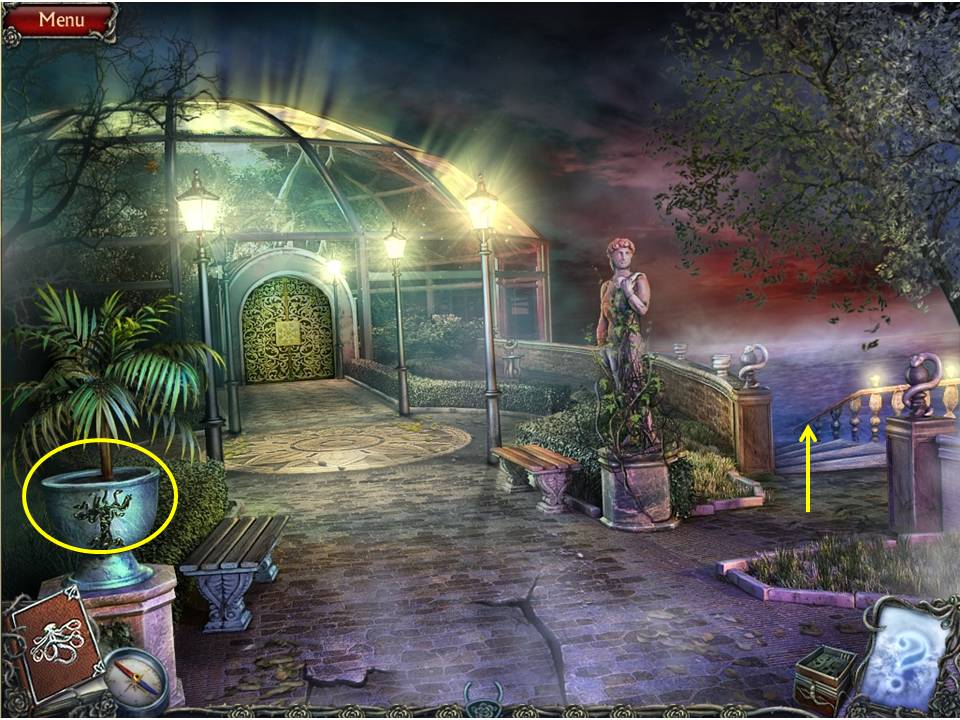
- Zoom in on the planter to the left and pick up the GRAPES lying on top.
- Go down the steps to the right and zoom in on the structure to the right of the pier to initiate the next HOA.
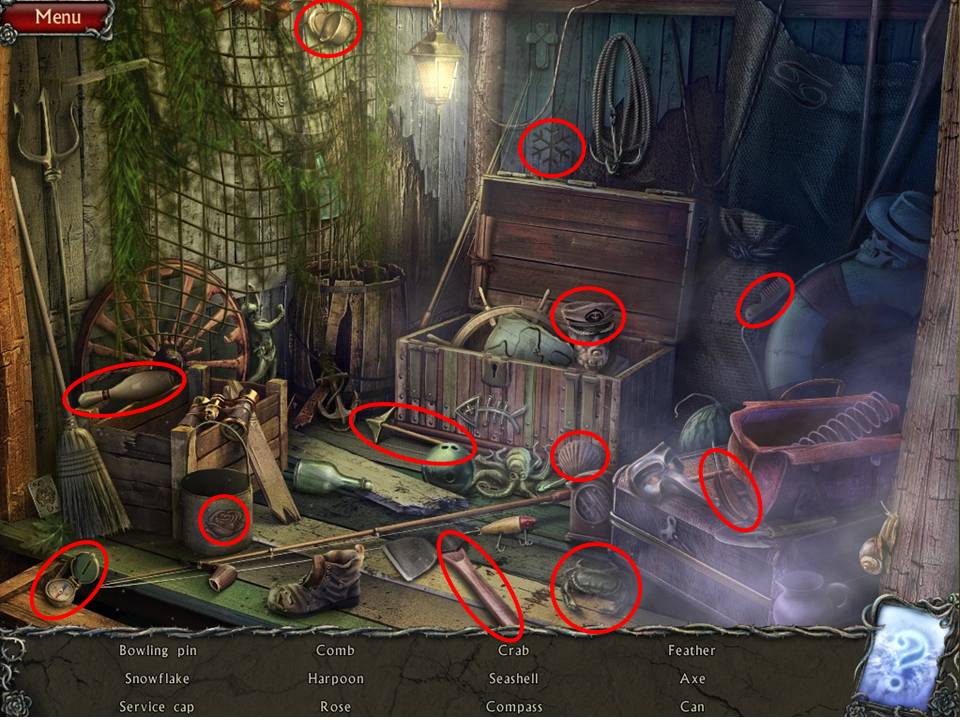
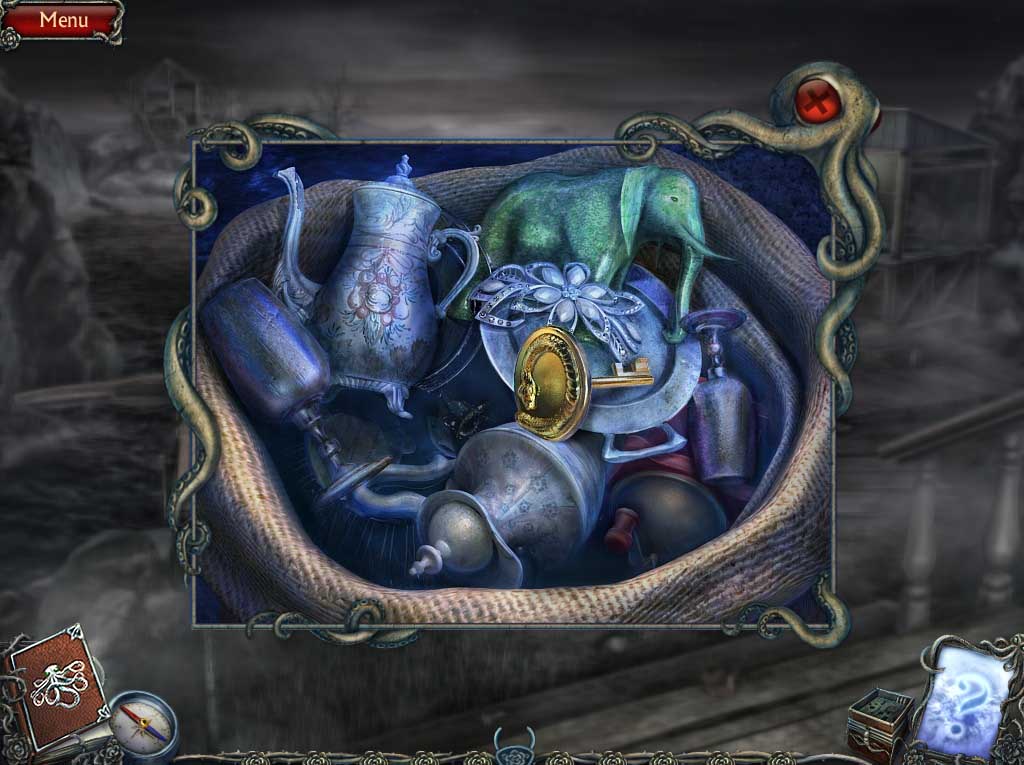
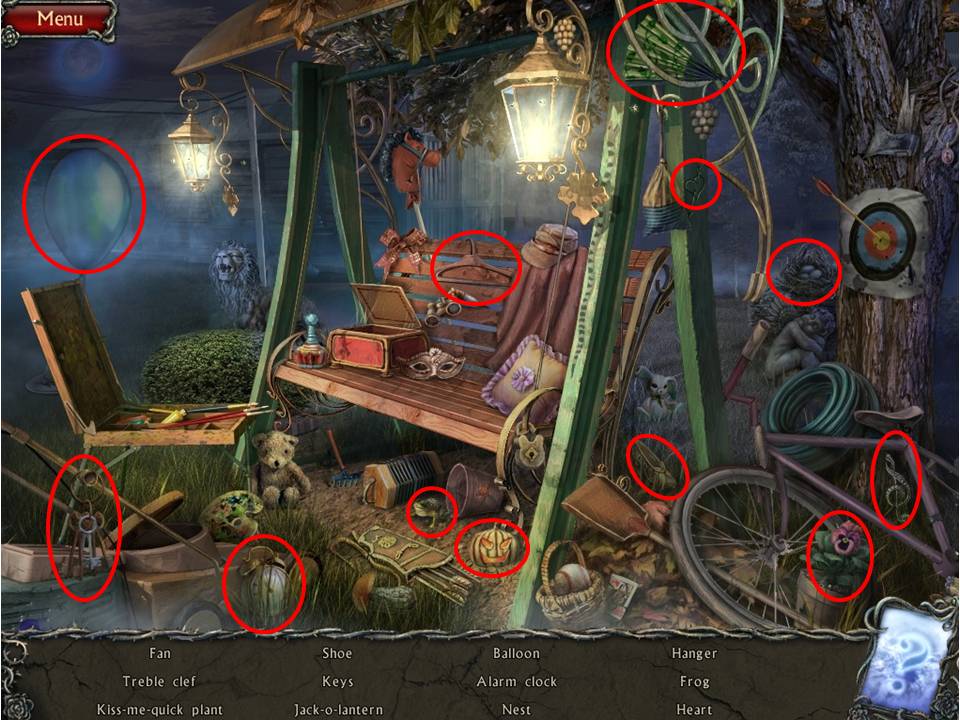
- Play the Hidden Object Area.
- Find the items listed.
- Open the trunk to get the service cap.
- Receive the HARPOON.
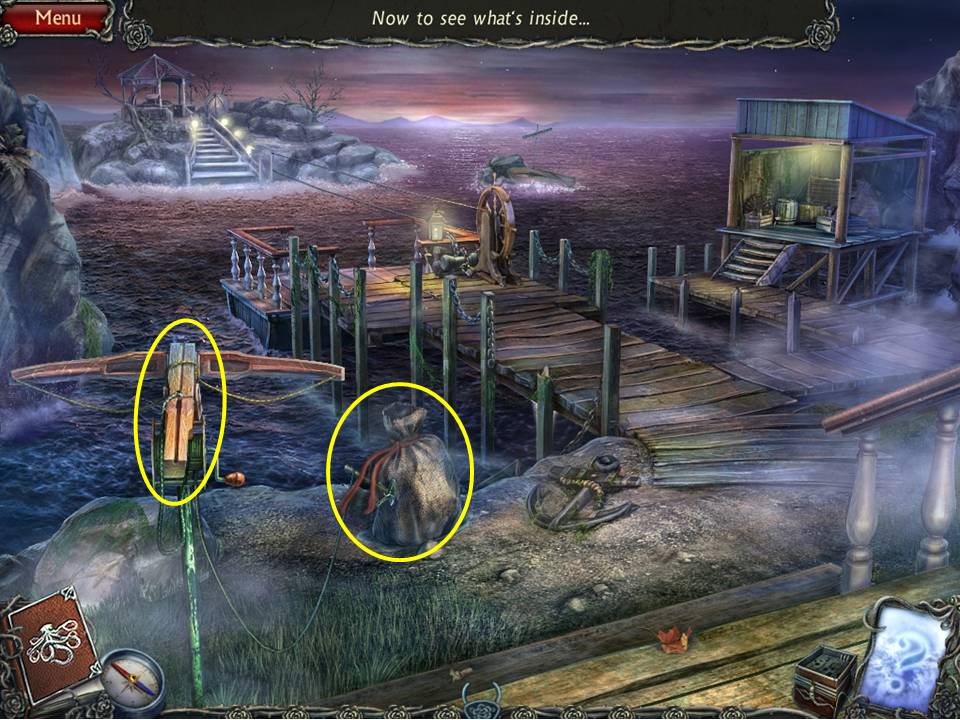
- Put the HARPOON and the ROPE on the crossbow.
- Pull on the crossbow.
- Zoom into the bag.
- Take the GRAPES.
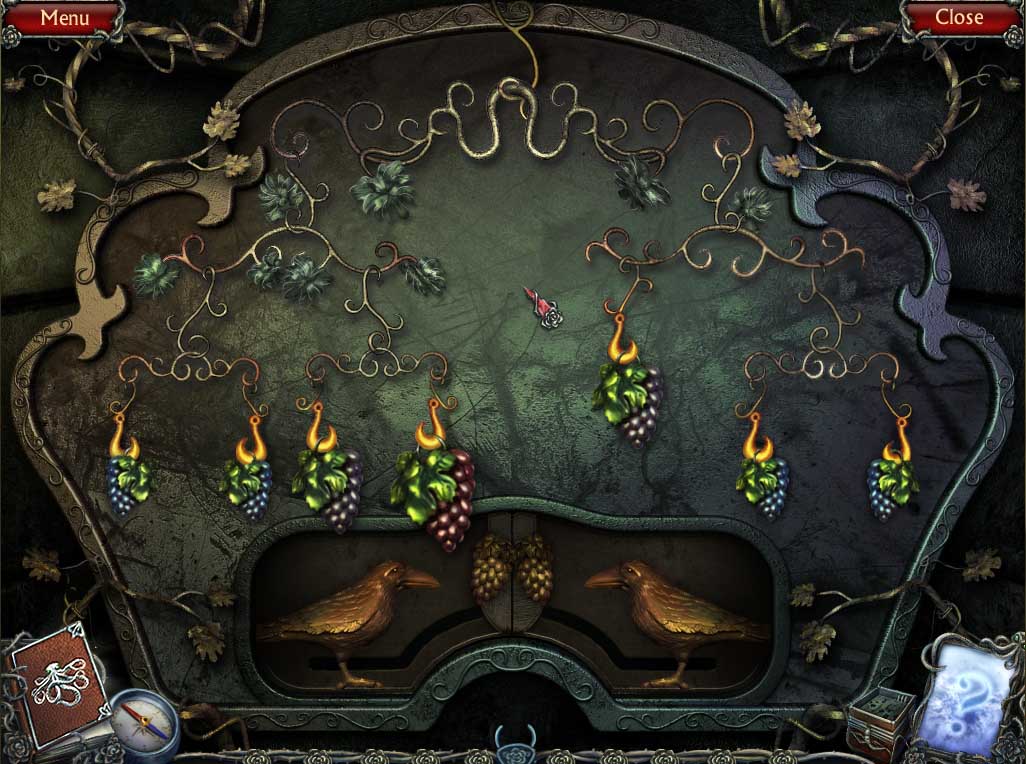
- Return to the greenhouse entrance and zoom into the door.
- Place the 3 GRAPES on the hooks.
- Enter the greenhouse.
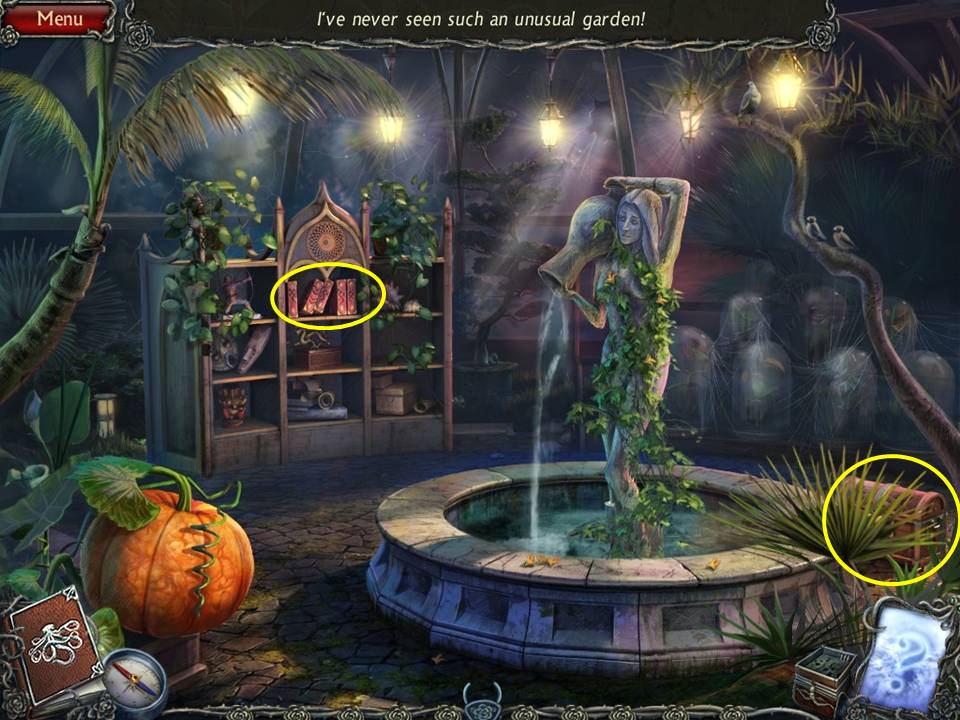
- Zoom into the books.
- Take the FLOWER.
- Move the palm frond to the right of the fountain and zoom into the chest.
- Place the FLOWER on the lock.
- Take the BOOK.
- Take the HOUSE, which will automatically take you back to the board game.
- Put it in place and exit back to the greenhouse.
- Zoom back on the bookcase and place the three BOOKS from inventory on the shelf.
- Exit down the hatch behind the bookcase.
- Note the book on the desk – take the SNAKE KEY inside.
- Take the KNIFE sticking in the memo board behind the desk – note the photograph of the pavilion.
- Return to the greenhouse and use the KNIFE to slice open the pumpkin.
- Take the PUMPKIN SEEDS.
- Return to the pier and use the KNIFE to cut open the sack.
- Take the second SNAKE KEY.
- Return to the lab behind the greenhouse.
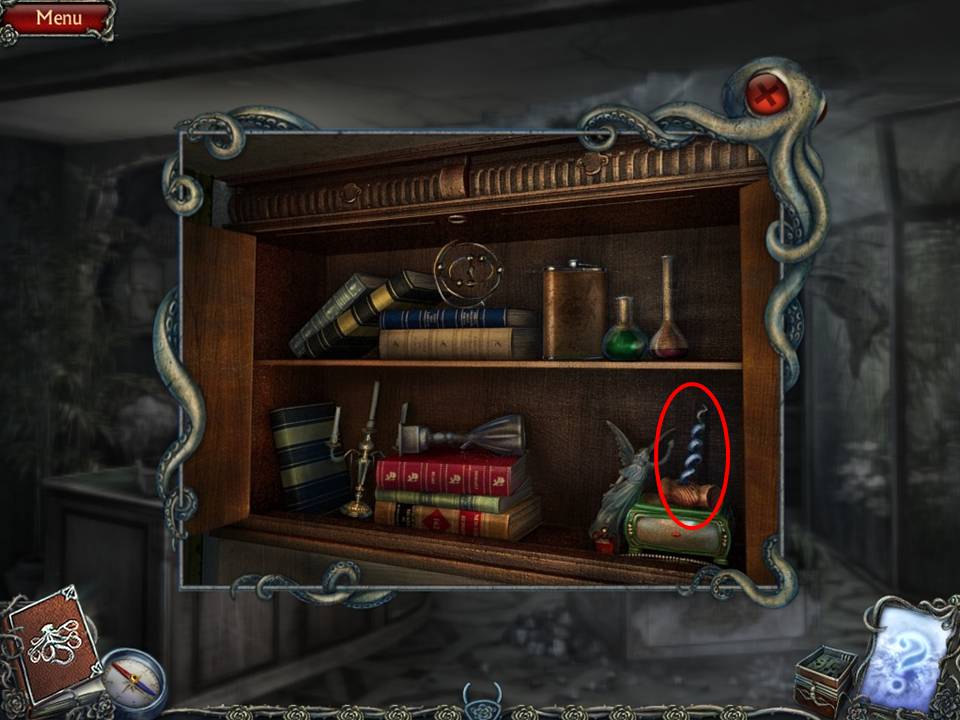
- Zoom in on the cabinet at the back of the room and insert the two SNAKE KEYS.
- Take the CORKSCREW.
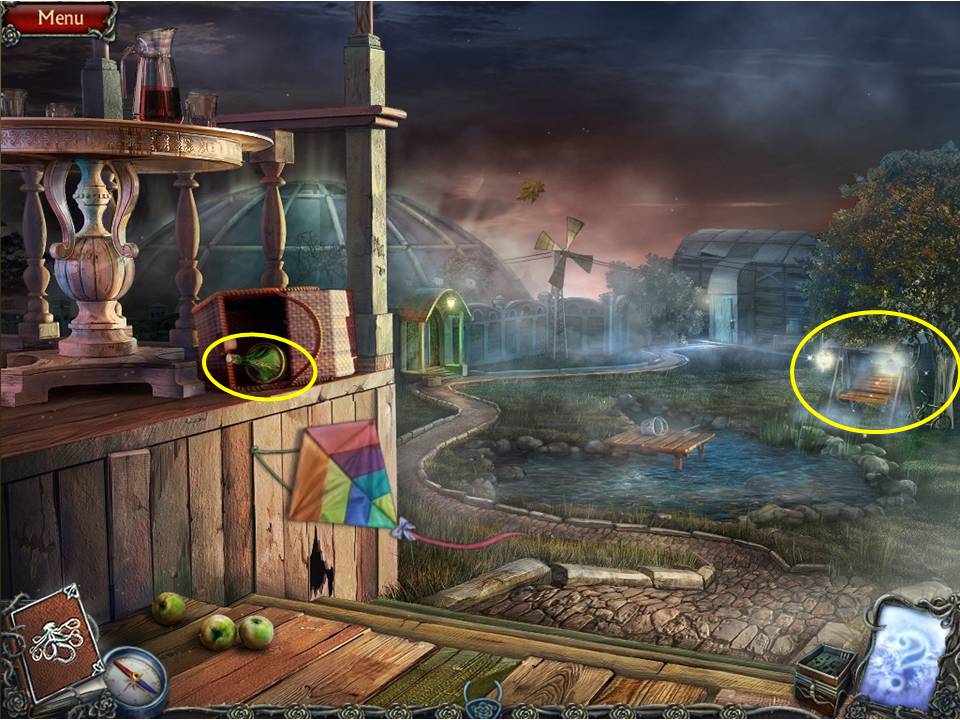
- Return to the mansion’s porch and use the CORKSCREW to open the green bottle.
- Extract the note inside.
- Then zero in on the area by the pond to initiate the next HOA puzzle.
- Find the objects and take the JACK-O-LANTERN.
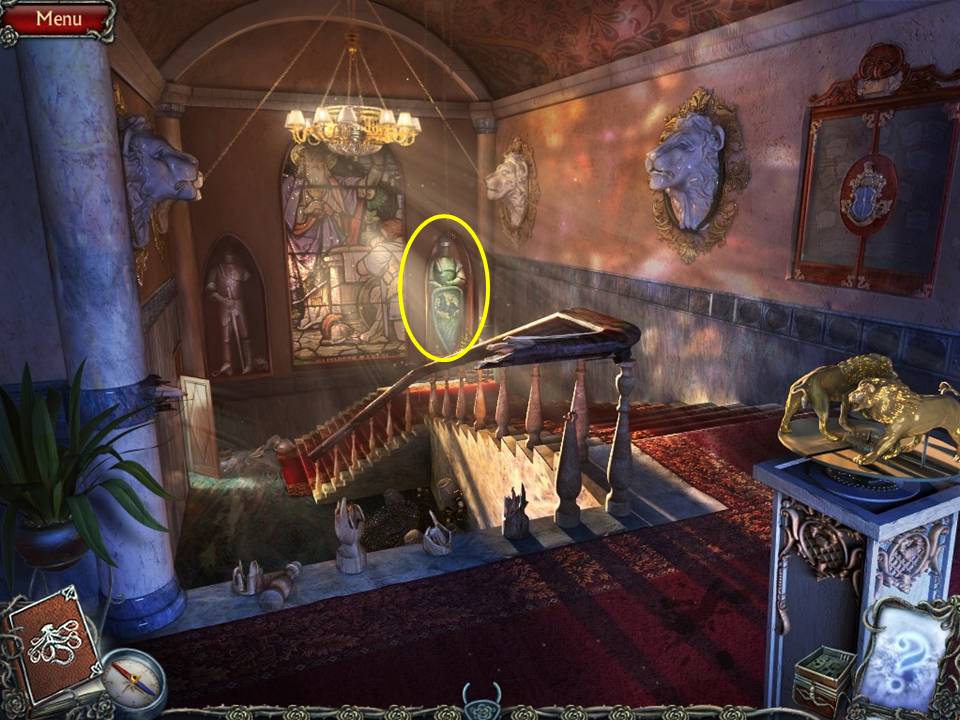
- Return to the mansion and go back to the stairway.
- Zoom in on the suit of armour to the right to initiate the next puzzle.
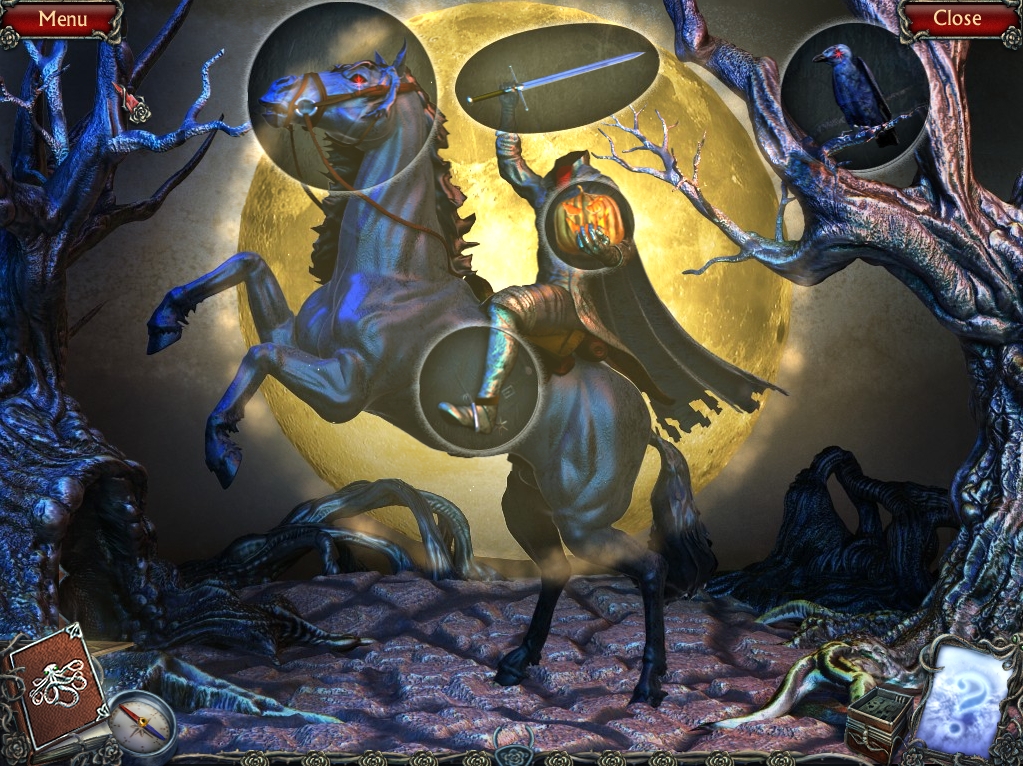
- The aim is simple enough, to rotate the images in each picture until you get the right combination, which will light up the background and present you with a COAT OF ARMS.
- Note the screenshot for the solution – don’t forget the bird sitting on the branch!
- Zoom out and take a look at the crest on the wall to the right of the lion’s head.
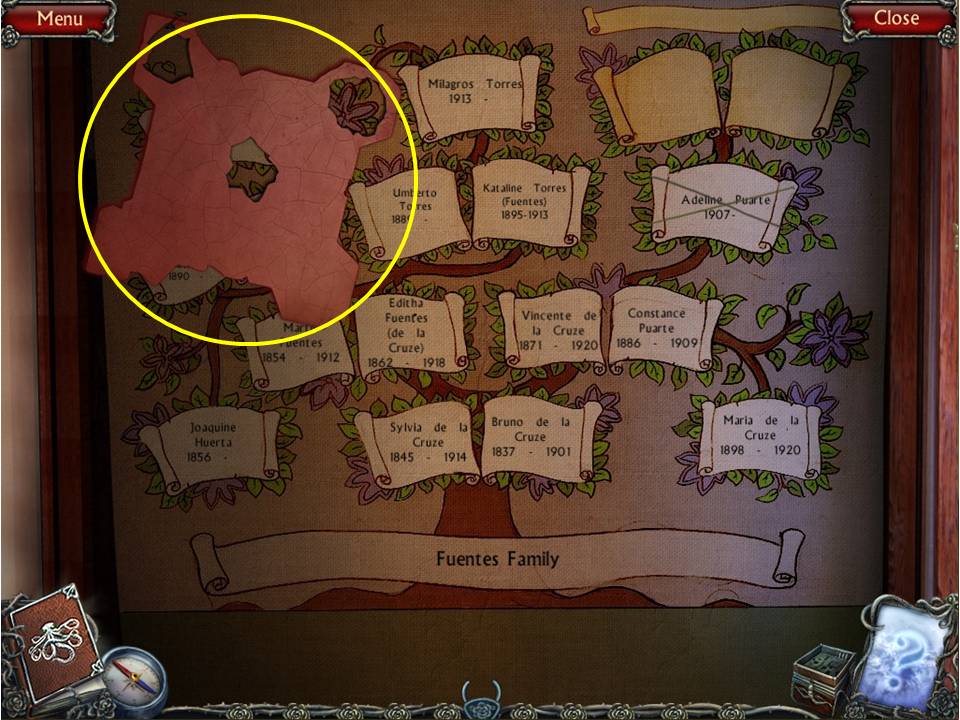
- Place the COAT OF ARMS on it to reveal a family tree.
- Take the STENCIL on show.
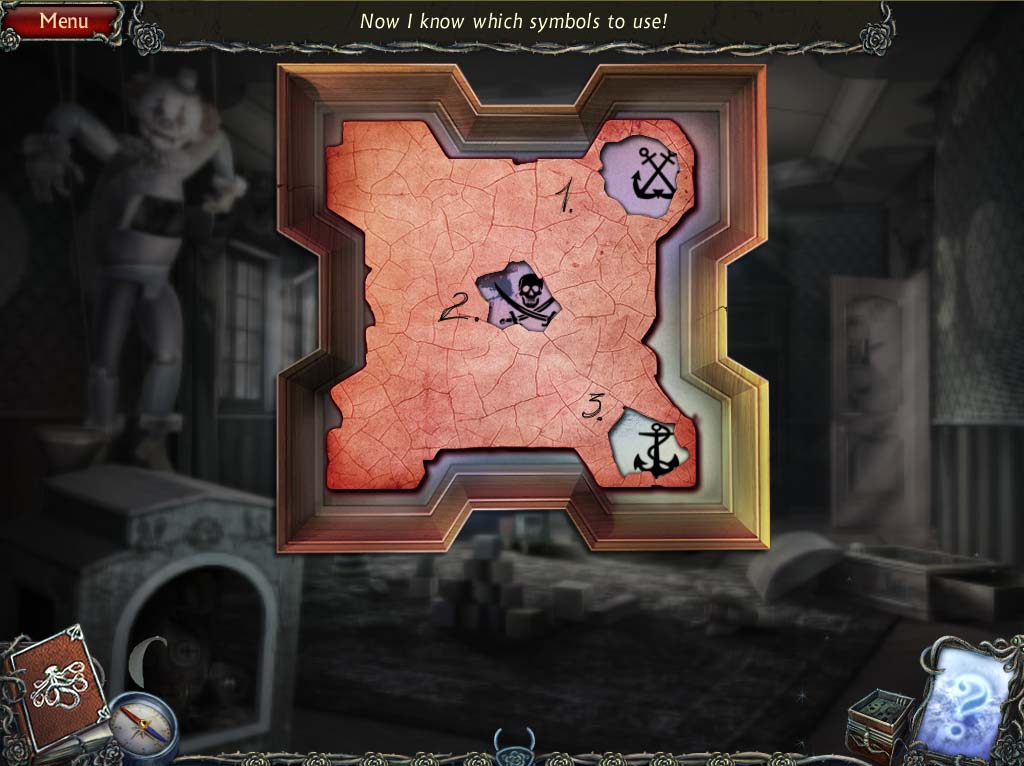
- Return to the nursery and apply the STENCIL to the picture frame in the playhouse – not the three symbols.

- Return to the pier and play the next HOA there.
- Take the SHOVEL.
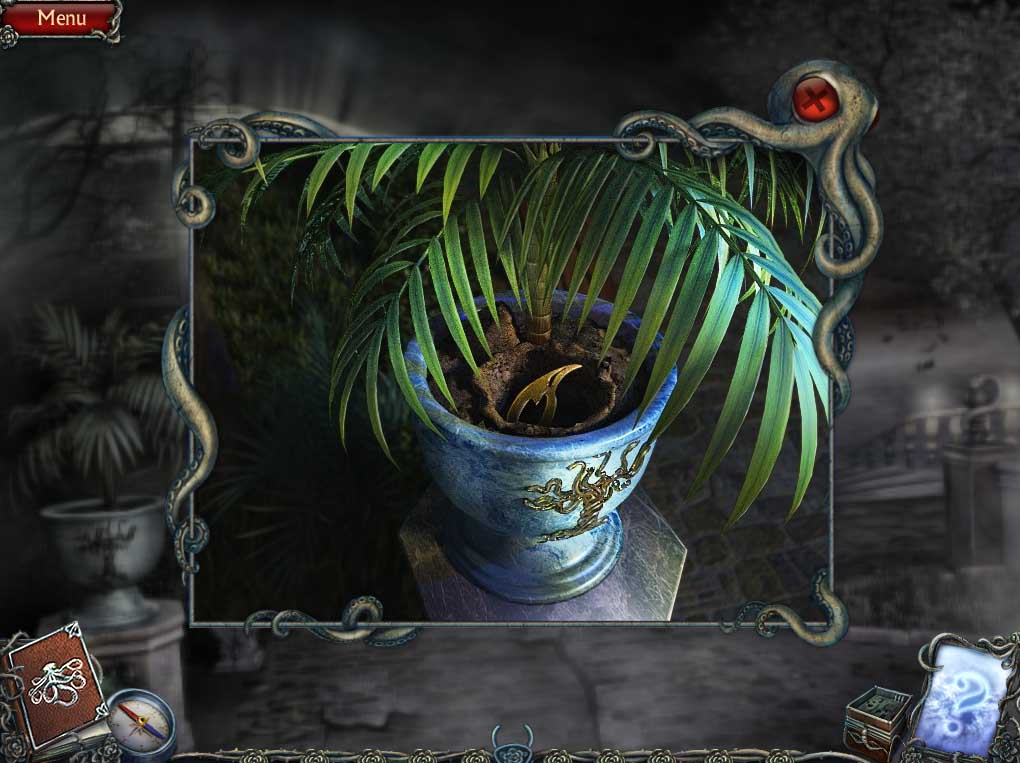
- Return to the area in front of the greenhouse, zoom in on the pot where you retrieved the grapes earlier, and use the SHOVEL to acquire a BAS-RELIEF FRAGMENT – you always wanted one, right?
- Go back down and out on to the pier, picking up the SUMMERHOUSE lying on the deck to the left.
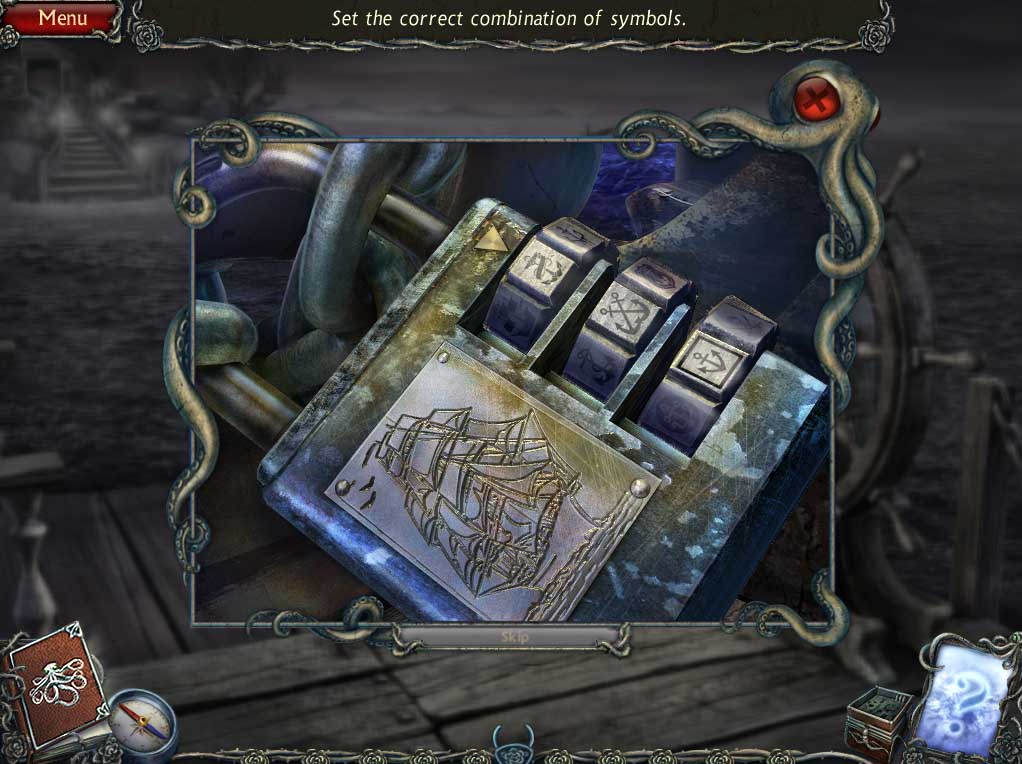
- Zoom in on the lock below the ship’s wheel, and enter in the symbols noted earlier from the nursery (1. Crossed anchors 2. Skull and crossed swords 3. Anchor and twirled chain).
- Place the SUMMERHOUSE on the puzzle board on the lower right to play the board game again.
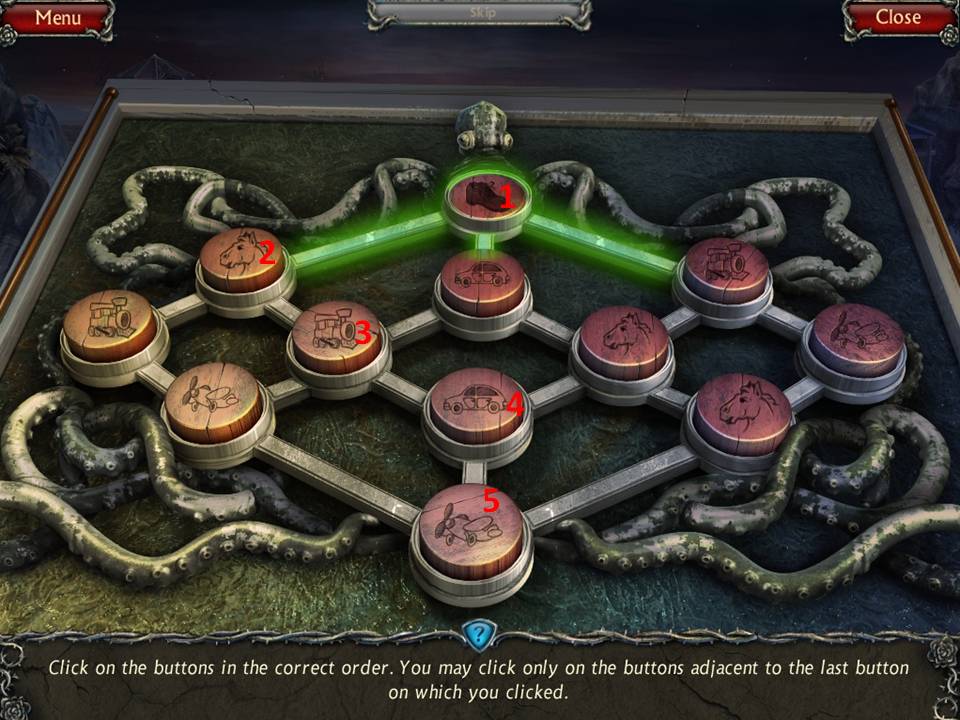
- The aim this time around is to select the buttons in a sequence that reflects humanity’s progression through varieties of transportation, starting with plain ol’ foot power!
- So we go foot-horse-train-car-plane via adjacent buttons. Presto!
- Take the second BAS-RELIEF FRAGMENT.
- Go back down to the pier and turn the ship’s wheel to head across to the island and the pavilion there.
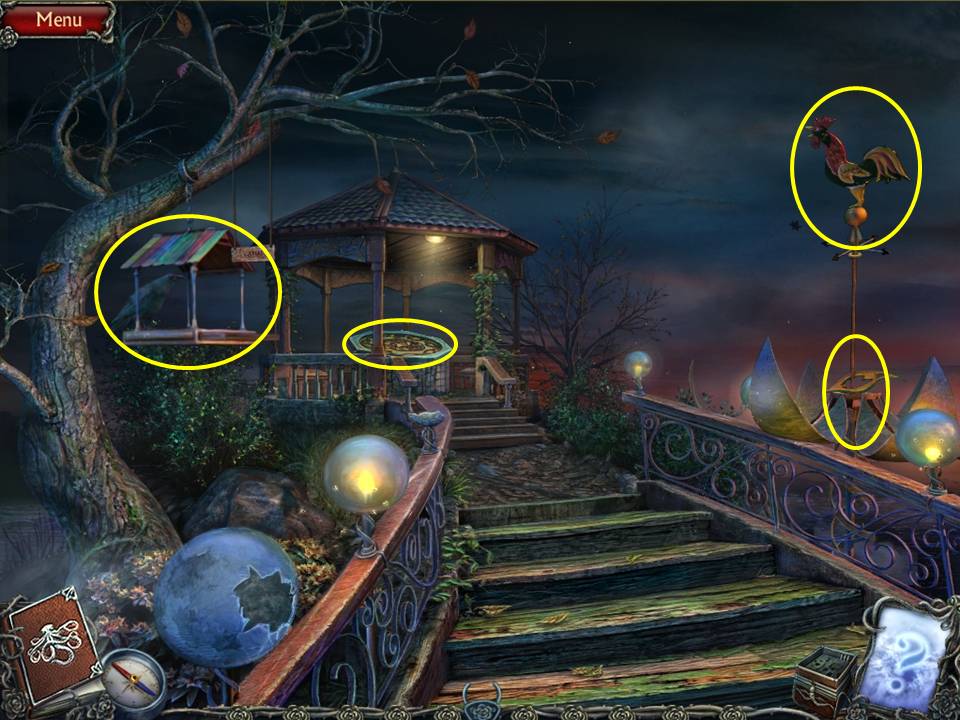
- Zoom into the birdfeeder.
- Place the PUMPKIN SEEDS on it.
- Take the WEATHERVANE.
- Place the WEATHERVANE on the globe.
- Take the third BAS-RELIEF FRAGMENT at the base of the weathervane.
- Zoom into the bas-relief.
- Insert the 3 BAS-RELIEF FRAGMENTS in the slots.
- Take the BIRD FIGURINE.
- Return to the pier.
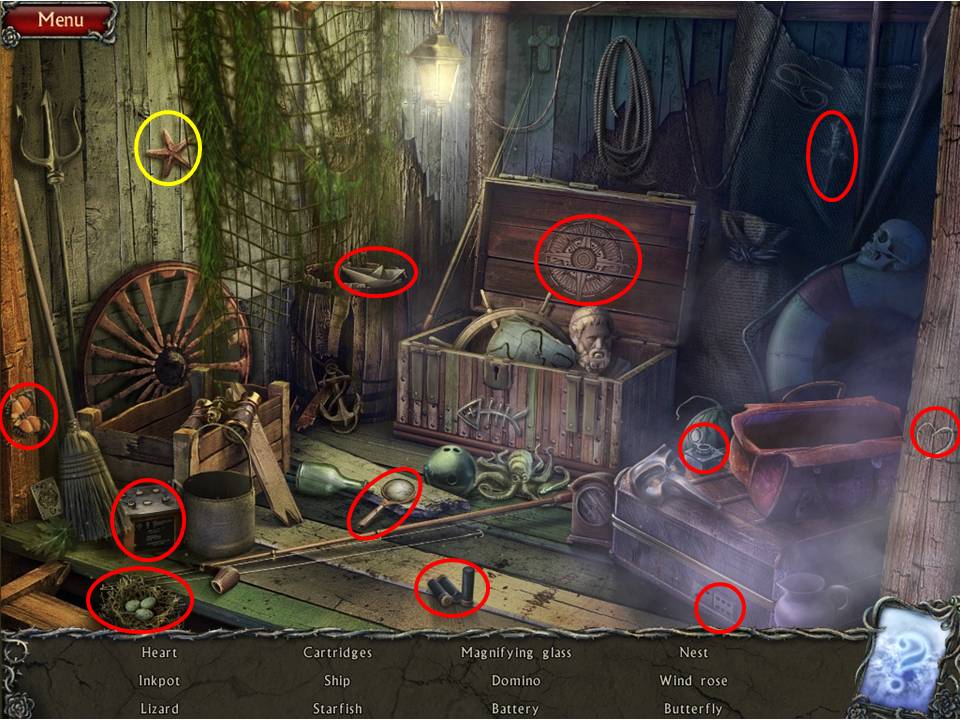
- Zoom in on the left to commence the next HOA puzzle.
- Find the items listed. Move the net to get the starfish.
- Receive the BATTERY.
- Return to the area by the pond to play the final HOA puzzle.
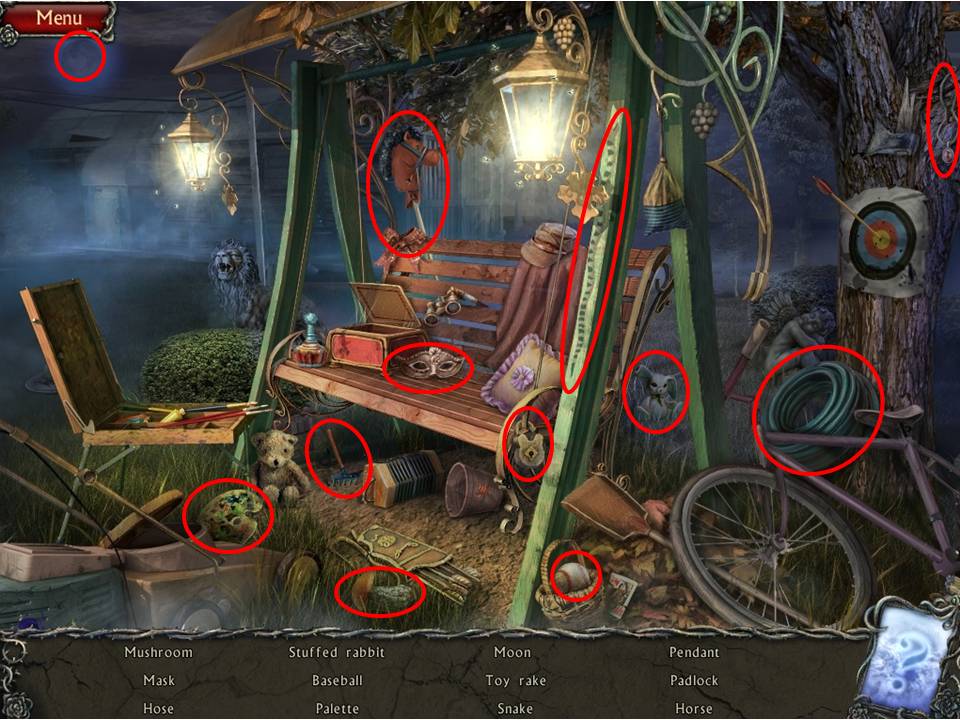
- Find the items listed.
- Receive the HOSE.
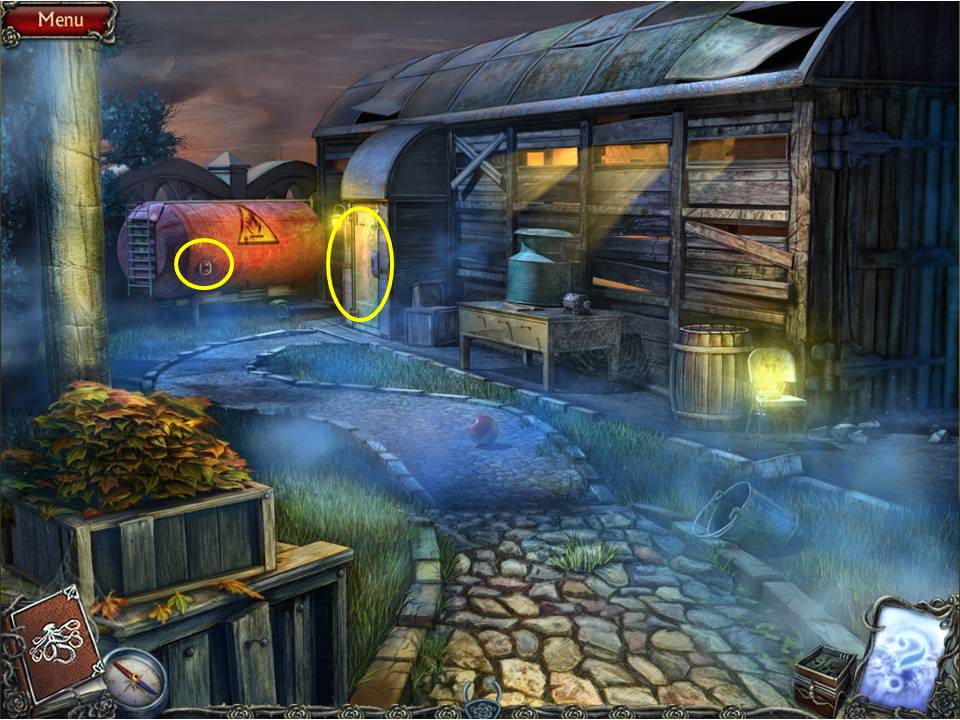
- Return to the hangar exterior.
- Attach the HOSE to the fuel tank.
- Zoom into the door.
- Place the BIRD FIGURINE on the door.
- Enter the hangar.

- Move the steps to connect the fuel hose on the floor to the plane.
- Open up the compartment on the side of the pump on the crate and insert the BATTERY.
- Press the red button to fuel up the airplane.
- Zoom in to the plane’s cabin to pick up a PLANE MODEL which will take you back to the board puzzle.
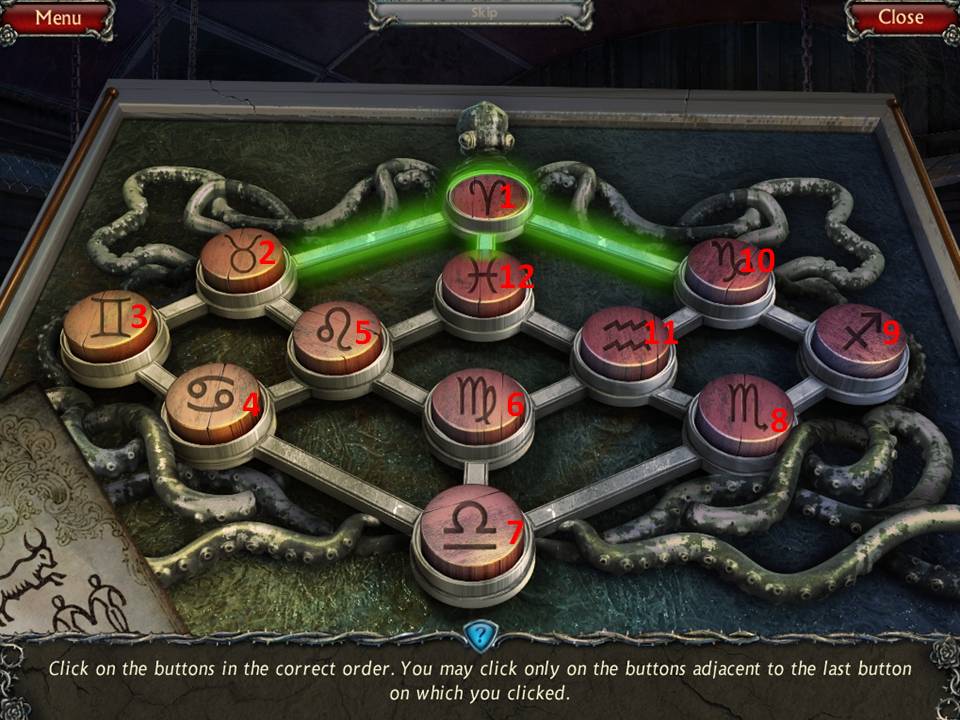
- The object of the puzzle this final time is to press the buttons in the order of the zodiac signs.
- See screenshot for solution.
- When finished, take the PLANE KEY and return to the hanger scene.

- Zoom in on the hangar doors and unlatch them.
- Enter the plane.
- Insert the PLANE KEY in the ignition and start your major carpet ride up!
Congratulations on completing Twisted Lands: Origin!
General Info and Tips
Chapter 1: Fork in the Road
Chapter 2: The Town
Chapter 3: The Cemetery
Chapter 4: The Hospital
Chapter 5: The Mansion
Chapter 6: The Greenhouse
Ask for help in the comments below!
Chapter 1: Fork in the Road
Chapter 2: The Town
Chapter 3: The Cemetery
Chapter 4: The Hospital
Chapter 5: The Mansion
Chapter 6: The Greenhouse
Ask for help in the comments below!