
Twisted Lands: Origin: Chapter 3: The Cemetery
Our Twisted Lands Origin Walkthrough will guide you through this stunning prequel to the Twisted games. Join the detective as your search for the missing Theresa, the daughter of your friend, quickly goes from bad to worse. We've made sure to include tons of screenshots with key areas and items marked clearly as well as step-by-step instructions on what to do from the moment you find yourself seasick and stuck by yourself on a ship being tossed by the elements off the shore of the island of Tormente.
General Info and Tips
Chapter 1: Fork in the Road
Chapter 2: The Town
Chapter 3: The Cemetery
Chapter 4: The Hospital
Chapter 5: The Mansion
Chapter 6: The Greenhouse
Ask for help in the comments below!
Chapter 1: Fork in the Road
Chapter 2: The Town
Chapter 3: The Cemetery
Chapter 4: The Hospital
Chapter 5: The Mansion
Chapter 6: The Greenhouse
Ask for help in the comments below!
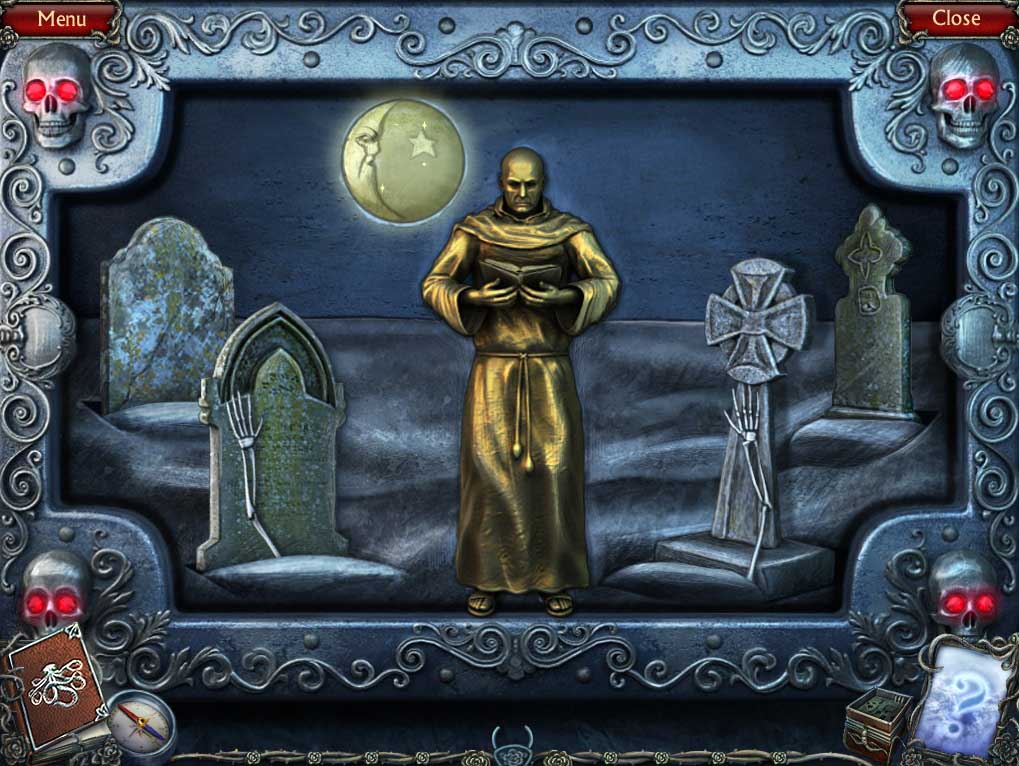
- Zoom into the gate.
- Place the CRESCENT MOON and MONK into the niches.
-
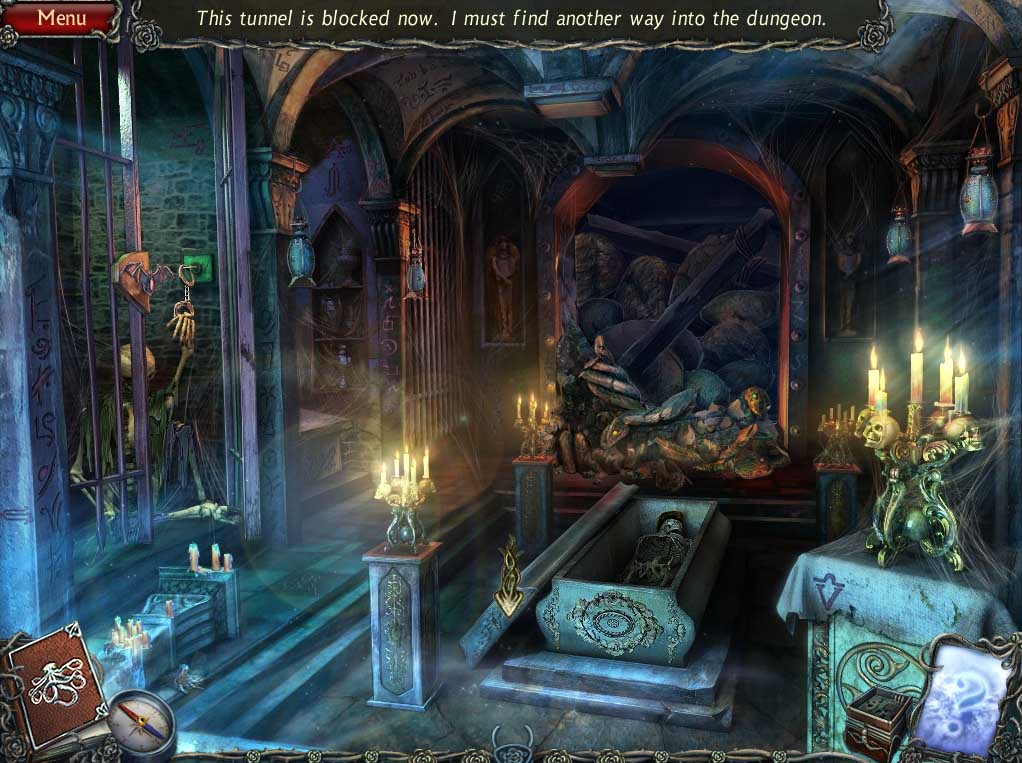
Go through the gate, listen to the ghost, and proceed to the dragon statue in the background to initiate the next HOA puzzle.
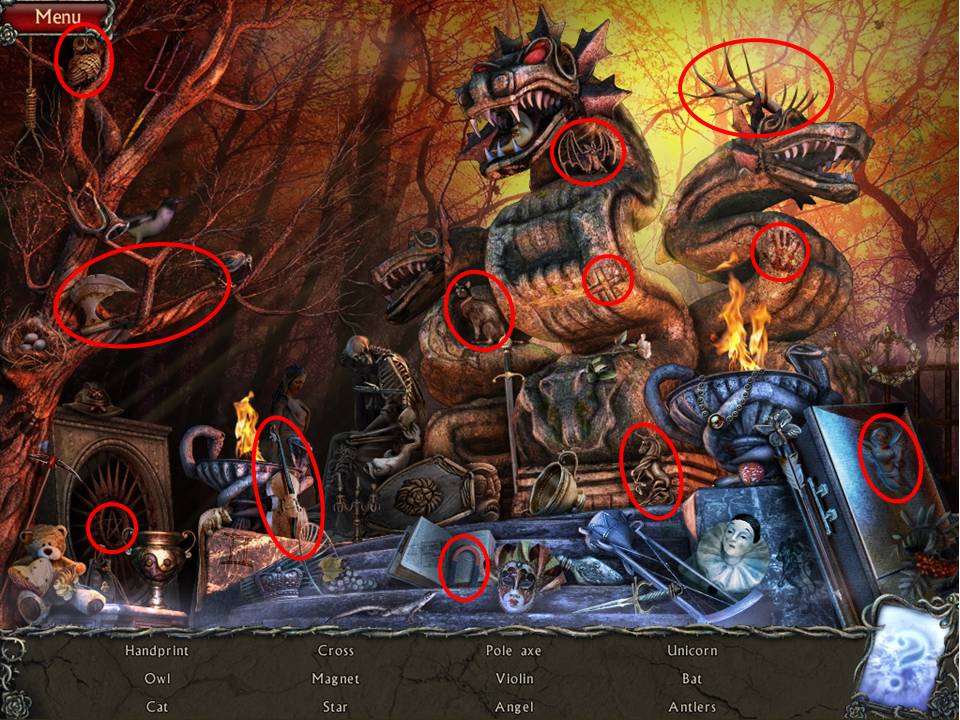
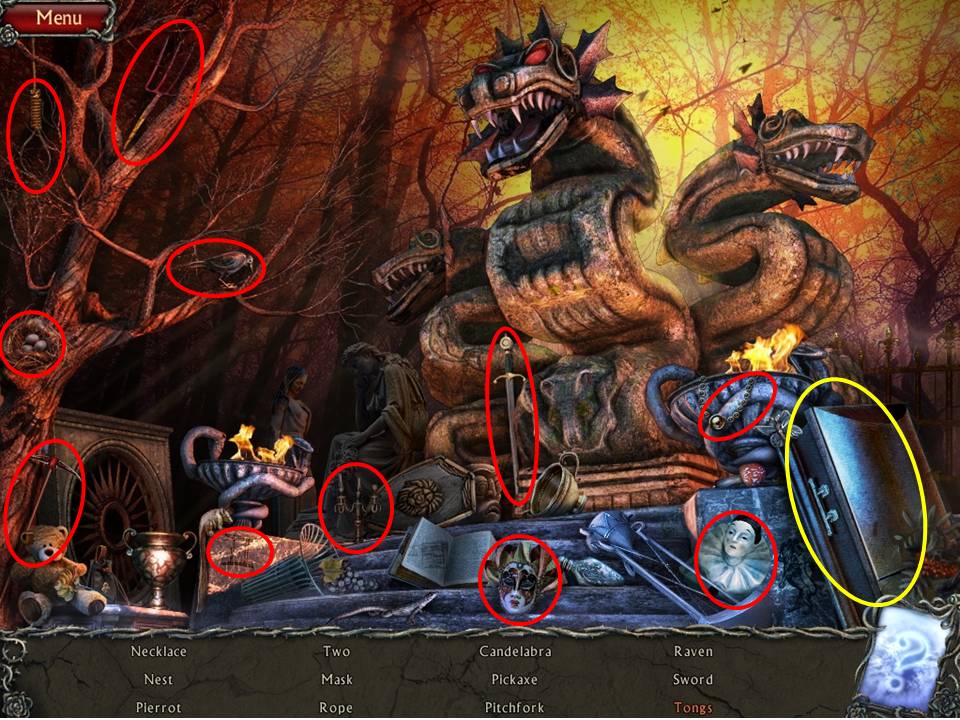
- Find the items listed.
-
Receive the MAGNET and watch the freaky scene with the dragon statue.
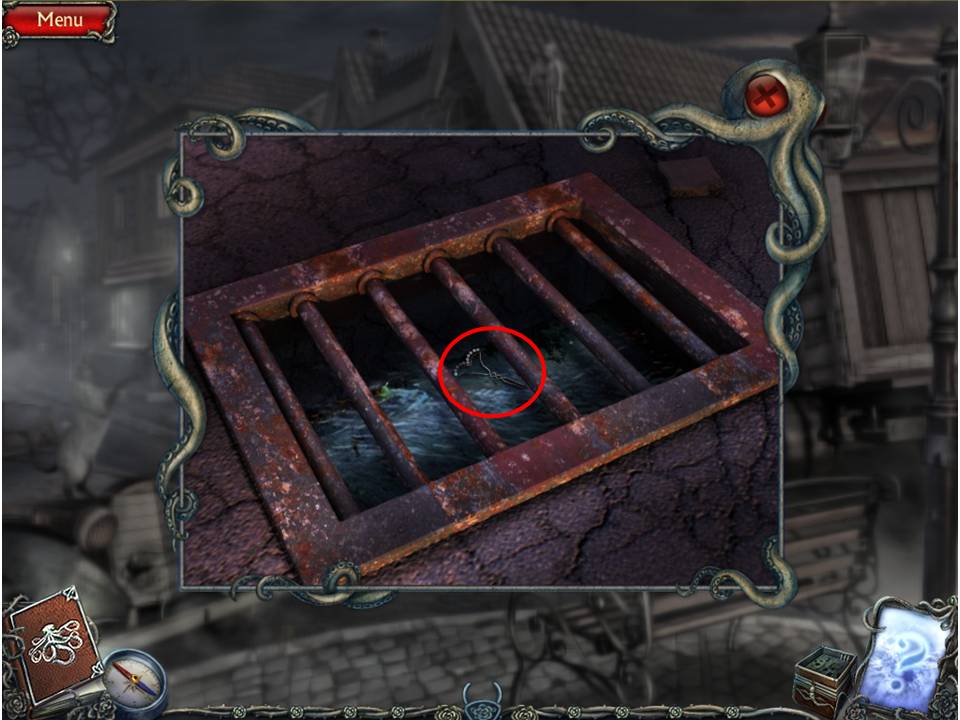
- Return to the grate outside the police station.
- Use the MAGNET
- Zoom into the grate.
- Attract the PIN with the MAGNET.
- Go left.
- Zoom into the window.
- Use the PIN in the lock.
- Take the SOLVENT, 2 COINS and CLOCK WEIGHT.
-
Click down.
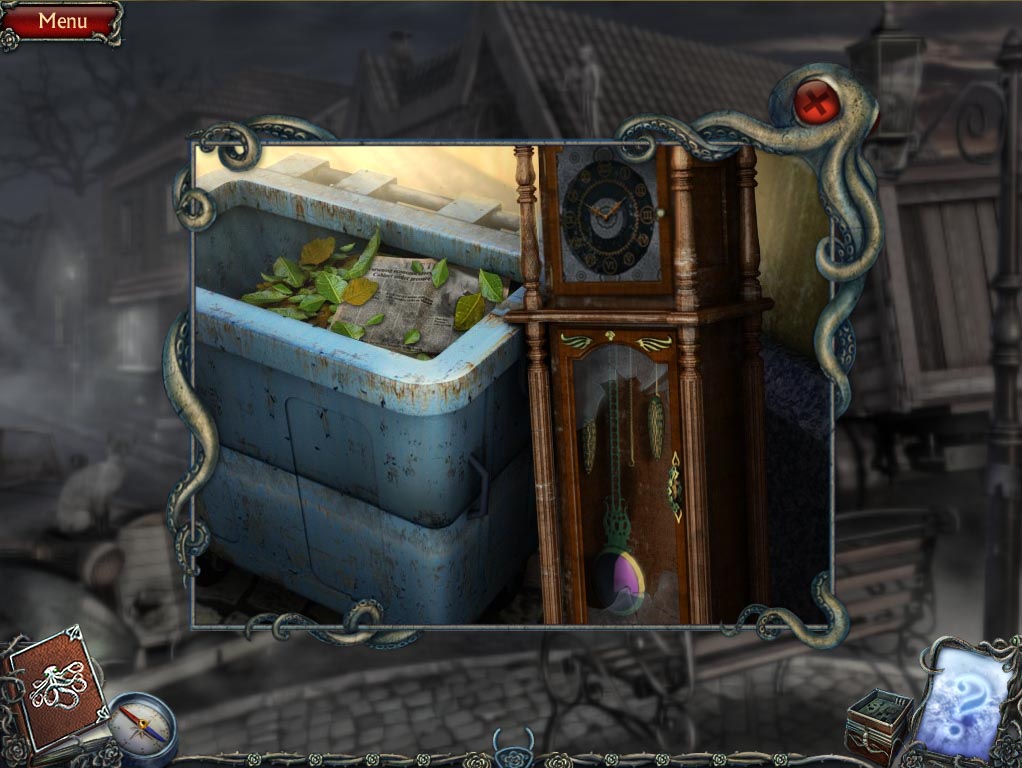
- Zoom into the bins.
- Place the CLOCK WEIGHT on the clock.
- Click twice on the CORK.
-
Go into the police station.
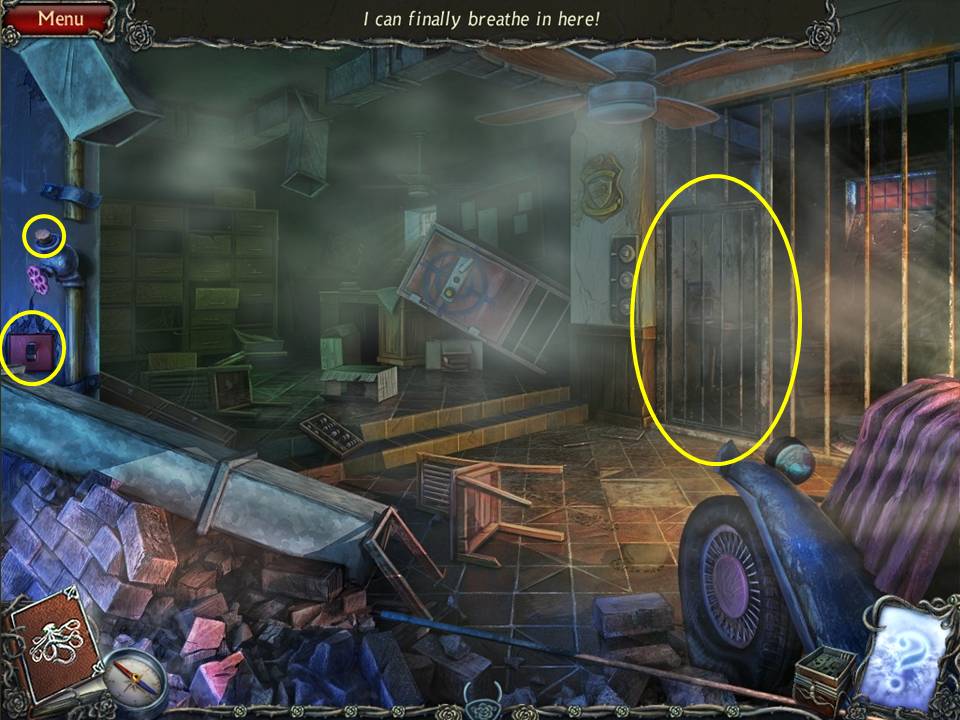
- Put the CORK over the steam.
- Click the switch under the valve to start the fan up.
- Open the door and enter the cell.
- Take the MILL WHEEL and put on the game board, then exit.
-
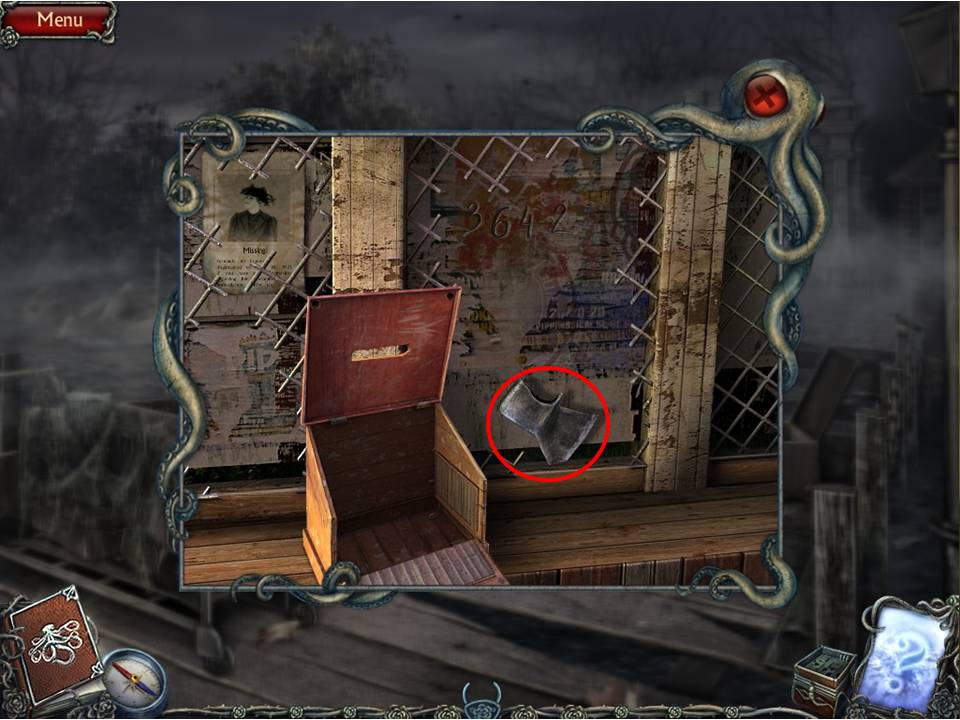
Return to the dock.
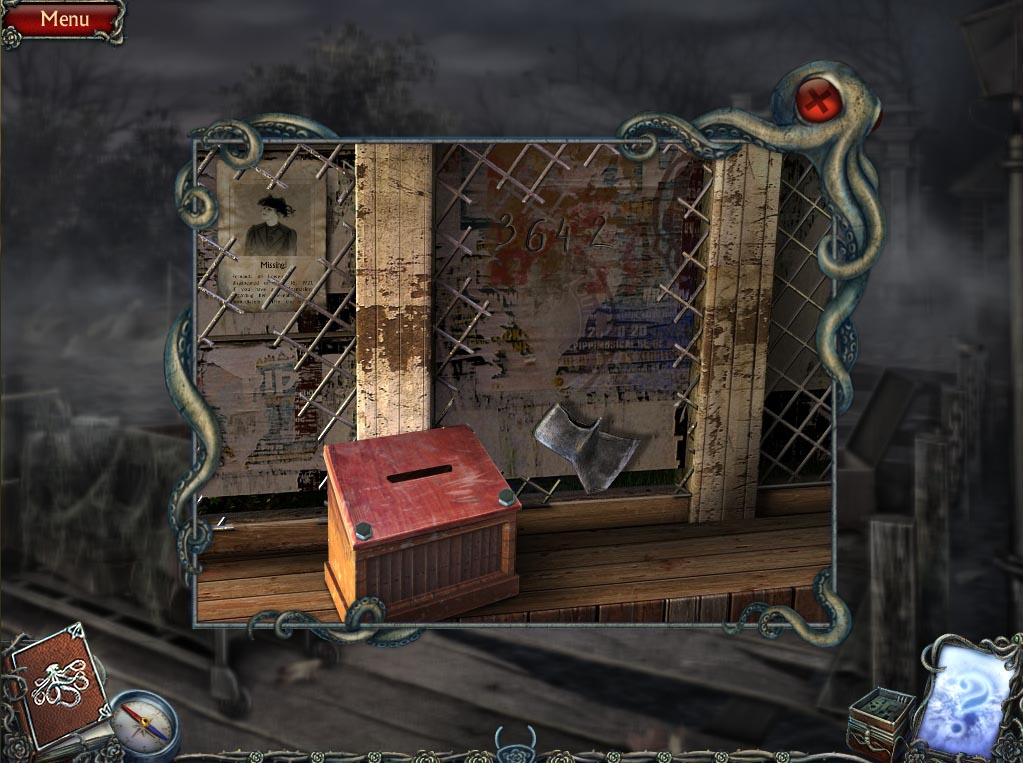
- Zoom into the stand.
-
Use the SOLVENT on the paint to view the code (3642).
- Return to the fork in the road.
- Zoom into the drawer area.
- Enter 3642 into the keypad.
- Click the shotgun and insert the CARTRIDGES to get the SHOTGUN.
-
Return to the police station – now for that cat!
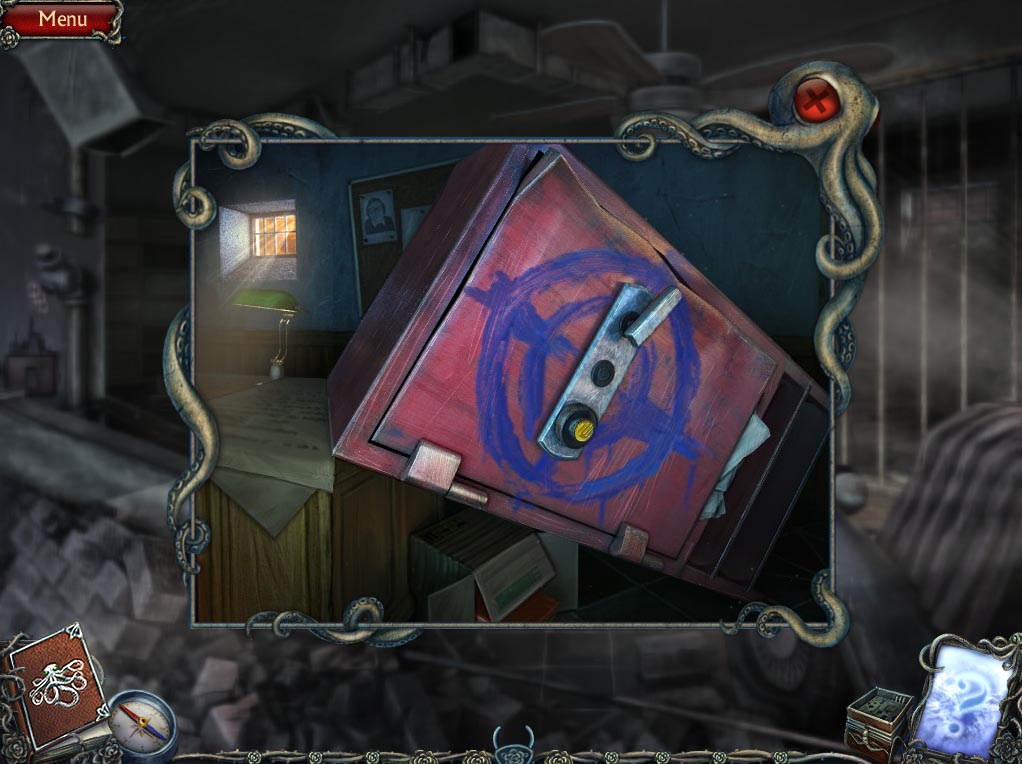
- Zoom into the safe.
- Blast the safe with the SHOTGUN.
- Take the COIN and ACID.
- Zoom into the two sets of files.
-
Leave the police station.
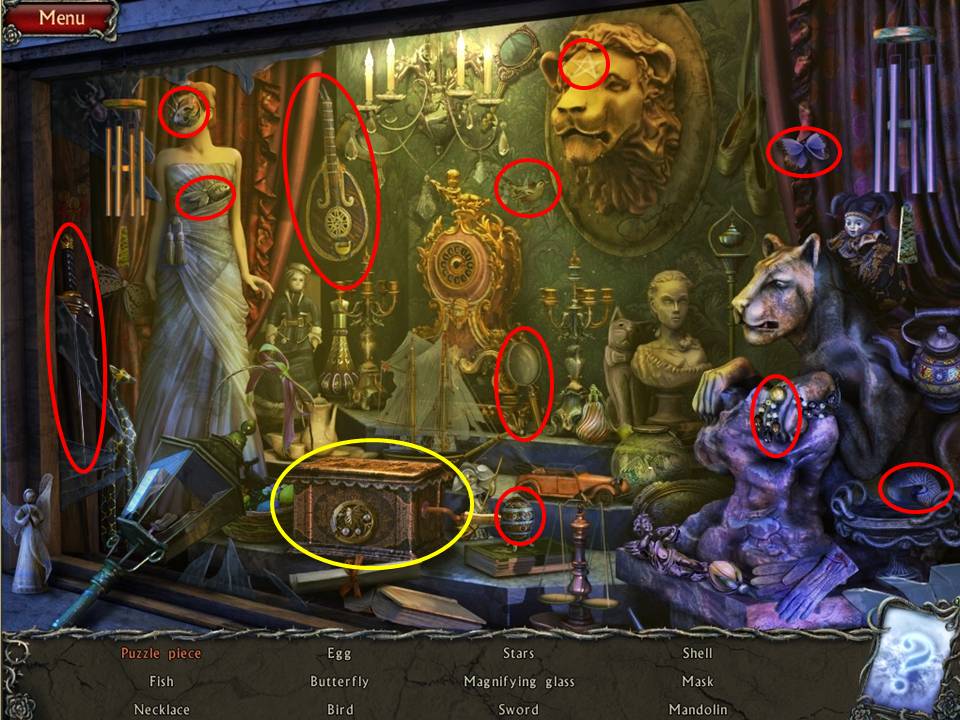
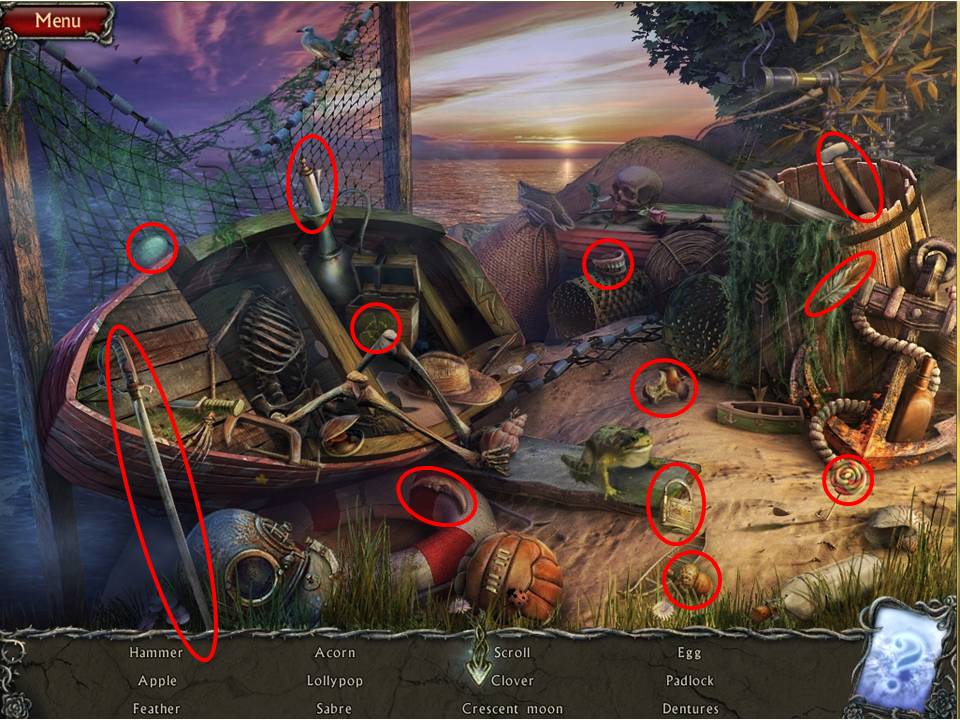
- Zoom in on the HOA puzzle in the building to the left.
- Find the items listed.
- Open the box to get the PUZZLE PIECE.
-
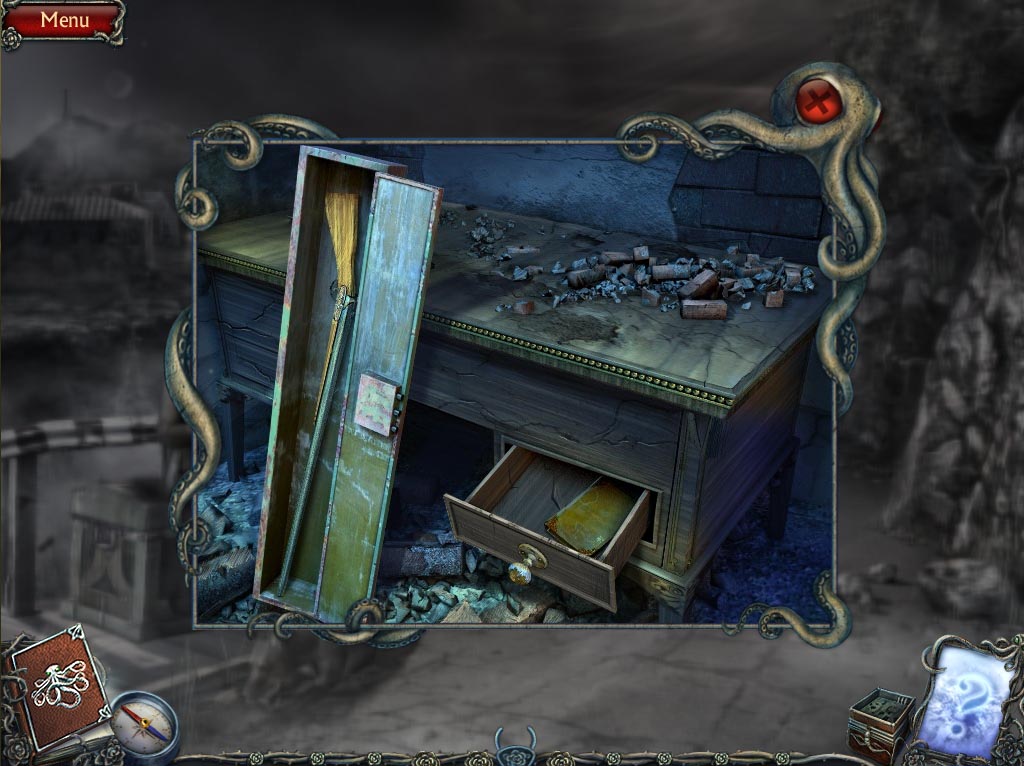
Return to the schoolhouse.
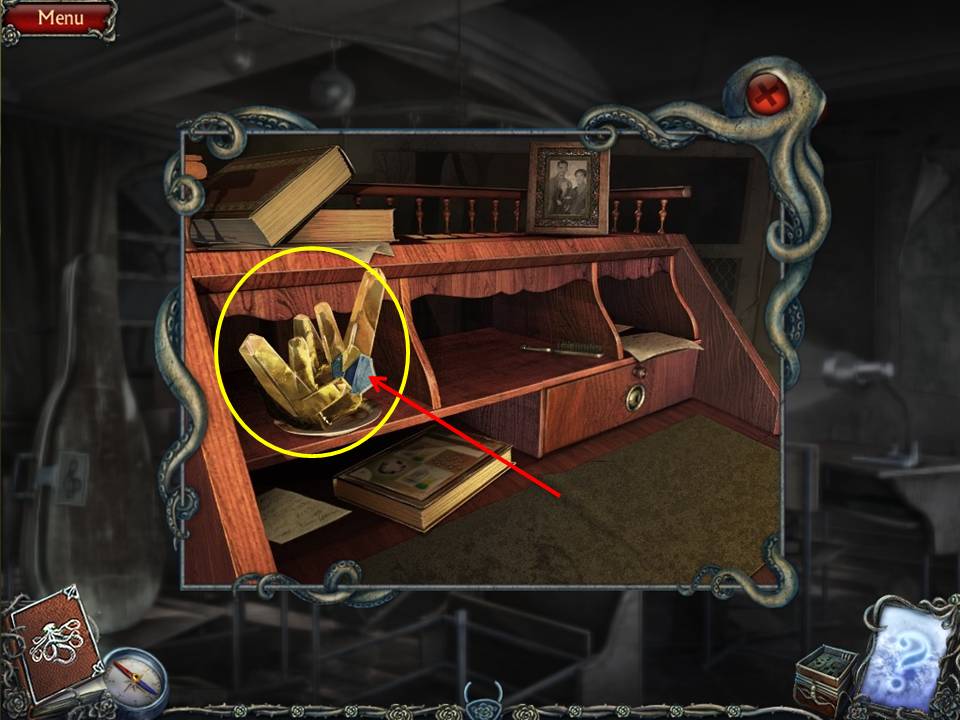
- Zoom into the desk.
- Use the ACID on the crystal.
- Take another PUZZLE PIECE.
- Return to the cemetery.
-
Zoom into the crypt door and place the PUZZLE PIECES on the door to initiate a puzzle.
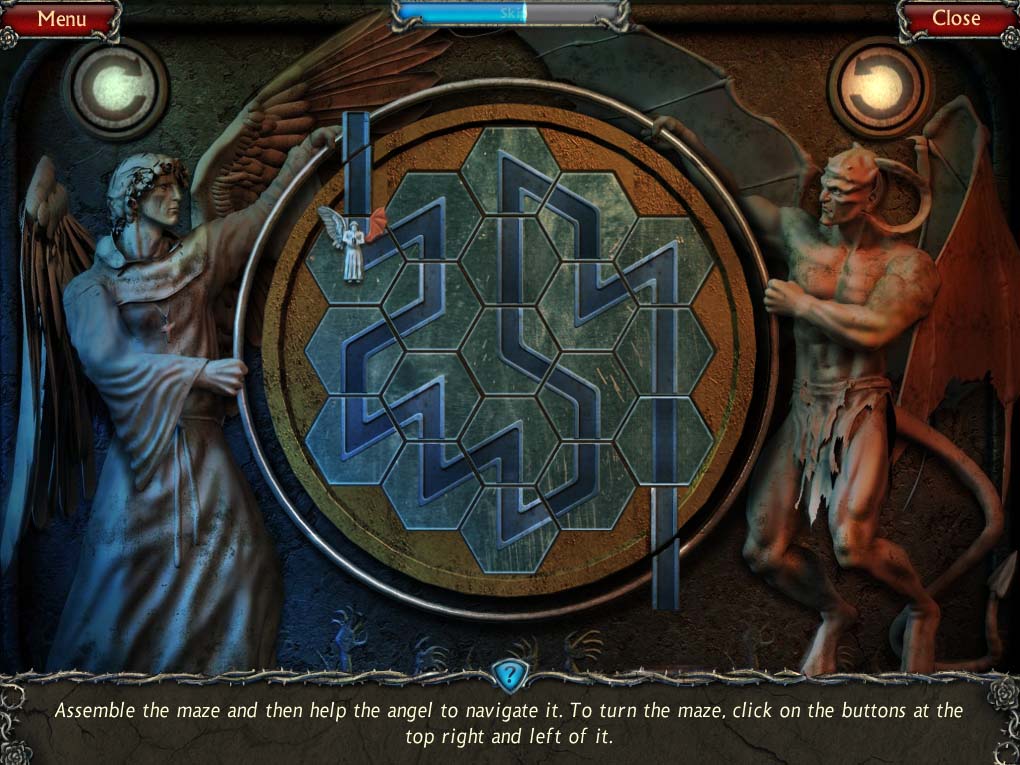
- The object of the puzzle is to assemble the maze and then help the angel to navigate it.
- The pieces don’t actually swap around, merely rotate.
- Starting from either end, it’s fairly obvious that the path must be fairly convoluted in order to incorporate all the pieces – see the screenshot for the solution.
- Once complete, the next phase is to get the angel from one end to the other, which is actually pretty easy once you consider that you basically have to use gravity to actually make the angel ‘fall’ down each section – meaning you have to use the arrows to left and right to turn the entire frame in order to set each section of path ahead of the angel in a vertical position so that it can drop down.
-
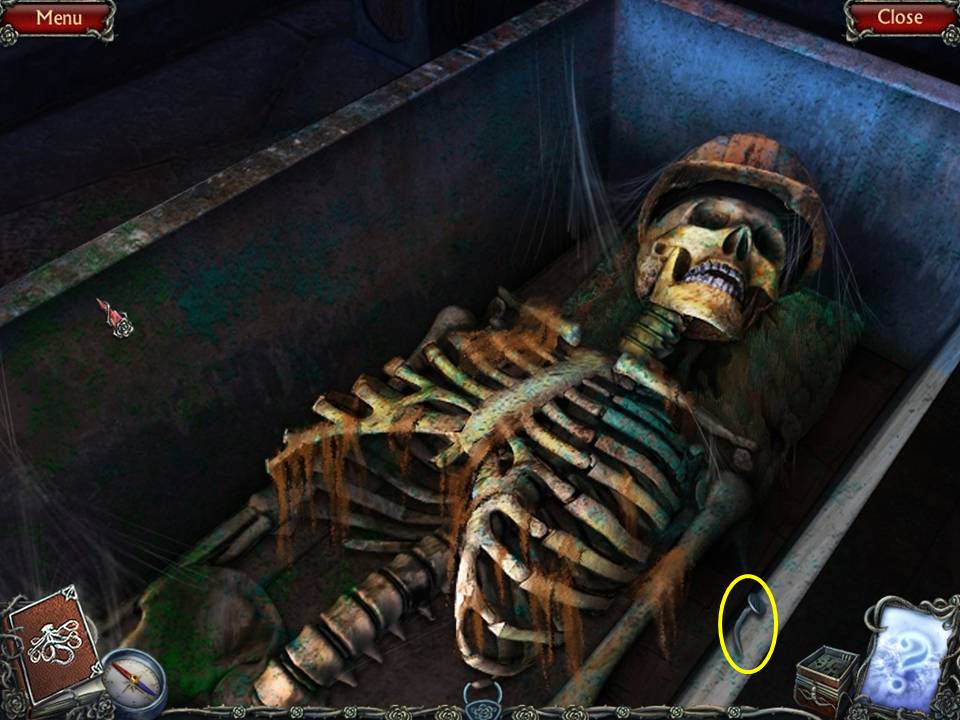
When finished, enter the crypt.
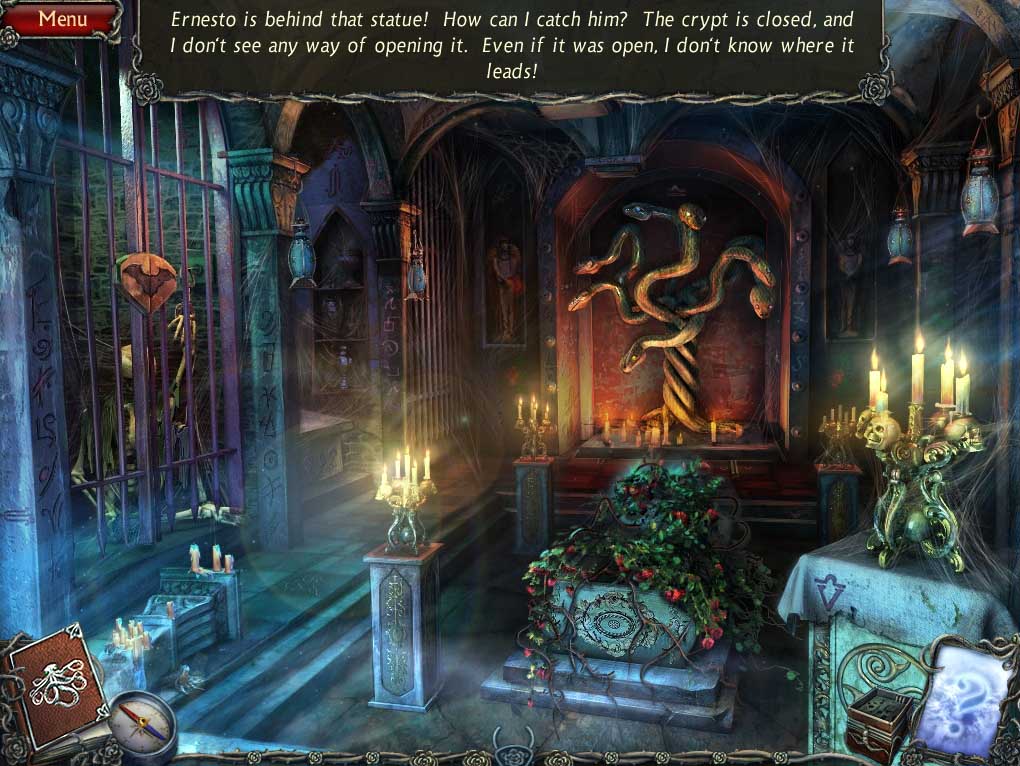
- Zoom into the casket.
- Take the WIND-UP KEY.
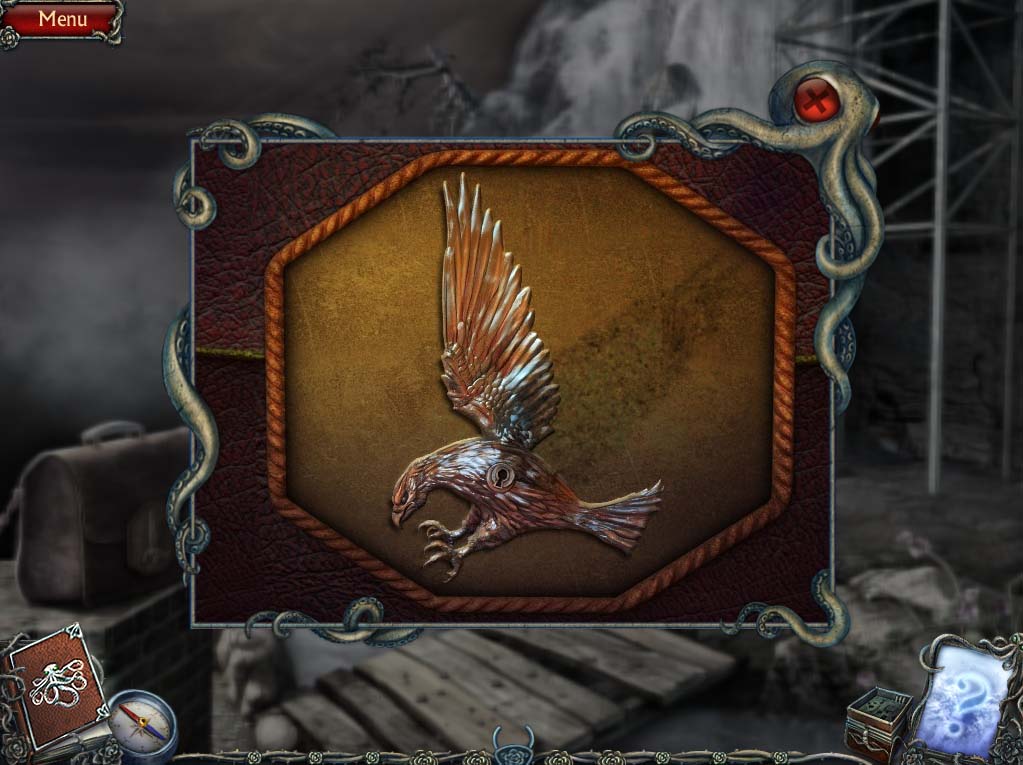
- Return outside and zoom into the statue to the right.
- Insert the WIND-UP KEY in the music box.
- Take the BAT.
- Read the note.
-
Return to the crypt.
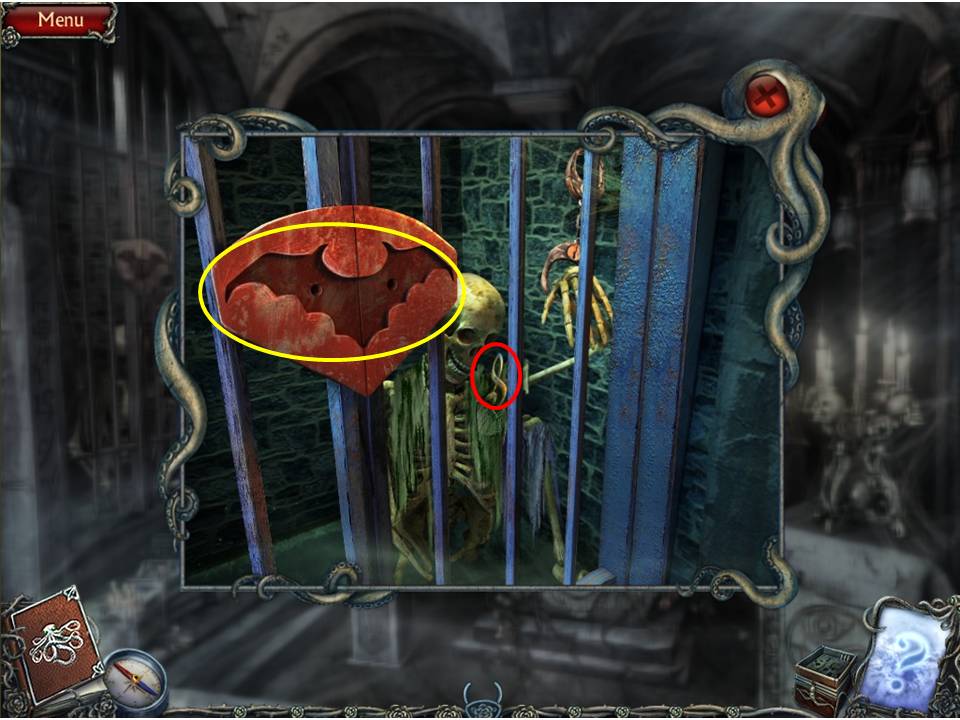
- Zoom into the cell at left.
- Place the BAT in the slot.
-
Take the TREBLE CLEF sitting on the skeleton’s shoulder.
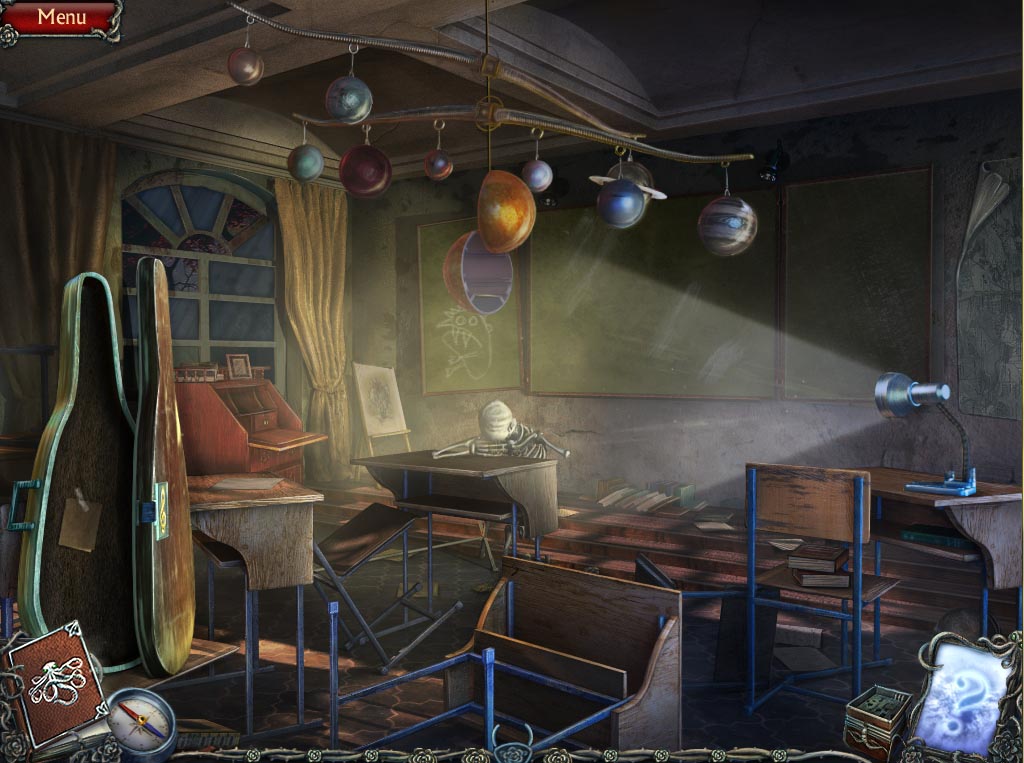
- Return to the schoolhouse.
- Place the TREBLE CLEF in the matching niche on the large instrument case on the left.
- Take the MIRROR.
-
Read the note.

- Return to the cemetery.
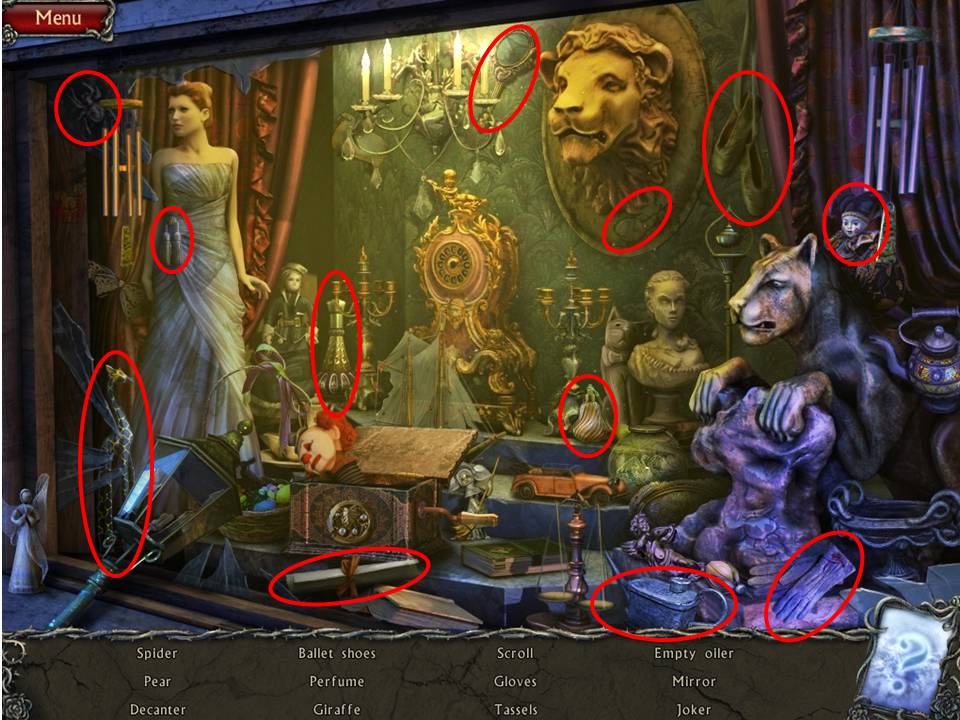
- Play the HOA puzzle and find the items listed.
-
Receive the SKELETON.
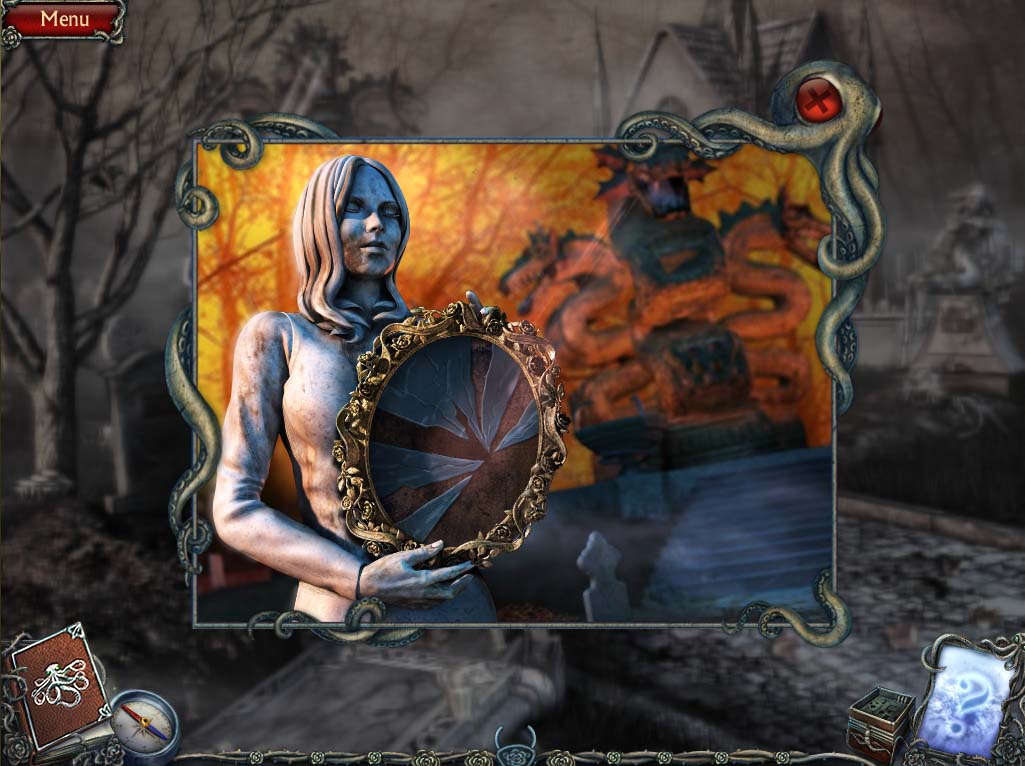
- Zoom into the statue with the broken mirror.
- Replace it with the MIRROR.
-
Return to the crypt.
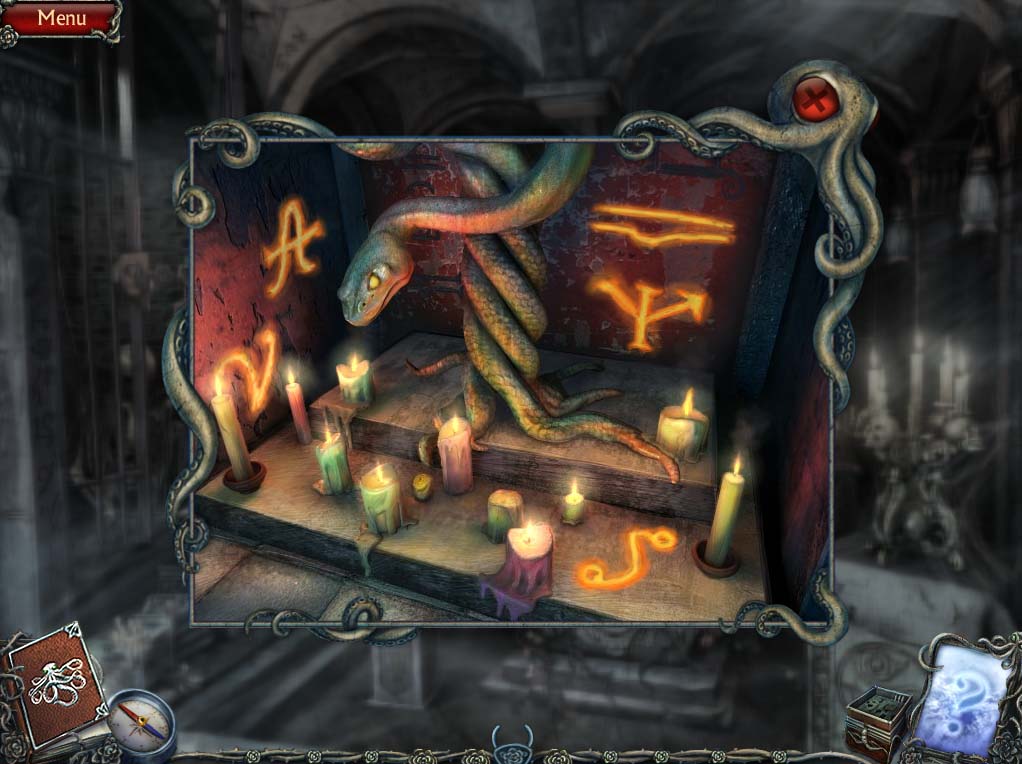
- Zoom into the codes on the altar.
- Zoom into the coffin.
- Place the SKELETON into the niche.
- Zoom into the coffin again.
-
Click the triangle to initiate a mini-game.
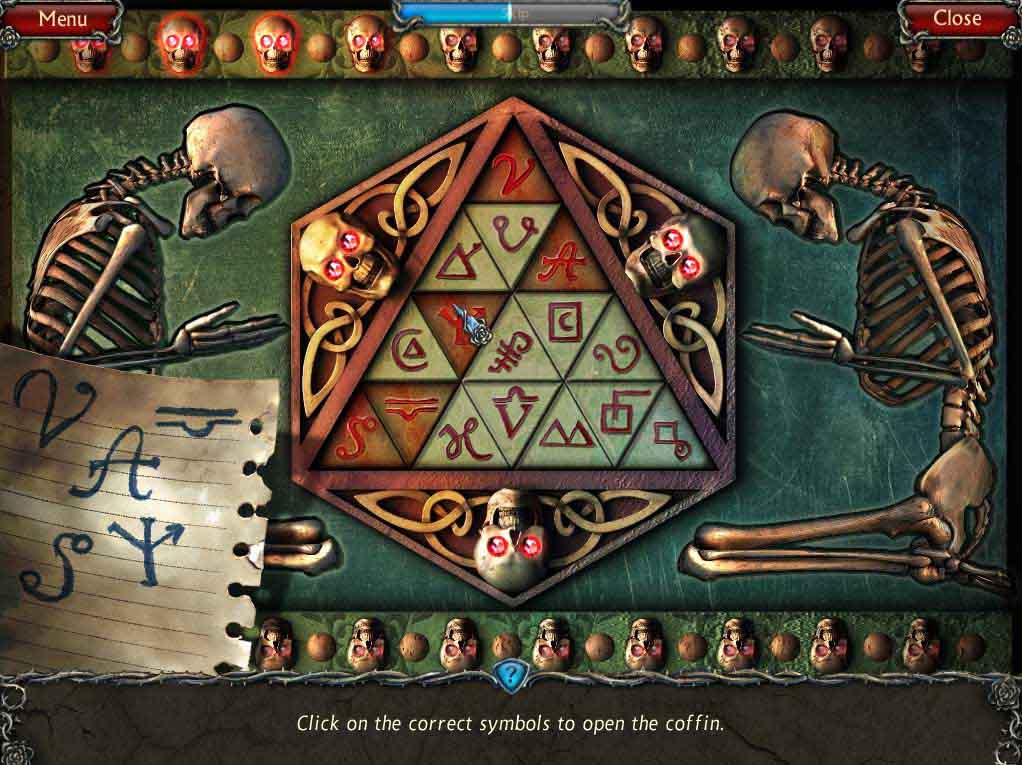
- The object of the game is to simply unlock it by inserting the symbols seen on the alter.
- See screenshot for solution.
-
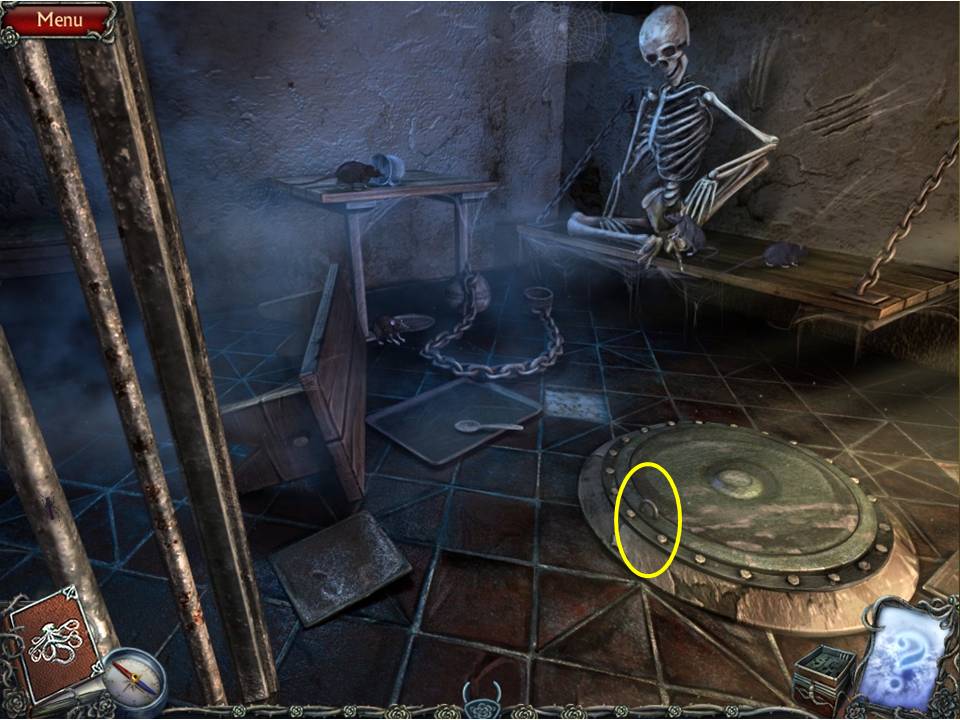
Zoom into the coffin once unlocked and take the WRENCH and 2 COINS.
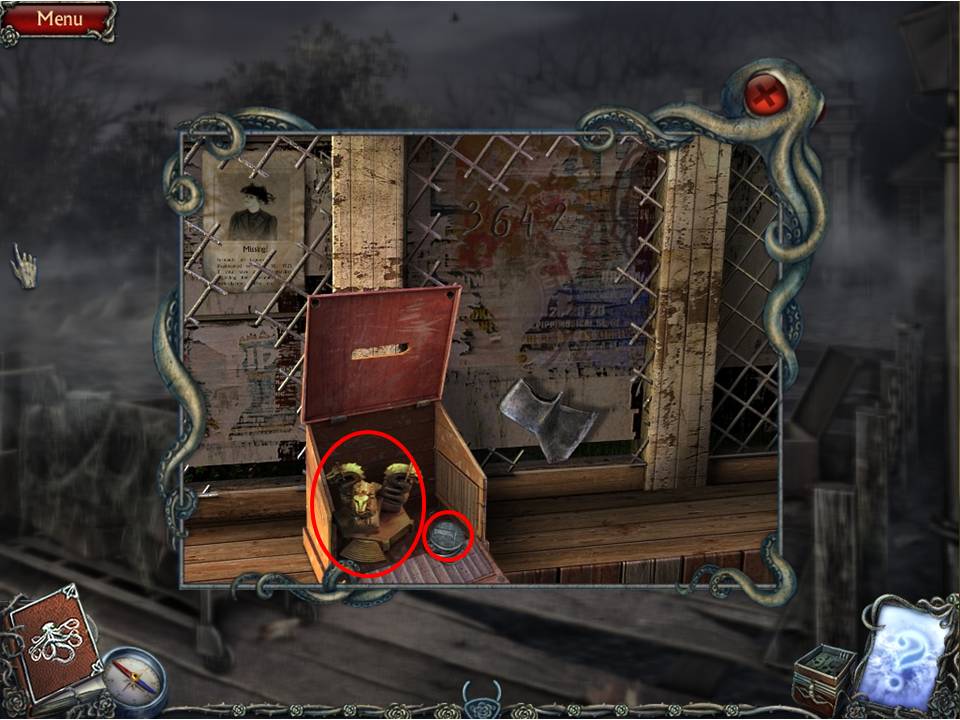
- Return to the dock.
- Zoom into the stand. Remove the bolts with the WRENCH.
- Take the 3 COINS and SNAKE STATUE.
-
Put the SNAKE STATUE on the board to initiate the next puzzle.
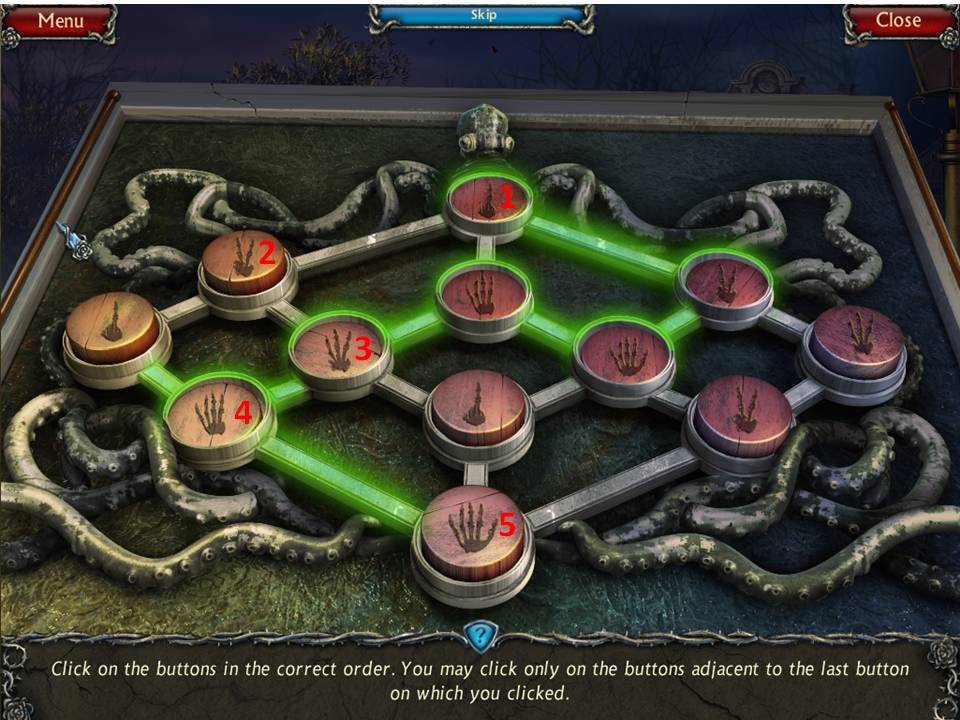
- The object of the puzzle is to click the buttons in order (1, 2, 3, 4, 5) to get across, according to the number of fingers.
- See screenshot for solution.
-
Take the COIN.
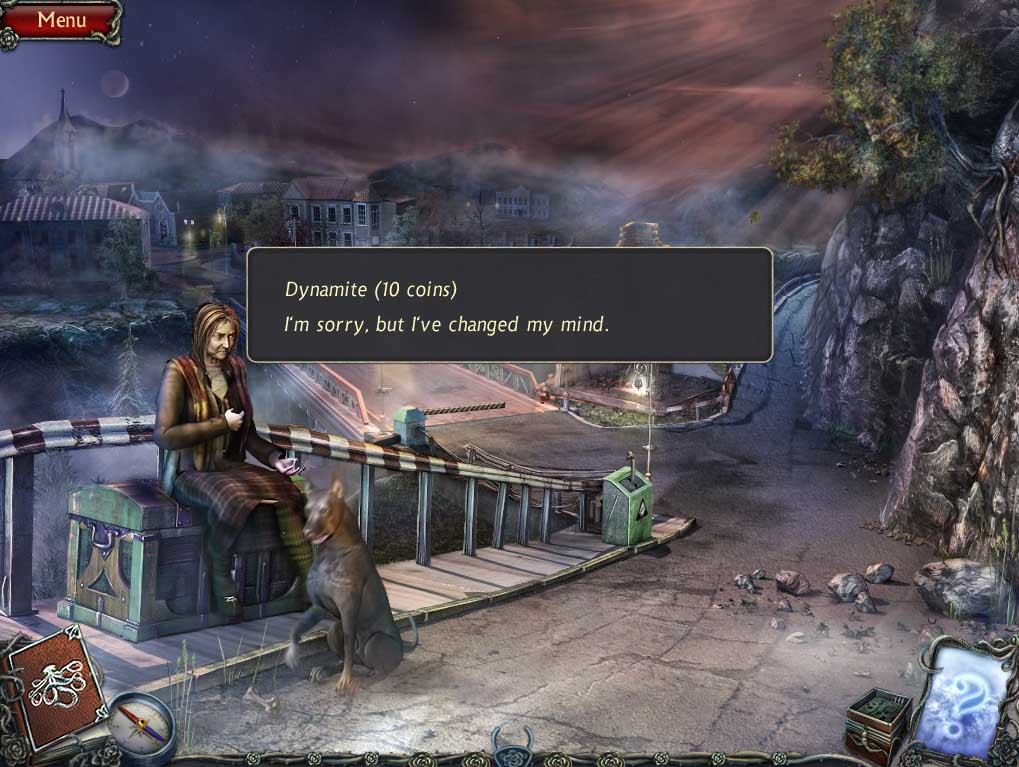
- Pay another visit to the woman at the fork in the road.
-
Buy the DYNAMITE for 10 COINS.
- Return to the crypt.
- Zoom into the altar.
- Place the DYNAMITE on it.
-
Exit and return to dragon statue to initiate the next HOA puzzle.
- Find the items listed.
- Open the casket to get the TONGS.
-
Return to the crypt.
- Zoom into the coffin.
- Pull the BENT NAIL with the TONGS.
- Zoom into the cell.
- Use the BENT NAIL on the HANDCUFFS.
- Exit to the church and talk to the monk.
-
Talk about doom and gloom – five minutes with this guy and you feel like slashing your wrists!
- Return to the police station and initiate the HOA in the nearby window.
- Find the items listed.
-
Receive the EMPTY OILER.
- Enter the jail cell in the police station.
- Use the HANDCUFFS on the hatch.
-
Take the WING and AXE HANDLE.
- Return across the bridge and head up the path to the elevator.
- Zoom in on the leather bag and place the WING on it.
-
Take the TAP inside and read the note.
- Return to the dock.
- Play the HOA puzzle.
- Find the items listed.
-
Receive the CRESCENT MOON.
- Zoom into the stand.
- Place the AXE HANDLE on the axe head to get the AXE.
-
Return to the outside of the police station.
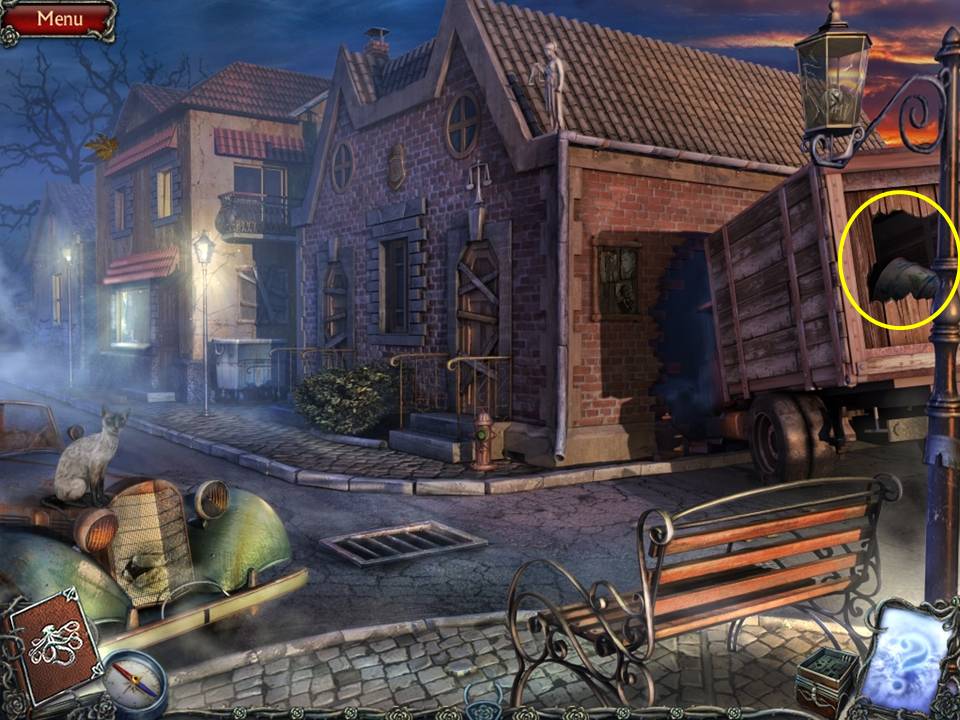
- Use the AXE on the back of the truck.
- Zoom into the truck.
- Take the CROSS.
- Put the EMPTY OILER down.
- TAP the spout.
-
Turn the tap and take the FULL OILER.
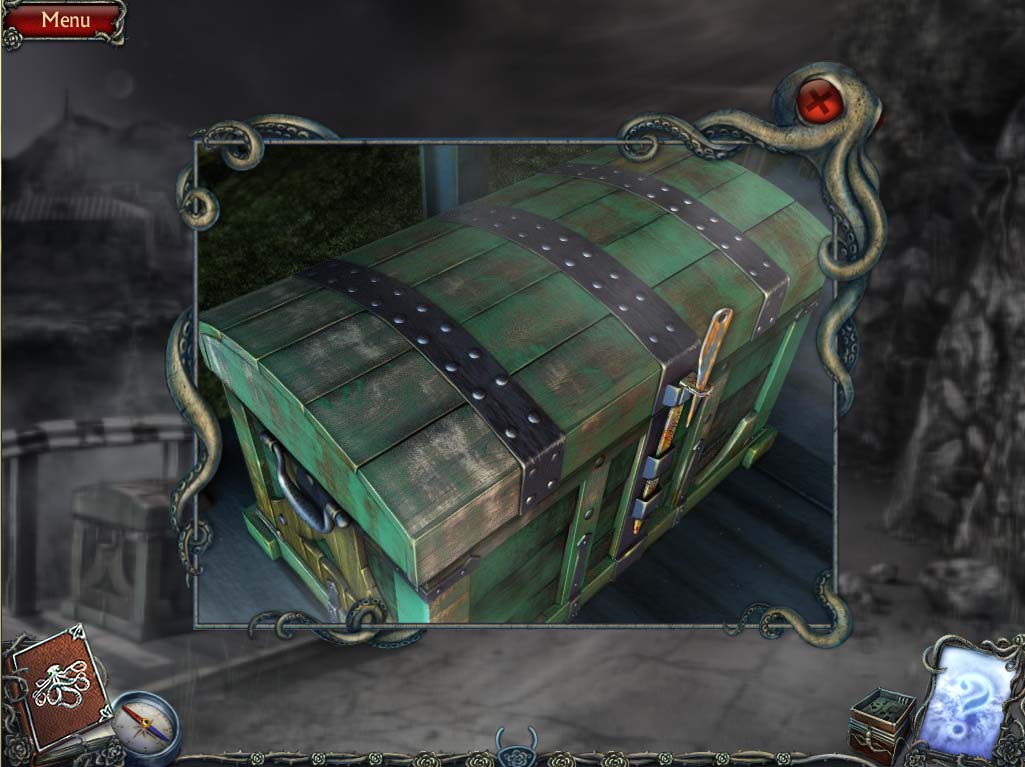
- Return back across the bridge and inspect the green trunk where the old woman sat.
- Remove the pin.
- Use the FULL OILER on the lock.
- Click the trunk.
- Take the ROYAL FAMILY and put them on the board when it appears.
- Return to the trunk.
- Take the MATCHES to light the lantern.
- Take the LANTERN - guess this stuff must have been a freebie from the old woman?
-
Return to the cemetery.
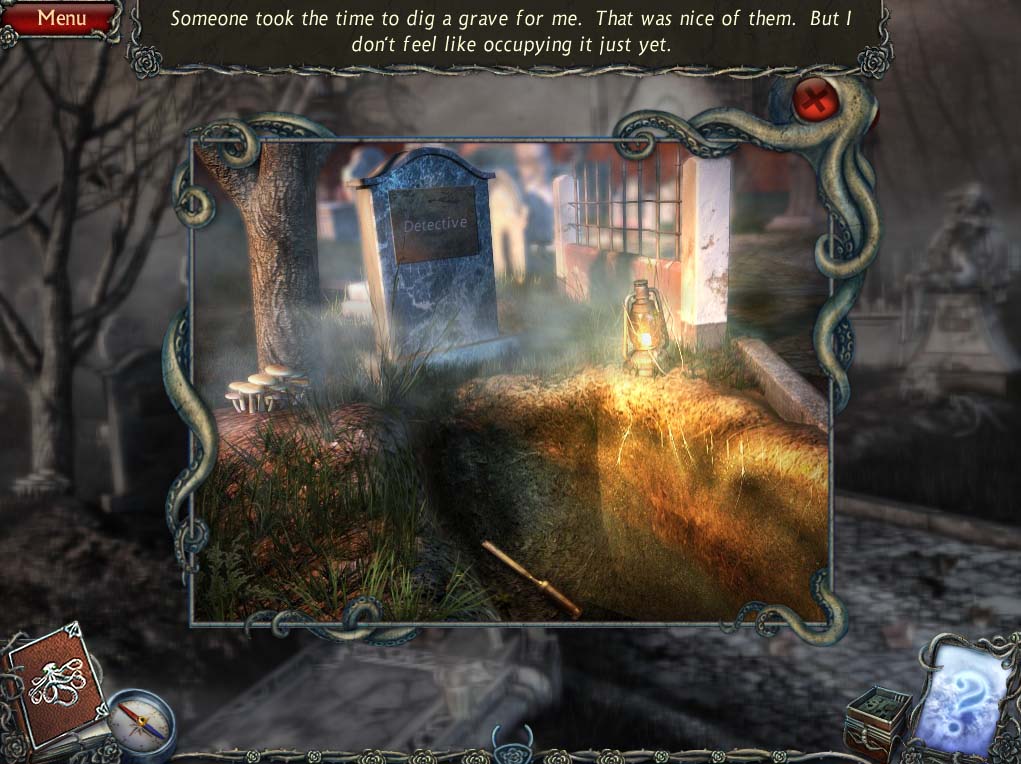
- Zoom into the grave.
- Place the LANTERN in it.
-
Take the CHISEL.
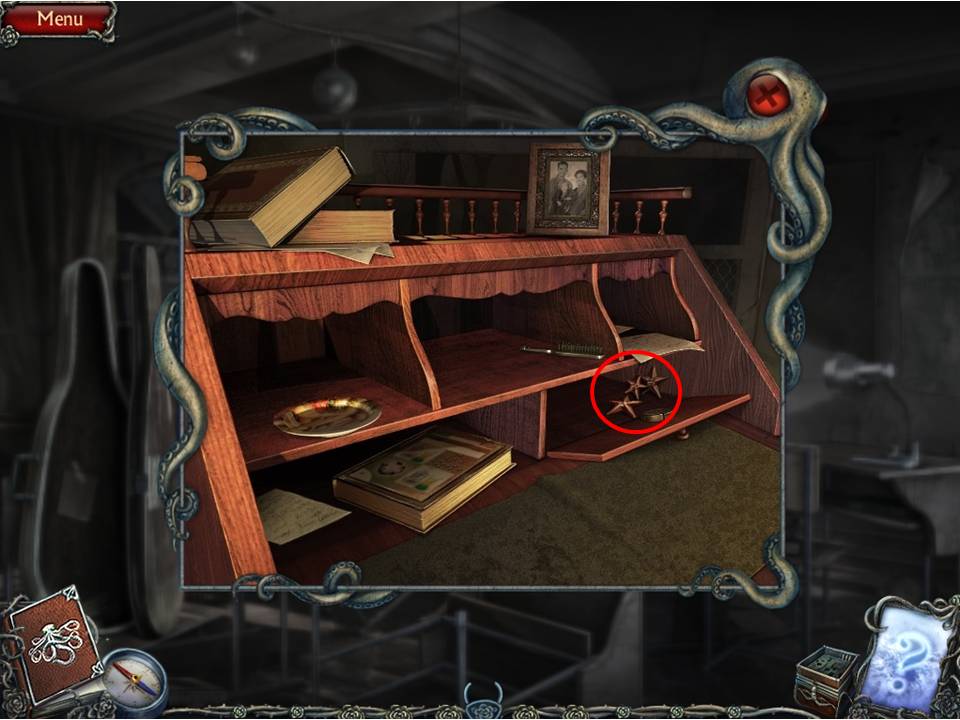
- Return to the schoolhouse.
- Zoom into the desk.
- CHISEL the lock.
-
Take the STARS.
- Return to the statues near the dock area.
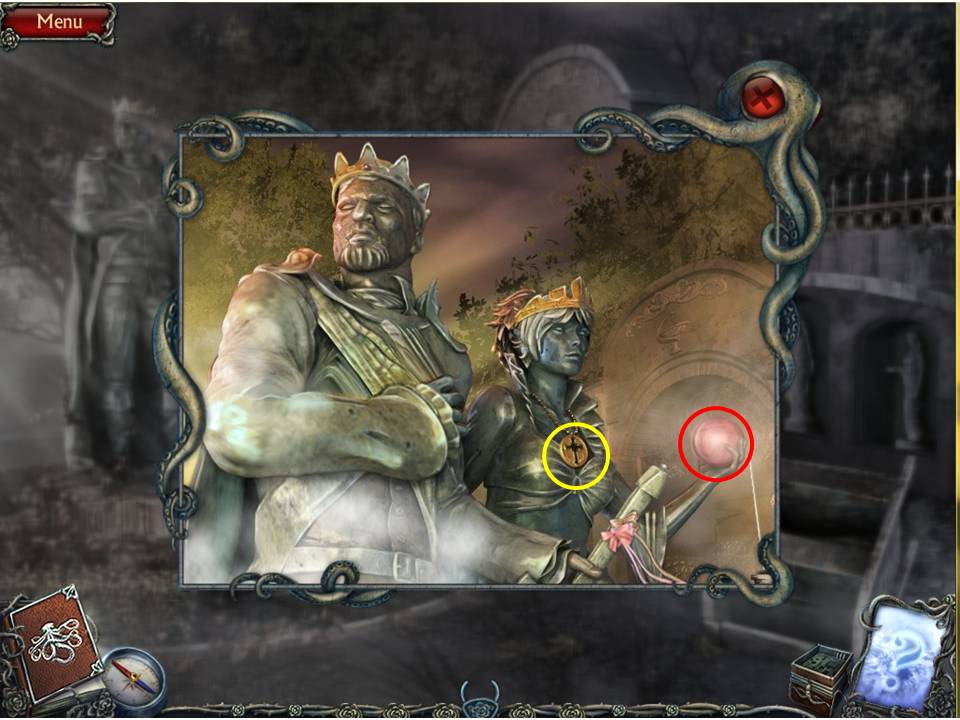
- Zoom into the queen’s pendant.
- Place the CROSS on the pendant.
- Take the STONE SPHERE.
-
Return to Main Street.
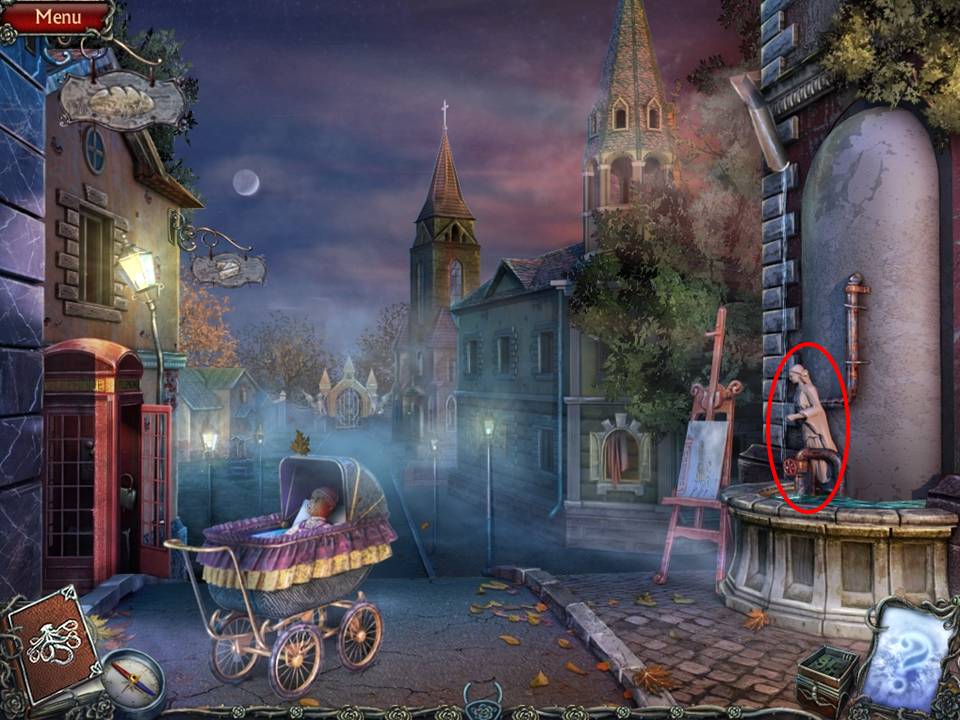
- Place the STONE SPHERE into the statue’s hand on the right.
- Take the STATUE that appears.
-
Return to the hospital gate.
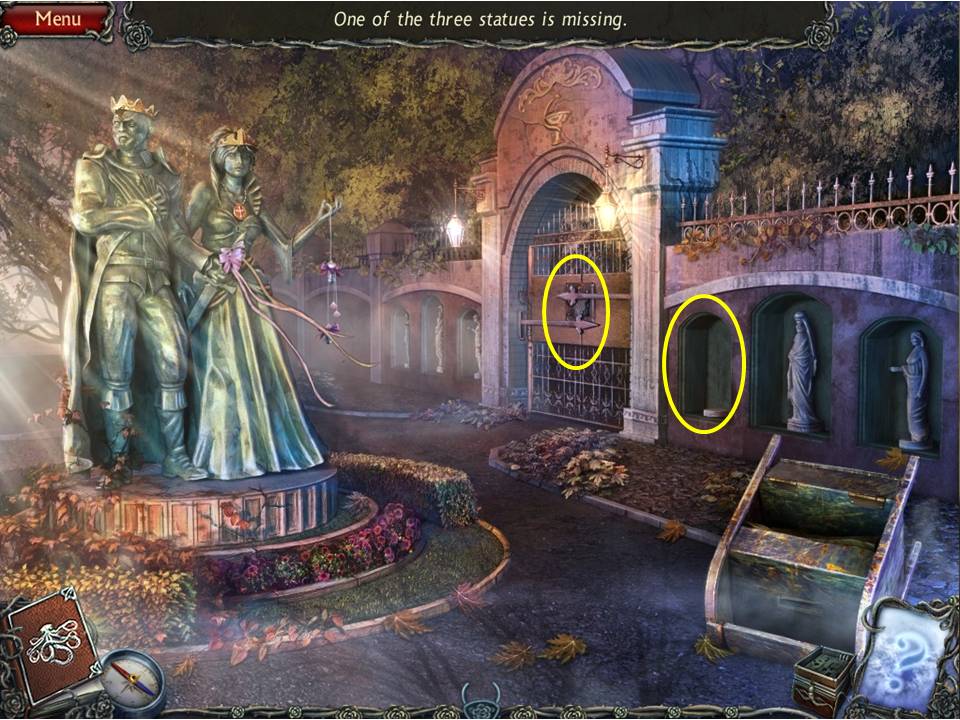
- Place STATUE in the space.
- Zoom into the gate.
- Take the SUN by the waist of the figure on the left.
-
Return to the dock.

- Zoom into the box.
- Zoom into the book.
- Place the CRESCENT MOON, STARS, and SUN on the book.
- Take the CADUCEUS.
- Read the note below it.
- Go left.
- Zoom into the gate.
-
Place the CADUCEUS on it to initiate a puzzle.
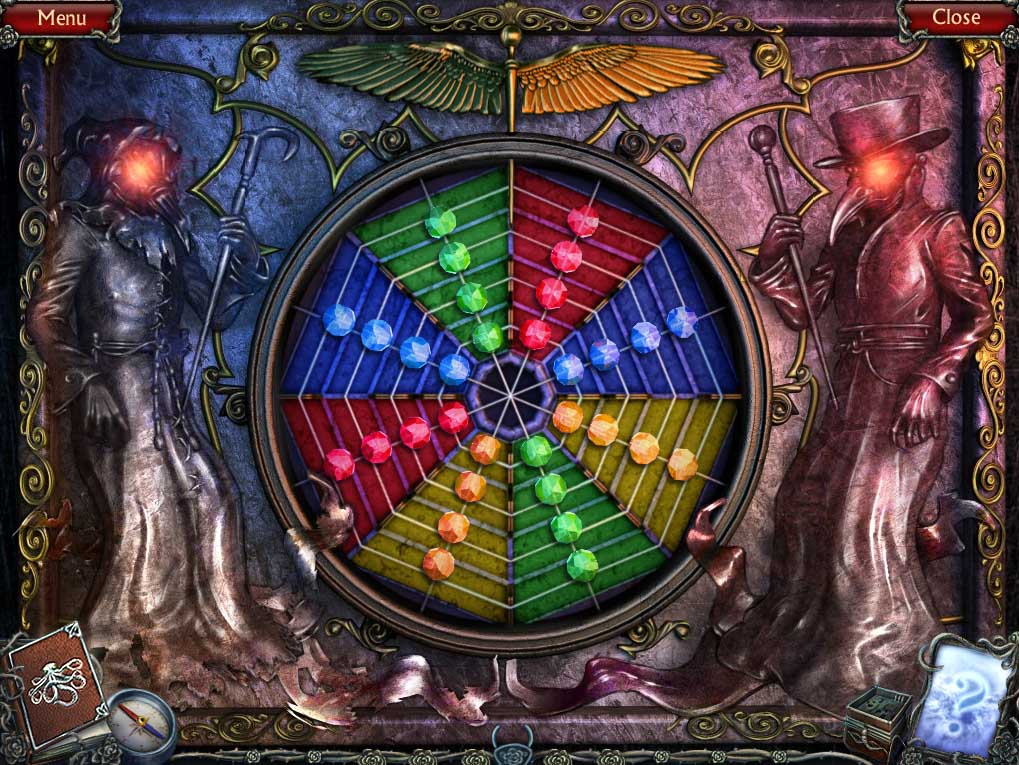
- The object of the puzzle is to move the gems into their matching spots.
- Click a gem to move it to an empty spot, either in the middle, or in between the lines until all gems are on their matching backgrounds.
- See screenshot for solution.
- This puzzle is a little tedious, but the key is to build up the lines in a group to one side and add to it on either side until there are only two lines left to sort out. Once complete go through the gate.
- Click “need to hurry” - you think!! With 100 zombie-like creatures breathing down your neck?
- You will be taken to the doctor’s house.
General Info and Tips
Chapter 1: Fork in the Road
Chapter 2: The Town
Chapter 3: The Cemetery
Chapter 4: The Hospital
Chapter 5: The Mansion
Chapter 6: The Greenhouse
Ask for help in the comments below!
Chapter 1: Fork in the Road
Chapter 2: The Town
Chapter 3: The Cemetery
Chapter 4: The Hospital
Chapter 5: The Mansion
Chapter 6: The Greenhouse
Ask for help in the comments below!