
Twisted Lands: Origin: Chapter 4: The Hospital
Our Twisted Lands Origin Walkthrough will guide you through this stunning prequel to the Twisted games. Join the detective as your search for the missing Theresa, the daughter of your friend, quickly goes from bad to worse. We've made sure to include tons of screenshots with key areas and items marked clearly as well as step-by-step instructions on what to do from the moment you find yourself seasick and stuck by yourself on a ship being tossed by the elements off the shore of the island of Tormente.
General Info and Tips
Chapter 1: Fork in the Road
Chapter 2: The Town
Chapter 3: The Cemetery
Chapter 4: The Hospital
Chapter 5: The Mansion
Chapter 6: The Greenhouse
Ask for help in the comments below!
Chapter 1: Fork in the Road
Chapter 2: The Town
Chapter 3: The Cemetery
Chapter 4: The Hospital
Chapter 5: The Mansion
Chapter 6: The Greenhouse
Ask for help in the comments below!
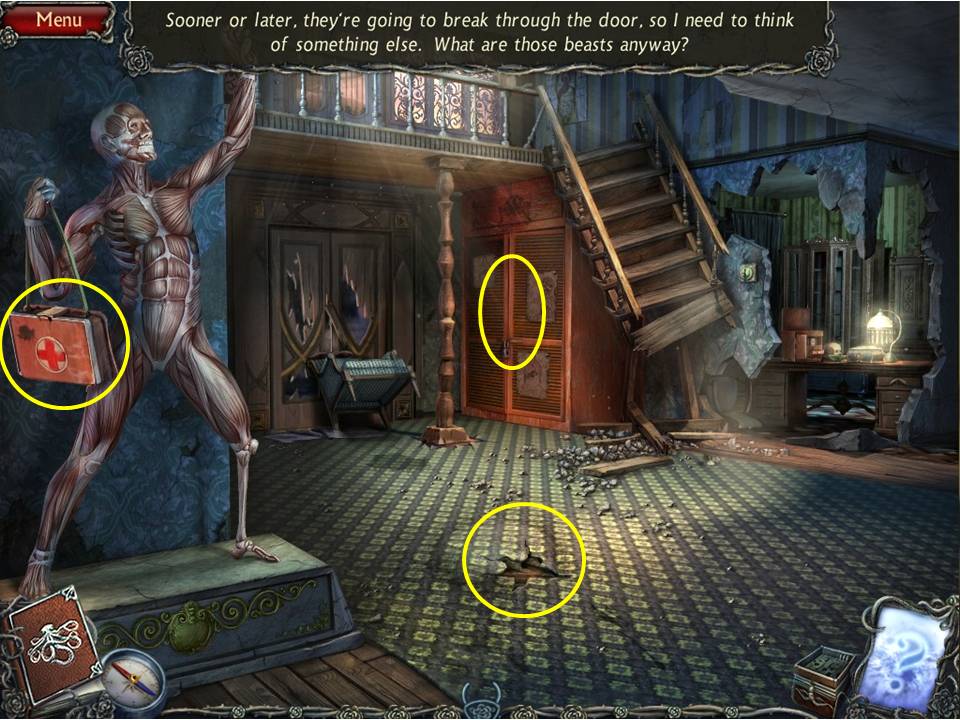
- Open the first aid kit.
- Take the SCISSORS.
- Zoom into and cut the carpet with the SCISSORS.
- Take the CLOSET KEY.
- Zoom into and open the closet with the CLOSET KEY.
- Open the curtain.
-
Take the GLASS EYE and the MEDICAL CROSS.
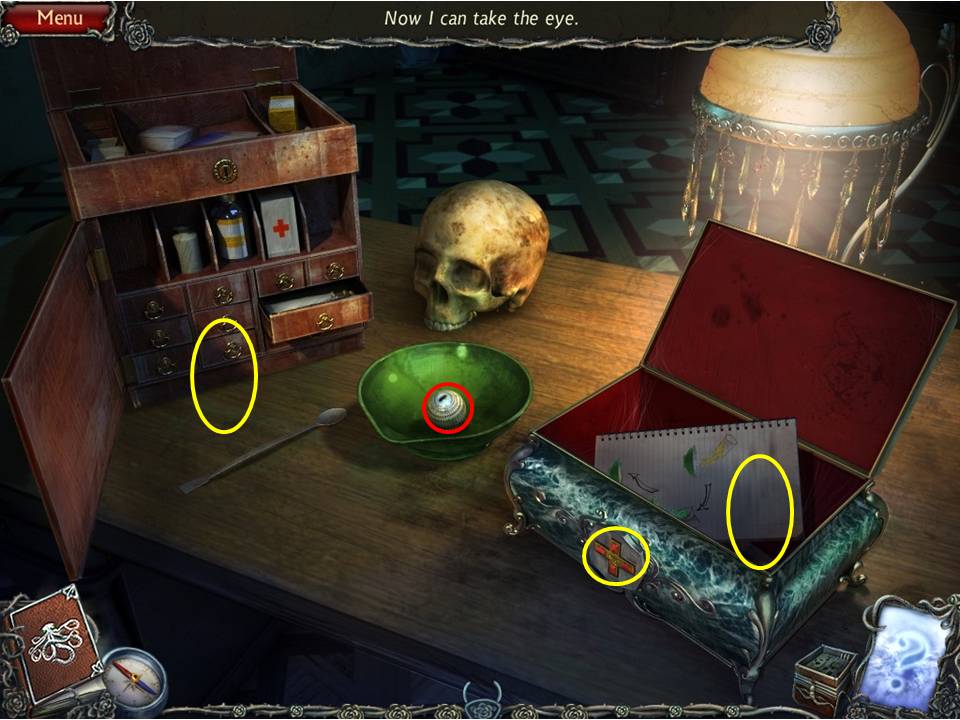
- Zoom into the desk.
- Take the YELLOW POWDER.
- Put the MEDICAL CROSS in the slot.
- Take the GREEN POWDER.
- Read the note.
- Place the YELLOW POWDER and the GREEN POWDER in the bowl.
- Take the second GLASS EYE.
- Zoom out of the desk and into the puzzle on the carpet.
-
Place the two GLASS EYES in the slots to initiate.
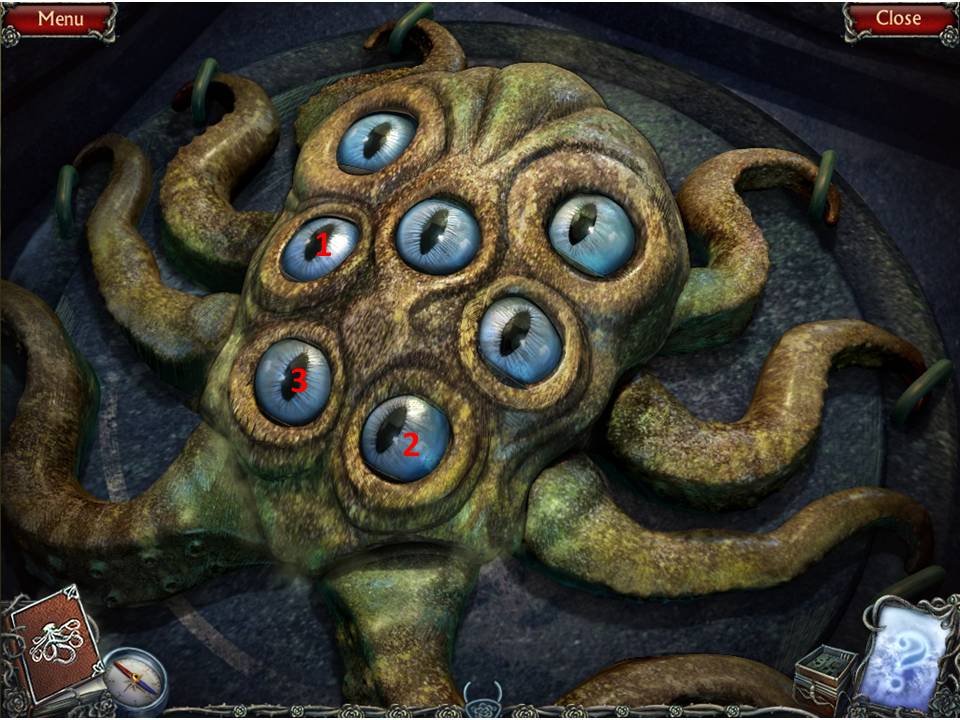
- The object of the puzzle is to click on the eyes until all are open.
- Click the eyes as indicated on the screenshot.
- Go down the hatch.
-
Turn left and follow the passage to the end until you reach the colonnade.
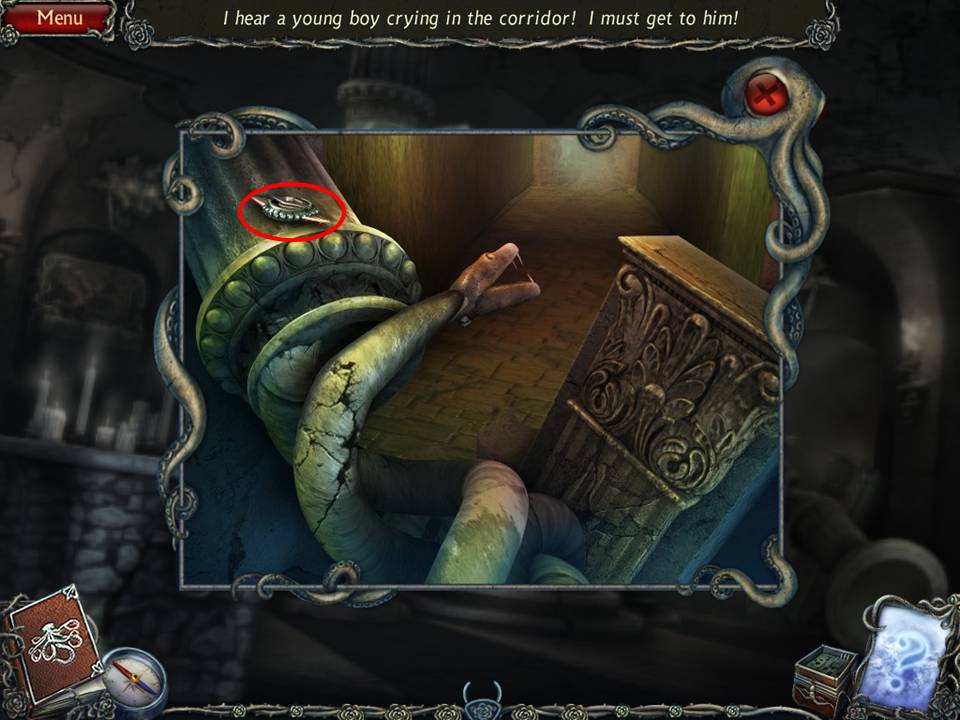
- Zoom into the fallen column at right.
- Take the KNOB.
-
Zoom back and initiate the HOA puzzle to the left.

- Find the items listed.
-
Receive the WRENCH.

- Return to the main passage and go through the doorway on the right.
- Zoom into the hatch above the ladder.
-
Place the KNOB on the hatch to initiate a puzzle.
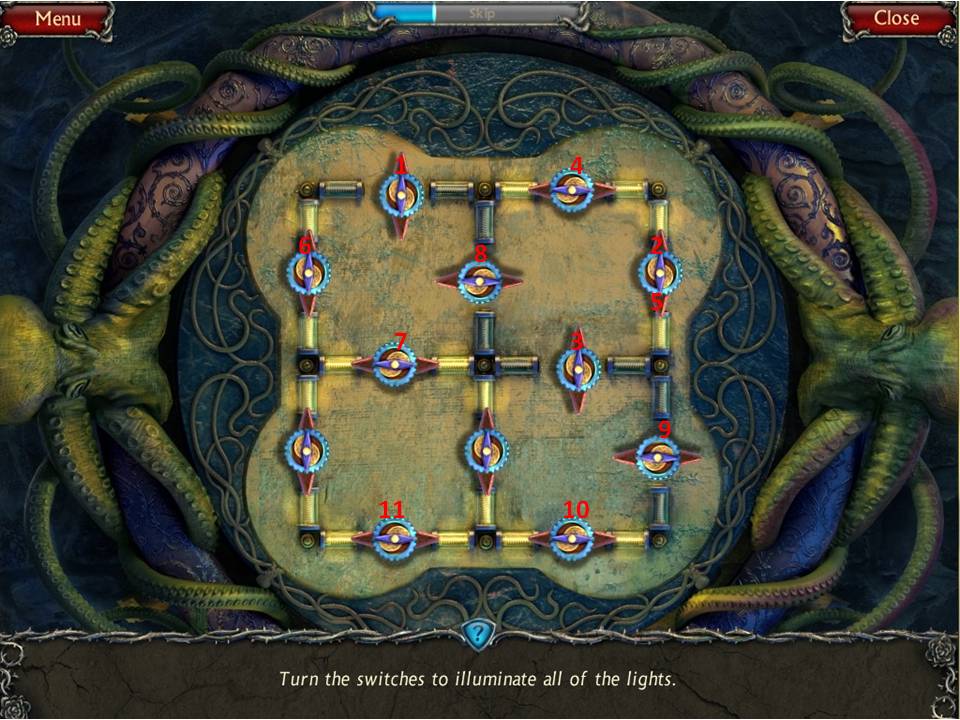
- The object of the puzzle is to turn the switches to illuminate all the lights.
- Note the screenshot and the numbers, which indicate the sequence with which you have to press each switch.
- When complete the hatch will open.
-
Proceed up and out into the hospital yard.
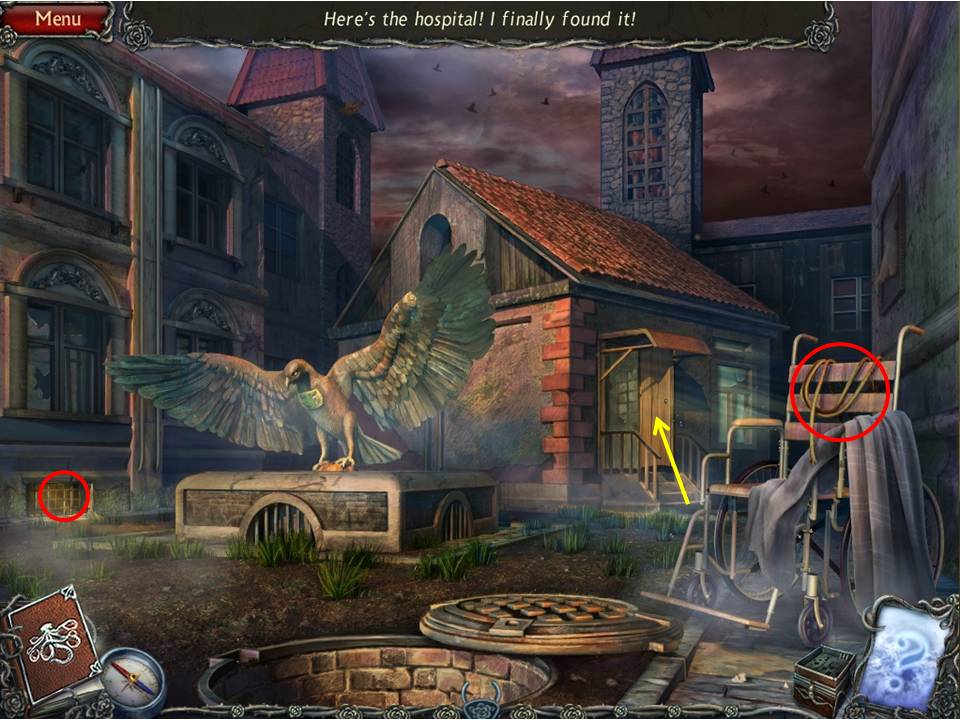
- Take the ROPE hanging on the wheelchair.
- Zoom into the grate.
- Take the GREEK LETTER.
-
Proceed up the steps and into the procedure room.
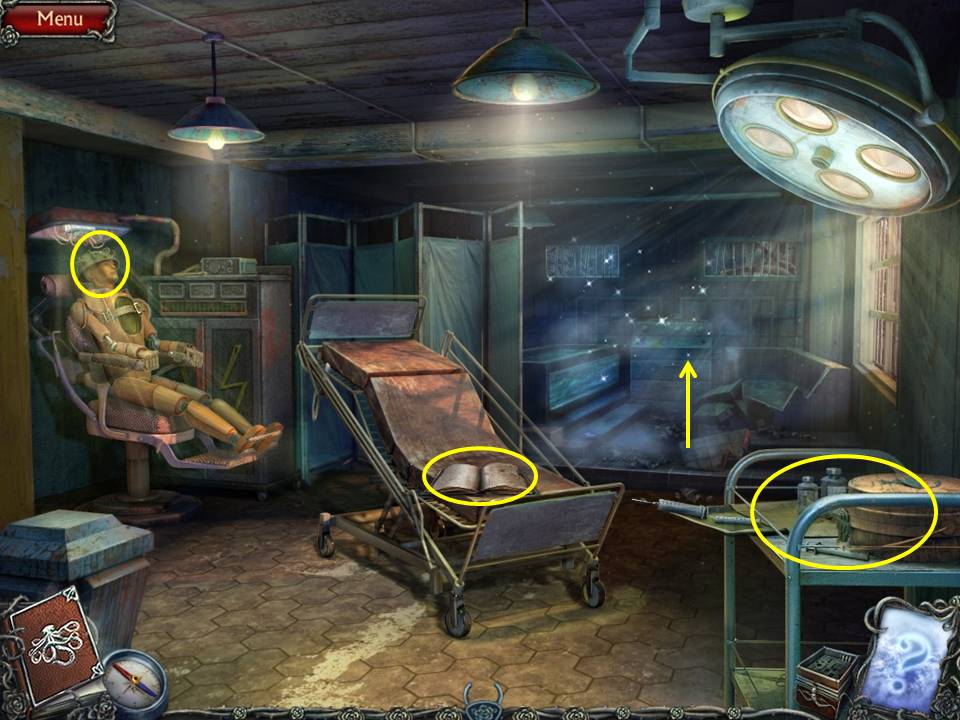
- Zoom into the book.
- Turn the pages.
- Zoom into the tray table.
- Place the Greek LETTER in the slot.
- Take the SULFURIC ACID.
- Take the OCTOPUS and put it in the case.
- Zoom into the dummy.
- Loosen the bolts on the helmet with the WRENCH and remove it.
- Take the VALVE HANDLE inside the head – getting weird, or is it just me?
-
Zoom into the HOA in the background to initiate it.
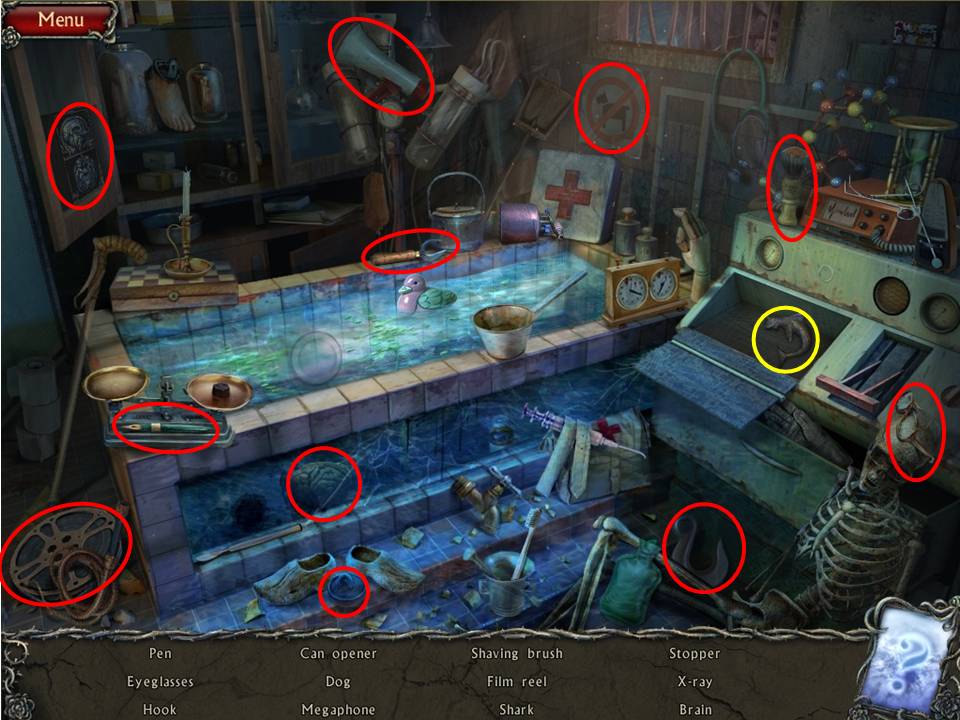
- Find the items listed.
-
Pull the lever to get the SHARK.
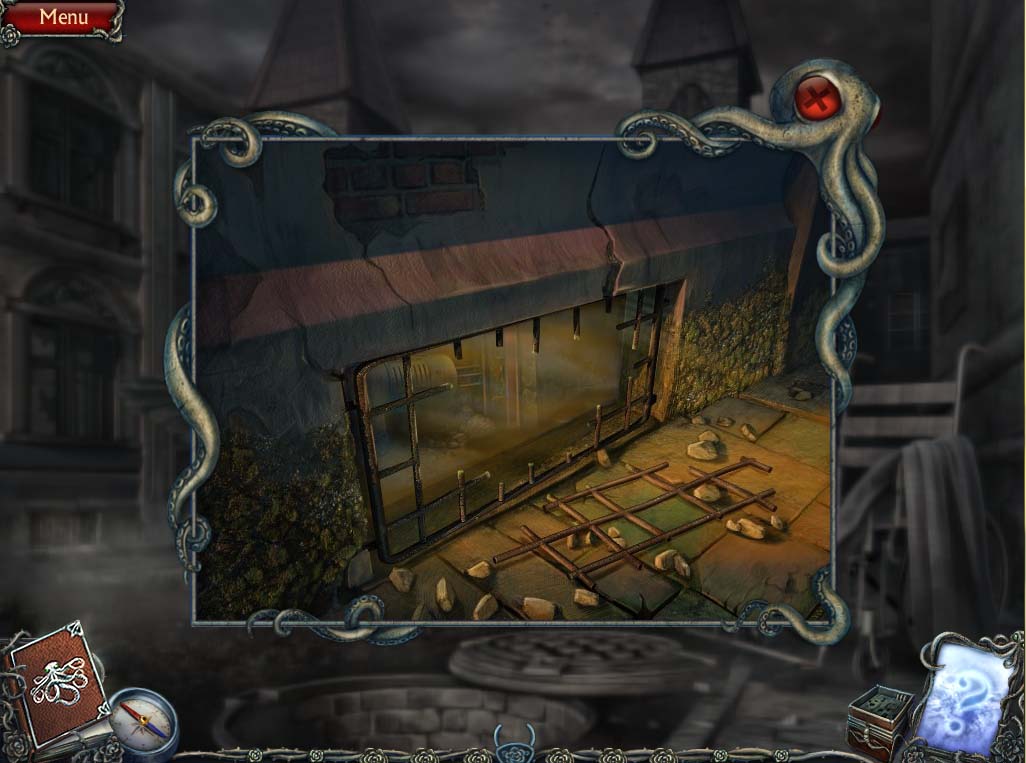
- Zoom into the grate.
- Pour the SULFURIC ACID on the bars.
- Go through the window to access the basement and hope like heck that you don’t disembowel yourself on the jagged sections of bar still sticking up.
-
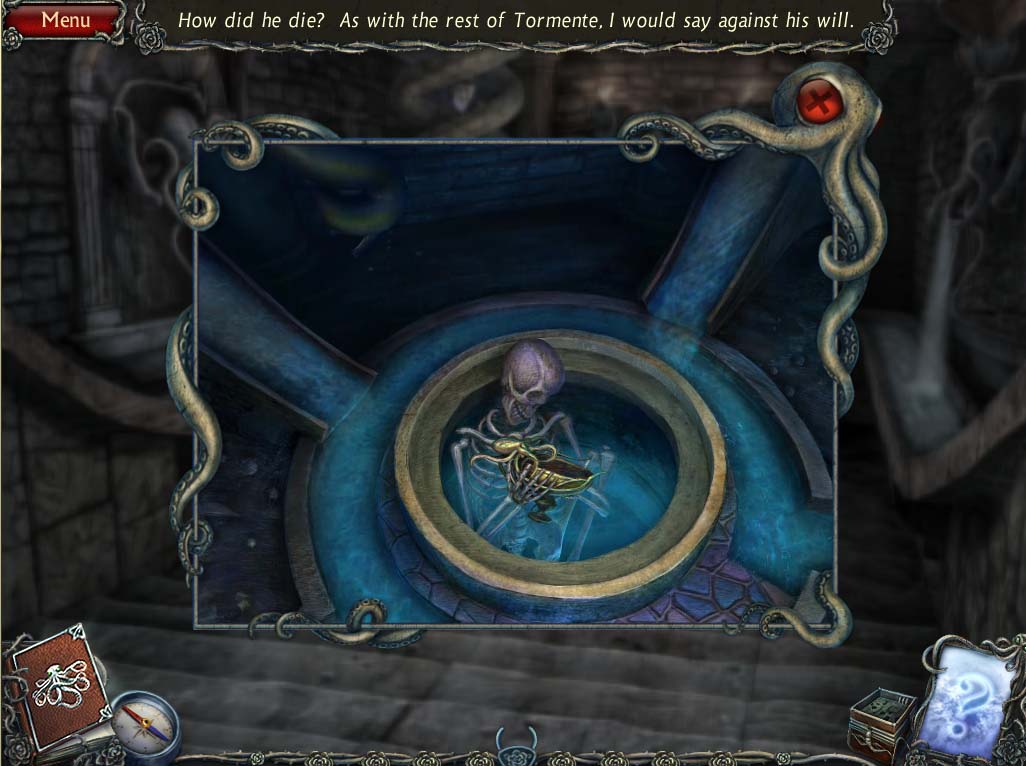
Take the steps on the right to reach the rose door room.
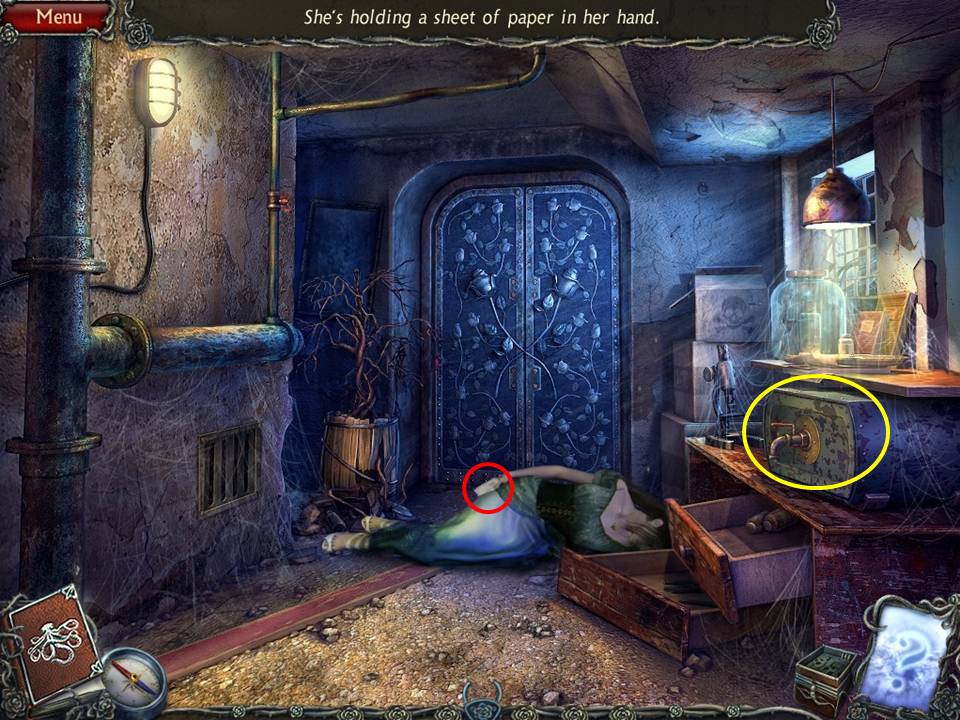
- Talk to Teresa.
- Read the instructions in her hand.
- Zoom into the device.
- Take the CADUCEUS and put it on the board when it appears.
- Exit to return to the scene at the hospital.
-
Retreat out through the hospital yard, back down the hatchway, and proceed to the colonnade via the left doorway in the tunnel.
- Zoom into the fallen column at right.
- Place the ROPE around it.
- Zoom into the mechanism.
- Place the SHARK on the board.
- Pull the lever.
-
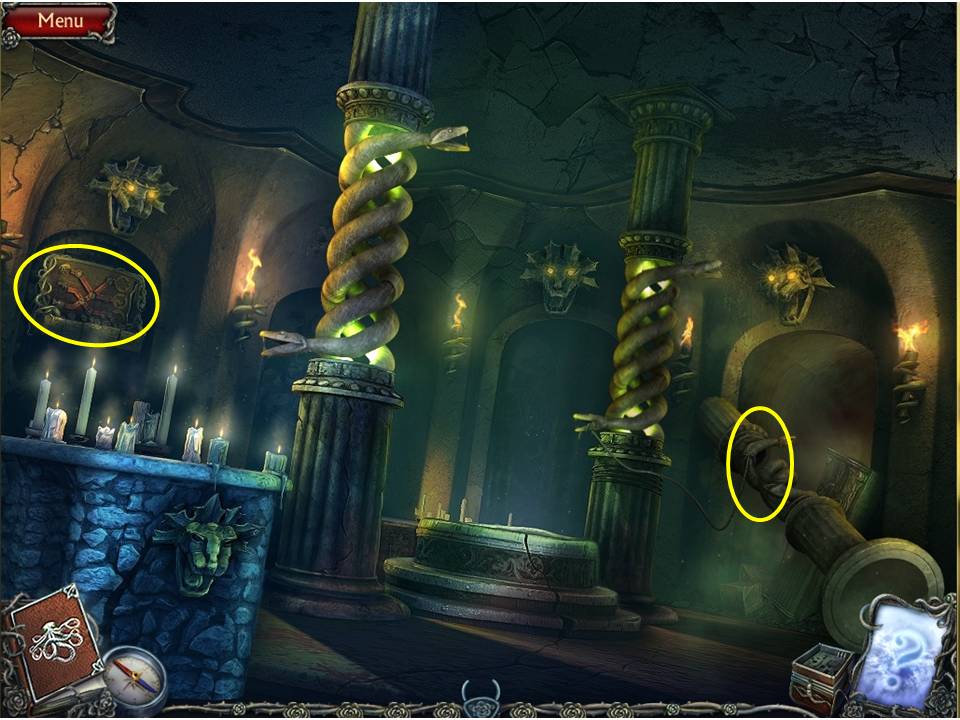
Go through the right door.
- Inspect the octopus water fountain to the left and take the METAL PLATE.
-
Zoom into the octopus at the centre of the room and take the POLICE STATION and place it on the board when it appears.
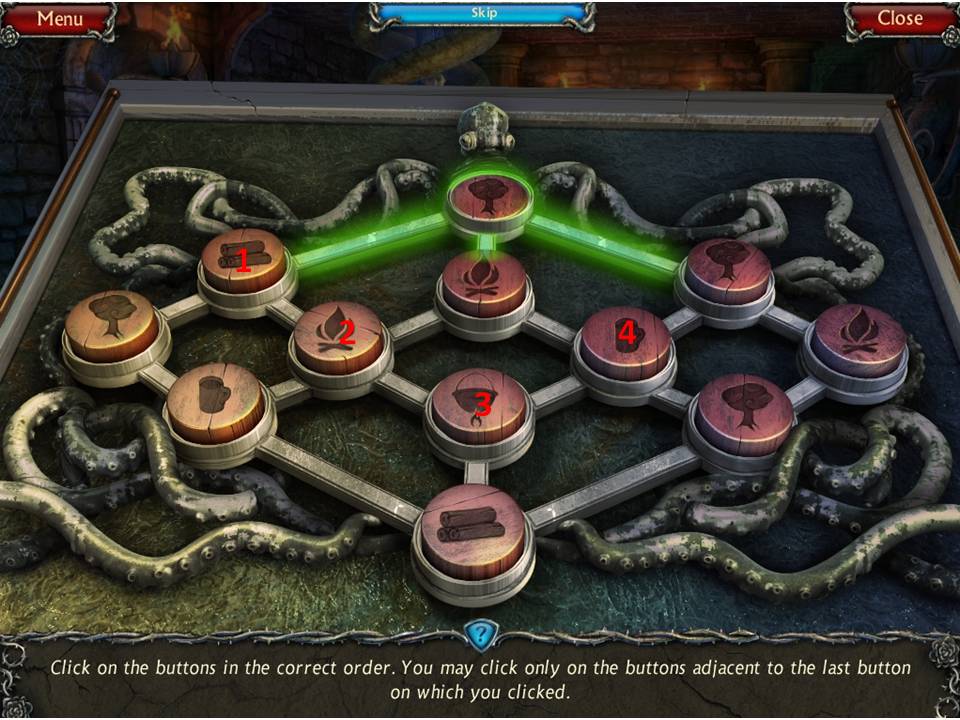
- The board will slide away again and reveal a similar button sequence puzzle as before.
- The idea is to press the buttons in the correct order to brew up some coffee – or is it tea? So what’s the natural sequence?
- From tree we go to firewood, then a fire, followed by a pot of boiling water, finishing off with a mug of hot brew.
- Note the screenshot for the solution.
-
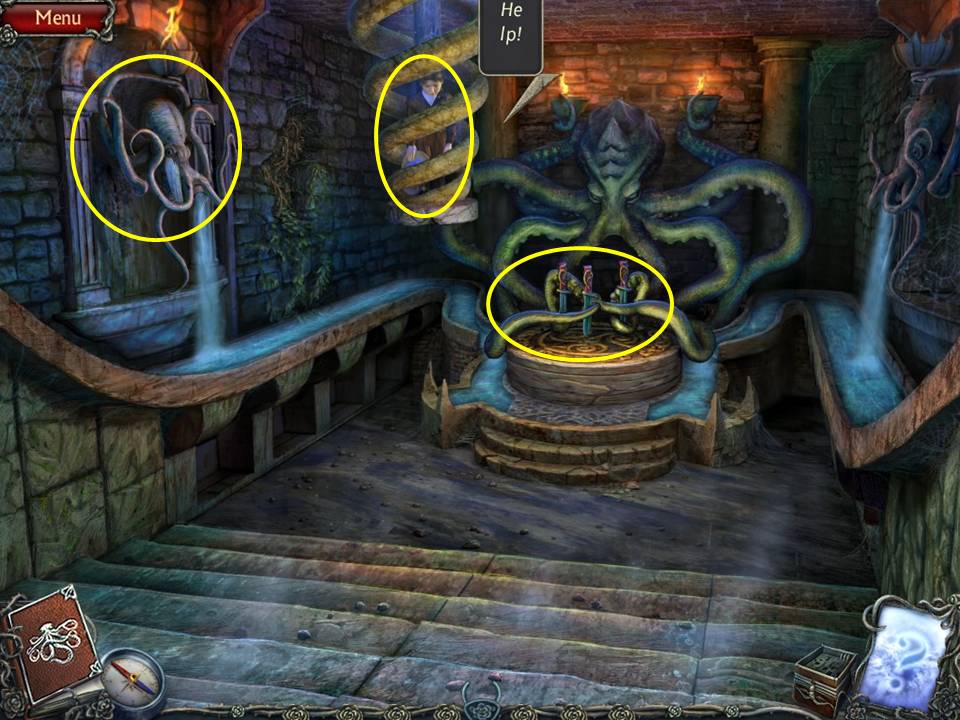
Take the DAGGER when complete.
- Note Ernesto trapped in the coils to the left.
- Talk to him and ask him some pertinent questions.
- Zoom into the mechanism again.
- Place the DAGGER on it and take the DIRTY BOWL.
- Zoom into the octopus on the wall to the left.
- Wash the DIRTY BOWL in the water to get a CLEAN BOWL.
-
Return to the room with the colonnade.
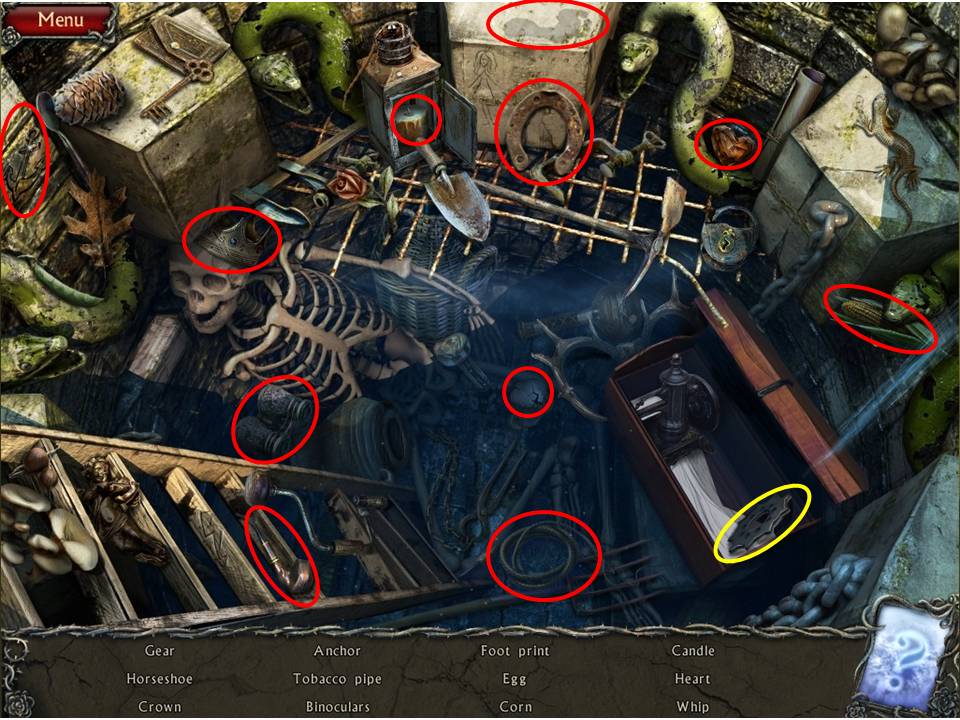
- Zoom into the area in the back of the room to initiate the next HOA puzzle.
- Find the items listed.
-
Open the trunk to get the GEAR.
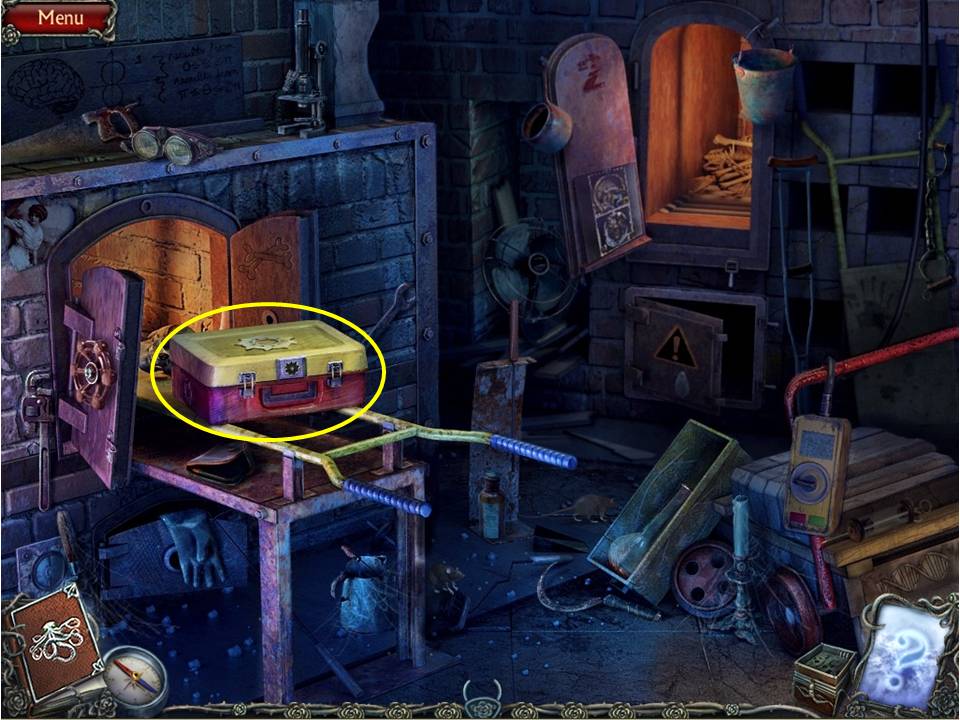
- Return to the yard via the hatch, and enter the hospital basement again via the grill.
- Enter the doorway beneath the light and zoom into the box.
- Place the GEAR in the lock.
- Take the SCREWDRIVER and REAGENT.
-
Return to the procedure room.

- Initiate the next HOA puzzle there.
- Find the items listed.
- Receive the BLOWTORCH.
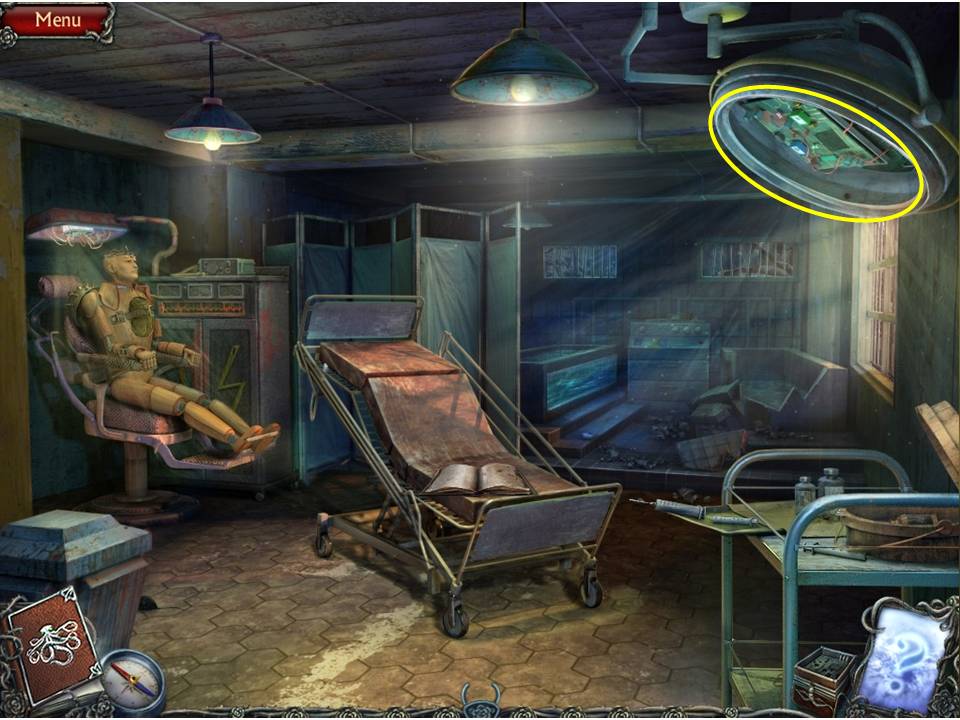
- Zoom into the light.
- Remove the cover.
- Unscrew the screw with the SCREWDRIVER.
- Take the MICROCHIP.
-
Return to the hospital basement.
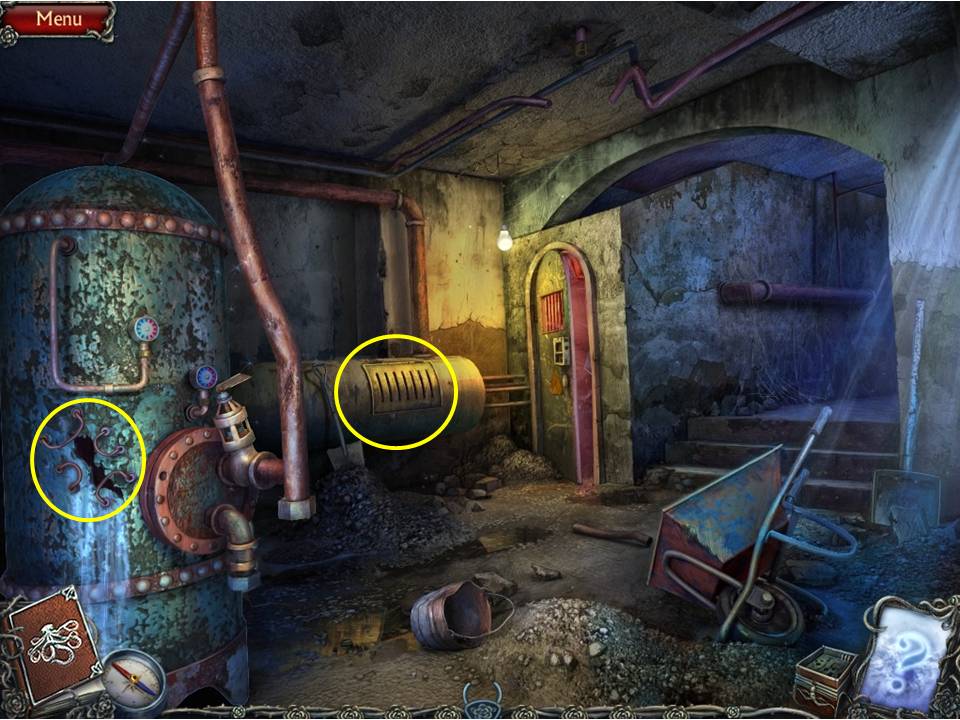
- Zoom into the boiler.
- Place the METAL PLATE on the brackets.
- BLOWTORCH that area.
- Zoom into the pipes.
- Remove the cover.
- Place the VALVE HANDLE on it.
- Turn the valves.
-
You will be transported to the rose door room.

- Zoom into the device.
- Put down the CLEAN BOWL.
- Turn the valve.
- Pour the REAGENT in the bowl.
- Take the BOWL OF LIQUID and pour it on the plant.
- Take the BIRD KEY from Teresa.
-
Return to the yard.
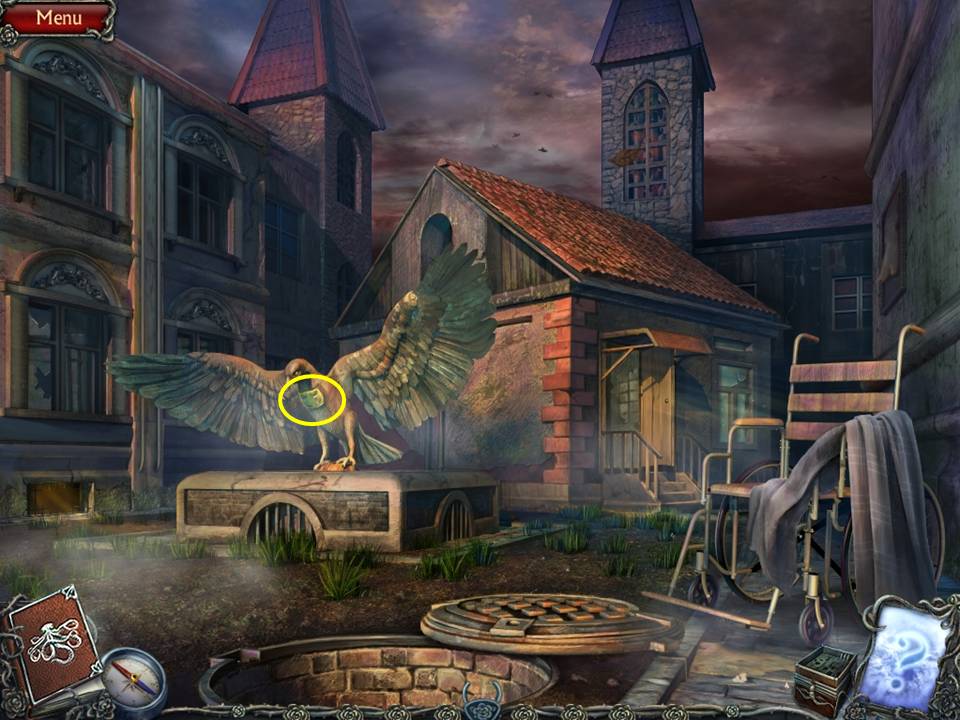
- Zoom into the eagle.
- Use the BIRD KEY in the lock.
- Zoom into the board.
- Place the MICROCHIP on it.
- Click on “need to hurry” when things get nasty again and return to the basement where a heartwarming scene takes place between Teresa and Ernesto – makes your heart just glow to be such a hero, right?
-
Now exit right and then through the rose door.
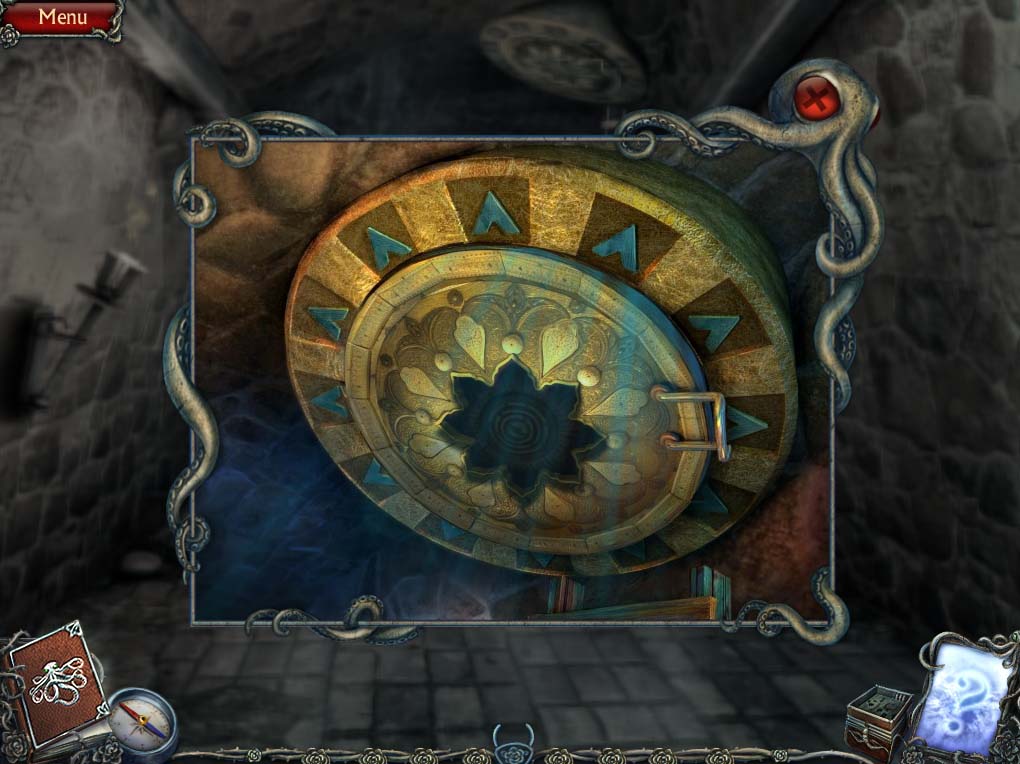
- Note the SUN-SHAPED KEY lying on the floor to the left – take it.
- Go right and out through the hatch, using the SUN-SHAPED KEY to unlock it.
General Info and Tips
Chapter 1: Fork in the Road
Chapter 2: The Town
Chapter 3: The Cemetery
Chapter 4: The Hospital
Chapter 5: The Mansion
Chapter 6: The Greenhouse
Ask for help in the comments below!
Chapter 1: Fork in the Road
Chapter 2: The Town
Chapter 3: The Cemetery
Chapter 4: The Hospital
Chapter 5: The Mansion
Chapter 6: The Greenhouse
Ask for help in the comments below!