
Twisted Lands: Origin: Chapter 1: Fork in the Road
Our Twisted Lands Origin Walkthrough will guide you through this stunning prequel to the Twisted games. Join the detective as your search for the missing Theresa, the daughter of your friend, quickly goes from bad to worse. We've made sure to include tons of screenshots with key areas and items marked clearly as well as step-by-step instructions on what to do from the moment you find yourself seasick and stuck by yourself on a ship being tossed by the elements off the shore of the island of Tormente.
General Info and Tips
Chapter 1: Fork in the Road
Chapter 2: The Town
Chapter 3: The Cemetery
Chapter 4: The Hospital
Chapter 5: The Mansion
Chapter 6: The Greenhouse
Ask for help in the comments below!
Chapter 1: Fork in the Road
Chapter 2: The Town
Chapter 3: The Cemetery
Chapter 4: The Hospital
Chapter 5: The Mansion
Chapter 6: The Greenhouse
Ask for help in the comments below!
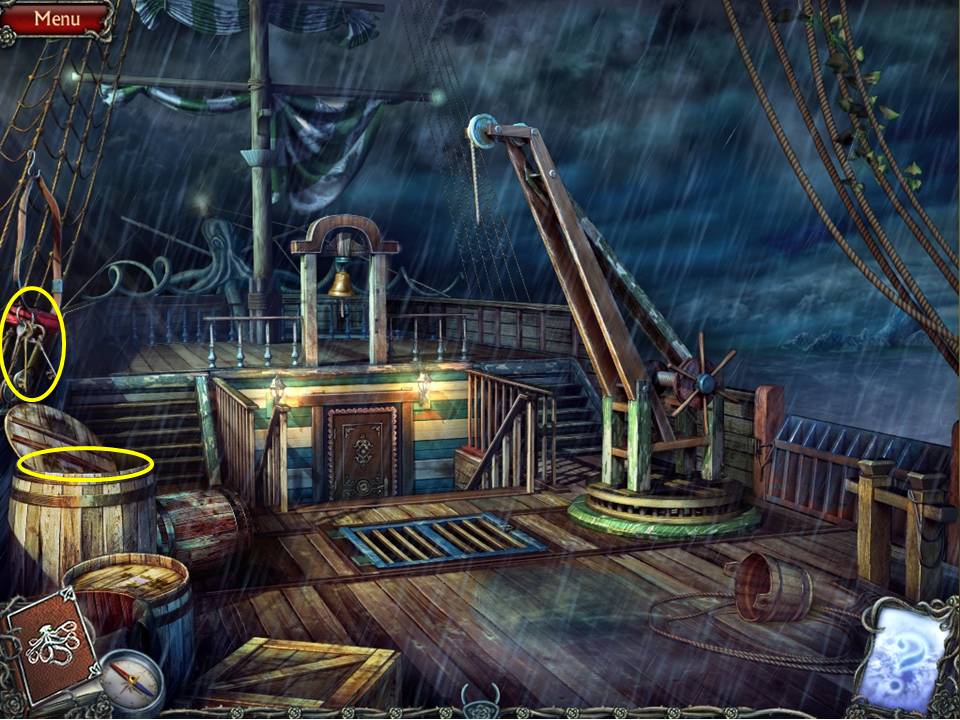
- Take your pick of either jumping over or crawling under the bridge.
- Touch the keys hanging to the left.
- Zoom in on the barrel and remove the lid.
- Take the HOLD KEYS.
-
Zoom in on the hatch to initiate a HOA.
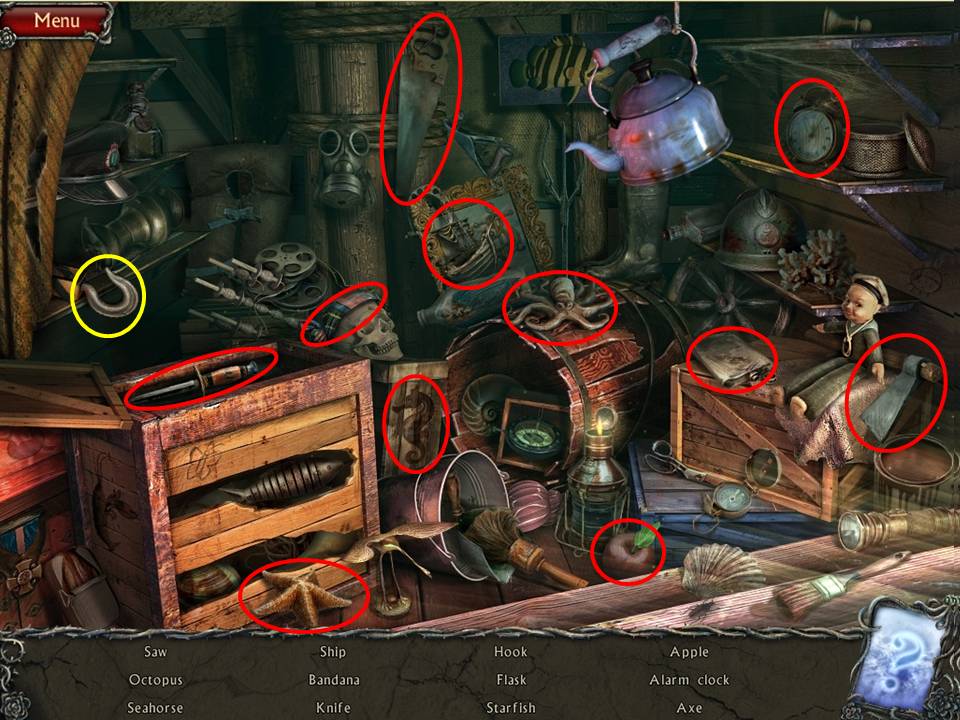
- Find the items listed.
- Move the curtain to get the hook.
-
When finished receive the HOOK and SHIP.
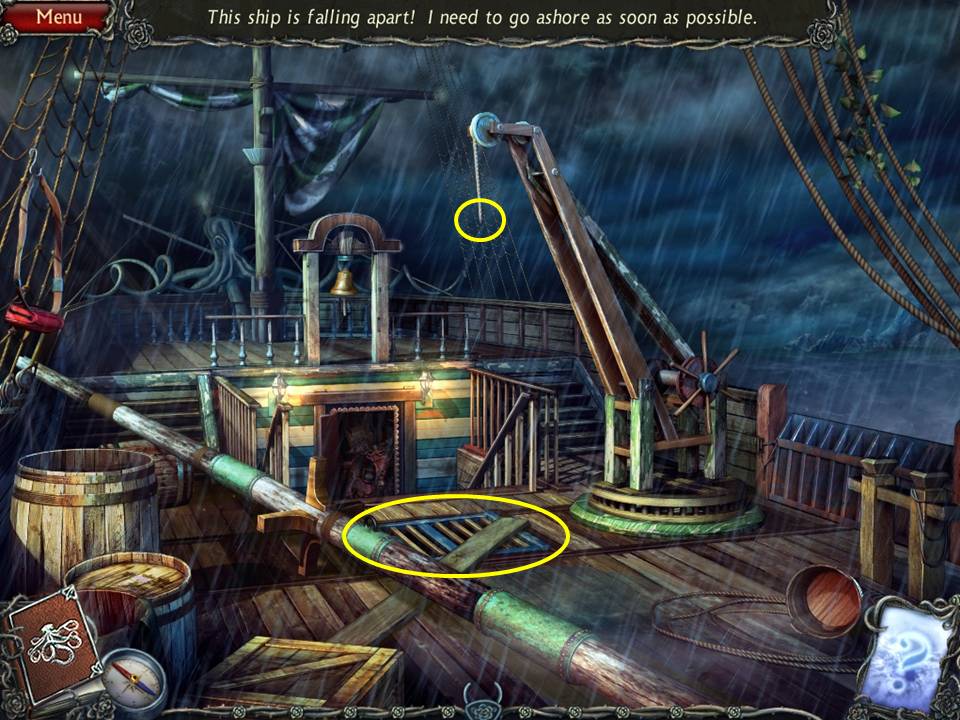
- Place the HOOK on the pulley.
- Pull the hook down the broken mast section.
- Next remove the board.
- Open the grate.
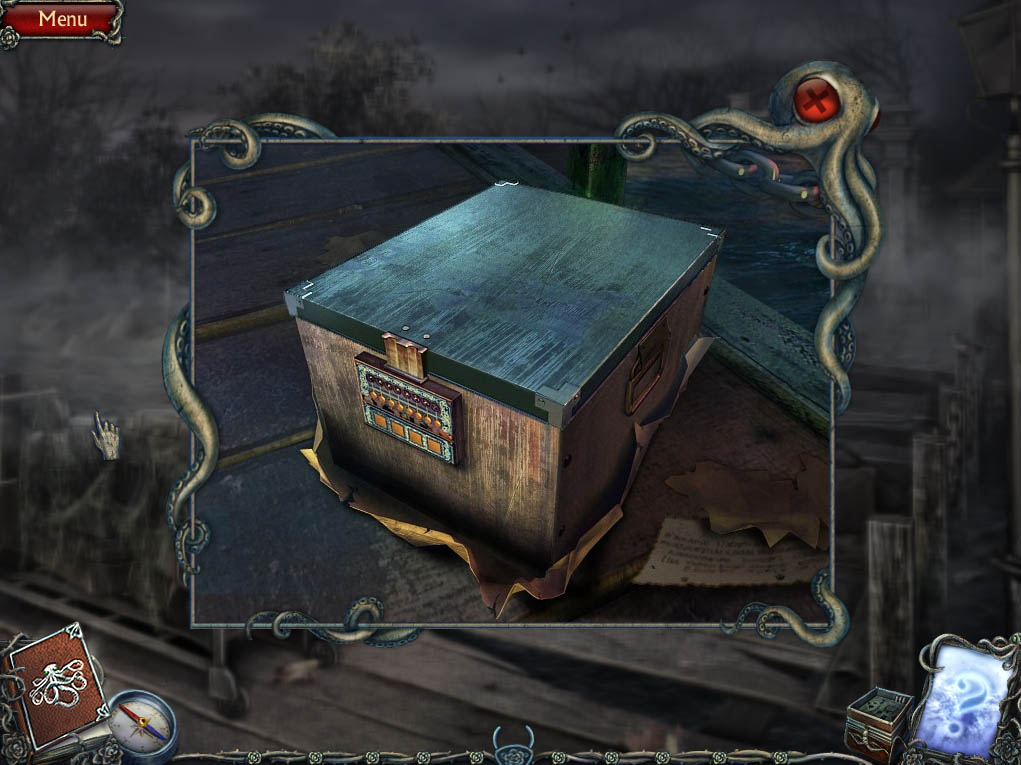
- Take the case to initiate a board puzzle.
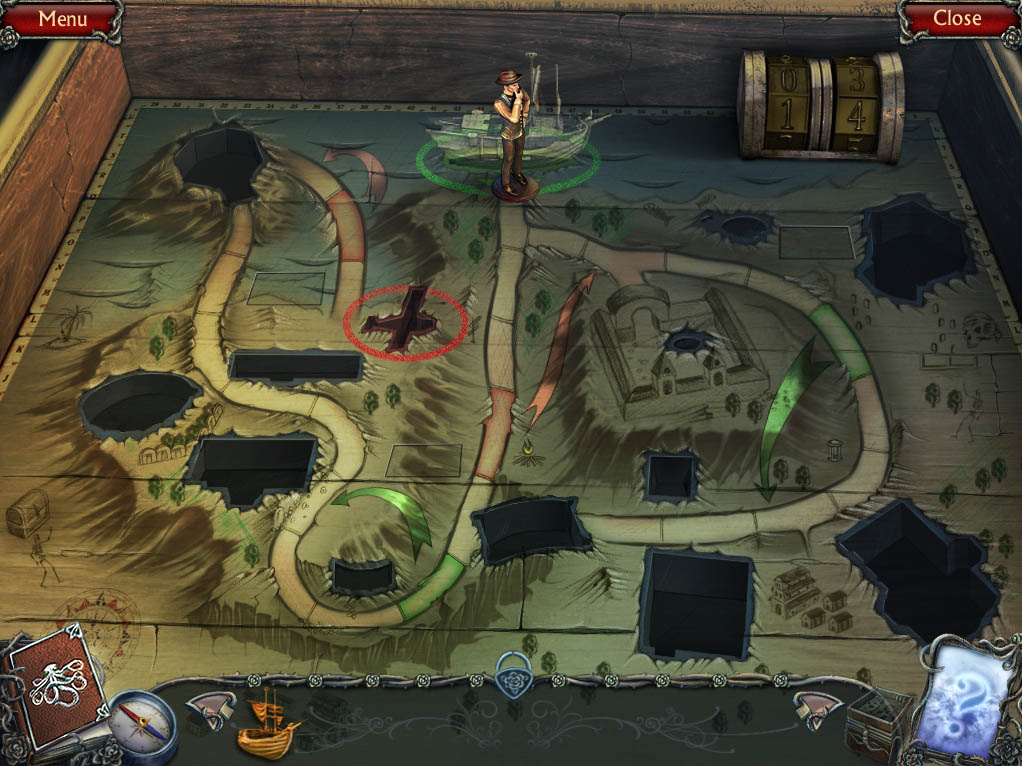
- The object of the puzzle is to move each token to a slot that corresponds to its theme.
- Begin by placing the SHIP on the board.
- Unfortunately there are still items that need to be collected in order to complete the board game – you’ll be collecting them throughout the game.
-
Exit, watch the creepy scene that ensues and exit the ship.
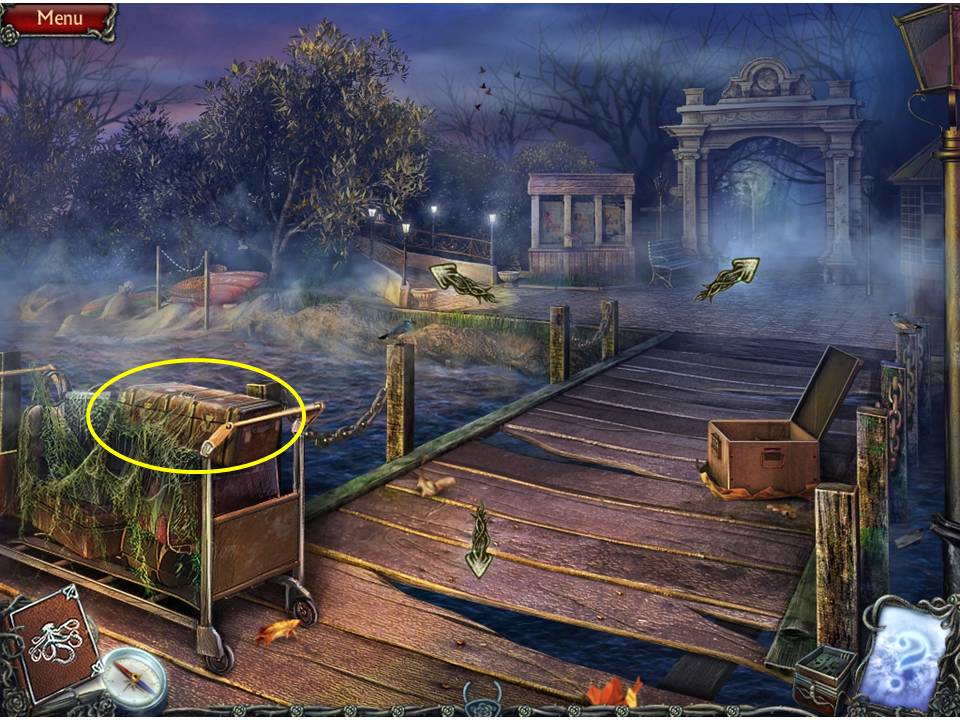
- Note the parcel sitting on the dock.
-
Open it to initiate the next puzzle.
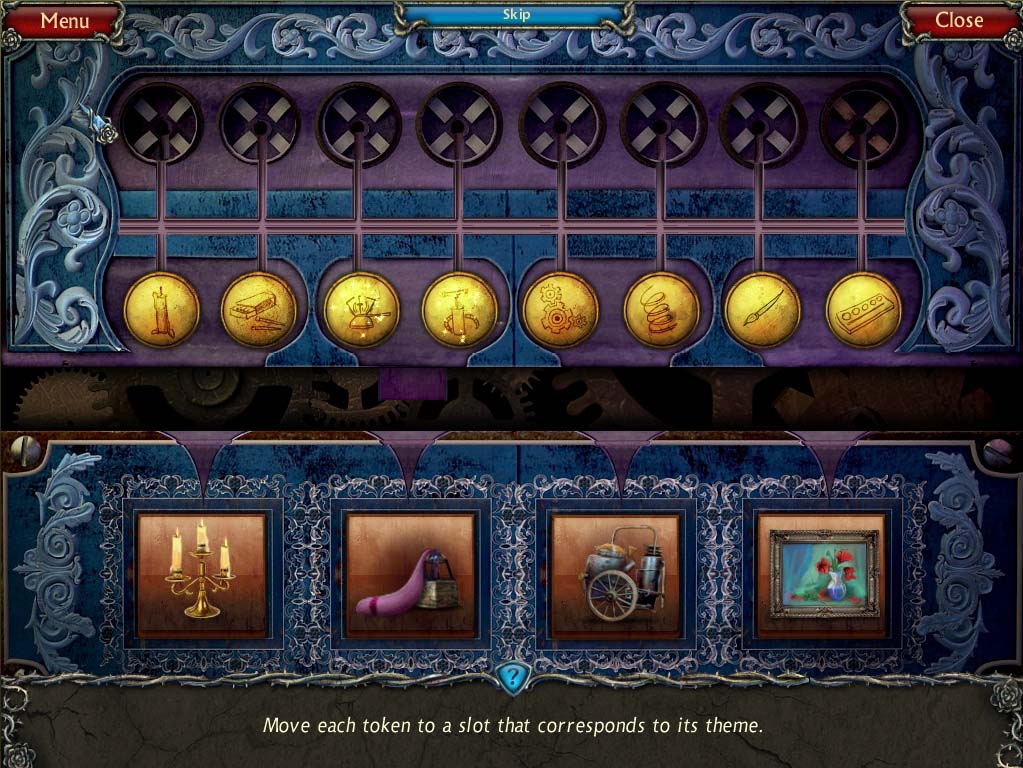
- The aim of the puzzle is the match the coins to the pictures below.
- Each picture pairs up to two associated coins.
- As an example, the first picture shows a candelabra – thus the matches and the candle are the two coins that correspond to it.
- Click on the coins, then on the two slots above the picture, and the coins will automatically slot into place.
- When placed correctly, the coins will glow.
- See the screen shot for the solution.
- Once complete, take the COIN and the BUG SPRAY.
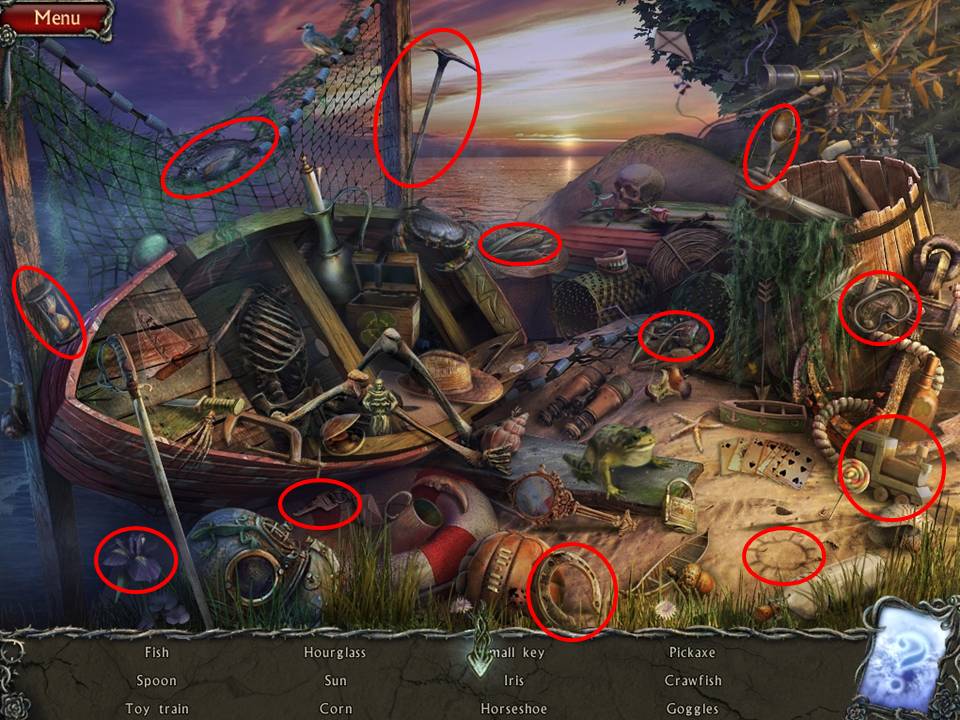
- Click on the boat to the left to initiate the next HOA puzzle.
- Once complete take the SMALL KEY offered up.
-
Proceed to the left.
- Take the HAND RAKE.
- Open the lock with the SMALL KEY.
- Zoom into the box.
- Read both notes.
- Note the code 8317. Exit.
- Zoom into the suitcase.
- Enter the combination 8317.
-
Take the WIRE CUTTERS.
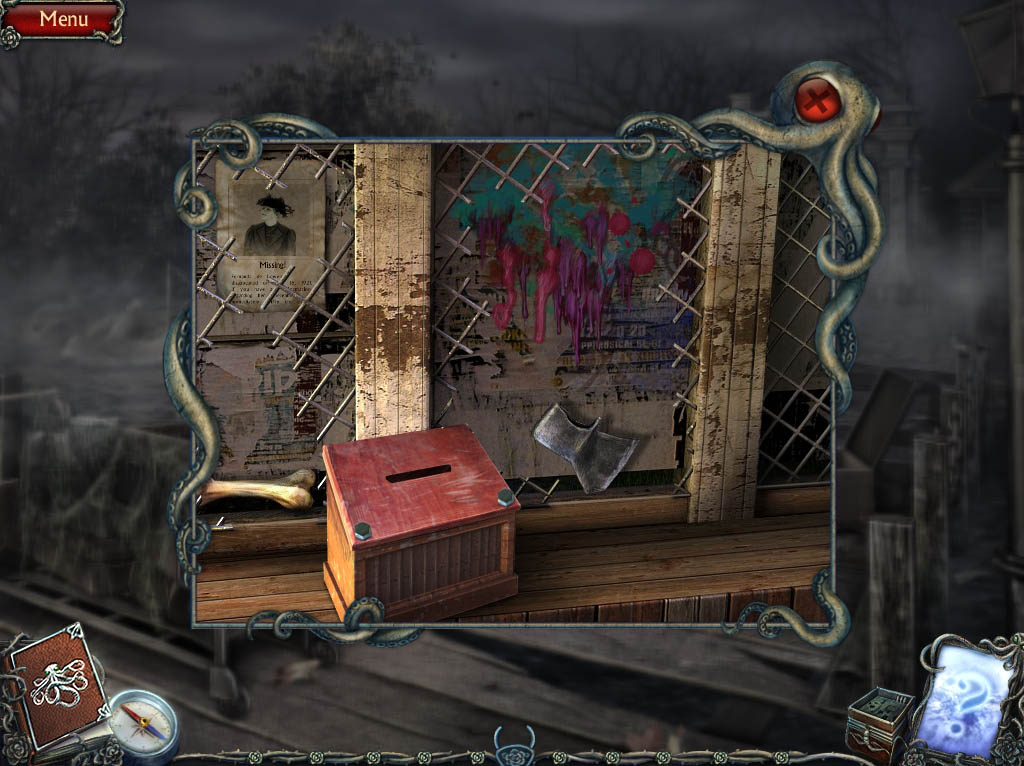
- Zoom into the stand to the left of the arched opening.
- Cut the mesh with the WIRE CUTTERS.
-
Take the BONE and note the axe head.

- Zoom out and move through the arched opening.
- Give the dog the BONE.
-
Choose the arrow to the right.
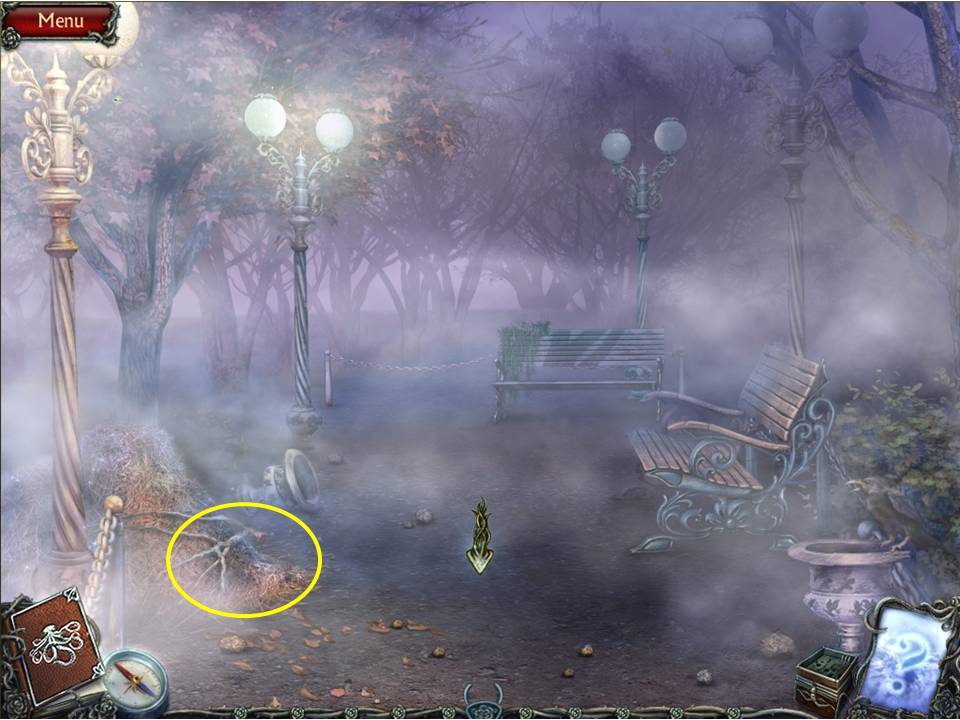
- Zoom into the ground by the broken doll hand – starting to feel a little weird?
- Rake the soil with the HAND RAKE.
- Take the COIN and BRIDGE – clicking on the latter will take you back to the board puzzle to put it in place.
-
Exit. Click down once, then go forward twice to arrive at the fork in the road after a rather dramatic sequence.
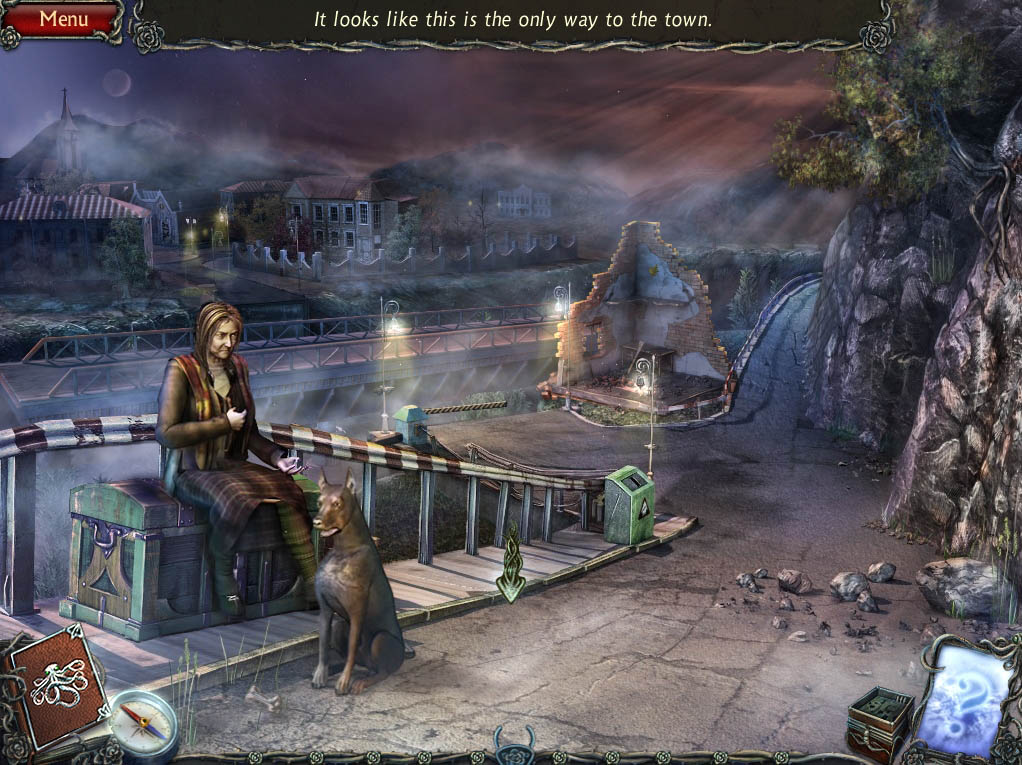
- Talk to the woman.
- Go right at the fork.
-
Move forward after the rock slide to reach the elevator.
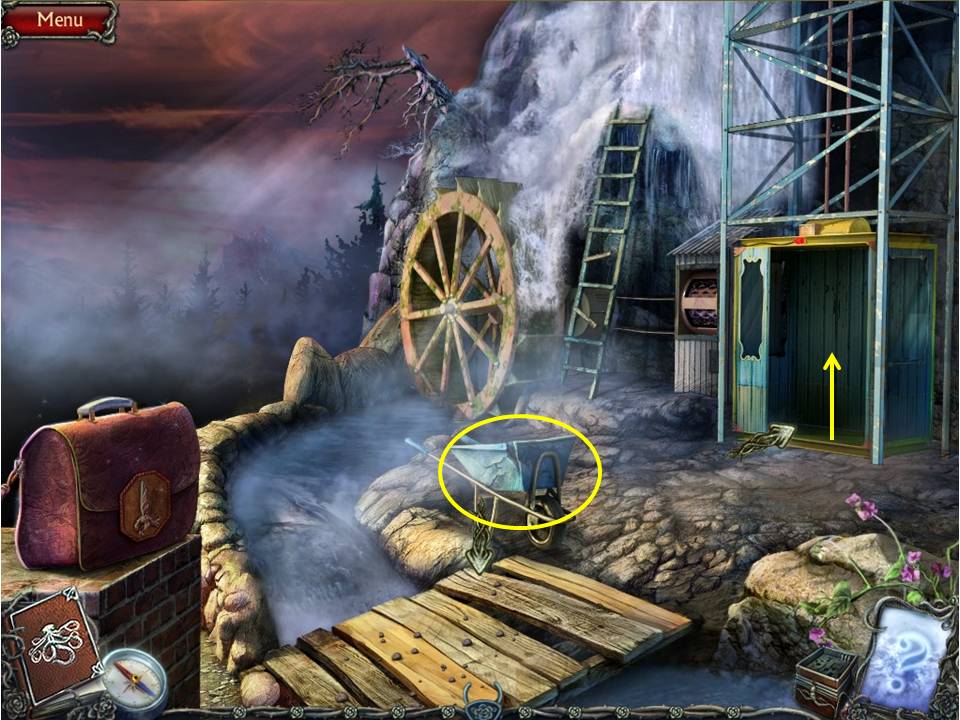
- Zoom into the wheelbarrow and remove the clipboard.
- Take the COIN lying beneath the helmet.
- Enter the elevator and exit at a path leading to a stairway.
-
Note the nearby telescope.
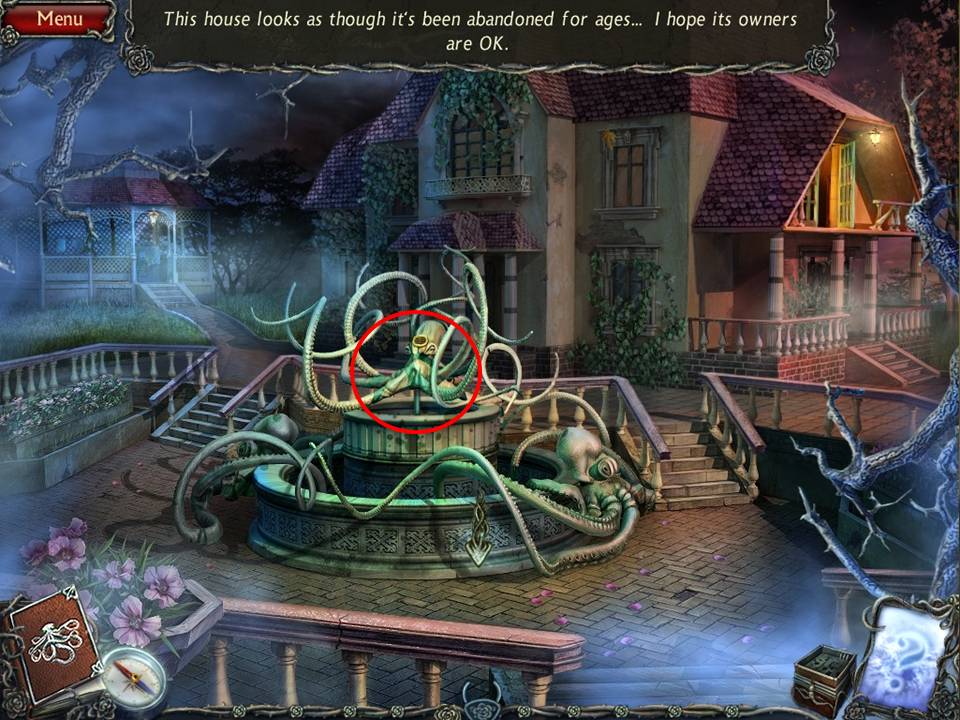
- Take the path in front of you to get to the mansion entrance.
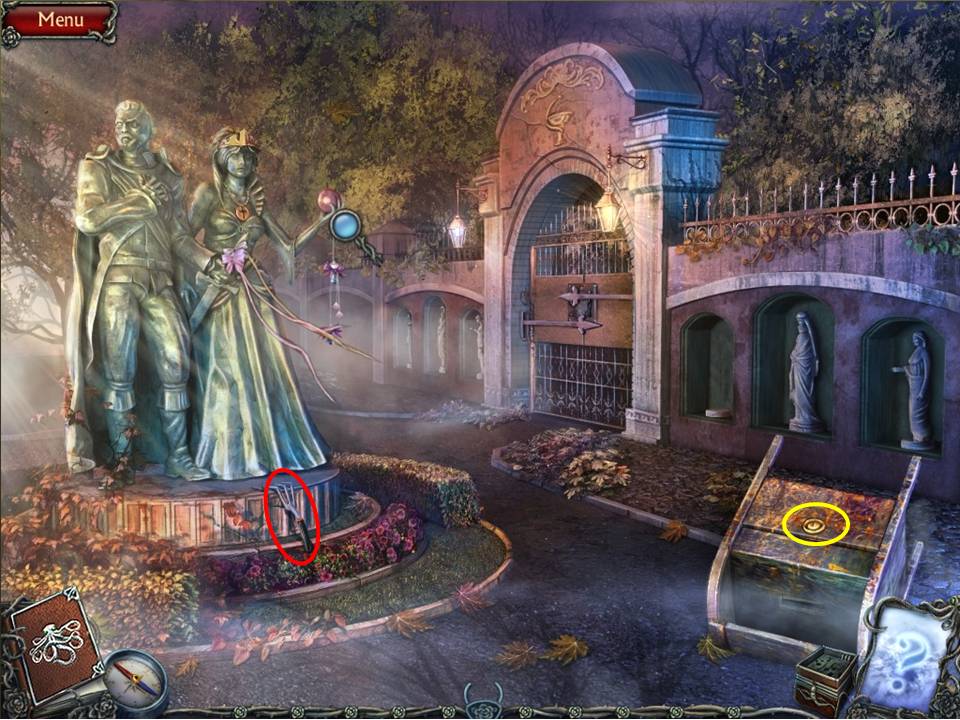
- Zoom into the fountain.
- Take the TOKEN. Return back down the stairs and use the TOKEN on the telescope to view the next dramatic scene, which finishes off by presenting clues to the nearby door.
-
Zoom into the door to initiate a puzzle.
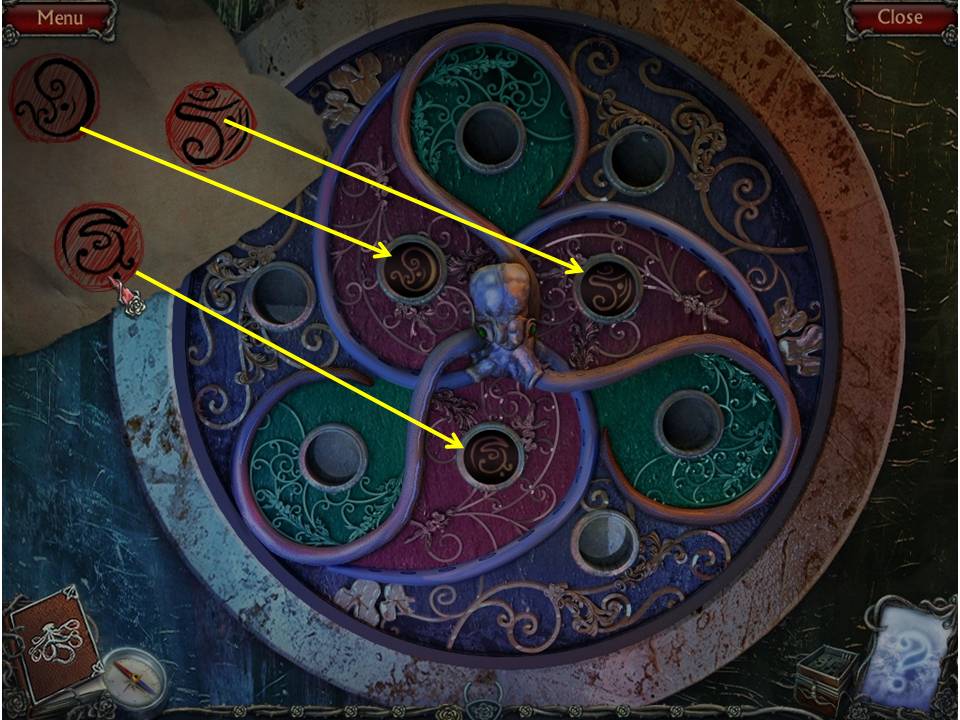
- The object of the puzzles is to match the symbols on the paper at left to the symbols on the board.
- Click to change the symbols until they match the paper.
- See the screenshot for solution.
-
Enter the catacombs.
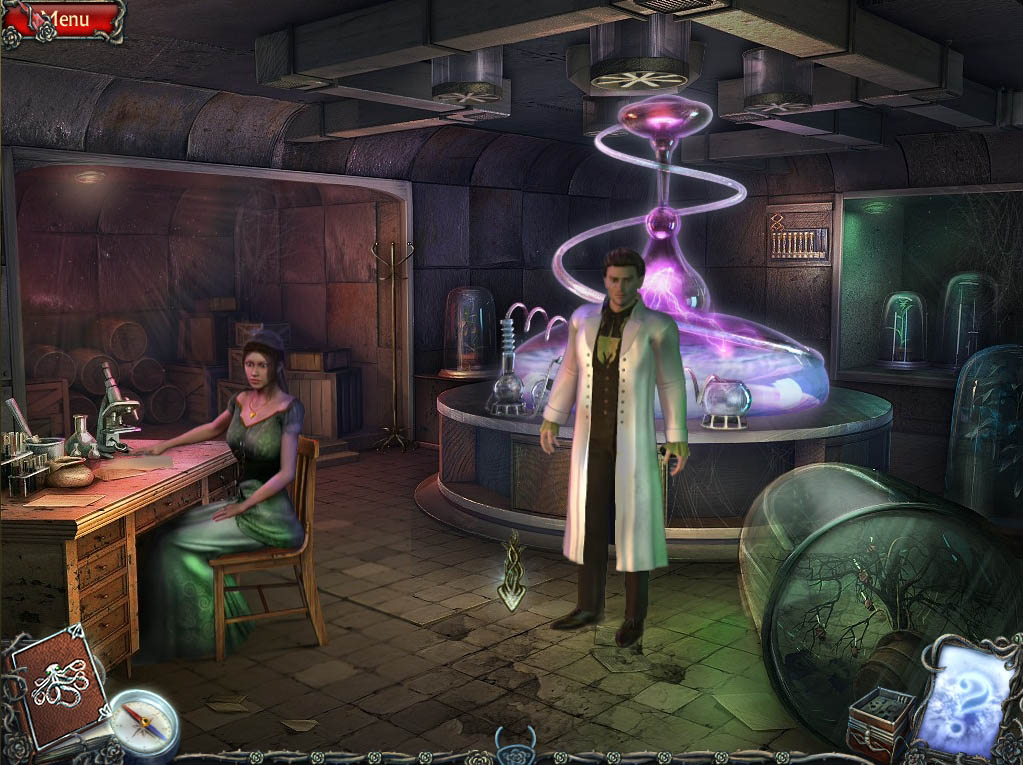
- Zoom into the door at left.
- Knock on it to summon Teresa.
- You will be transported to another scene.
- Take the LETTER from Teresa, after which you’ll find yourself inexplicable back outside the door.
- Click on “Smash the door down” twice when prompted – this is getting nasty!
-
You will be automatically returned to the woman by the fork in the road.
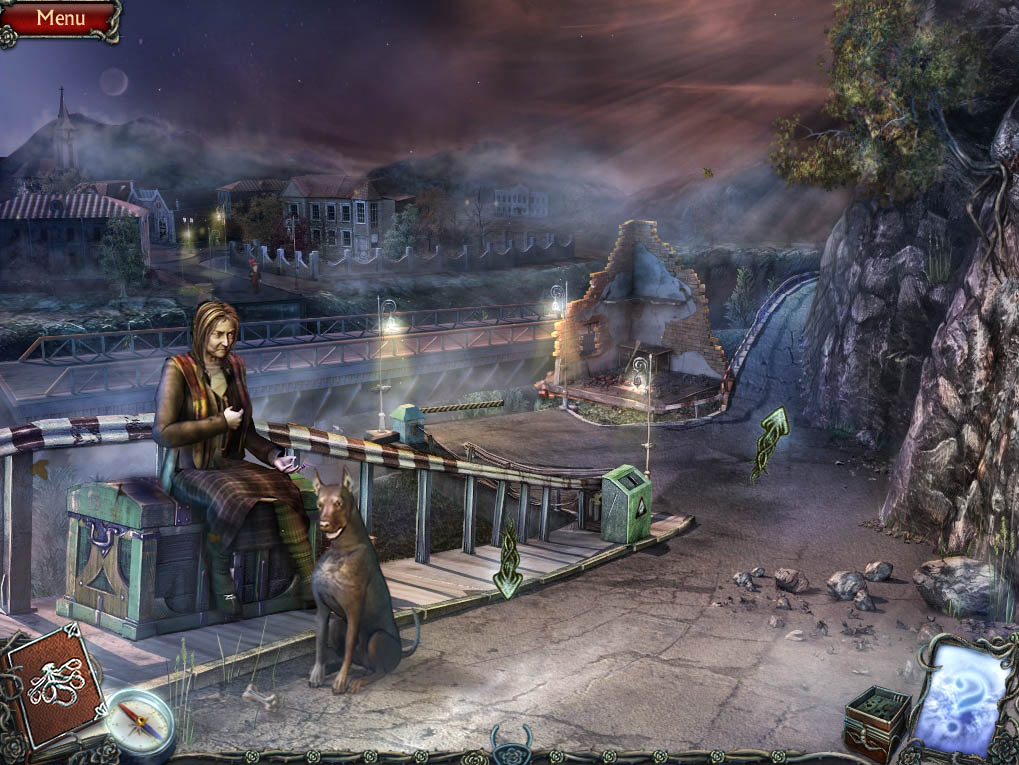
- Talk to the woman who will itemize a number of things for sale.
- As you have already collected THREE COINS you have enough to purchase the HAMMER from her.
-
Do so.
- Return down the path to the elevator and watch the next installment of ‘let’s kill the sleuth’.
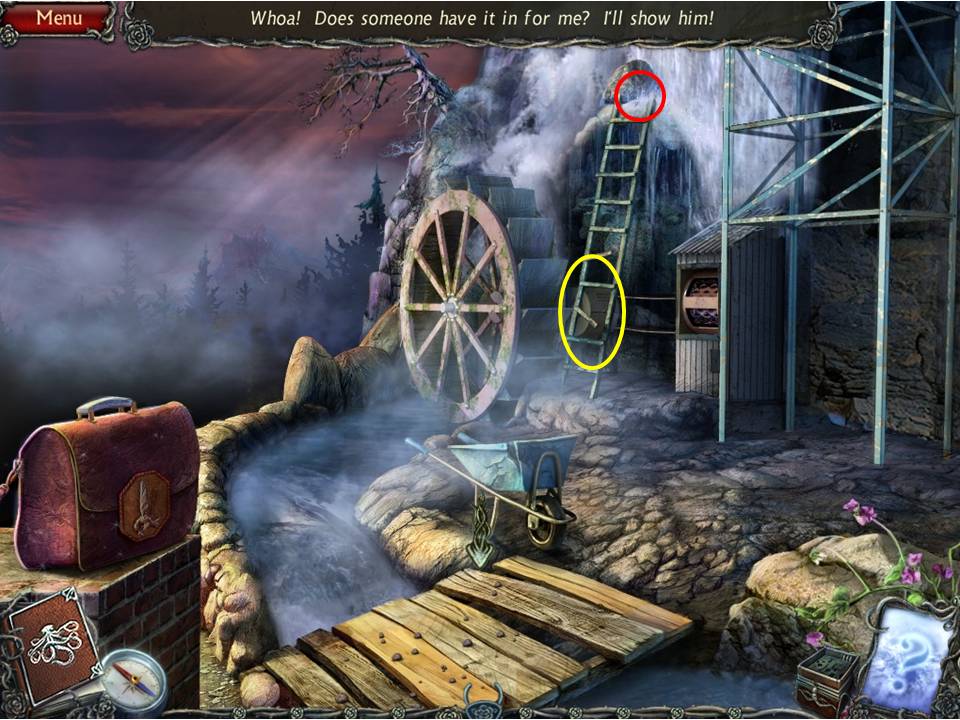
- After the scene plays out and the waterwheel grinds to a halt, use the HAMMER to repair the ladder and climb up to retrieve the LEVER.
-
Return to the old woman and zoom in on the green control box for the bridge to her right.
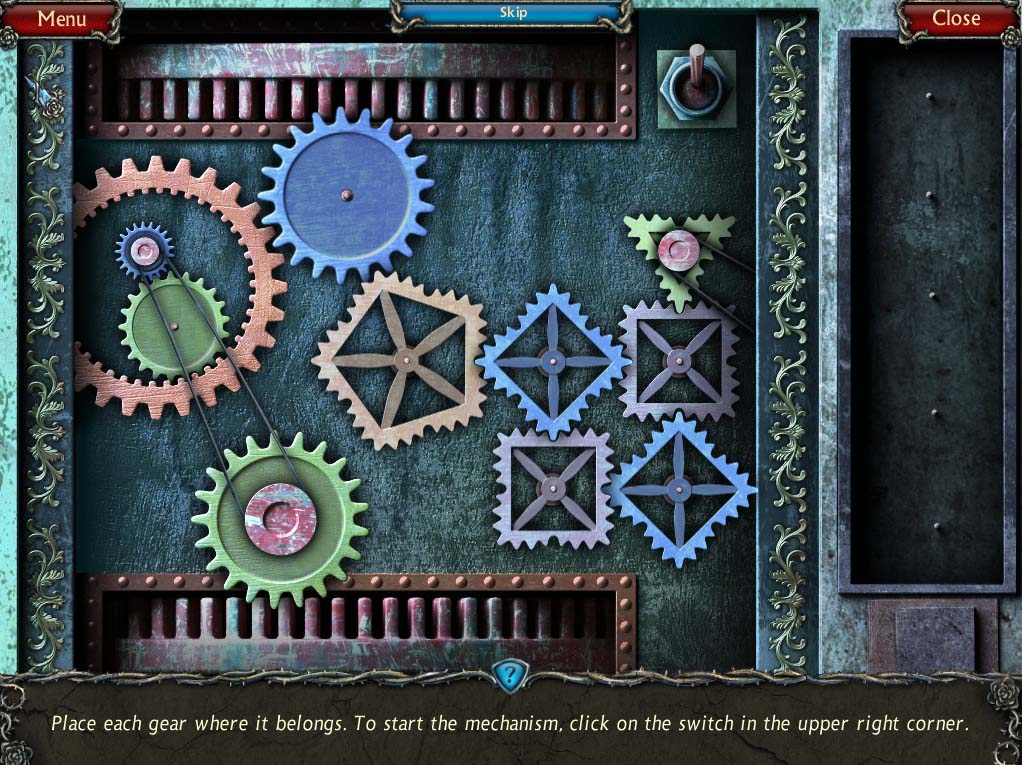
- Insert the LEVER in place and then click on the box for a closer look.
- The object of the exercise is to place each gear on the right into the proper spot on the left.
- Click a gear and then click the spot in which you want to place it.
- See screenshot for solution.
-
Once done, cross the bridge.
General Info and Tips
Chapter 1: Fork in the Road
Chapter 2: The Town
Chapter 3: The Cemetery
Chapter 4: The Hospital
Chapter 5: The Mansion
Chapter 6: The Greenhouse
Ask for help in the comments below!
Chapter 1: Fork in the Road
Chapter 2: The Town
Chapter 3: The Cemetery
Chapter 4: The Hospital
Chapter 5: The Mansion
Chapter 6: The Greenhouse
Ask for help in the comments below!