
The Agency of Anomalies: The Last Performance: Chapter 4: What Lies Above
The Agency of Anomalies The Last Performance Walkthrough will be your assistant detective as you take on the case to discover a dark and mysterious brotherhood who has stolen the paranormal powers from a group of theater performers. In order to help them regain their powers and their human forms, you will need to get to the bottom of this mystery and discover where the theater's founder, Patrizia Edelshtain has disappeared to. With custom screenshots and detailed instructions to guide you in your hour of need, you'll have no problem solving the case with the Last Performance Walkthrough.
Welcome to the fourth chapter of our Agency of Anomalies: The Last Performance Walkthrough. In this chapter, we’ll be exploring more of the theater and working toward gaining another Power. When you’ve completed this chapter and are ready to move on, please click on the navigation that appears at the top and bottom of this page.
- Pick up the TELESCOPE HANDLE.
-
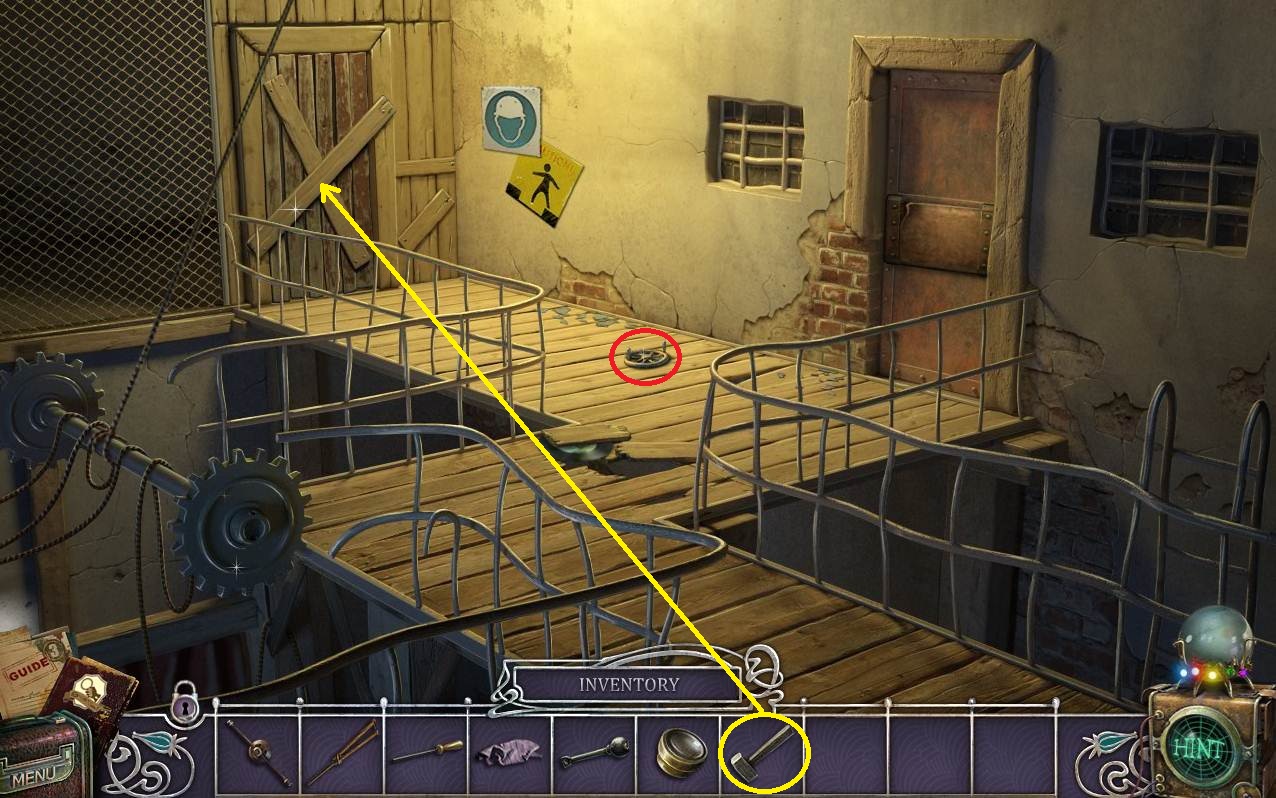
Use the SLEDGEHAMMER on the blocked door and then go through.
- Grab the KEY.
-
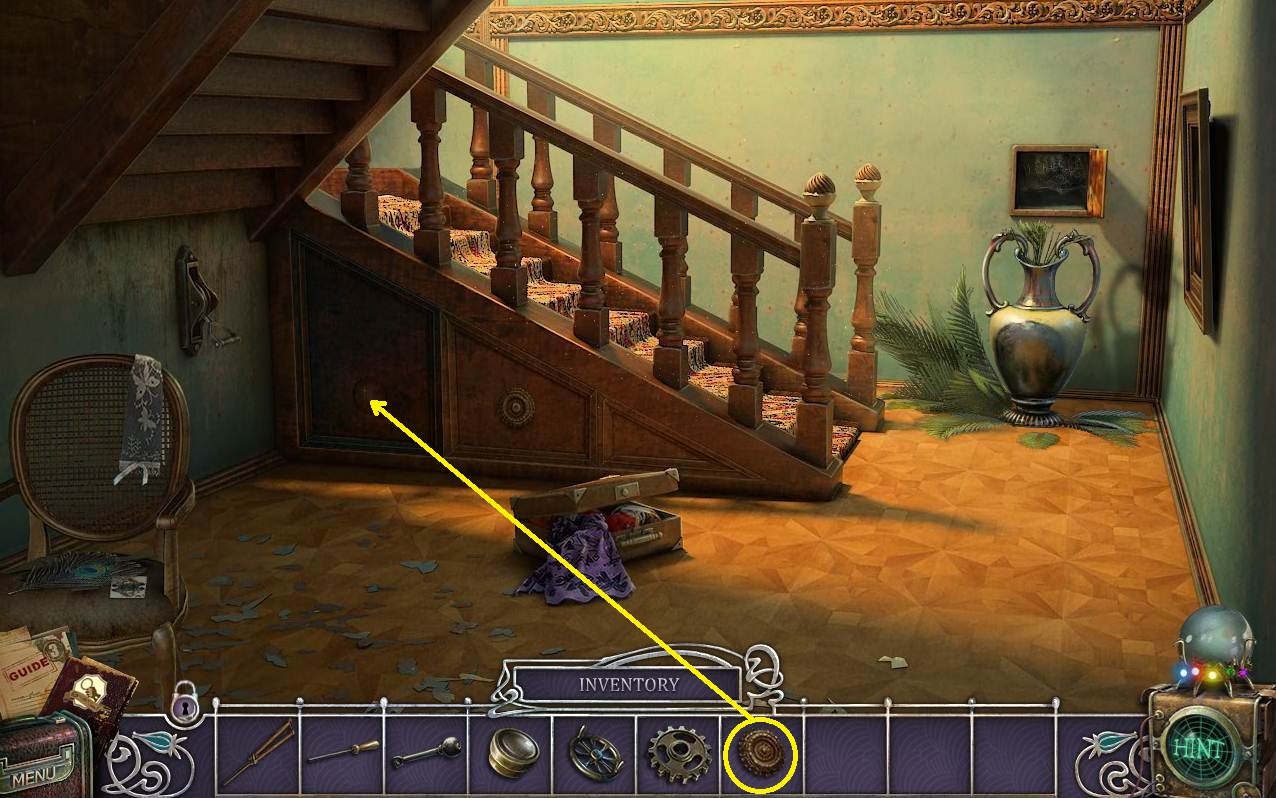
Go to the room under the stairs (click back four times).
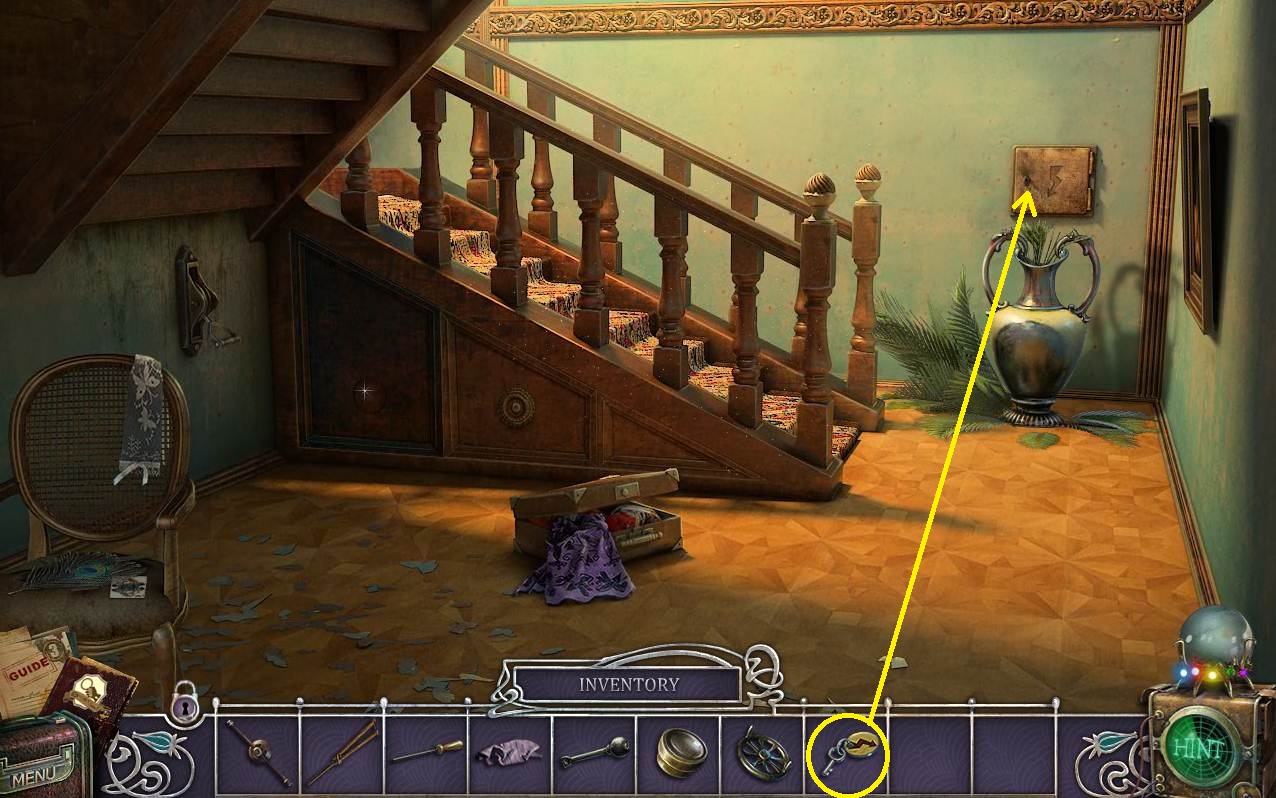
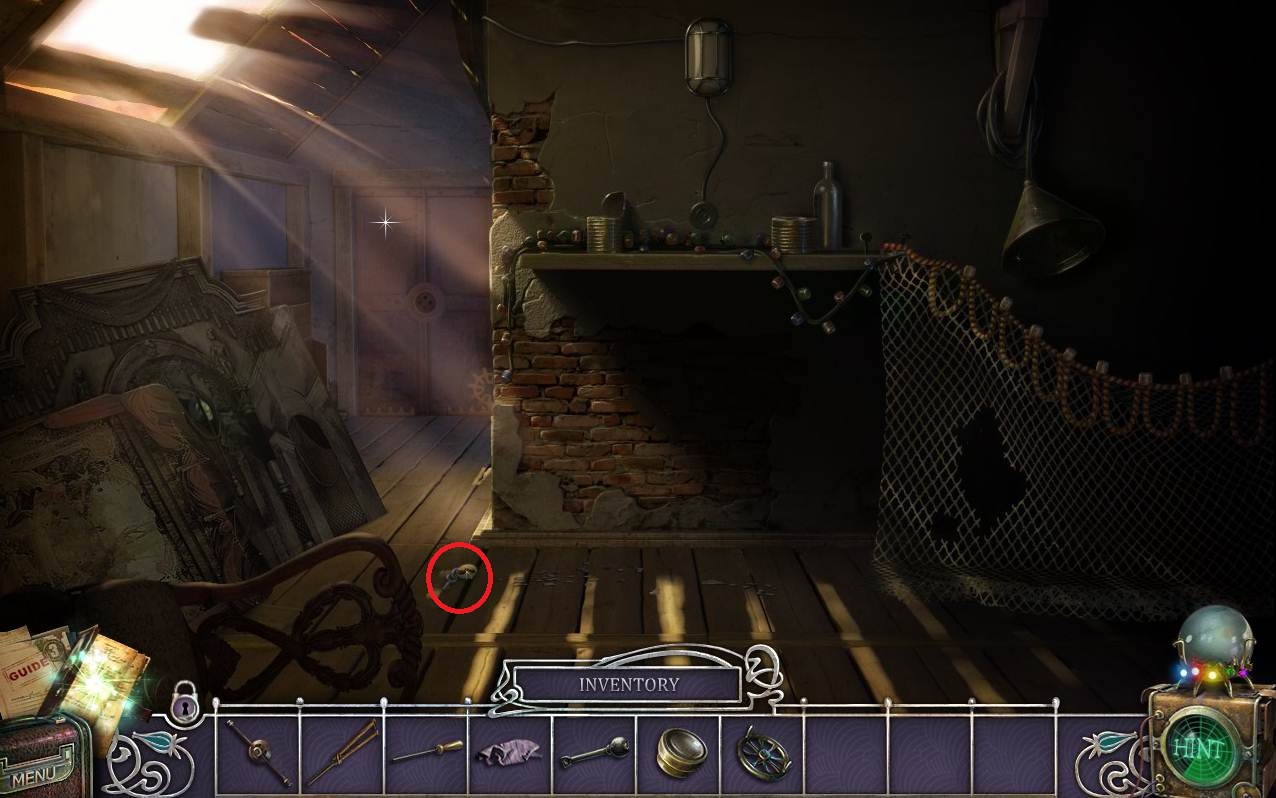
- Use the KEY on the box and pick up the TWEEZERS.
- Go up the stairs and hang a left.
-
Click on the sparkling area to activate an HOS.
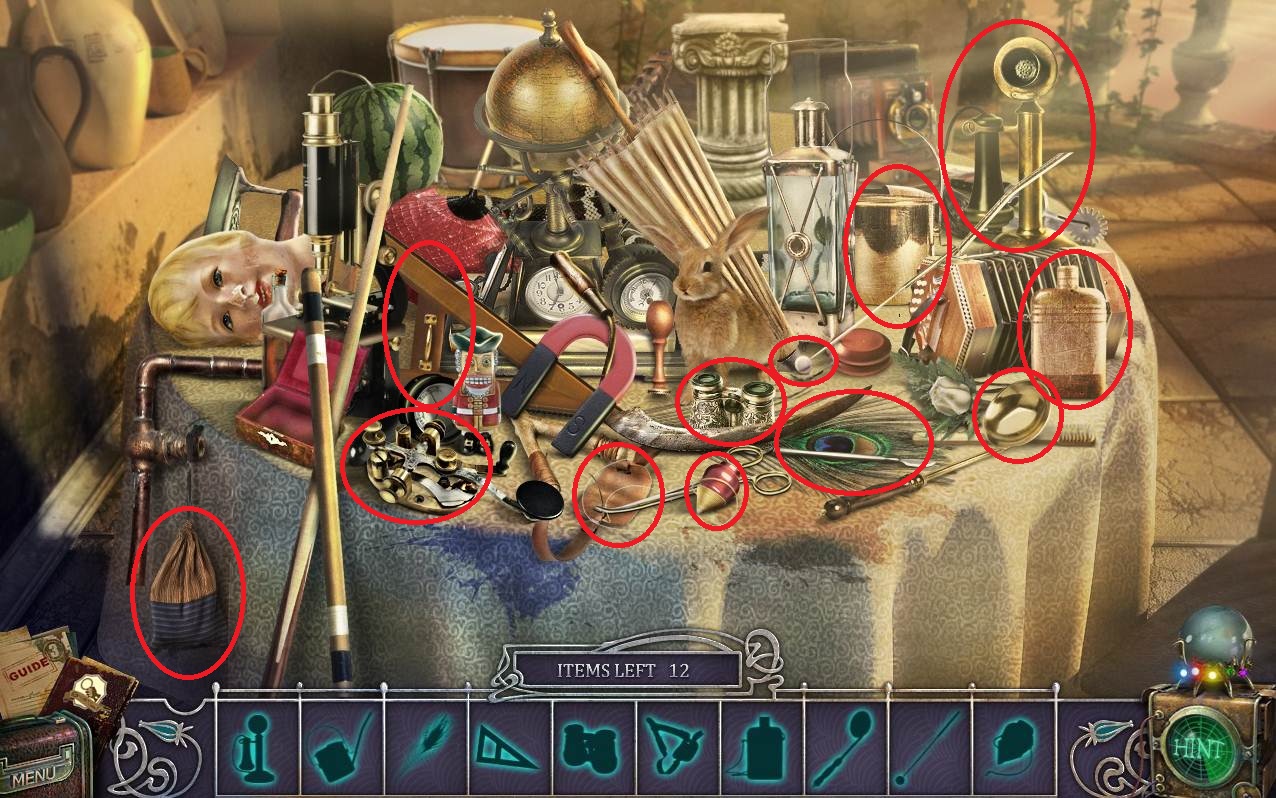
- Use the screenshot to find all the silhouette items; receive the BIG GEAR.
-
Return to the room beneath the trapdoor (go back four times, take a right, go forward, and then go down the stairs).
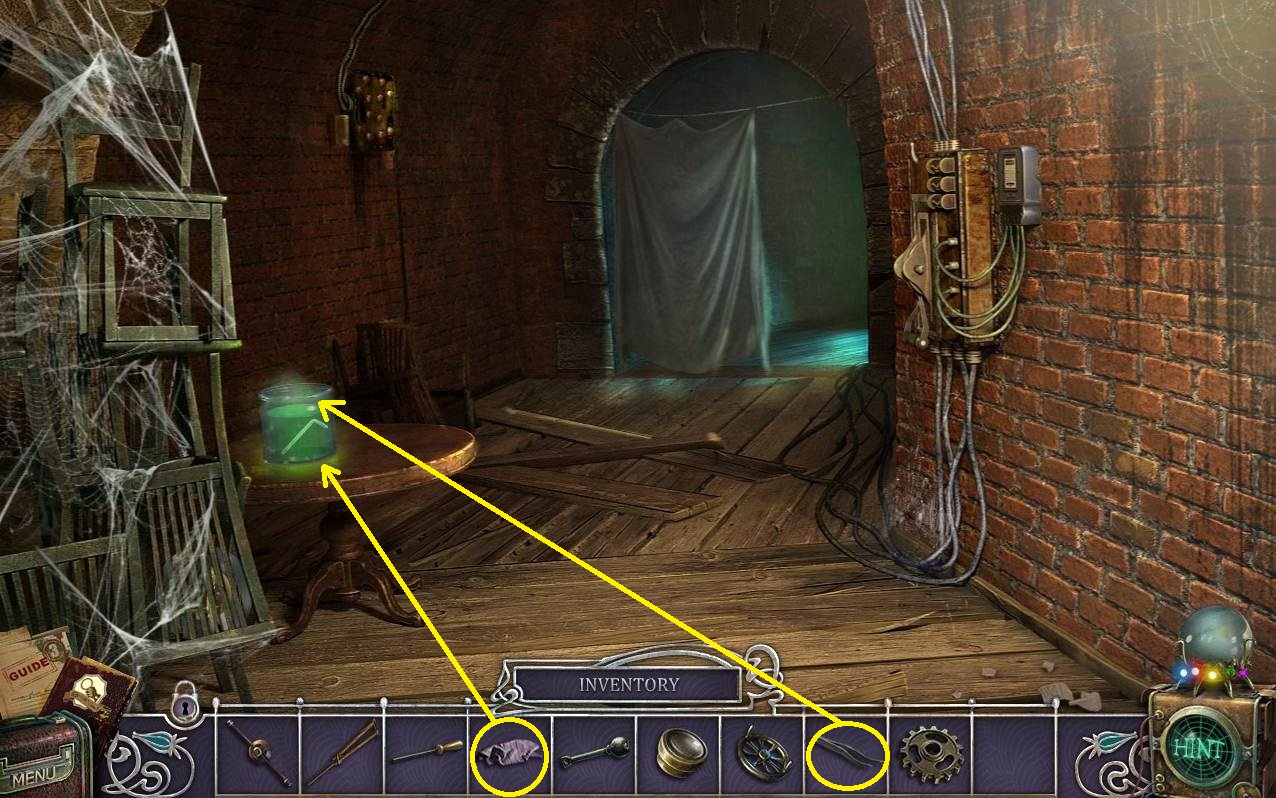
- Use the TWEEZERS on the jar.
- Use the HANDKERSHIEF on the hex wrench and then pick up the HEX WRENCH.
- Go back once and then forward to get to the garden outside.
- Click on the sparkling area to activate an HOS.
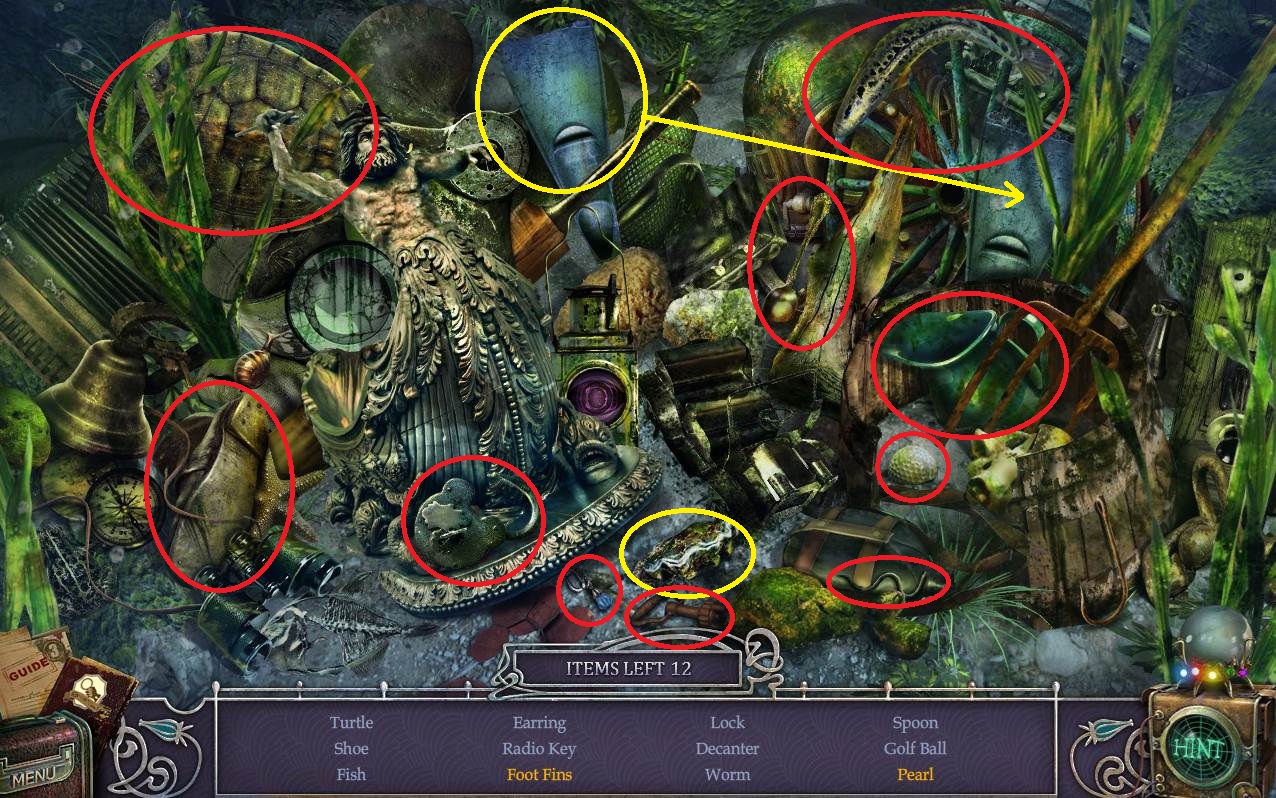
- Put the two fins together, then pick them up.
- Click on the oyster to get the pearl.
- Use the screenshot to gather the remaining items to receive the RADIO KEY.
- Return to the theater balcony (go back three times, go forward, take a left, go up the stairs, and then turn right).
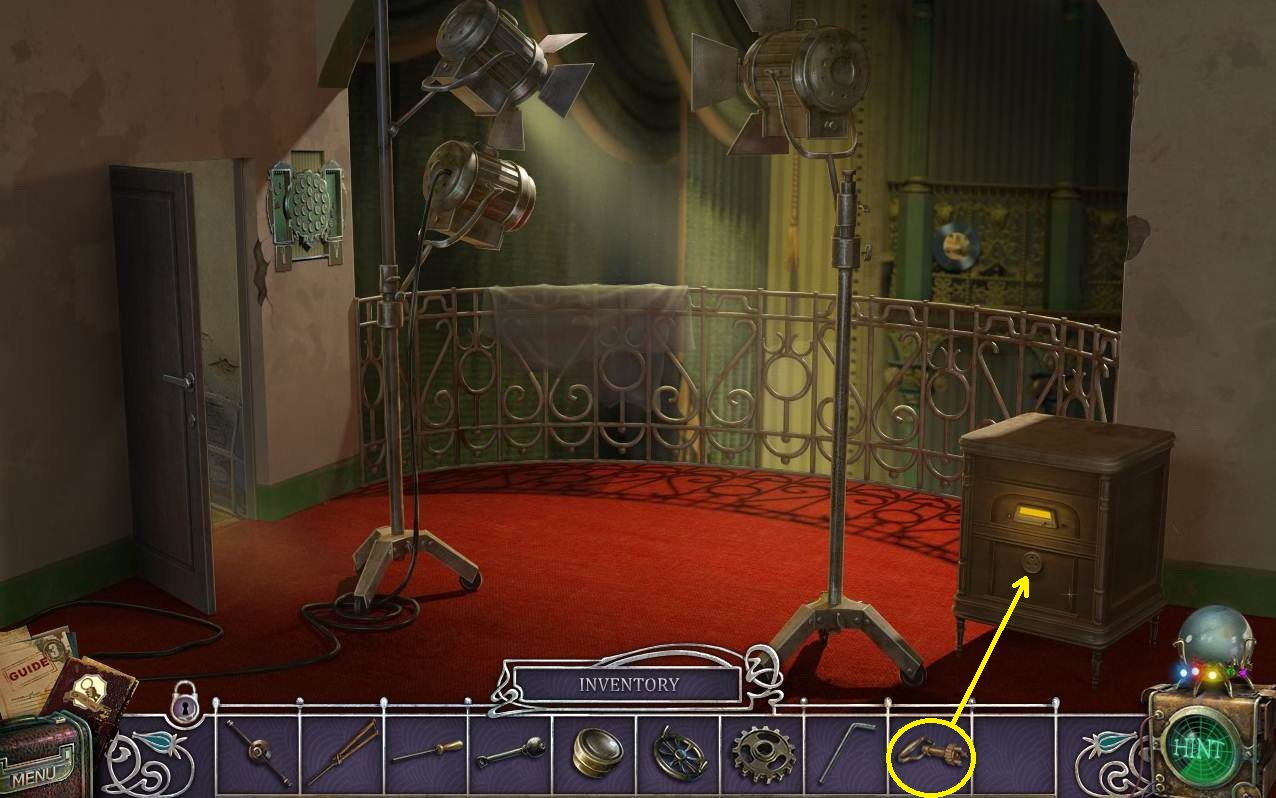
- Use the RADIO KEY on the radio.
- Grab the BULB.
- Go back to the garage (click back four times, take a right, then go forward three times).
- Use the HEX WRENCH on the engine in the back left corner to get the GEAR.
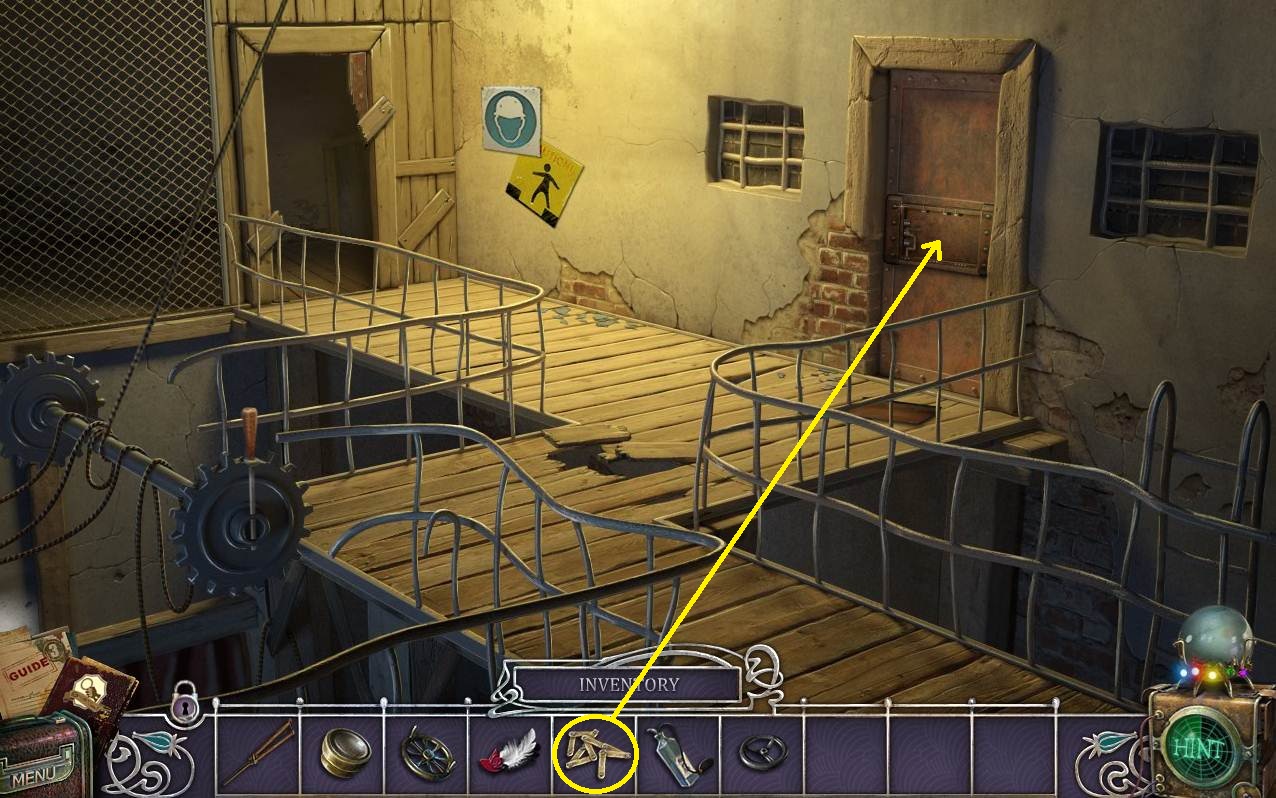
- Return to the dark room with the net (go back four times, go forward, take a left, go up the stairs, take a right, and then go left two times).
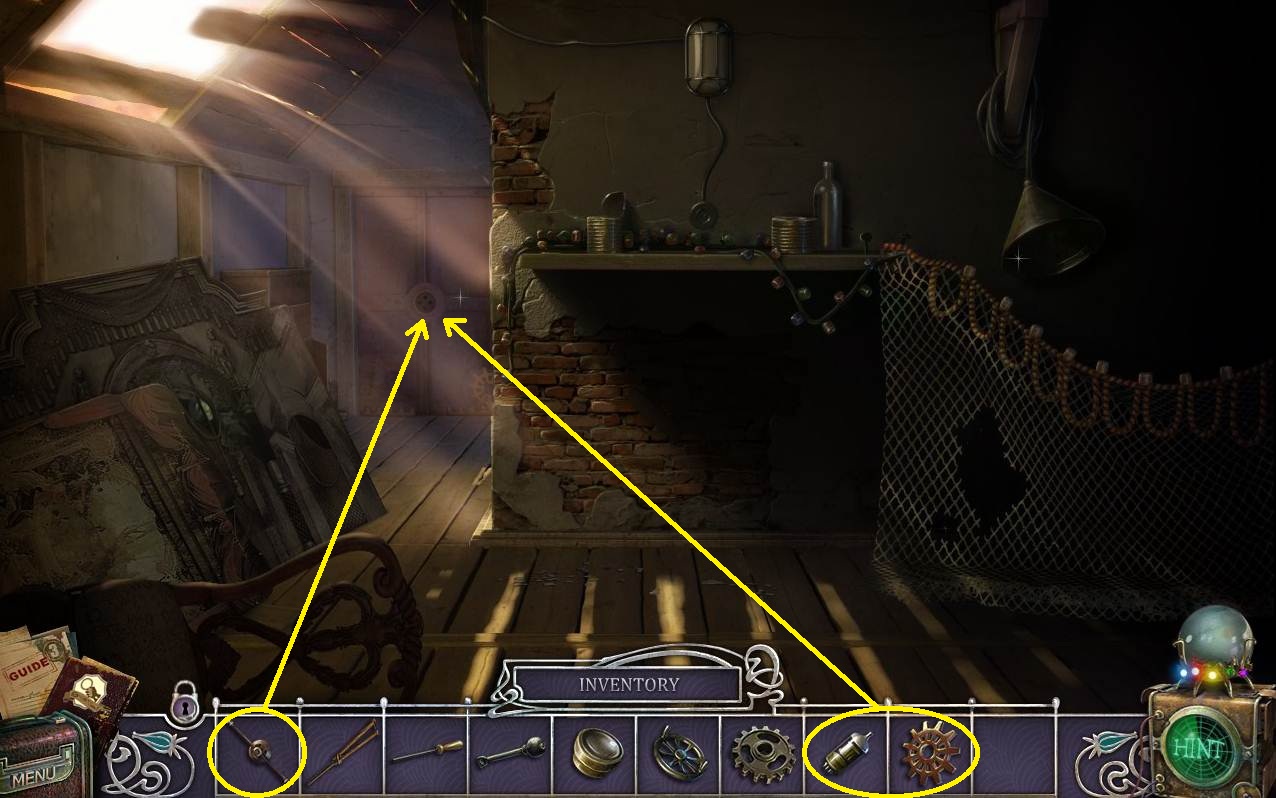
- Click on the door and use the GEAR, HANDLE, and BULB on it to activate a mini-game.
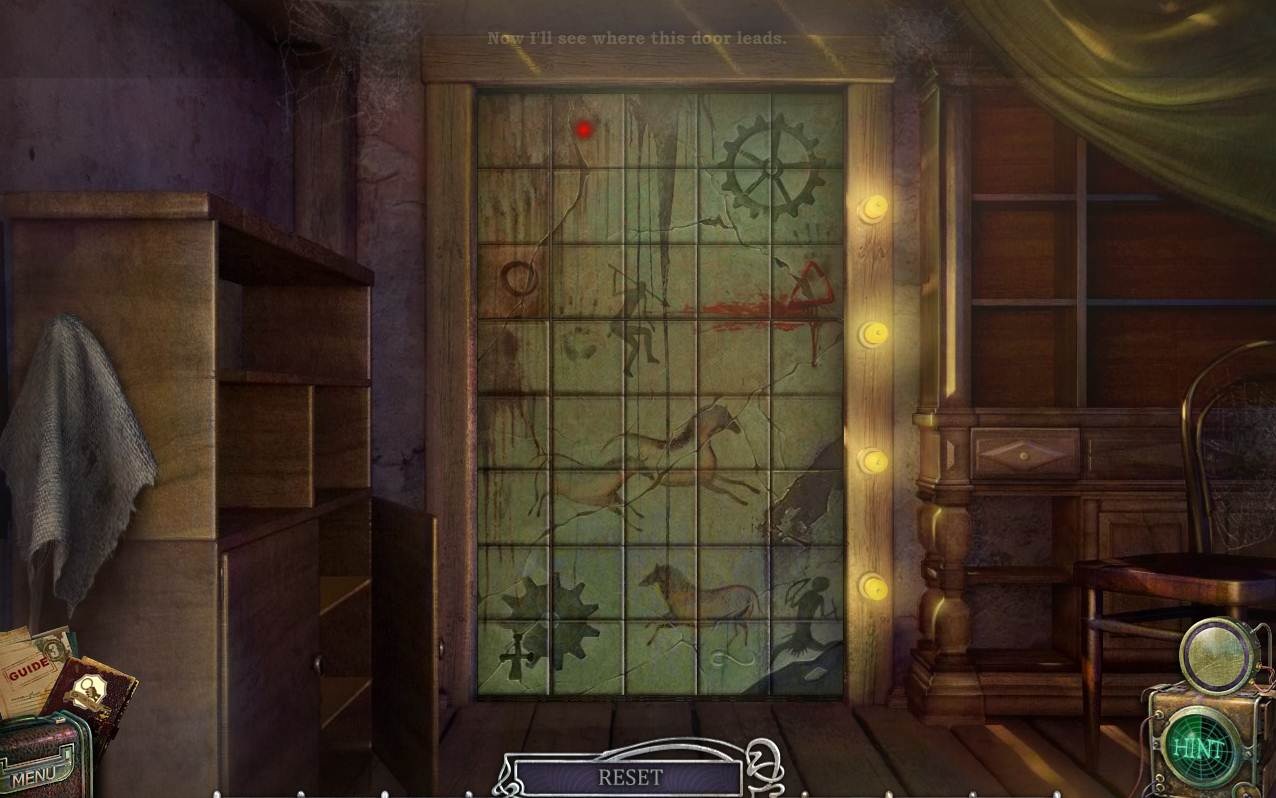
- For this game you need to recreate a picture by putting the tiles on the door. Use the screenshot and the outlines on the door to put the pieces in correctly.
-
Go through the door.
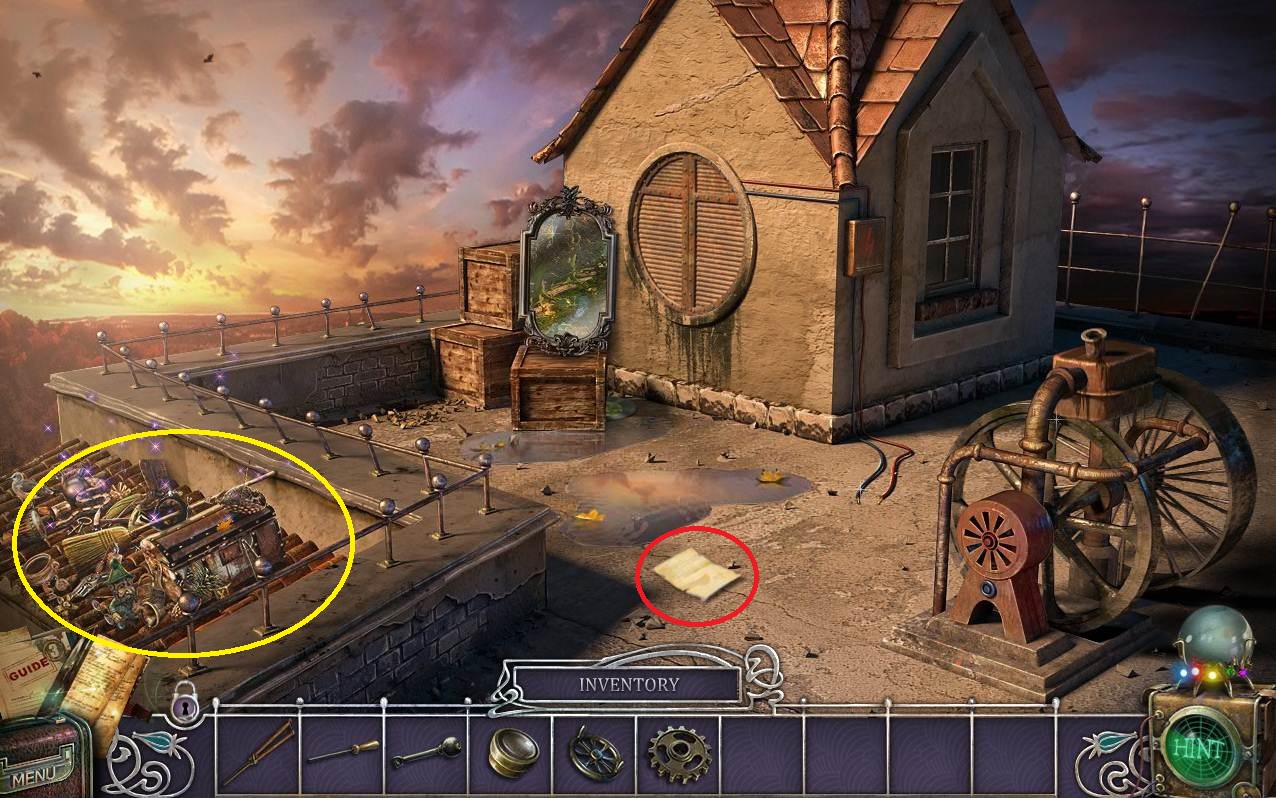
- Pick up the note.
- Click on the sparkling area to activate the HOS.
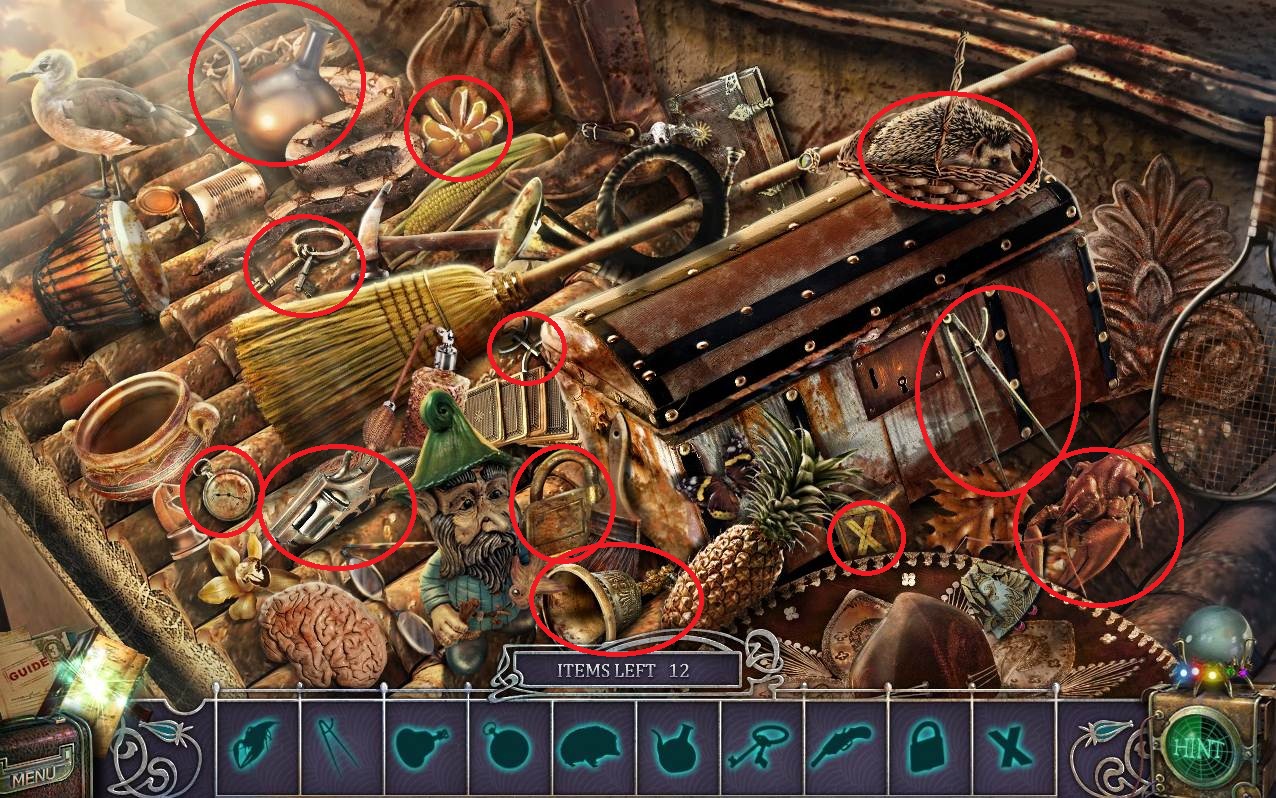
- Collect the silhouette items shown in the screenshot to receive the METAL CUTTER.
- Return to the catwalk (go back twice).
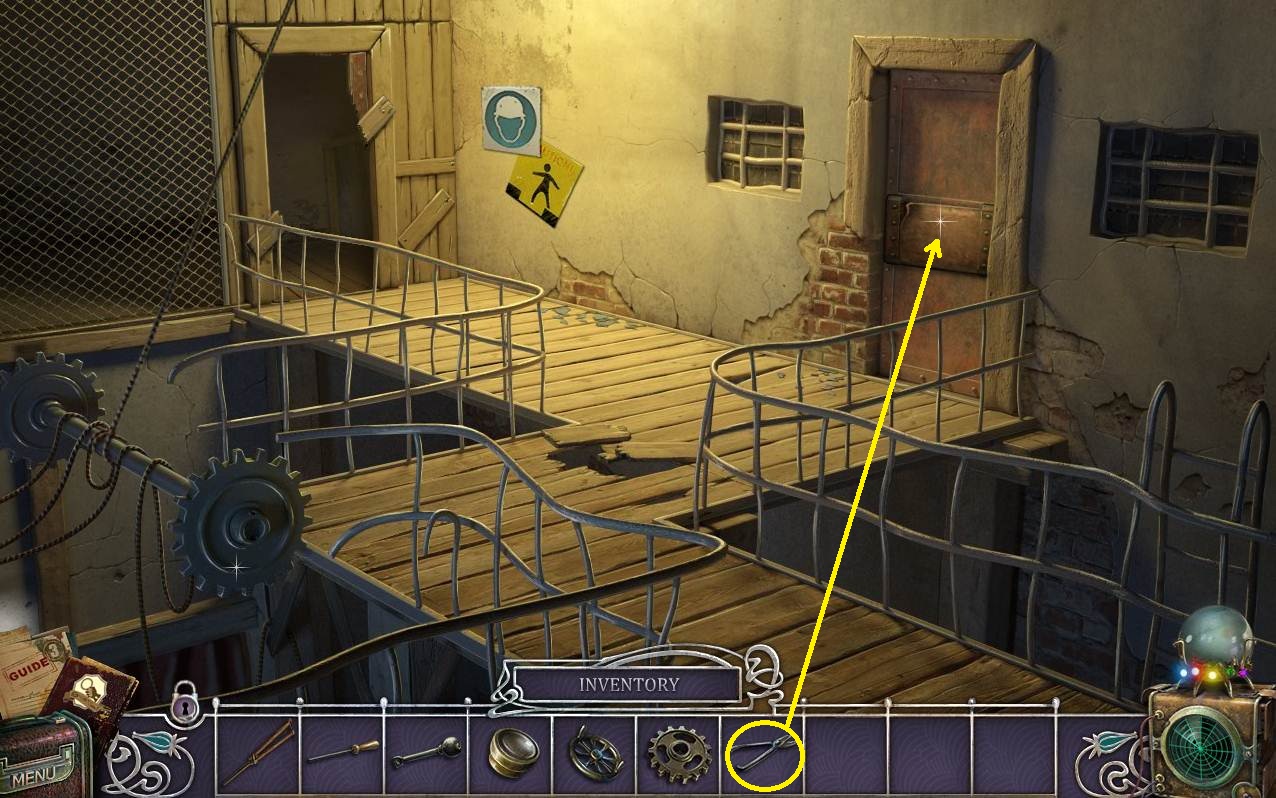
- Use the METAL CUTTER on the metal panel.
- Take the WOODEN CIRCLE.
- Go back three times to get to the room under the stairs.
- Put the WOODEN CIRCLE on the wooden compartment.
- Take the OIL and the GENERATOR WIRE.
- Go up the stairs; take a right and then a left to get to the catwalk.
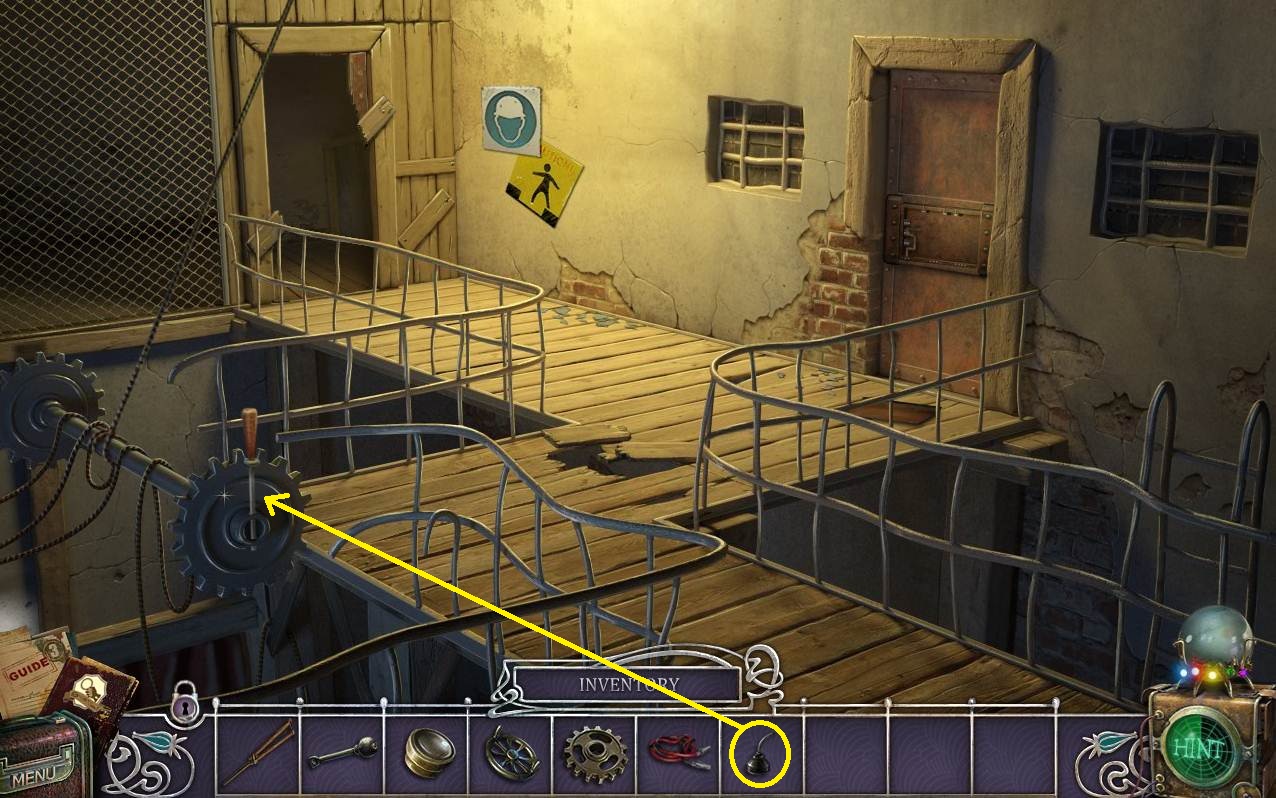
- Use the WENCH HANDLE and the OIL on the device (in the screenshot the wench handle is already in place).
- Push the handle and then take the GAS
- Take a left and go forward.
- Use the GENERATOR WIRE and the GAS on the device.
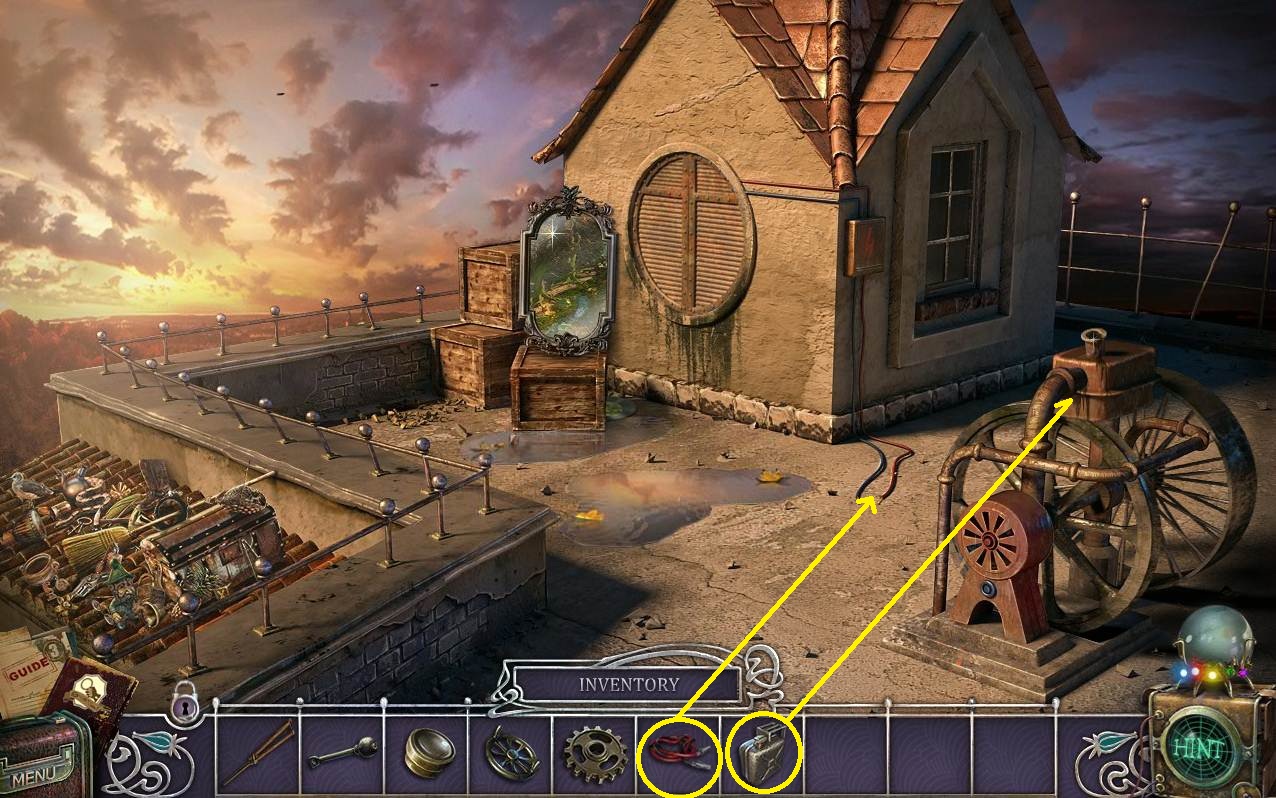
- Go forward through the round window.
- Grab the HAT, the CLEANER, the METAL STRIP, and the VALVE.
- Use the LEVER on the contraption.
- Put the BIG GEAR on the rod.
- Return to the catwalk (go back three times).
- Click on the panel and put the METAL STRIP on the device; this will activate a mini-game.
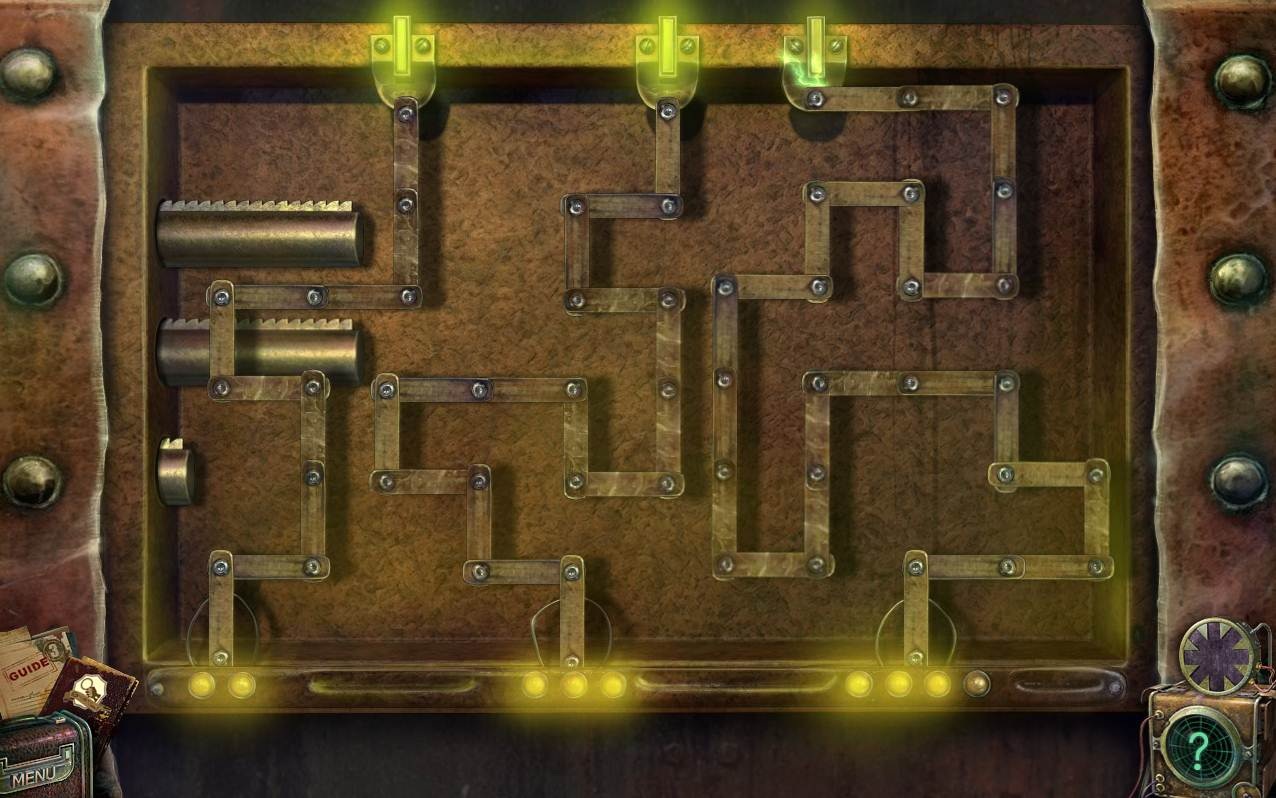
- For this game you have to memorize the right alignment of the metal strips (there are three levels so you’ll have to do it a total of three times). Use the screenshot to solve the game.
- Go through the opened door.
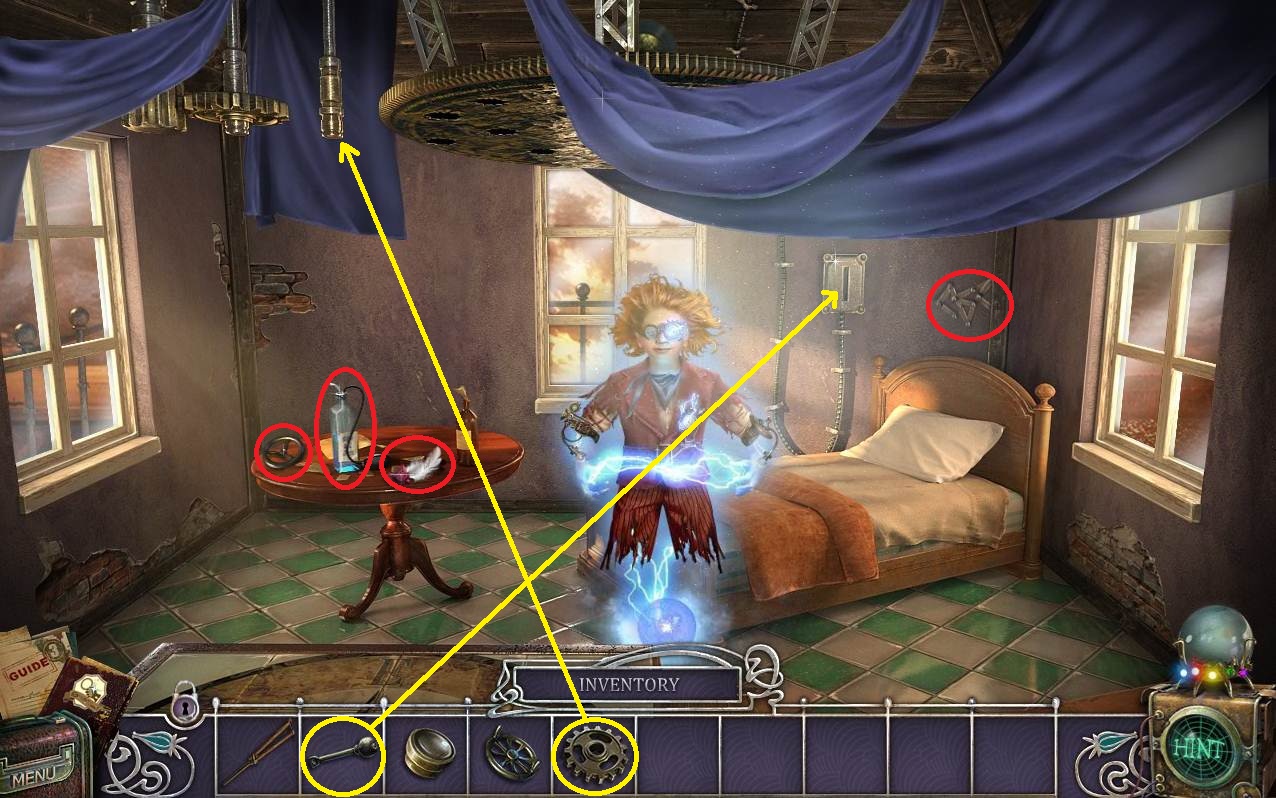
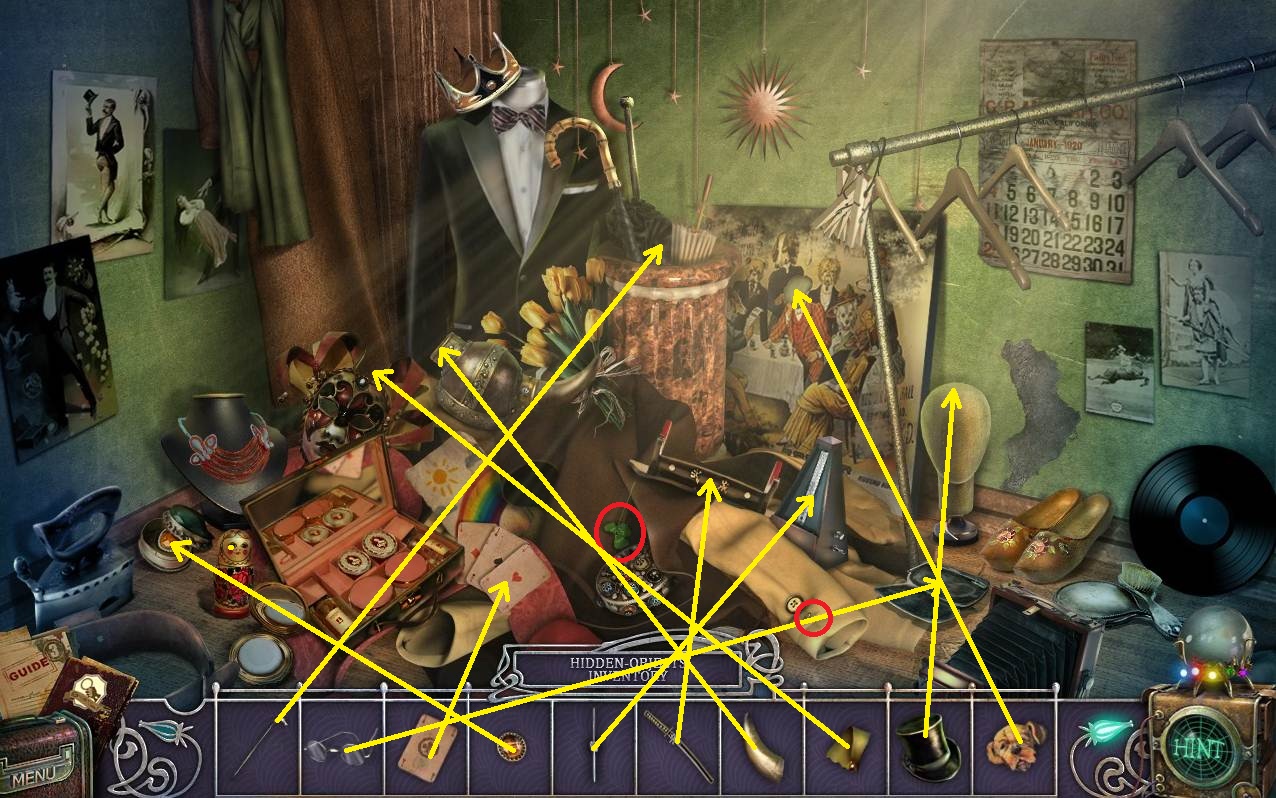
- Click on the sparkling area to activate an HOS.
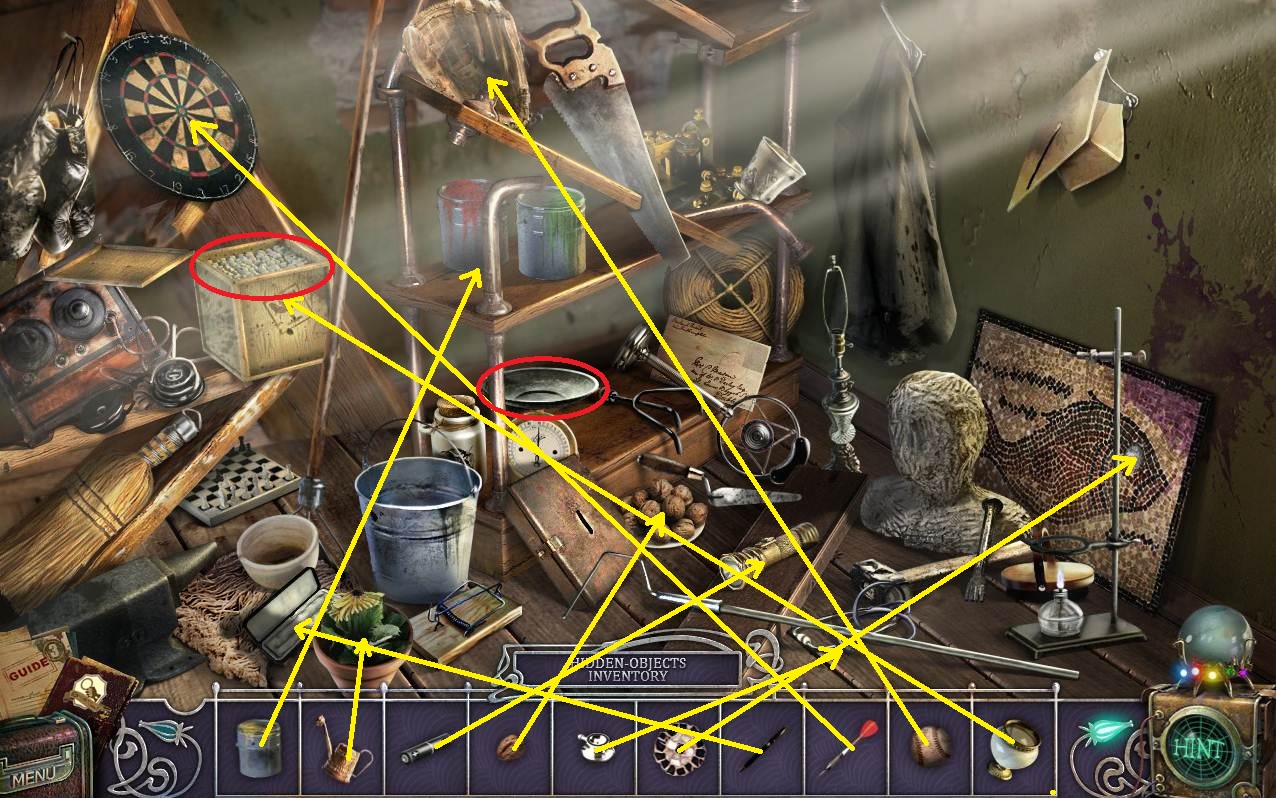
- Put the items away according to the screenshot to get the PIN (the red circles indicate items that are off screen).
- Click on the desk to find the COOKIE.
- Use the Super-flexibility Power on the hook to activate a mini-game.
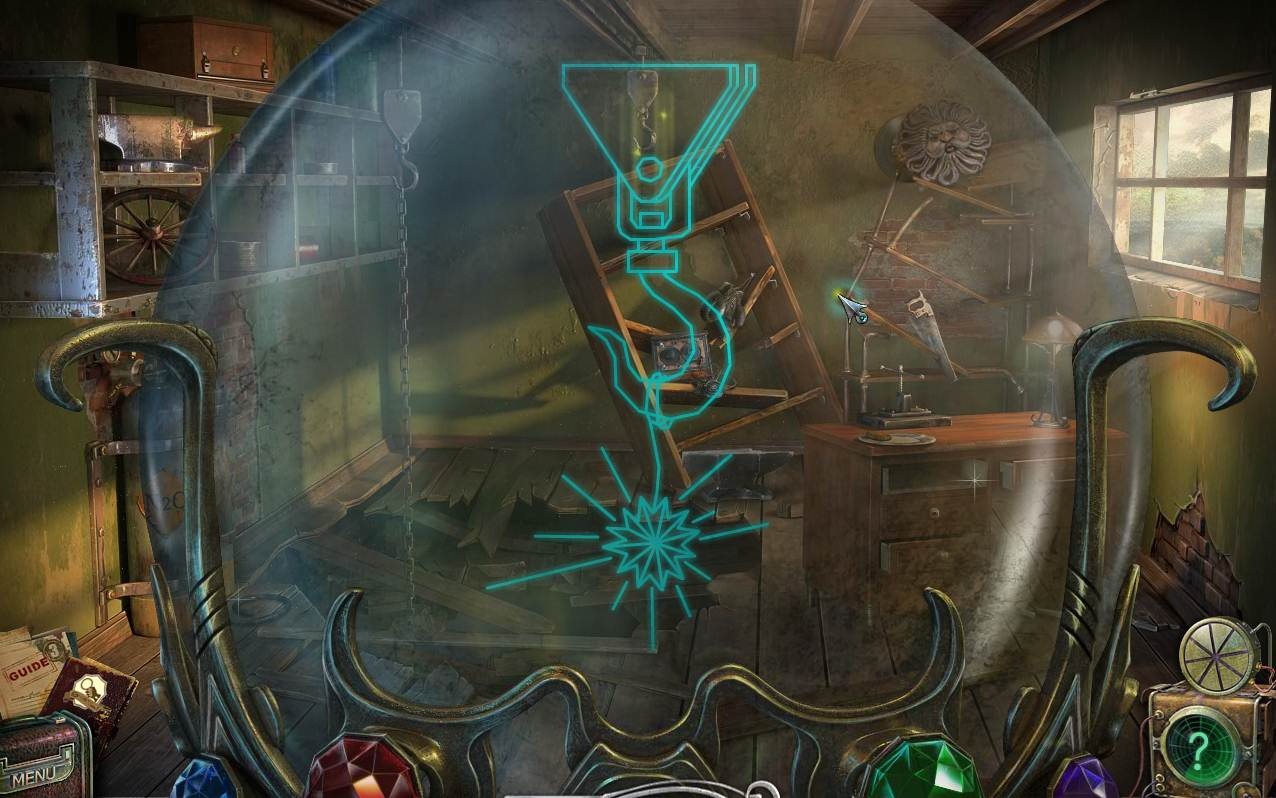
- Once again you’ll need to move the cursor around to create a picture.
- The screenshot shows the solution.
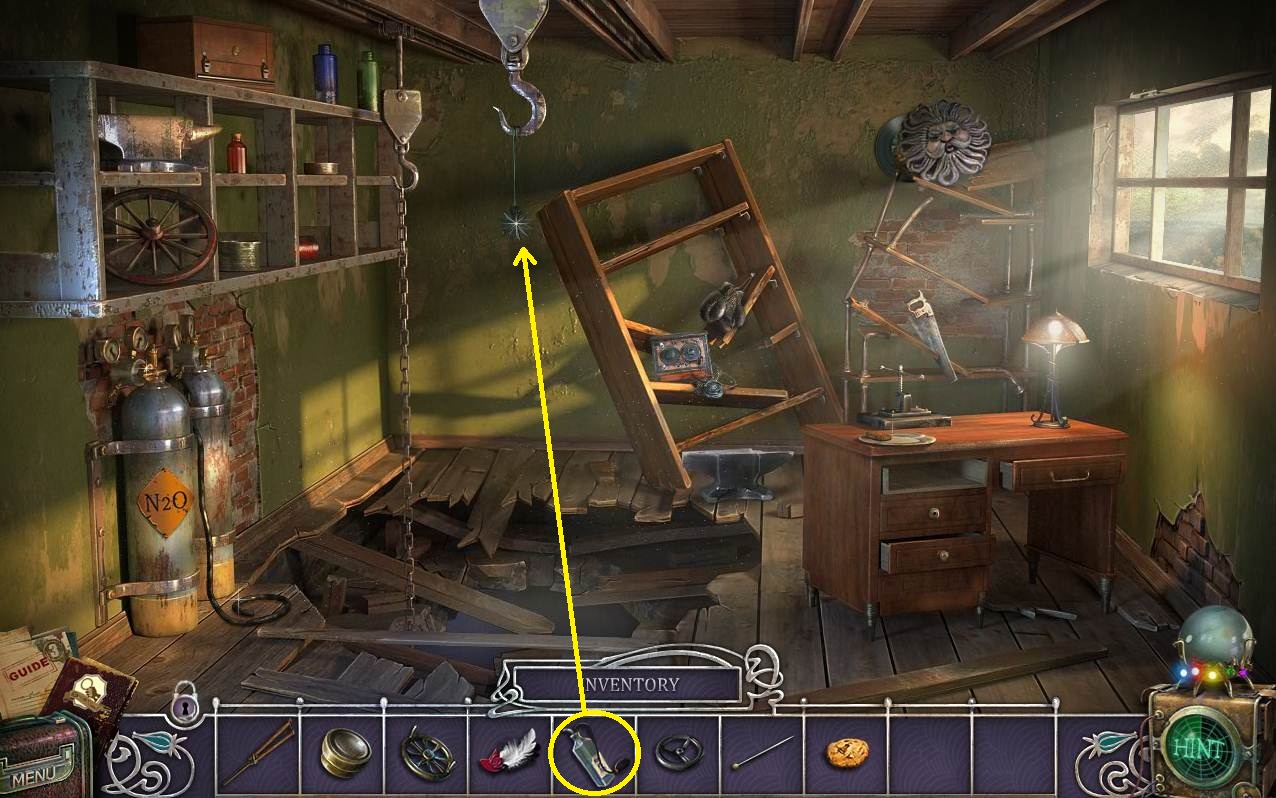
- Use the CLEANER on the star and then add the STAR to your inventory.
- Go back six times, take a right, and click on the sparkling area to activate an HOS.
- Use the screenshot to put all the items in their proper places; once again the red circles indicate areas for items that are off screen. Take the SMALL HANDLE once the area is complete.
- Go forward three times to reach the garage.
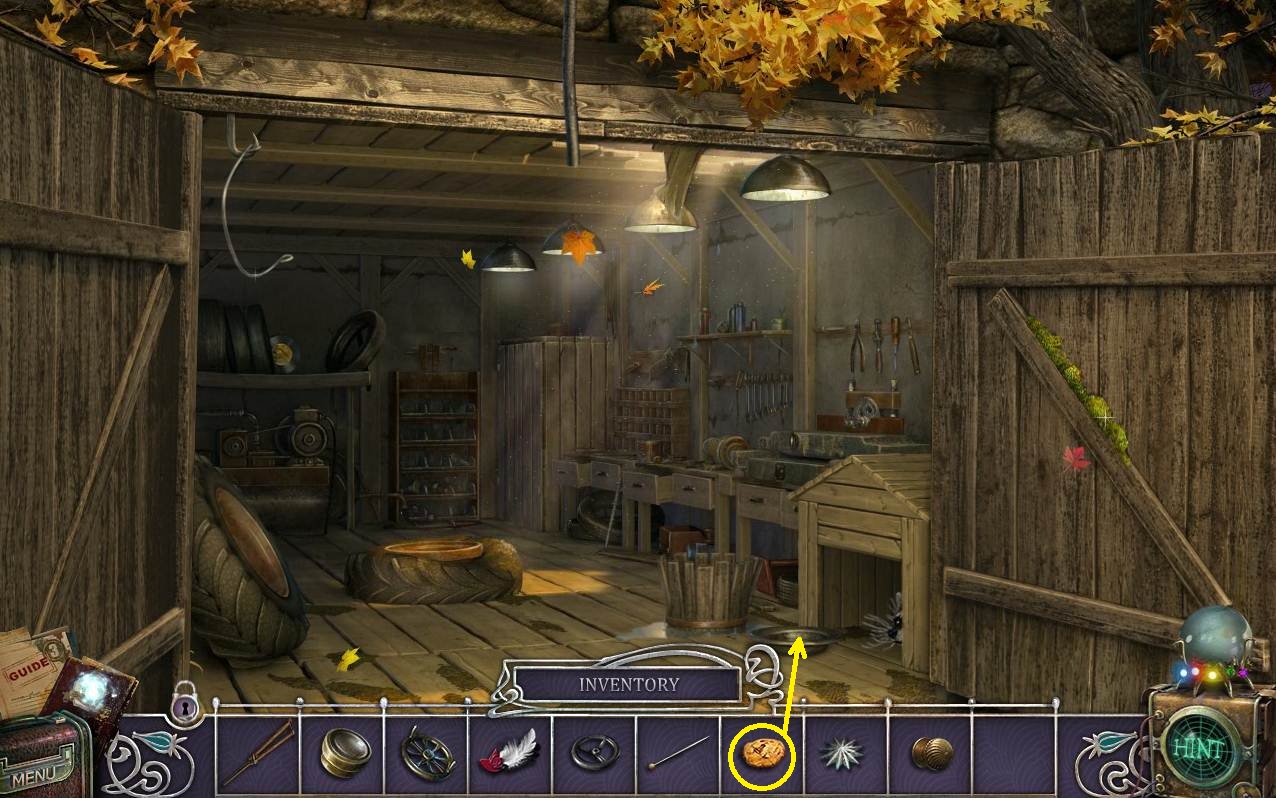
- Click on the small house and the put the COOKIE in the bowl; take the STAR.
- Return to the room you got the first star from (go back once, then go forward, take a left, go up the stairs, take a right, take a left, and go forward once more).
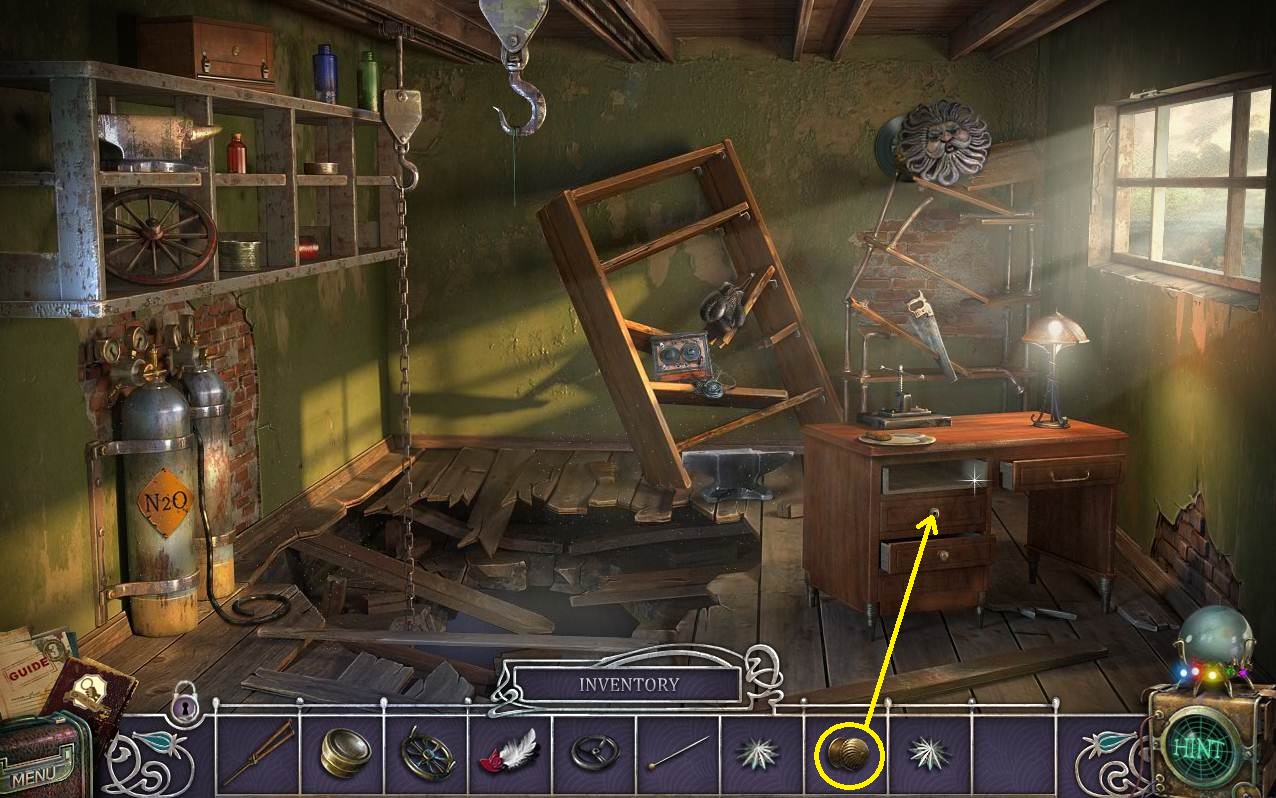
- Click on the desk and then put the SMALL HANDLE on the drawer.
- Pick up the SOLID FUEL.
- Go back five times, then forward twice to the room behind the curtain.
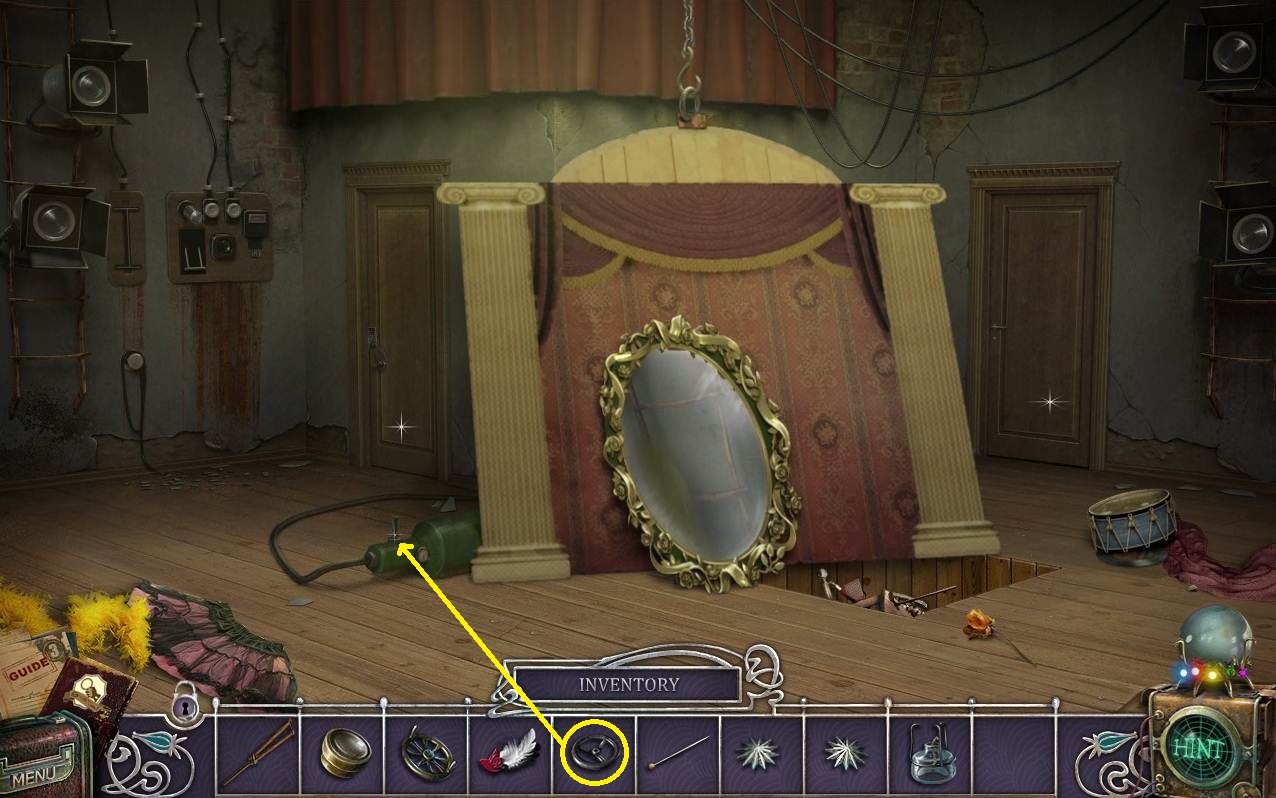
- Put the VALVE on the device and then turn it.
- Return to the catwalk (go back two times, take a left, go up the stairs, take a right, and then take a left).
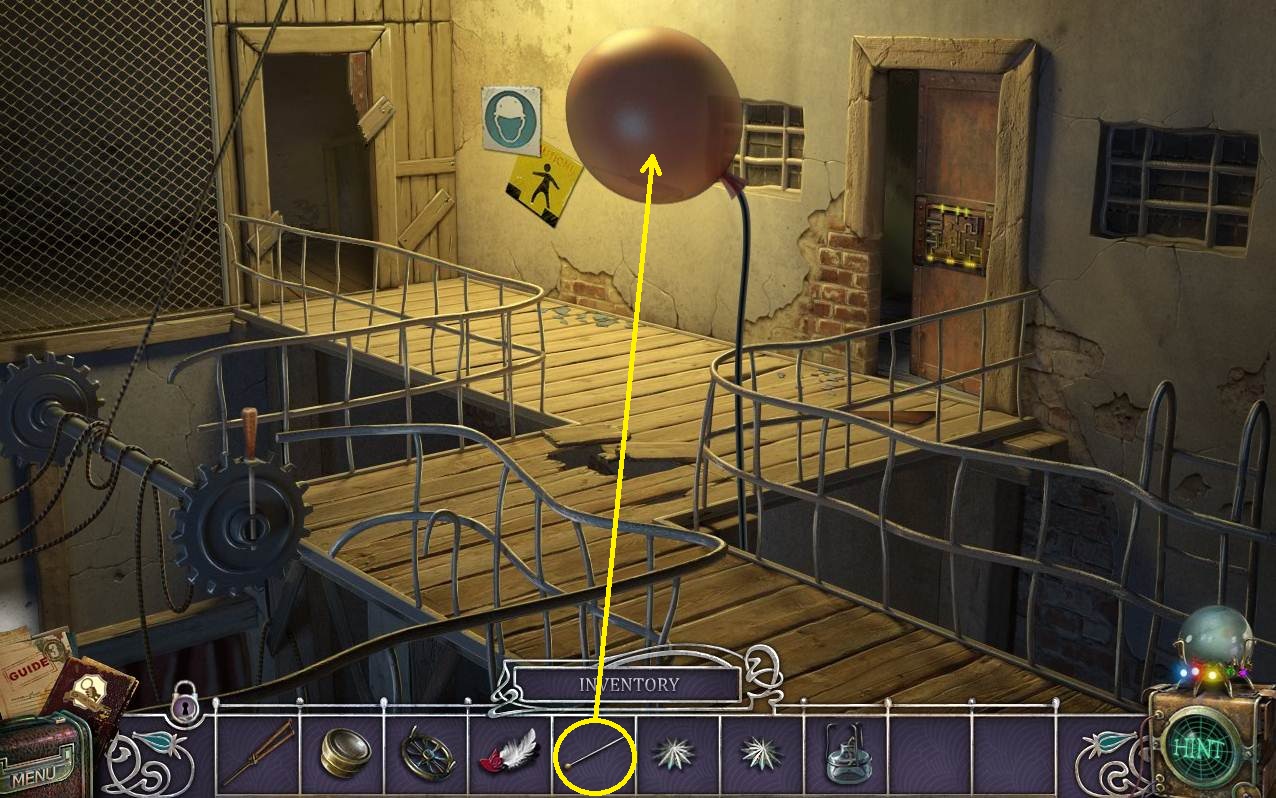
- Use the PIN on the balloon.
- Pick up the LOCKPICK and the STAR.
- Go back four times and then forward twice.
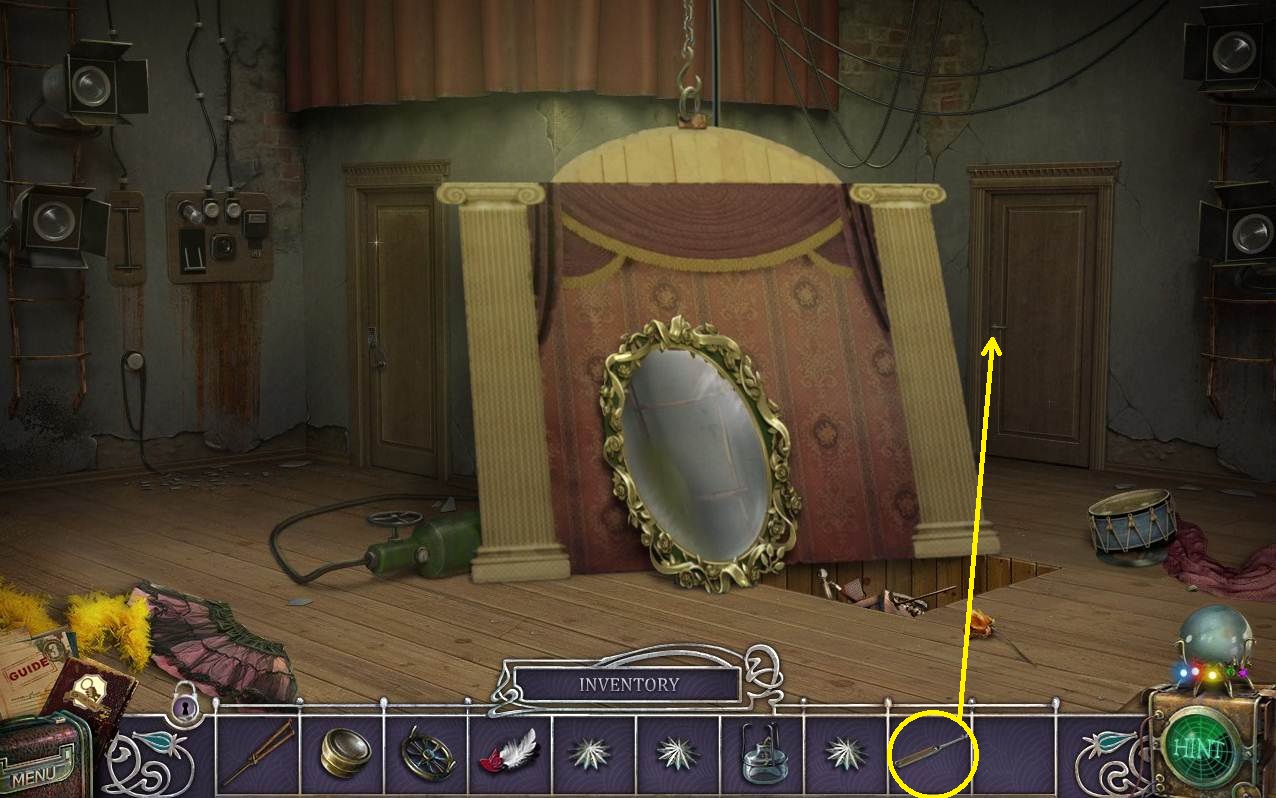
- Use the LOCKPICK on the door on the right.
- Go through the opened door.