
Secrets of the Dark: Mystery of the Ancestral Estate: Chapter Four: Sofia’s House
Rely on our Secrets of the Dark: Mystery of the Ancestral Estate Walkthrough to shed some light on your investigation as you explore a vast ancient mansion in search of family secrets that might explain the unusual disturbances of late. Use our custom screenshots, detailed instructions, and comprehensive puzzle solutions to help make your way through the darkness.
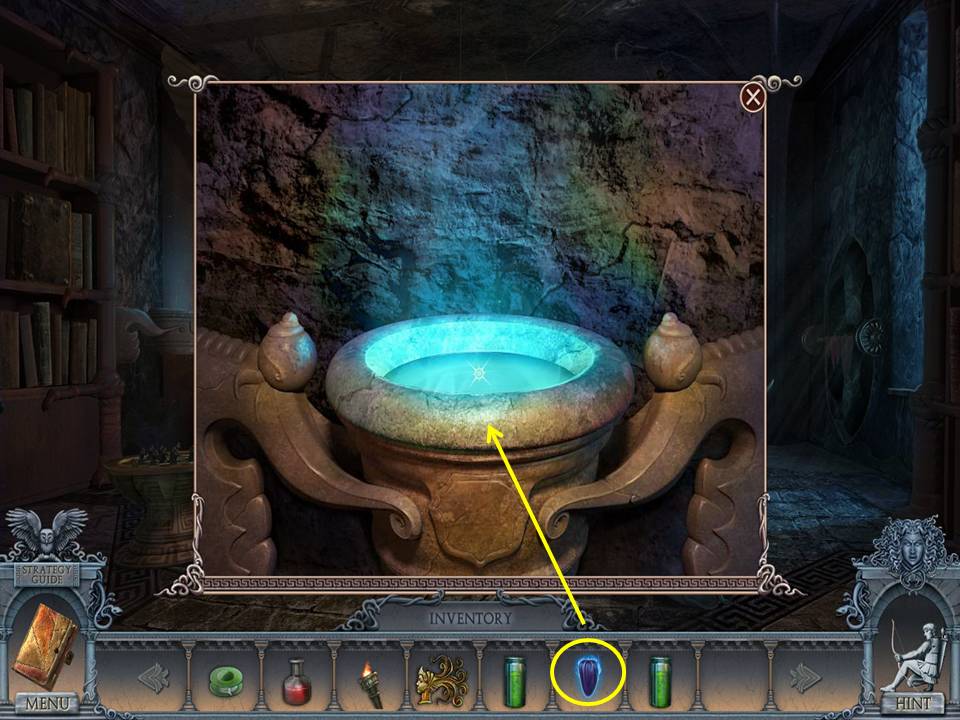
- Zoom into the magic pot.
- Plant the SEED.
- Take the FIRE FLOWER.
- Use the raft to go to the ship.
- Use the FIRE FLOWER on the Harpy.
- Take the SLEDGEHAMMER.
- Click down.

- Zoom into the door.
- Place the two LIQUIDS on the lock.
- Enter Sofia’s house.
- Take the SPEAR.
- SLEDGEHAMMER the wheel.
- Take the STEERING WHEEL.
- Click down and use the raft to go forward.
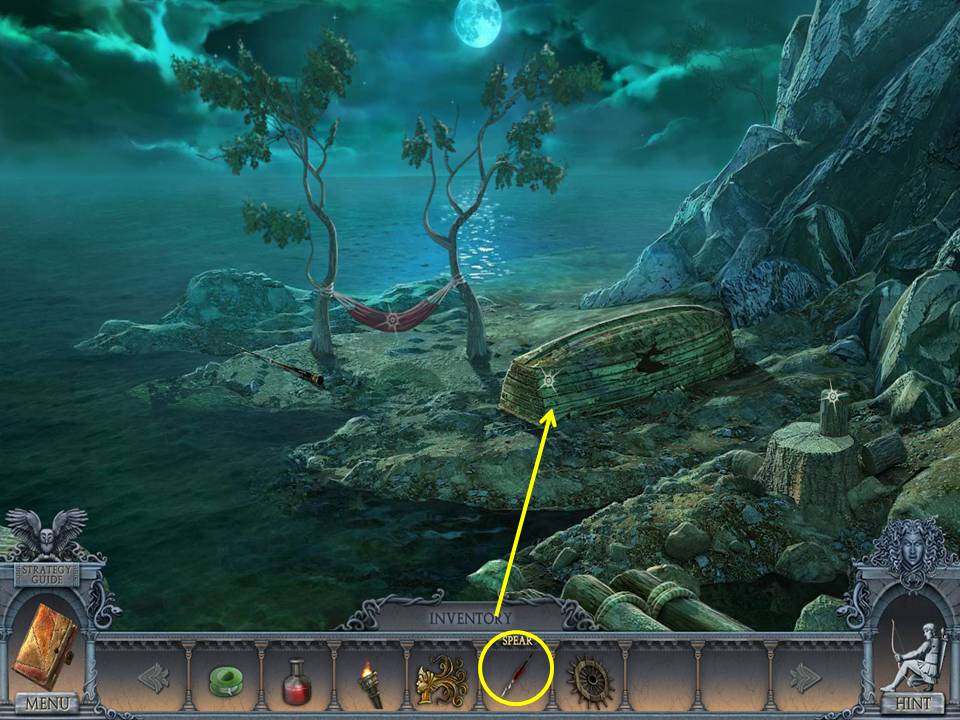
- Use the SPEAR on the boat.
- Take the DIVING MASK.
- Click down.
- Enter the ship.
- Put the STEERING WHEEL on the stern.
- Click to turn it
- Take the BUCKET.
- Return to the hold.
- Use the DIVING MASK on the opening.
- Go right.
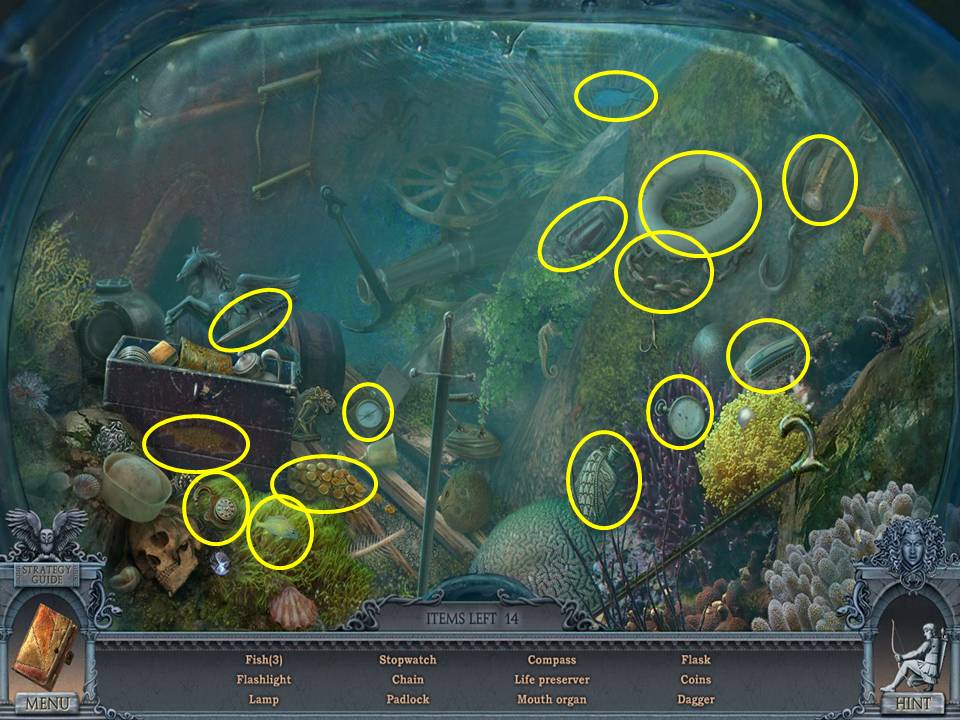
- Zoom into the sunken ship to play an HOA.
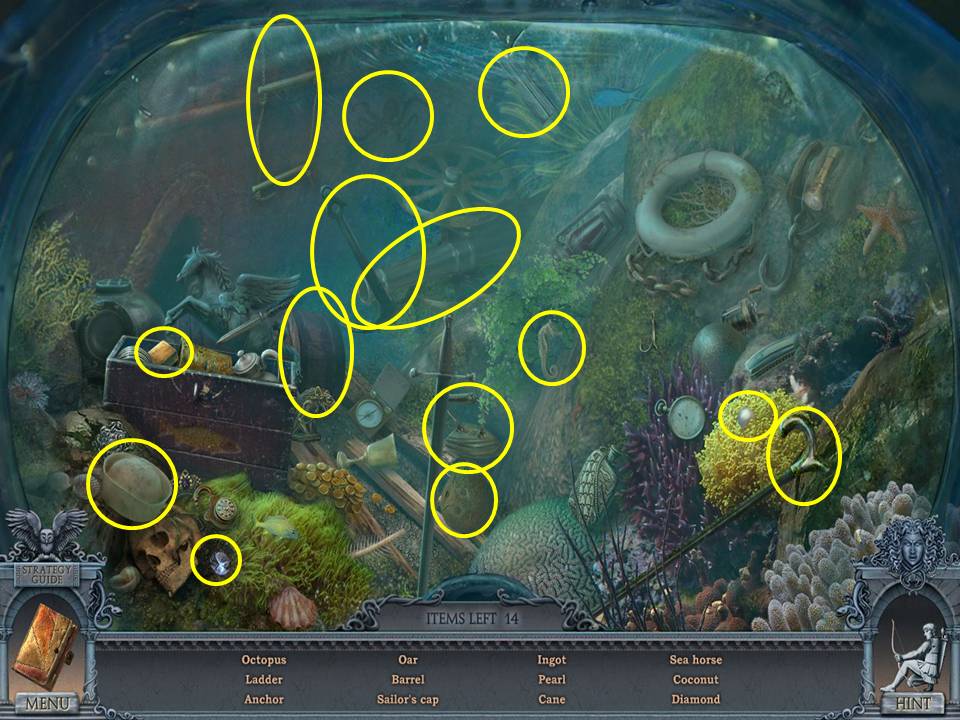
- Find the items listed.
- Receive the FISHING LINE.
- Leave the ship and go forward on the raft.
- String the FISHING LINE on the pole.
- Take the FISHING ROD.
- Click down.
- Enter the ship.
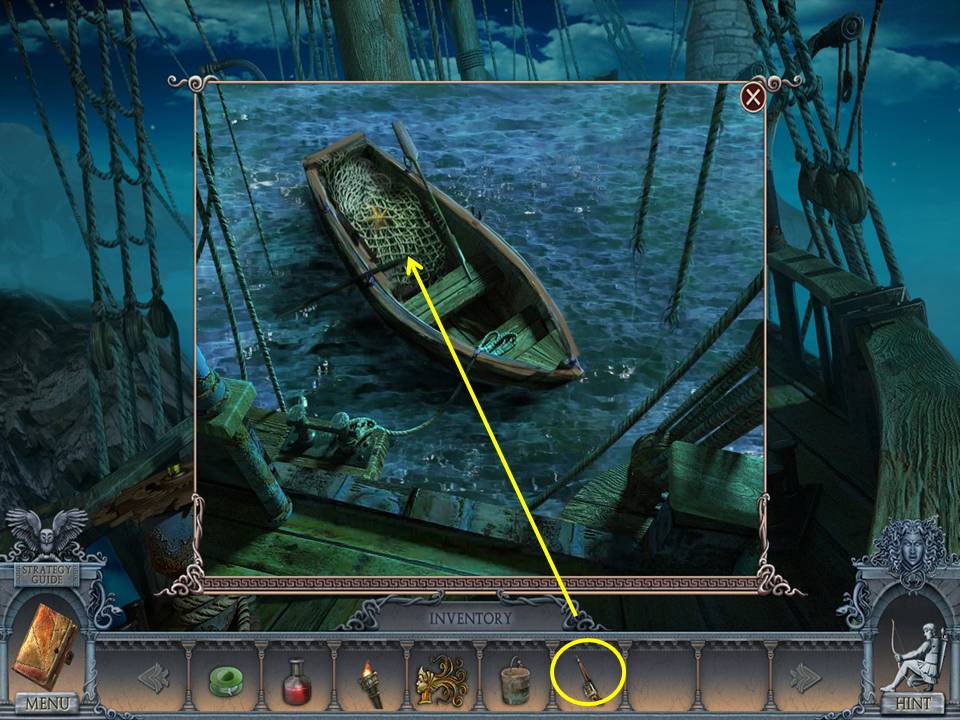
- Zoom into the side of the ship and fish out the net with the FISHING ROD.
- Take the STAR.
- Descend into the hold and move right through the opening.
- Zoom into the chest on the left.
- Place the STAR in the space to initiate a puzzle.

- The object of the puzzle is to close all of the shells except for the center one.
- Assuming the shells are numbered one through 13 from left to right and top to bottom.
- Click the shells in this order: 3, 2, 6, 11, 10.
- When finished, take the LAMP RING from the center shell.
- Leave the ship and enter Sofia’s house.
- Zoom into the lamp.
- Place the LAMP RING on it.
- Click the ring to change the lighting.
- Zoom into the shelves to play an HOA.
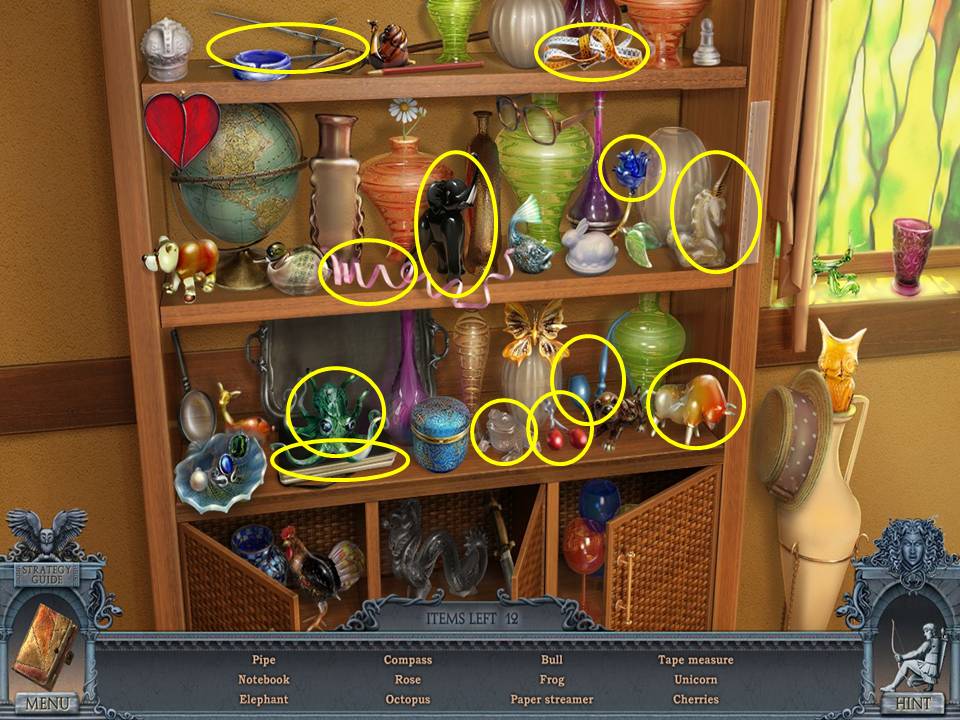
- Find the items listed.
- Receive the KNIFE.
- Click down and go forward on the raft.
- Cut the hammock with the KNIFE.
- Take the RED FABRIC.
- Click down and go to the library.
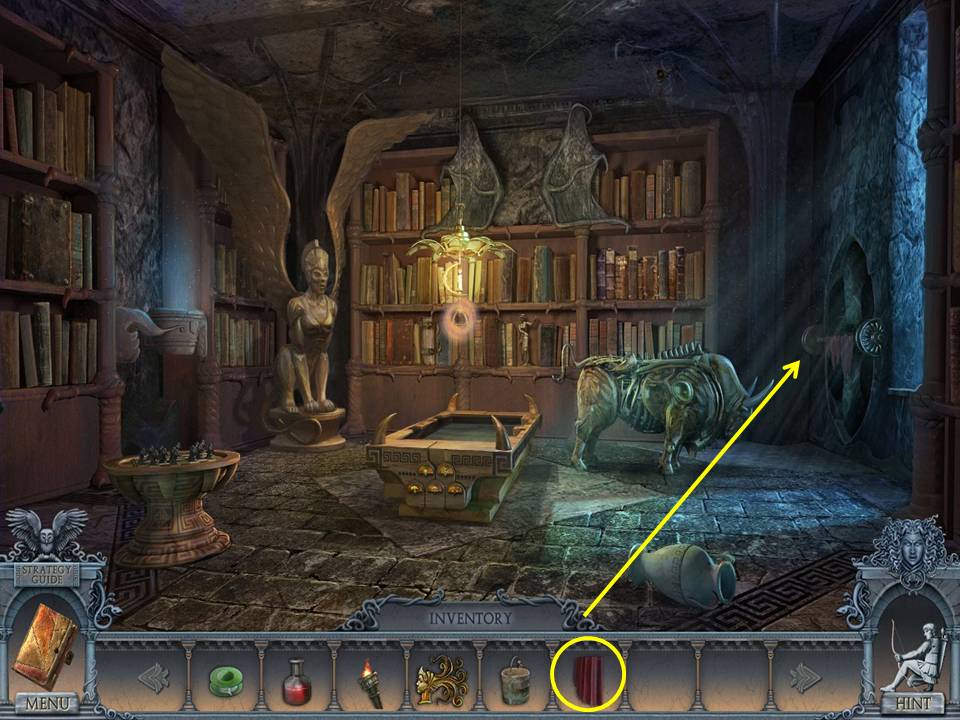
- Drape the RED FABRIC on the rack.
- Take the GATE KEY.
- Depart the mansion.
- Go left through the arch.
- Unlock the gate with the GATE KEY.
- Go right through the gate.
- Zoom into the iron gate.
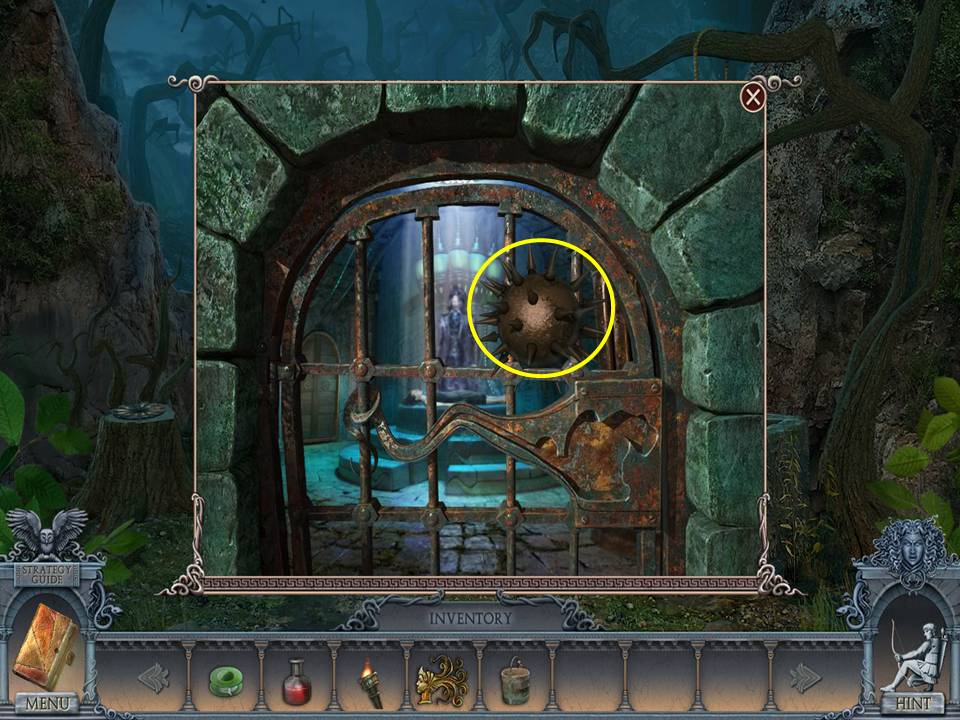
- Take the MACE HEAD.
- Go to the ship and enter Sofia’s house.
- Change the lighting in the room.
- Insert the MACE HEAD on the weapon at right by the skeleton.
- Click the handle.
- Take the OCTOPUS.
- Go to the ship’s hold and head right through the opening.
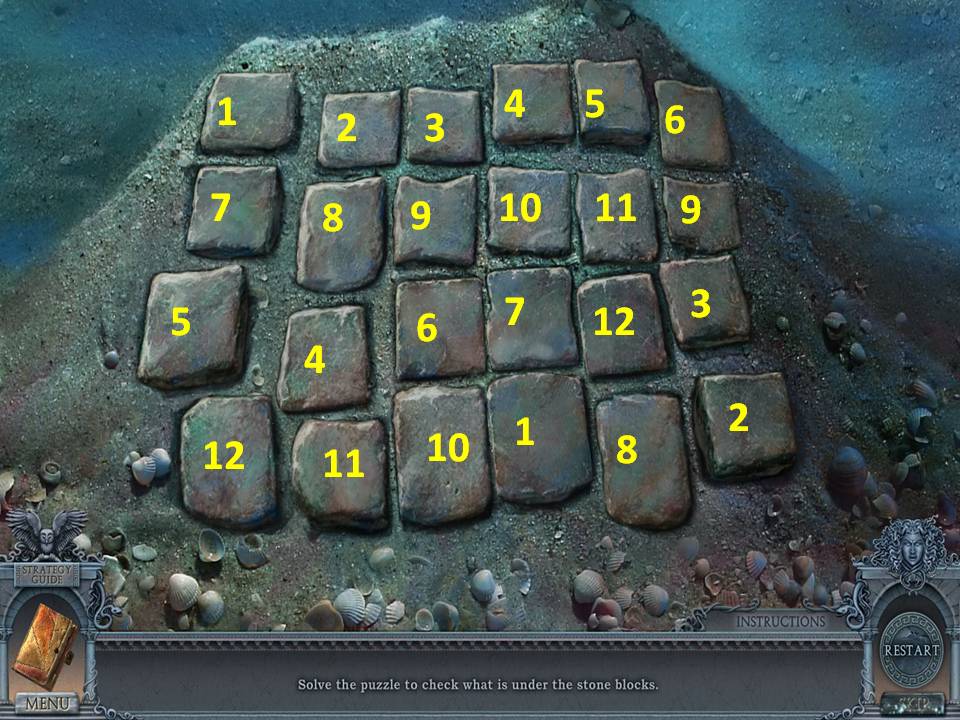
- Zoom into the chest on right and put the OCTOPUS in the appropriate space to initiate a puzzle.
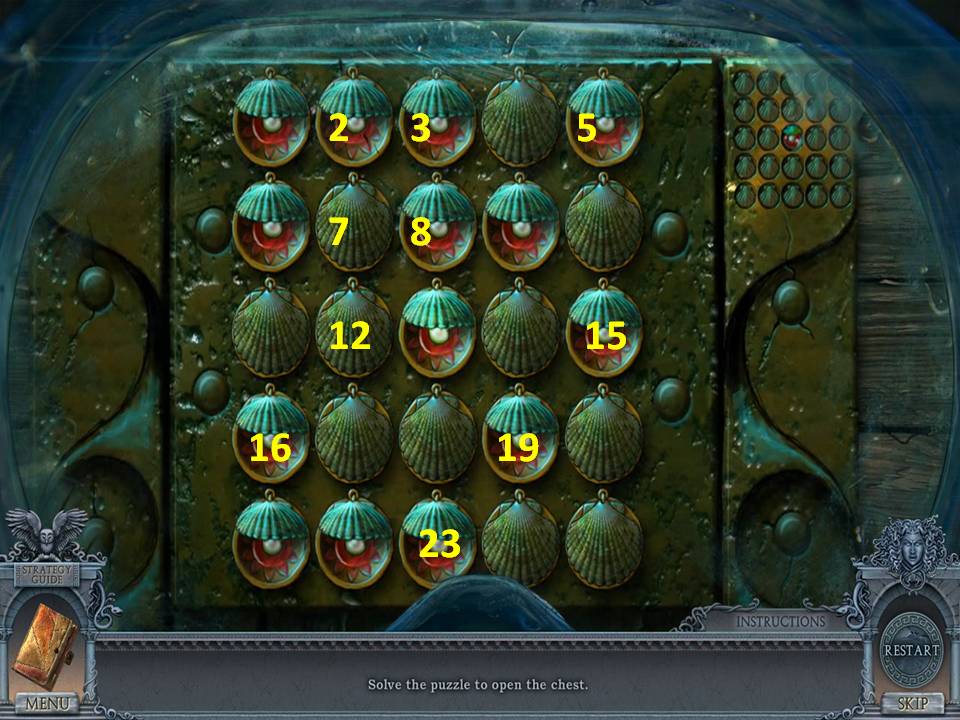
- The object of this puzzle is to close all of the shells except the center one.
- Assuming the shells are numbered one through 25 from left to right and top to bottom.
- Click the shells in this order: 12, 16, 23, 15, 19, 8, 2, 7, 5, 3.
- When finished, take the second REAGENT from the center shell.
- Zoom into the sunken ship to play an HOA.
- Find the items listed.
- Receive the GATE KEY.
- Click down five times.
- Go right.
- Zoom into and unlock the iron gate with the GATE KEY.
- Take the HANDLE.
- Go to the cable car.
- Move forward.
- Place the HANDLE on the box.
- Take the SAW and AXE.
- Return to Sofia’s house.
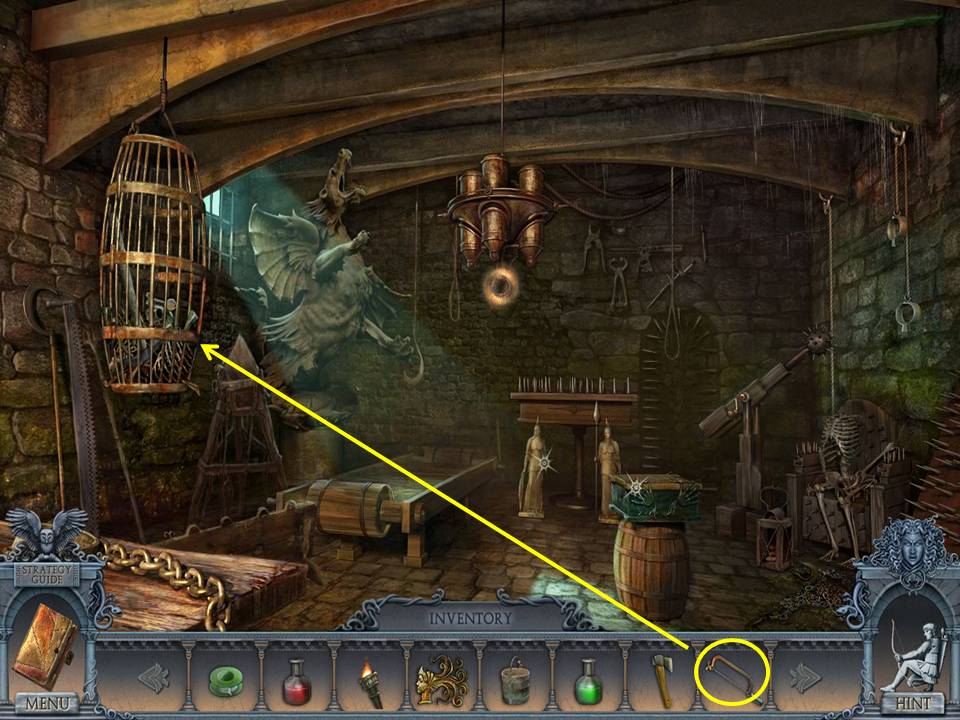
- SAW the cage.
- Take the PICKAXE and COFFER KEY.
- Click down and go forward on the raft.
- AXE the log.
- Take the FIREWOOD.
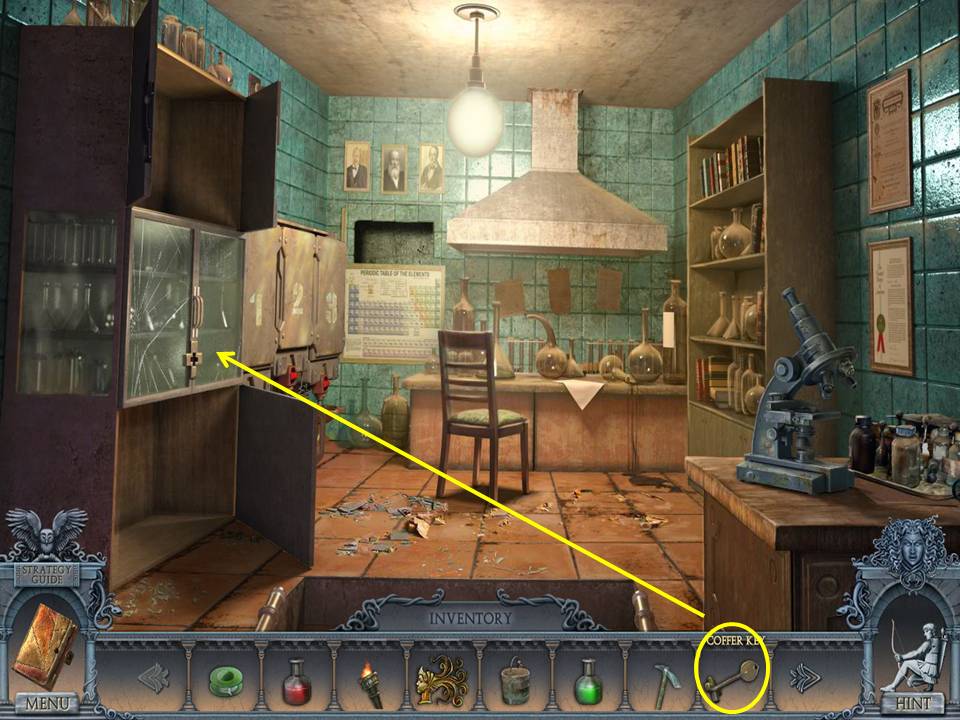
- Go to the lab in the House of Kleitos.
- Unlock the cabinet with the COFFER KEY.
- Take the FISH FOOD.
- Go to Sofia’s house.
- Change the lighting in the room.
- Feed the aquarium fish with the FISH FOOD.
- Go through the doorway.
- Take the SHEARS and BROOM.
- Click down.
- Zoom into the shelves to play an HOA.
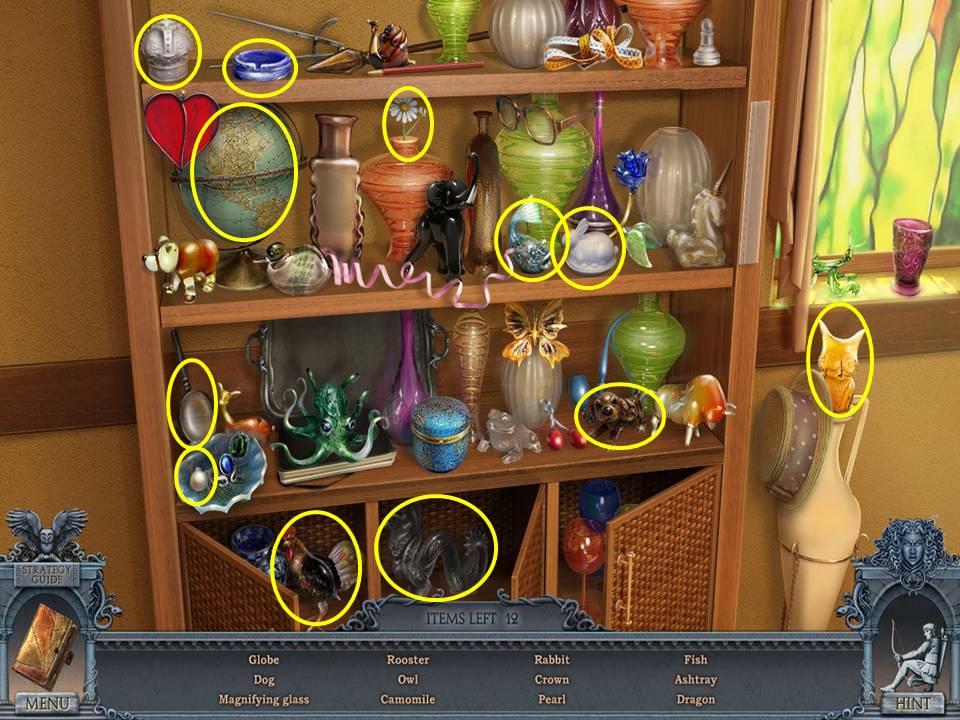
- Find the items listed.
- Receive the STEMWARE.
- Click down.
- SHEAR the sheep.
- Take the FLEECE.
- Return to Sofia’s house.
- Spin the FLEECE on the spinning wheel.
- Take the THREAD.
- Move forward.
- Zoom into the table and place the STEMWARE in the scene to initiate a puzzle.
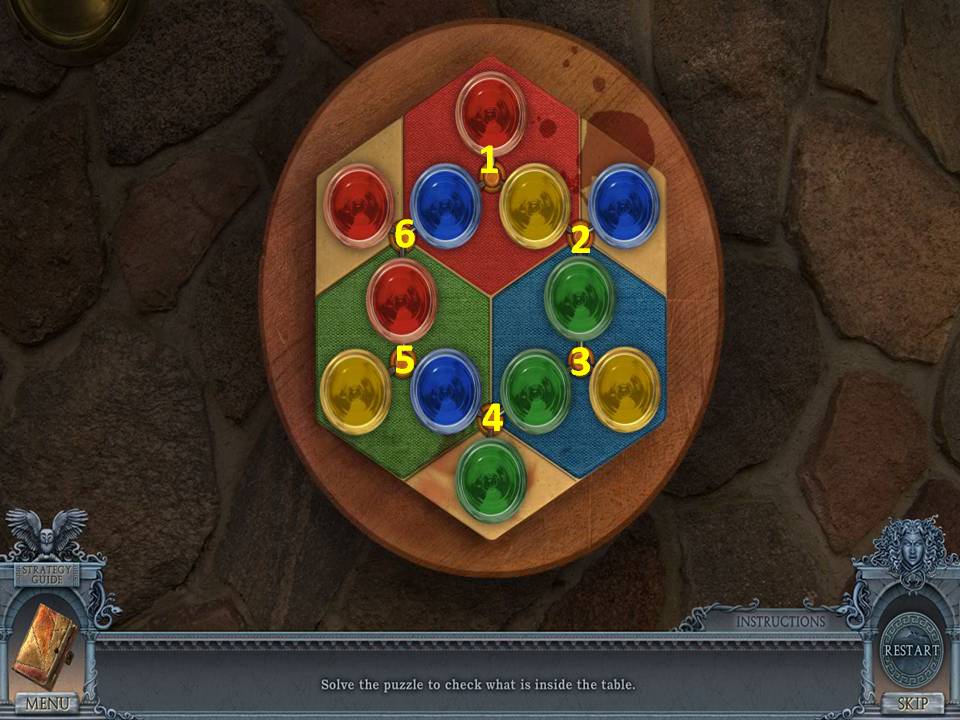
- The object of the puzzle is to move all the colored glasses to their matching spaces.
- Assuming that the buttons are numbered one through six beginning at the top and moving clockwise, click the buttons in this order: 6, 2, 1, 4, 5, 6, 3, 4.
- When finished, take the MAGIC BALL.
- Click down and put the MAGIC BALL on the statue.
- Zoom into the statue.
- Take the third REAGENT and the note.
- Click down and go forward on the raft.
- Zoom into the rocky shore.
- Sweep the sand with the BROOM to initiate a puzzle.
- The object of the puzzle is to find the matching pairs.
- See screenshot for solution.
- Zoom into the glass castle.
- Take the MECHANISM PART.
- Ride the cable car forward.
- Zoom into the shelves.
- THREAD the needle.
- Take the THREADED NEEDLE.
- Return on the cable car and go right.
- Zoom into the blimp.
- Use the THREADED NEEDLE on the cloth.
- Take the BAG.
- Click down.
- Enter the building.
- Go upstairs.
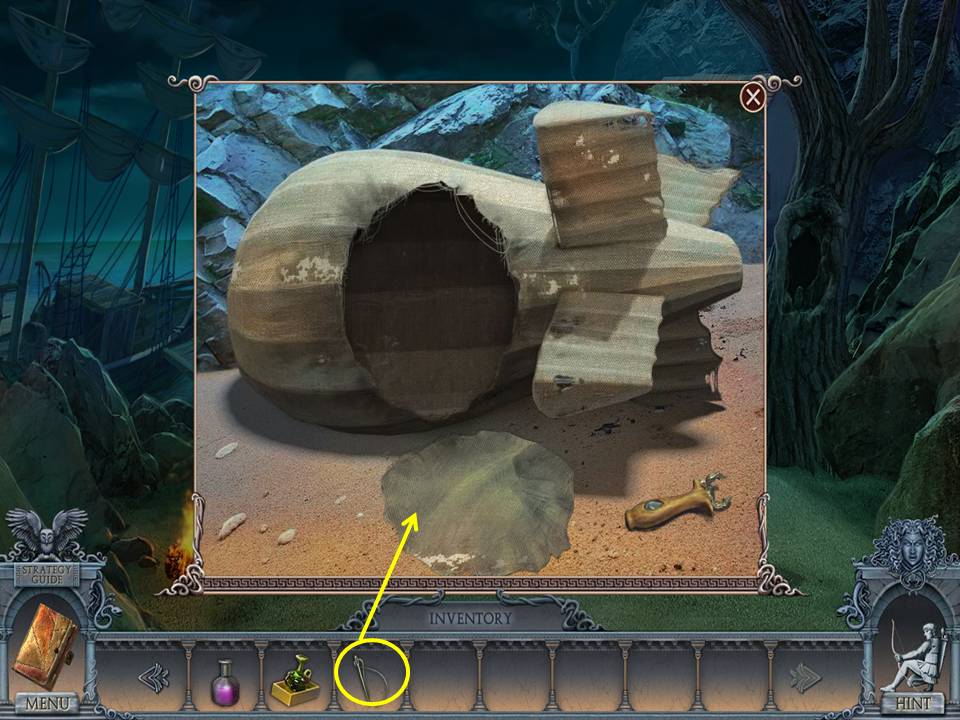
- Use the BAG on the flower.
- Take the SEEDS.
- Click down four times.
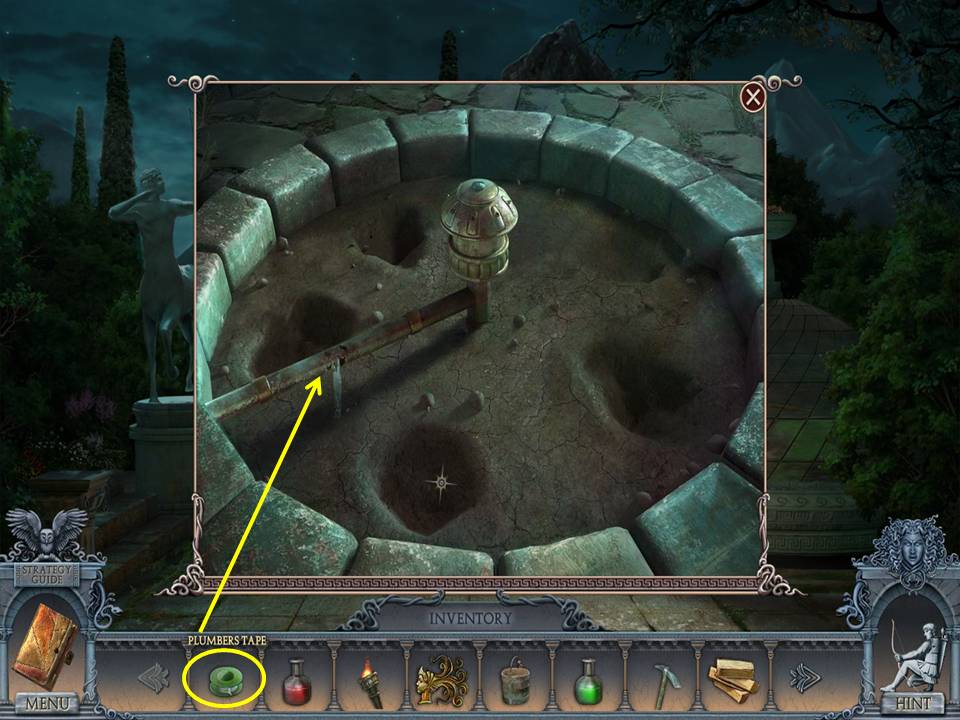
- Zoom into the fountain.
- Tape the pipe with PLUMBERS TAPE.
- Scatter the SEEDS on the dirt.
- Pick five flowers.
- Go through the arch.
- Give the flowers to the topiary shaped like a lady.
- Take the BRUSH.
- Go to the art room in Sofia’s house.
- Place the MECHANISM PART on the mechanism.
- Dial the parts to match the code in the journal.
- Take the FACE.
- Click down four times.
- Go right.
- Put the FACE on the well.
- Take the METAL HEAD and BOARD PART.
- Ride the cable car to Kleitos’ house.
- Scale the ladder.
- Zoom into the table.
- Put the BOARD PART in the scene to initiate a puzzle.
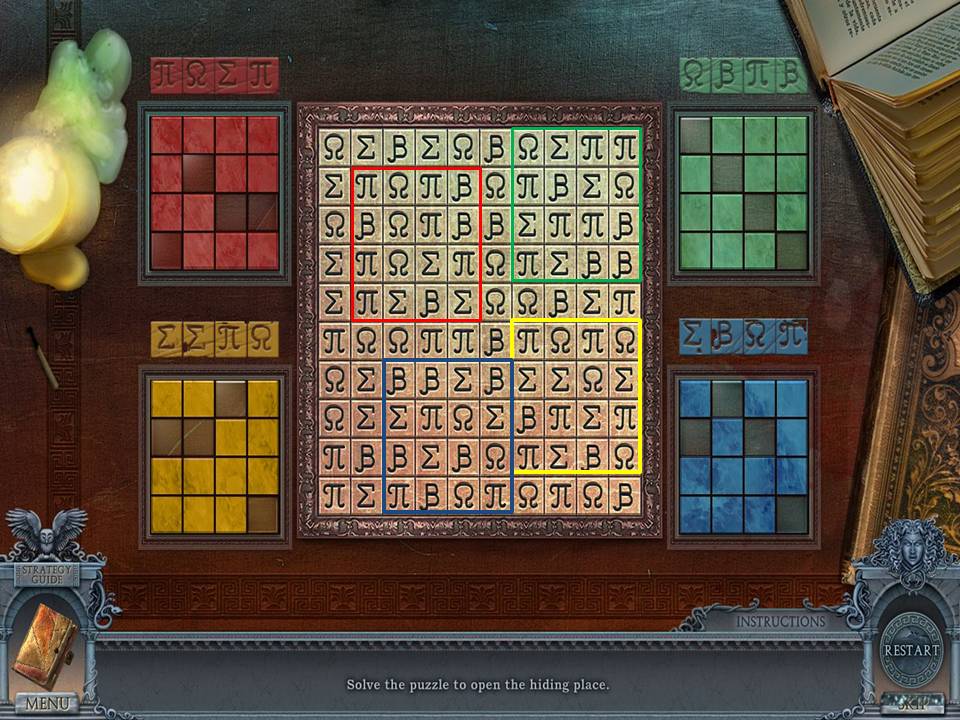
- The object of the puzzle is to place the colored templates on the board to match the symbols.
- See screenshot for solution.
- Take the fourth REAGENT.
- Go to Sofia’s art room.
- Zoom into the easel.
- Place the four REAGENTS and the BRUSH in the scene.
- Take the ARROWS.
- Click down.
- Zoom into the shelves to play an HOA.
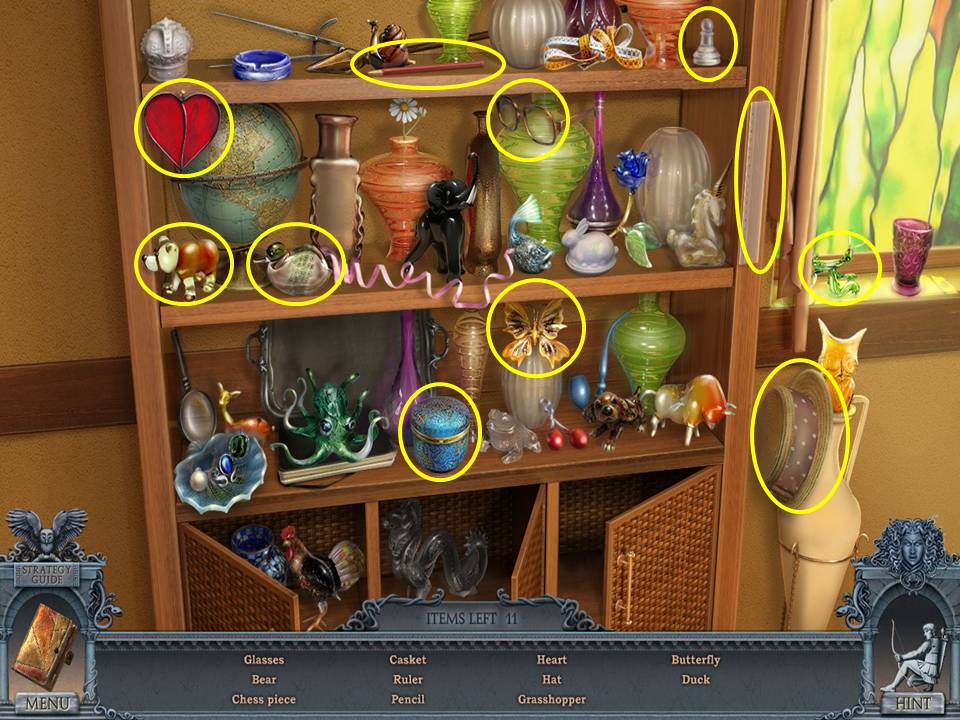
- Find the items listed.
- Receive the LANCE.
- Change the lighting in the room.
- Give the soldier statue the LANCE.
- Change the lighting in the room.
- Zoom into the table.
- Take the second PUZZLE PIECE.
- Change the lighting in the room.
- Zoom into the puzzle box and insert the two PUZZLE PIECES in the slots to initiate a puzzle.
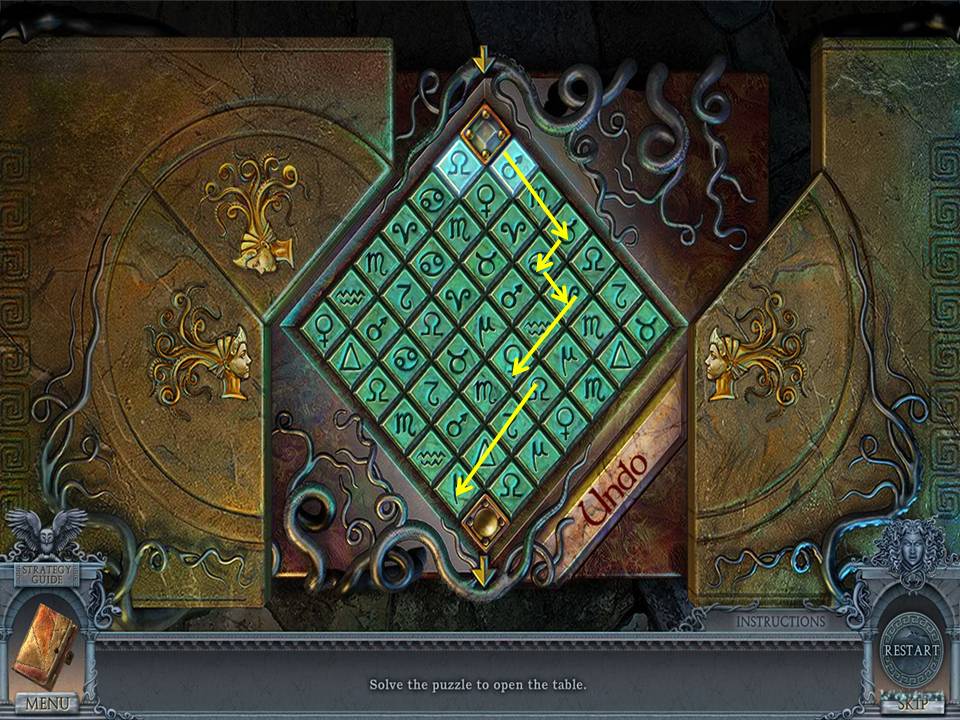
- The object of the puzzle is to guide the square to the bottom slot.
- See screenshot for solution.
- Take the STONE FLOWER.
- Change the lighting in the room.
- Zoom into the angel statue.
- Give her the STONE FLOWER.
- Take the BULB.
- Click down five times.
- Go to the crypt.
- Zoom into the lamp.
- Insert the BULB in the slot.
- Click anywhere in the scene to receive a CRYSTAL.
- Go to the shore.