
League of Light: Wicked Harvest: Chapter Two: The Fortune Teller
Our League of Light: Wicked Harvest Walkthrough will watch your back as you explore the town of Blake's Mountain where the children of the town have gone missing and a fabled Red Moon is on the rise. Trust our detailed game instructions, our custom marked screenshots, and easy-to-understand puzzle solutions to see you safely through this new investigation for the League of Light!
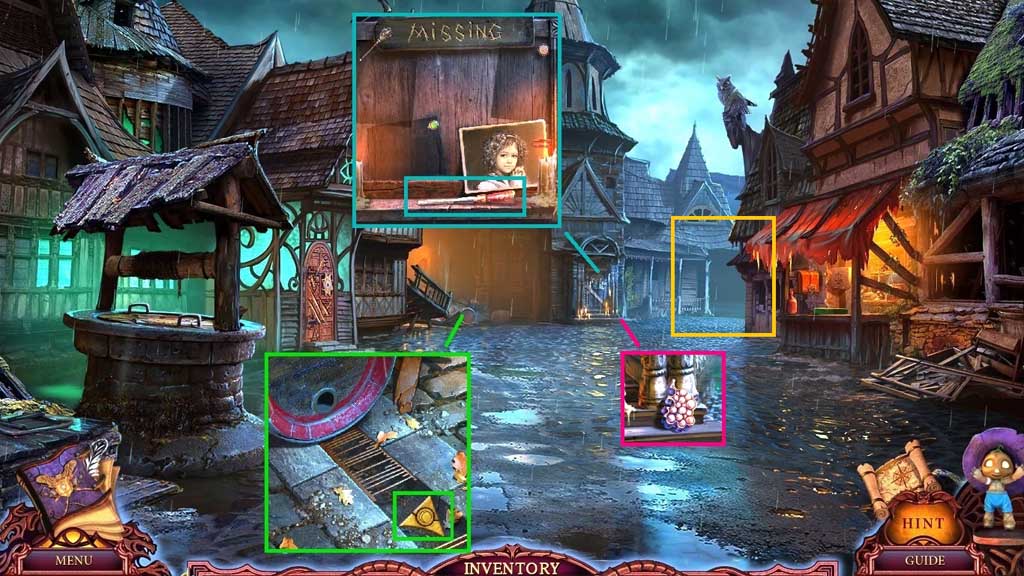
- Select the corkscrew to uncork the barrel; collect 2 /3 runes.
- Collect the grapes and the chisel.
- Move forward to the Yard.

- Select the chisel to collect the snake ring.
- Collect 3 /3 runes.
- Move down once.
- Click the notices.
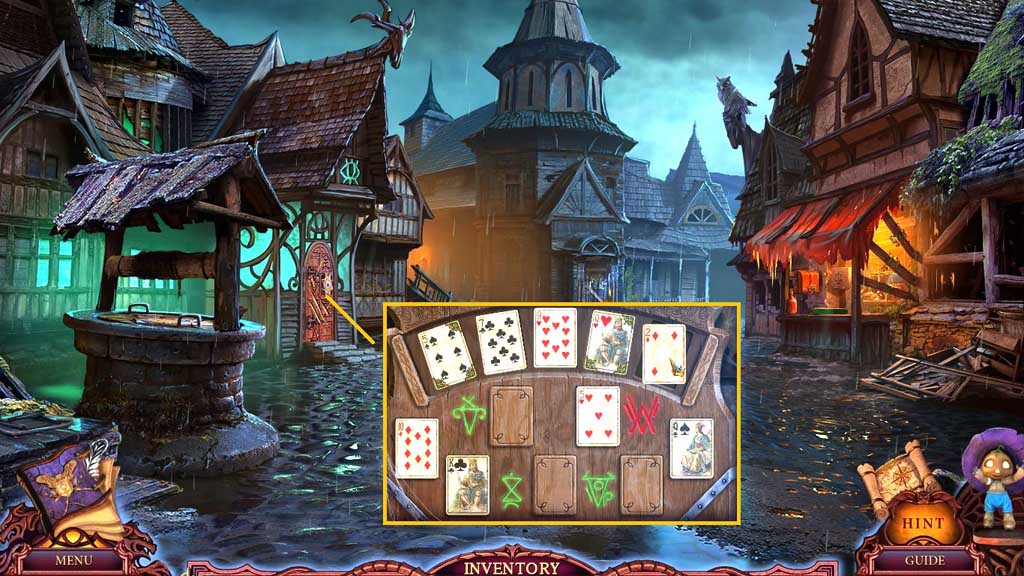
- Insert the runes to trigger a mini game.
- Solve the game by moving the cards into the empty spaces to complete the sequence.
- Move into the Fortune Teller’s.
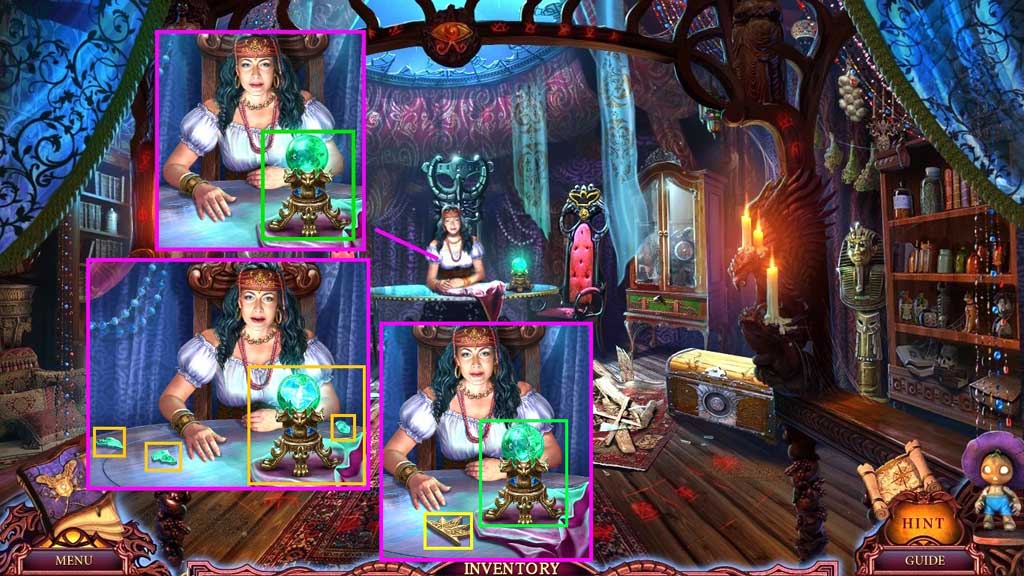
- Click the fortune teller and speak to her.
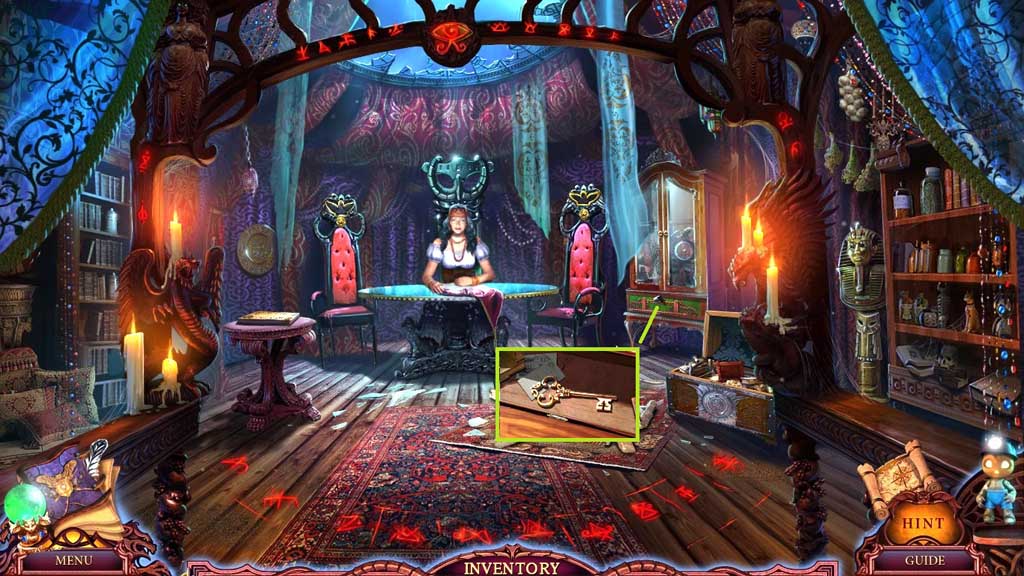
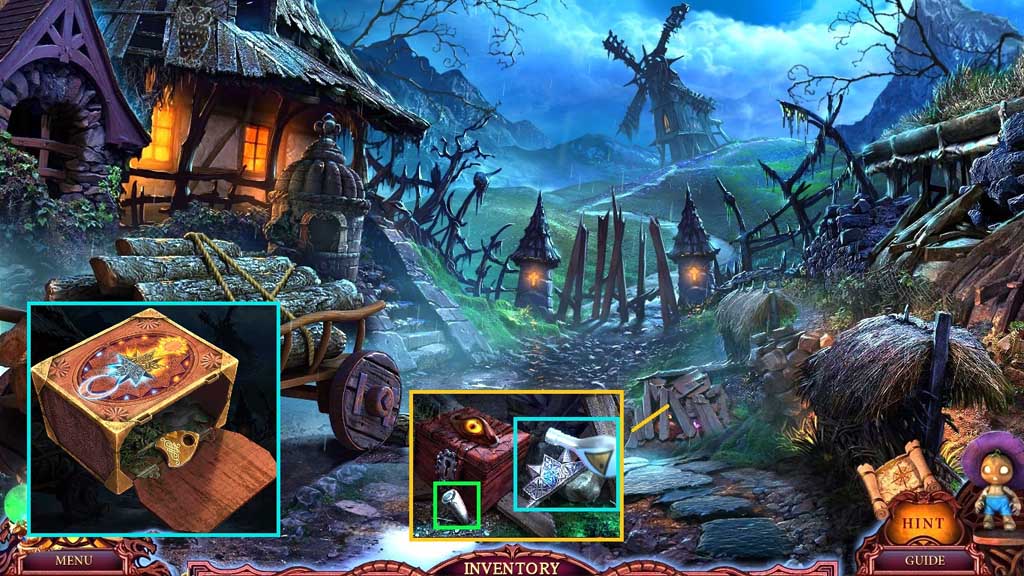
- Click the crystal ball; place the broken piece into the crystal ball and collect it.
- Collect the star half.

- Collect the solvent.
- Insert the snake ring; collect the photo and the grapes.
- Collect the broken figurine and click it once.
- Assemble the figurine; collect the dancer figurine.
- Move to the House Interior and click the hidden objects area.
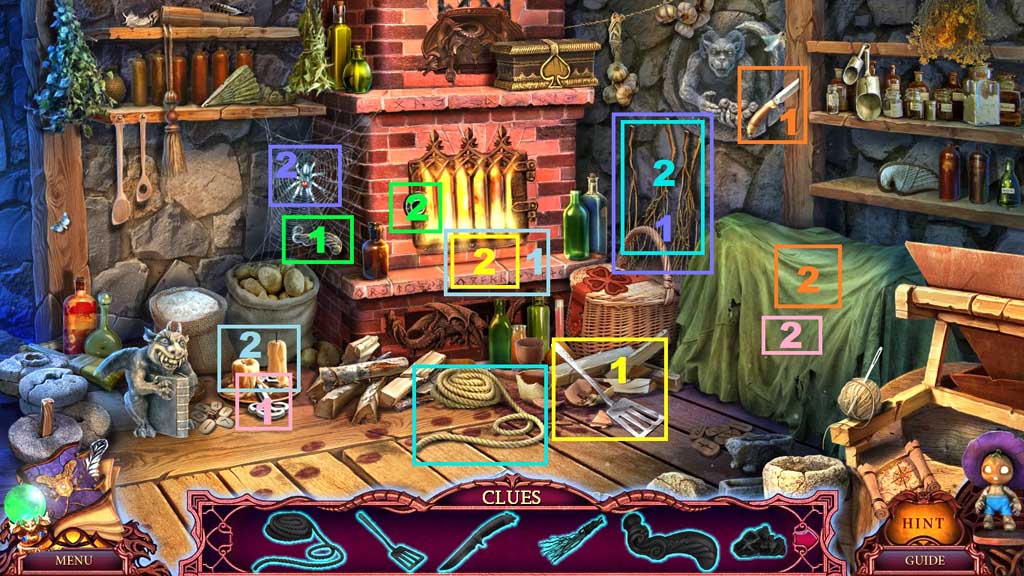
- Find the items.
- Select the rope and use it on the twigs; collect the broom.
- Select the broom to clear the cobwebs; collect the handle.
- Attach the handle onto the oven and click it open.
- Select the spatula to collect the hot coal; use the coal to melt the candles and collect the key.
- Select the knife to slice the cloth and uncover the chest.
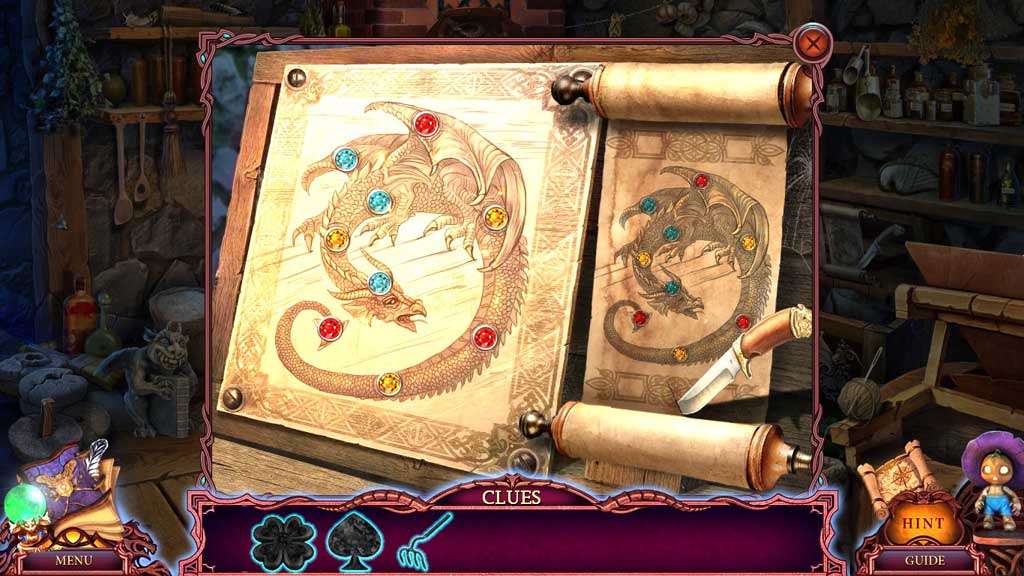
- Insert the key into the chest; zoom into the chest to trigger a mini game.
- Select the knife to open and hold the scroll.
- Solve the mini game by switching the gems around to match the diagram; collect the clover.
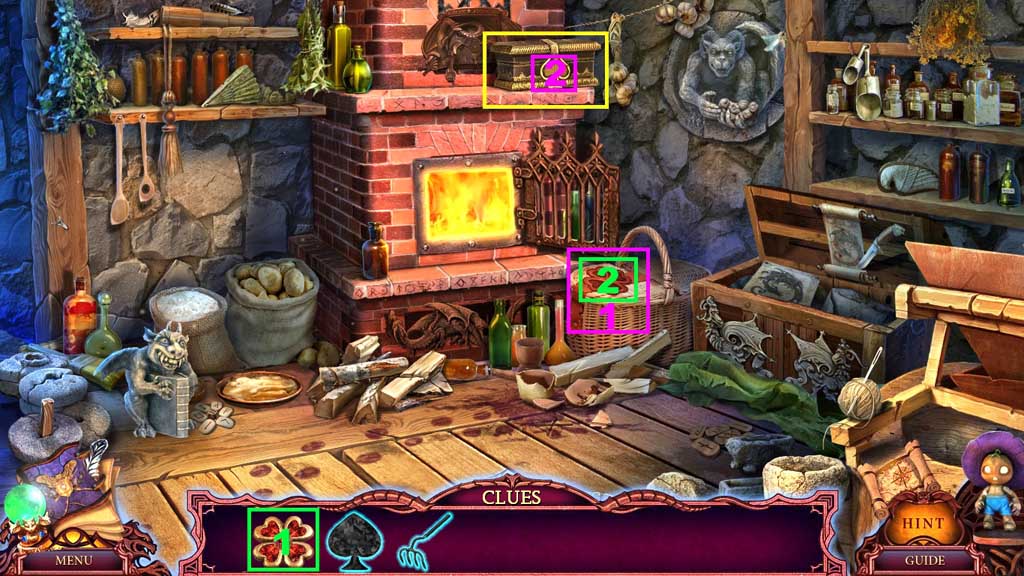
- Insert the clover into the basket; collect the spade.
- Insert the spade into the box.
- Collect the rake.
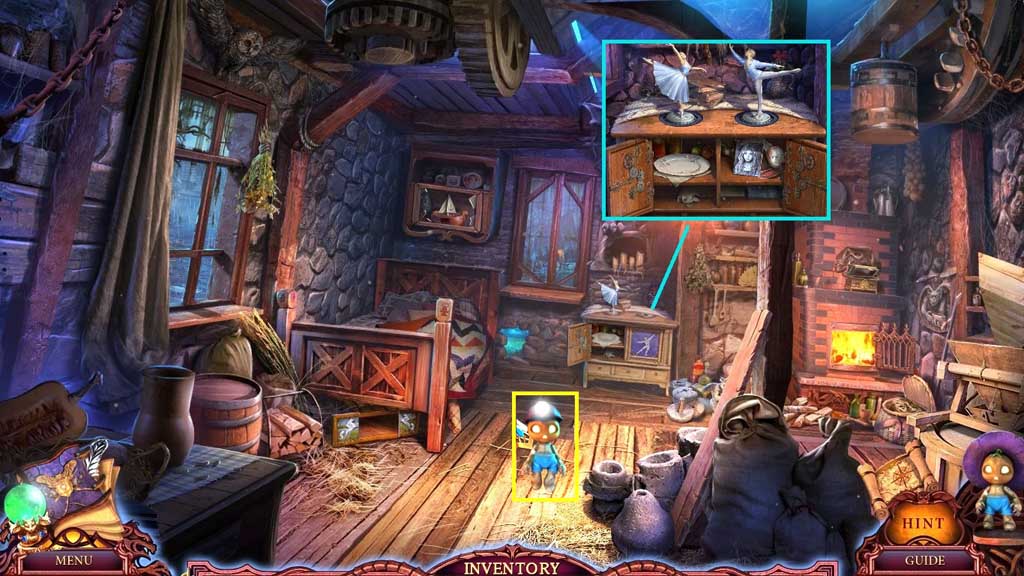
- Place the dancer figurine; collect the photo and the miner’s helmet.
- Click the miner’s helmet and place the little scarecrow.
- Move down once.
- Click the leaves 2x’s and select the rake to use on the soil.
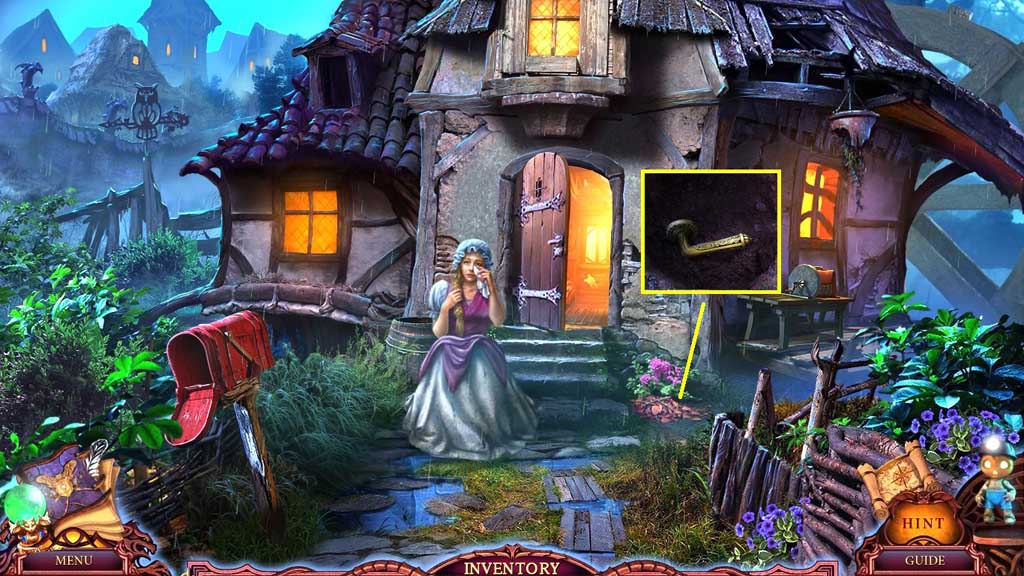
- Collect the handle.
- Move to the Fortune Teller.
- Attach the handle; collect the well key.
- Move down once.
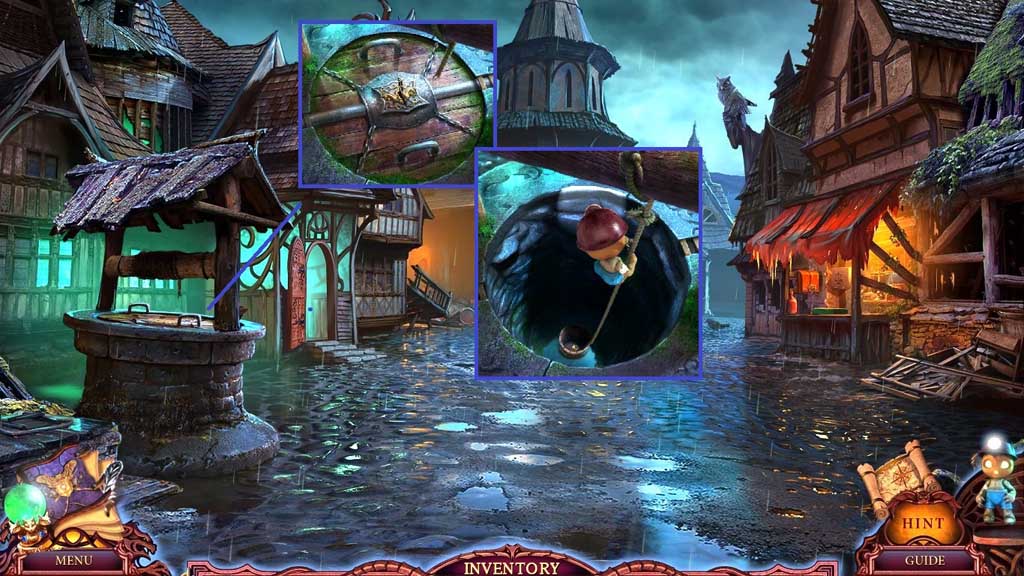
- Insert the well key.
- Click the ring and connect the rope.
- Place the little scarecrow down the well; collect the diamond ring.
- Move to the Fortune Tellers.
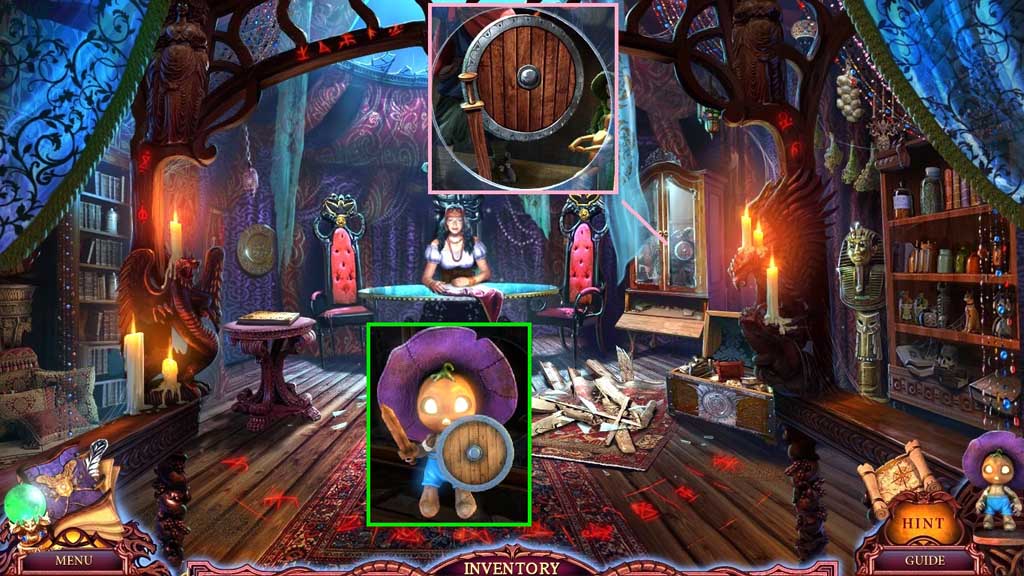
- Select the diamond ring to cut the glass; collect the shield and sword.
- Click the shield and sword and place them onto the little scarecrow.
- Move down once.
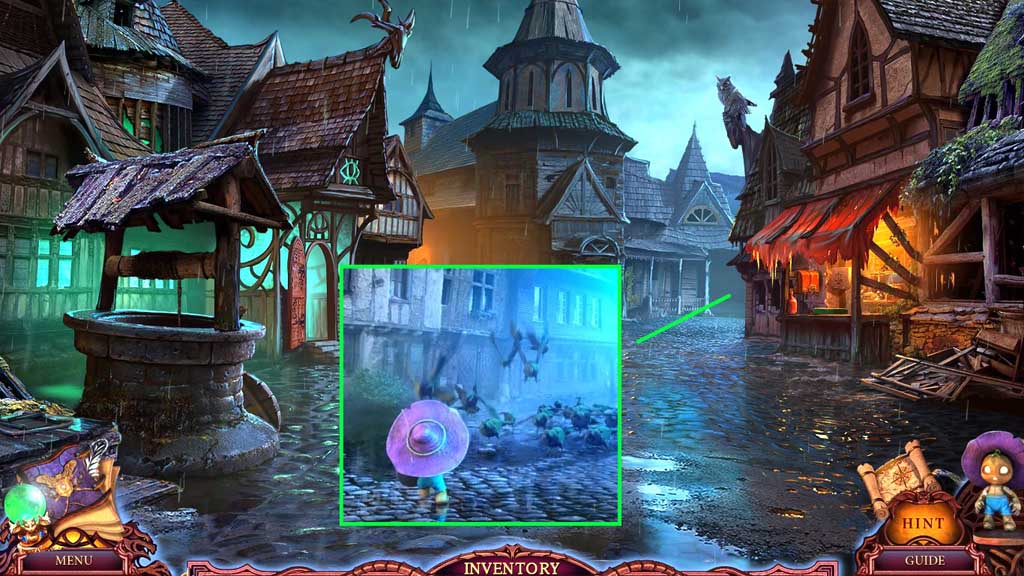
- Select the little scarecrow to clear the crows.
- Move into the Yard.
- Click the 3 boards; collect 1 /2 fangs.
- Select the solvent to collect the star half.
- Click the chest 3x’s and insert the star halves.
- Collect the pointer.
- Move to the Fortune Teller.
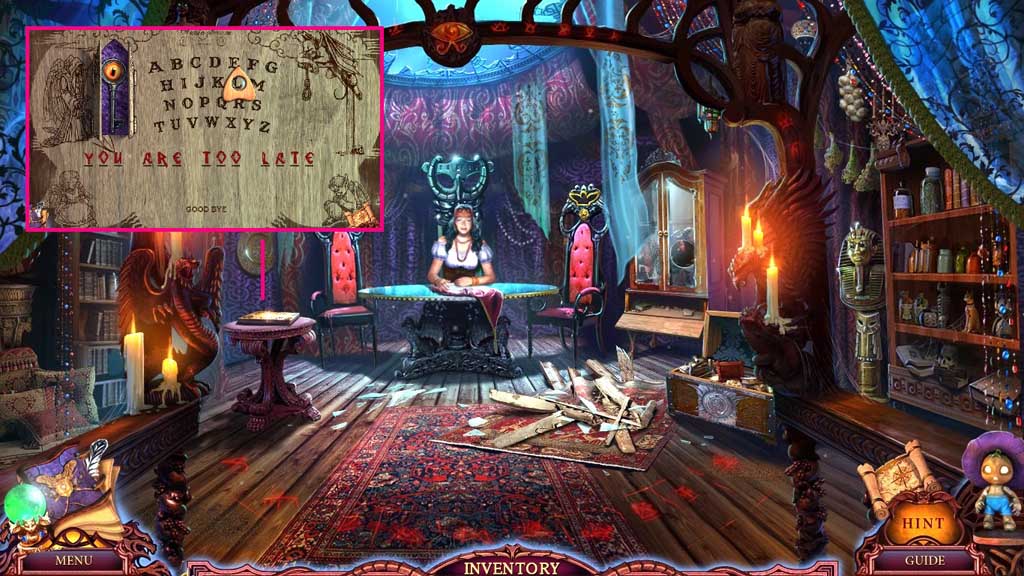
- Place the pointer onto the Ouija board to trigger a mini game.
- Solve the game by selecting the correct letters to complete the phrase.
- Collect the eye key.
- Move to the Yard.
- Insert the eye key; collect the demon.
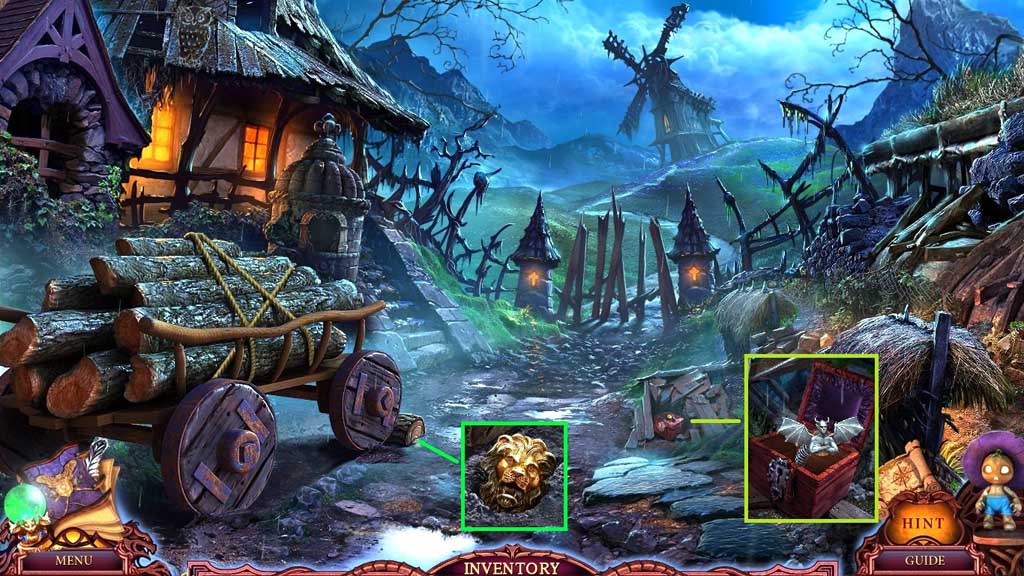
- Click the soil 2x’s; collect the lion.
- Move down once.
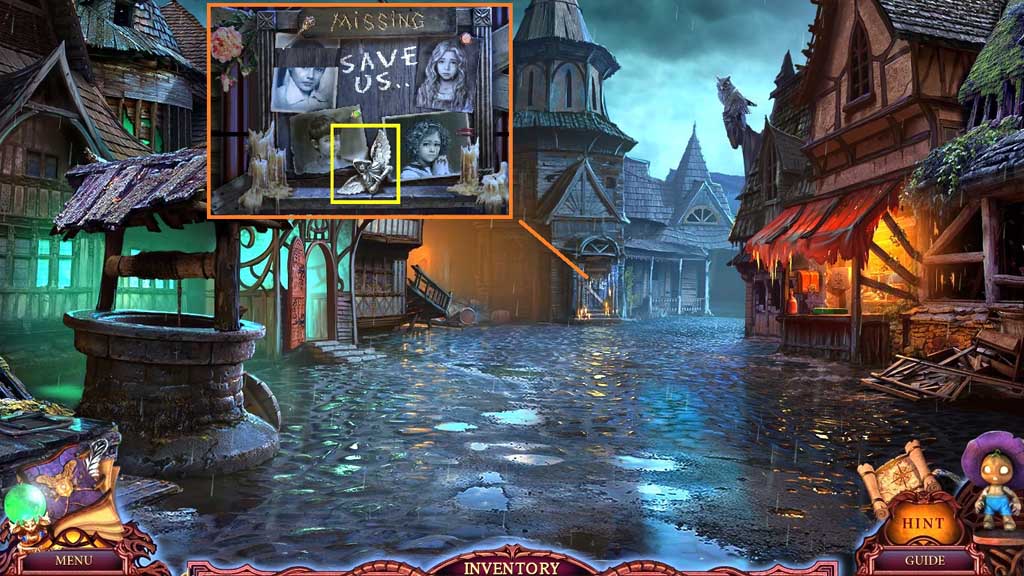
- Attach the photos onto the notice board; collect the angel.
- Move to the Fortune Teller.
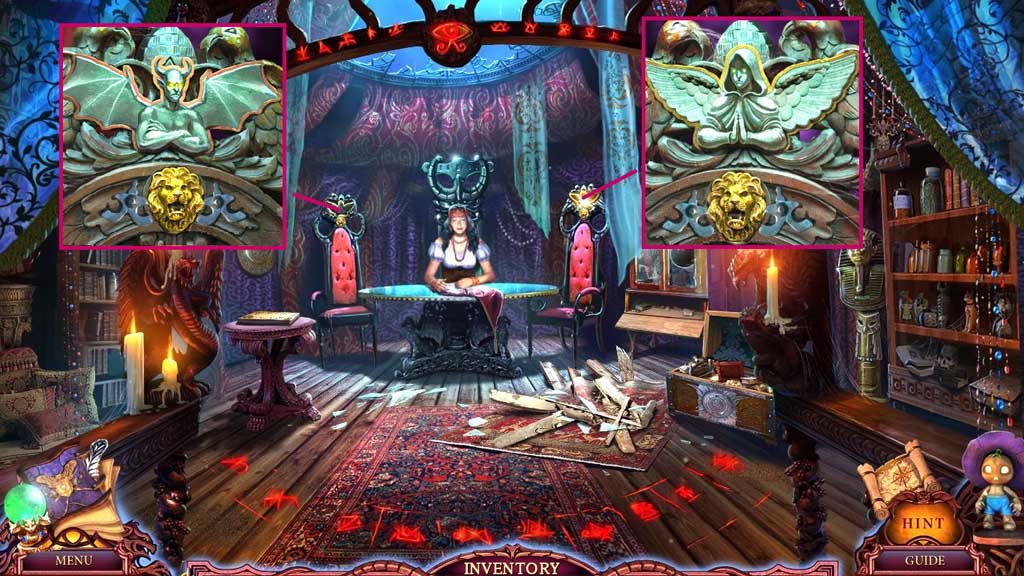
- Insert the angel; collect the lion.
- Insert the demon; collect the lion.
- Move down once and click the hidden objects area.
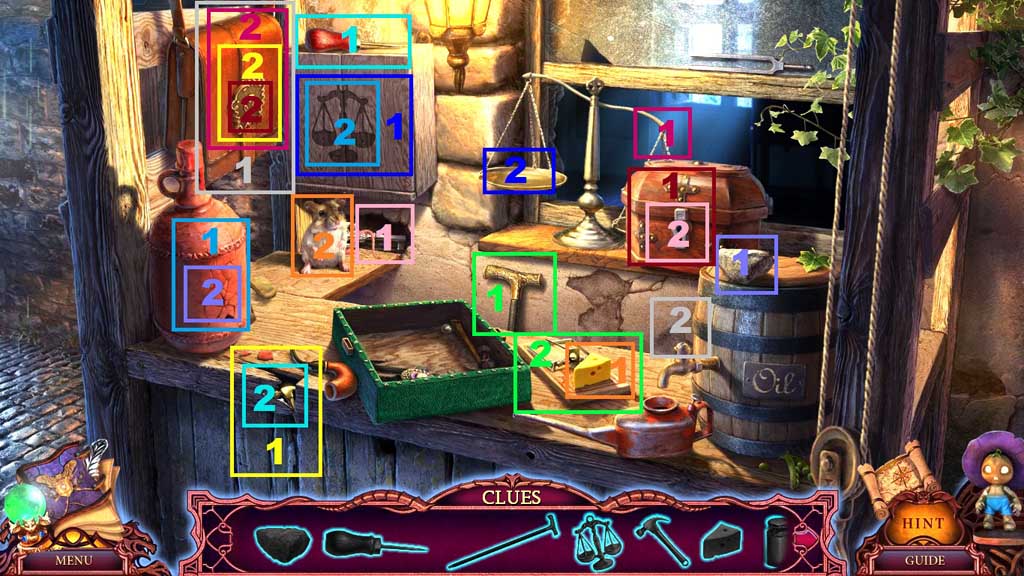
- Find the items.
- Select the chisel to remove the wood; collect the hammer.
- Select the hammer to
- Select the cane to remove the cheese from the trap and give it to the mouse; collect the key.
- Insert the key into the chest; collect the gear.
- Select the stone to smash the jug; collect the scales; insert the scales into the door and collect the weight.
- Place the weight onto the scale and collect the wrench.
- Select the gear, the wrench and the hammer to insert into the satchel; collect the handle.
- Place the handle onto the tap.
- Collect the oilcan.
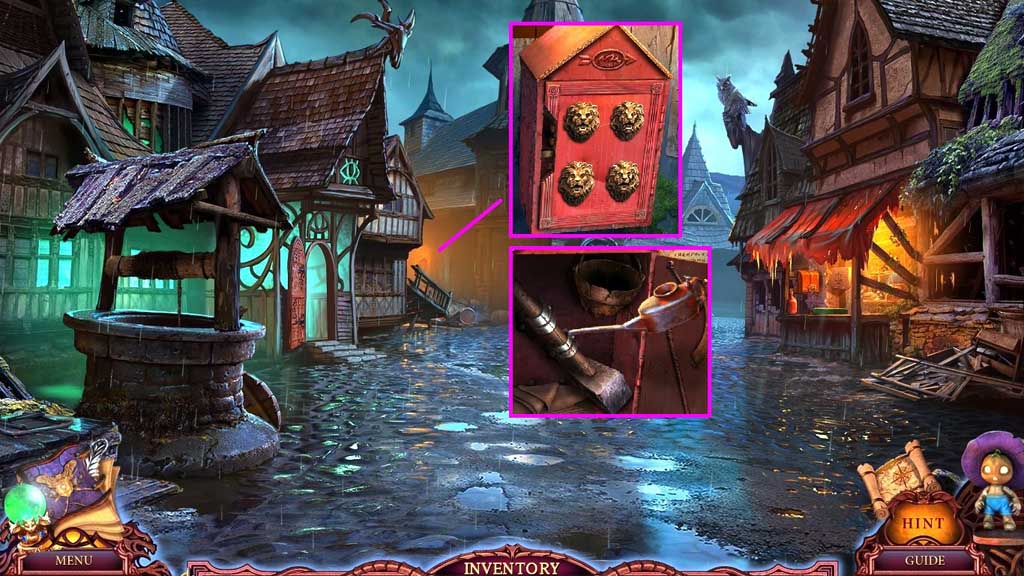
- Zoom into the alley 2x’s.
- Insert the lions and use the oil can to lubricate the locks.
- Collect the sledgehammer.
- Move to the Yard.
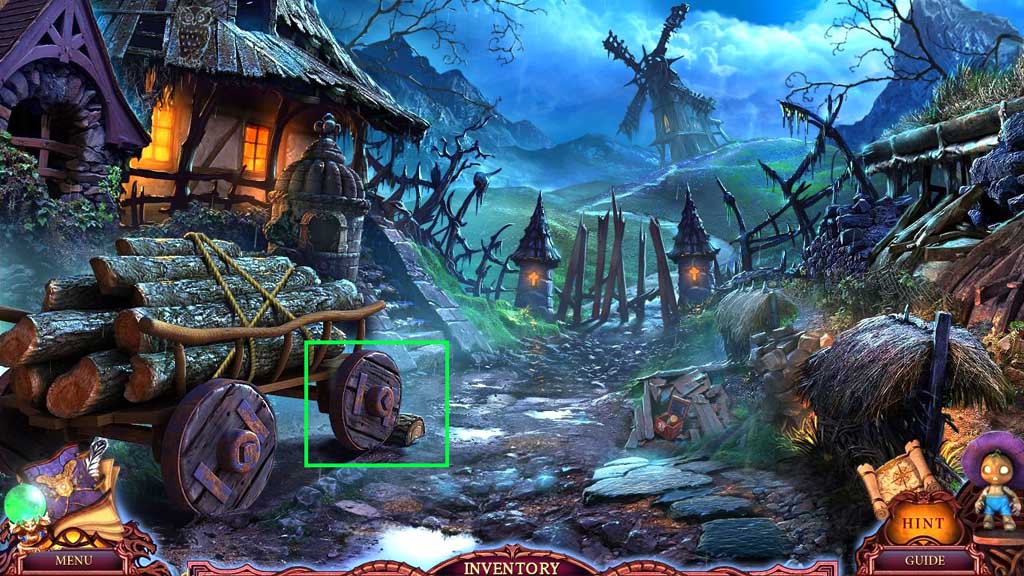
- Select the sledgehammer to remove the wood from the wheel area.