
League of Light: Wicked Harvest: Chapter One: In the Beginning
Our League of Light: Wicked Harvest Walkthrough will watch your back as you explore the town of Blake's Mountain where the children of the town have gone missing and a fabled Red Moon is on the rise. Trust our detailed game instructions, our custom marked screenshots, and easy-to-understand puzzle solutions to see you safely through this new investigation for the League of Light!
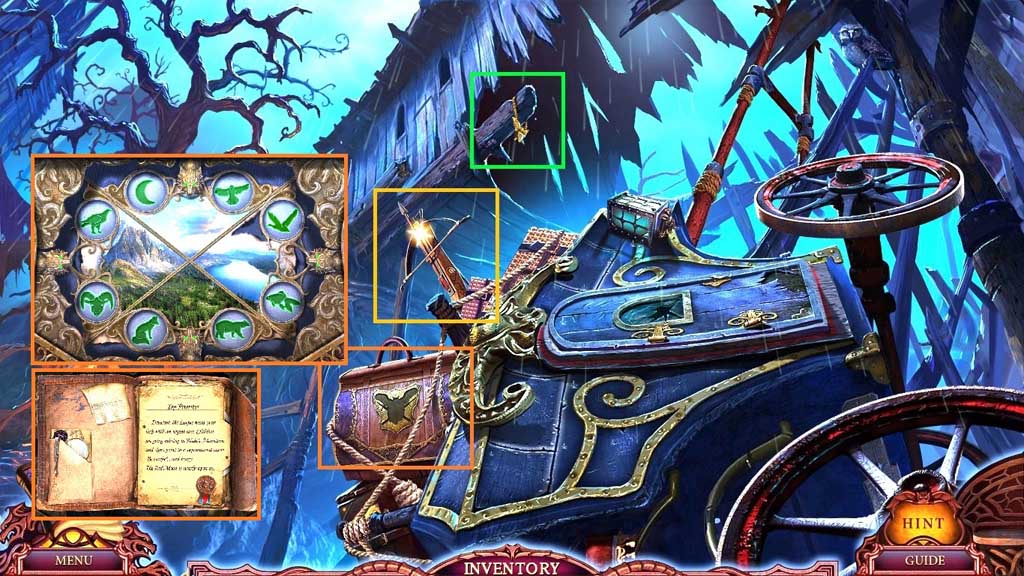
- Collect the crossbow; click it 2x’s.
- Select the crossbow to shoot toward the owl badge; collect the owl badge.
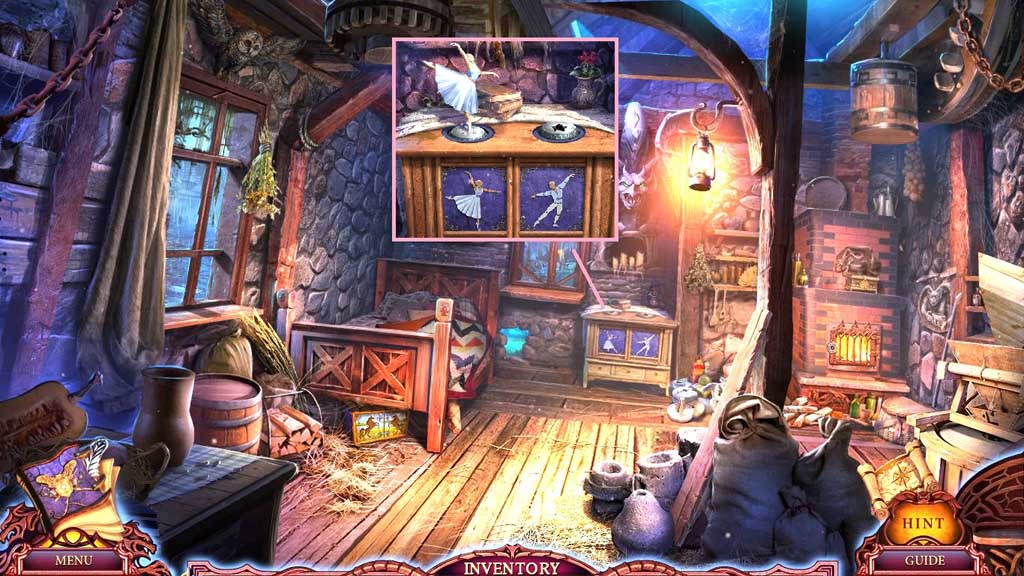
- Insert the owl badge to trigger a mini game.
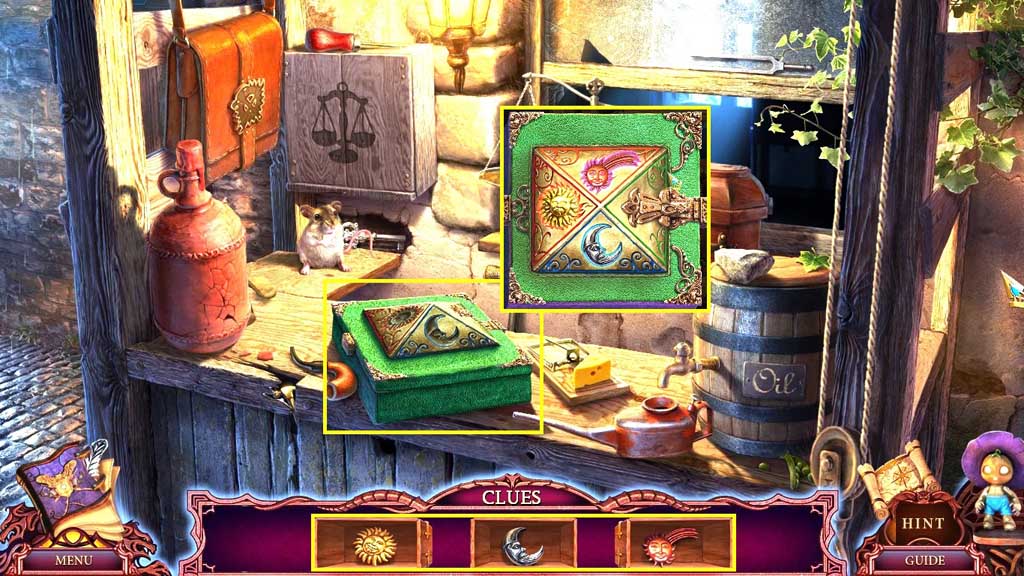
- Solve the game by clicking the discs to match the scene.
- Click the file; read the letter and collect the photo and the crowbar beneath.
- Select the crowbar to pry open the door and trigger a hidden objects area.

- Find the items.
- Select the book key and insert it into the book; collect the triangle key.
- Insert the triangle key into the groove.
- Select the tongs to collect the safe dial and place it onto the safe to trigger a mini game.
- Solve the game by finding the correct combination to open the safe.
- Collect the hunter torso and place it onto the seat handle; collect the combination.
- Place the combination onto the safe and use it to unlock the safe and collect the triangle key.
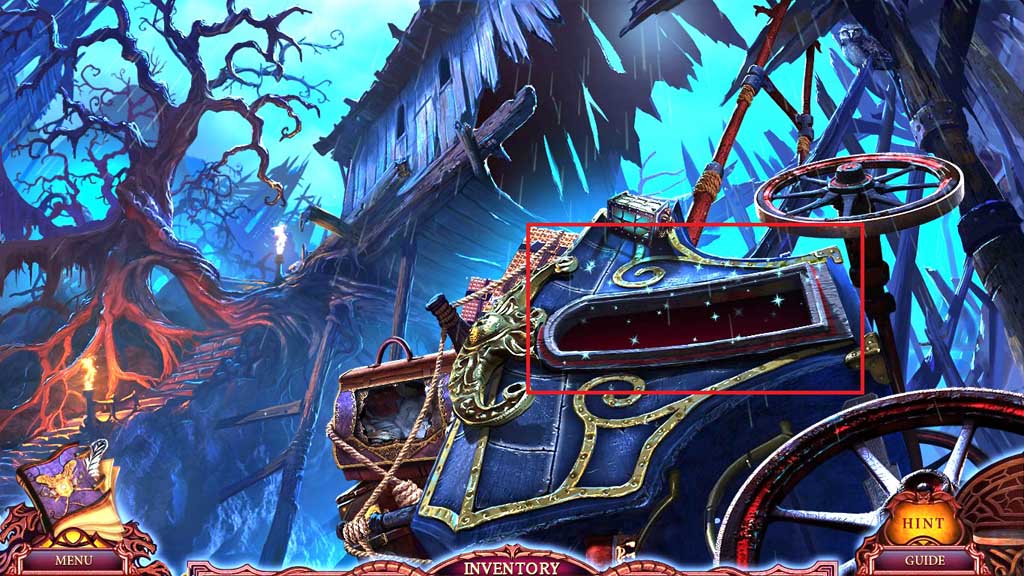
- Insert the triangle key and collect the scissors; use them to cut the seam and collect the rope.
- Select the handle and place it onto the compartment to reveal the hook.
- Select the rope and attach it onto the hook to create the grappling hook.
- Collect the grappling hook.
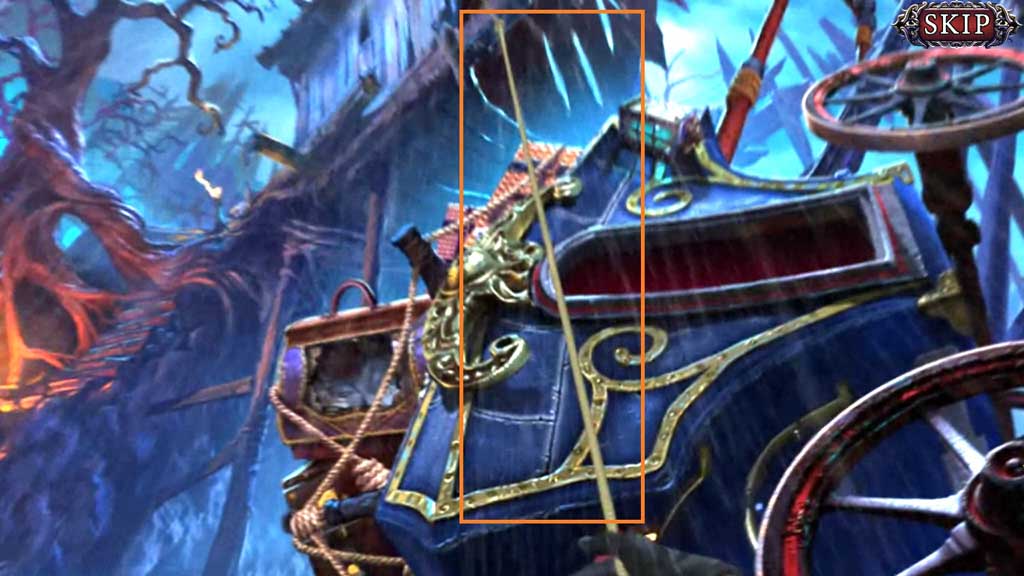
- Toss the grappling hook to climb up.
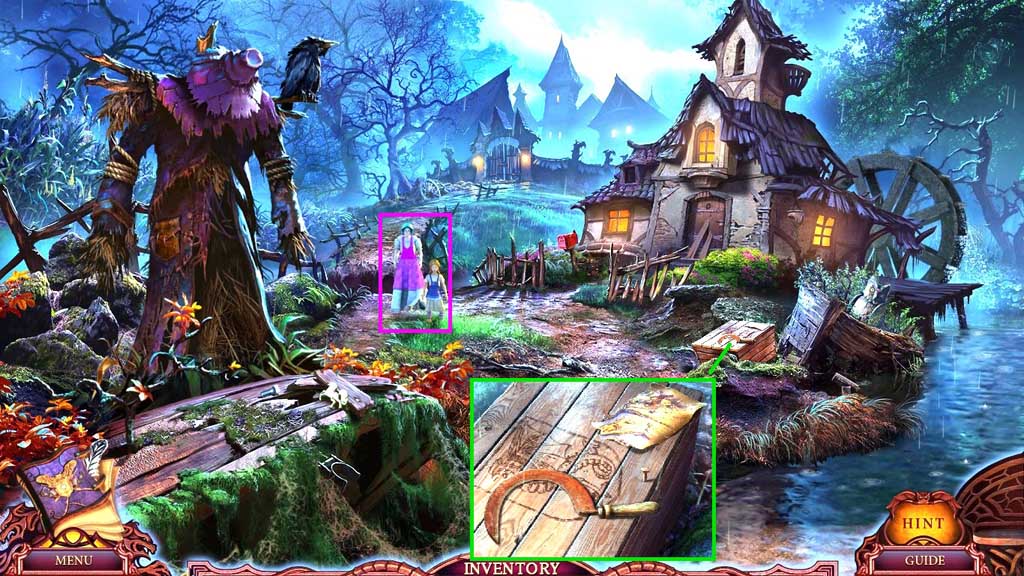
- Click the scene.
- Speak to the woman.
- Collect the dull sickle and the map piece.
- Move to the Front of House.
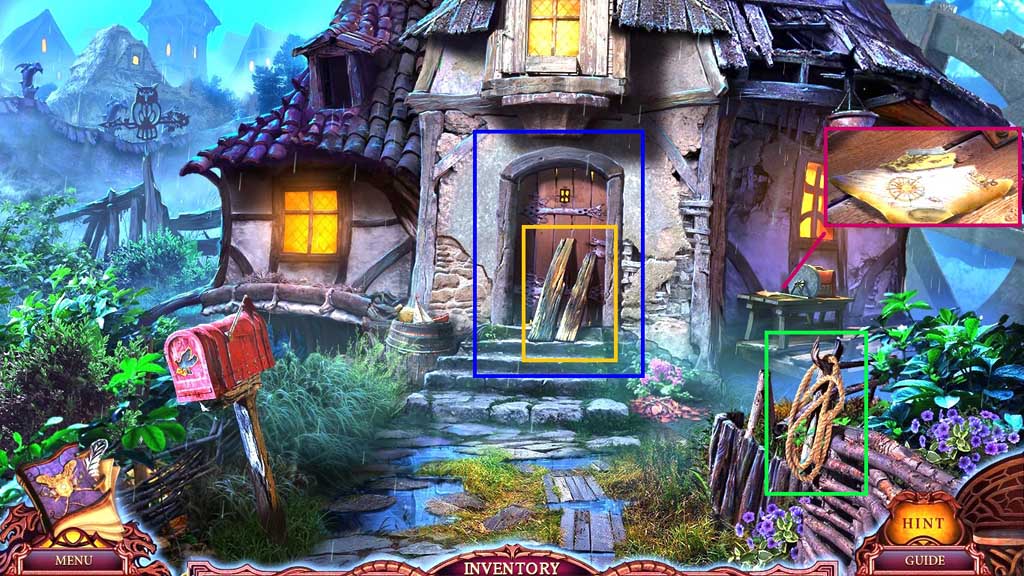
- Collect the rope and the map piece.
- Click the boards and then click the door.
- Move into the House Interior.
- Collect the handle.
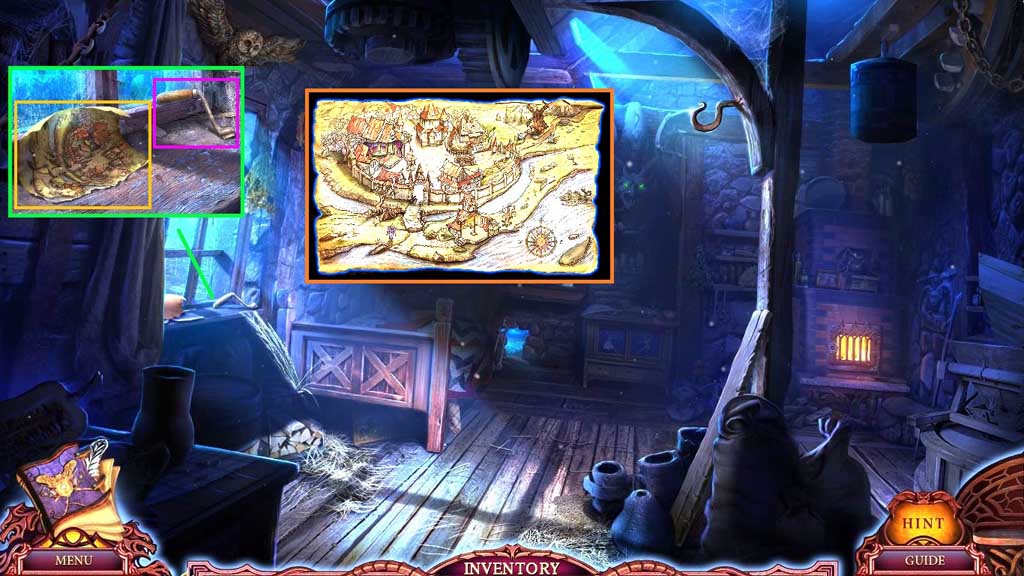
- Click the map and attach the map pieces; collect the map.
- Move down once.
- Click the map to move to locations.
- Attach the handle onto the grindstone.
- Select the dull sickle and sharpen it; collect the sickle.
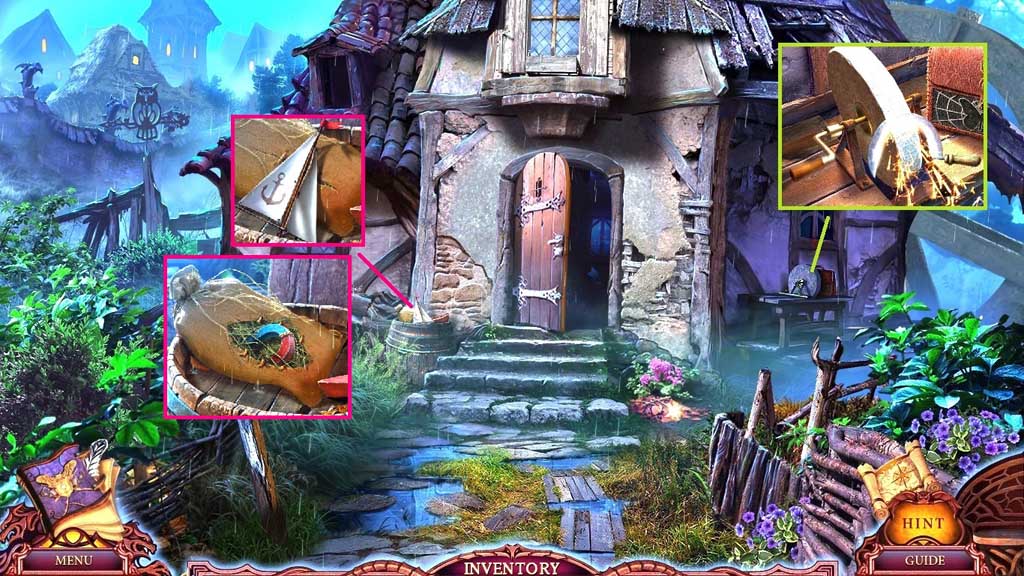
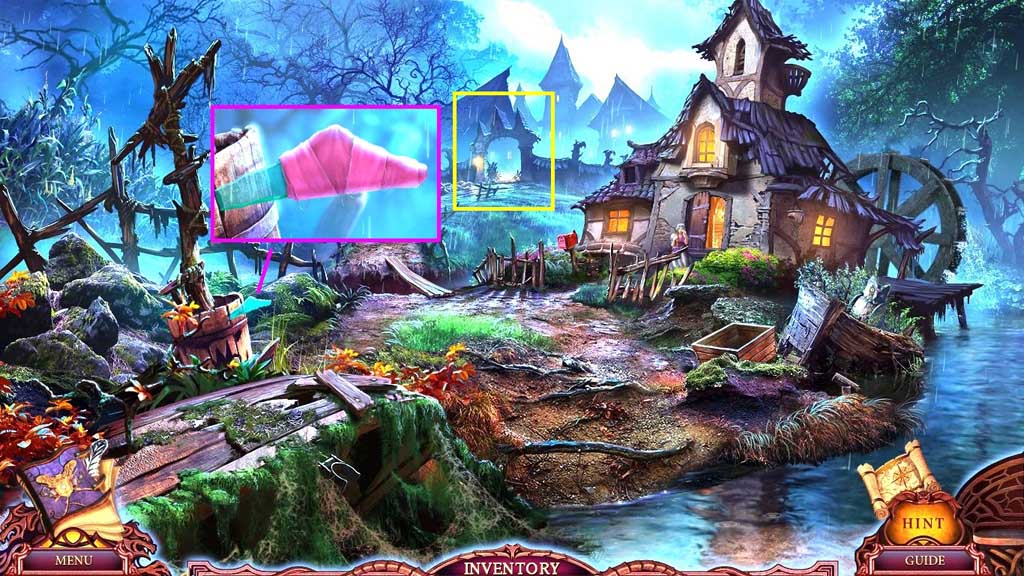
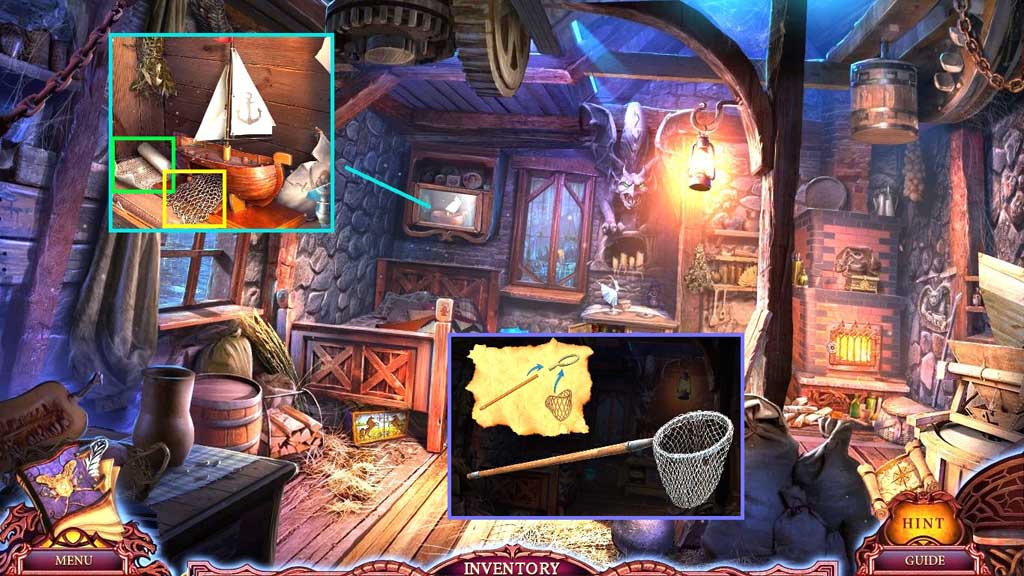
- Collect the sail.
- Select the sickle to slice the stitches, click the bag and collect the magnet.
- Move down once.
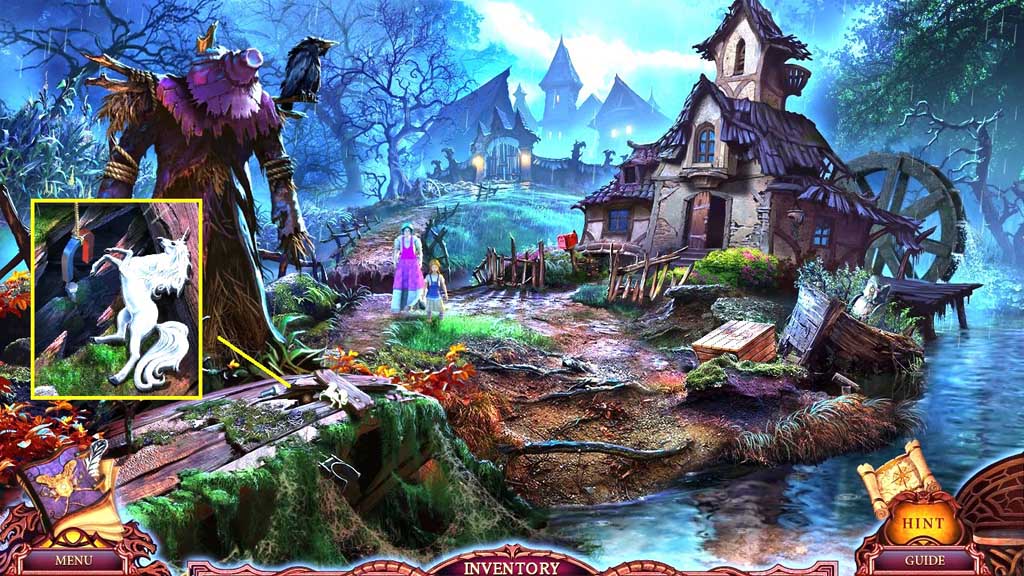
- Collect the unicorn.
- Click the bolt and use the magnet to collect the bolt.
- Move to the House Interior.
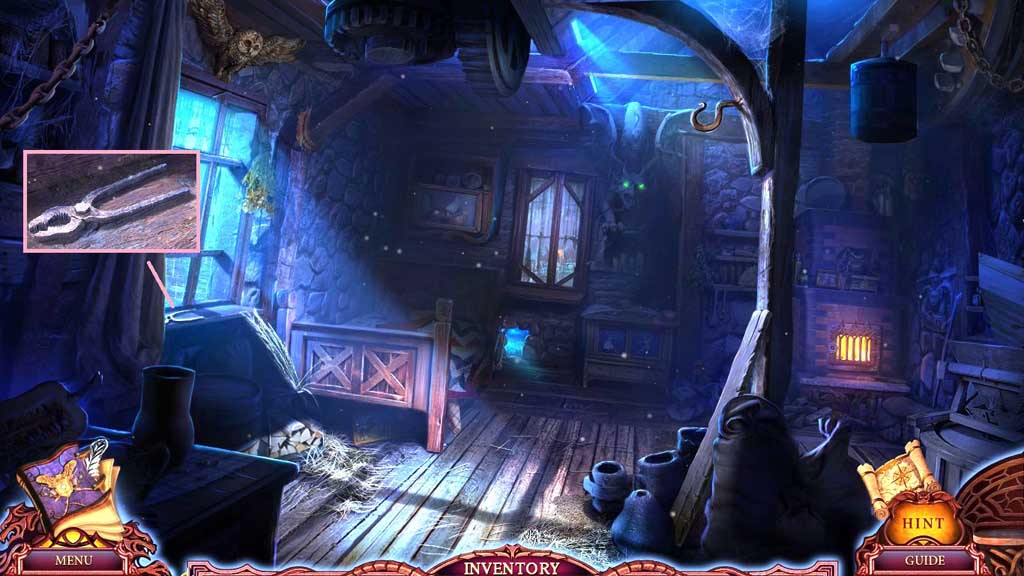
- Click the broken pliers and insert the bolt; collect the pliers.
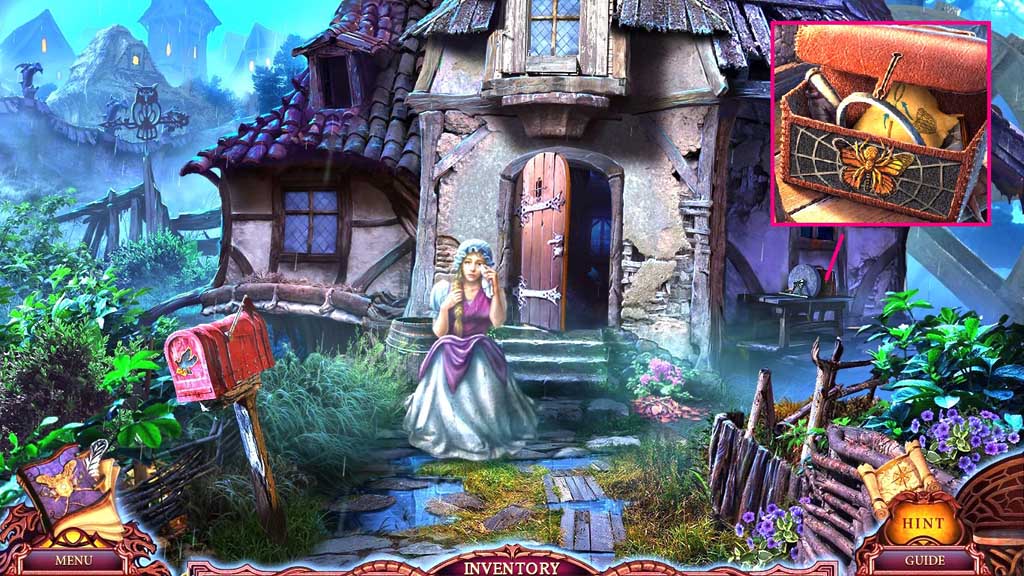
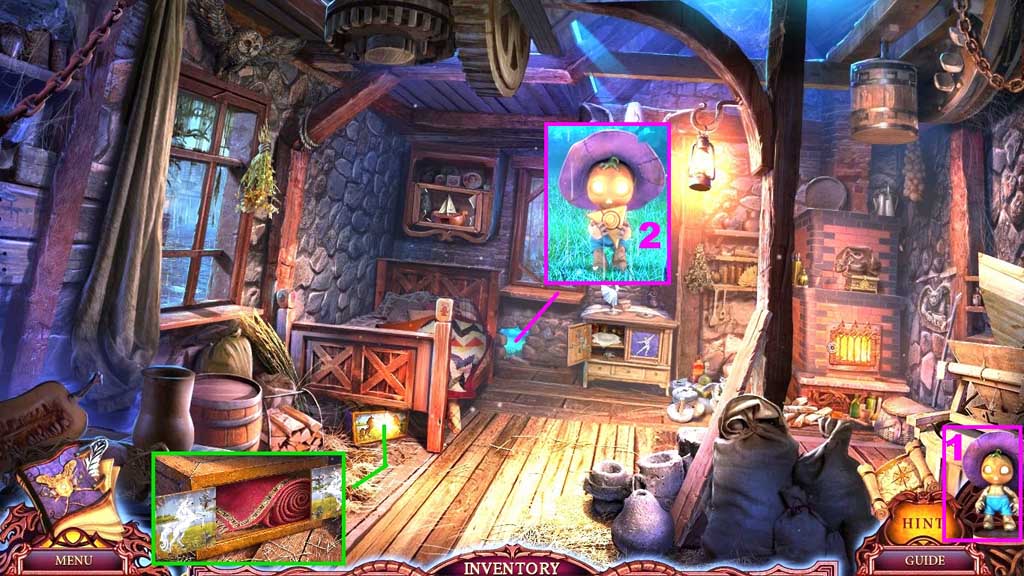
- Speak to the woman.
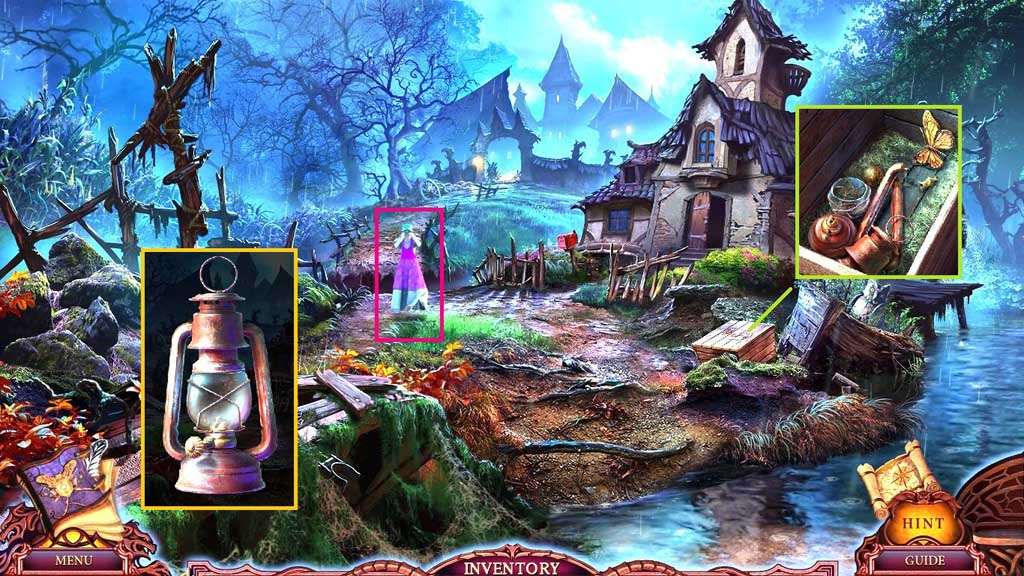
- Use the pliers to open the crate; collect the broken lantern and the butterfly.
- Click the broken lantern and attach the parts; collect the lantern.
- Move to the Front of House.
- Insert the butterfly; collect the net parts.
- Move to the House Interior.

- Hang the lantern to illuminate the scene.
- Click the hidden objects area.
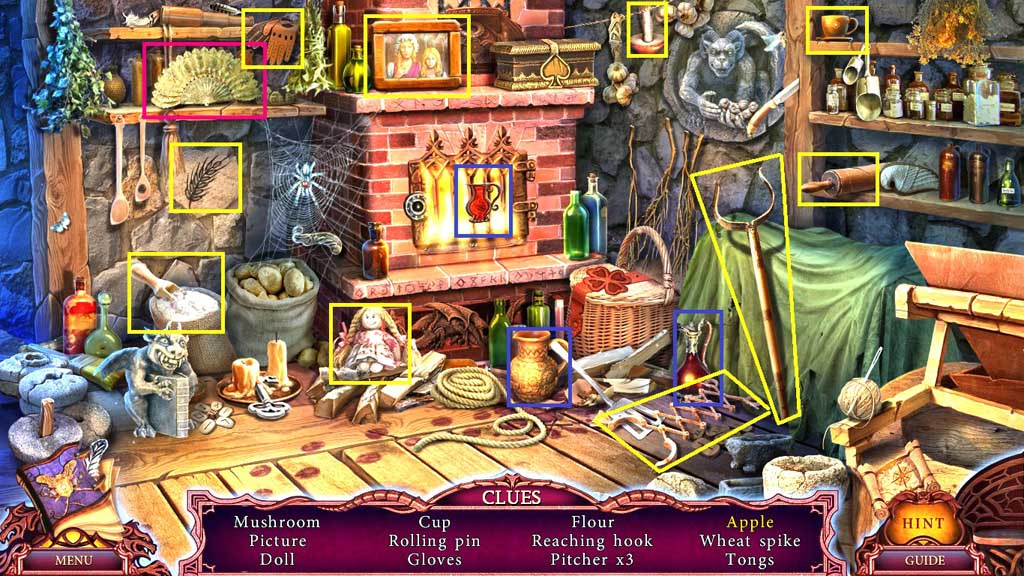
- Find the items.
- Click the fan; collect the apple.
- Collect the tongs.
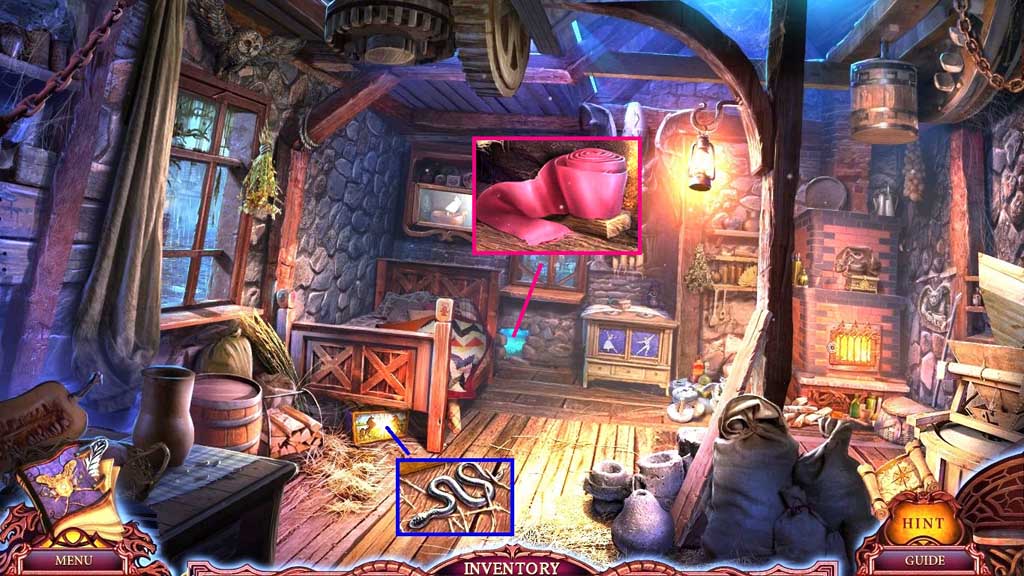
- Collect 1 /3 snakes and the ribbon.
- Move to the Riverbank.
- Place the ribbon around the glass; collect it.
- Move to the Gate.
- Select the tongs to collect the dove.
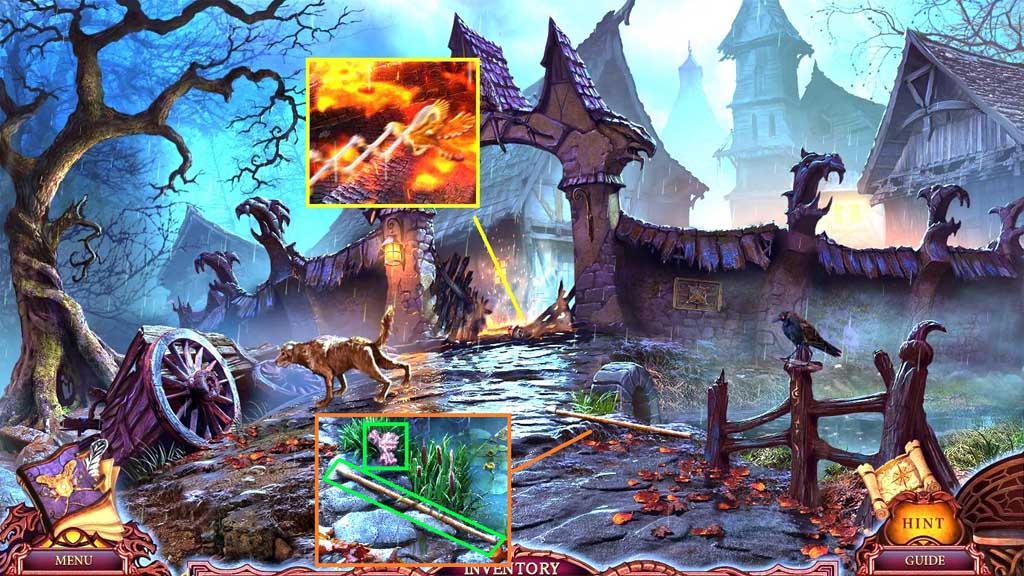
- Collect the leaf and the stick.
- Move to the Front of House.
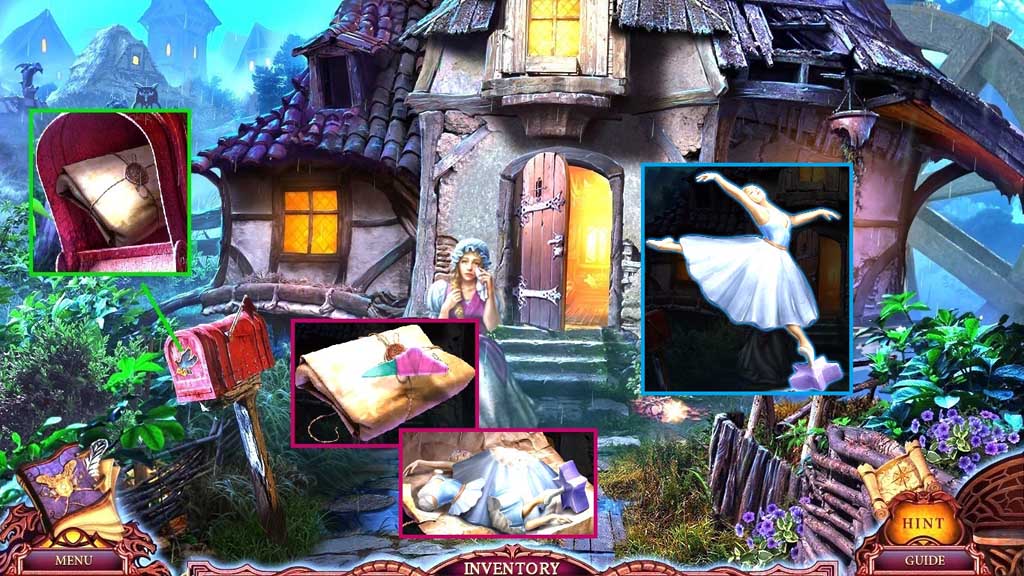
- Insert the dove; collect the package and 2/3 snakes.
- Click the package.
- Select the glass to slice the string and collect the broken figurine.
- Assemble the figurine; collect the ballerina figurine.
- Move to the House Interior.
- Place the ballerina figurine and click it; collect the ham.
- Move to the Gate.
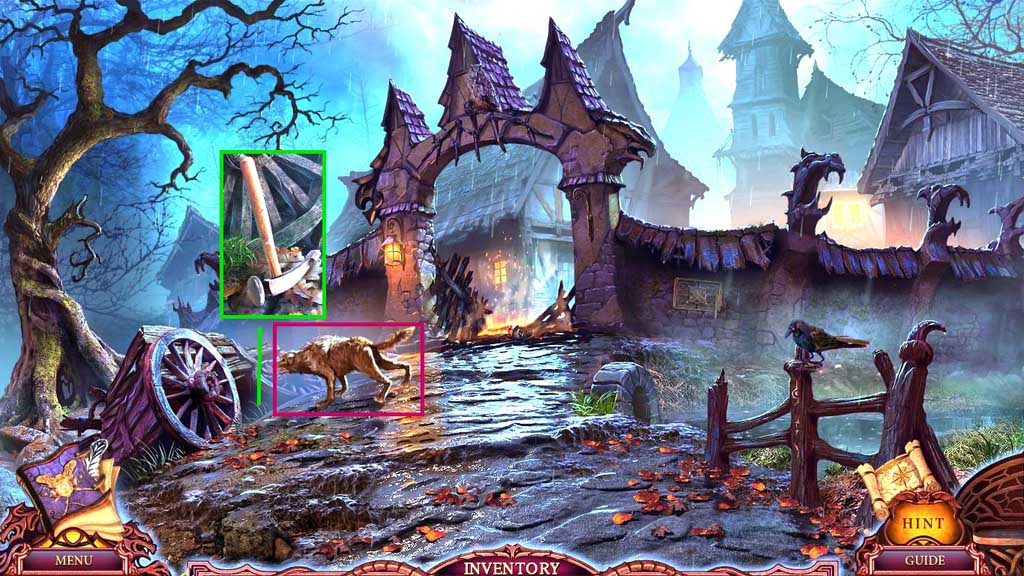
- Give the dog the ham; collect the hammer.
- Move to the House Interior.
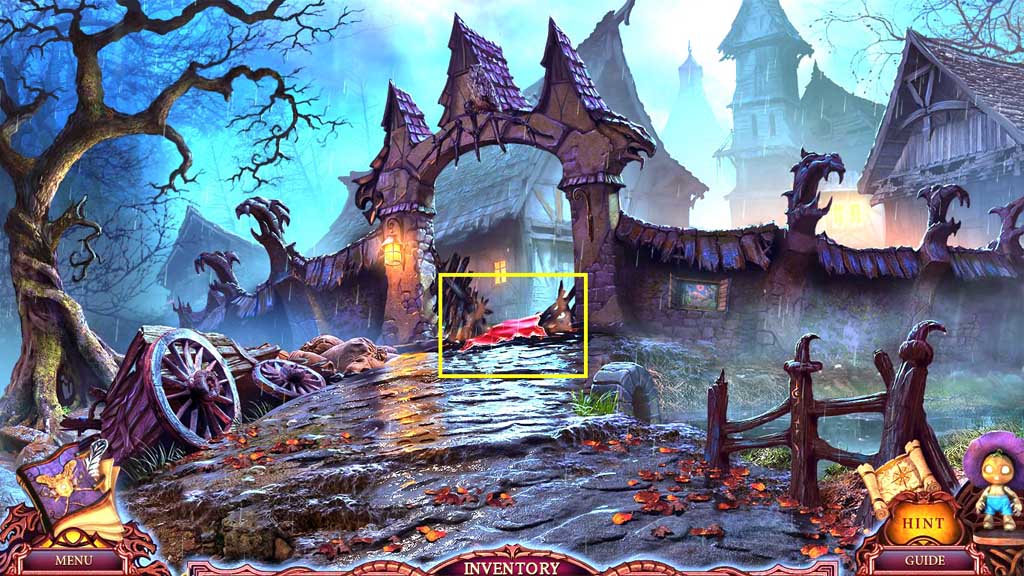
- Select the hammer to smash the glass.
- Click the sail and replace it; collect the net and the bandage.
- Click the net parts and connect the stick; collect the net.
- Move to the Gate.
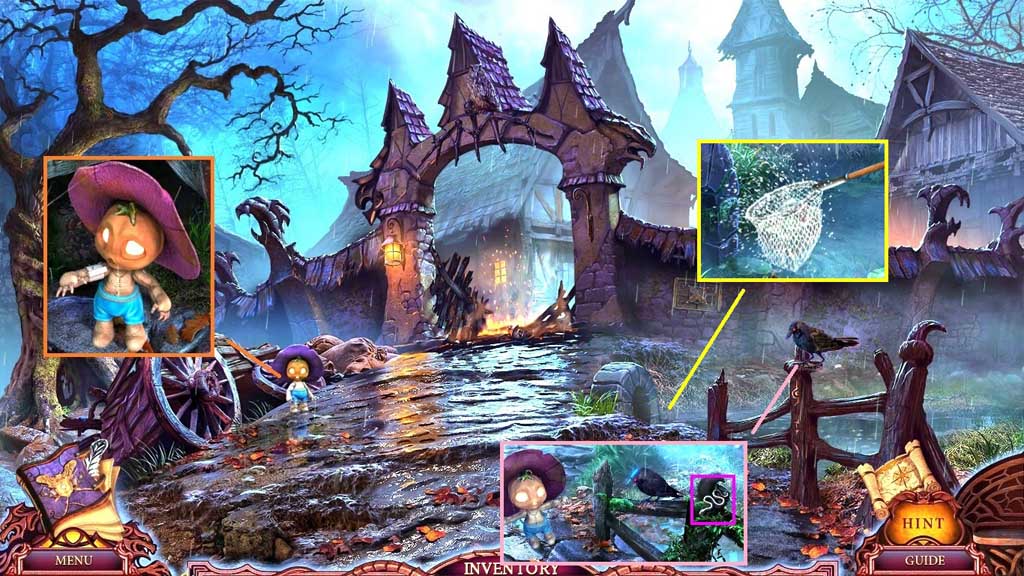
- Place the bandage onto the little scarecrow.
- Click the little scarecrow and use it to scare the crow; collect 3 /3 snakes.
- Select the net to collect the chest.
- Click the notices and insert the snakes to trigger a mini game.
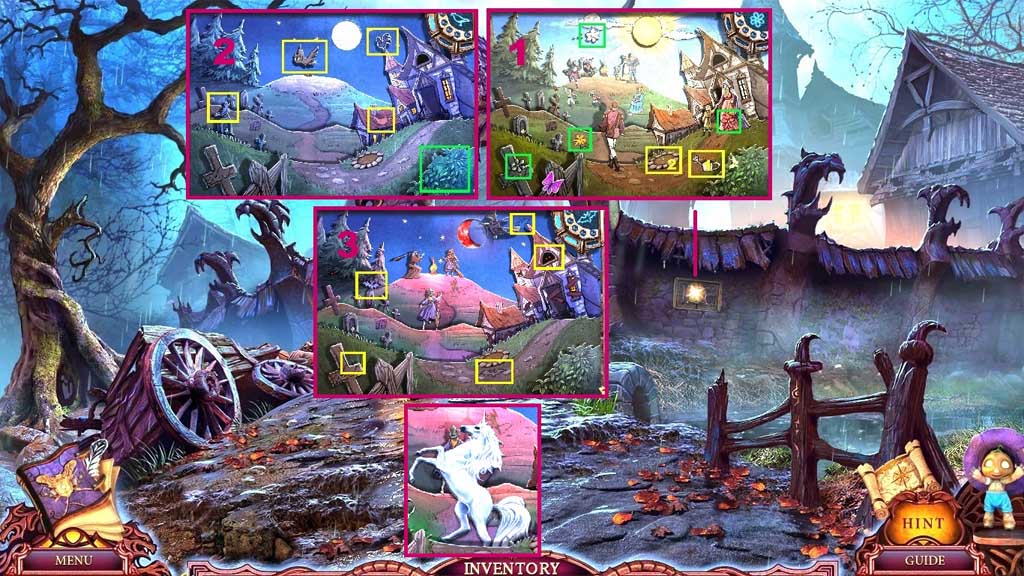
- Solve the game by finding the icon shown in the top right corner in the scene.
- Select the watering can to water the seed; collect the flower.
- Click the bush; collect the bird.
- Collect the unicorn.
- Move to the House Interior.
- Insert the unicorns; collect the rug.
- Select the little scarecrow to collect 1 /3 runes.
- Move to the Gate.
- Place the rug onto the embers.
- Move to the Square.

- Collect the weights and place them onto the scale.
- Click the hidden objects area.
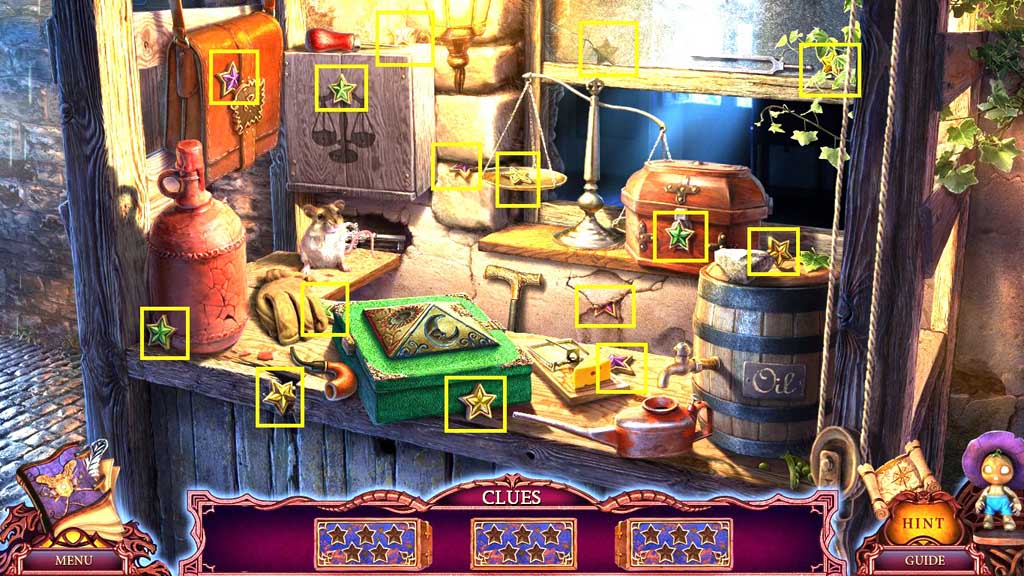

- Find the items.
- Insert the items into the box.
- Collect the corkscrew.