
Haunted Halls: Revenge of Doctor Blackmore: Chapter Two: Chicago
Our Haunted Halls Revenge of Dr. Blackmore Walkthrough takes you deep inside the bizarre world of Dr. Blackmore where anything can and probably will happen. Armed with our easy to understand instructions and detailed screenshots found in this Haunted Halls Walkthrough, you'll be ready to face whatever weird and frightening things Dr. Blackmore will throw in your path in his attempt to enact some twisted form of revenge on you and your fiance.
General Info and Tips
Chapter One: Trapped
Chapter Two: Chicago
Chapter Three: Chernobyl
Chapter Four: Pompeii
Chapter Five: Alaska
Ask for help in the comments below!
Chapter One: Trapped
Chapter Two: Chicago
Chapter Three: Chernobyl
Chapter Four: Pompeii
Chapter Five: Alaska
Ask for help in the comments below!
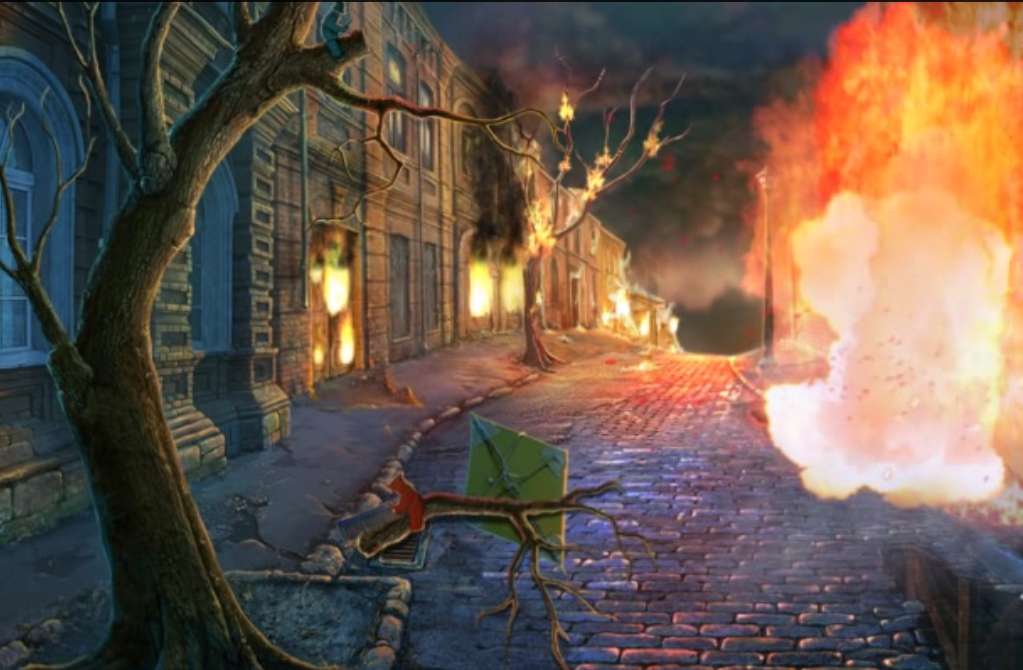
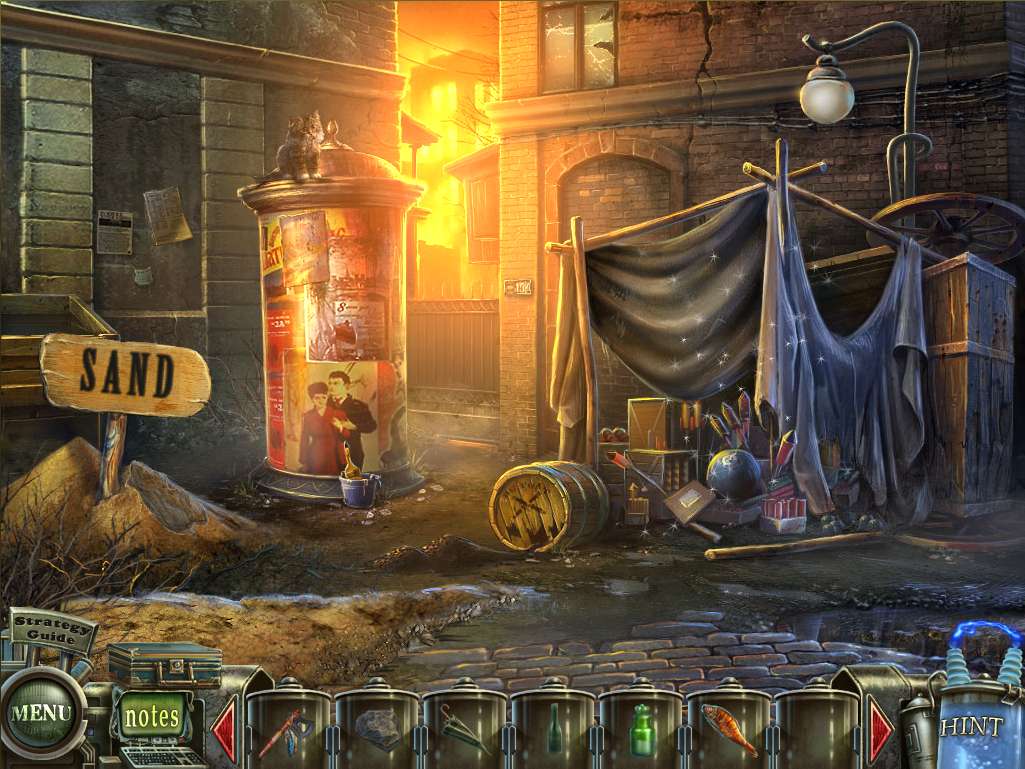
- Note the gold SHOVEL lying on the road – pick it up.
- Glance at the newspaper nearby.
- Take a look at the base of the water tower to the right – use the SHOVEL at the base to dig up a WORM (umm – yummy!) and place it in inventory.
- Note the branches nearby where the toys are located, particularly their futile little efforts to cut the branch, then proceed forward.
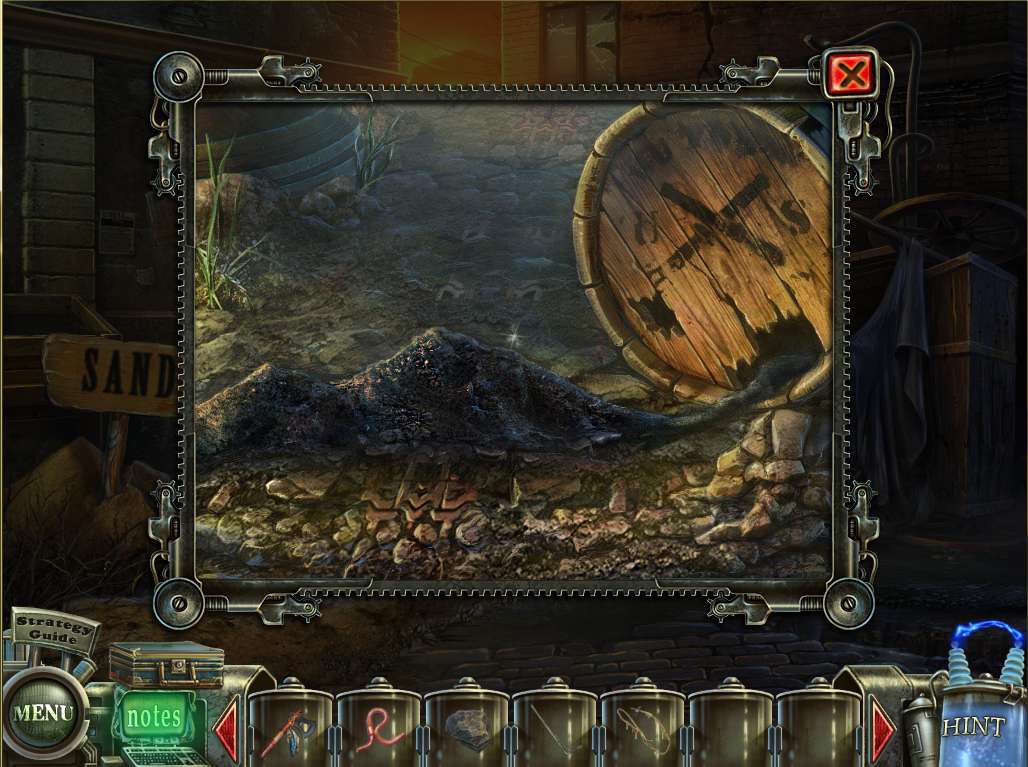
- Use the SHOVEL on the sand to put the fire out.
- Pick up the STONE, POKER and METAL COMB from the sand, then zero in on the lean-to on the right to initiate the next HOA puzzle.
- Note the bucket of glue in the background.
- Find all the items circled in red, noting that there might be some slight variation in the objects to find due to random selection by the game.
- When complete, take the DYNAMITE and return back up the street.
- Zoom in on the water tower base and put the dynamite in place.
- Next, zoom back in on the toys trying to cut the branch and hand them the METAL COMB to finish off their job.
- When done, take the TWINE from the fallen branch and make your way back to the lean-to.
- Dip the TWINE in the bucket of glue to obtain some STICKY ROPE – as against sticky twine?
- This glue must have growth hormone properties!
- Use the STICKY ROPE on the gunpowder lying on the ground in front of the barrel to make yourself a handy-dandy FUSE – hmmm, I wonder what this is going to get used on!
- Return back down the street.
- Zoom in on the tower and place the FUSE on the dynamite.
- Boom! (Okay, how did I light the fuse?) And I just blew up the tower in order to damage the door on the left enough to be able to get in – with some help from the tomahawk? Eh, wouldn’t it have been the smarter and more obvious move to just dynamite the door?
-
Oh well! Don’t ask any questions, just enter the building!
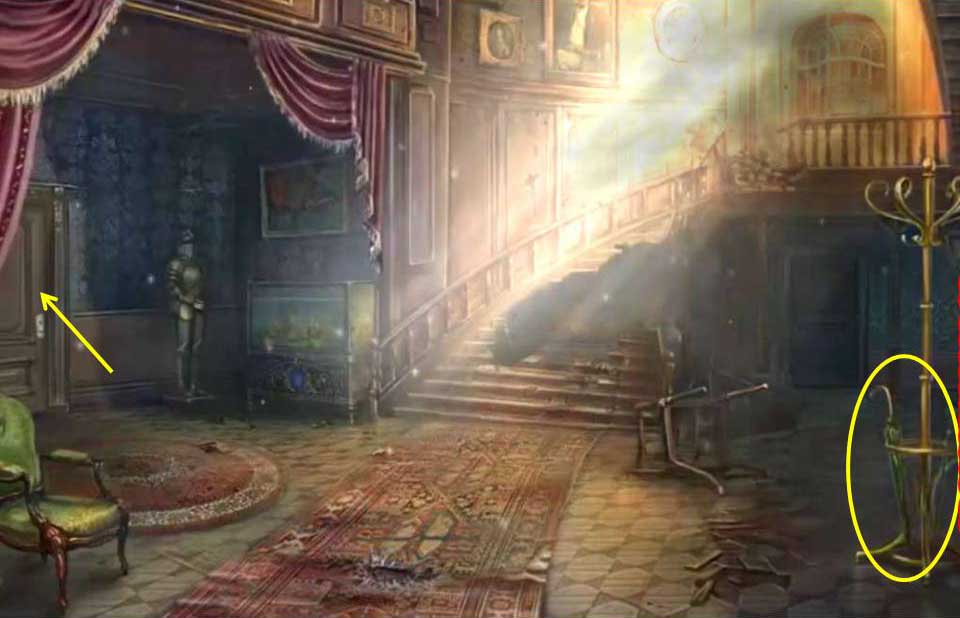
- Zoom in on the umbrella stand on the right.
- Note the death’s head walking stick, then take the green UMBRELLA.
- Next, go through the door on the left into the kitchen.
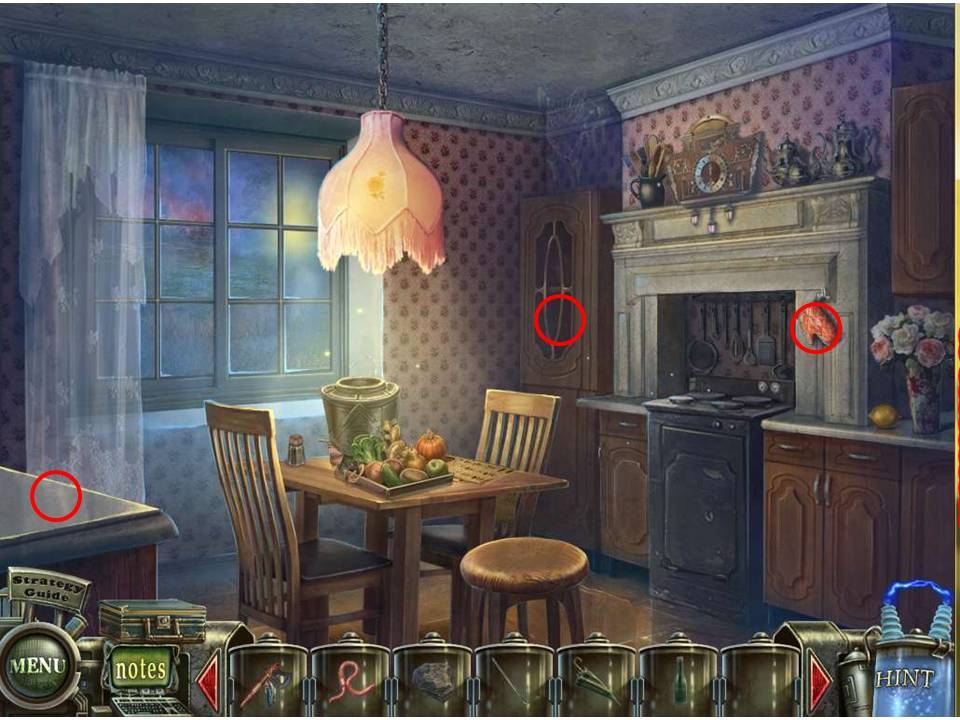
- Take the bottle of VINEGAR sitting on the counter to the left, then grab the SMELLING SALTS from the cabinet in the far corner.
- Grab the OVEN MITT as well and enter it into inventory, then open the oven and use the MITT to pull out the tray.
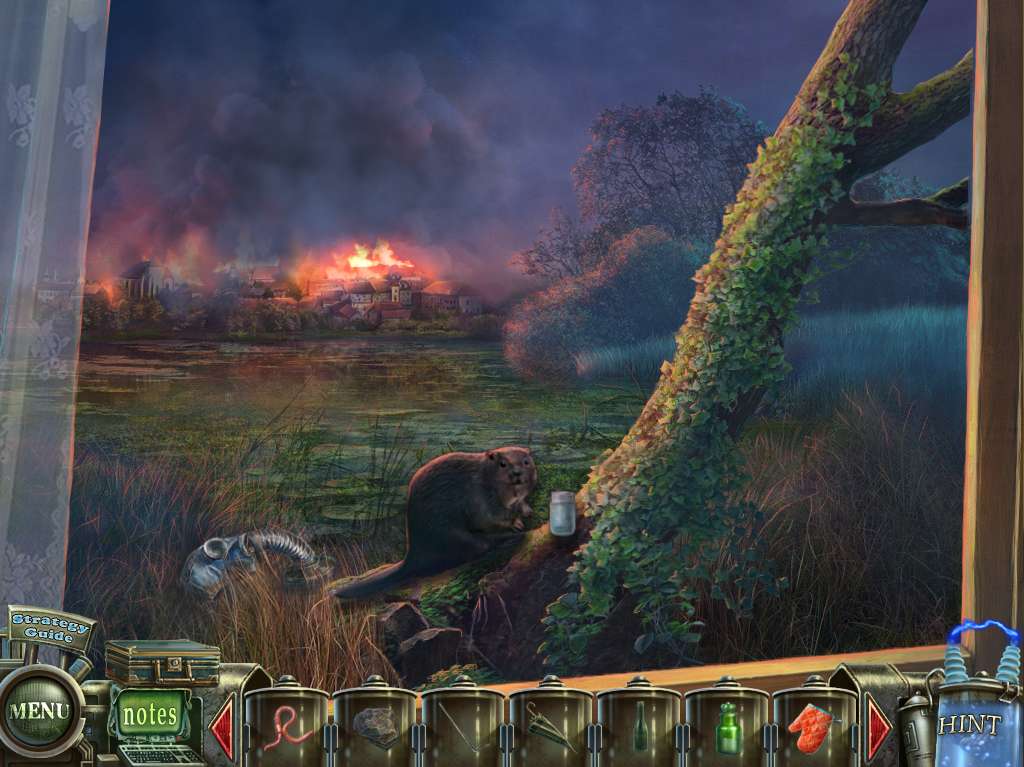
- Click on the window to the left and glance outside at the scene of a beaver.
- Clear away the poison ivy on the tree using the TOMAHAWK.
- Click on the mask, which will hover and drop into your lab kit.
- Then watch the beaver go to work. Wow – is this guy an artist, or what?! Too bad the poor thing chips a tooth.
- Nothing more to do at this point so exit back to the kitchen.
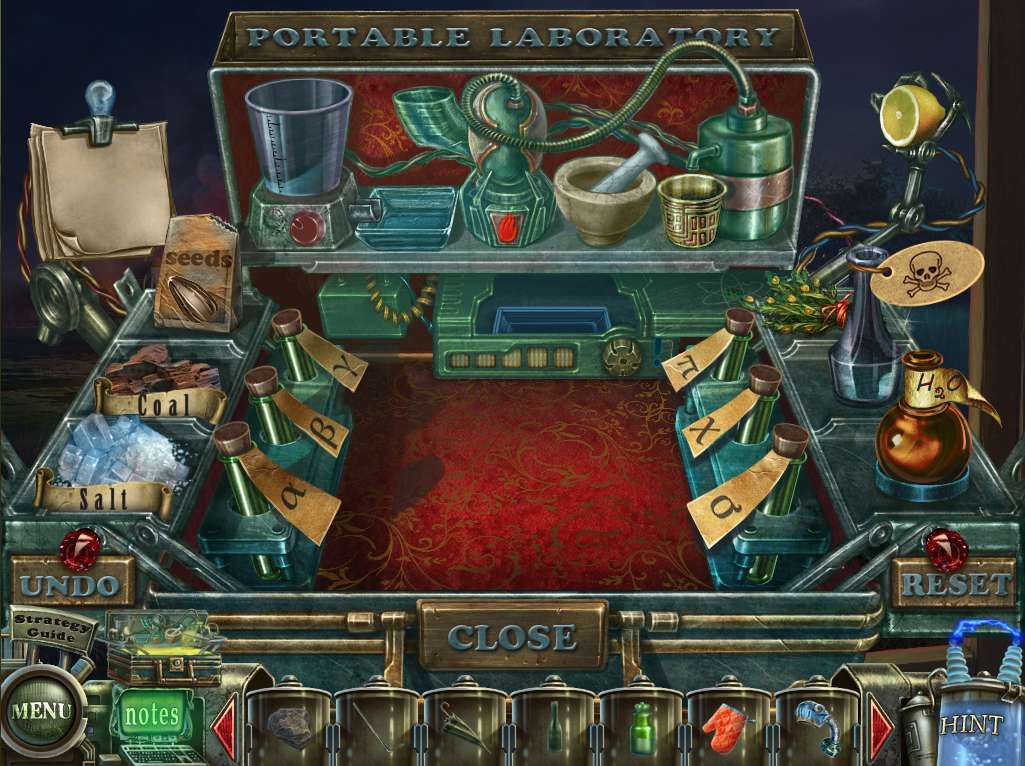
- You may have noted the lab kit trying to gain your attention – zoom in to see what it wants!
- Follow the notes to perform the following – Add the salt and the coal to the grinder and grind away!
- Put the resulting yellow powder through the liquefier, then return the results back to the grinder for another round of grinding, adding the seeds in this time.
- Toss the results into the mortar and put the pestle to good use.
- Add the final product into the mask’s filter, which will then place the GAS MASK in inventory.
- Exit the lab.
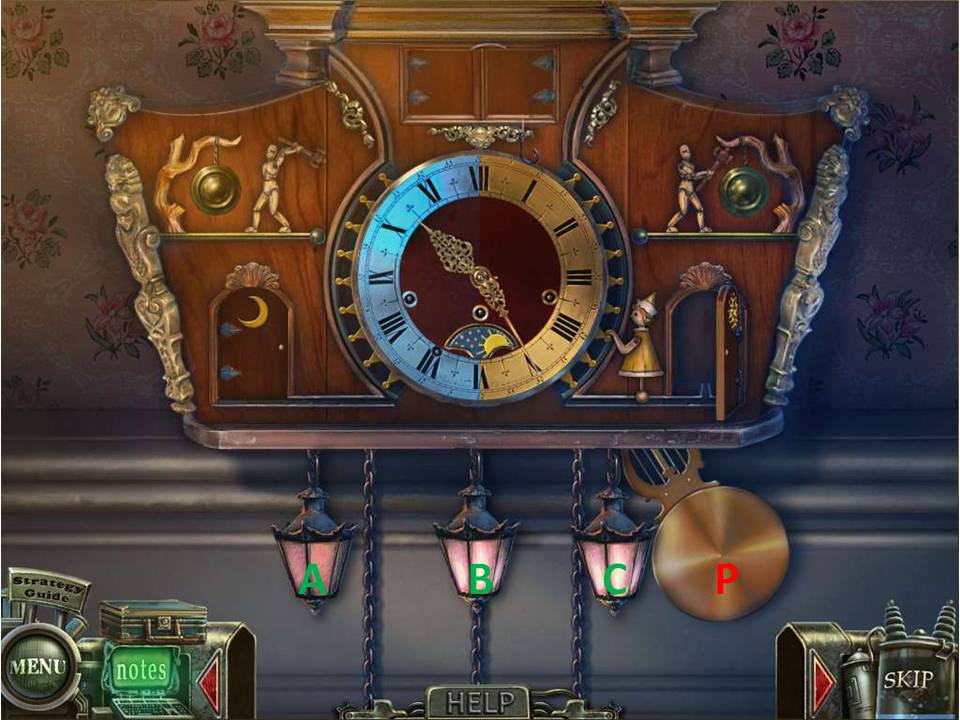
- Now zoom in on the clock to initiate the next puzzle.
- The aim is to set the clock to 12:00.
- Given the position of the hour hand, the quickest solution is to work counter-clockwise.
- With the lanterns marked A to C and the pendulum marked P, here’s the process - Cx2, P, Bx6, P, Cx6, P, Bx5. If successful, the little doors will open up and proffer a FISHING LINE WITH HOOK.

- Zero in on the oven again and use the POKER on the coals, where you’ll find an IRON TOOTH. (So I guess the beaver won’t have to worry about wearing it out, just rusting away? Guess instead of toothpaste, it could use lubricant?)
- Use the OVEN MITT to grab it.
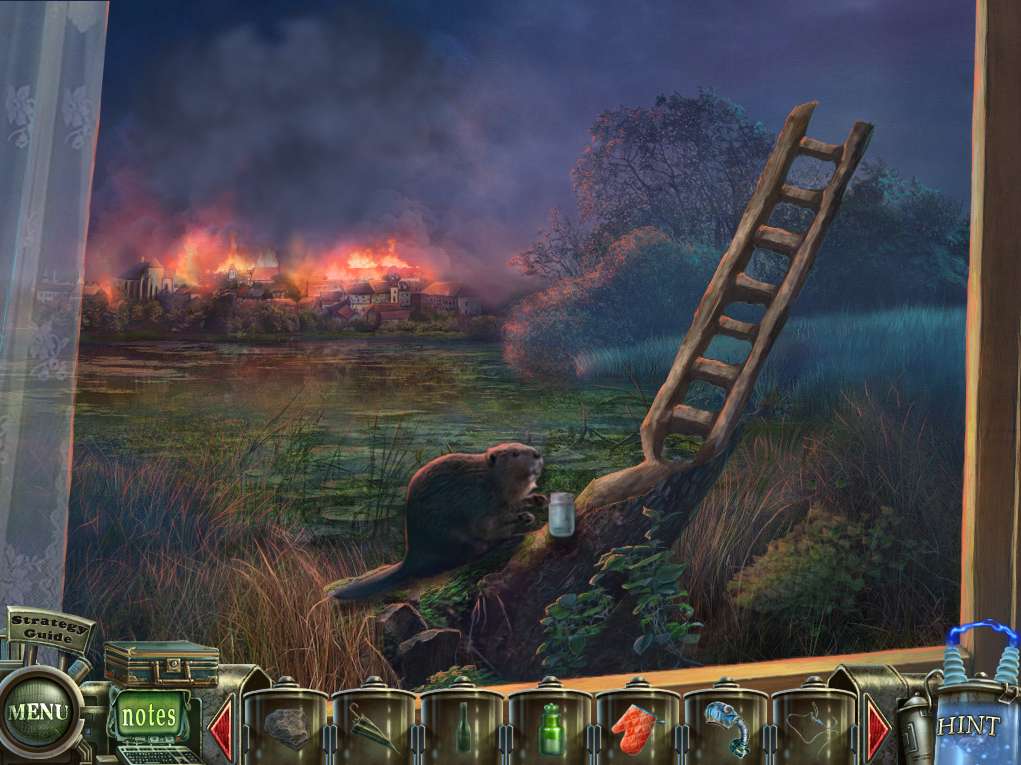
- Go back to the window and hand the TOOTH to the beaver, who’ll proceed to finish off his work of art – Henry Moore had nothing on this guy!
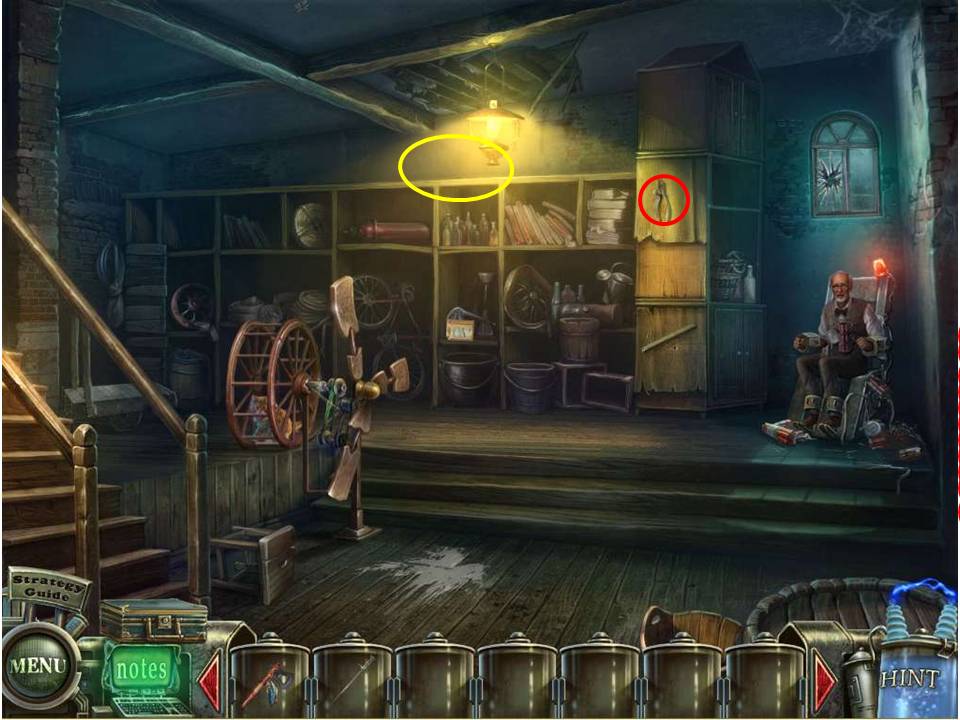
- Take the ladder and head to the foyer.
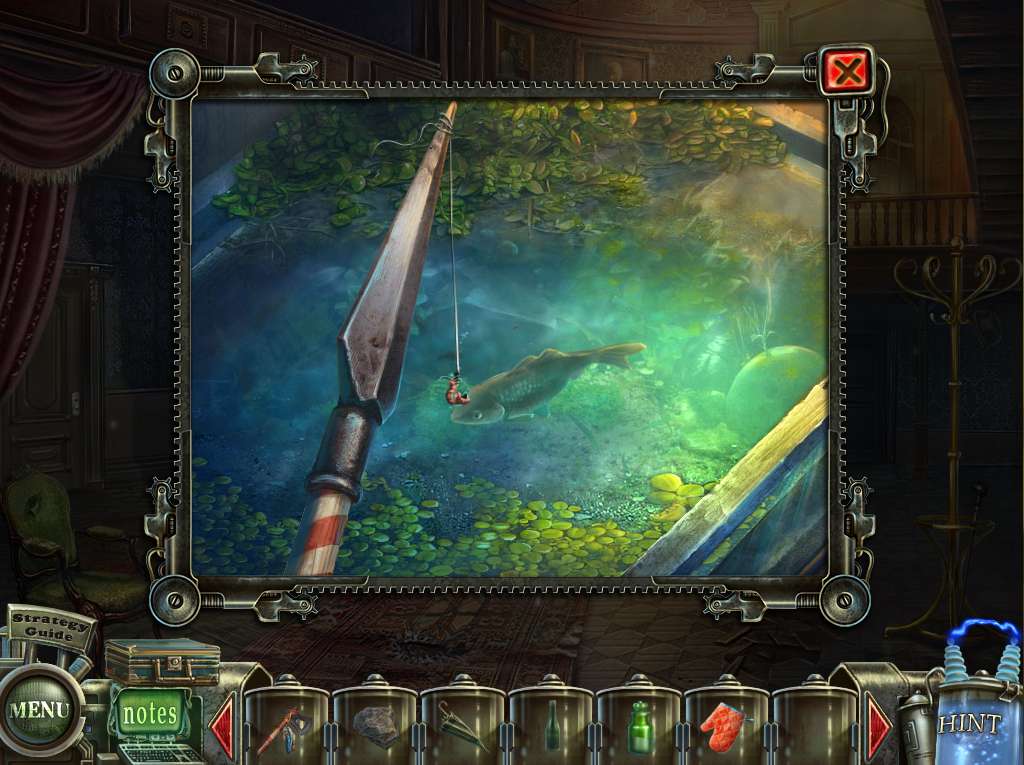
- Return to the foyer, zoom in on the fish tank, and place the FISHING LINE WITH HOOK and the WORM on the spear tip, then dip it into the tank to catch yourself a FISH – doesn’t seem very sporting, does it?
- Return to the kitchen.
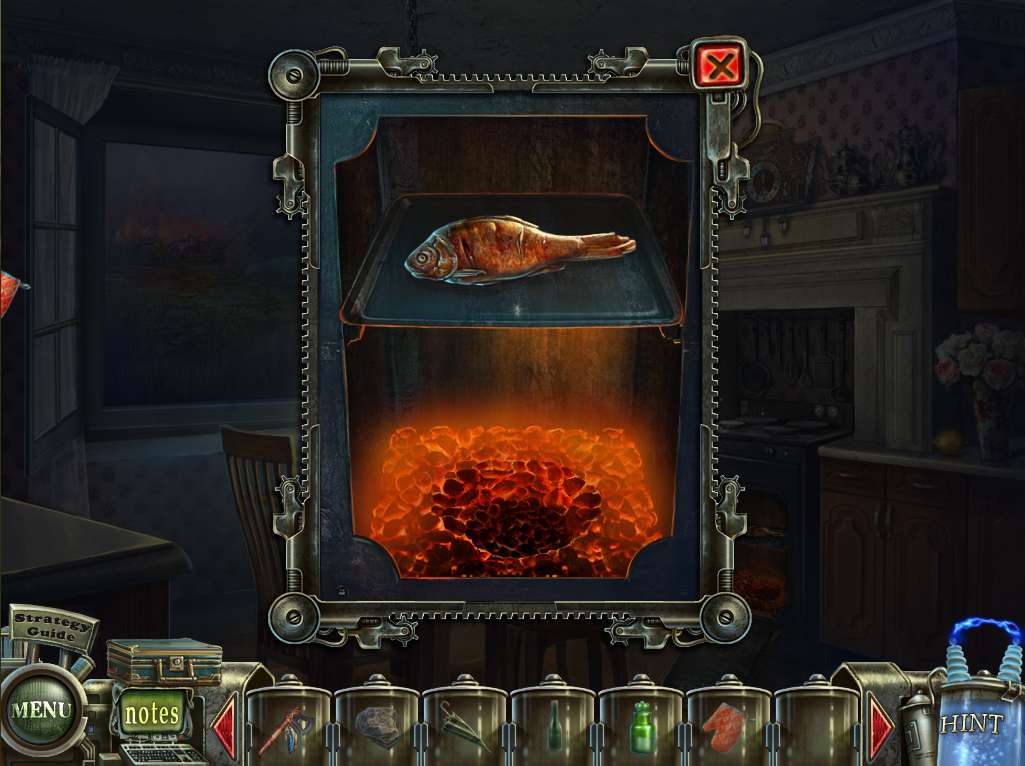
- Zoom in on the oven and place the fish on the plate using the OVEN MITT, then take the BAKED FISH.
- Exit the home and go up the road to the lean-to.
- Zoom in on it to initiate the next HOA puzzle.
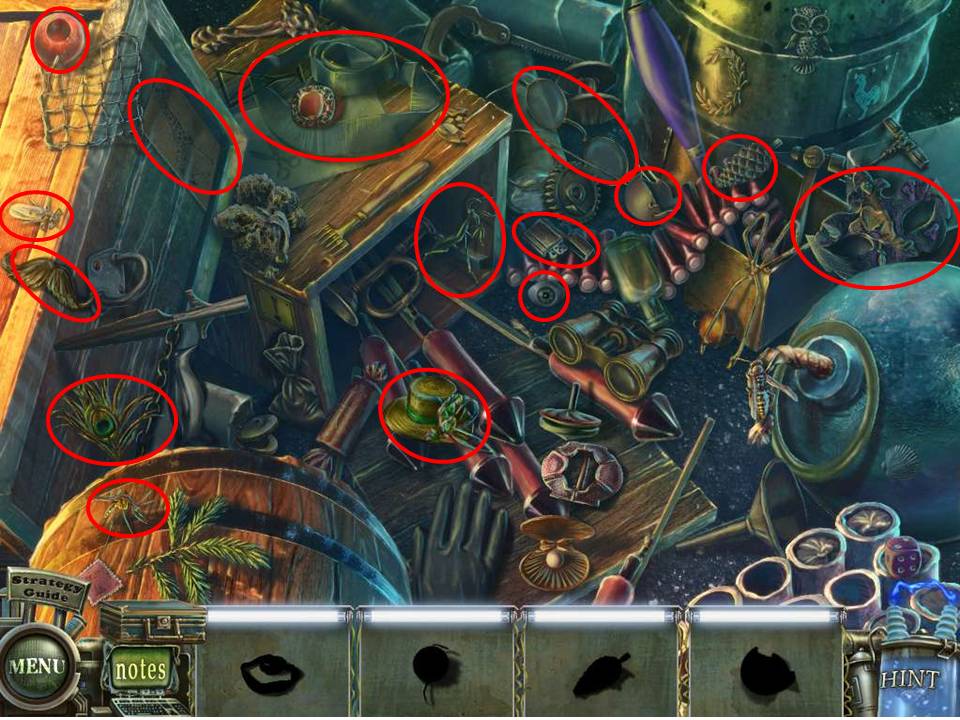
- Find all the items circled in red, noting that there might be some slight variation in the objects to find due to random selection by the game.
- When complete, take the BELT.
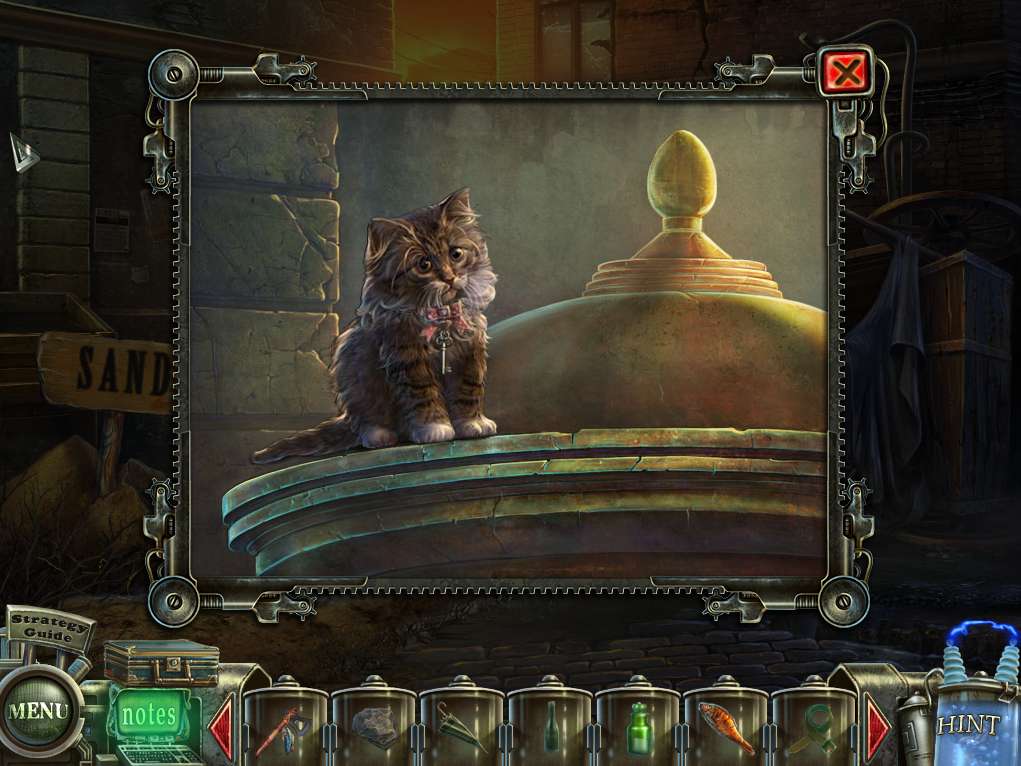
- Zoom in on the cat sitting atop the advertising cylinder in the background and give it the BAKED FISH (why did the fish need to be cooked – this is some cat living on the street, and it’s going to be that picky over its food?)
- When the CAT jumps off, click on it to place it in inventory – nice, the cat doesn’t even get the chance to eat the fish you went to so much trouble to prepare!
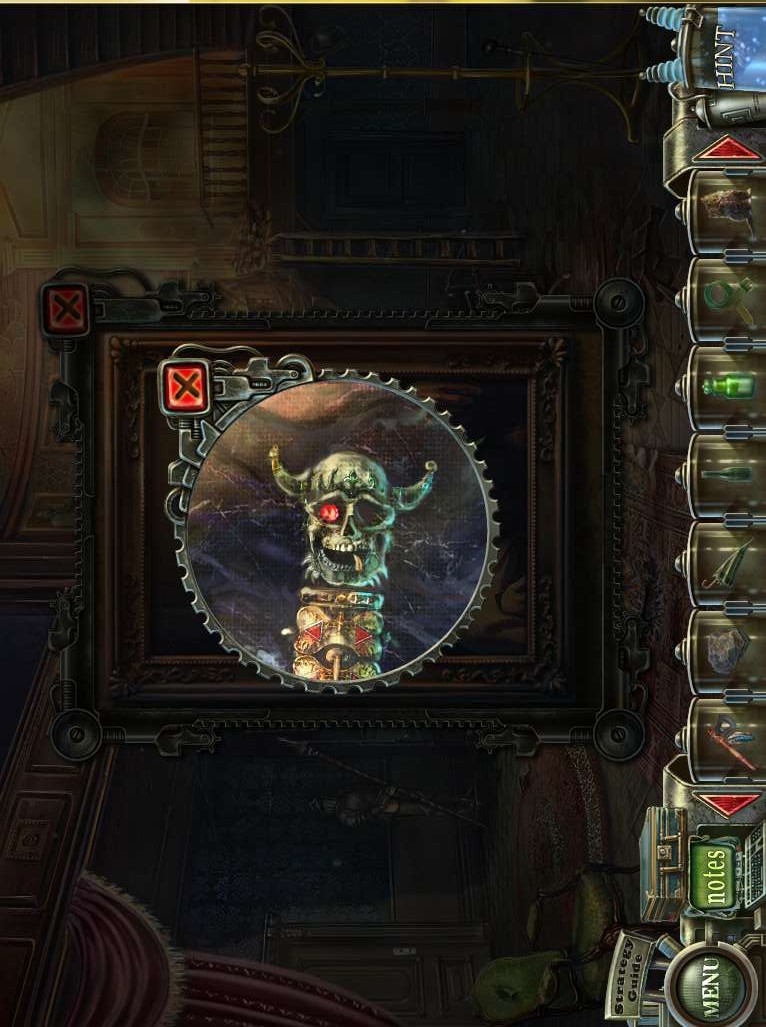
- Return to the foyer and glance at the large portrait hanging half way up the stairs.
- Note the head of the cane and how it differs in appearance to the one in the rack at the entrance.
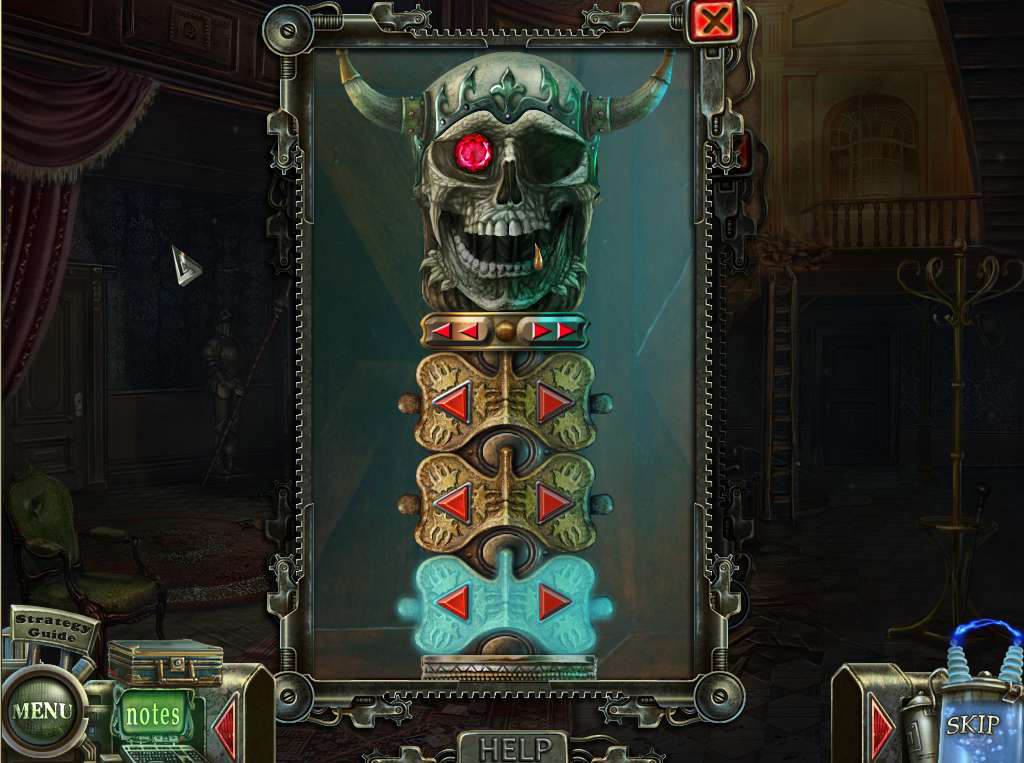
- The solution is pretty easy on this one, as there’s only a handful of variations for each part, though you need to take into account that the collar with the arrows on it controls three areas on the skull (the horns, the eyes, and the item in the mouth) and to the way to access each one is to press on one of the three plates below – notice in the screenshot how the lower one has been switched ‘on’ via the fact it’s turned blue.
- Note the screenshot for the final solution.
- When complete take the SWORD and proceed to the storeroom under the stairs.
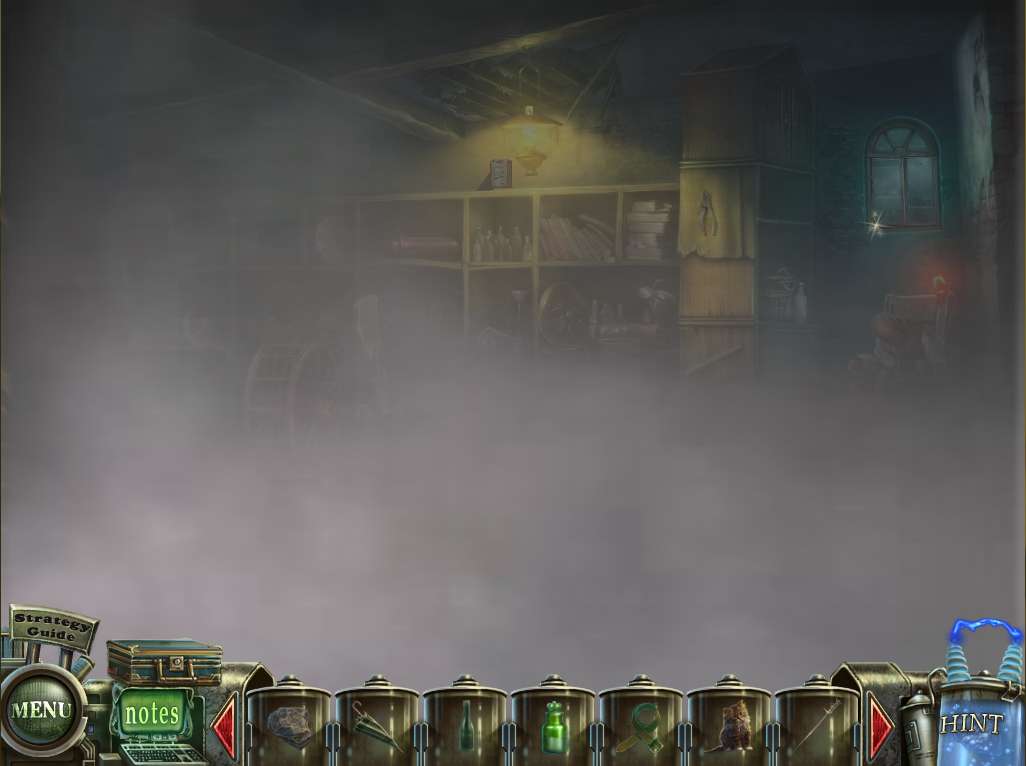
- Okay, it looks like a an old fashioned London fog in there – or Cheech and Chong’s home after one of their smoking sessions!
- Use the STONE from inventory to smash open the window just visible in the background.
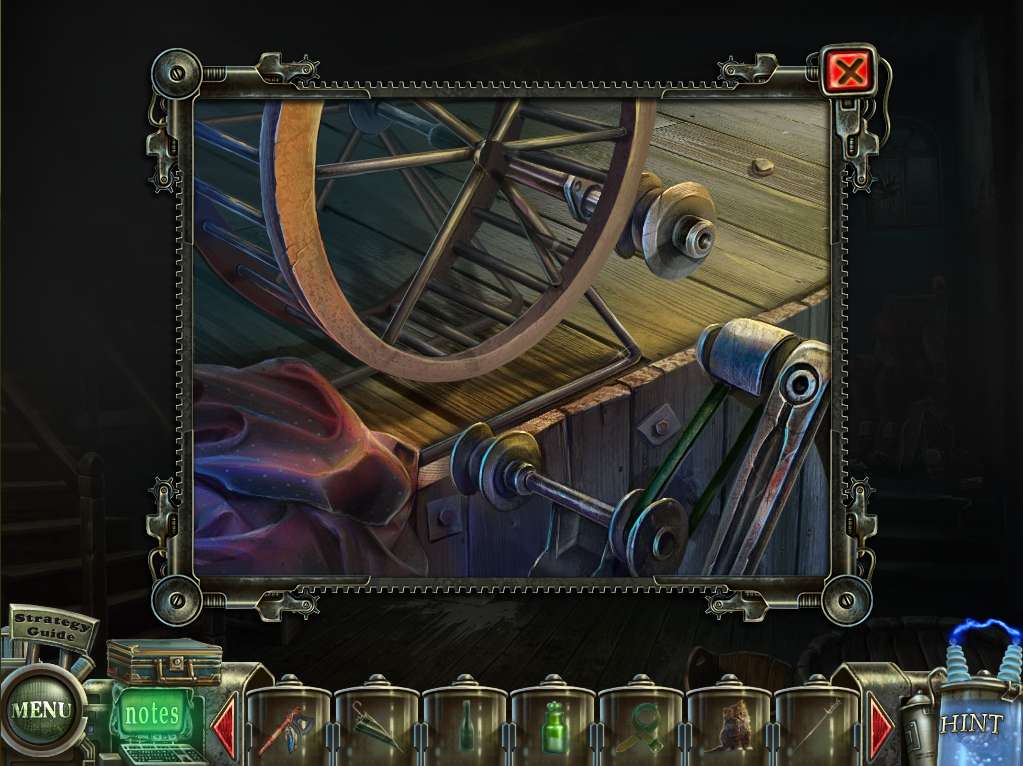
- Next, place the kitty CAT in the contraption to the left and watch the little guy run!
- Attach the belt as a pulley, and away goes the rest of the smoke – though why the cat would want to help you after you stiffed him on the fish is anyone’s guess.
- Note the poor guy locked in the chair to the right – it’s Dr. Armstrong.
- Use the SMELLING SALTS to revive him.
- Note the combination he gives you – 4ZHK.
- To his left, hanging from a nail on the cabinet, is a pair of PLIERS – grab them.
- Onward and upward – use the UMBRELLA to knock down the box sitting atop the shelving, which will fall on a pot and deposit its dusty contents inside.
- Use the VINEGAR, which will dissolve the powder and leave the imprint of a number – X27Z.
- Head back to the foyer.
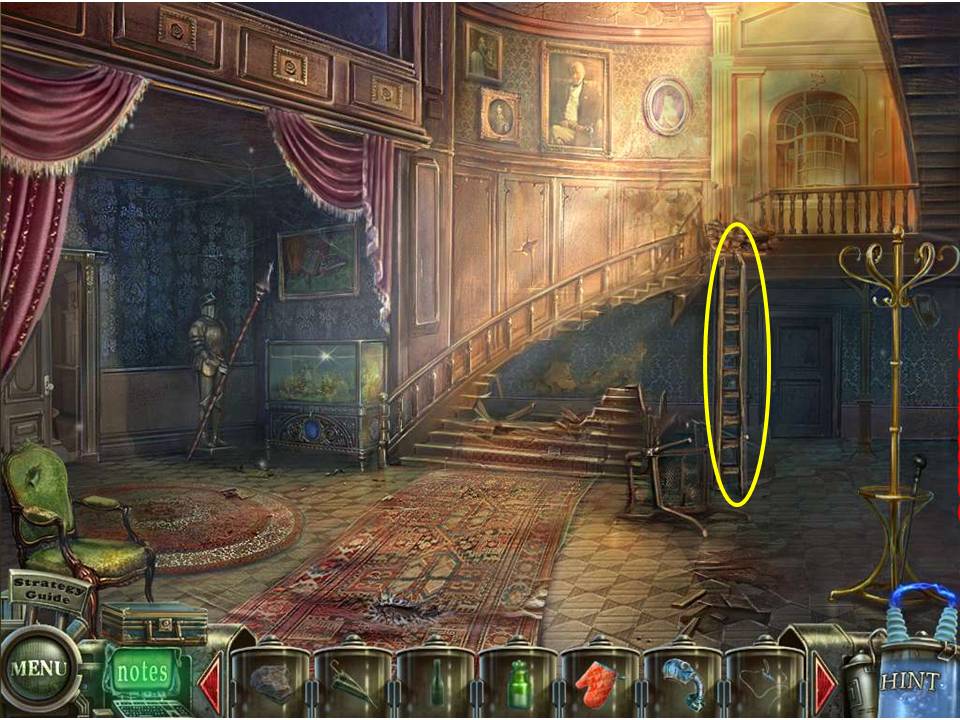
- Place the ladder against the landing at the top of the stairs and make you way up to the next floor
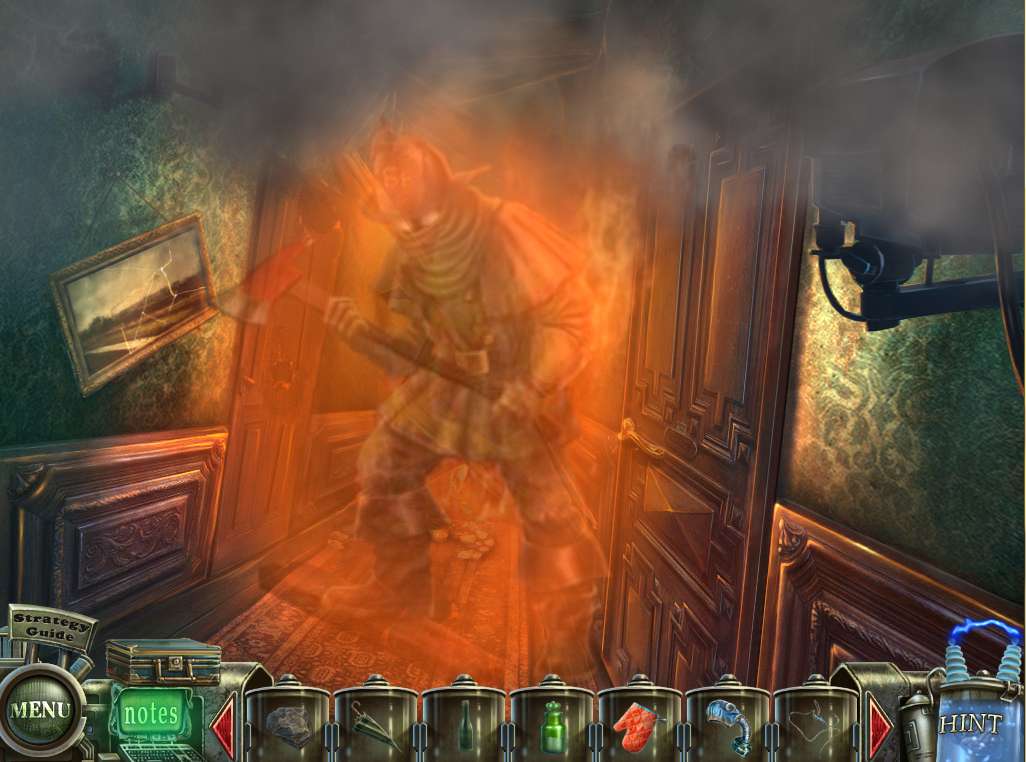
- Watch the cut scene, then use the GAS MASK to whisk the hallucination away.
- Then zero in on the door to the left and enter in.
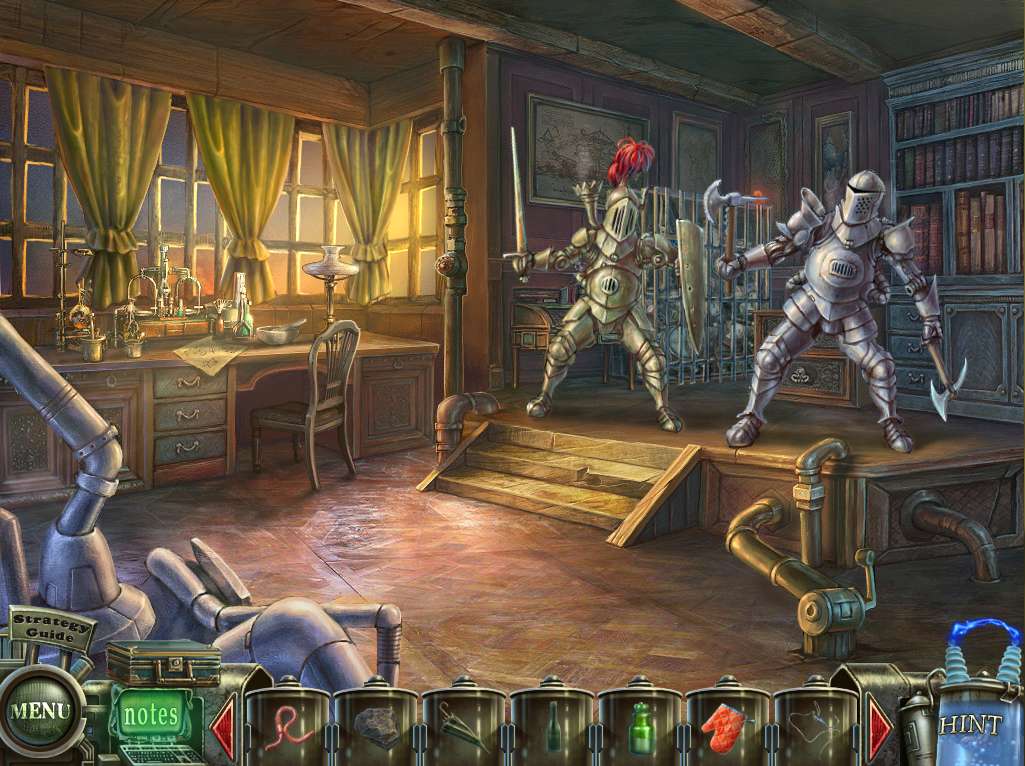
- Tackle the suit of armor to the right with the TOMAHAWK and watch it collapse into a pile of spare parts.
- The guy on the left is a tougher nut to crack, as you have to find some way of blocking off the steam vent on his shoulder.
- Take a look at the desk and note the missing piece to the broken CD for Chernobyl.
- Exit from the room.
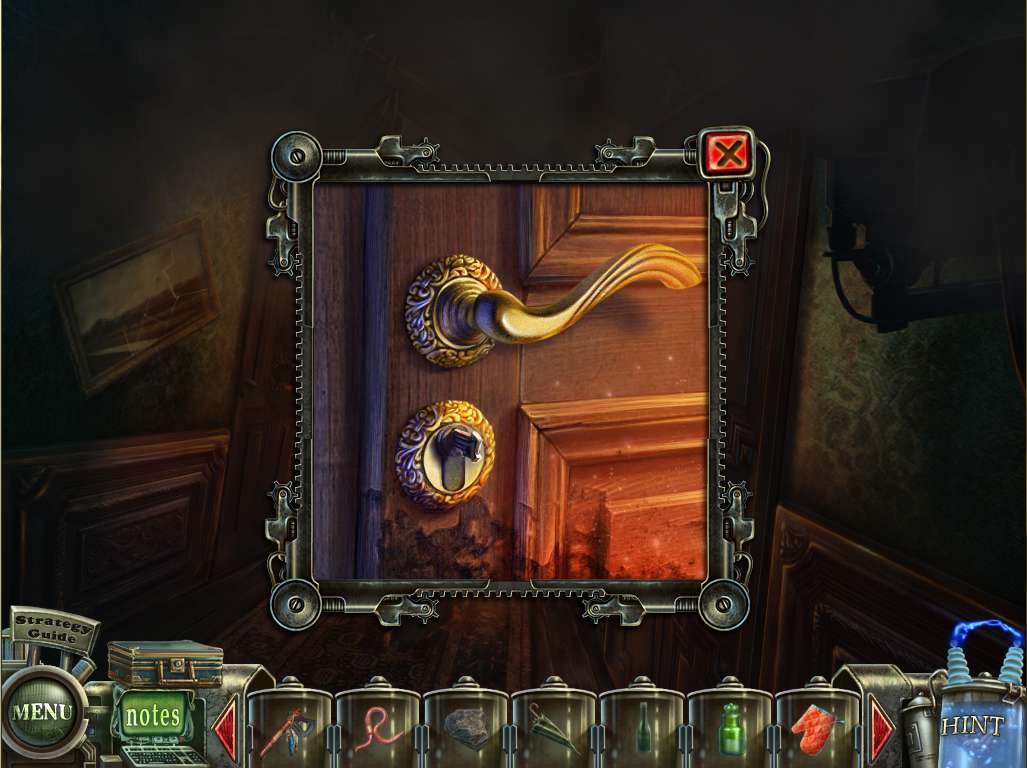
- Zoom in on the door to the right and use the PLIERS to turn the broken key in the lock.
- Once the door is open, initiate the HOA puzzle on view inside.
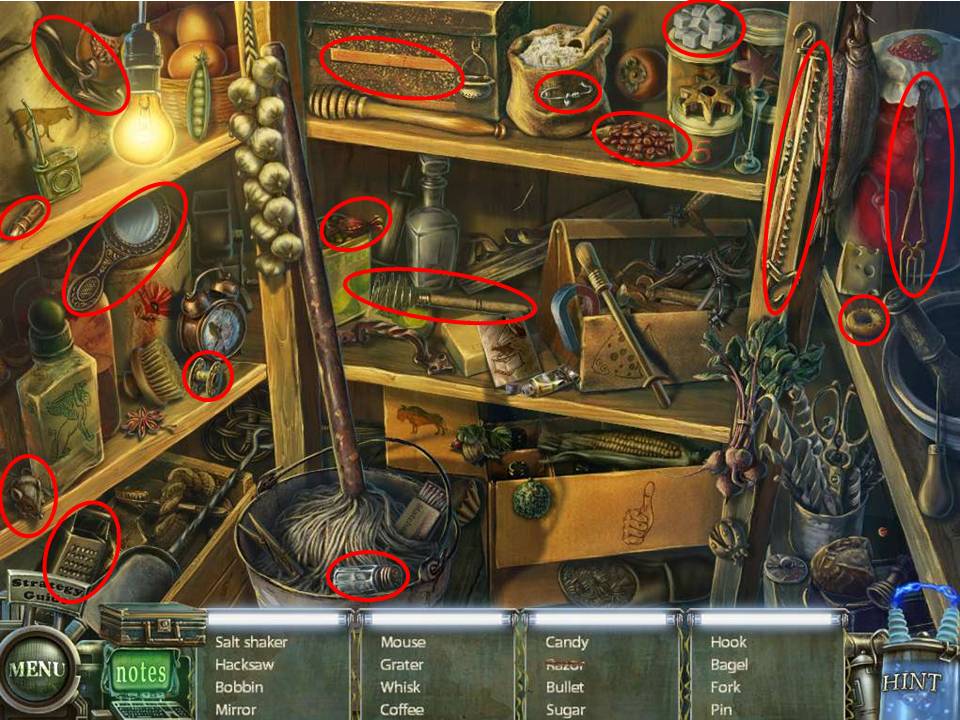
- Find all the items circled in red, noting that there might be some slight variation in the objects to find due to random selection by the game.
- When complete, take the SALT and head downstairs to the kitchen.

- Zoom in on the table and place the SALT on it to initiate the next puzzle.
- It’s all pretty basic – follow the guidelines set out on the paper to prepare and cook the food, noting that as each section is completed, each part of the engraved pattern on the cooker will light up in blue. Note that to cut pieces into segments you may have to use the knife multiple times, and once you’ve added the piece to the pot you clear the cutting board for the next item to prepare.
- You know you’re on the right track because the food item you’re preparing will light up when you add it to the pot – but only if you’ve put in the correct amount.
- If you goof the game will let you know, and you have to reset and start again on the particular section of the recipe you’re working on.
- Once finished, take the PUMPKIN and head upstairs again to the study.
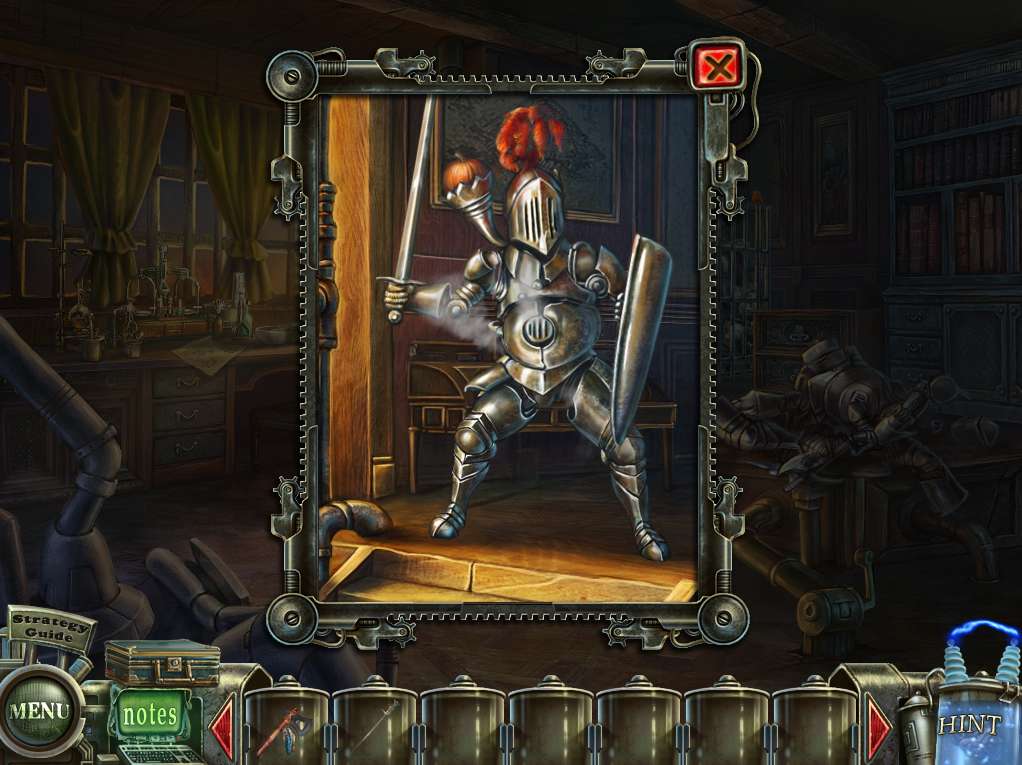
- Okay, time to tackle that steam-driven suit of armor!
- Zoom in and use the PUMPKIN to block the vent (who would have thought?) and while it’s having a fit use the SWORD to skewer it!
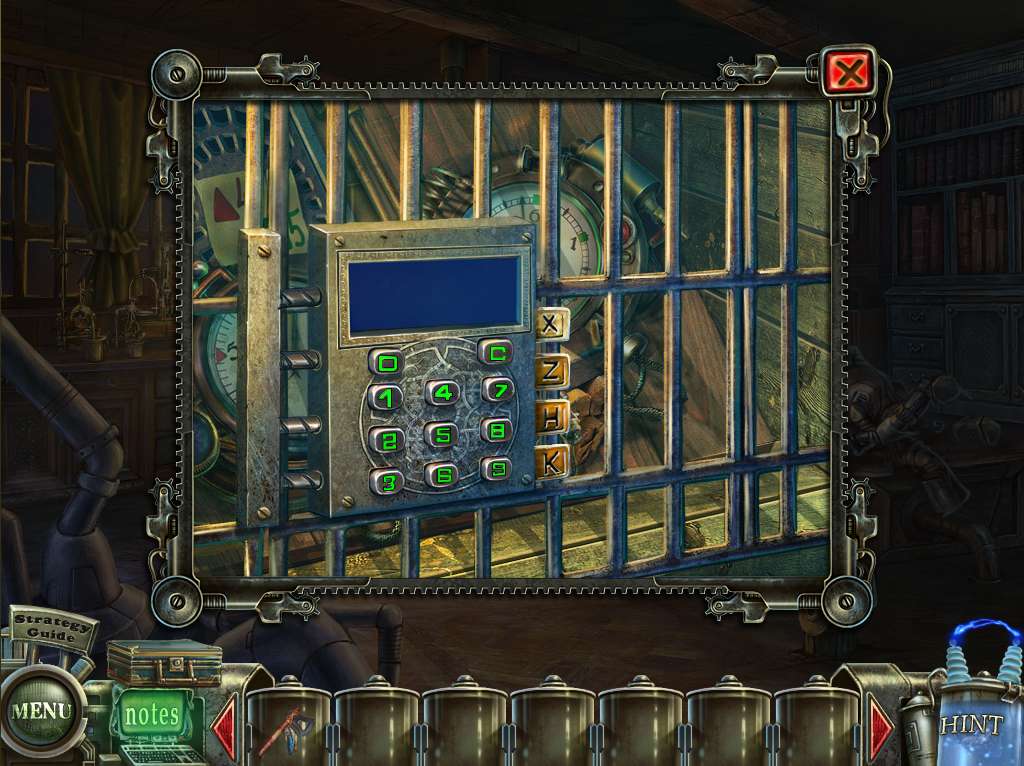
- Zoom in on the cage in the back corner and note the keypad – time to use those codes acquired earlier!
- Punch in 4ZHK and X27Z
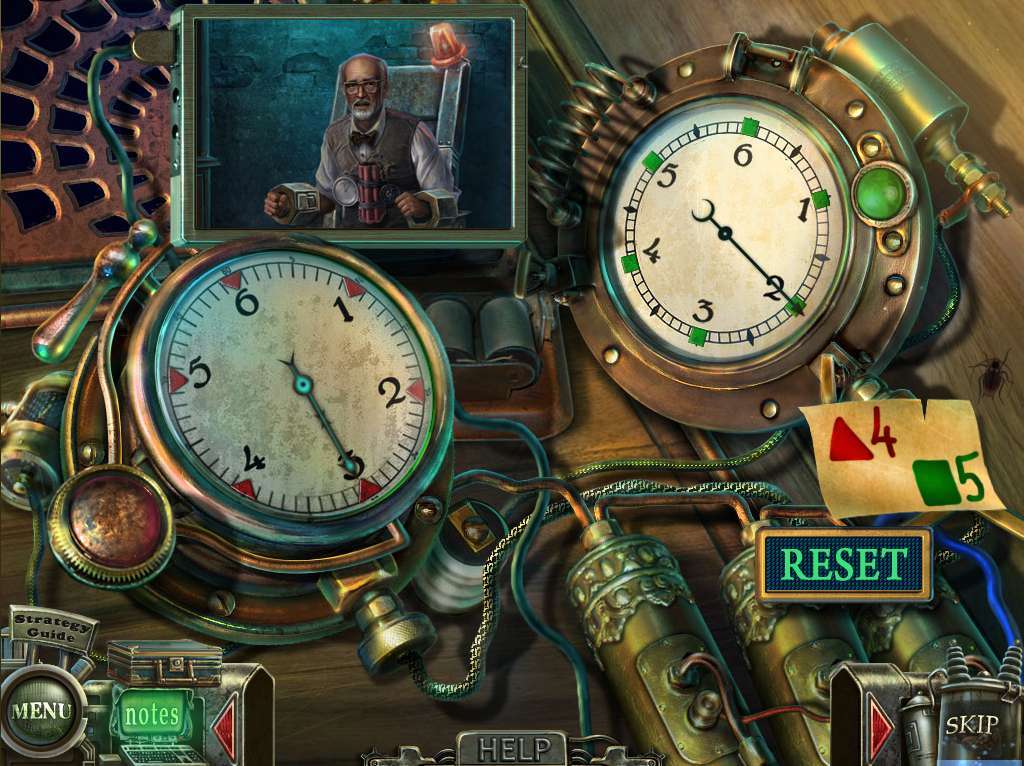
- Okay, time to defuse a bomb! Note the card on the left with what appears to be the solution – but could it be a trick!
- Well, it’s only a game, so the only person who really stands to die is Dr. Armstrong, so what the heck, right?
- Here’s the trick – the button on the left makes the hand to the left move one number, while the hand on the green clock moves two.
- Press the green button five times, and the red button twice.
- Now would you have done all that if it was a REAL bomb, eh?
- Head back downstairs and go to the storeroom, where you’ll find Dr. Armstrong up and around.
- Talk to him, and after he leaves take the BLUE ENERGY ORB left floating in the air – yeah, you come cross these all the time just hanging about!
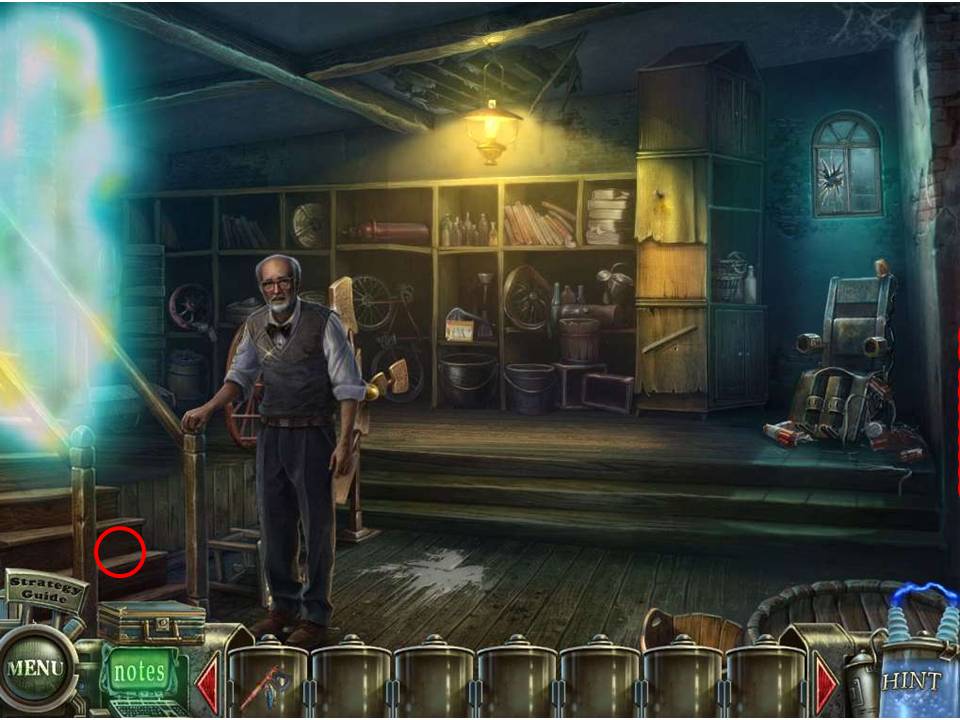
- Also pick up the DISK PIECE sitting on the lower step, then go back upstairs.
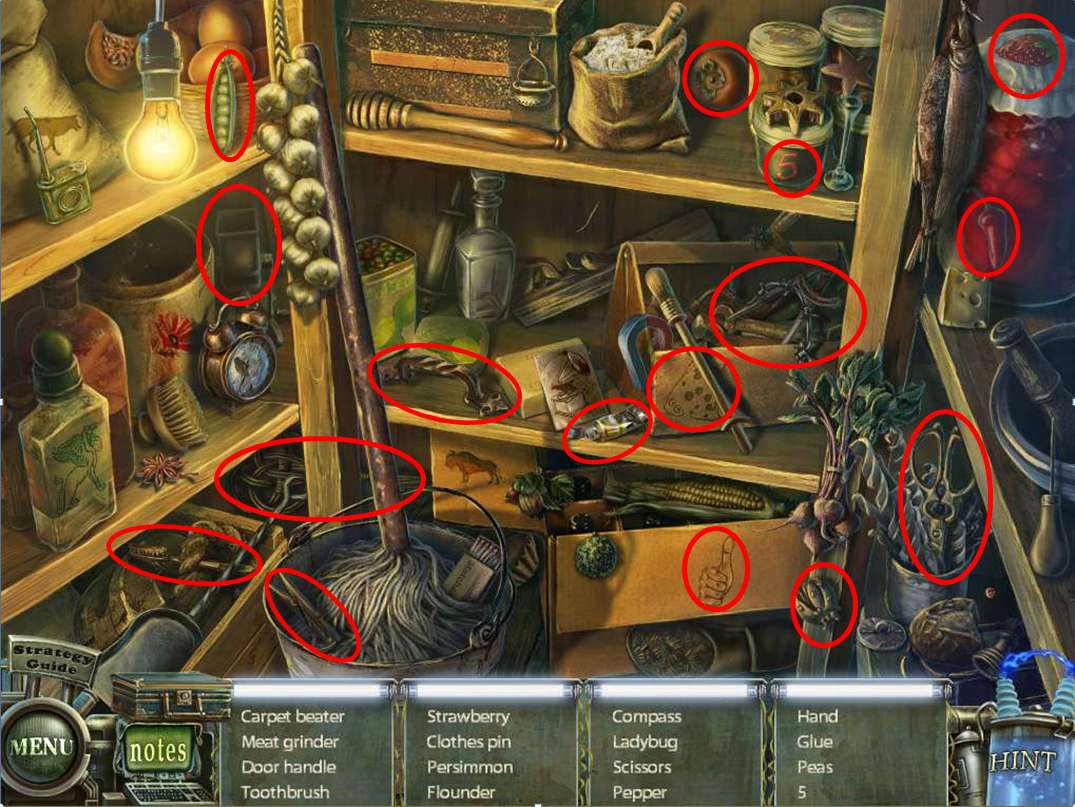
- Find all the items circled in red, noting that there might be some slight variation in the objects to find due to random selection by the game.
- When complete, take the GLUE and head back to the study.
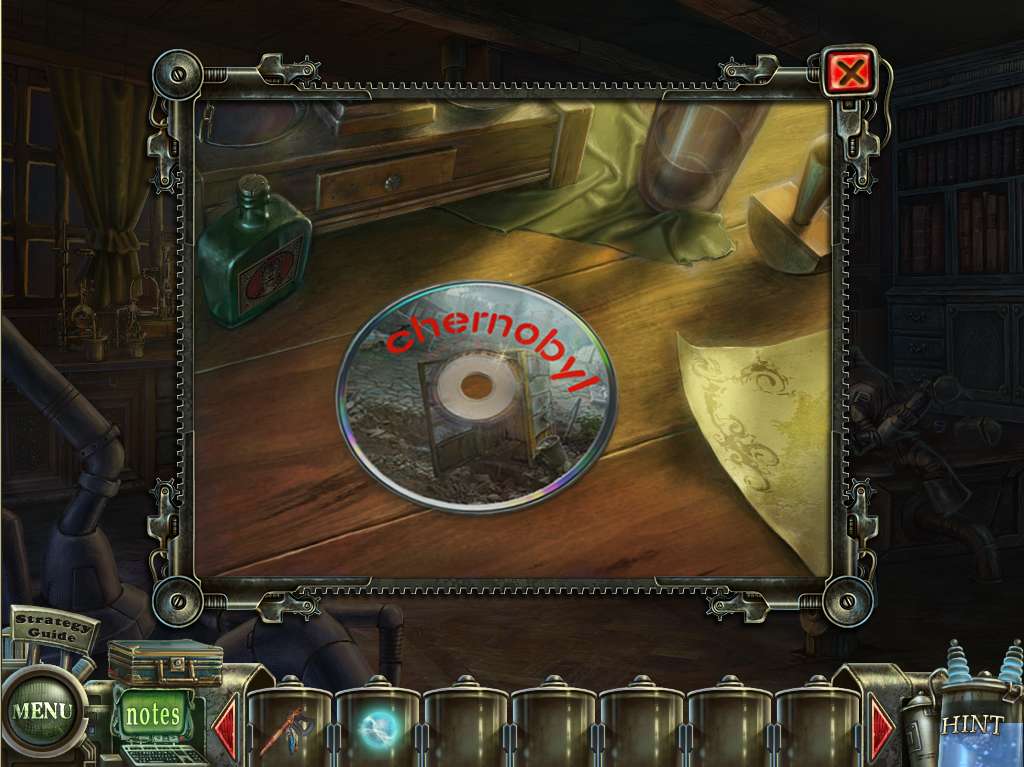
- Zoom in on the desk, place the DISK PIECE on it, and use the glue to repair the broken disk – if only it was really this easy, right?
- When complete, take the CHERNOBYL DISK and head out of the building.
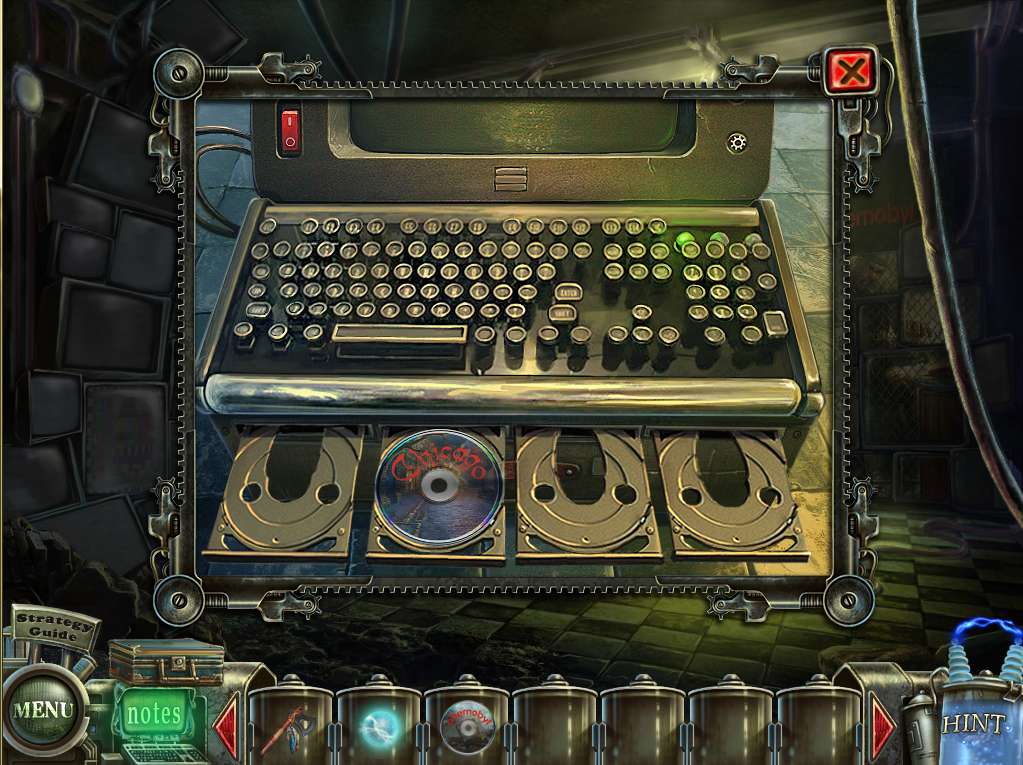
- Reverse out of the scene and back to the computer room.
- Have your dialogue with Mr. Nasty, then cut over to the computer sitting on the floor, insert the CHERNOBYL DISK, and click on the Chernobyl monitors to the right to head off on the next phase of your adventures.
General Info and Tips
Chapter One: Trapped
Chapter Two: Chicago
Chapter Three: Chernobyl
Chapter Four: Pompeii
Chapter Five: Alaska
Ask for help in the comments below!
Chapter One: Trapped
Chapter Two: Chicago
Chapter Three: Chernobyl
Chapter Four: Pompeii
Chapter Five: Alaska
Ask for help in the comments below!