
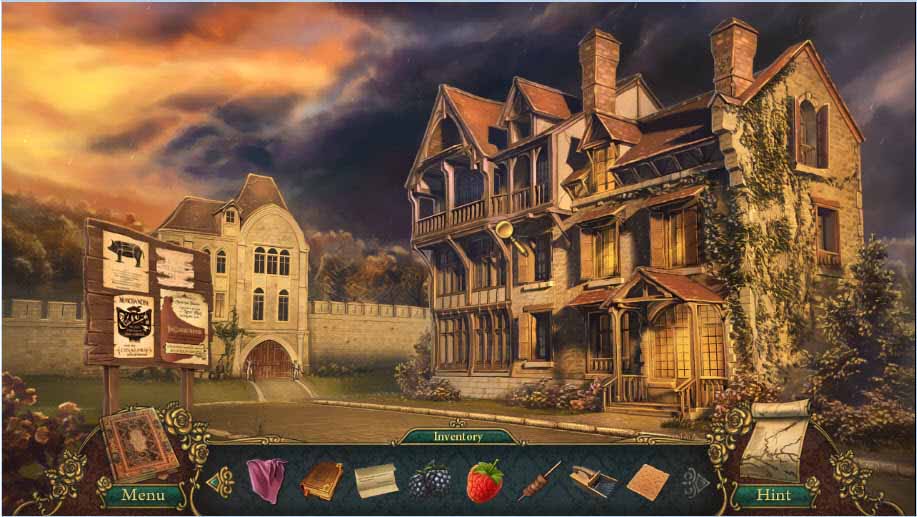
Fairly Twisted Tales: The Price Of A Rose: Chapter Four: Around Town
Our Fairly Twisted Tales: The Price of a Rose Walkthrough will be your guide as you attempt to discover the truth in this mysterious kingdom. When Bella agrees to stay with the beast in exchange for her father’s life you are called to see if there isn’t a way to rescue her. Now you must use your wits to find the scroll that could be the key to saving Bella. Our helpful hints, step-by-step instructions, and custom screen shots will help you as you race to find a happy ending in this twisted tale.
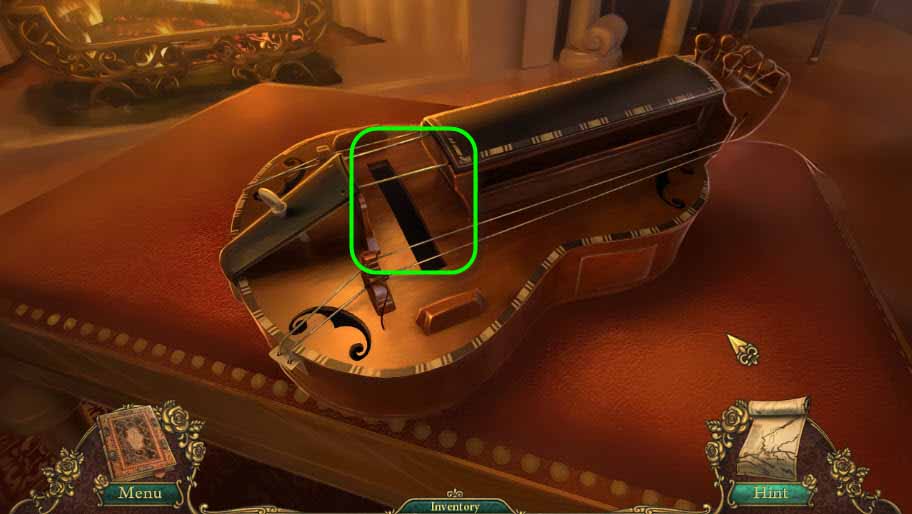
- Select the SAW from the inventory and cut the fallen tree with it
- Cut several times until the road to Town Square opens
- Click the road to Town Square to go there now
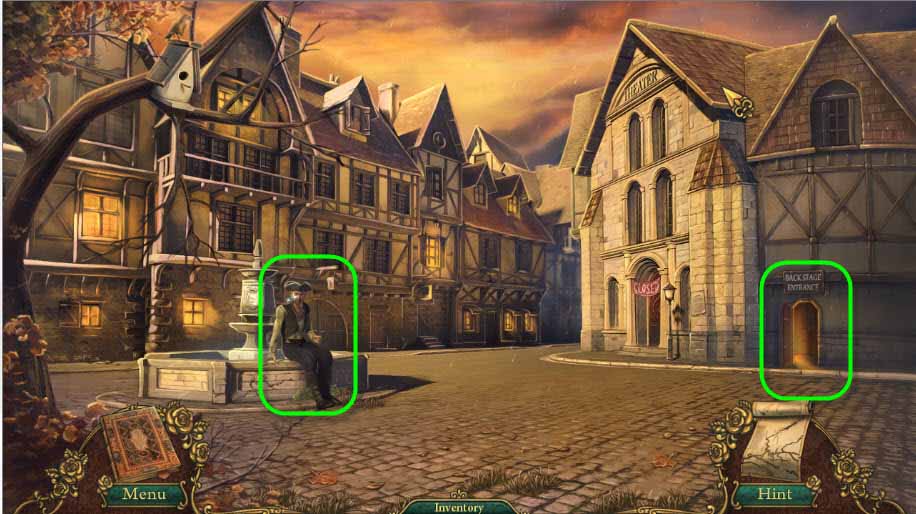
- Click on the Pirate to talk with him
- Give him the ORANGE from the inventory
- In return he will give you a MEAT STICK
- Next click the Theatre Backstage entrance circled above
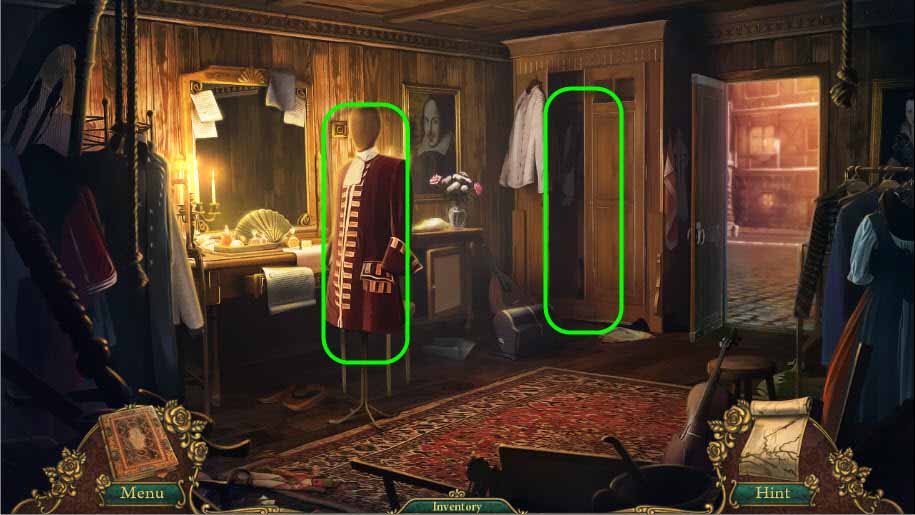
- First click the closet and grab the CLOAK inside; it will fall into the inventory
- Select it from the inventory and place it on the Mannequin
- Leave the Theatre Backstage
- Return to the Town Square and proceed to Downtown by moving the cursor around the Town Square until the Downtown link is located; click
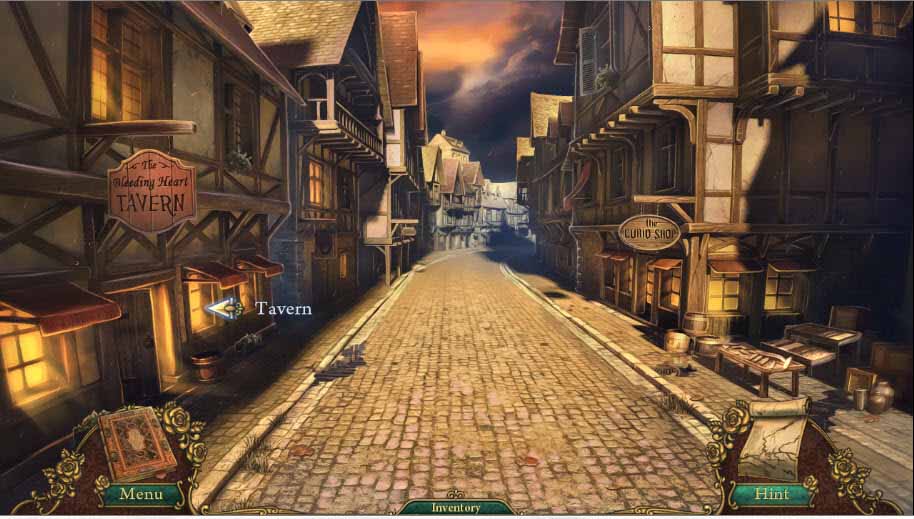
- Enter the Tavern
- Once inside, speak with Jacques; he’s the only man in the Tavern
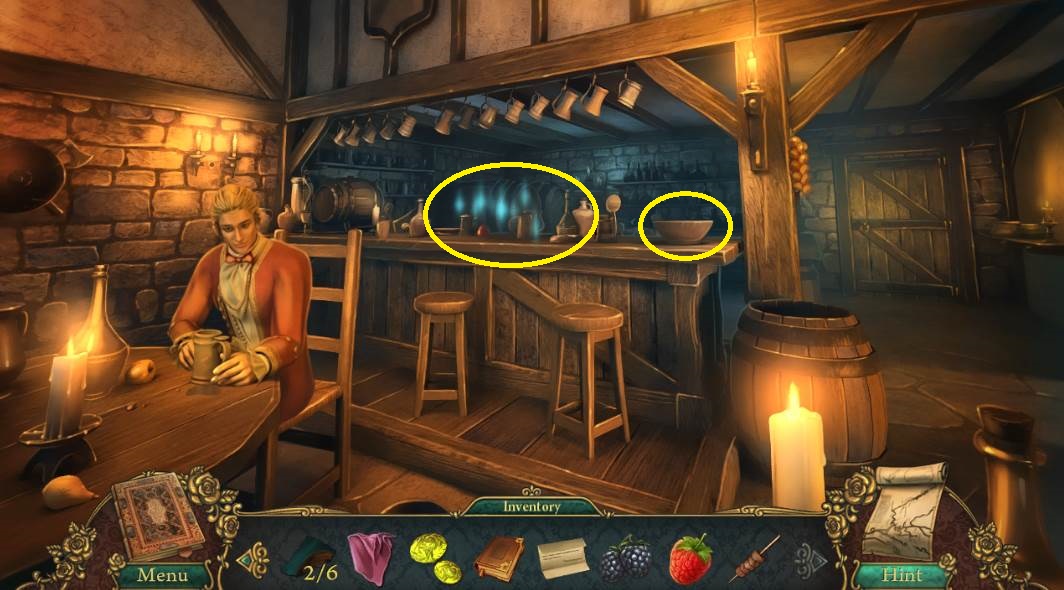
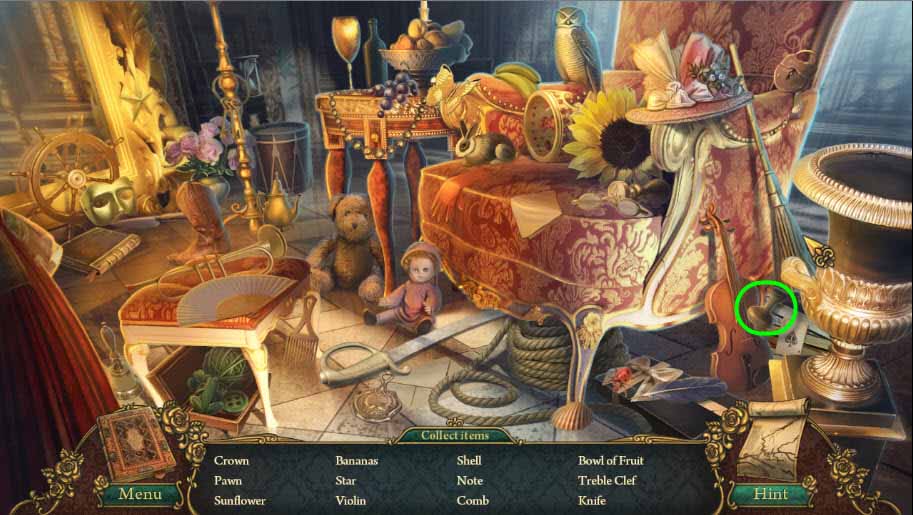
- Click on the bowl circled above and grab the Cracker for the inventory
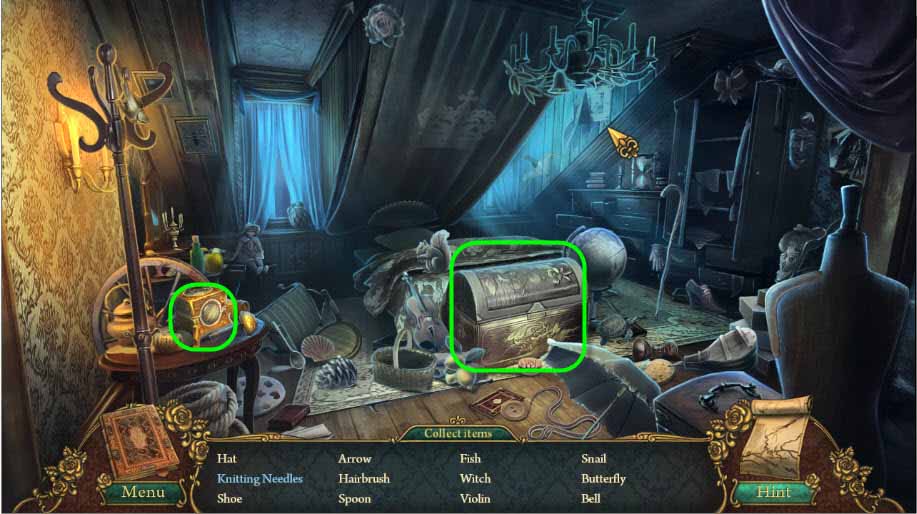
- Now click the shimmers to play the hidden object game
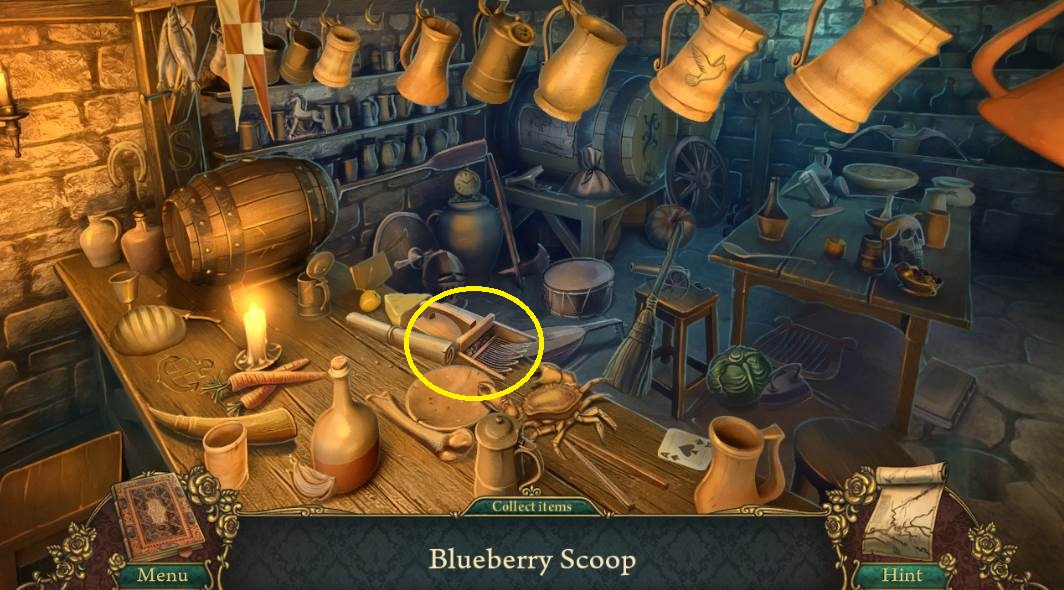
- Grab all the items on the list
- Then grab the BLUEBERRY SCOOP
- Leave the Tavern and go to the Curio Shop
- The only task in the Curio Shop at this time is to speak with the shop owner
- Leave the Curio Shop and go back into Downtown
- Cursor around and find the link to the Crossroads; click
- Cursor around until the link to Raphael’s Foyer appears by the house; click to enter
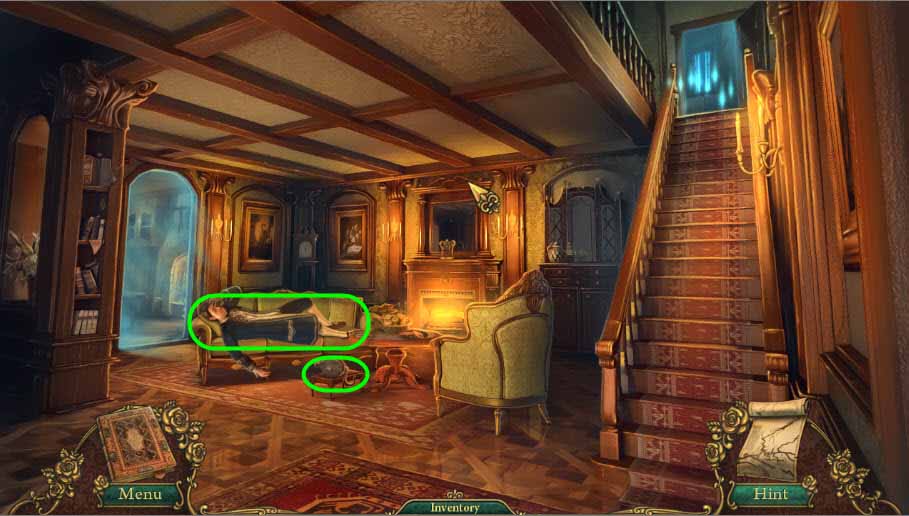
- Click on Raphael to speak with him and then grab the PULLEY on the coffee table for the inventory
- At the top of the stairs, click on the shimmers to play the hidden object game
- Find all of the items on the list
- Some of the items may be in the trunk so click on it to open and peek inside for items
- Next click on the Small Box circled above to grab Bella’s Diary Page.
- You will get a ROSE for your inventory
- Go to the Kitchen
- Find the link for the Kitchen by moving the cursor on the left side of the screen; click
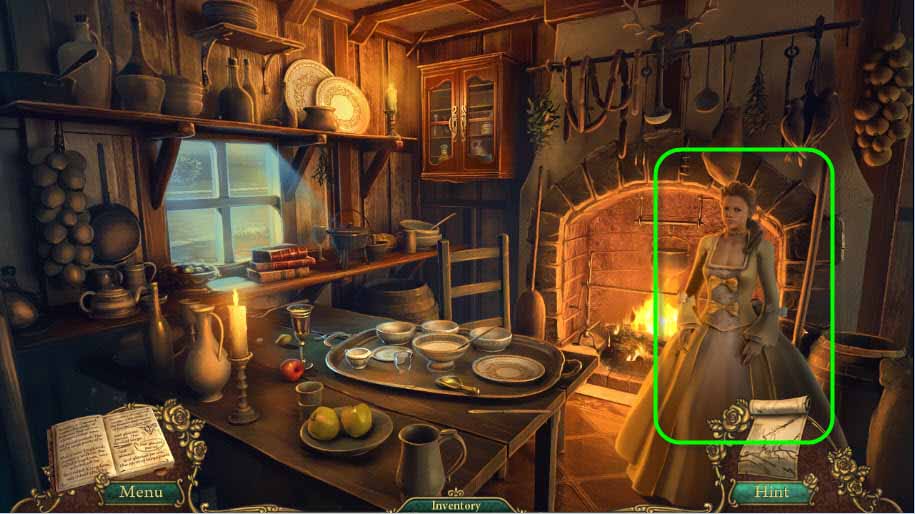
- Talk to Caprice
- Present her with Jacques Love Letters from the inventory
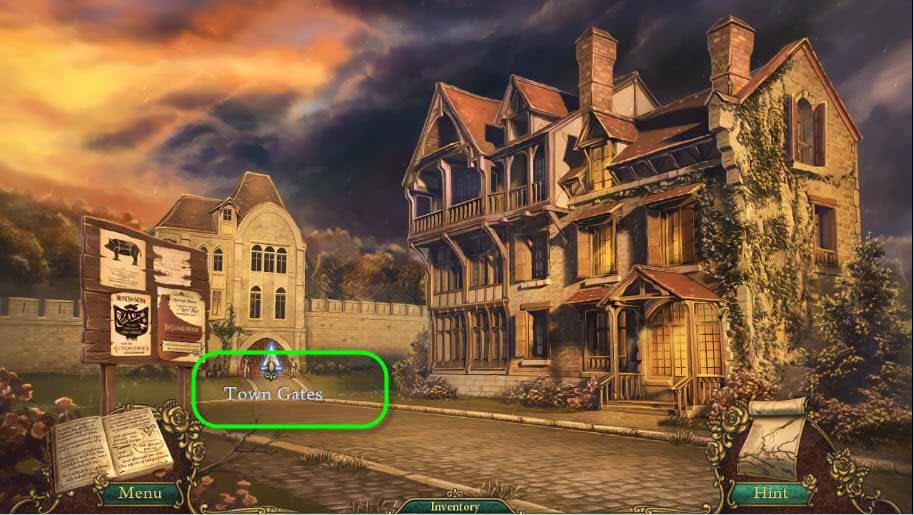
- Next go to the Town Gates
- Leave Raphael’s House to find them
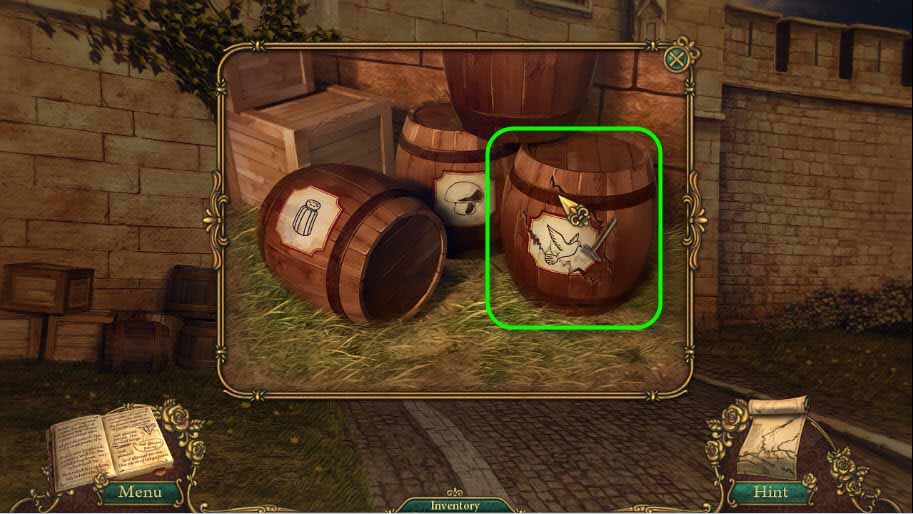
- Click on the barrels and open the one with BIRD SEED by selecting and using the HAMMER from the inventory
- Go back to the Town Square
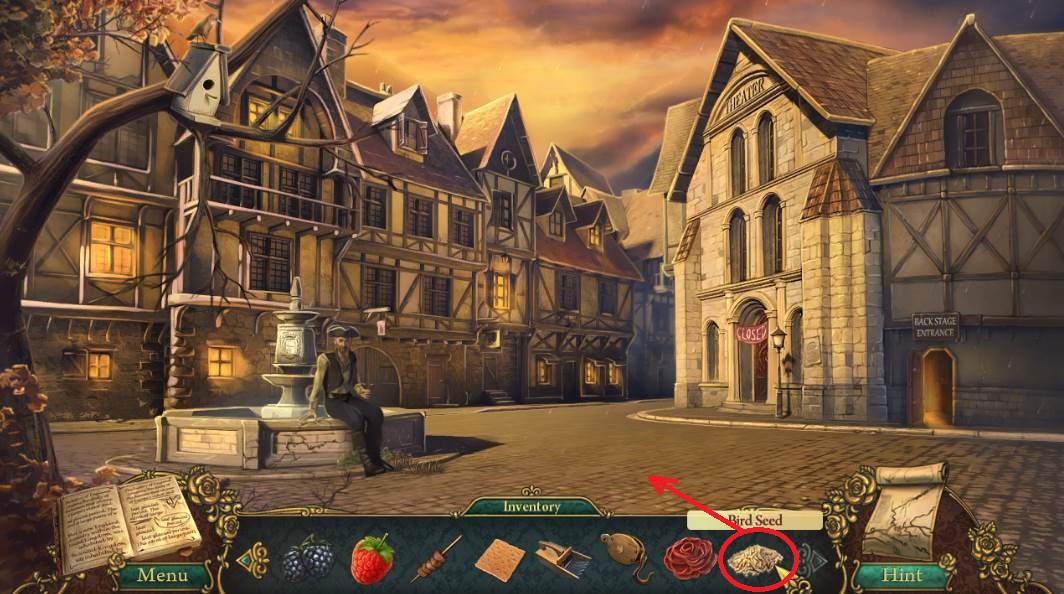
- Place the BIRD SEED on the ground where the shimmers appear
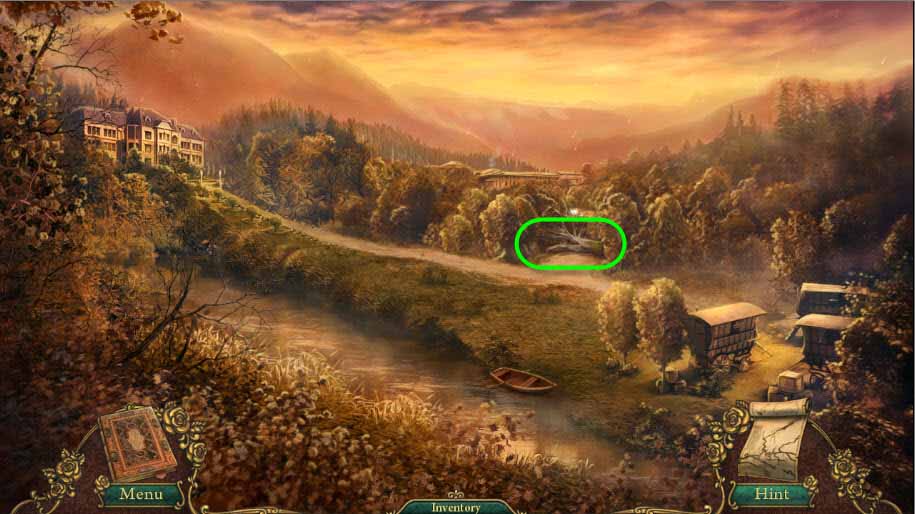
- Leave the Town Square and go to The Road
- Go back to the Town Square where birds will now be eating the BIRD SEED
- Click on the one remaining bird after the rest fly away and collect the BLACK BIRD FEATHER for the inventory
- Return to the Waterfall using the map for an easier return
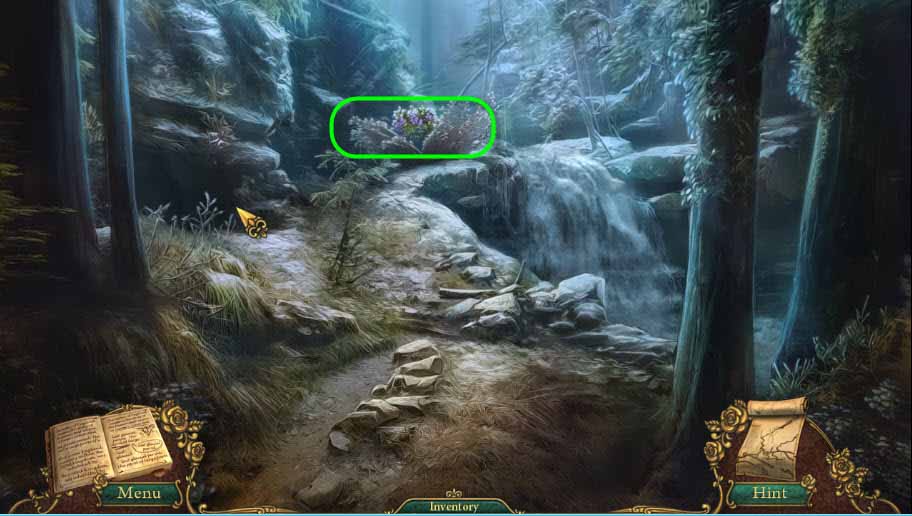
- Use the Blueberry scoop from the inventory to gather blueberries from the bush circled above
- Return to the Staircase Landing, again using the map for ease of moving from one scene to another
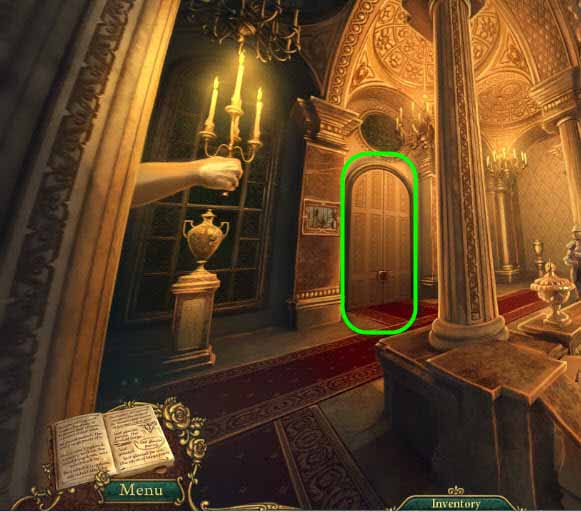
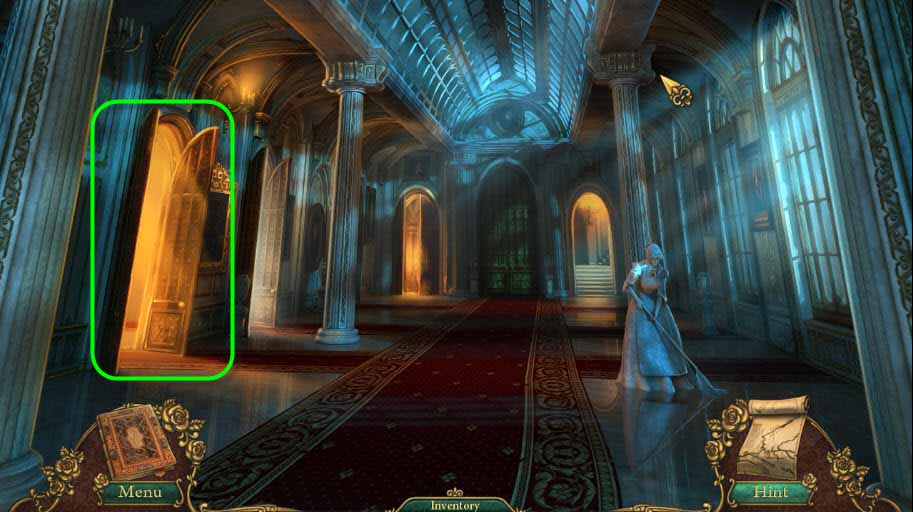
- Click the doors circled in the image above
- Select the Rose from the inventory and place it in the puzzle
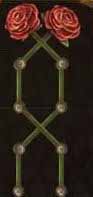
- Solve the puzzle by configuring as shown above
- The easiest way to solve this puzzle is to start clicking the dots from the bottom up
- Don’t forget that puzzle can be reset to start over
- Once the puzzle is solved the doors to the Upper Hall will open; click to enter
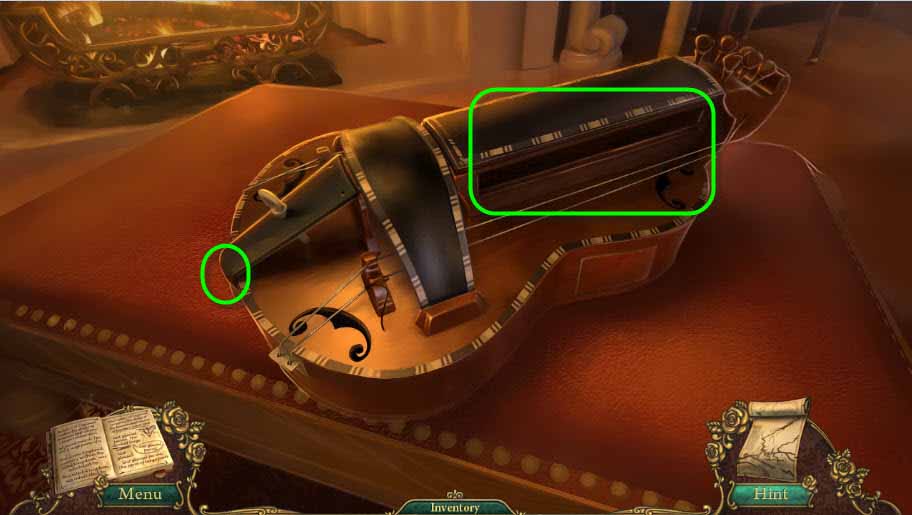
- Enter the Music Room through the doors circled above
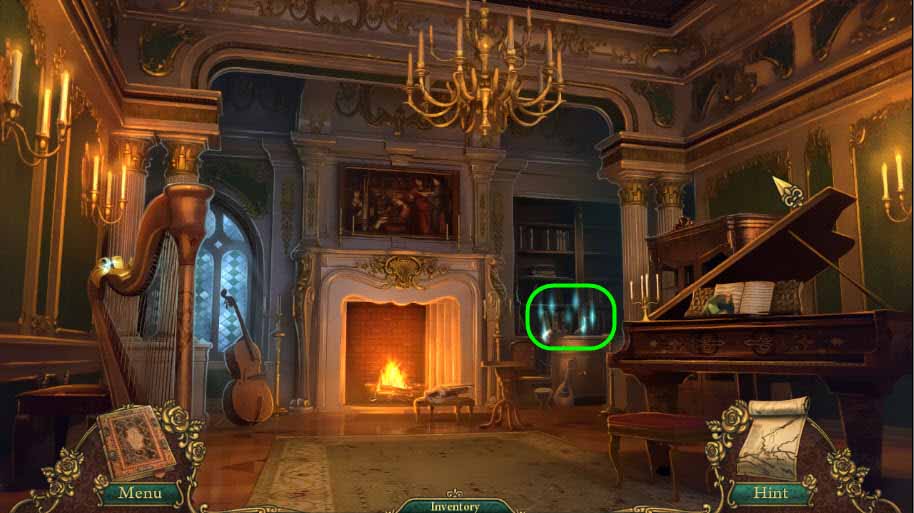
- Click on the shimmers circled in the image above to start the hidden objects game
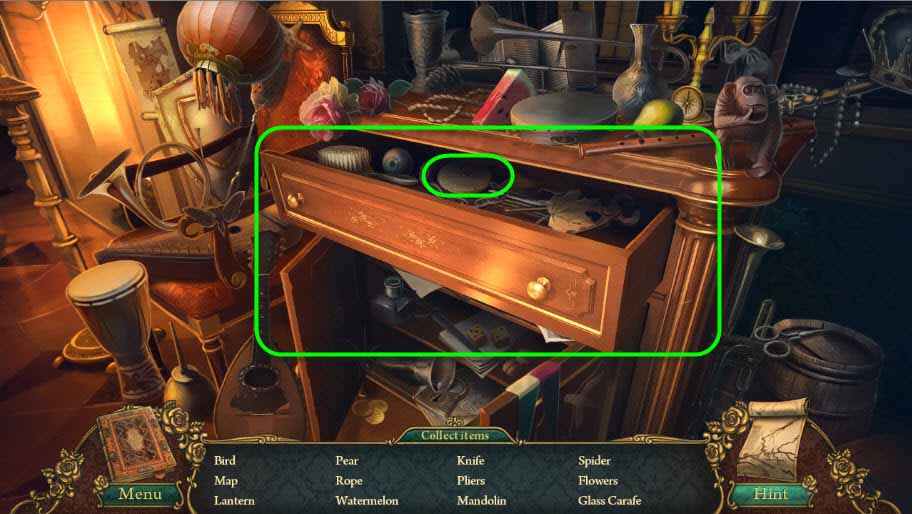
- Before starting the hidden object session open the drawer
- Find all the items at the listed and the collect the WHEEL in the drawer circled above for the inventory
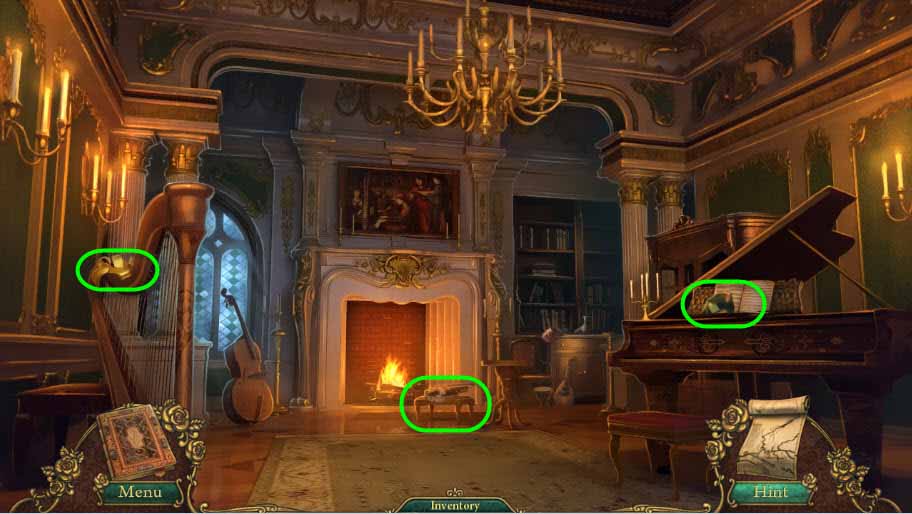
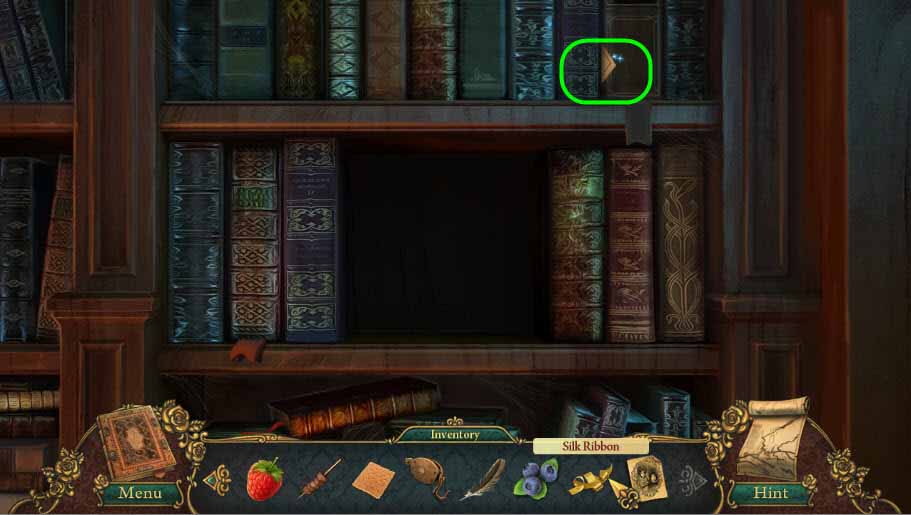
- Grab the SILK RIBBON circled for the inventory
- Next collect the PORTRAIT PIECE on the piano
- Click on the Footstool
- Select the WHEEL from the inventory and insert in the slot circled above
- Return to the Music Room by moving the cursor around the bottom of the screen until the link is located; click
- Return to the Main Hall
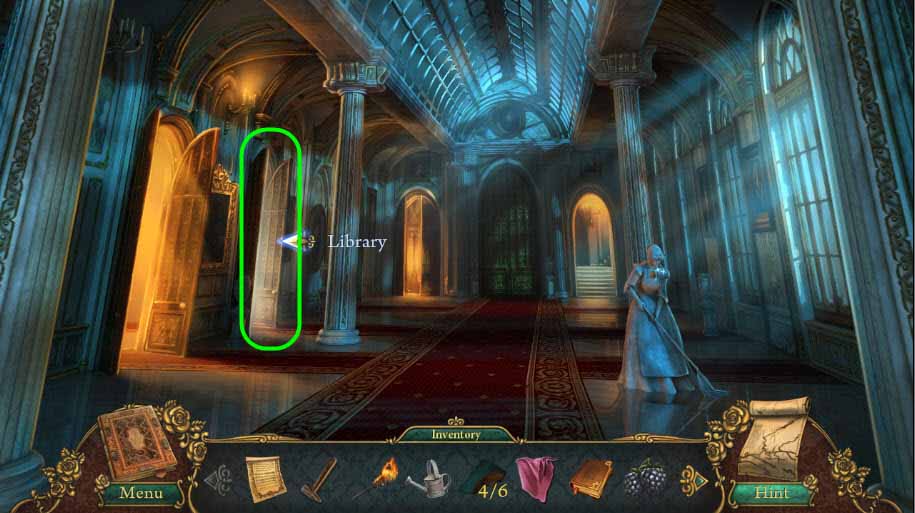
- Enter the Library through the doors circled above
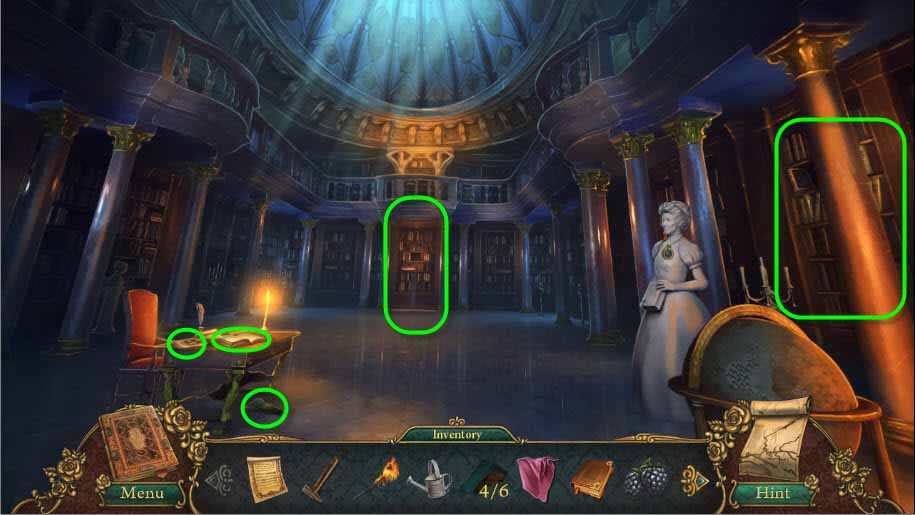
- Grab the PORTRAIT PIECE under the desk
- Next grab the SMALL PORTRAIT on the desk; it’s the left circle
- Check out the book on the desk; it’s the circled item to the right
- Return to the Library by clicking near the bottom of the screen
- Click on the bookcase on the back wall and grab the CLAIM CHECK
- Click the bookcase on the sidewall and grab the FULL MOON SYMBOL
- Go back to the Curio Shop; use the map to navigate with ease
- Give the shop owner behind the counter the CLAIM CHECK from the inventory
- In return he will give you the BOOK OF THE POOR
- Leave the Curio shop through the doorway into Downtown to have a conversation
- Go back to the kitchen at Raphael’s House; use the map for ease of traveling
- Raphael’s House is in the Downtown area
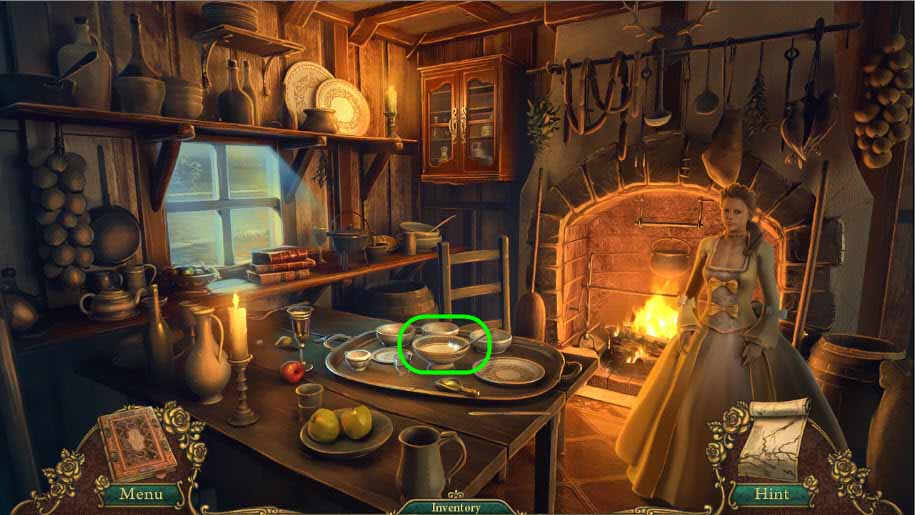
- Click the bowl on the table, circled in the image above
- To begin, put the BLUEBERRIES, RASPBERRIES, and BLACKBERRIES in the bowls
- Place the cornstarch, which is in the small container on the left in the image above, into the large bowl
- You will need to drag and drop to complete this action as well as the next action
- Then place the sugar, which is in the small container next to the cornstarch, in the large bowl
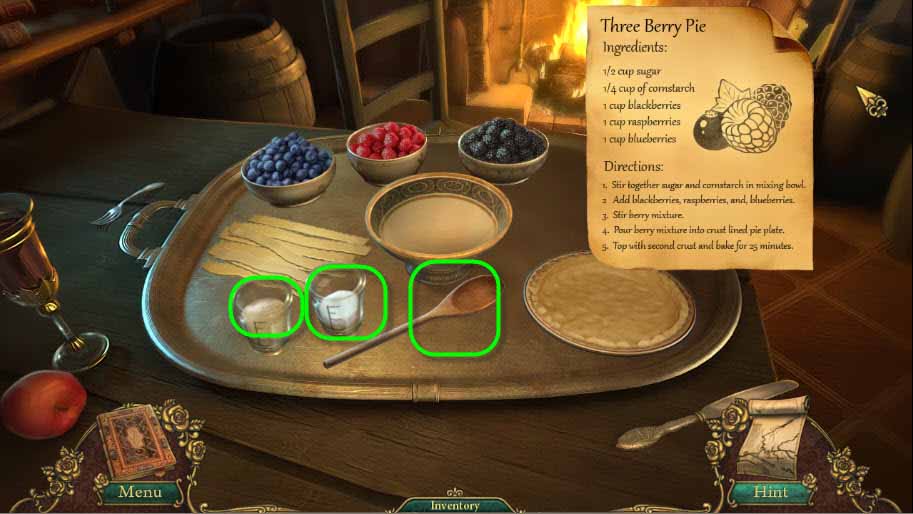
- Stir them with the spoon lying on the table; simply click the spoon and they will be stirred
- Add all of the berries, stir again, and them place the mixture in the Pie Crust
- Now add the top of the pie crust by dragging and dropping them onto the pie
- Grab the THREE-BERRY PIE for the inventory
- Go back to the Tavern in Downtown and give Jacques the THREE-BERRY PIE
- Now go back to the Front Porch at Fouquet Manor; use the map for ease
- Talk to Baron Fouquet
- Go back to Raphael’s House and enter the kitchen
- Talk to Caprice
- Now go back to the Tavern in Downtown
- Click on the shimmers behind the bar to start the hidden object game
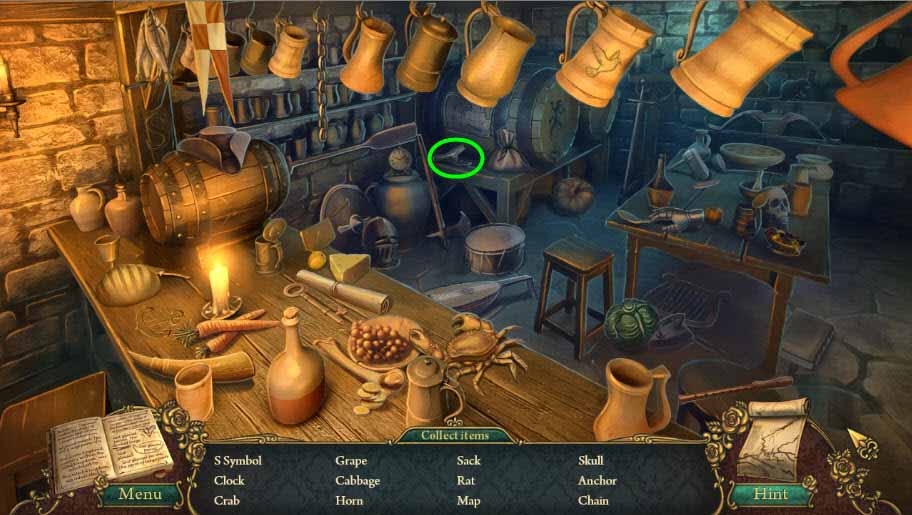
- Find all of the items on the list then grab the BROKEN BOTTLE circled in the image above
- Now go to the Town Gates; use the map for ease
- Talk to the child there
- Go back to the Upper Hall at the Castle
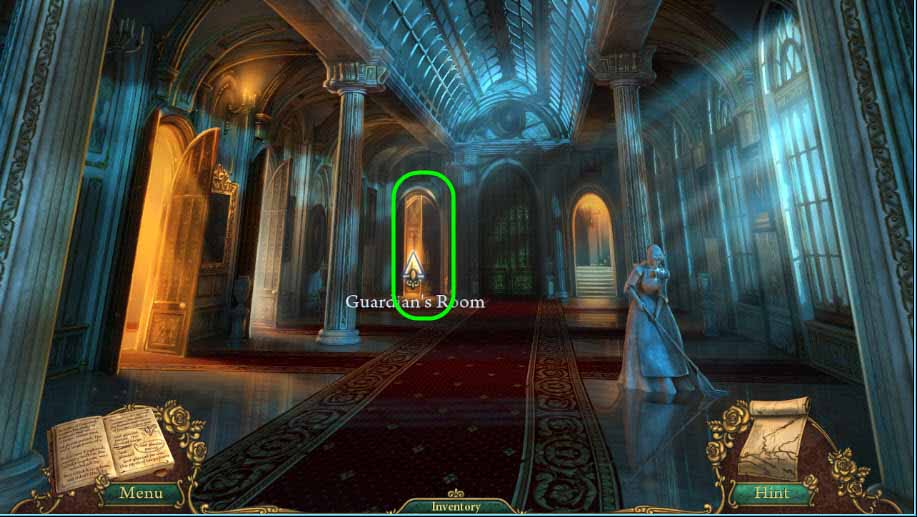
- Enter the Guardian’s Room
- Click the shimmers circled above to start the hidden object game
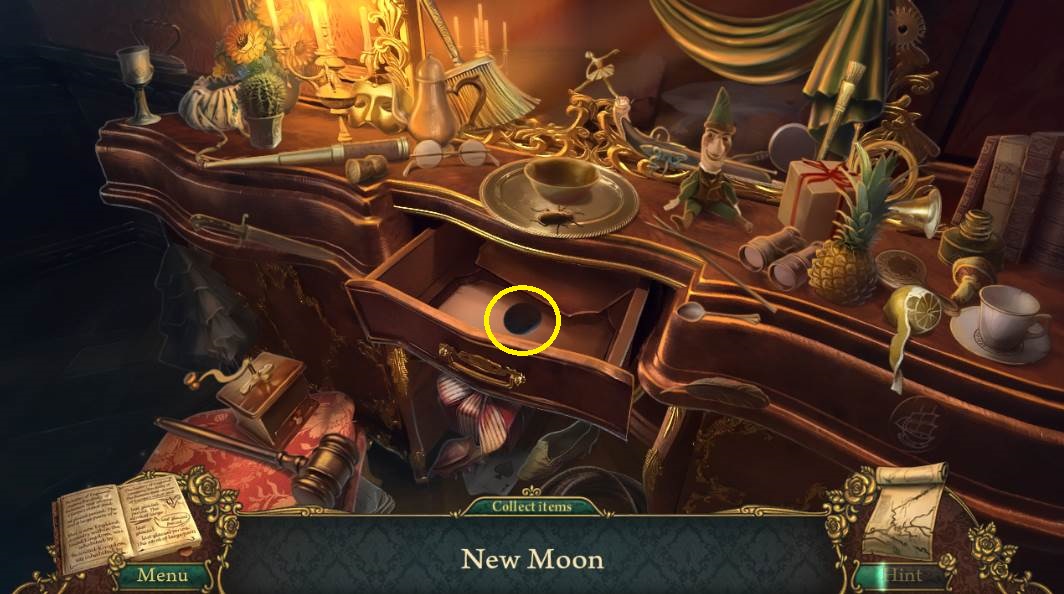
- Open the drawer
- Once all the items are found, click inside the drawer to move the file
- Grab the NEW MOON
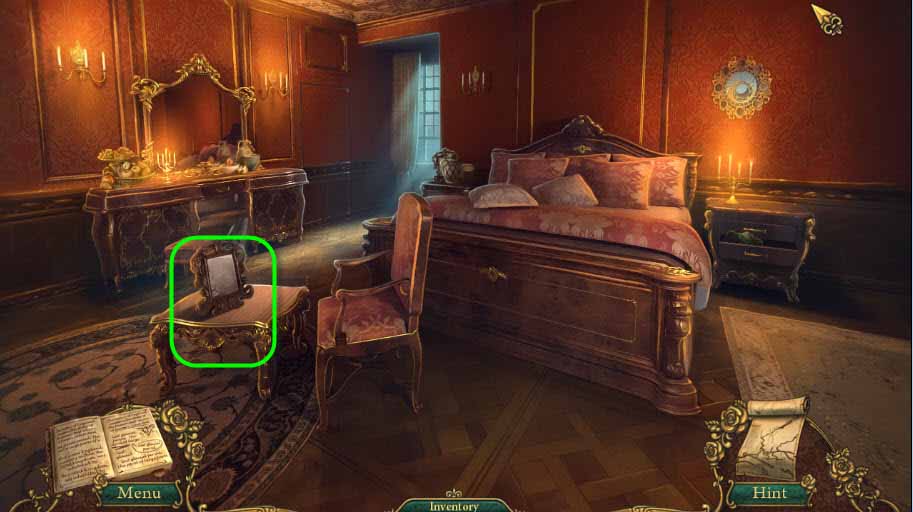
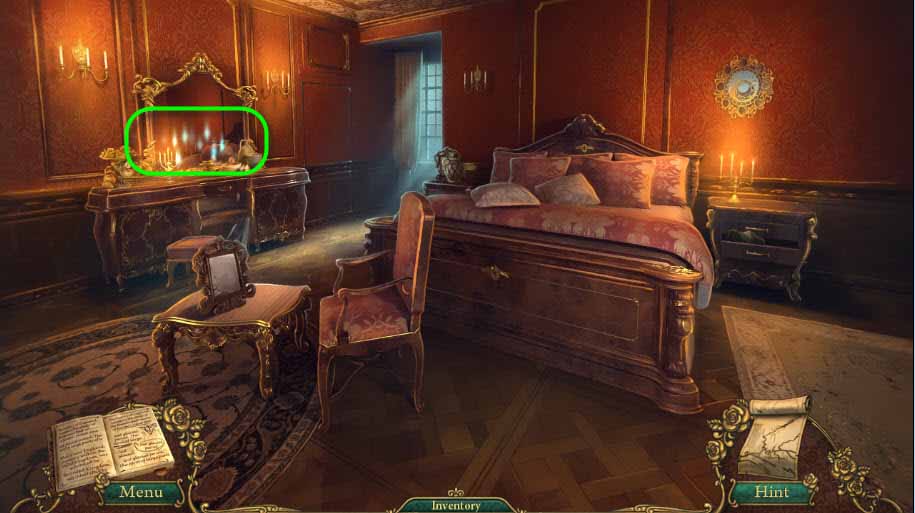
- Having returned to the Guardian’s Room, click the small table by the chair
- Grab the clue circled in the image
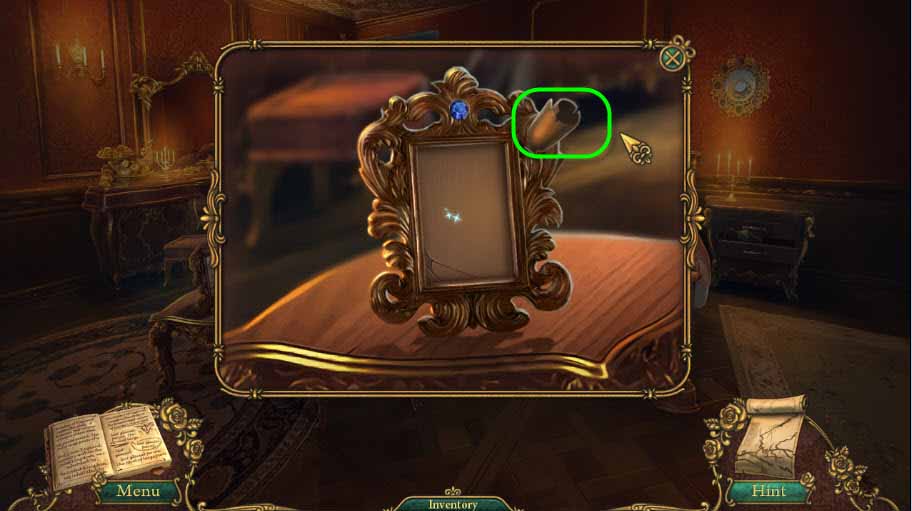
- Select the SMALL PORTRAIT from the inventory and place it in the frame
- Grab the SAPPHIRE
- Click on the nightstand and grab the PORTRAIT FRAGMENT
- Click the clock hanging over the nightstand
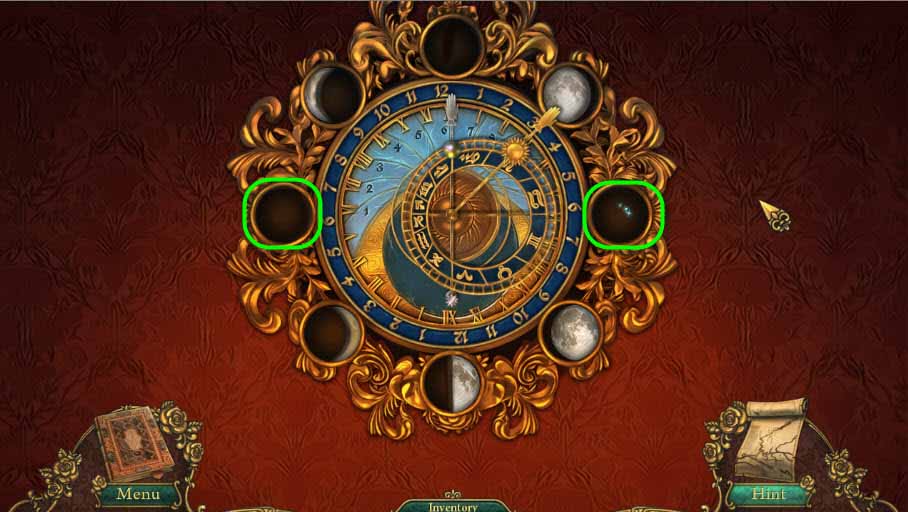
- Place the NEW MOON from the inventory on the left and the FULL MOON SYMBOL on the right as circled above
- Return to the Guardian’s Room by clicking near the bottom of the screen and then return to the Upper Hall
- Place the PORTRAIT FRAGMENTS into the frame
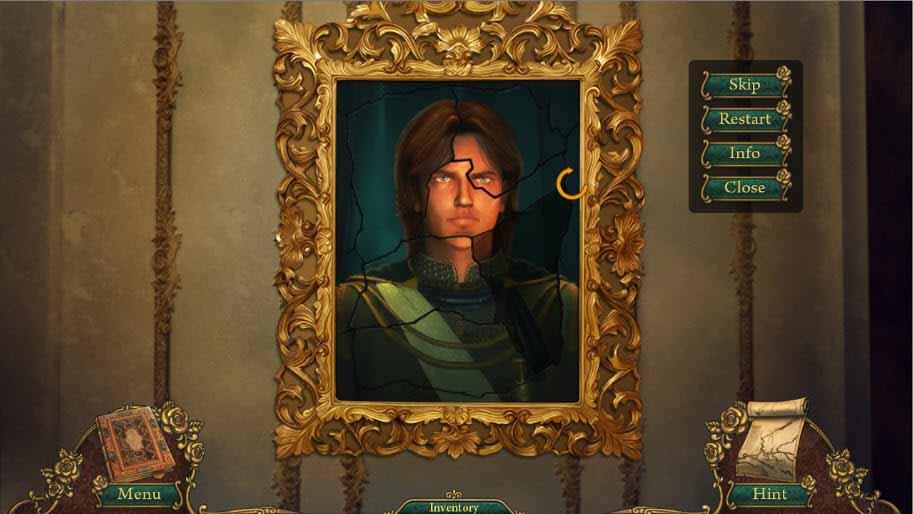
- Arrange the pieces as shown in the image
- Portrait fragments are dragged and dropped
- They can also be rotated by clicking on the rotation symbol that appears once the piece is clicked
- Once the puzzle is complete, grab the KEY PUZZLE PIECE for the inventory
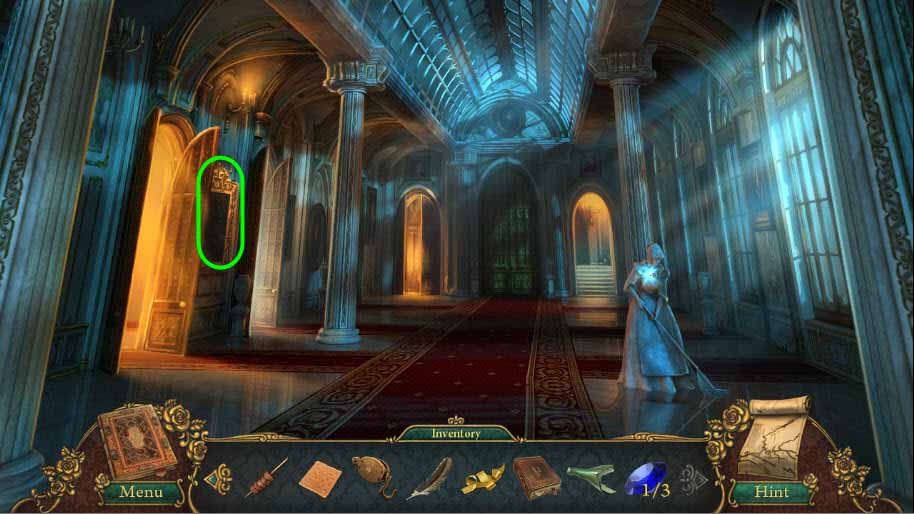
- Still in the Upper Hall, click the closed door at the end of the hall
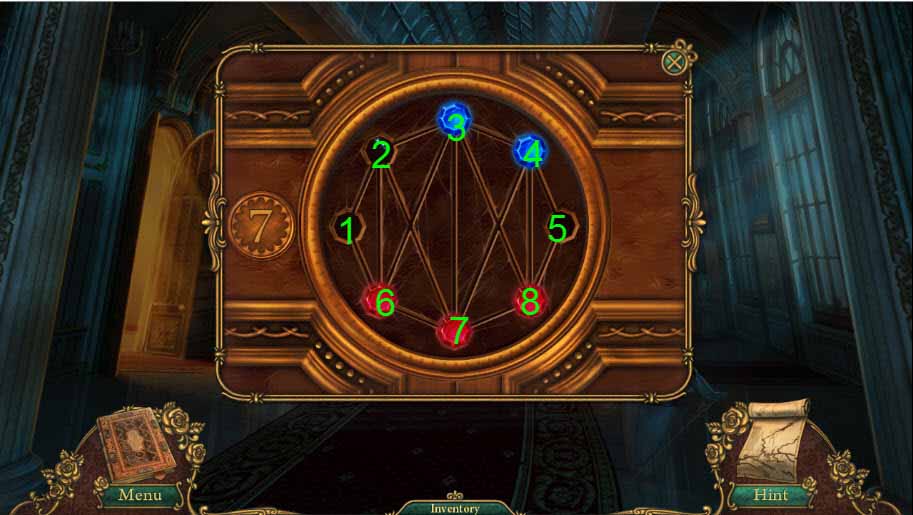
- Insert the Key Puzzle Piece into the hole marked number 2 in the image
- To solve the puzzle move the pieces in the following order; move 4 to 5, 7 to 4, 2 to 7, 6 to 2, 3 to 6, 8 to 3, and 5 to 8
- Pay close attention to the number of the pieces in the image; they are not in order
- When the puzzle, the doors to the Ballroom will; click to enter
- Click on the shimmer coming from the chair to start the hidden object game
- Find all the items on the list and the grab the CRANK circled in the image above
- Back in the Ballroom, click on the large mirror; it’s the only really large mirror in the Ballroom
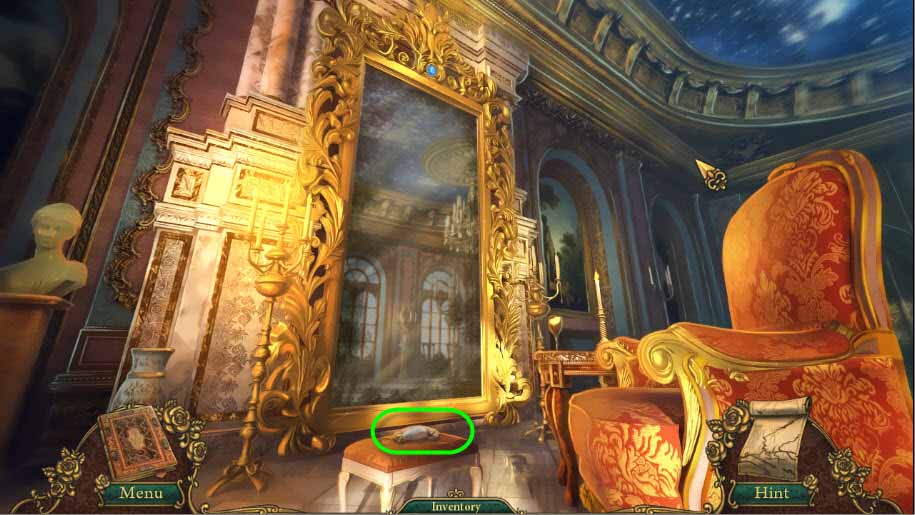
- Grab the RABBIT FOOT off the foot stool for the inventory
- Select the FULL WATERING CAN and click the mirror while holding it with the cursor
- Next select the CLOTH and wipe the mirror dry
- Click the mirror again to read the clue
- Grab the SAPPHIRE from the top of the Mirror frame
- Return to the castle Dining Room; use map for easy return
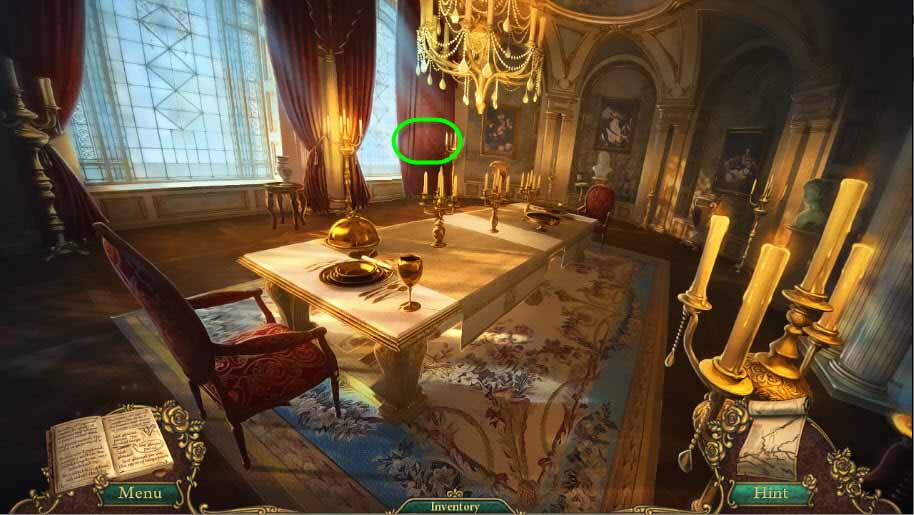
- Select the SILK RIBBON from the inventory to tie back the curtain
- Then collect the SAPPHIRE that was hidden behind the curtain for the inventory
- Go back to the Upper Hall
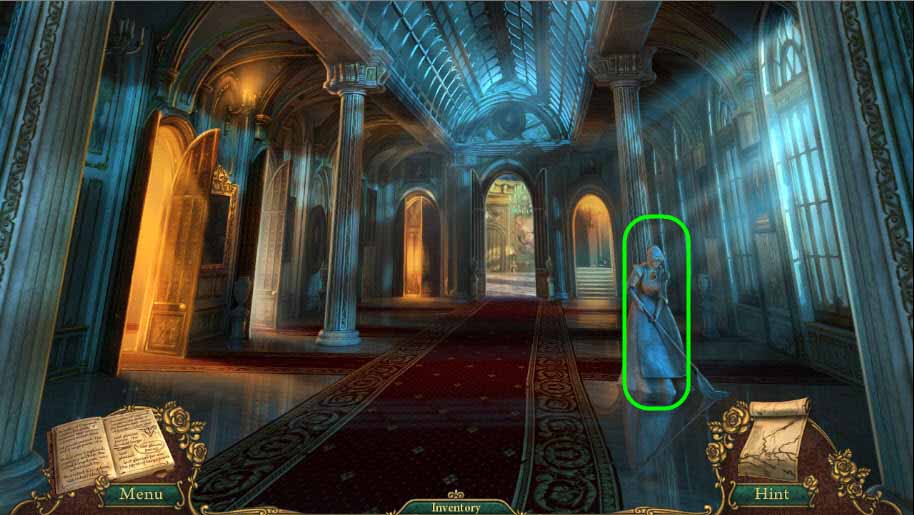
- Click the maid and put all of the SAPPHIRES in her necklace
- The scene will return to the Upper Hall
- Click the maid again to receive her MOP for the inventory
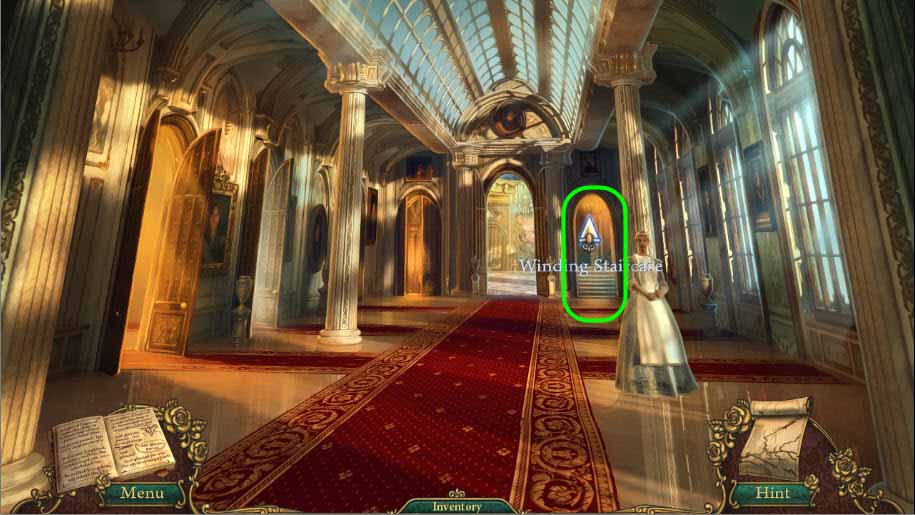
- Click the Winding Staircase to enter
- Select the MOP from the inventory and clean the stairs
- Proceed up to the stairs to the Princess Tower
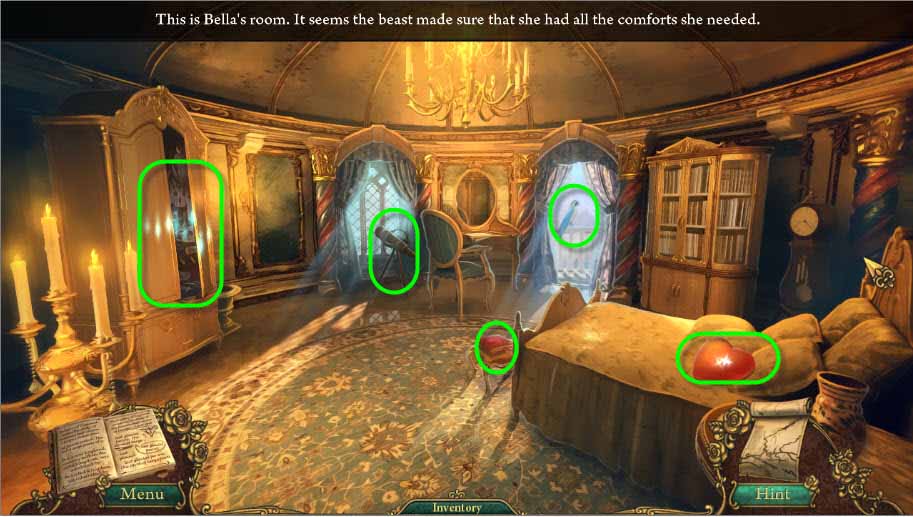
- Grab the pillow and move it over to pick up the EMERALD that was hiding underneath
- Next grab the BOOK OF LOVE
- Check out the telescope
- Next select the CRACKER from the inventory and feed it to the parrot circled in the image above
- Grab the INSTRUMENT KEYBOARD for the inventory
- Now click the wardrobe closet where the shimmers appear to play the hidden object game
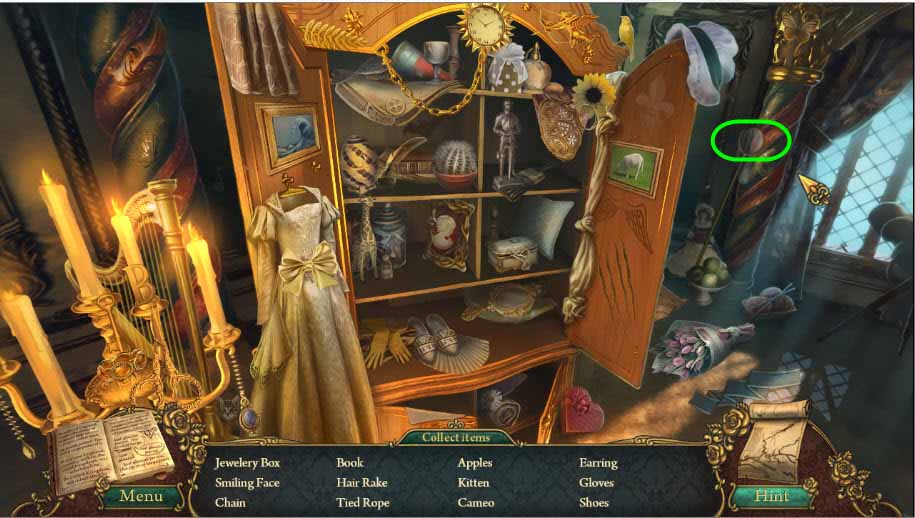
- Find all the items on the list
- Then grab the BUTTERFLY NET circled above for the inventory
- Go back to the Music Room
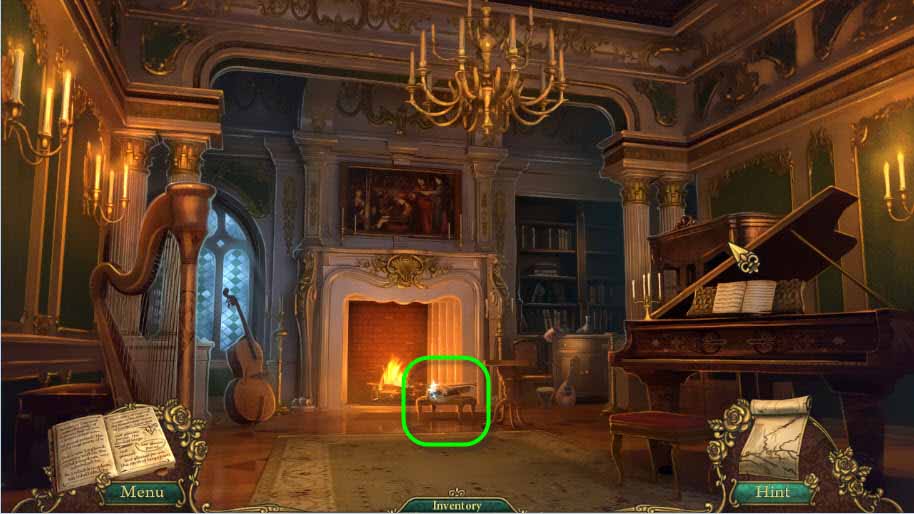
- Click the footstool circled above
- Place the INSTRUMENT KEYBOARD in the slot and the CRANK at the bottom of the instrument; see image
- The keyboard will appear
- Spin the crank by clicking on it
- Play the Keyboard Instrument by clicking the keys in this order: F, A, C, E
- Collect the EMERALD when the drawer slides out
- Go to the Fountain
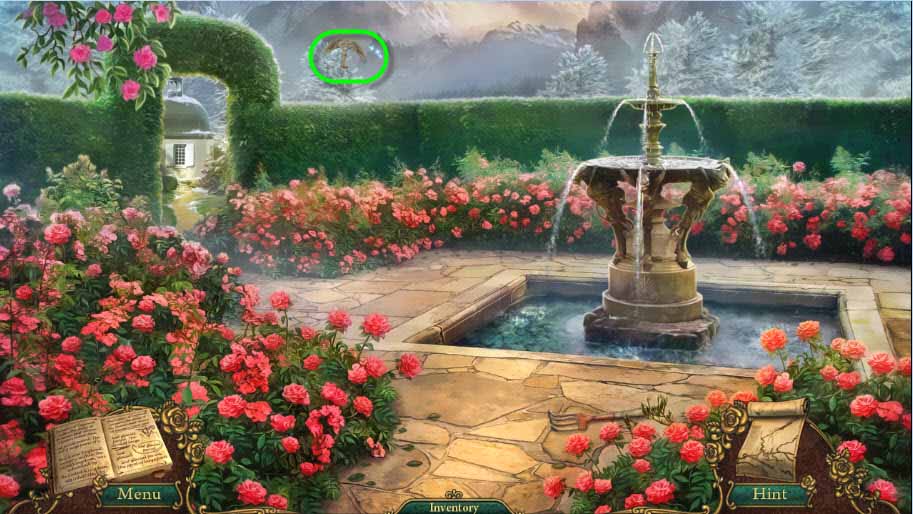
- Catch the FLYING KEY with the BUTTERFLY ET from the inventory
- Go to the Tool Shed
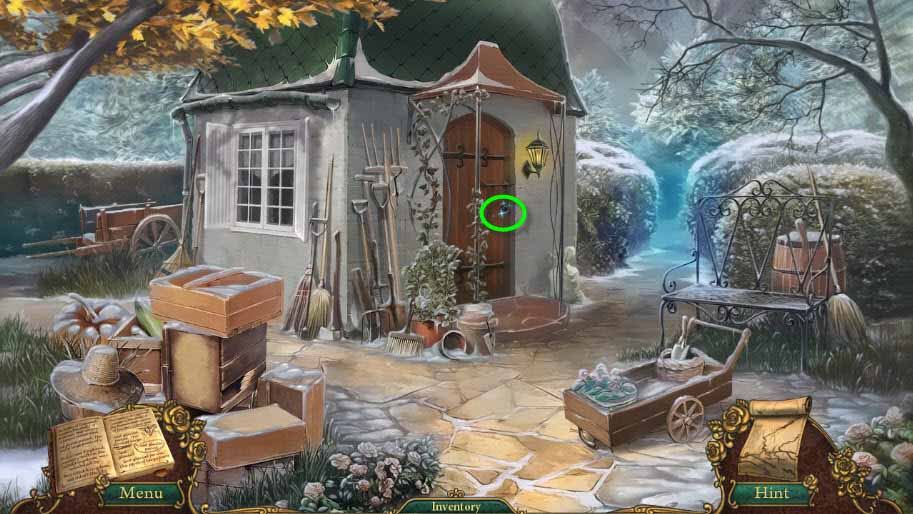
- Click on the lock
- Use the FLYING KEY to open the lock
- Go inside the Tool Shed
- Click on the shimmers to start the hidden object game
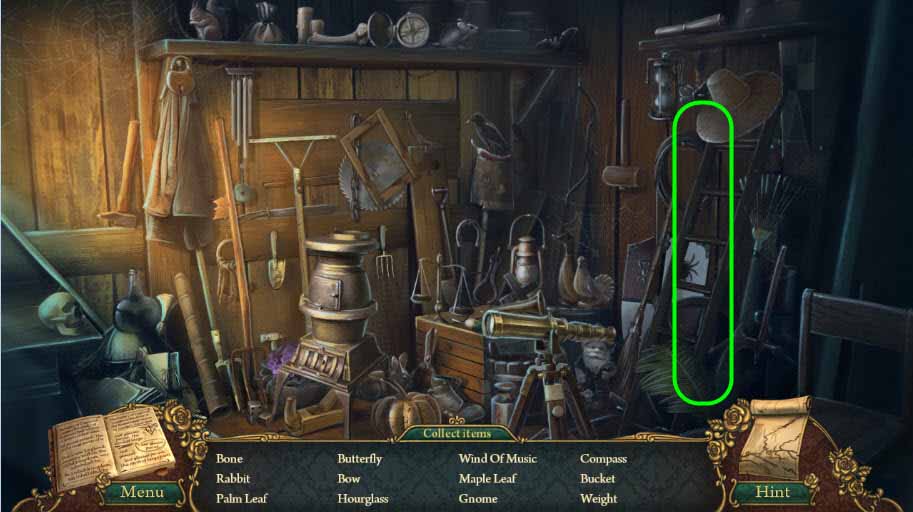
- Find all the items on the list and then grab the LADDER for the inventory
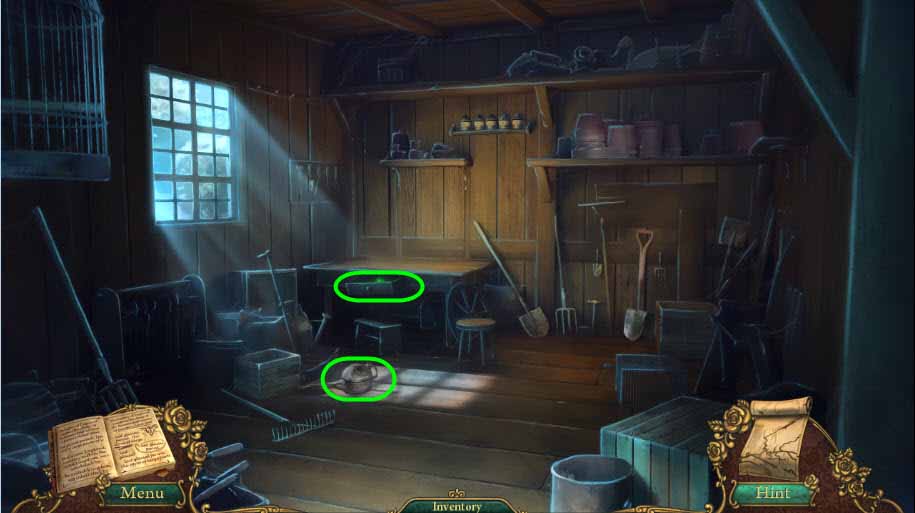
- Open the drawer and grab the EMERALD
- Grab the OIL CAN as well
- Go back to the Library; use the map for ease of travel
- Click on the statue and place the Emeralds in her necklace
- Grab the CHRONICALS OF WAR for the inventory
- Click the bookcase in the back of the room
- Place the four books from the inventory in this exact order; Book of Riches, Book of Poor, Book of Love, and last Book of War. Place the books in this order starting from left to right. This will open a hidden secret passage.