
Fairly Twisted Tales: The Price Of A Rose: Chapter Three: At the Castle
Our Fairly Twisted Tales: The Price of a Rose Walkthrough will be your guide as you attempt to discover the truth in this mysterious kingdom. When Bella agrees to stay with the beast in exchange for her father’s life you are called to see if there isn’t a way to rescue her. Now you must use your wits to find the scroll that could be the key to saving Bella. Our helpful hints, step-by-step instructions, and custom screen shots will help you as you race to find a happy ending in this twisted tale.
- Cursor around again until you locate the Castle Approach; click to move forward.
-
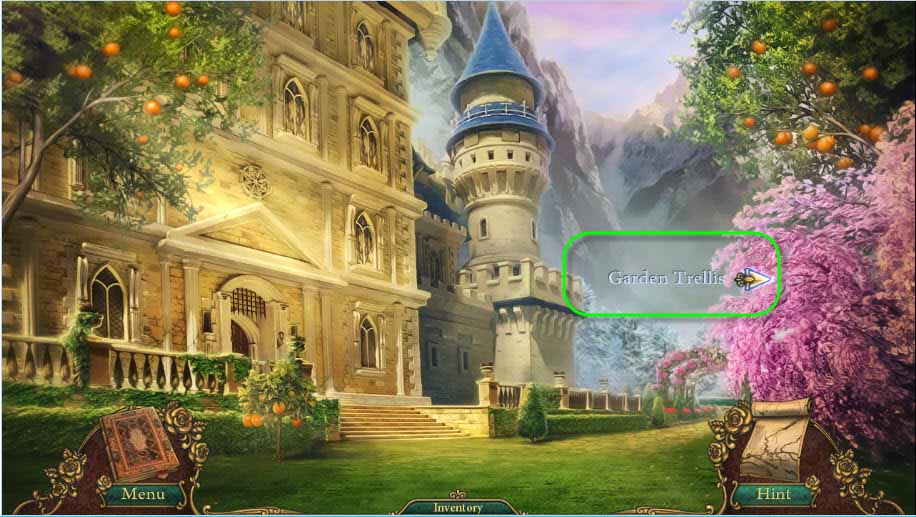
With your cursor, locate the path to the Garden Trellis; click to move.
- Click and move toward the fountain ahead.
-
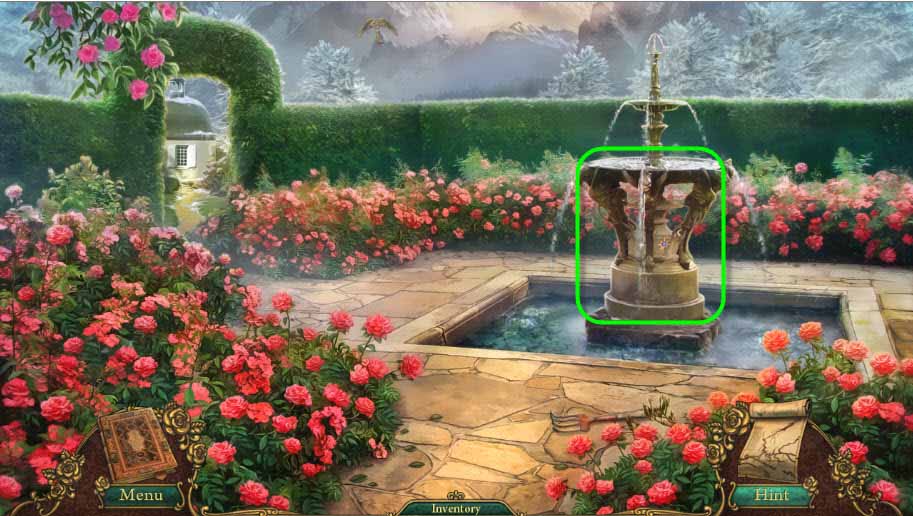
Select the fountain to begin a hidden object area
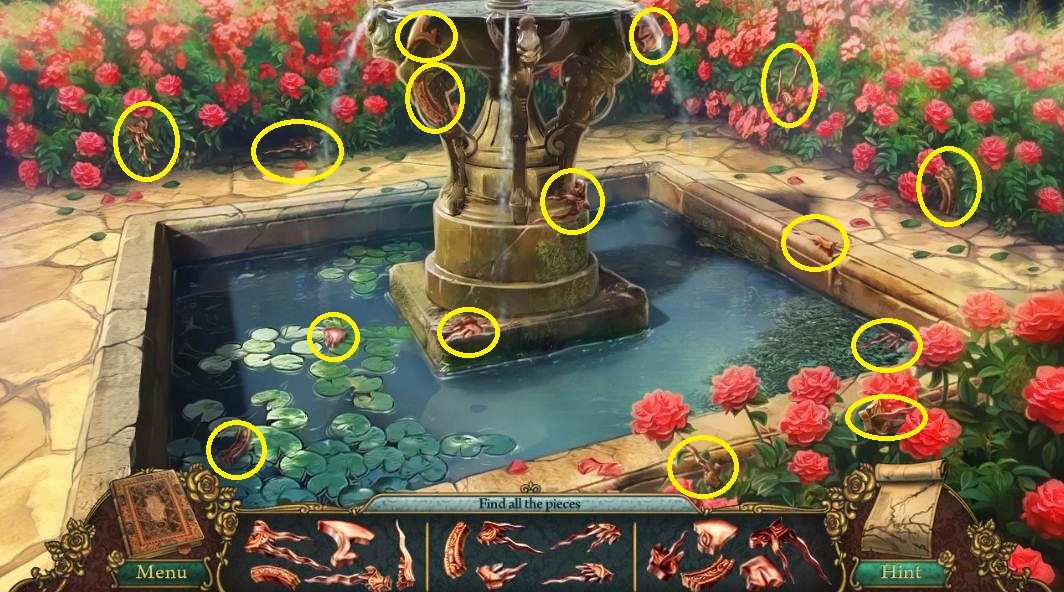
- In this hidden object scene, all of the missing items on the list must be located to find and receive the other half of the sun disk already in the inventory.
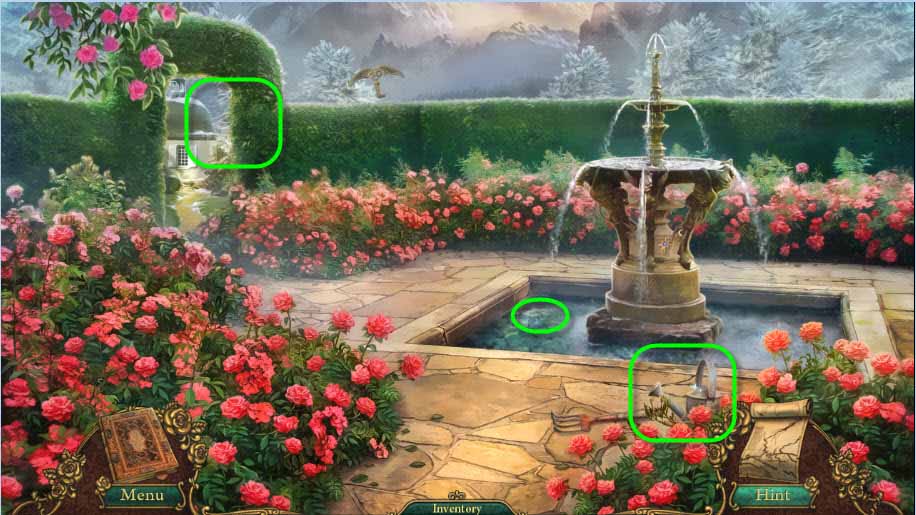
- Once the SUN DISK RIGHT HALF is in the inventory grab the WATERING CAN and fill it at the fountain so that it will become a FULL WATERING CAN for the inventory
- Over to the upper left of the screen will be the path to the tool shed; click when your cursor finds the path
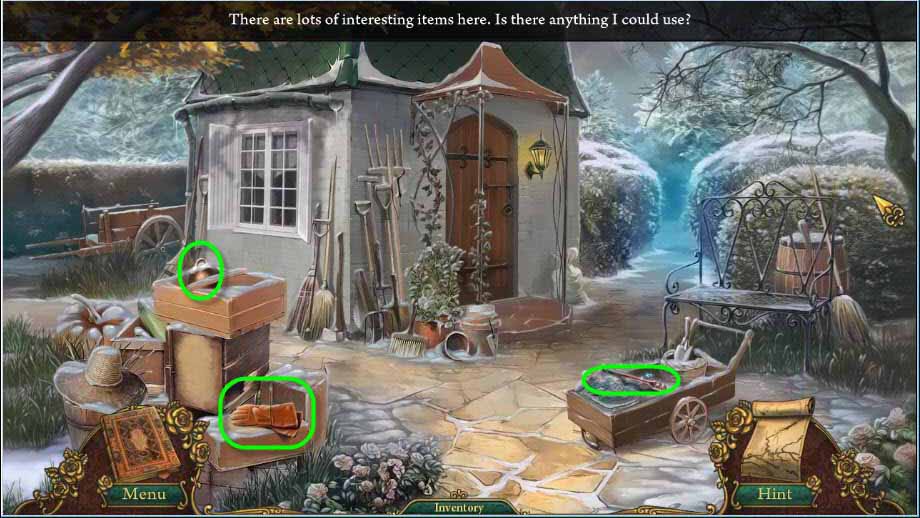
- At the Tool Shed’s patio, grab the GLOVE, IRON BALL, and GLASS CUTTER
-
Go back to the Castle Approach by backtracking the same way
-
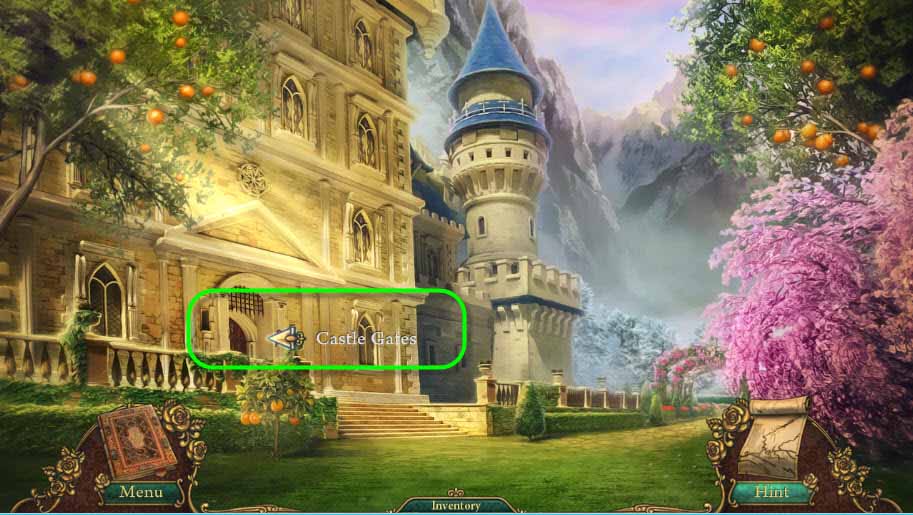
From there, cursor around and locate the Castle Gates path from the Castle Approach; click to move.

- Break the pot by the castle doors using the HAMMER from the inventory
- Grab the HANDLE from the pile of broken pot pieces
-
Click on the front gates to get a closer look
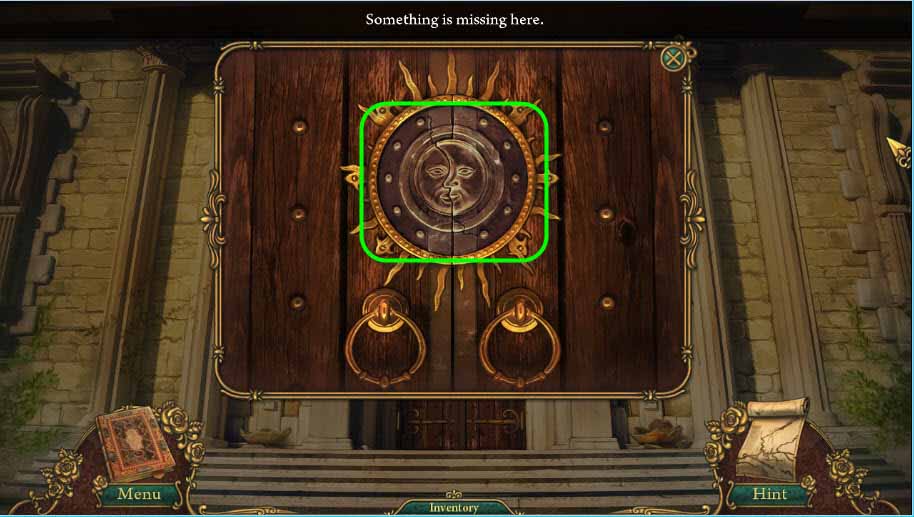
- Here you will place the halves of the SUN DISK from the inventory
- The completed sun disk will open the Castle Gates
- Click on the open gates to enter the Main Hall
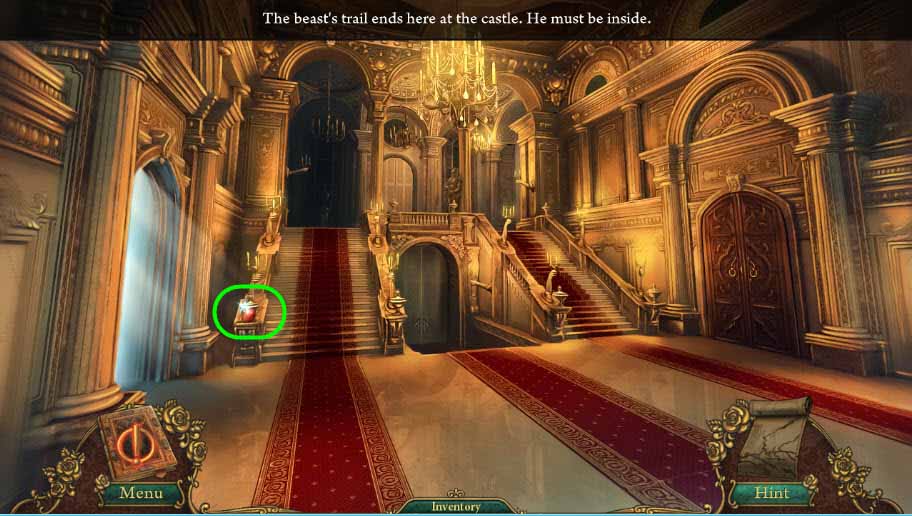
- Grab the RUBY from the post at the beginning of the staircase
-
Leave the Main Hall and enter the Dining Room located on the left side of the hall through the open doorway
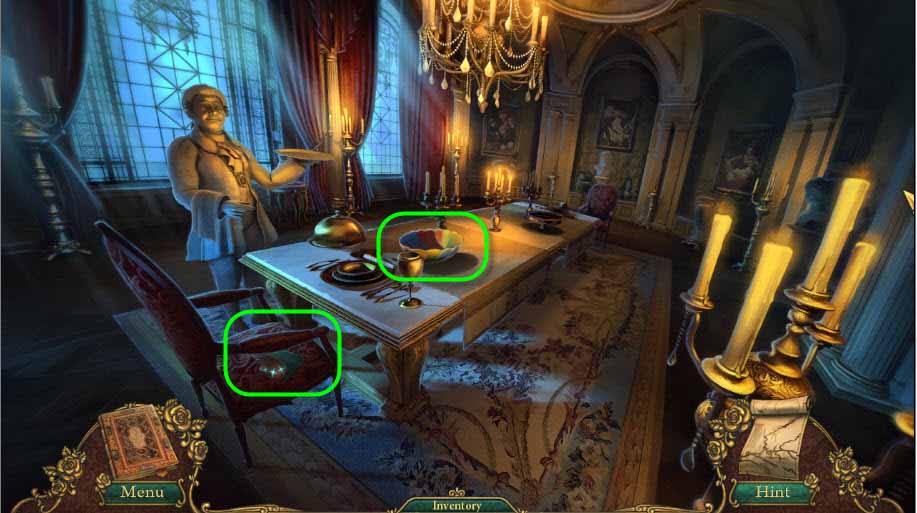
- Grab the PORTRAIT FRAGMENT from the dining room chair’s seat
- Smash the bowl on the dining room table with the HAMMER from the inventory
- The broken pieces from the bowl need to be shaped with the GLASS CUTTER in the inventory; take it out and click
- Collect the broken pieces now shaped to STAINED GLASS
- Leave the room and re-enter the Main Hall
-
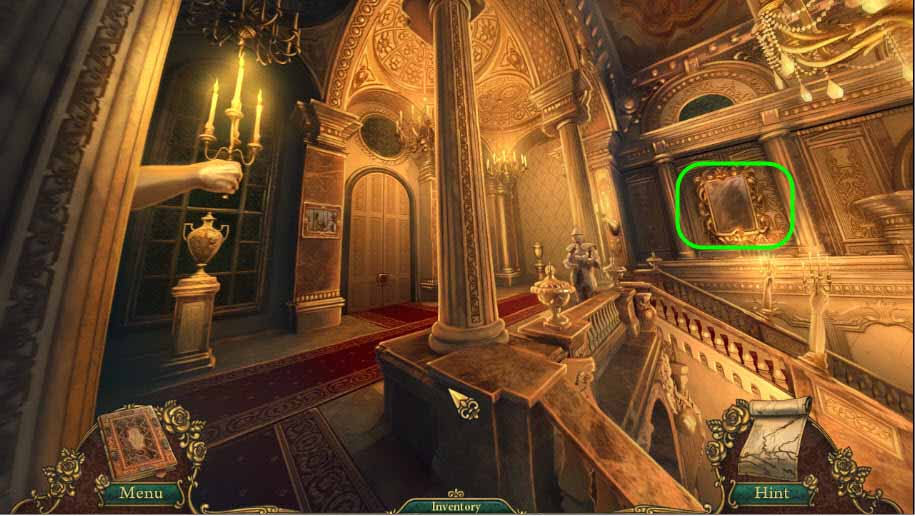
Click either Staircase to enter the Staircase Landing
- Place your cursor over the portrait circled in the image above and click
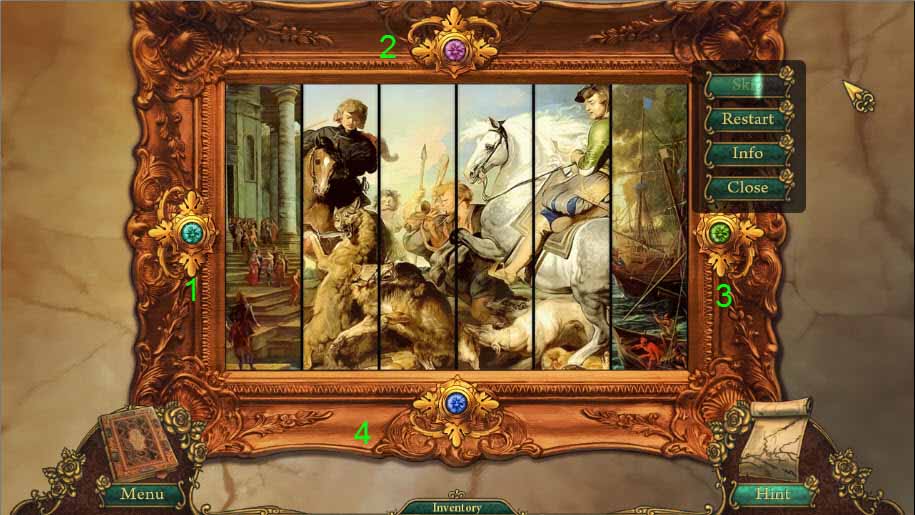
- Even though this puzzle has 4 buttons only press two of them. Press 3, and then click 1
- Back in the landing, free access to the diamond behind the portrait is now available; grad the DIAMOND
-
Next light the candle holder with the LIT TORCH from the inventory
- Grab the SHIELD and the THRONE ROOM KEYS
- Go back to the Main Hall downstairs
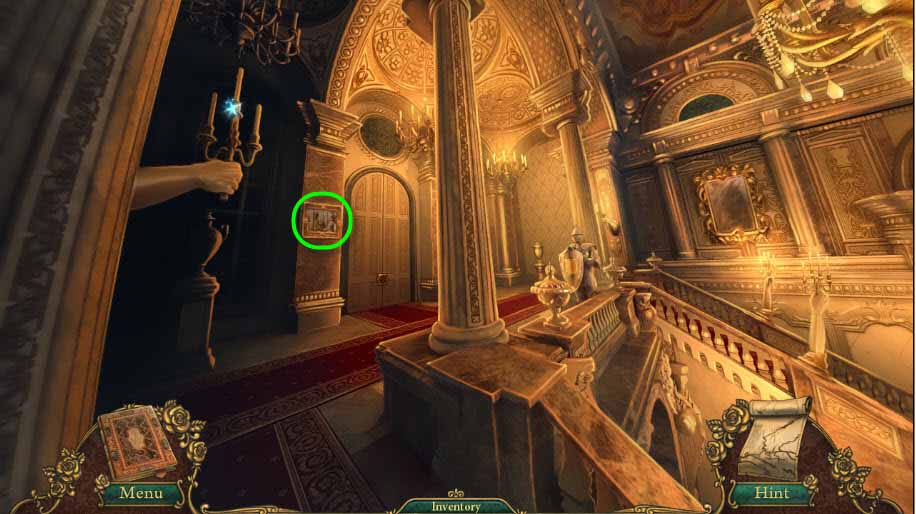
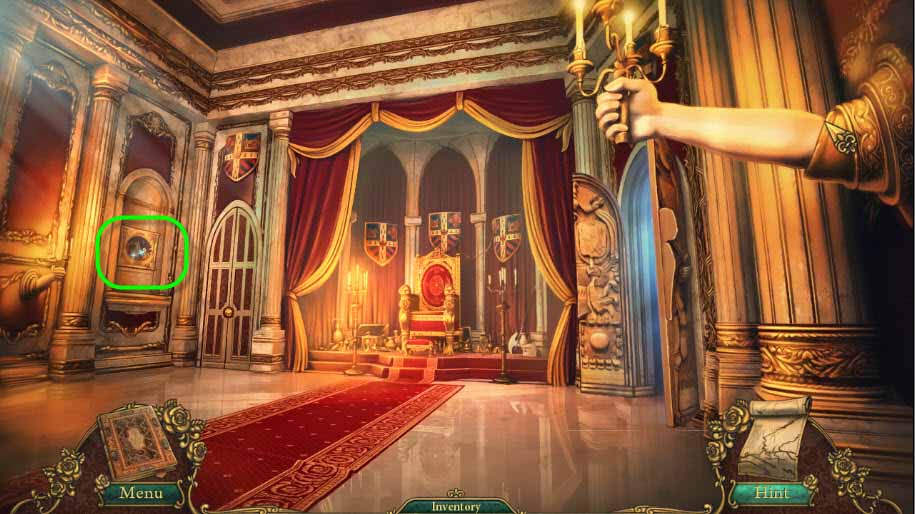
- The doors circles above lead to the Throne Room
- Use the THRONE ROOM KEY from the inventory to open the Throne Room doors
- When the door opens, click on it to enter the Throne Room
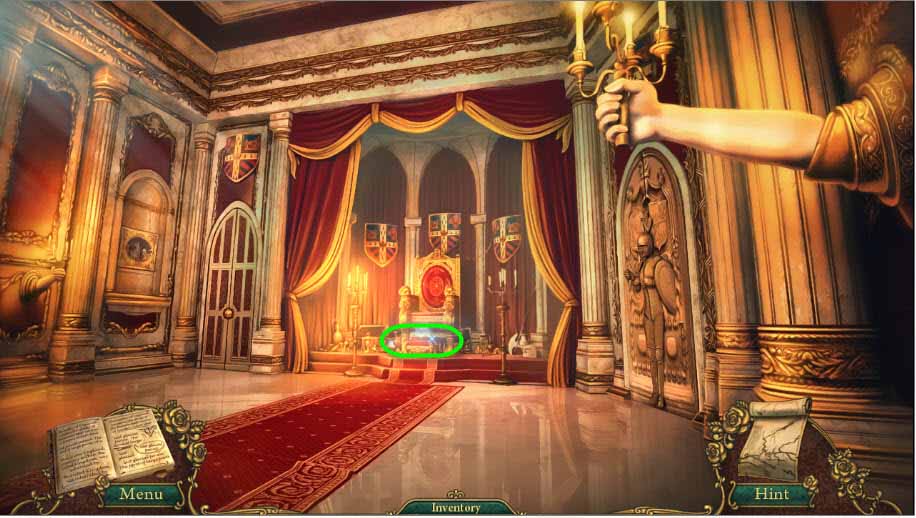
- Click on the shimmers below the throne seat to begin the hidden object scene
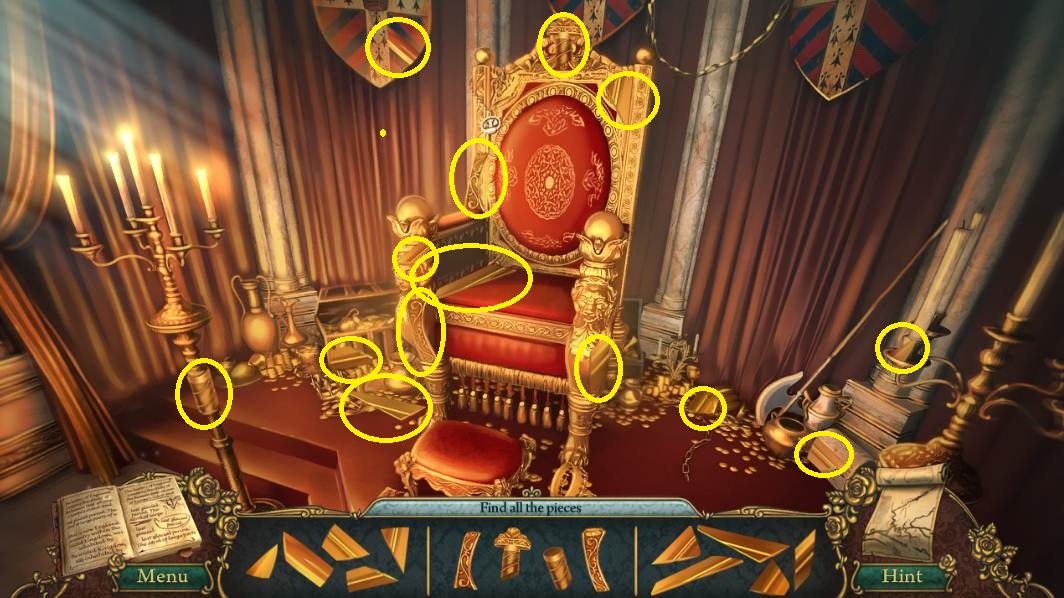
- Find all of the pieces to build the SWORD
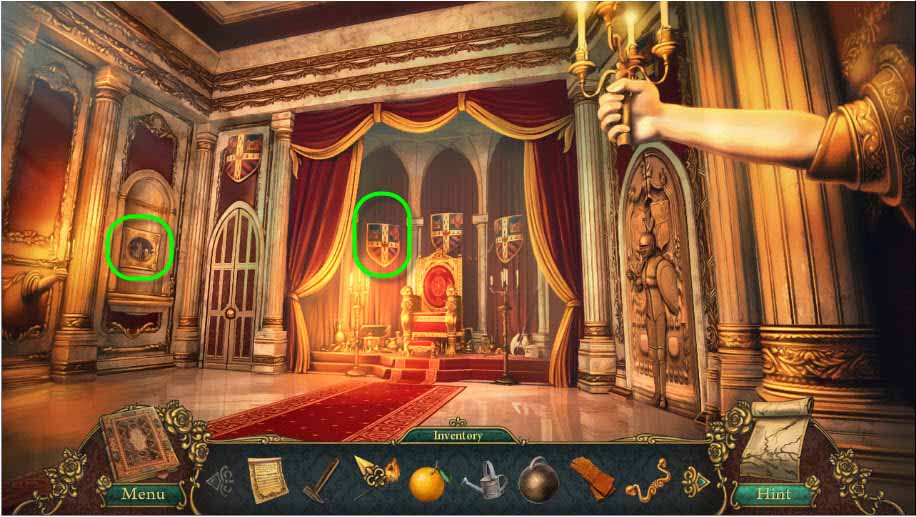
- Click the shield circled above and another DIAMOND will drop to the floor
- Pick it up for the inventory
- Next click the circular framed painting
- Select the pull Handle from the inventory and place it in the holes circles above
- Afterwards cursor down toward bottom screen center to find the Throne Room; click
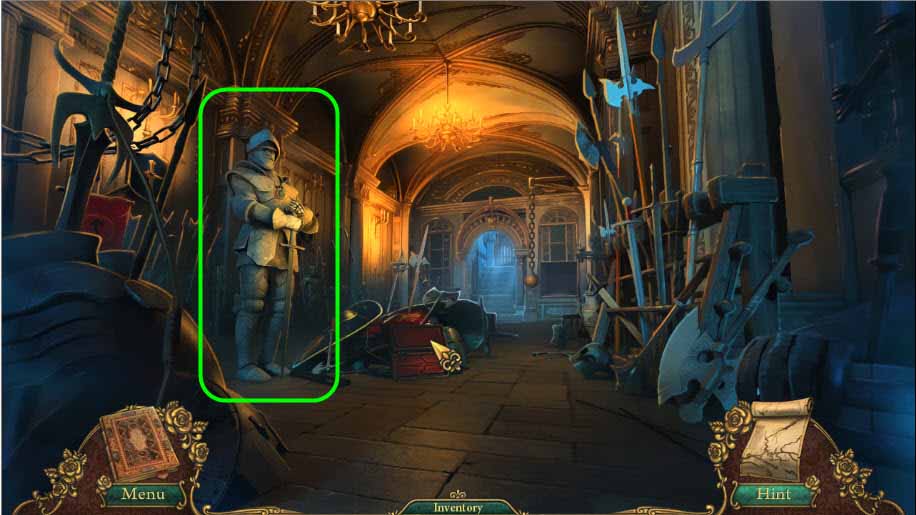
- Click on the doors on the right side of the room with the knight in armor on it
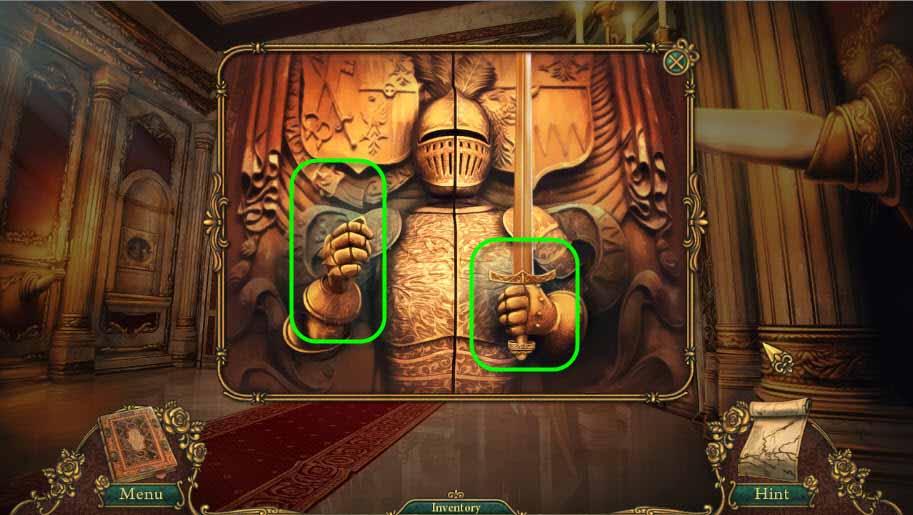
- Take the SWORD from the inventory and put it in the knight’s left hand
- Take the SHIELD from the inventory and put it in the knight’s right hand
- The Armory doors are now open
- Enter the Armory

- Grab the PORTRAIT FRAGMENT circled to the left in the above image
- Next click on the junk pile circled above
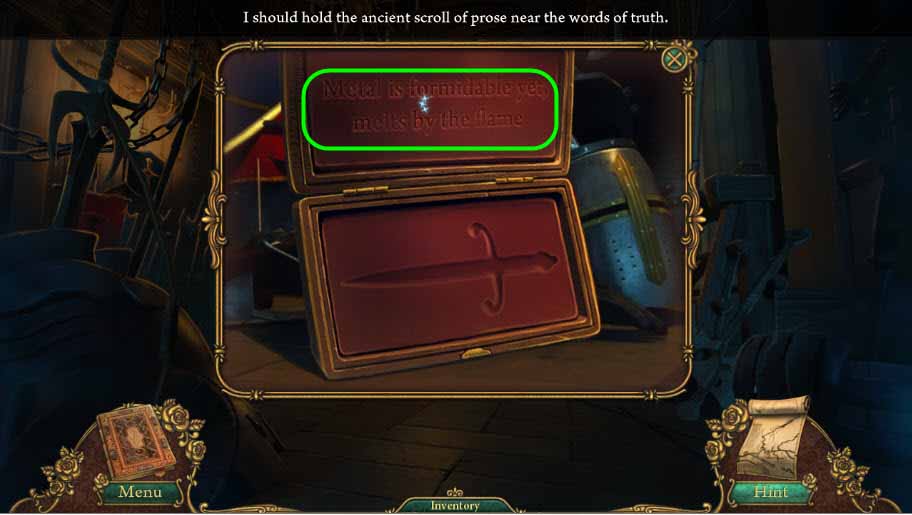
- Grab the DAGGER
- Select the ANCIENT SCROLL from the inventory and place it over the text above where the dagger was
- Click the window in the back of the Armory Room
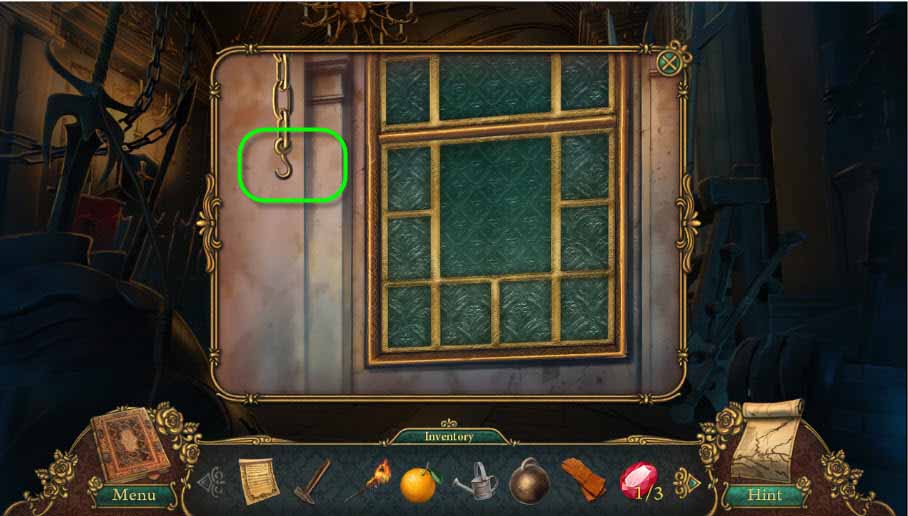
- Take the IRON BALL from the inventory and hang it on the chain
- Collect the RUBY for the inventory
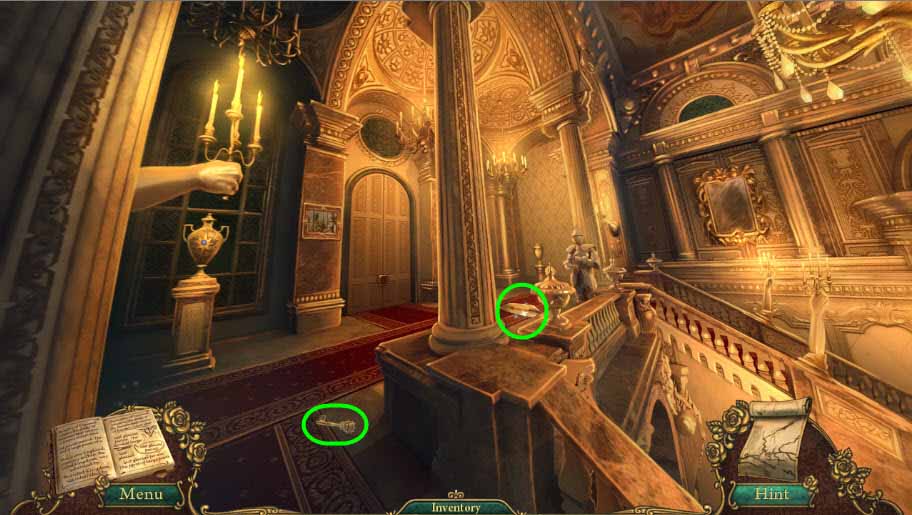
- Now backtrack to the Staircase Landing
- Click on the urn
- Select the DAGGER from the inventory to pry the first GOLDEN STAR loose from the urn
- Check out the door’s lock while on the landing by placing your cursor on it and click
-
Go back to the Fountain
- Click on the fountain and use the DAGGER from the inventory to pry loose the second GOLDEN STAR
- Go back to the Throne Room
- Remember that the map in the right lower corner can be used to return to places that have already been visited
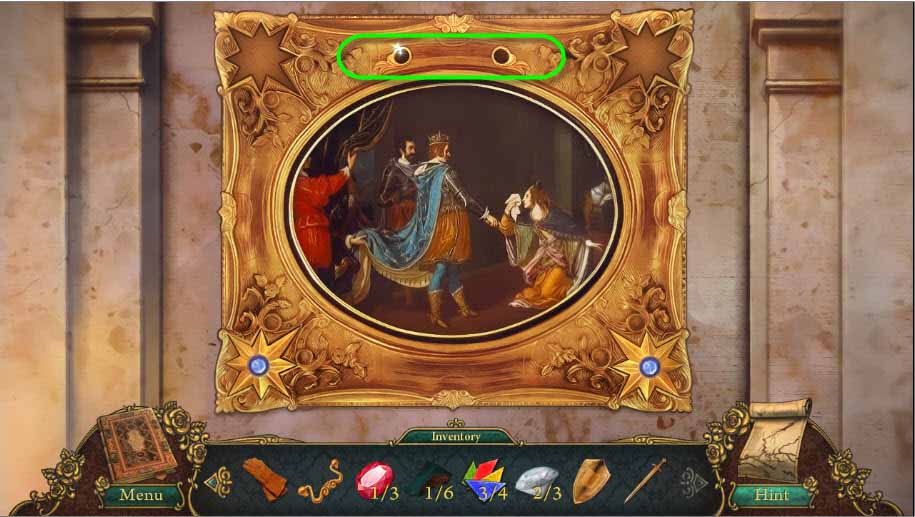
- Click on the painting circled above
- Place the two GOLDEN STARS from the inventory into the slots on the painting frame
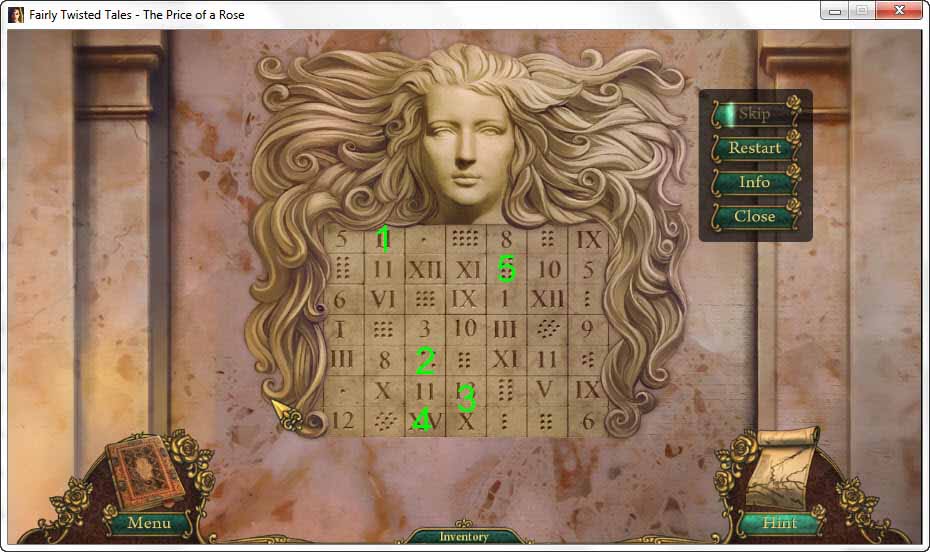
- Click the puzzle pieces as illustrated above
- If an incorrect box is clicked it will highlight a border around the box in red
- Simply start again if this happens
- Grab the RUBY for the inventory
- Go back to the Dining Room; the entrance is from the Main Hall
- Click on the Butler’s necklace
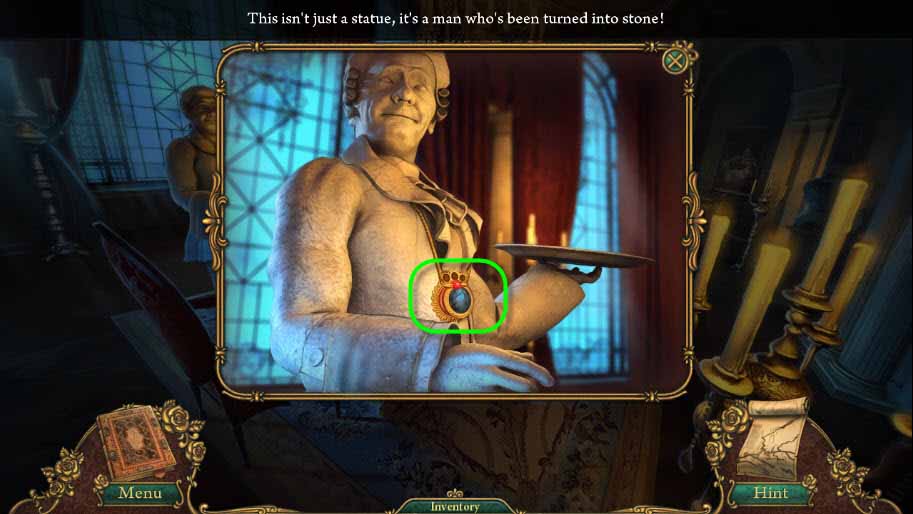
- Select the RUBIES and place them in the Butler’s necklace
- Click and accept the CHAPEL KEY for the inventory
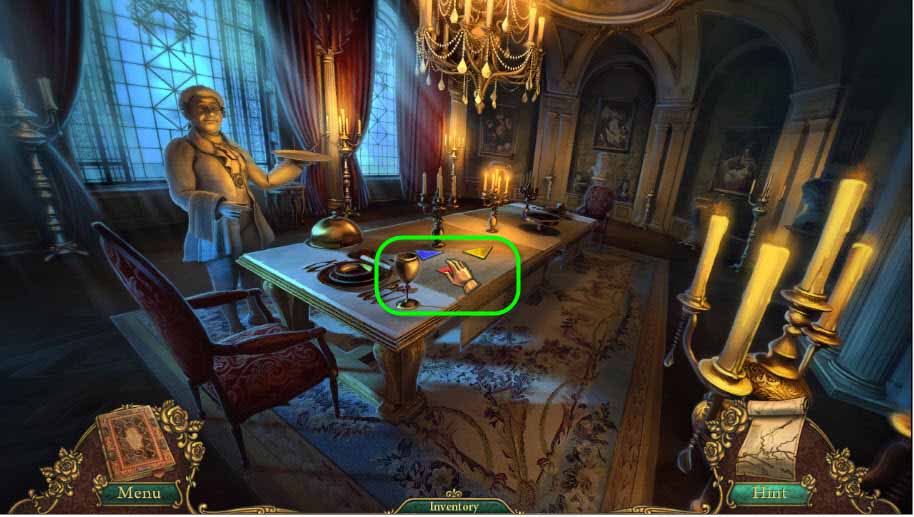
- Grab the violet colored CLOTH from the dining table
- Click on the shimmers to play the hidden objects game

- The lids from the sugar and eggplant need to be removed to grab them
- Find everything else on the list to be allowed to grab the green STAINED GLASS piece located on the bottom part of the wall behind the dining room table. It’s shaped like a triangle.
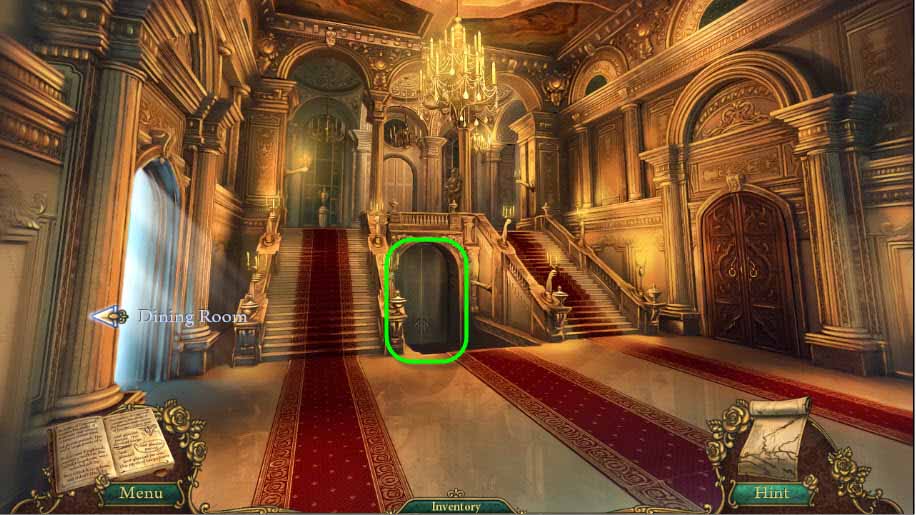
- Go back to the Main Hall
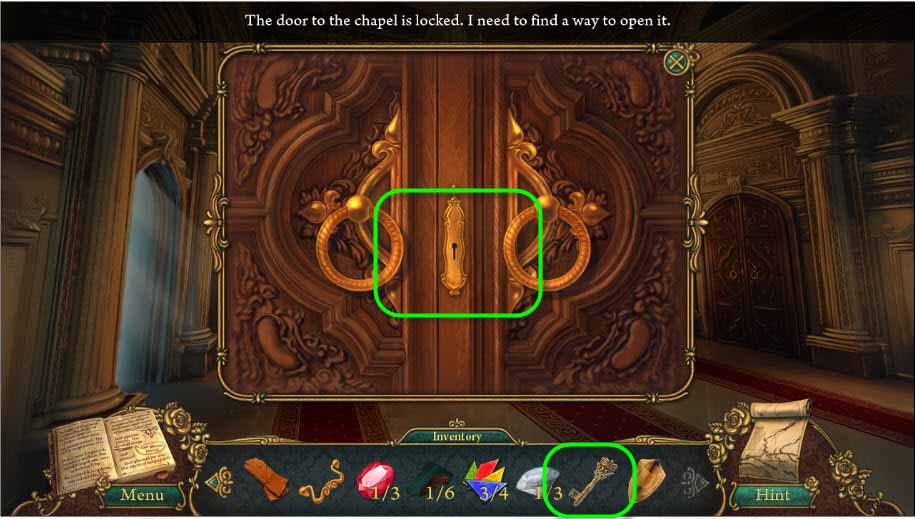
- Use the Chapel Key from the inventory to open the Chapel doors
- Then click to open the Chapel doors to enter
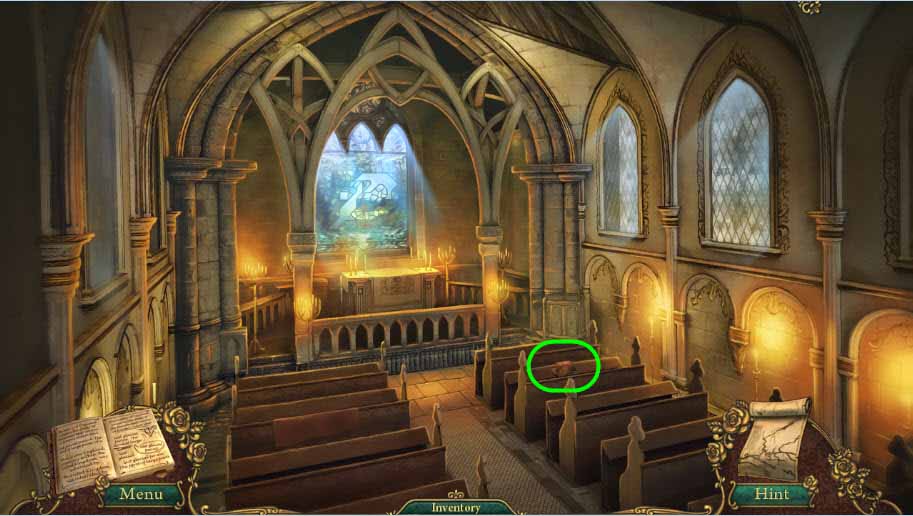
- Click on the Portrait Piece on the pew circled above to collect for the inventory
- Next click the stained glass window behind the altar
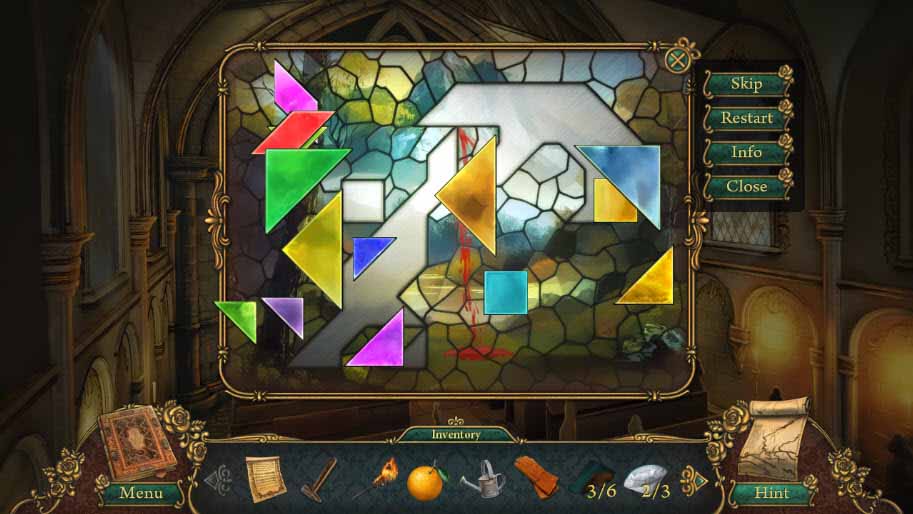
- Open the inventory and click on the stained glass puzzle pieces
-
They will all be installed into the puzzle
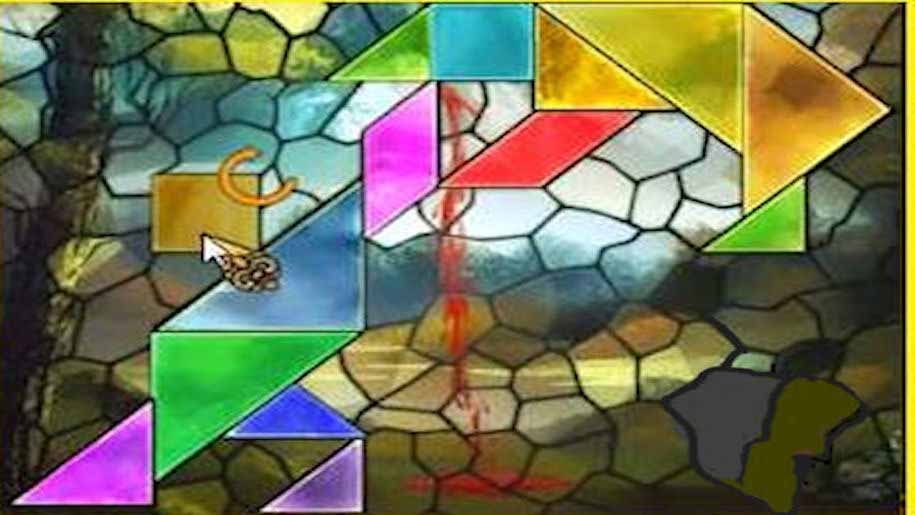
- The symbol that looks like a “c” when you click on a piece is actual a rotation button so the pieces can be rotated to fit
- When they are fitted properly a DIAMOND will appear in the opening of the floor
- Grab it for the inventory
- Go back to the Armory; try using the map for the return trip
- Click on the knight circled above
- Place the three DIAMONDS from the inventory in his necklace
- Collect the TREASURE ROOM KEY
- Proceed to the door at the back of the Armory room; this is the Treasure Room
- Open the door with the TREASURE ROOM KEY in the inventory

- Grab the CANARY DIAMONDS circled above
- Next click on the chest to play the puzzle game for this room
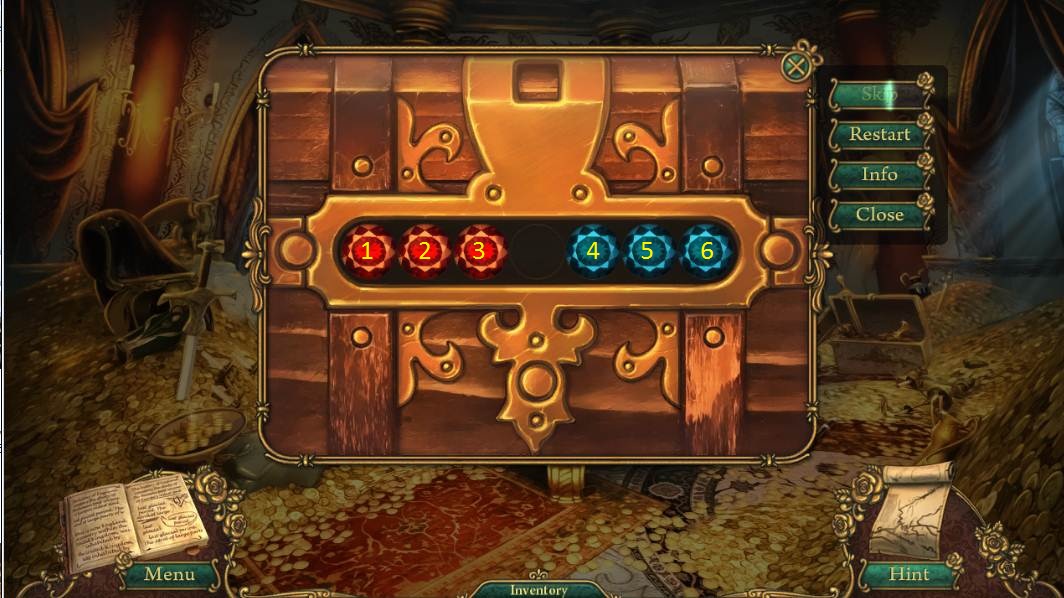
- Move the pieces in the following order 4, 3, 2, 4, 5, 6, 3, 2, 1, 4, 5, 6, 2, 3, and 6. As you play you'll need to keep track of which gem was given which numerical assignment.
- When the puzzle is complete grab the BOOK OF RICHES from the open trunk
- Now return to the Staircase Landing
- Clean up the mirror circled above with the violet CLOTH from the inventory
- Click the mirror again for a clue
- Go back to the Hunter’s Camp; remember the map can be used for a shortcut return
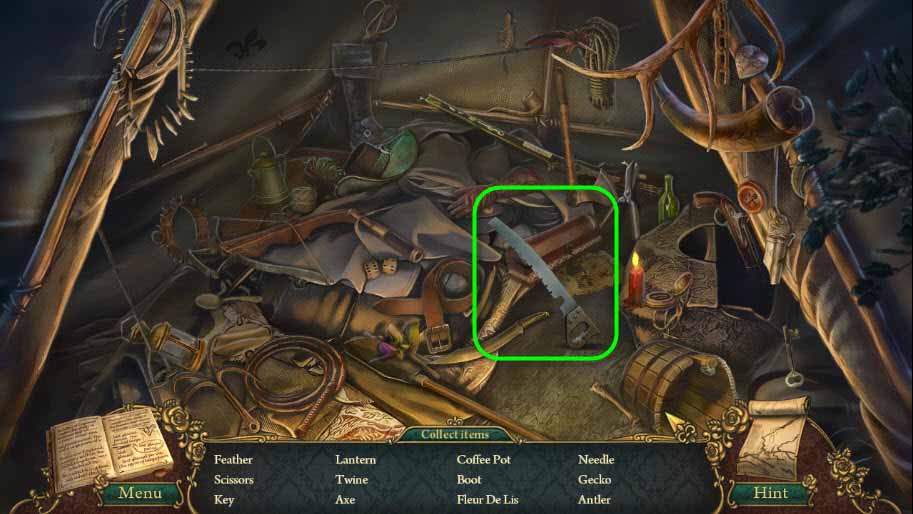
- Once there click on the shimmers at the front of the tent to play the hidden object game that will allow the collection of a SAW upon completion
- Go back to the Backyard at Fouquet Manor

- Talk to everyone in the Backyard
- This will reveal Jacques Love Letters; grab for the journal
- Go to the Front Porch of Fouquet Manor
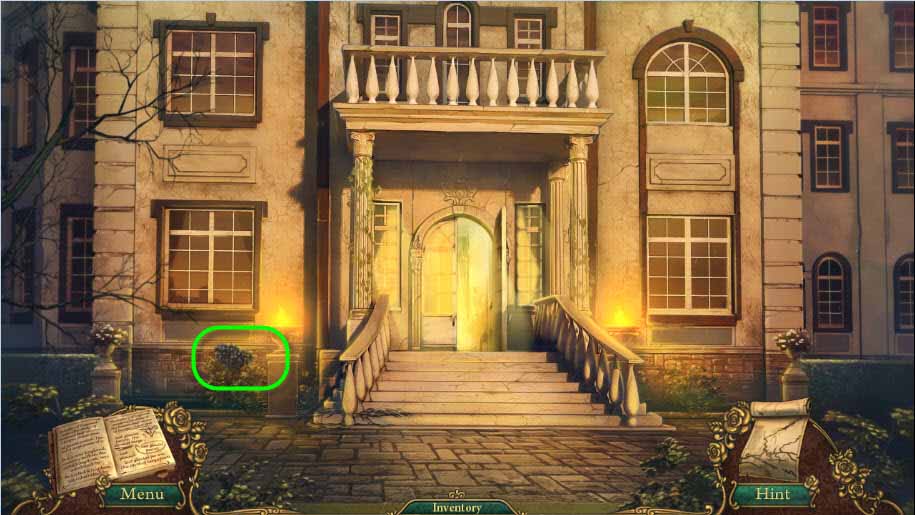
- In order to grab the BLACKBERRIES for the inventory water them with the FULL WATER CAN from the inventory
- Go back to the Caravan Camp

- Select the GLOVES from the inventory to pick the RASPBERRY for the inventory
-
Go back to The Road