
Dreamscapes: The Sandman: Chapter Seven: The Empty Square
Depend on our Dreamscapes: The Sandman Walkthrough to help you navigate the dark recesses of Laura's nightmare as you attempt to save her from the vile Sandman who has trapped her. Our beautifully marked screenshots, puzzle solutions, and detailed step-by-step instructions will help you locate the missing pieces of Laura's dreamcatcher and put an end to this night terror once and for all!
Chapter One: The Professor’s Laboratory
Chapter Two: The Ruined Church
Chapter Three: The Frozen Lake
Chapter Four: The Family Home
Chapter Five: The Corrupted Forest
Chapter Six: The Abandoned Theme Park
Chapter Seven: The Empty Square
Chapter Eight: The Endless Desert
Chapter Nine: The Ritual
Ask for help in the comments below!
Part I: Betrayal
With two thirds of the dreamscape back to its former glory, it is obvious that we are nearing the end of our mission. We must push on and stop the Sandman from achieving his goals! Head back to the CATWALK by going down the elevator and going through the hole in the wall.
The numbers in the images correspond to the instructions below.
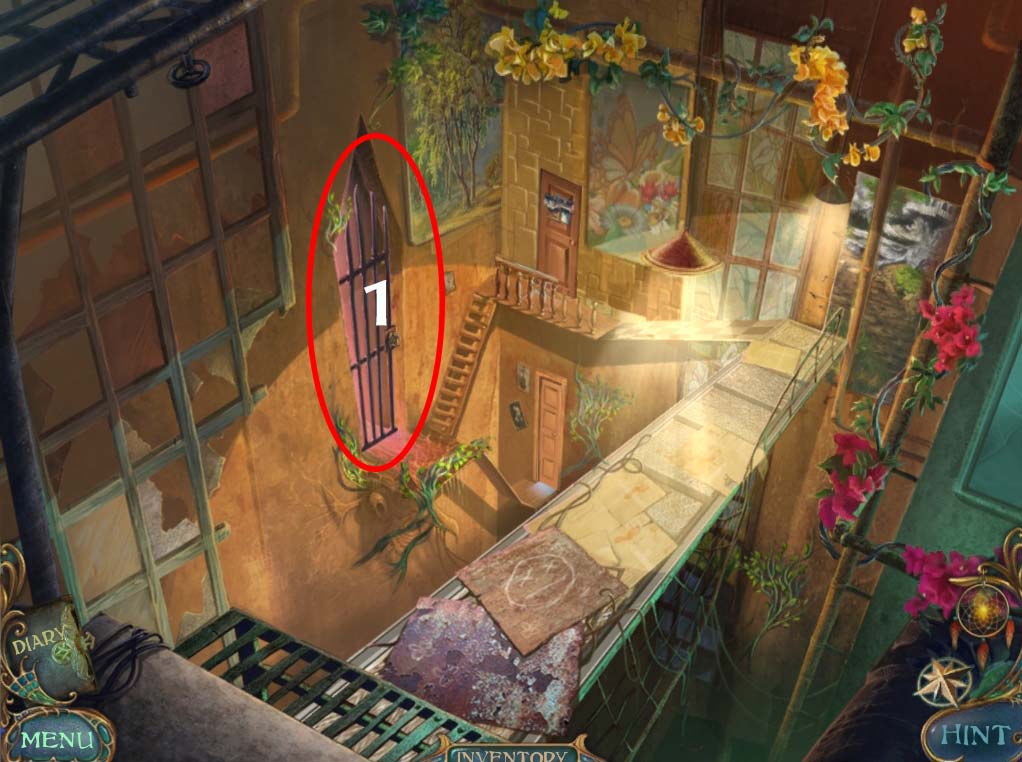
- 1. Investigate the door circled in red above. You’ll see an outstretched hand that seems to be asking for something. Give it the DOLLAR from your inventory and it will open. Head inside to find Laura hiding around the corner. Click her to watch a short, but very eventful cutscene!
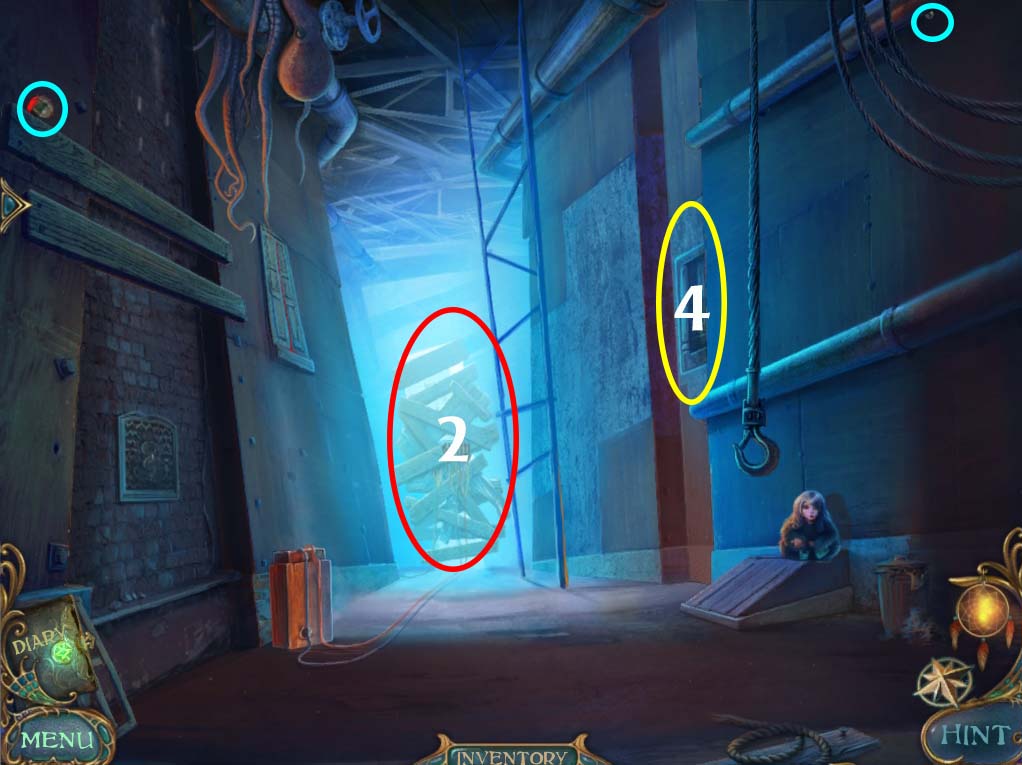
- Eliminate the BEHOLDERS hiding in the HALLWAY (circled in blue above) (2 of 2) / (72 of 110)
- 2. Head straight down the HALLWAY for now (the area circled red above). The things we need are in the other room
- Eliminate the BEHOLDER in the area (circled in blue above) (1 of 1) / (73 of 110)
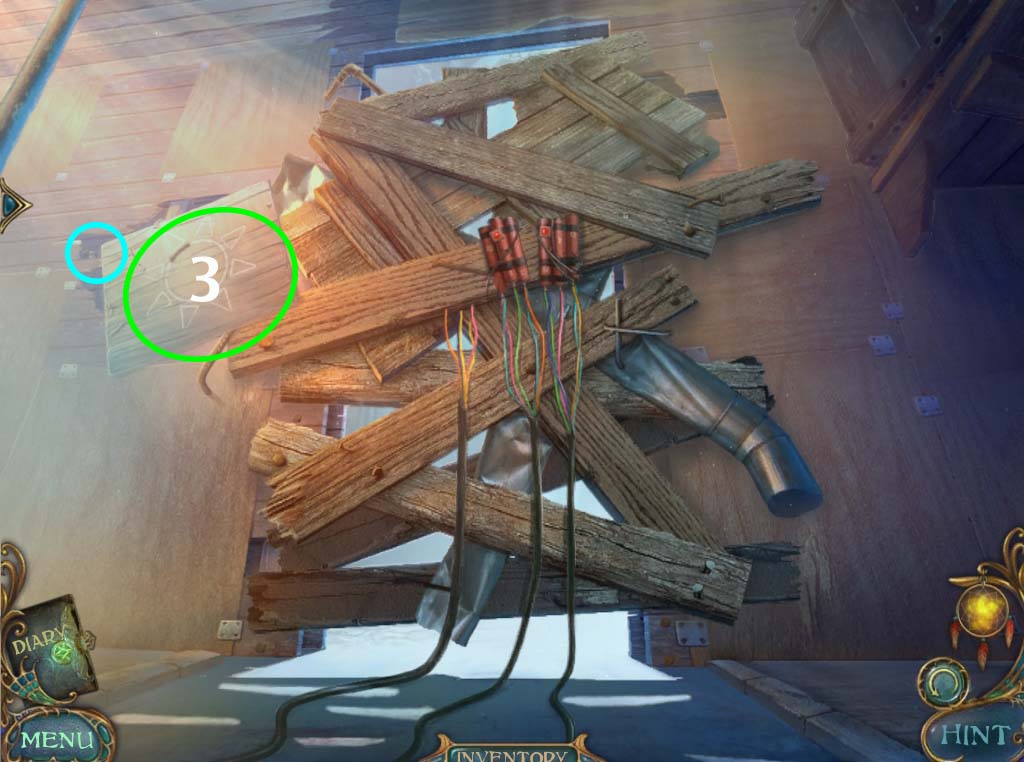
- 3. Investigate the SUN DRAWING (circled in green in the image above) and use the MAGNIFYING GLASS in your inventory to cut out a hole. Take the MIRROR SHARD and the IDOL hidden inside and head back to the HALLWAY.
- 4. Back at the HALLWAY investigate the PANEL circled in yellow in the HALLWAY image above. You’ll find a slot where the IDOL in your inventory fits perfectly. Slot it in to start the MATCHING PUZZLE, probably one of the hardest puzzles in the game.
MATCHING PUZZLE
The object of the puzzle is to rebuild the different jumbled figures and then replace them on the slots in the back. Each piece of the figure is color-coded, but you can only move each piece on top of a similarly colored piece, and you can only put each piece on top of another if it is higher in the order, for example:
HEAD NECK CHEST LEGS FEET
You can place the NECK on top of the CHEST, LEGS or FEET, or the NECK on top of the FEET, as long as it is higher in the order. You can’t put LEGS on top of CHESTS or FEET on top of HEADS. There is no exact solution to the puzzle as it is jumbled each time it is played, and pushing reset causes it to randomly jumble again. The figures that need to be formed are shown below (placed in their respective slots):
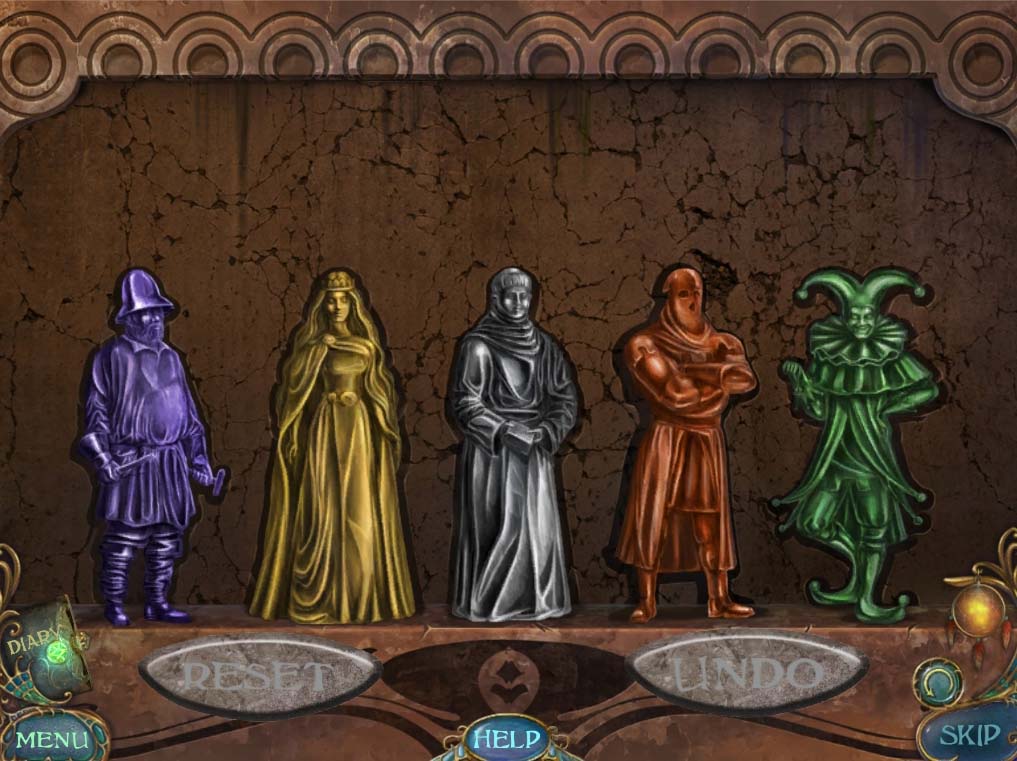
- Solving this puzzle opens the wall. Step inside to watch a short cutscene. Another part of Laura is in terrible danger! We must save her.
Part II: A Stay of Execution
The Sandman has trapped Laura in a guillotine! We must find away to free her before the blade cuts her life short! The EMPTY SQUARE that you’re in must offer a solution out of this predicament!
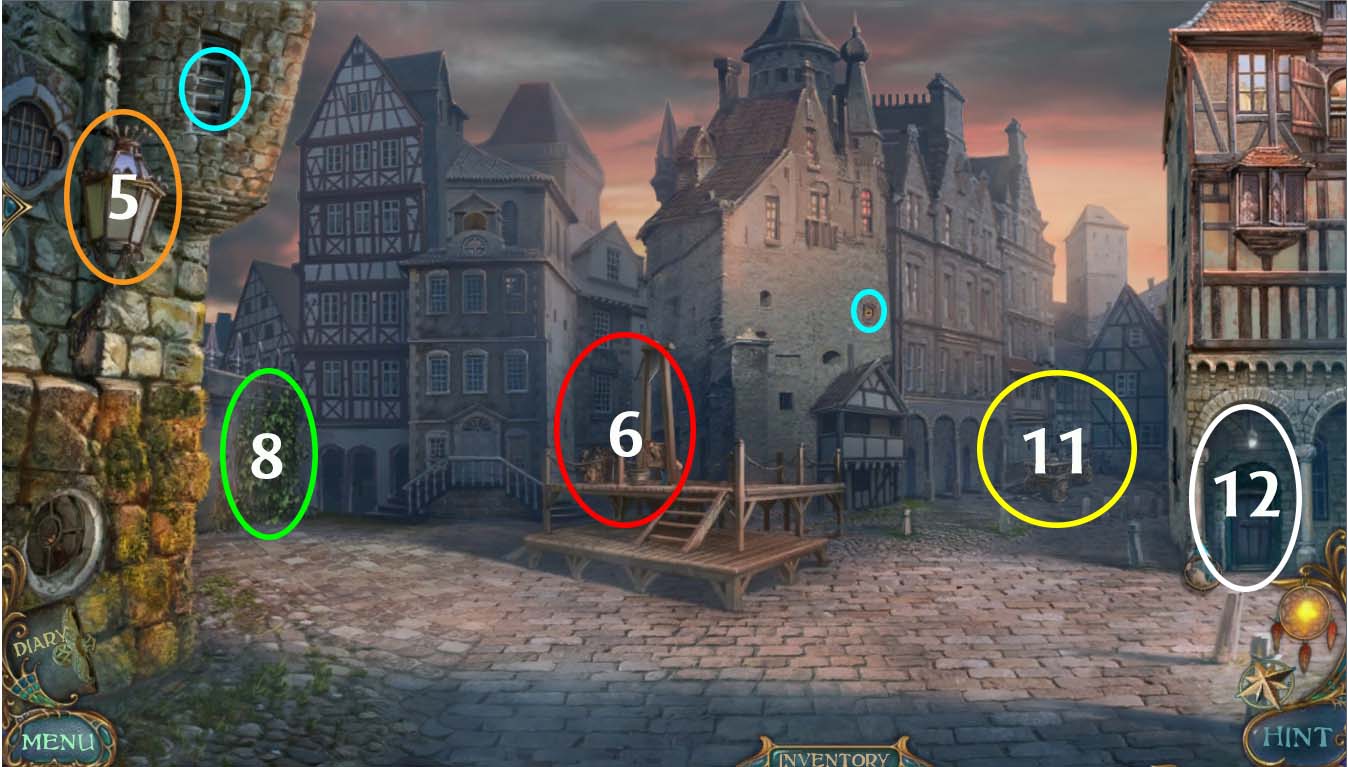
- Eliminate the BEHOLDERS in the area (circled in blue above) (2 of 3) / (75 of 110)
- 5. Check the LAMP (circled in orange above) and open it. Take the WICK that you find inside.
- 6. Go to Laura. You might not be able to help her right now, but we’ll certainly try.
- Eliminate the BEHOLDERS in the area (circled in blue above) (4 of 4) / (79 of 110)
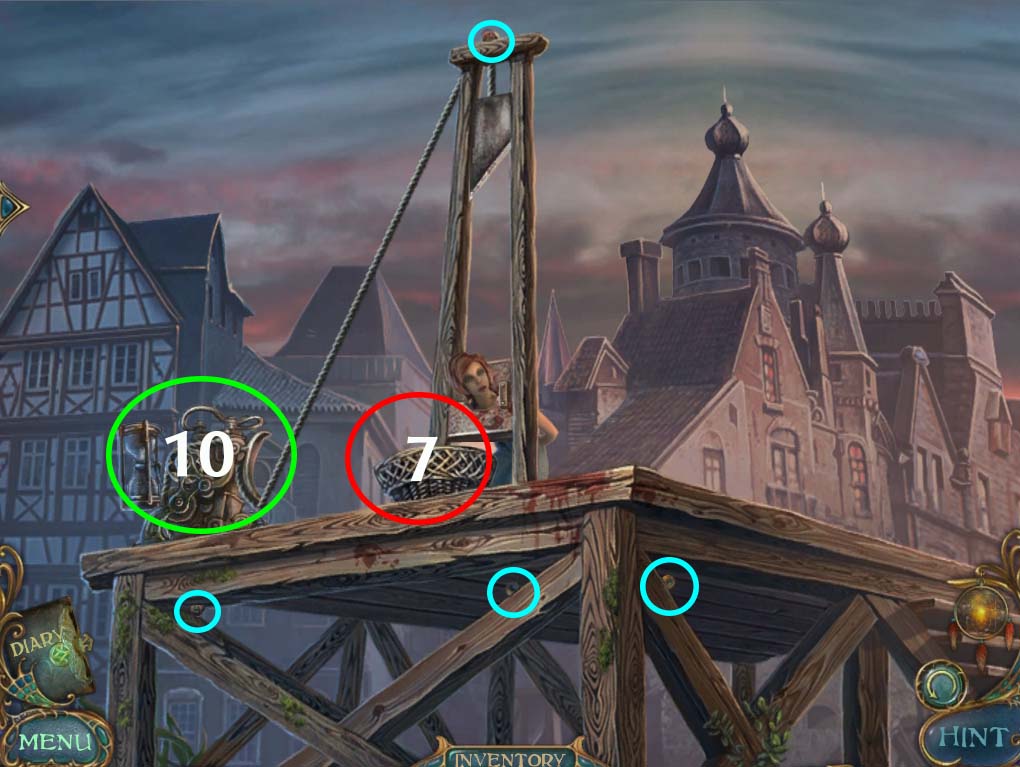
- 7. It may seem strange, but investigate the basket in front of the guillotine (circled in red above). Take the PRUNING SHEARS that you find inside and head back the EMPTY SQUARE.
- 8. Check the POISON IVY BUSH growing on the wall at the left side of the EMPTY SQUARE (circled in green on the EMPTY SQUARE image above).

- Eliminate the BEHOLDER near the bush (circled in blue above) (3 of 3) / (80 of 110)
- 9. Trim the IVY BUSH in the area circled red above, and it should yield you some POISON IVY leaves for your inventory. Take the wooden WEDGE that is also jutting out the side of the building. Return to Laura.
- 10. Jam the WEDGE in the guillotine mechanism (circled in green on the GUILLOTINE image above). This should hold the blade in place until we can find a way to get Laura out of there! Check the machine again and take the SCREW that you find in the wreckage.
- 11. Head back to the EMPTY SQUARE and investigate the HAY CART in the distance (circled in yellow in the EMPTY SQUARE image above). Take a look inside the HAY CART and move the hay away by clicking it several times. You should find an OIL CAN beneath all that straw. Take it and head back to the EMPTY SQUARE.
- 12. Check the LAB DOOR in the area circled in white at the EMPTY SQUARE image above.

- Eliminate the BEHOLDERS hiding in the wall (circled in blue above) (2 of 3) / (82 of 110)
- 13. Check the HOLE IN THE WALL (circled in red in the image above)
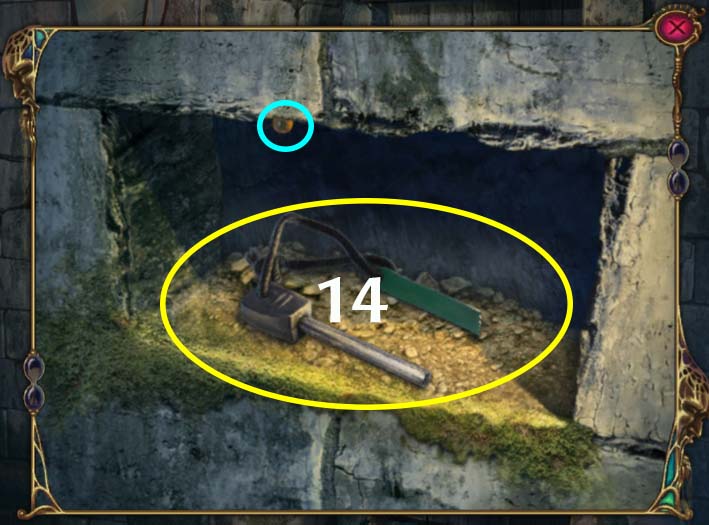
- Eliminate the BEHOLDER hiding in the wall (circled in blue above) (3 of 3) / (83 of 110)
- 14. Take the FLINT AND STEEL (circled in yellow in image above)
- 15. Investigate the door (circled in green in LAB DOOR image above). Take the OIL CAN from your inventory and oil this rusted lock, then take the SCREW and put it in the lock itself. Click it again to open the door.
- Eliminate the BEHOLDERS in the area (circled in blue above) (3 of 7) / (86 of 110)
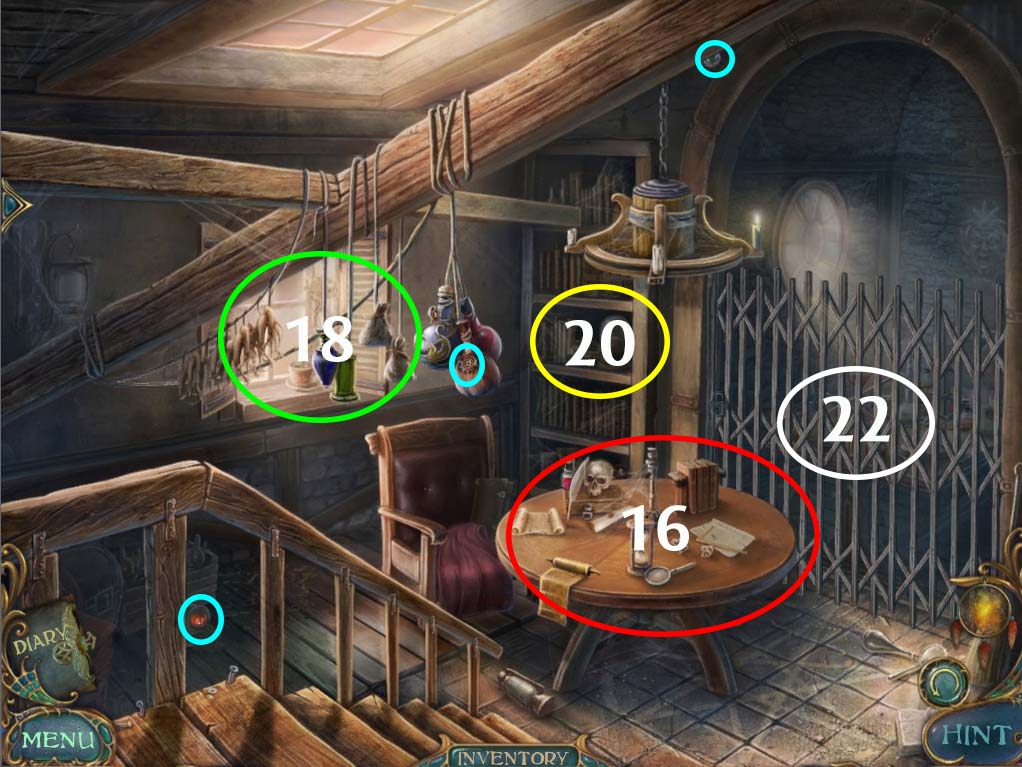
- 16. Check the Table (circled in red in image above)
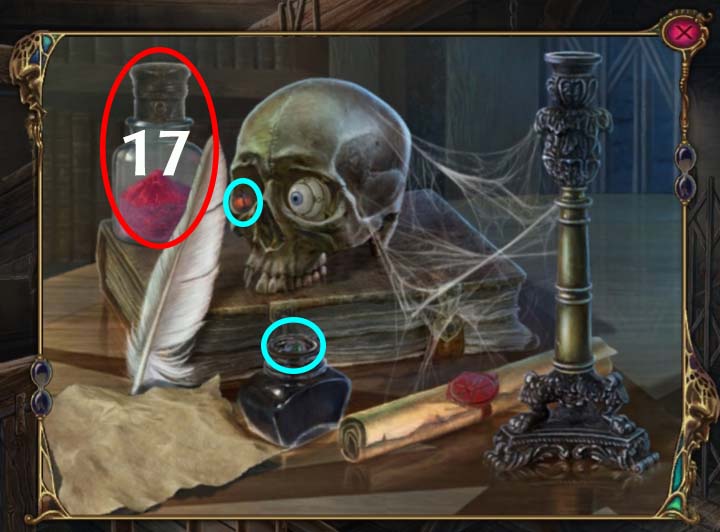
- Eliminate the BEHOLDERS in the area (circled in blue above) (5 of 7) / (88 of 110)
- 17. Take the bottle of PINK POWDER and exit.
- 18. Investigate the WINDOWSILL (circled in green in the LAB image above).
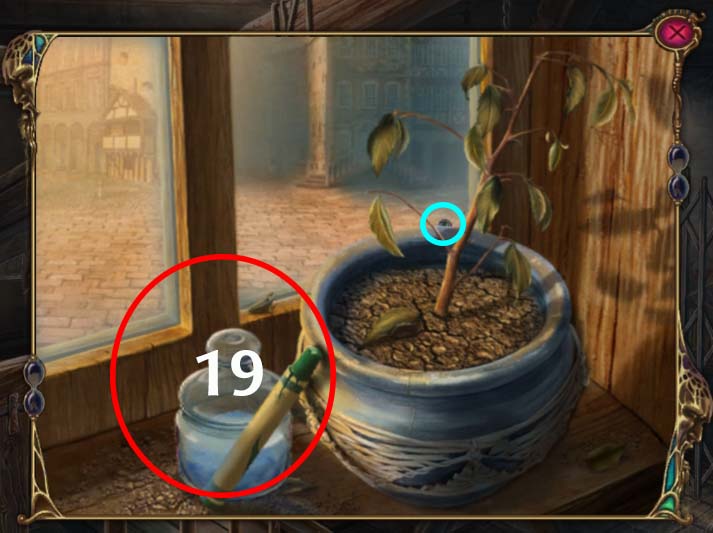
- Eliminate the BEHOLDER in the area (circled in blue above) (6 of 7) / (89 of 110)
- 19. Take the GREEEN CRAYON and the BLUE POWDER for your inventory (both circled in red above).
- 20. Check the BOOKSHELF (circled in yellow on the LAB image above).
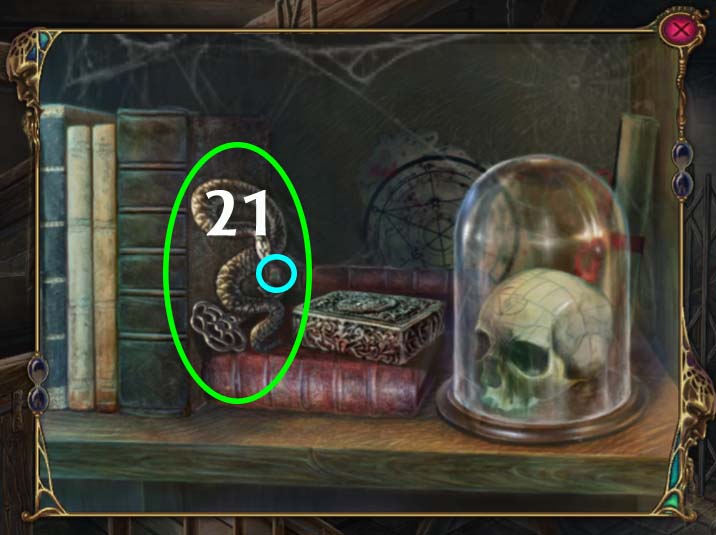
- Eliminate the BEHOLDER in the area (circled in blue above) (7 of 7) / (90 of 110)
- 21. Take the SERPENT symbol and the KEY both circled in green above.
- 22. Check the locked GRILL (circled in white on the LAB image above) and use the key you’ve just found on the lock. Investigate to reveal the ALCHEMY PUZZLE.
ALCHEMY PUZZLE
- The object of this puzzle is to combine the liquids to the similarly colored powders to create a strong acid. The solution to this puzzle is detailed below:
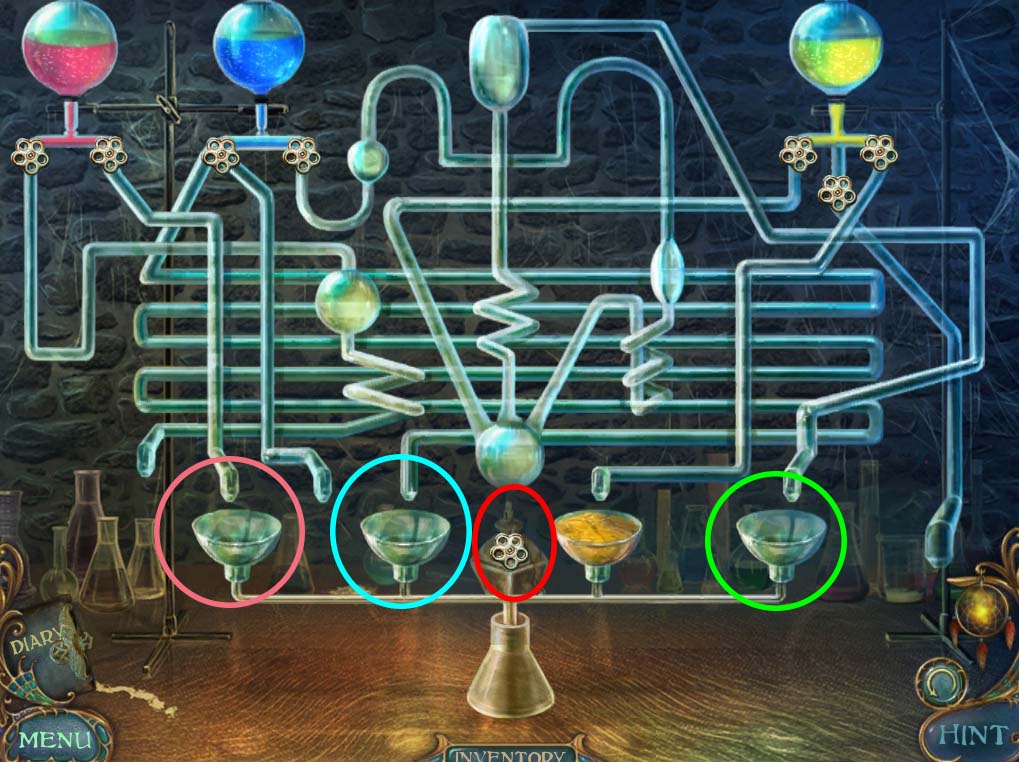
- Place the PINK POWDER on the container circled in PINK
- Place the BLUE POWDER in the container circled in BLUE
- Place the POISON IVY on the container circled in GREEN
- Check the BUNSEN BURNER (circled in red) and place the WICK on it. Afterwards, light it with the FLINT AND STEEL.
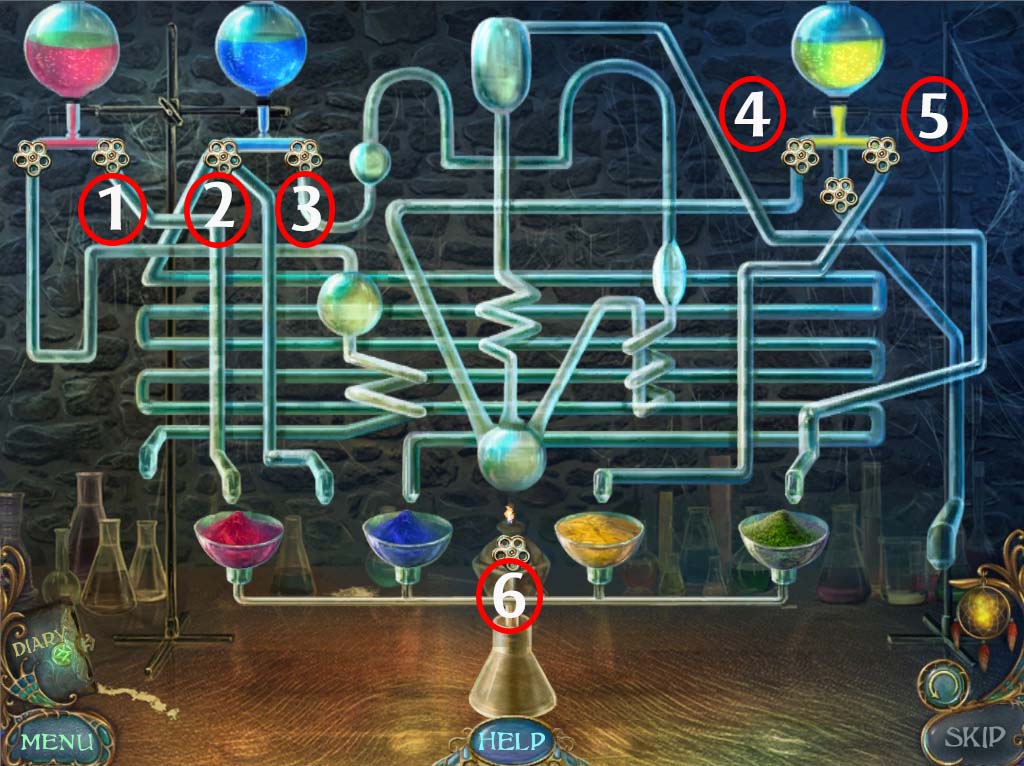
- Turn the VALVES in the order listed above (from 1 to 6). The combination of these chemicals will give you a bottle of ACID. Head back to the GUILLOTINE. It’s time to get Laura out of there!
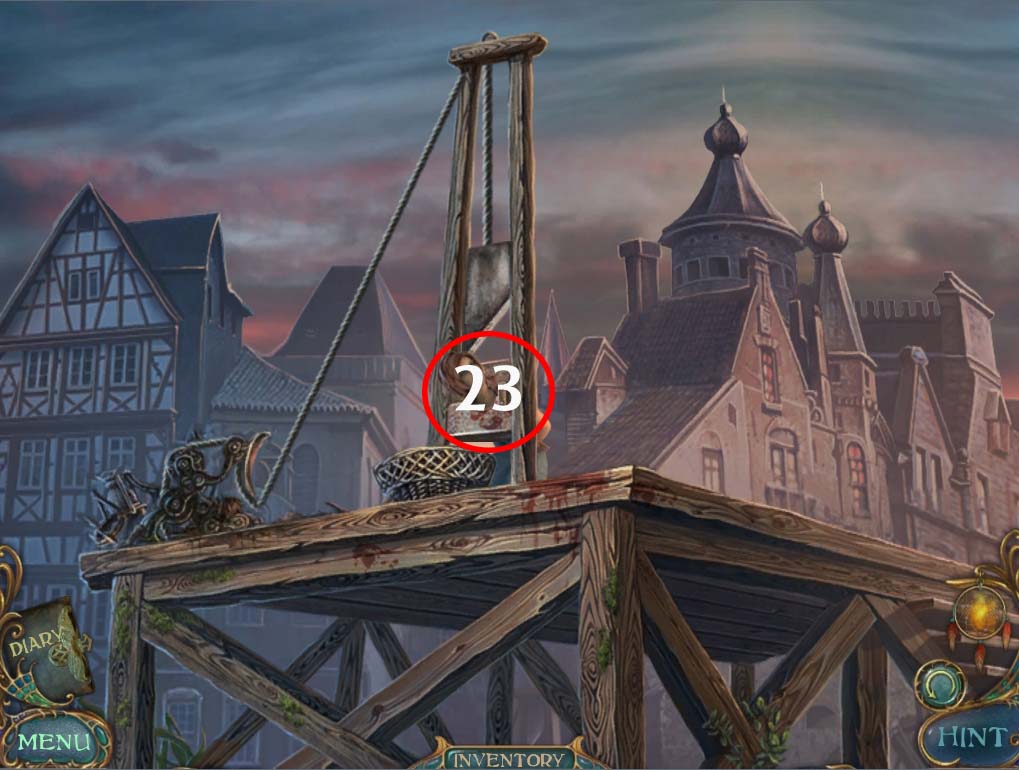
- 23. Check the area circled in red above. Use the ACID in your inventory to release Laura. She warns you of the danger that the Sandman poses to the world. She says that the dreamcatcher is almost complete and once again disappears. Check the GUILLOTINE BASKET again to find another piece of the dreamcatcher and more DIARY PAGES. Doing this will send us back to the HALLWAY.
End of Chapter VII
Chapter One: The Professor’s Laboratory
Chapter Two: The Ruined Church
Chapter Three: The Frozen Lake
Chapter Four: The Family Home
Chapter Five: The Corrupted Forest
Chapter Six: The Abandoned Theme Park
Chapter Seven: The Empty Square
Chapter Eight: The Endless Desert
Chapter Nine: The Ritual
Ask for help in the comments below!