
Dreamscapes: The Sandman: Chapter Six: The Abandoned Theme Park
Depend on our Dreamscapes: The Sandman Walkthrough to help you navigate the dark recesses of Laura's nightmare as you attempt to save her from the vile Sandman who has trapped her. Our beautifully marked screenshots, puzzle solutions, and detailed step-by-step instructions will help you locate the missing pieces of Laura's dreamcatcher and put an end to this night terror once and for all!
Chapter One: The Professor’s Laboratory
Chapter Two: The Ruined Church
Chapter Three: The Frozen Lake
Chapter Four: The Family Home
Chapter Five: The Corrupted Forest
Chapter Six: The Abandoned Theme Park
Chapter Seven: The Empty Square
Chapter Eight: The Endless Desert
Chapter Nine: The Ritual
Ask for help in the comments below!
Part I: Hanging in Mid-Air
With the BRIDGE area taken care of, it’s time to head back to the DREAMSCAPE area and clear out the other nightmares that the Sandman left behind. Our foray into the Corrupted Forest has given us a CLOWN PART that we can use to open up another path deeper into Laura’s dreams.
- The numbers on the images relate to the instructions below.
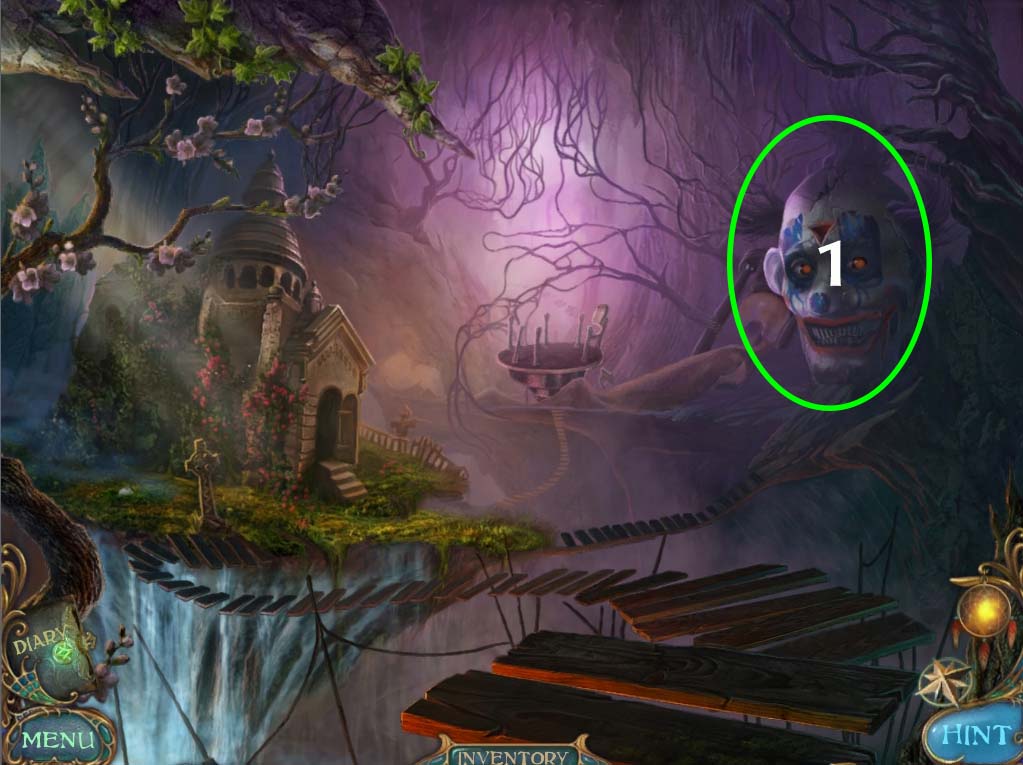
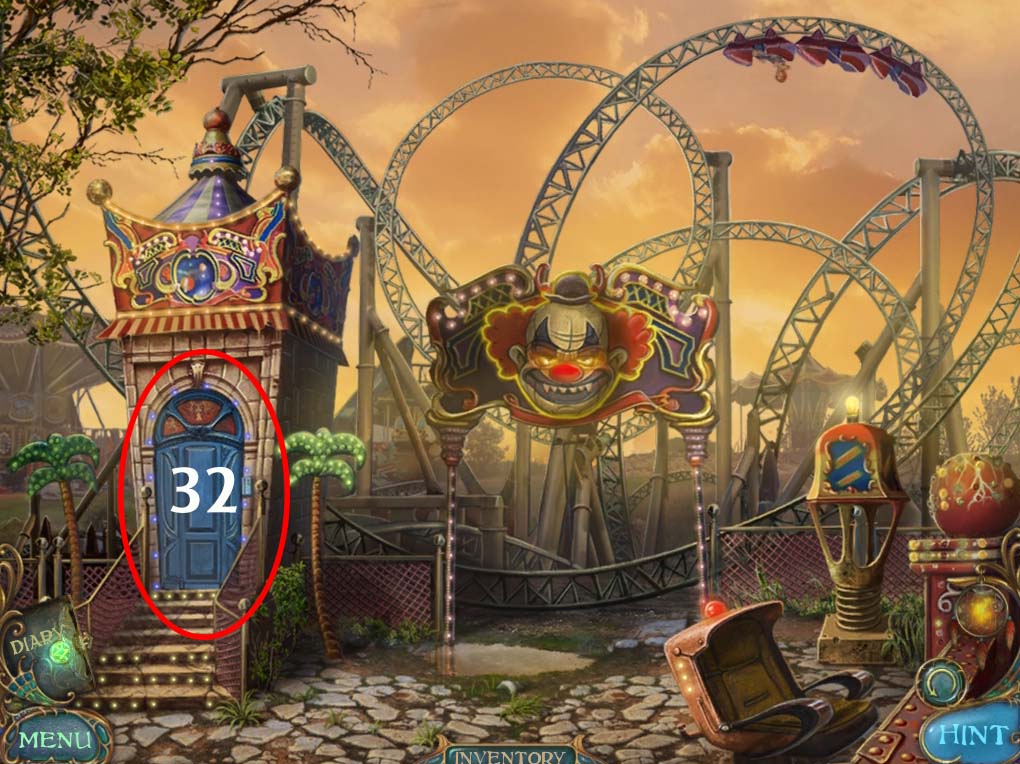
- 1. Return to the dreamscape area and investigate the CLOWN FACE (circled in green above).

- 2. Take the CLOWN PART from your inventory and place it on the area circled in white above. This will cause the clown to open his mouth. It usually isn’t a good idea to jump into the mouth of anything, more so if that thing is a creepy clown, but it seems like we have no choice. Hop right in. A short cutscene shows Laura in another dangerous situation. Click on her to continue.
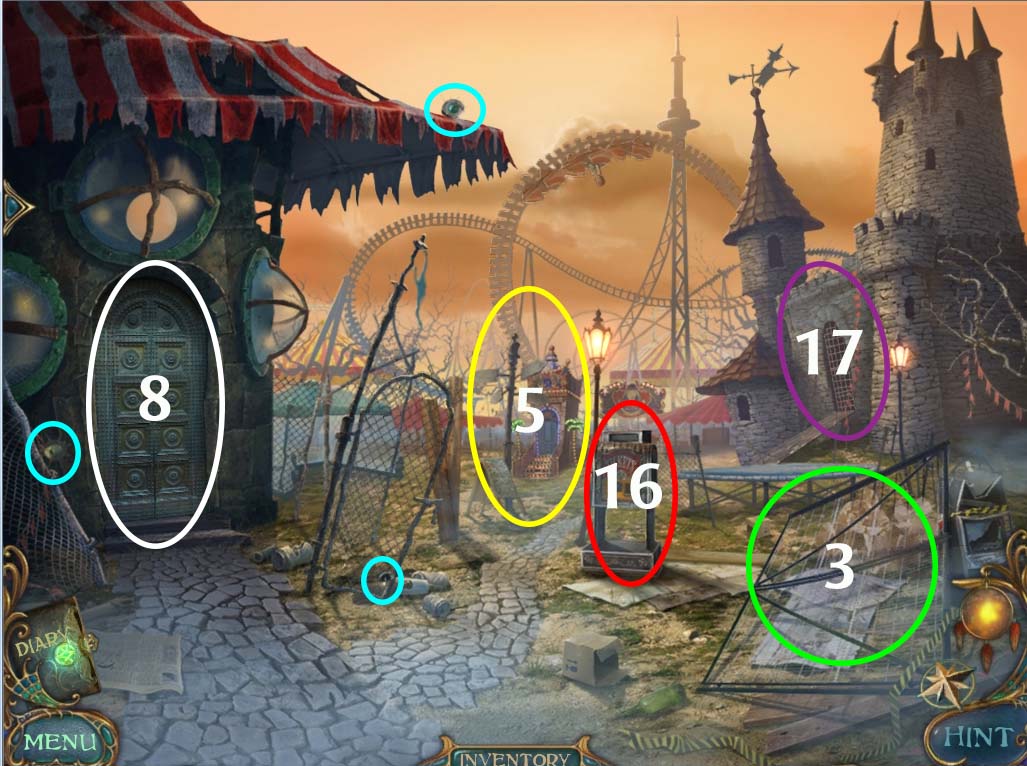
- Eliminate the BEHOLDERS hiding around the PARK GATE (circled in blue above) (3 of 3) / (61 of 110)
- 3. Check the broken gate (circled in green above).
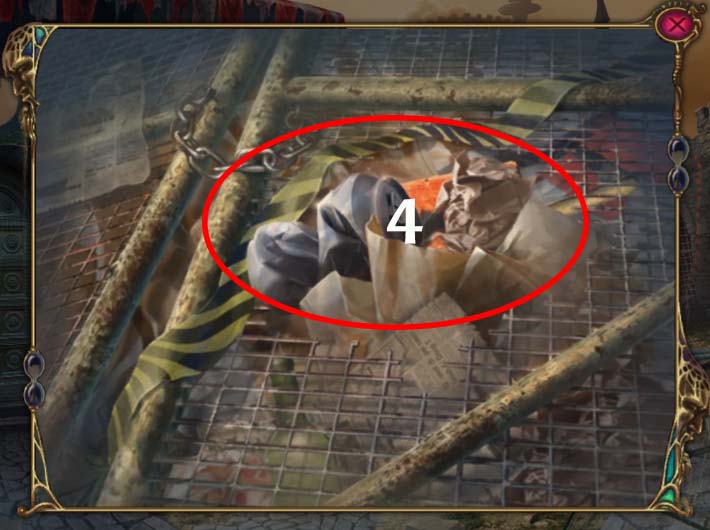
- 4. Clear out the debris in the area that is circled in red above. Underneath all that trash you’ll find a BRICK and a SWITCH. Take both of them for your inventory.
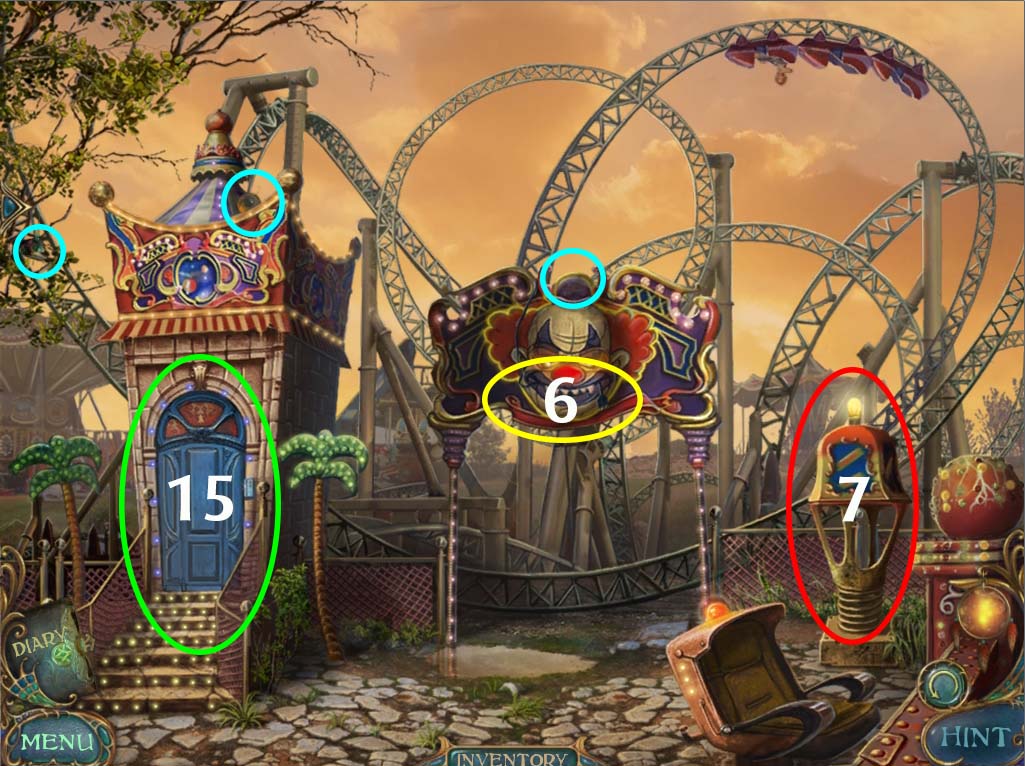
- 5. Go further inside the theme park, near the CONTROL BOOTH (circled in yellow on PARK GATE image above).
- Eliminate the BEHOLDERS in this area (circled in blue above) (3 of 3) / (64 of 110)
- 6. Take the POWER CABLE lodged in the mouth of the clown (circled in yellow above)
- 7. Check the area circled in red above and you’ll find a FILE in the bottom of the seat. Take it for your inventory as well.
- 8. Head back to the PARK GATE area and investigate the ARCADE DOOR.
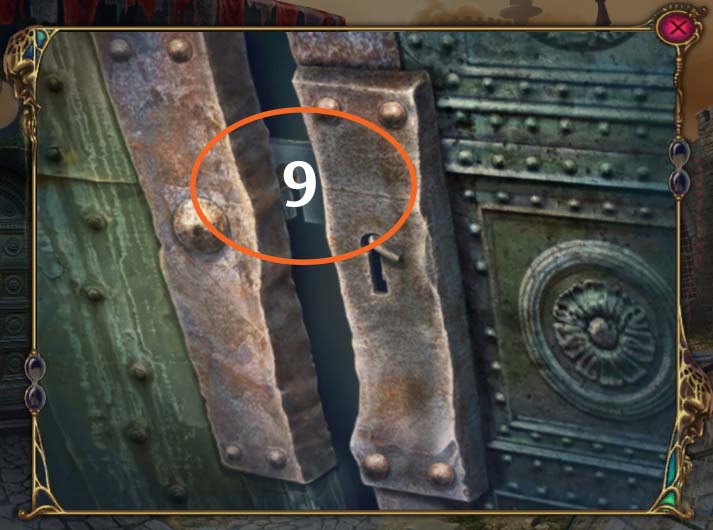
- 9. Use the FILE that you picked up to jimmy the lock. This causes the door to open. Step inside.
- Eliminate the BEHOLDERS hiding around the arcade (circled in blue above) (3 of 3) / (67 of 110)
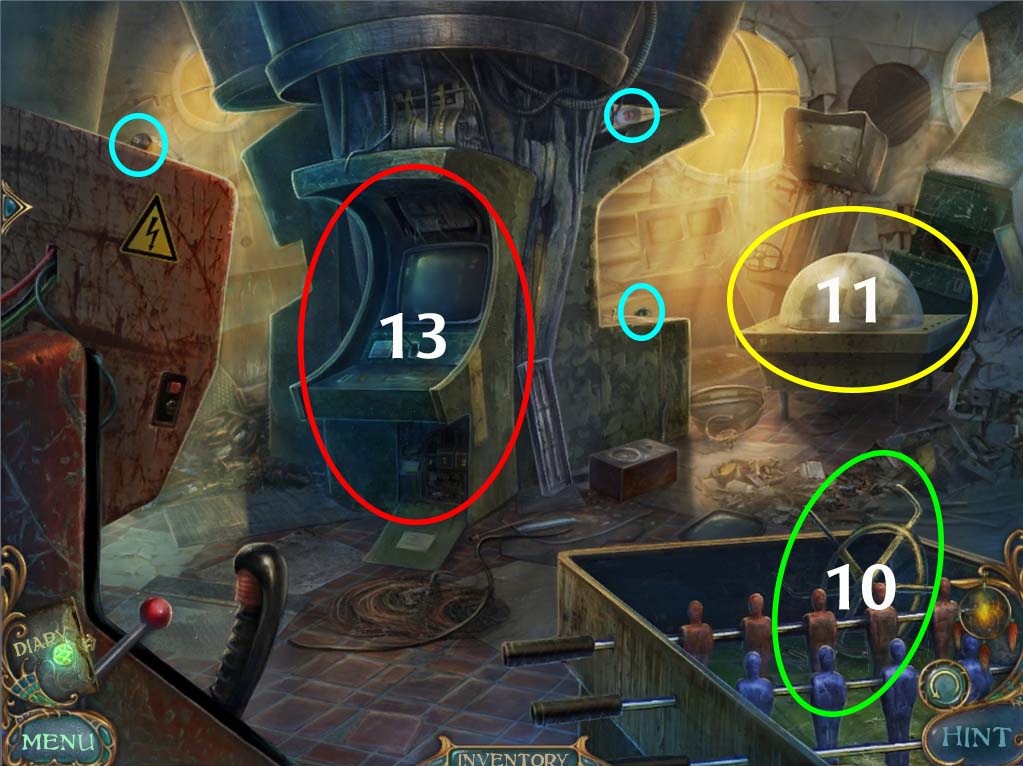
- 10. Take the HOIST HANDLE that is lying on the foosball table.
- 11. Have a closer look at the CRANGE GAME (circled in yellow in the image above).
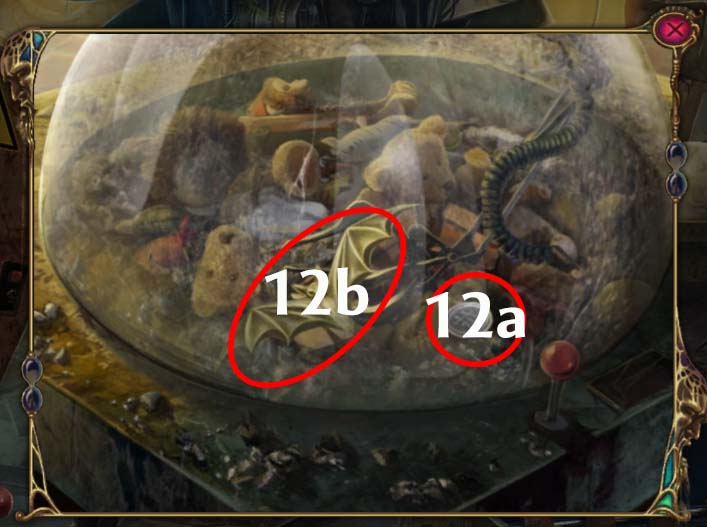
- 12. Use the BRICK in your inventory to break the glass. Once you’re done, take the SILVER COIN and the BAT TOY for your inventory.
- 13. Investigate the ARCADE GAME a bit closer (circled in red on the ARCADE image above)
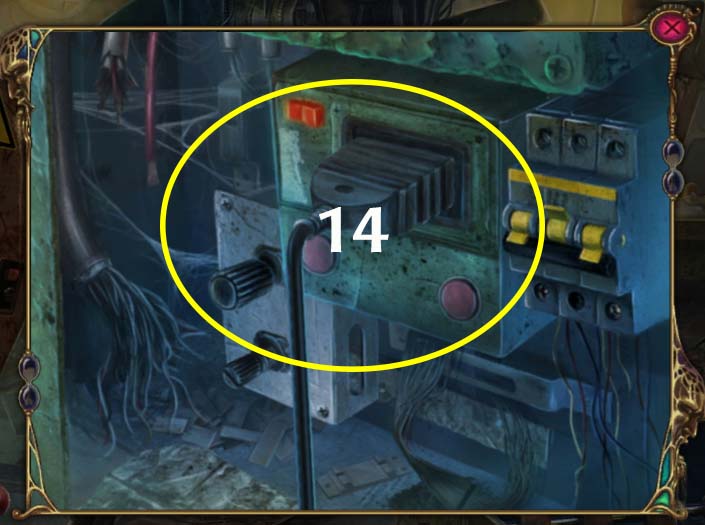
- 14. Take the POWER CABLE from your inventory and plug it in the ARCADE GAME as shown above. This will turn the game on and activate a mini-game.
ARCADE MINI GAME
The object of the mini game is to get your character from the start point to the goal without hitting any of the other creatures or falling down the chasms. You can use the keyboard buttons to move your character left or right. The up button causes your character to jump. All of the creatures here can kill your character, and you have 3 tries before you get a game over. If you use up all three lives you have to start from the beginning again.
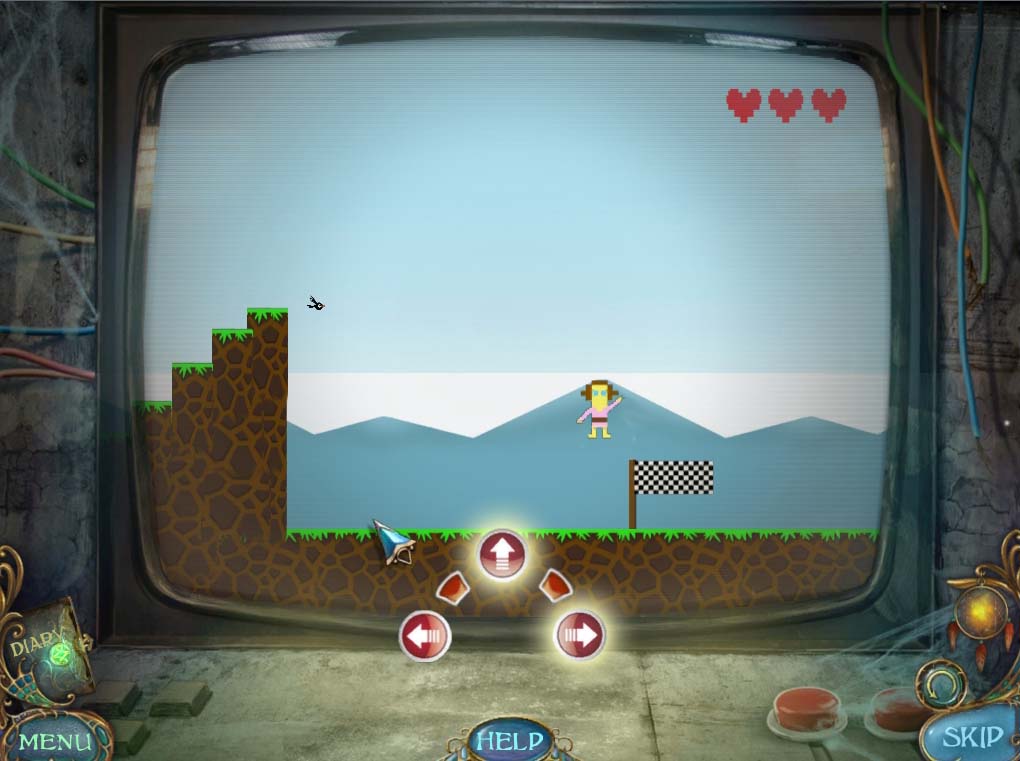
- Once you finish the game, a CASH REGISTER will open at the side of the game machine. Check it out and take the DOLLAR and the GOLD COIN that you find inside.
- 15. Return to the CONTROL BOOTH (circled in green at the CONTROL BOOTH area image above). Investigate the lock and you’ll find a COPPER COIN stuck in it. Take it for your inventory and head back to the PARK GATE.
- 16. Check the TICKET DISPENSER (circled in red at the PARK GATE image above) and drop in the GOLD COIN, the SILVER COIN, and the COPPER COIN into the slot. The machine will then hand you a TICKET.
- 17. Head to the DUNGEON GATE (circled in violet in the PARK GATE image above).
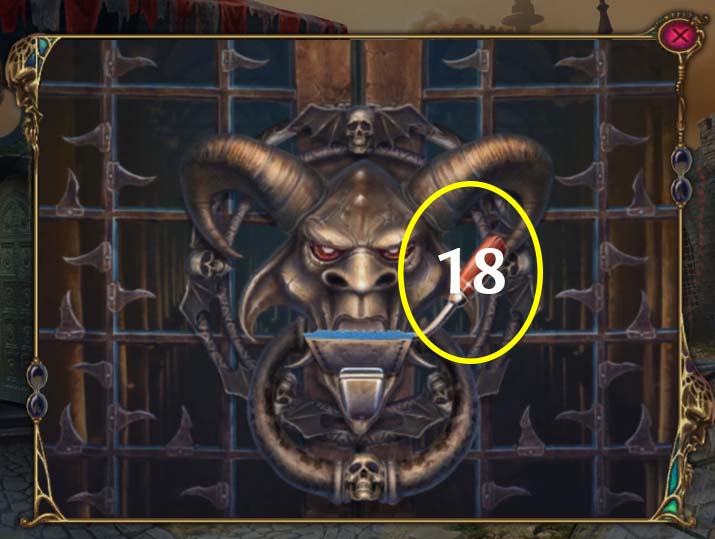
- 18. Place the TICKET on the GARGOYLE’S mouth as shown above, and pull the LEVER (circled in yellow). This will open the gates and let you inside the DUNGEON.
Part II: Into the Dungeon
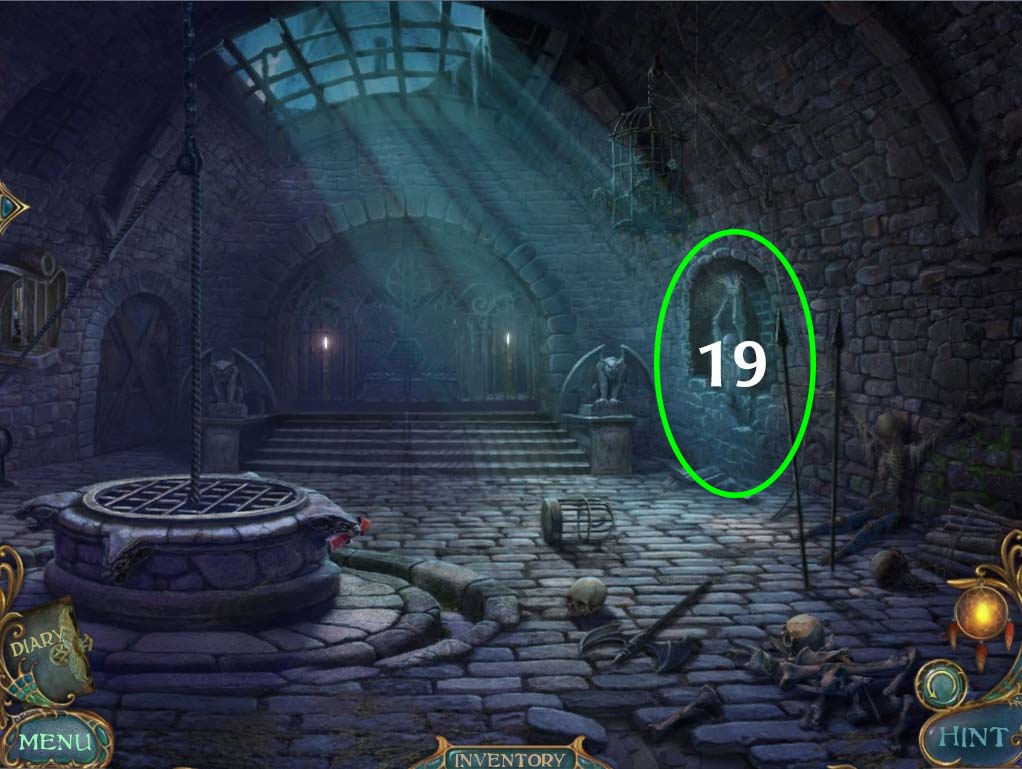
- 19. Once you enter the DUNGEON, you find it hard to see anything due to the darkness inside. Head to the area circled in green on the image above to shine a light on your predicament.
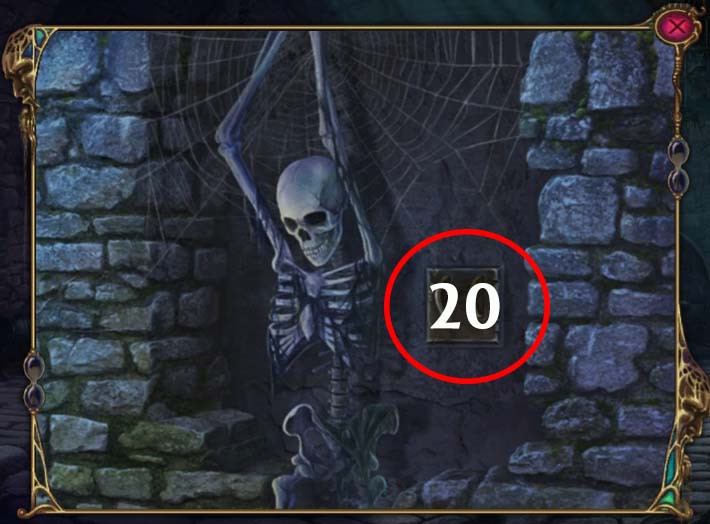
- 20. Take the SWITCH from your inventory and attach it to the area circled in red on the image above. Flick the SWITCH to light the dungeon.
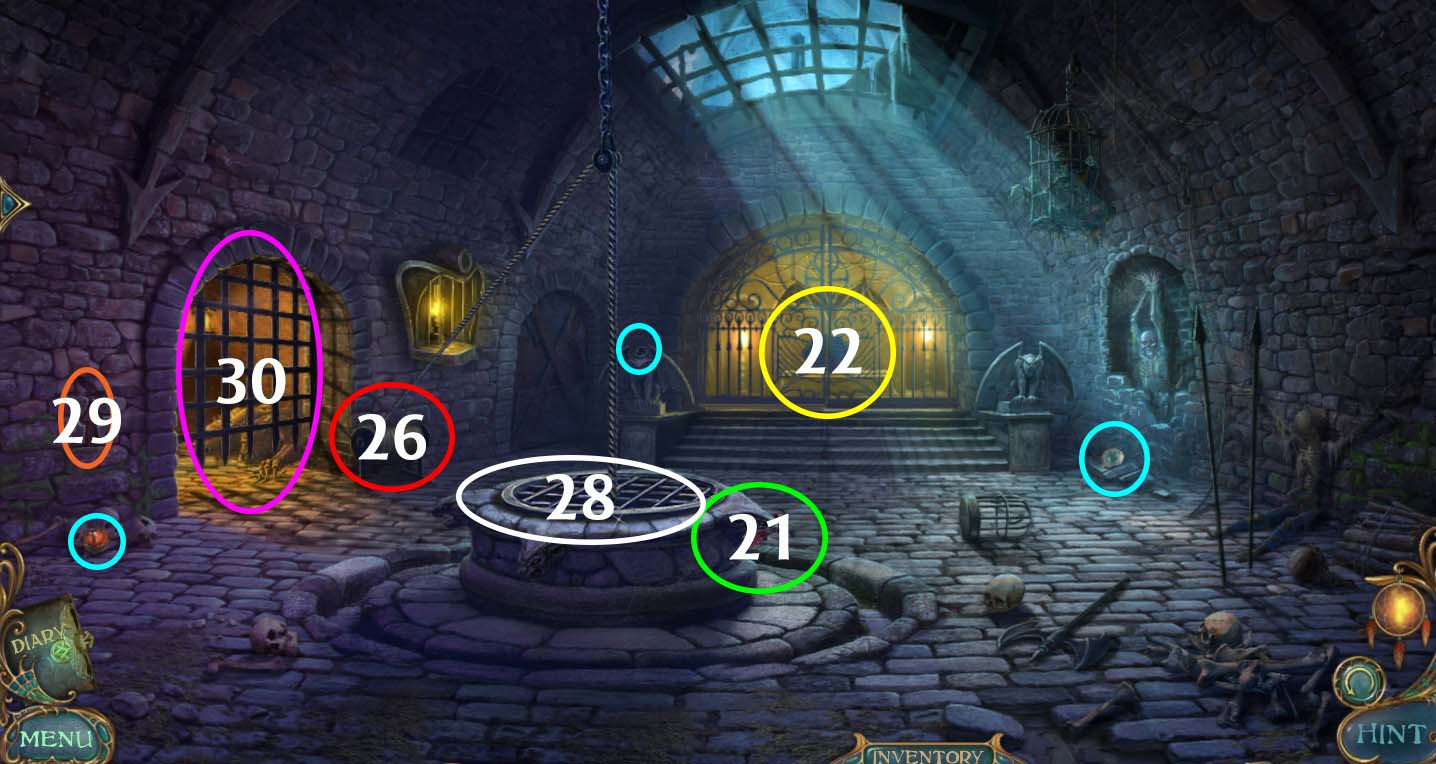
- Eliminate the BEHOLDERS scattered around the DUNGEON (circled in blue above) (3 of 3) / (70 of 110)
- 21. Investigate the side of the WELL (circled in green on the image above) and grab the ARROW that you find there. Exit for now.
- 22. Check the GATE (circled in yellow above). Doing this will start the BATS PUZZLE
BATS PUZZLE
- The object of this puzzle is to connect the similarly colored bat symbols to each other without any of the lines crossing each other. This is a simple puzzle, and it does have several solutions. One of the ways to solve this puzzle is shown below:
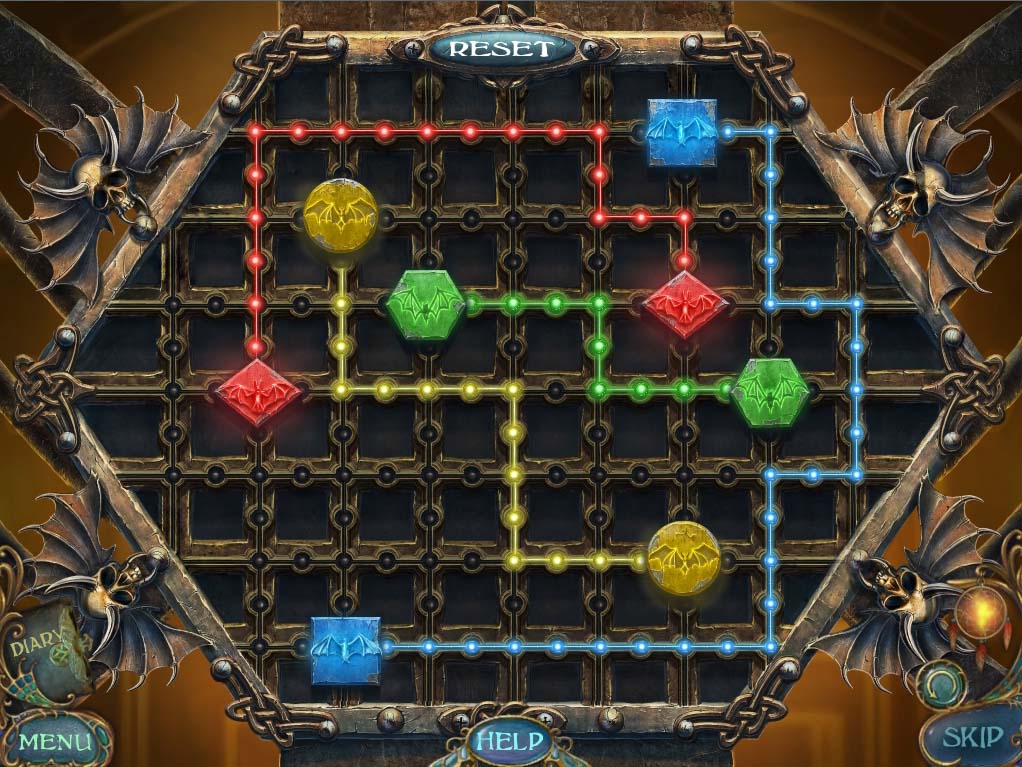
- Solving this puzzle opens the gate. Go inside to investigate further.

- 23. Take the ROPE (circled in red on the image above) for your inventory.
- 24. Use the BAT TOY in your inventory and insert it on the notch on the lid of the coffin (circled in green in the image above). Click the coffin lid, and it opens revealing a vampire lying inside.

- 25. It is rather unnerving to take things from creatures that will seemingly attack you if you disturb it, but this vampire has something we need. Take the ACCESS CARD from its hands (circled in red in image above) and get out of there!
- 26. Check the WINCH (circled in red on the DUNGEON area image above).
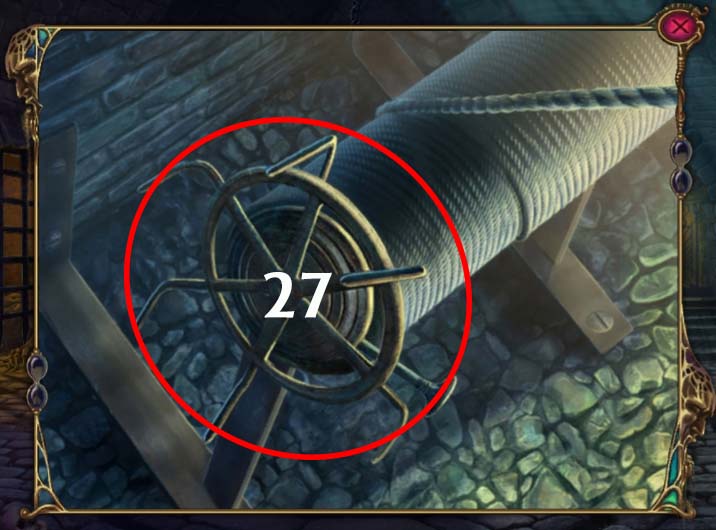
- 27. Place the HOIST HANDLE in your inventory on the WINCH as shown above. Give it a few turns by clicking on it, and the WELL should open up.
- 28. Check the WELL and throw the ROPE in. You’ll pull up a bucket full of bones. Take a BONE for your inventory.
- 29. Check the area circled in orange in the DUNGEON area image above. You should notice a notch in the wall that is a perfect place to put the ARROW that you found earlier. Place the ARROW and click on it. Doing this will open the gate beside it.
- 30. Go inside the now open gate (circled in violet on the DUNGEON image above).
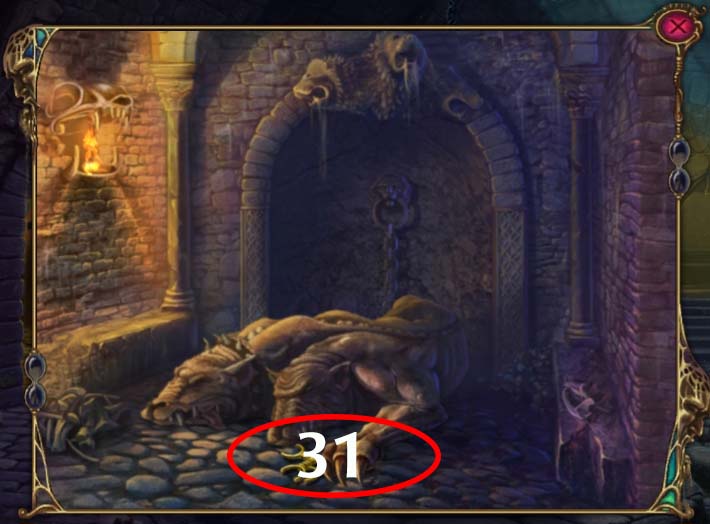
- 31. That is one mean looking two-headed dog! We don’t want to wake it up, so use the BONE from your inventory to take the CONNECTORS that it’s holding under its paws. We’re done with this area, so head back out to the CONTROL BOOTH.
- 32. Investigate the CONTROL BOOTH DOOR (circled in red above) and use the ACCESS CARD to open it. Check inside and use the CONNECTORS in your inventory to activate the CONNECTORS PUZZLE
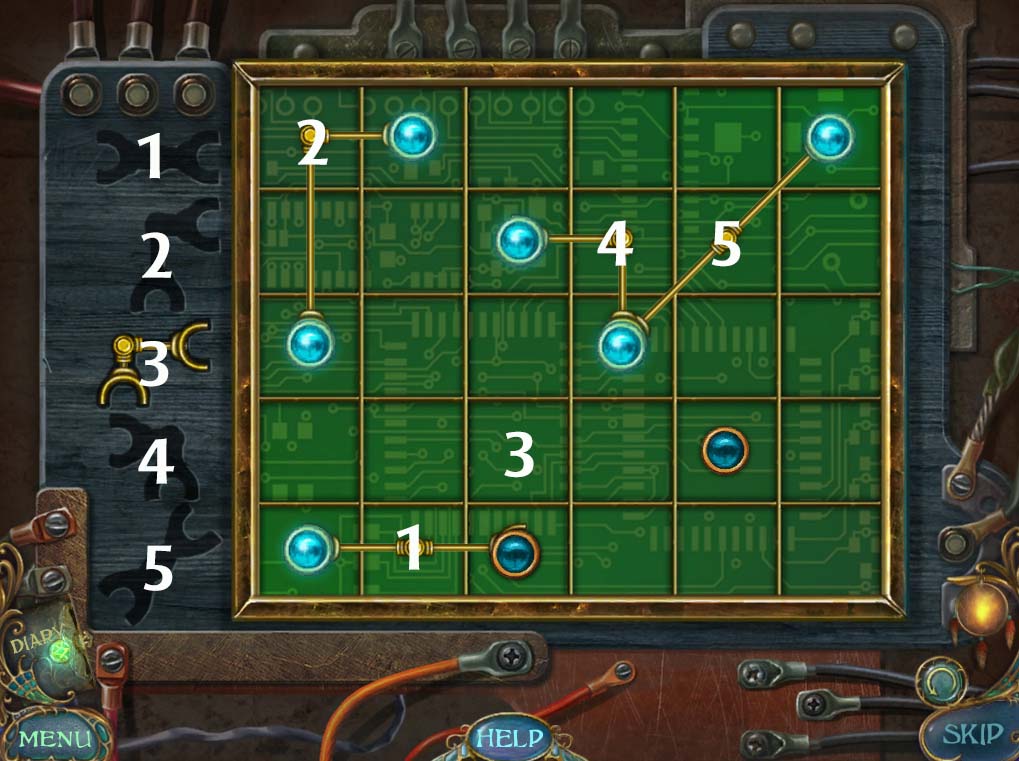
CONNECTORS PUZZLE
The object of this put the corresponding connectors to each fuse so that all fuses become lit. A solution to this puzzle is shown below. Just place the corresponding fuse to the numbered boxes to connect them to the fuses.
- Solving the puzzle causes the rollercoaster to once again move, bringing Laura safely to the ground. Speak with her and she reveals that the Sandman knows her fears and is using them to torture her. She thanks you for her timely rescue and once again disappears. Check the seat of the rollercoaster to find more DIARY PAGES and another piece of the dreamcatcher. Once you take them you are automatically sent back out to the DREAMSCAPE area which once again heals from the Sandman’s corruption.
End of Chapter VI
Chapter One: The Professor’s Laboratory
Chapter Two: The Ruined Church
Chapter Three: The Frozen Lake
Chapter Four: The Family Home
Chapter Five: The Corrupted Forest
Chapter Six: The Abandoned Theme Park
Chapter Seven: The Empty Square
Chapter Eight: The Endless Desert
Chapter Nine: The Ritual
Ask for help in the comments below!