
Dreamscapes: The Sandman: Chapter Two: The Ruined Church
Depend on our Dreamscapes: The Sandman Walkthrough to help you navigate the dark recesses of Laura's nightmare as you attempt to save her from the vile Sandman who has trapped her. Our beautifully marked screenshots, puzzle solutions, and detailed step-by-step instructions will help you locate the missing pieces of Laura's dreamcatcher and put an end to this night terror once and for all!
General Information & Tips
Chapter One: The Professor’s Laboratory
Chapter Two: The Ruined Church
Chapter Three: The Frozen Lake
Chapter Four: The Family Home
Chapter Five: The Corrupted Forest
Chapter Six: The Abandoned Theme Park
Chapter Seven: The Empty Square
Chapter Eight: The Endless Desert
Chapter Nine: The Ritual
Ask for help in the comments below!
Part I: Welcome to the Dreamscape
- Laura is definitely in trouble and you must help her no matter what. Before you leave this dreamscape and chase after Laura, it would be a good idea to get rid of the creatures called Beholders that seem to be spying on you.
- There are 110 BEHOLDERS in the entire game, and although you don’t really need to find them all, doing so will unlock an achievement. Throughout this walkthrough, BEHOLDERS will be marked by a blue circle. Clicking on them once will reveal them, clicking twice will neutralize them.
- The numbers in the images correspond to the instructions below:
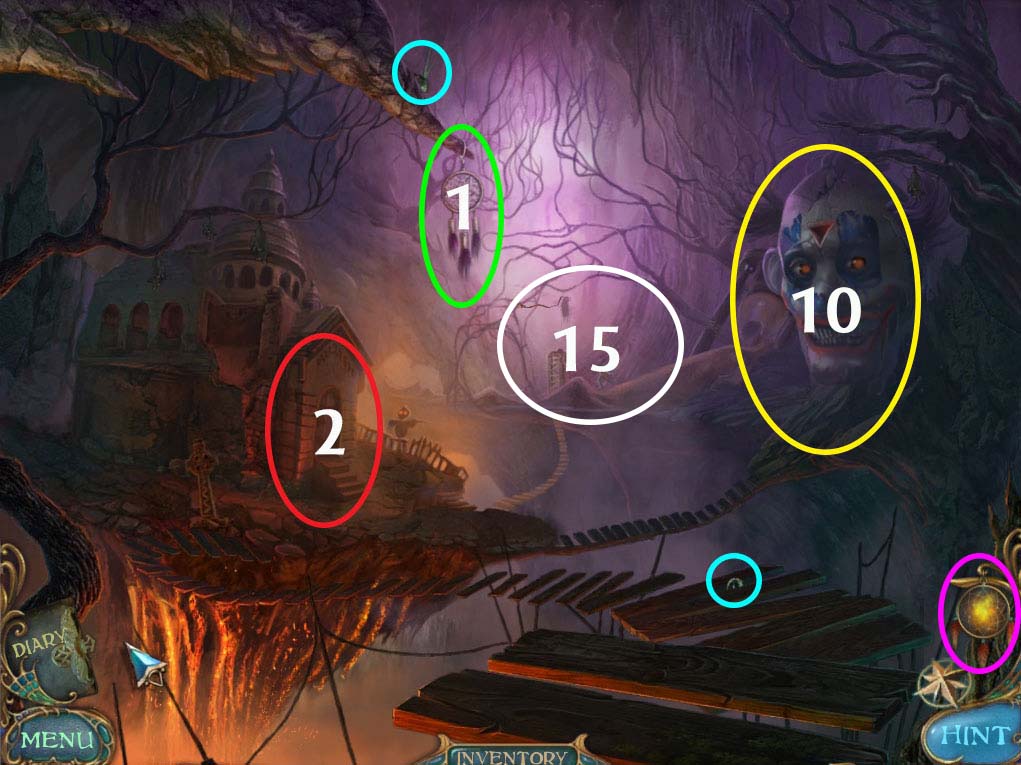
- Eliminate the BEHOLDERS circled in blue above (2 of 2) / (2 of 110)
- 1. Grab a PIECE OF THE DREAMCATCHER (circled in green above) and the dreamcatcher icon (circled in violet above) will become available. Every time you get a piece of the dreamcatcher, you can click the dreamcatcher icon to reassemble the broken amulet. You can do this now or wait until you get more pieces at your discretion.
- 2. Head to the Church Entrance (circled in red above) to follow Laura and the mysterious stranger.
- *NOTE: The BEHOLDER MENU (circled in green above) will appear whenever there are beholders in a particular area.
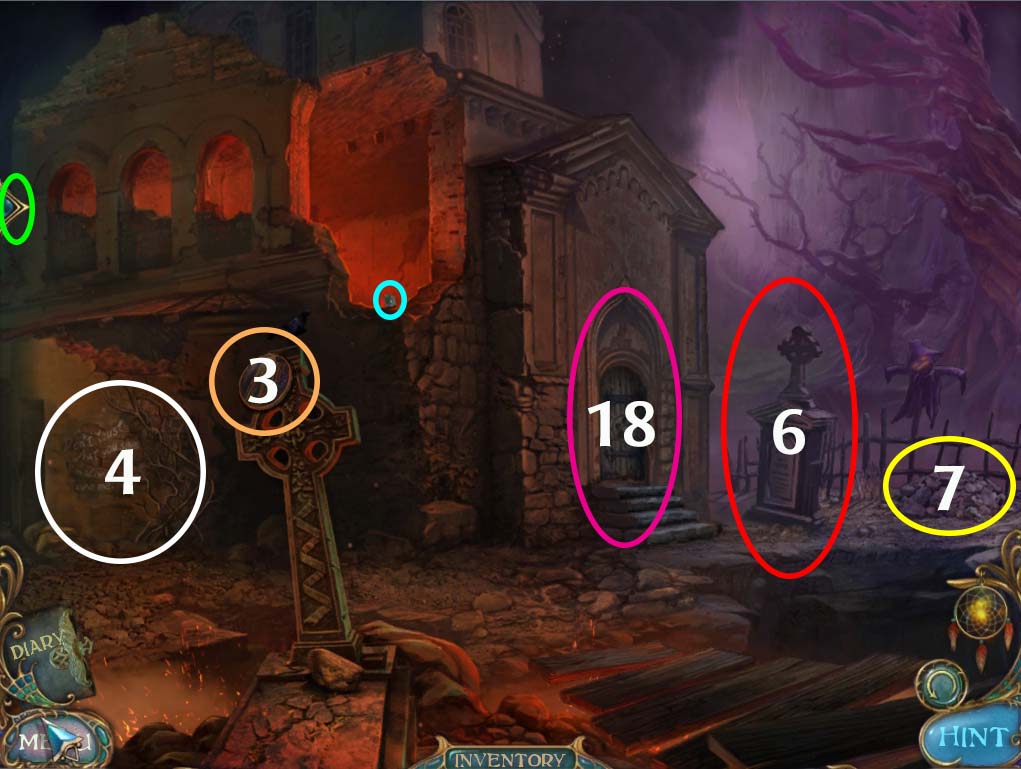
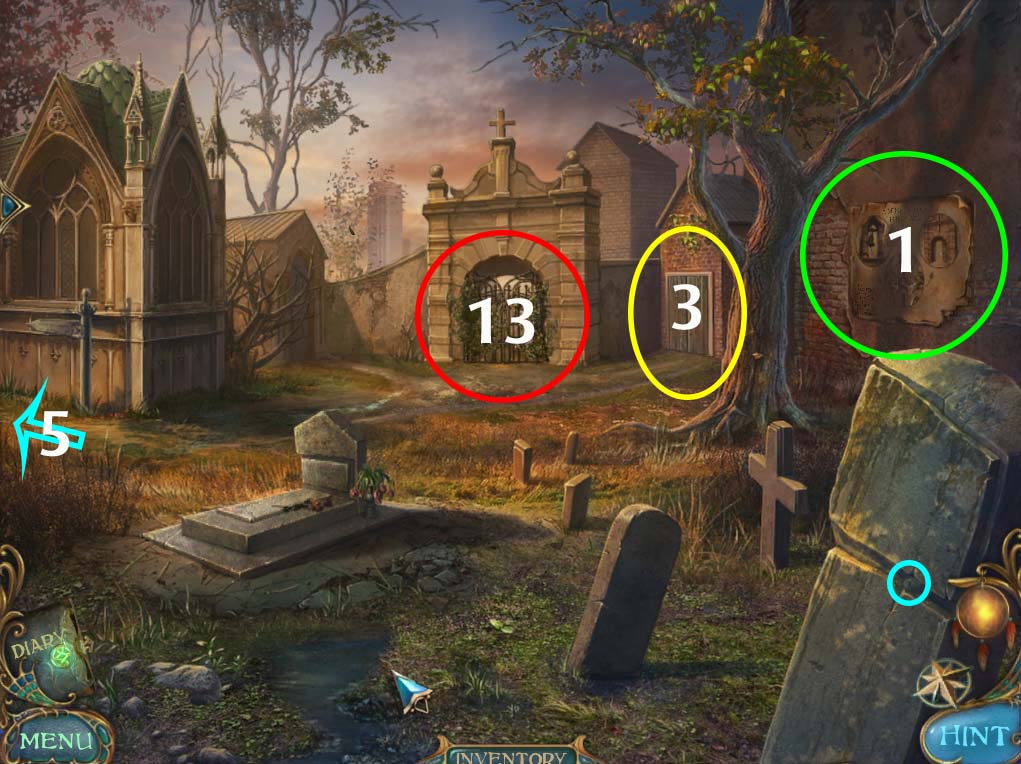
- Eliminate the BEHOLDER circled in blue above (1 of 3) / (3 of 110)
- 3. Grab the MEDALLION circled in orange above (1 of 4)
- 4. Investigate the SIDE WALL (circled in white above)
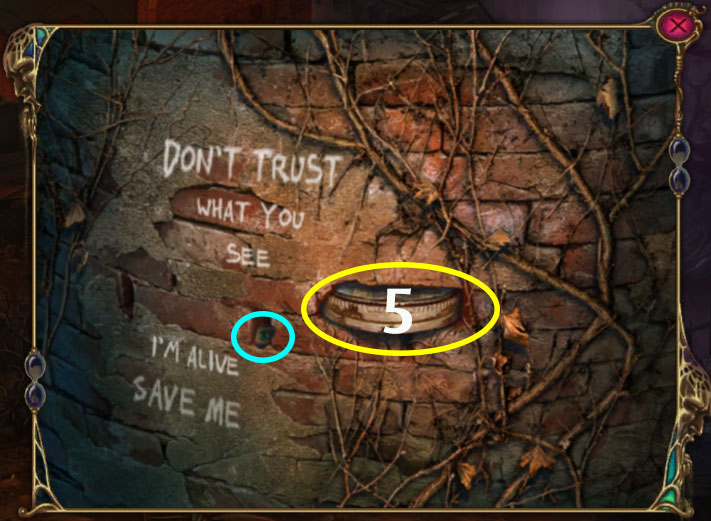
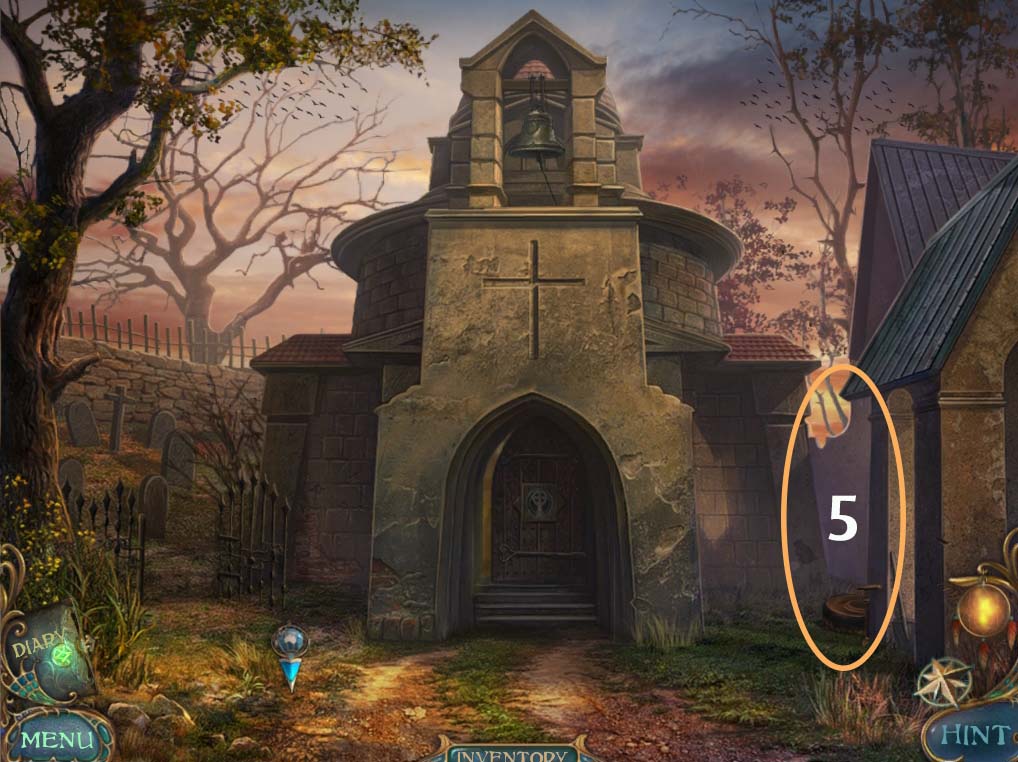
- Eliminate the BEHOLDER circled in blue above (2 of 3) (4 of 110)
- 5. GRAB the MEDALLION circled in yellow above (2 of 4) and exit
- 6. Investigate the HEADSTONE (circled in red in the entrance image on top)
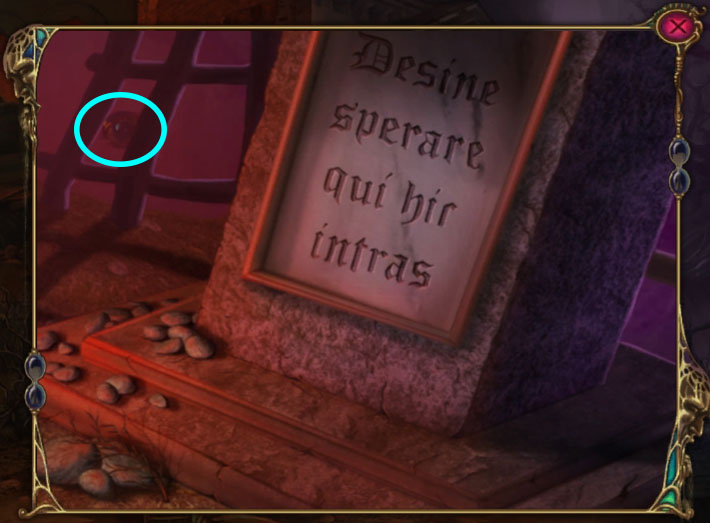
- Eliminate the BEHOLDER circled in blue above (3 of 3) (5 of 110) and exit
- 7. Investigate the ROCK PILE (circled in yellow in the entrance image on top)
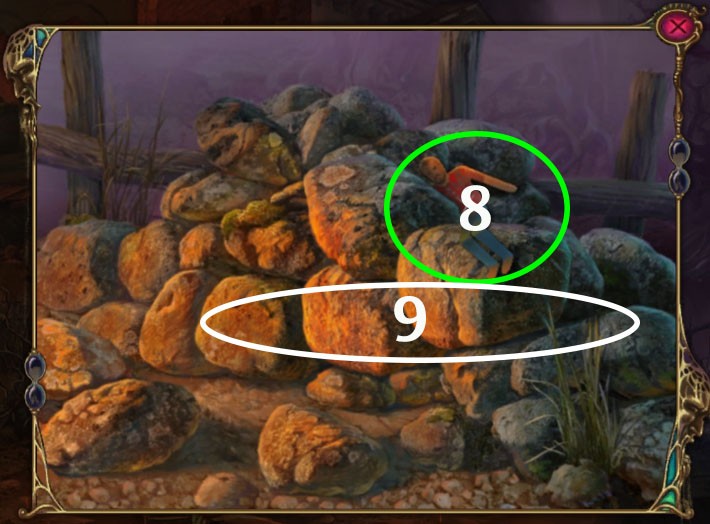
- 8. Grab the PAPER FATHER for your inventory (circled in green above)
- 9. Remove three rocks (circled in white above) to reveal a SIEVE. Take it for your inventory and exit.
- 10. Return to the Dreamscape and investigate the CLOWN FACE (circled in yellow on topmost image).
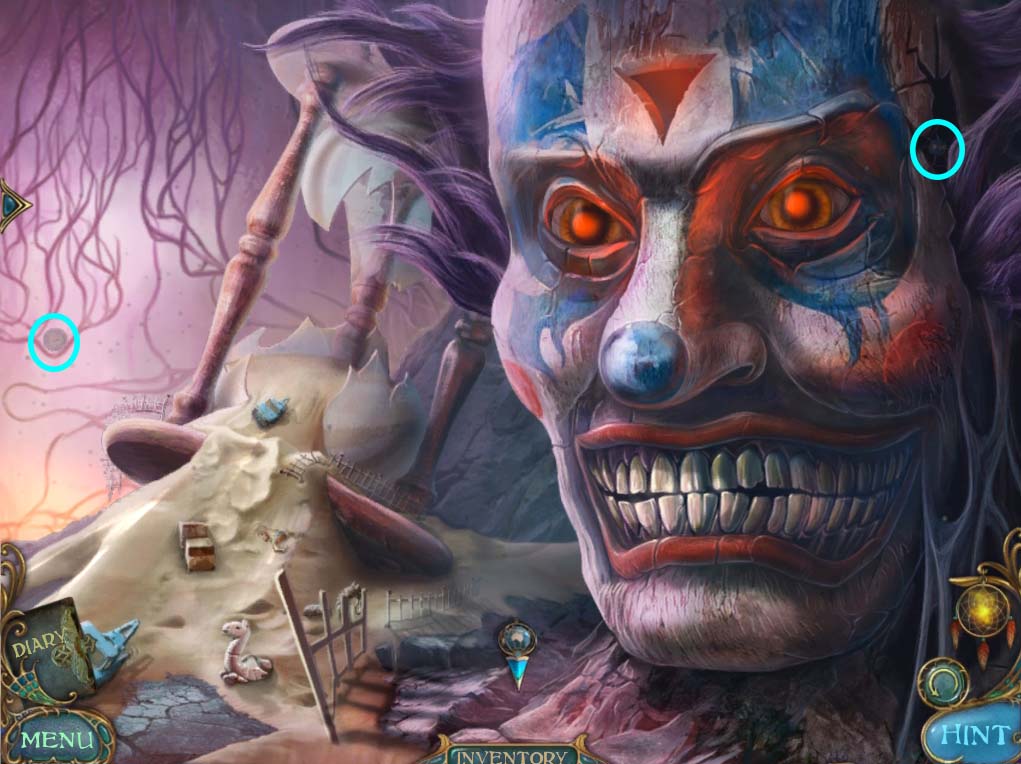
- Try to ignore the creepy clown for now and eliminate the BEHOLDERS circled in blue (2 of 2) / (7 of 110)
- 11. Investigate the SAND PATCH
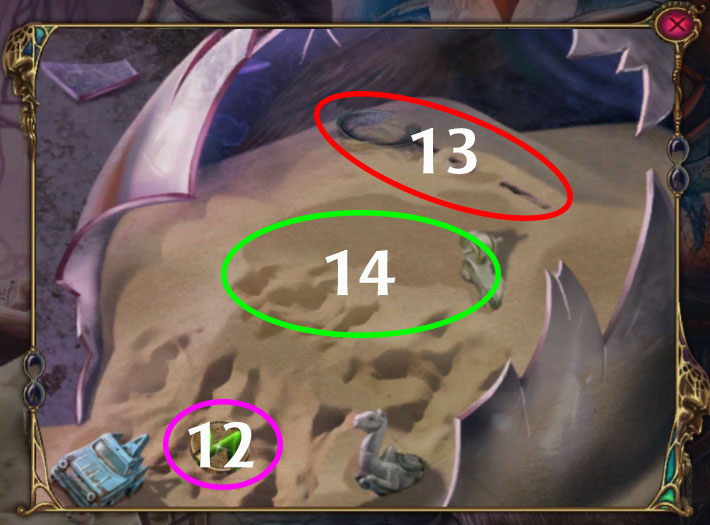
- 12. Take the CIRCUITRY (1 of 3) for your inventory (circled in violet above)
- 13. Take the BUTTERFLY NET (circled in red above) as well
- 14. Use the SIEVE from your inventory in this area to reveal a MEDALLION (3 of 4). Once you have all the items here, you’ll automatically exit the area.
- 15. Return to the Dreamscape and investigate the ELEVATOR (circled in white on the dreamscape image on top)
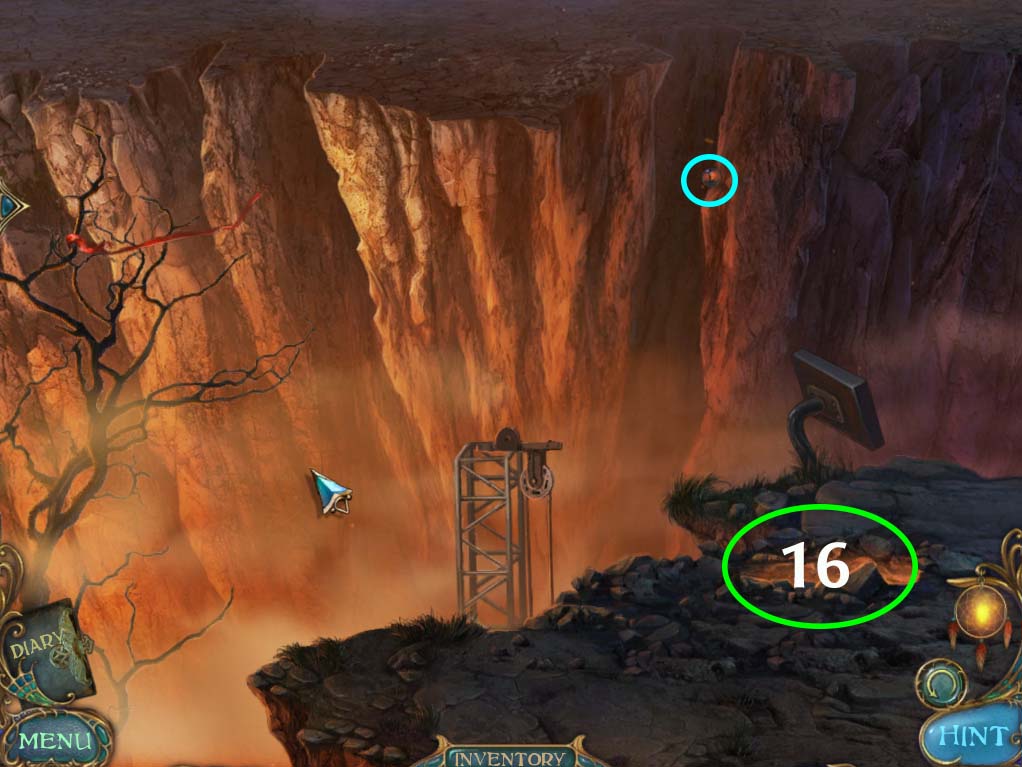
- Eliminate the BEHOLDER circled in blue above (1 of 2) / (8 of 110)
- 16. Investigate the LAVA HOLE circled in green above.
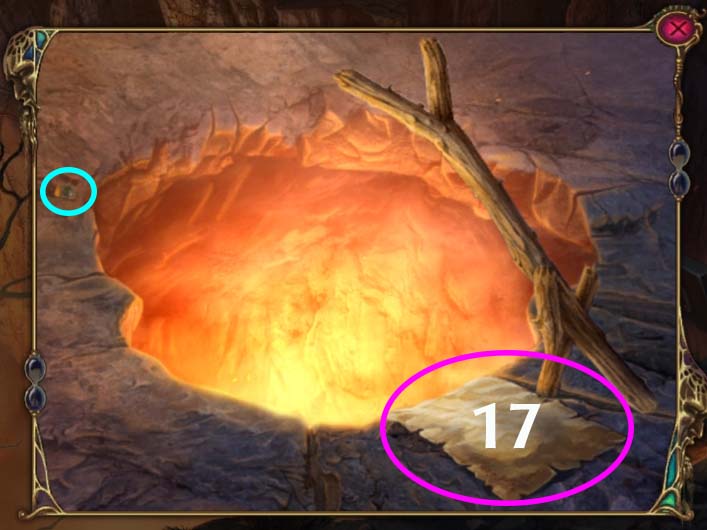
- Eliminate the BEHOLDER circled in blue above (2 of 2) / (9 of 110)
- 17. Grab the DIARY PAGES (circled in violet above) to reveal a MEDALLION (4 of 4) underneath. You are done with this area for now. Return to the CHURCH ENTRANCE.
- 18. Investigate the CHURCH GATE and use the MEDALLIONS from you inventory to start the CHURCH GATE PUZZLE.
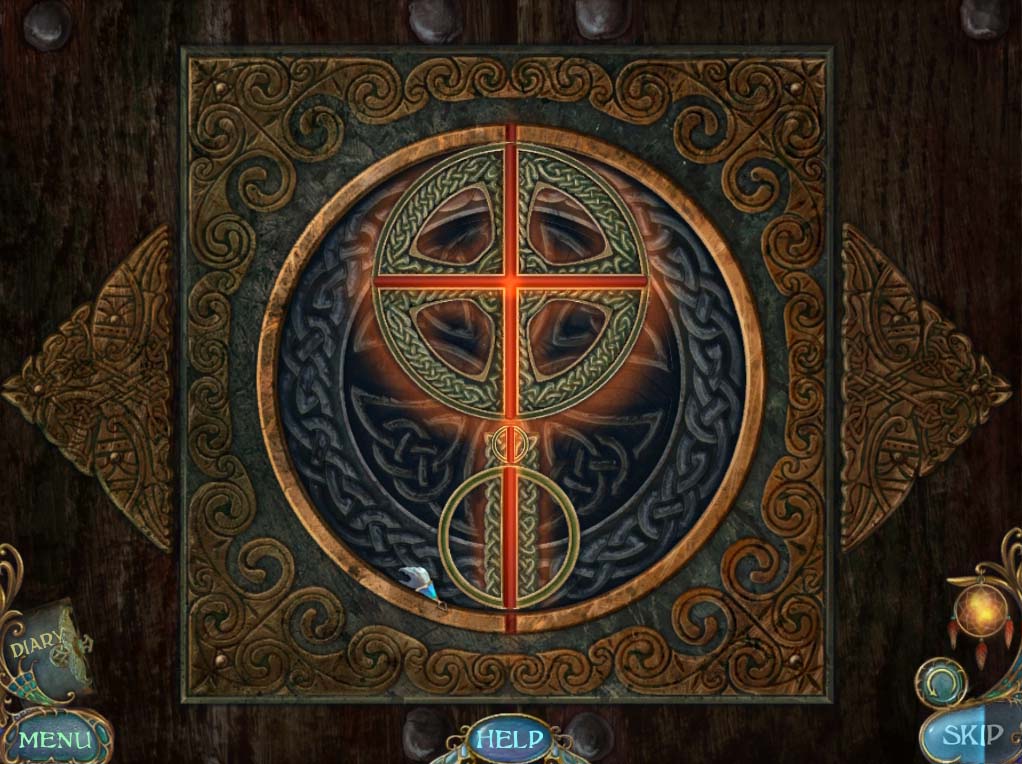
CHURCH DOOR PUZZLE
- The object of the puzzle is to stop the revolving medallions when they align with the image on the gate. The ring around the medallion will glow and a sound will play if you get the pattern correctly. The more of the revolving medallions that you get correct the faster the remaining medallions spin. The finishd image is shown below:
- Once the puzzle is solved, the gates open and clicking on them starts a cutscene.
Part II: Entombed
- You enter the church courtyard just in time to witness a horrible event. The mysterious stranger has buried Laura alive inside a stone tomb and has left her to die! The tomb is too heavy to open on your own so you’ll need several items to help you rescue poor Laura.
- First things first, eliminate the BEHOLDER in the COURTYARD (circled in blue) (1of 1) / (10 of 110)
- 1. Investigate the POSTER on the wall (circled in green)
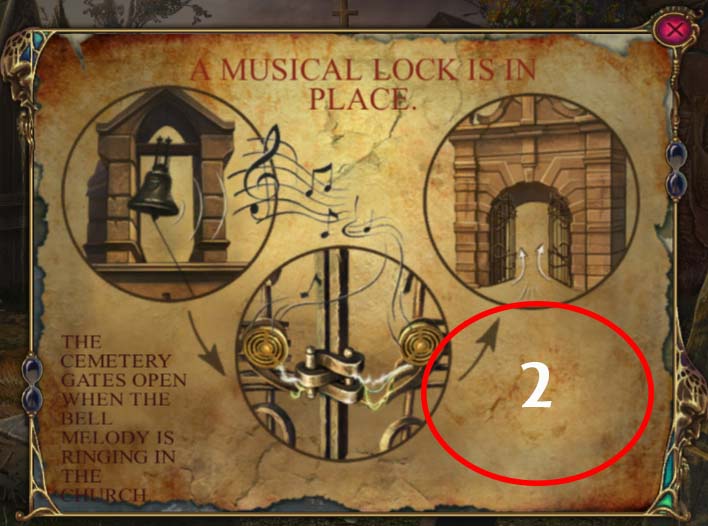
- 2. The POSTER shows you the way to open the gate on the back of the courtyard. Click on the area circled in red to reveal a RING (1 of 2) which you will be able to use later. Exit the POSTER.
- 3. Investigate the GARAGE DOOR (circled in yellow on courtyard image above).
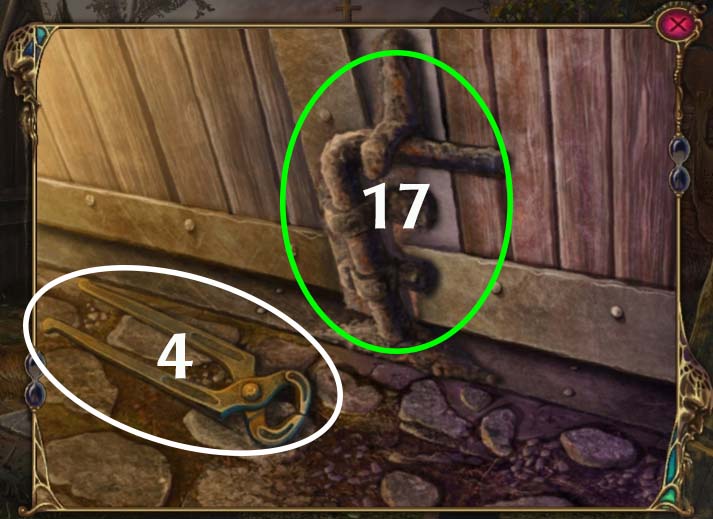
- 4. Grab the CUTTERS and exit.
- 5. Head to the CHURCH FRONT YARD (arrow on the COURTYARD map)
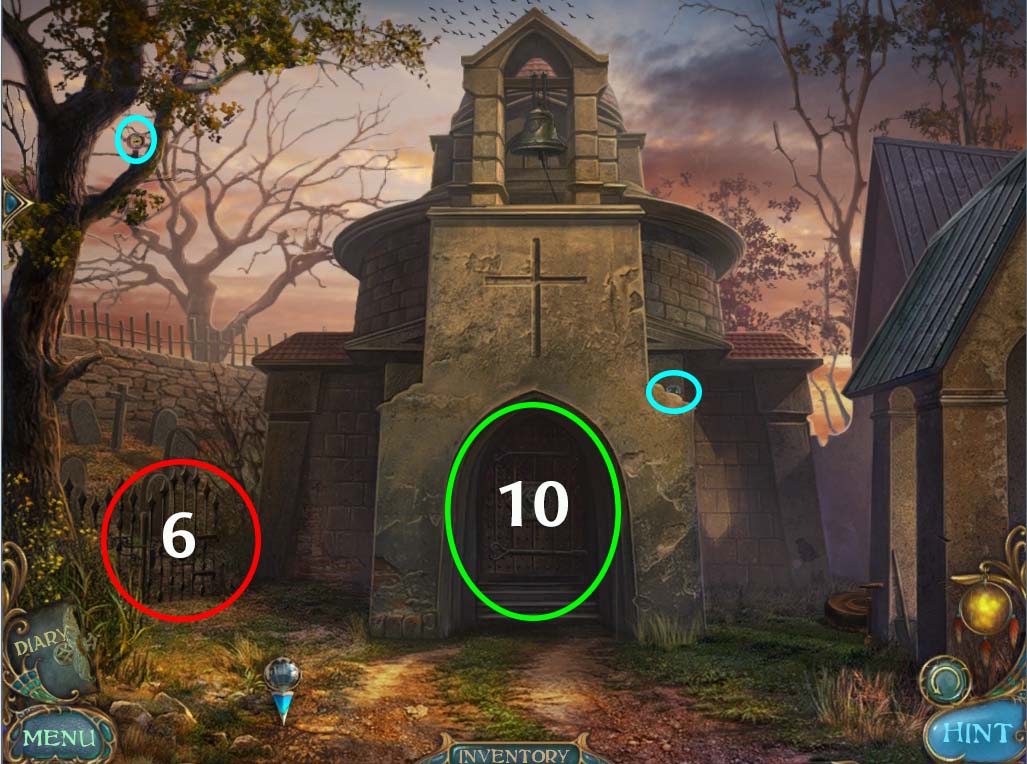
- Eliminate the BEHOLDERS circled in blue (2 of 2) / (12 of 110)
- 6. Investigate the CHURCH BACKYARD GATE
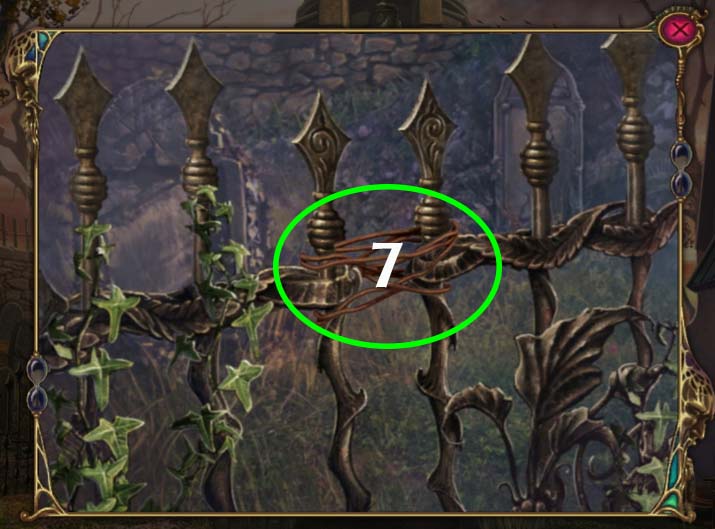
- 7. Use the CUTTERS that you found on the wires on the gate and enter the CHURCH BACKYARD
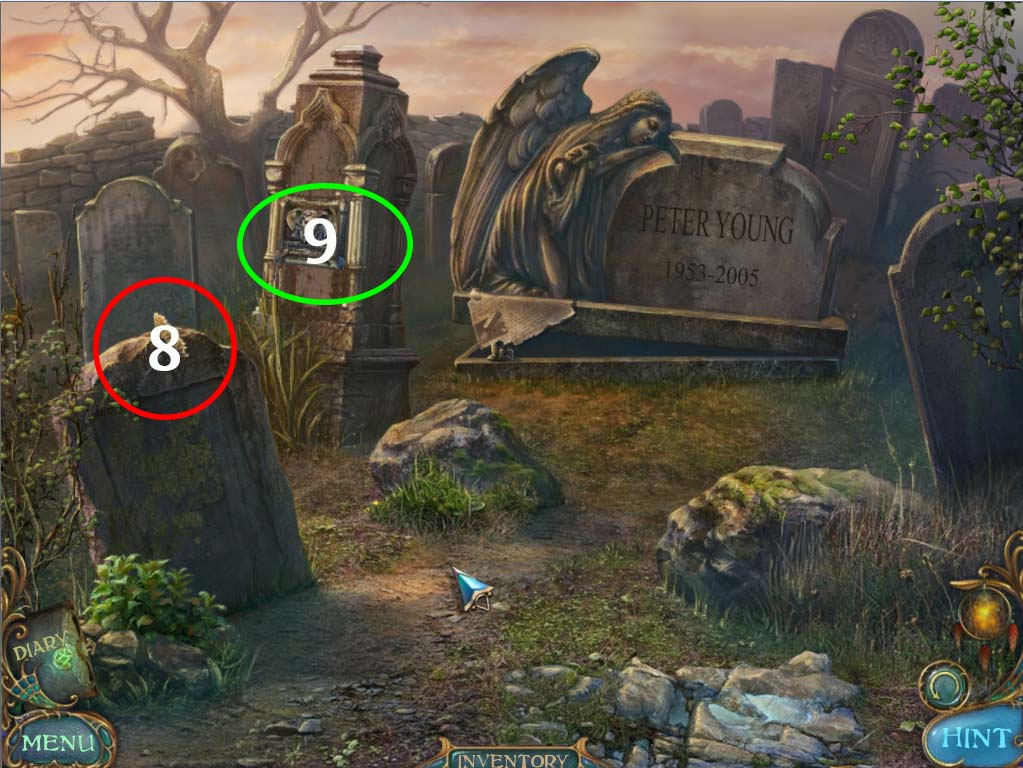
- 8. Investigate the TOMBSTONE which is circled in red above and grab the ORNAMENT (1 of 2) that is wedged on the top.
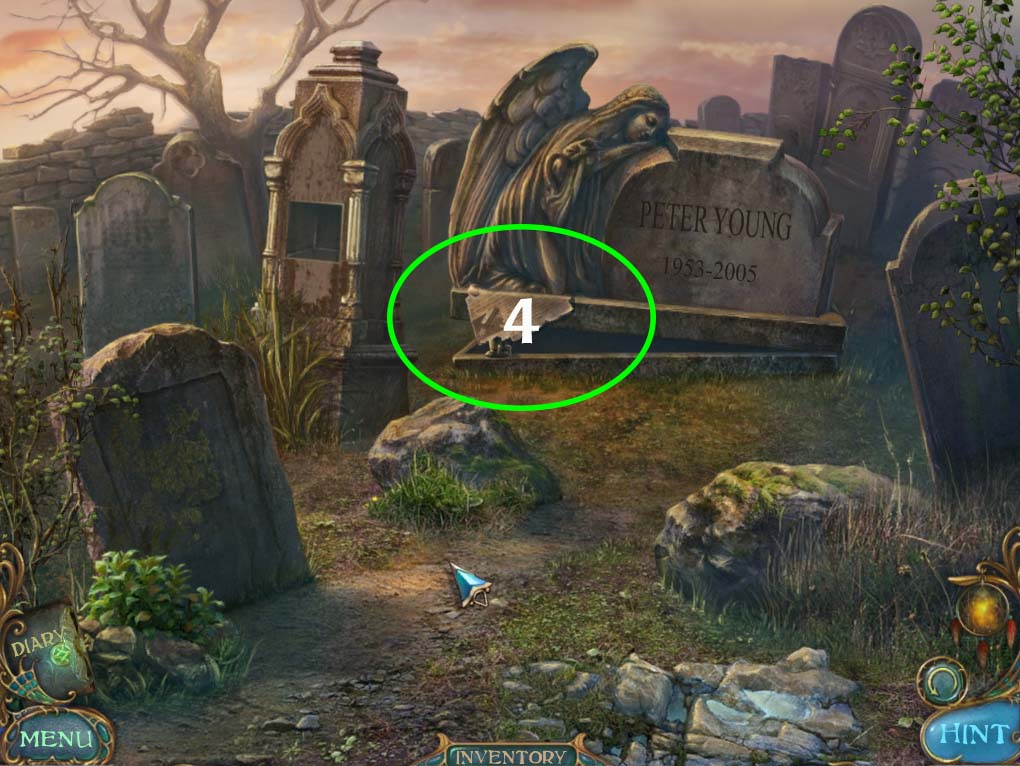
- 9. Investigate the TOMBSTONE which is circled in green above to activate the TOMBSTONE PUZLE
TOMBSTONE PUZZLE
- The object of this puzzle is to arrange the jumbled images so that they create a single whole image. This is a rather simple puzzle and there are several solutions to it as there are multiple images you can form. Once you make a single image the panel drops down to reveal a sleeping gremlin. Click on it to wake it up (and earn an achievement) and reveal a RING (2 of 2). Take it and go back to the CHURCH FRONT YARD.
- 10. Investigate the CHURCH DOORS (circled in green on CHURCH FRONT YARD image above) and use the RINGS on your inventory to activate the CHURCH DOOR PUZZLE
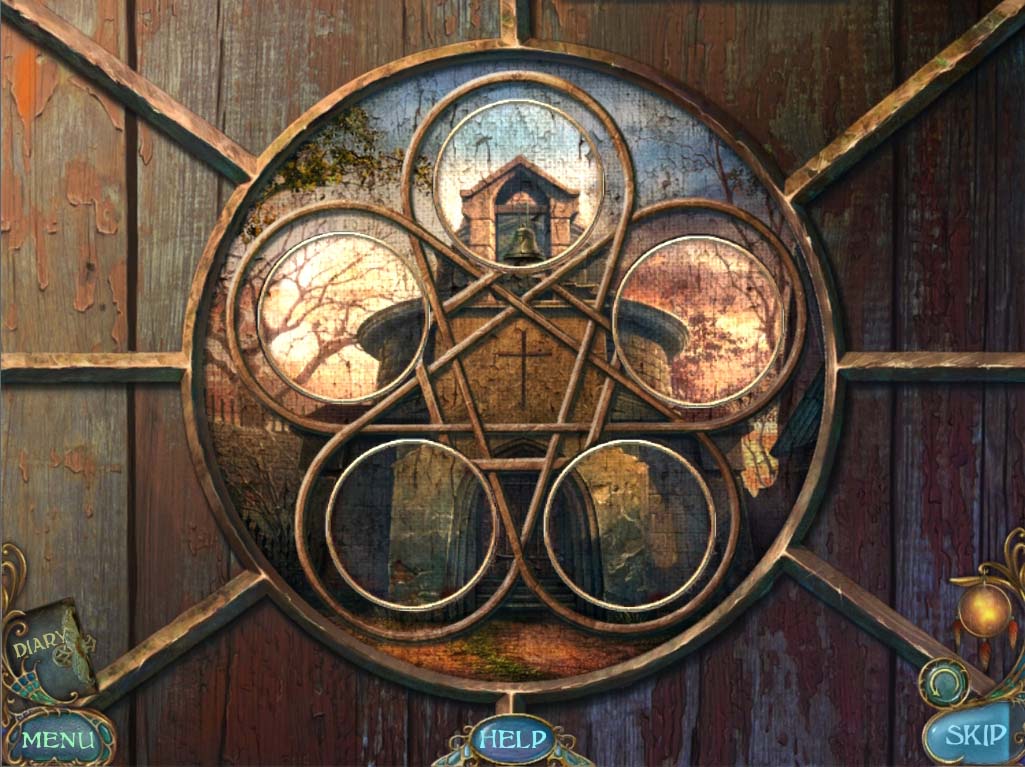
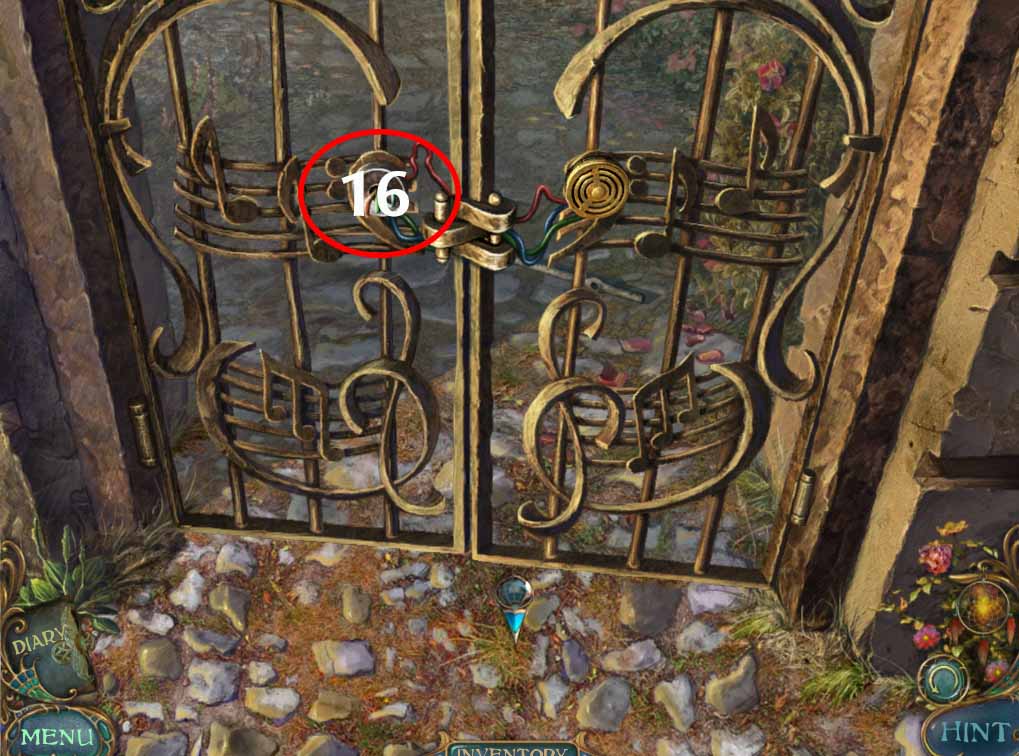
CHURCH DOOR PUZZLE
- The object of the puzzle is to arrange the rings until they form an image similar to the one below. Just click, hold and drag either left or right to move the rings into place.
- Once they are arranged properly, the door will open. Head inside.
- Before you do anything, eliminate the BEHOLDER circled in blue above (1 of 1) / (13 of 110)
- 11. Grab the RUST REMOVER for your inventory (circled in red above)
- 12. Investigate the CARILLON (circled in green above) and grab the GARDEN SHEARS. Exit to the COURTYARD area.
- 13. Investigate the GARDEN GATE (circled in red in the COURTYARD image above) and use the GARDEN SHEARS to clear of the overgrown rose bushes.
- Once you’ve cleared off the garden gate, BENNY THE GREMLIN appears once again. Look closer and you’ll see that it’s holding the 2nd half of the ORNAMENT in its hands. Click him and he’ll scamper away, leaving the ORNAMENT (2 of 2) behind.
- Head back to the CHURCH INTERIOR.
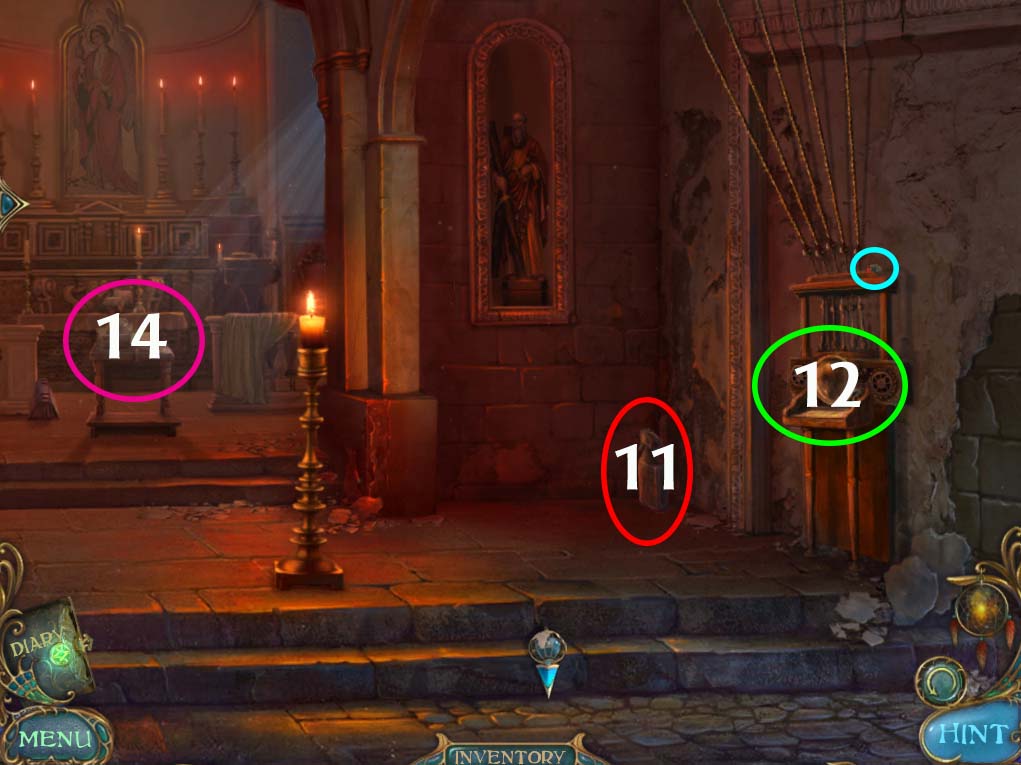
- 14. Investigate the BIBLE (circled in violet on the CHURCH INTERIOR image above)
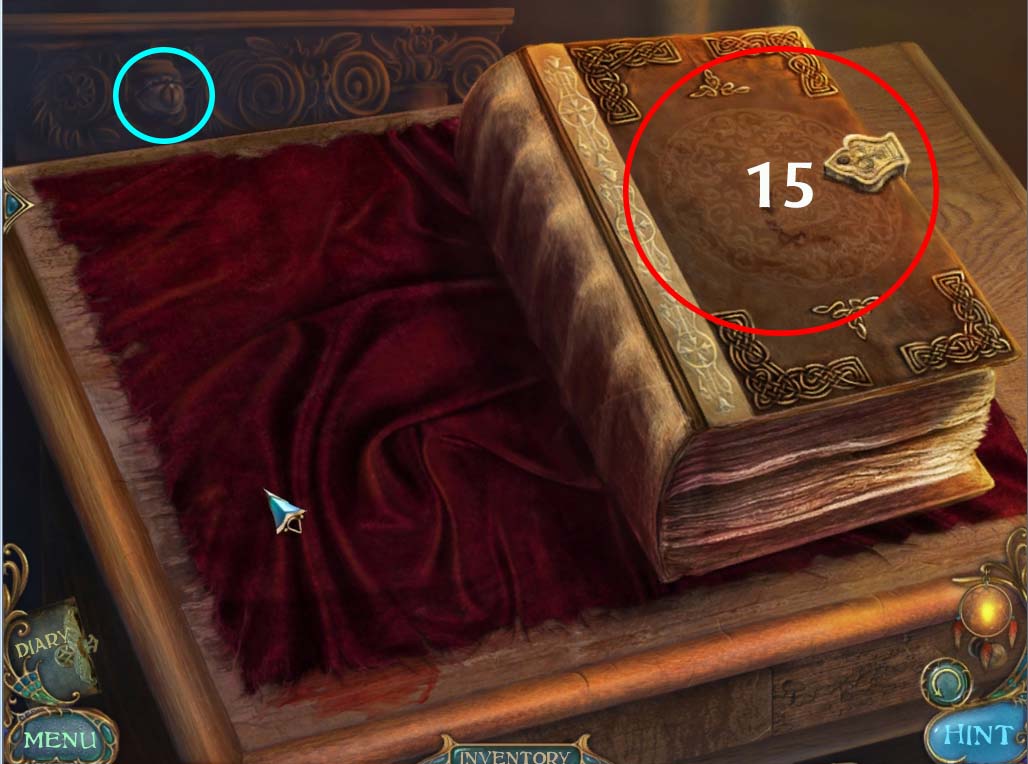
- Eliminate the BEHOLDER circled in blue (1 of 1) / (14 of 110)
- 15. Use the ORNAMENT from your inventory on the BIBLE (circled in red above). Doing this will reveal a CARILLON KEY. Take it to automatically go back to the CHURCH INTERIOR area.
- Examine the CARILLION again (circled in green on CHURCH INTERIOR image above) and use the CARILLON KEY. This will automatically start the CARILLON PUZZLE
CARILLON PUZZLE
- The object of this puzzle is to click the specific colored key according to the color that is shown in the circle above the keys, for example, in the image below, the image shown is blue, and therefore you must click the blue key. If you miss a color, you’ll have to start from the beginning.
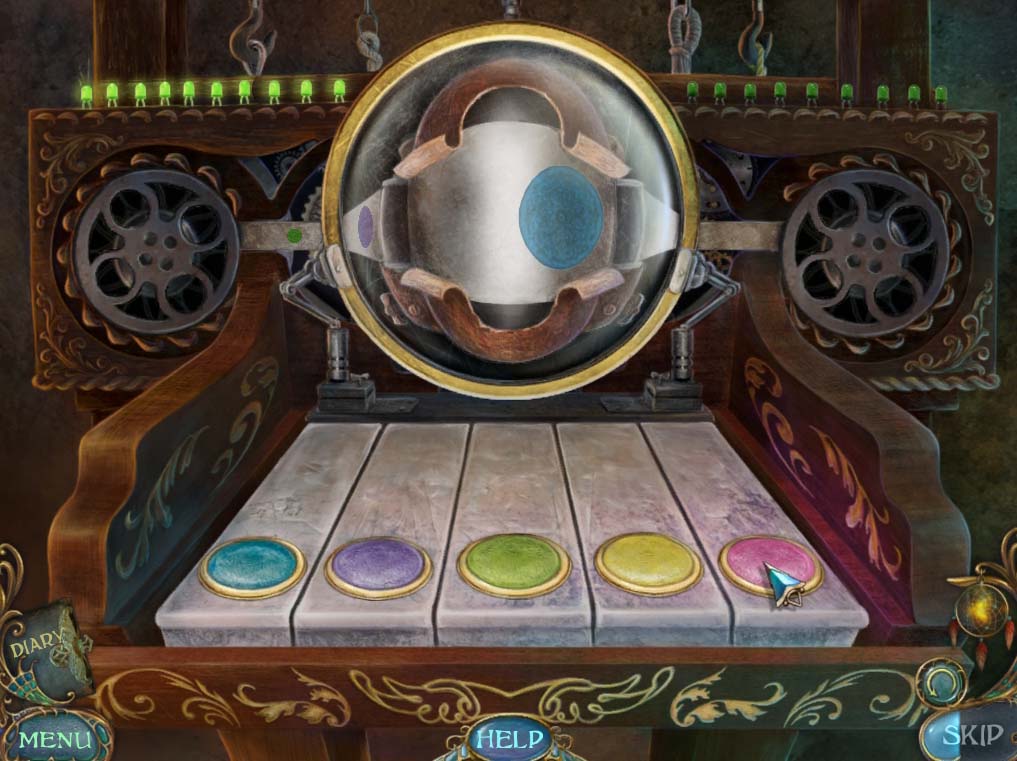
- The patterns for the colors are enumerated below:
- Blue-Violet-Green-Yellow Blue-Blue-Violet-Green Pink-Pink-Blue-Violet Green-Yellow-Violet-Violet Blue-Pink-Green
- Once the puzzle is solved, a MICROPHONE drops to the ground. Pick it up and head back to the COURTYARD. Once there, investigate the GARDEN GATE (circled in red in COURTYARD image above).
- 16. Use the MICROPHONE that you found on the area circled in red above. This will trigger a short cutscene and cause the gate to open. Behind the gate you will find a WRENCH. Take it and head to the GARAGE DOOR (circled in yellow in COURTYARD image above)
- 17. Use the RUST REMOVER on the RUSTED BOLT (circled in green on the GARAGE DOOR image above) and it will cause the doors to open.
Part III: Automotive Escape
- Head inside the now open GARAGE and you’ll find a HEARSE. It’s the perfect thing to use to get the stone tomb open and save LAURA! Unfortunately, it seems that it has a flat tire. We’re going to have to fix that.
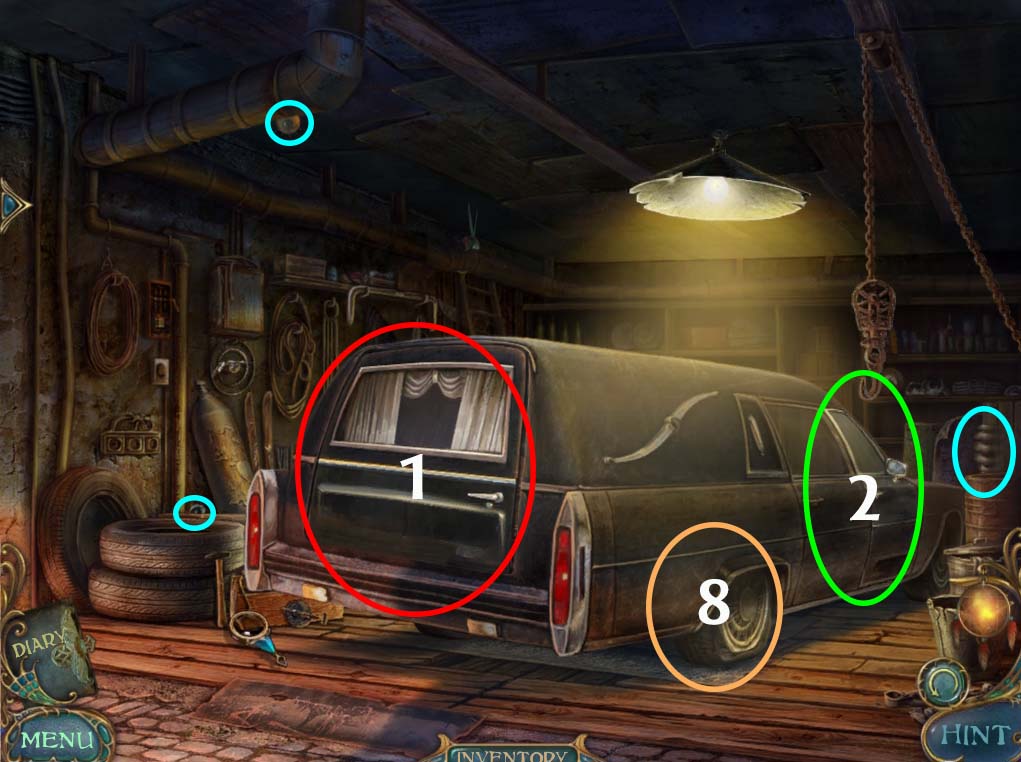
- Before you do anything, eliminate the BEHOLDERS circled in blue (3 of 3) / (17 of 110)
- 1. Open the BACK DOOR (circled in red above) and investigate. Inside you’ll find a coffin. Open it and grab the JACK HANDLE that you find inside.
- 2. Open the FRONT DOOR and head inside.
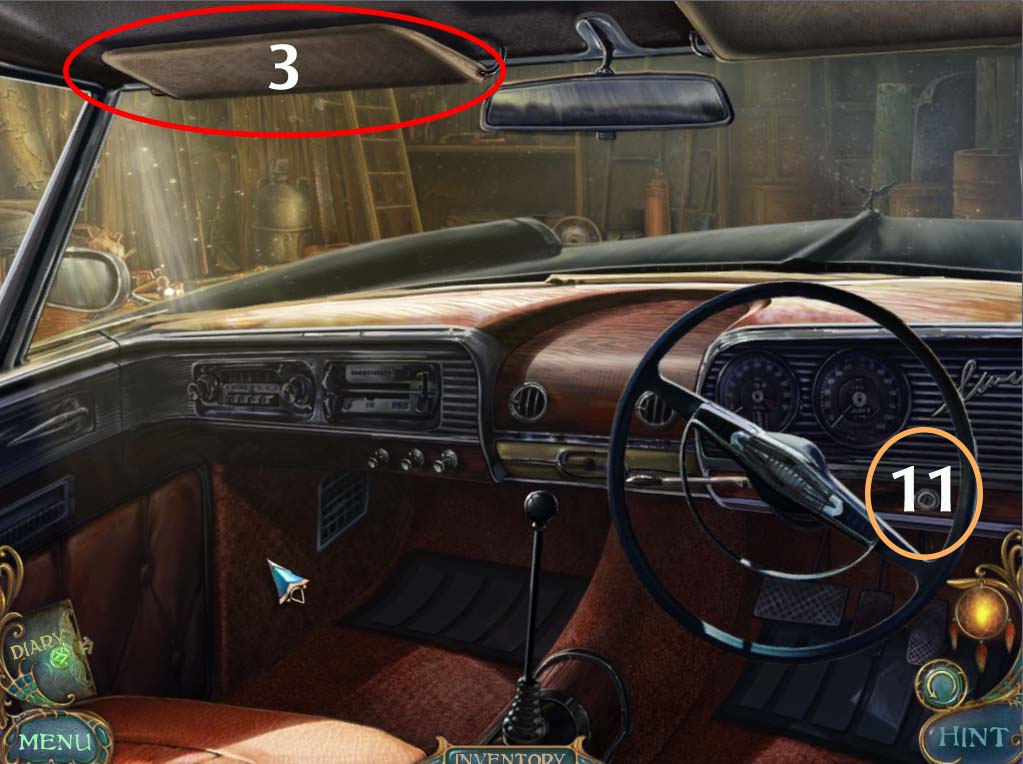
- 3. Pull down the SUN VISOR (circled in red above) and take the PUMP HOSE that is hidden inside. Once you have it, exit and head back to the CHURCH BACK YARD.
- 4. Investigate the TOMBSTONE circled in green above and grab the NEWSPAPER ARTICLE (additional pages for your DIARY). Use the JACK HANDLE on the JACK keeping the TOMBSTONE open and click it. It should release the JACK which you can now pick up for your inventory.
- 5. Return to the CHURCH FRONT YARD and investigate the area circled in orange above.
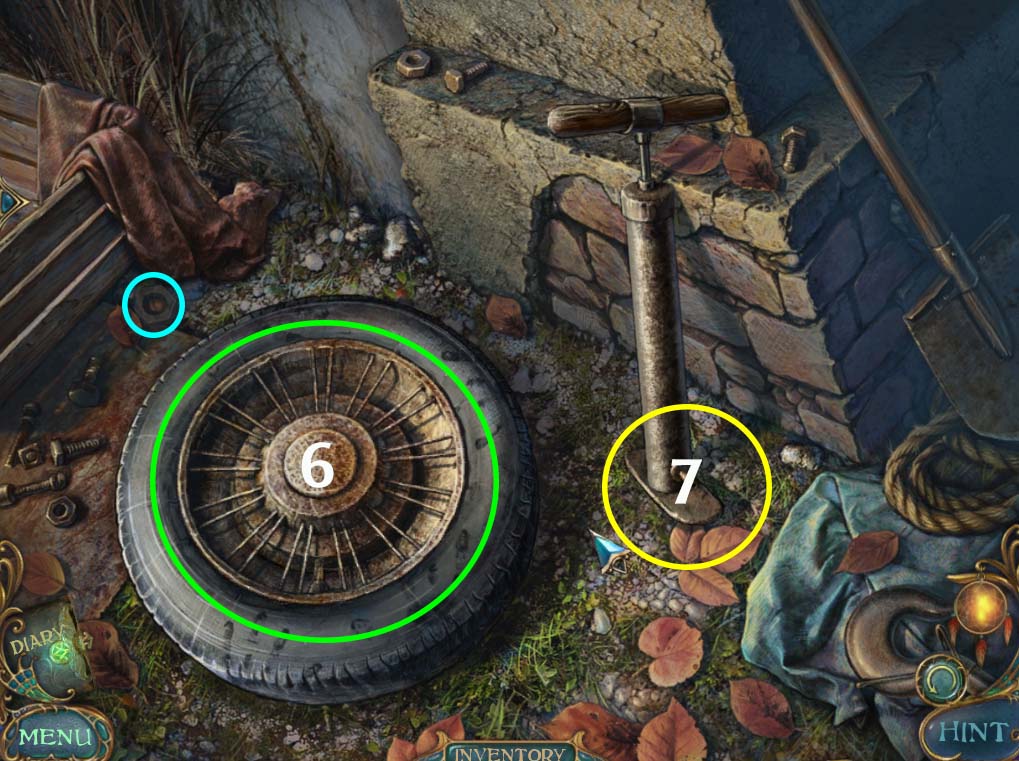
- Eliminate the BEHOLDER circled in blue above (1 of 1) / (18 of 110)
- 6. Take of the TIRE RIM (circled in green above).
- 7. Use the PUMP HOSE on the PUMP (circled in yellow above) and inflate the TIRE. Once you’re done, grab the TIRE for your inventory and head back to the GARAGE.
- 8. Once in the GARAGE, investigate the FLAT TIRE (circled in orange on the GARAGE image above). Use the JACK to prop up the tire, remove the TIRE RIM to reveal the bolts and use the WRENCH to remove the TIRE. You should end up with something similar to the image below.
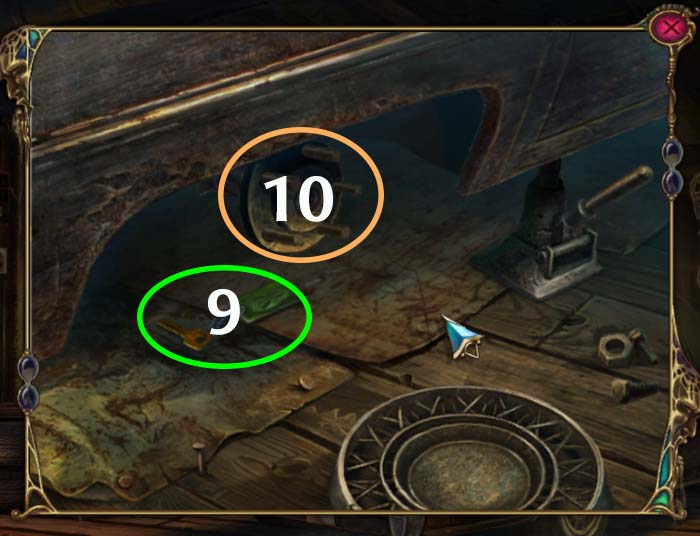
- 9. Grab the CAR KEY (circled in green above) for your inventory.
- 10. Use the TIRE you have in your inventory in the area circled in orange above; remove the JACK then head back into the CAR INTERIOR.
- 11. Use the CAR KEY on the IGNITION (circled in orange in CAR INTERIOR image above). This will cause the HEARSE to back up near the tomb that Laura is trapped in.
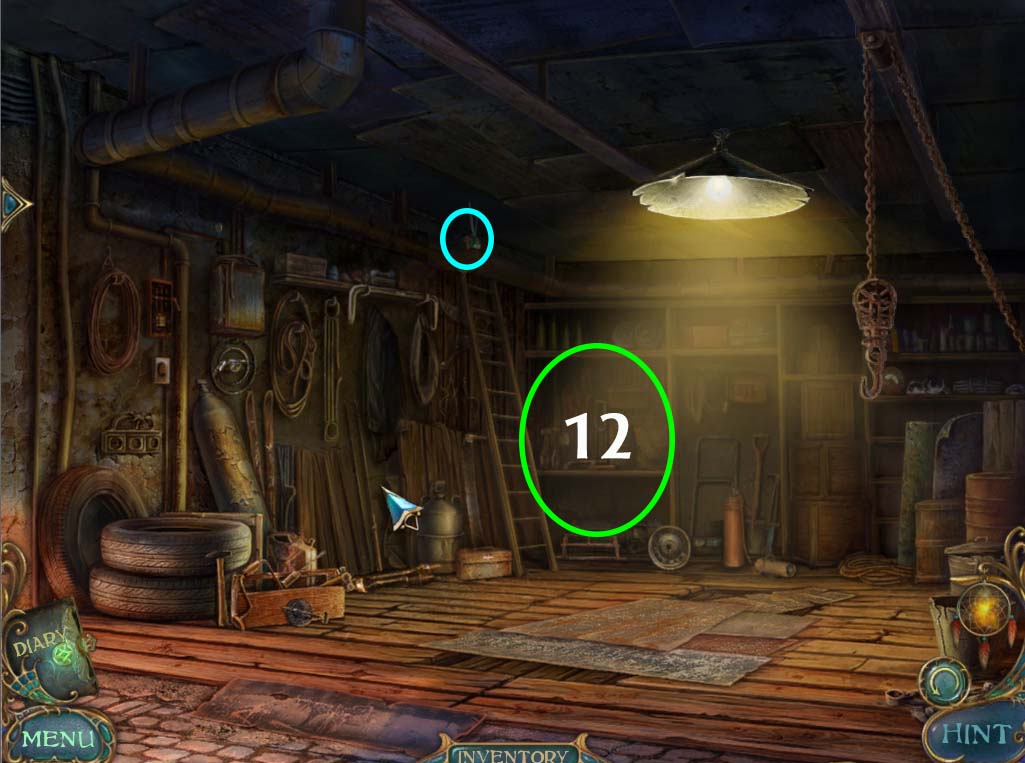
- Eliminate the BEHOLDER hiding in the area circled in blue (4 of 4) / (19 of 110)
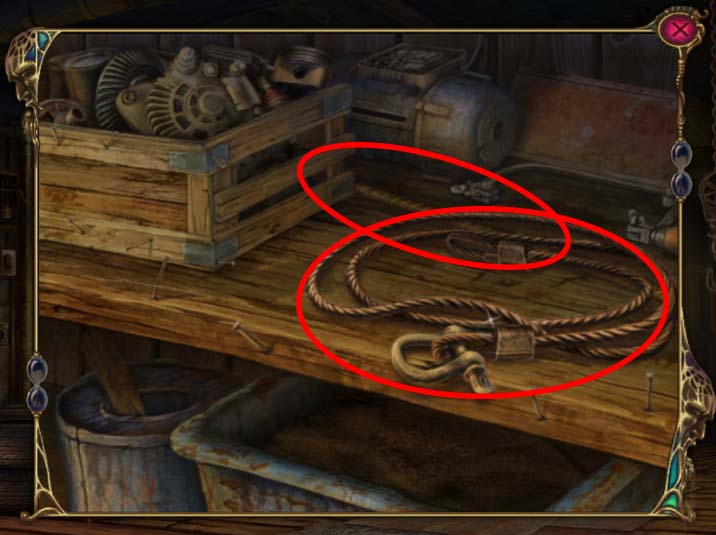
- 12. Investigate the SHELF circled in green above. Grab both the TOW CABLE and the METAL ROD which are circled in red below. Once you have them head back to the COURTYARD.
- Laura’s rescue is near at hand! Now all we need to do is tow the stones out of the way.
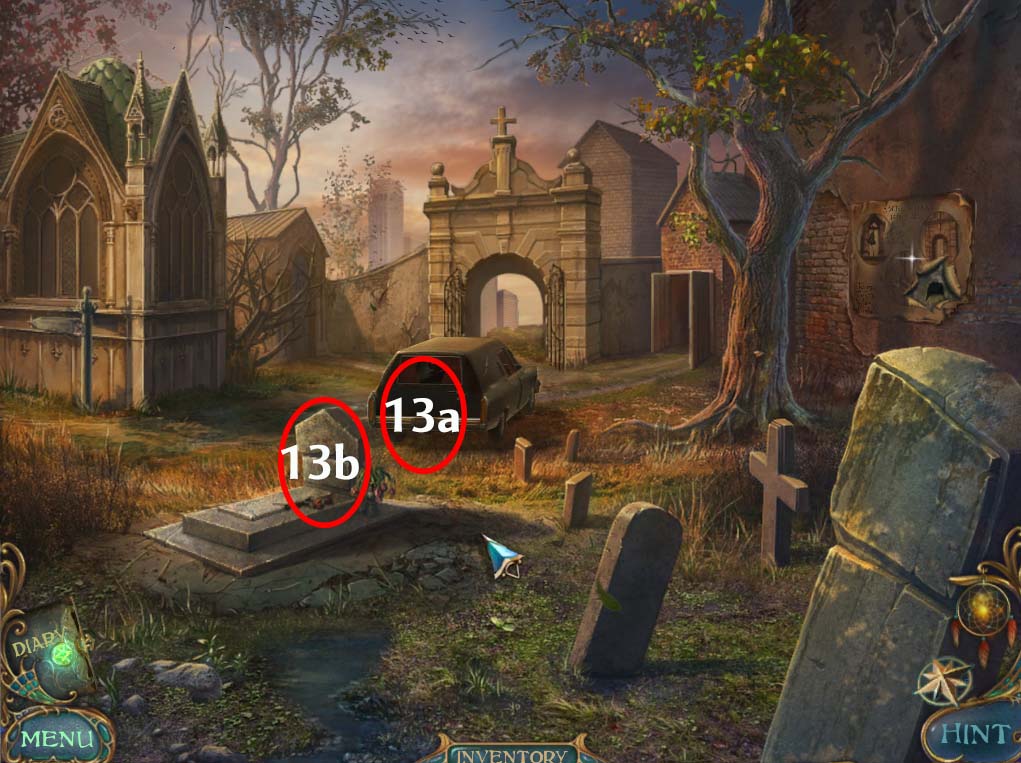
- 13. Attach the TOW CABLE to the back of the HEARSE (13a circled in red above) and secure it to the TOMBSTONE (13b also in red above). This will allow the HEARSE to pull the TOMBSTONE out of its place. Once it’s done, investigate the TOMB.
- You’ll find Laura still struggling to get free. Use the METAL ROD from your inventory to move the STONE TOMB out of its place.
- Once this is done, Laura is set free. But it seems that we’ve only just begun our quest to save her in the real world. From what Laura tells us, she’s only one part of the whole, and that the mysterious stranger, now revealed as one called the SANDMAN is after her for reasons unknown. She also reveals that to stop him, we must reconstruct the dreamcatcher that has been broken into pieces.
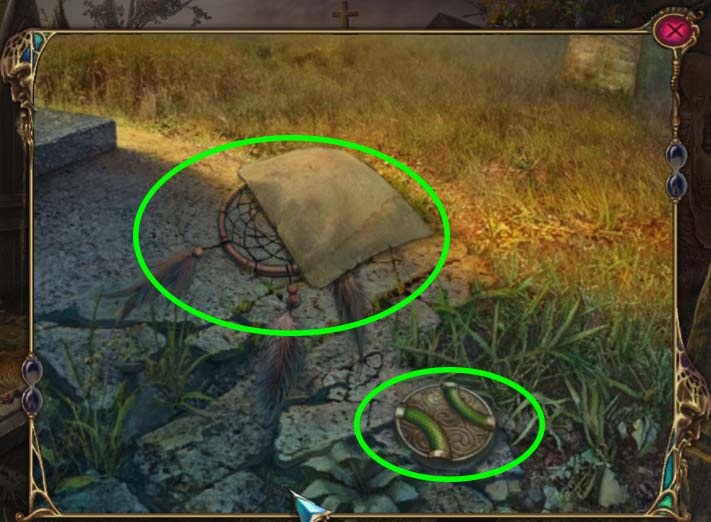
- After her revelation, she thanks you and then disappears, leaving several pages of her DIARY, a piece of CIRCUITRY (2 of 3) and a PIECE OF THE DREAMCATCHER behind (all circled in green below). Take all of these, and you automatically return to the dreamscape, which now shows a remarkable change.
End of Chapter II
General Information & Tips
Chapter One: The Professor’s Laboratory
Chapter Two: The Ruined Church
Chapter Three: The Frozen Lake
Chapter Four: The Family Home
Chapter Five: The Corrupted Forest
Chapter Six: The Abandoned Theme Park
Chapter Seven: The Empty Square
Chapter Eight: The Endless Desert
Chapter Nine: The Ritual
Ask for help in the comments below!
Chapter One: The Professor’s Laboratory
Chapter Two: The Ruined Church
Chapter Three: The Frozen Lake
Chapter Four: The Family Home
Chapter Five: The Corrupted Forest
Chapter Six: The Abandoned Theme Park
Chapter Seven: The Empty Square
Chapter Eight: The Endless Desert
Chapter Nine: The Ritual
Ask for help in the comments below!