
Hidden Expedition: The Crown of Solomon: Chapter One: It Begins
Our Hidden Expedition: The Crown of Solomon Walkthrough will play the part of your faithful companion as you travel the world in search of the scattered pieces of King Solomon's Crown. Trust in our expert guidance, our simple puzzle solutions, and our custom marked screenshots as you race against time to find the crown's fragments before a nefarious criminal gets his hands on it.
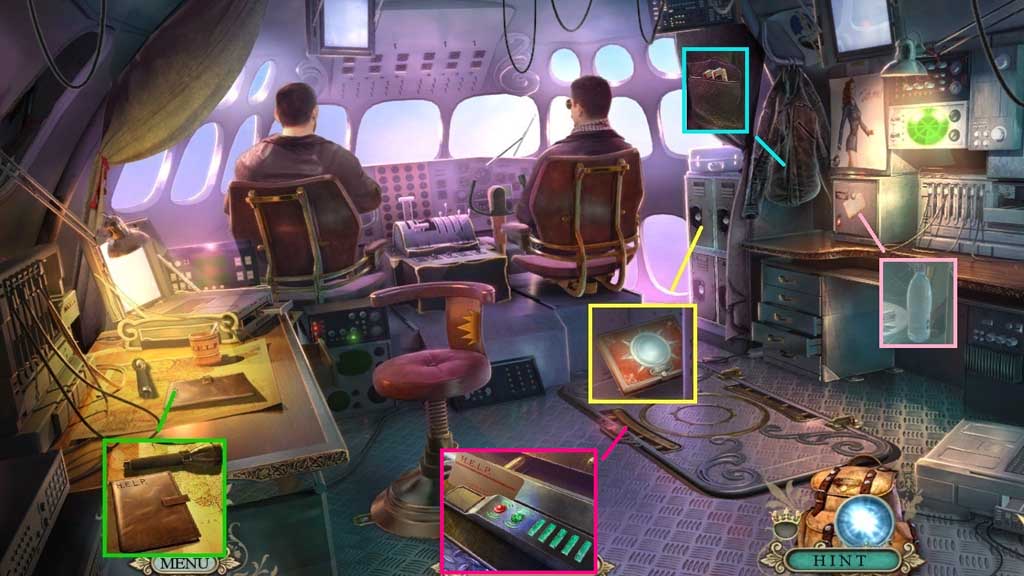
- Speak to the Captain.
- Collect the empty flashlight; click the book 2x’s.
- Click the locker; collect the help box and the access card beneath it.
- Click the pocket; collect the batteries.
- Click the mini fridge; collect the bottle of water and the safety fuse behind it.
- Swipe the cargo access card.
- Enter the Cargo Hold.
- Insert the batteries into the empty flashlight; collect the flashlight and use it to illuminate the scene.
- Click the panel; click and replace the safety fuse.
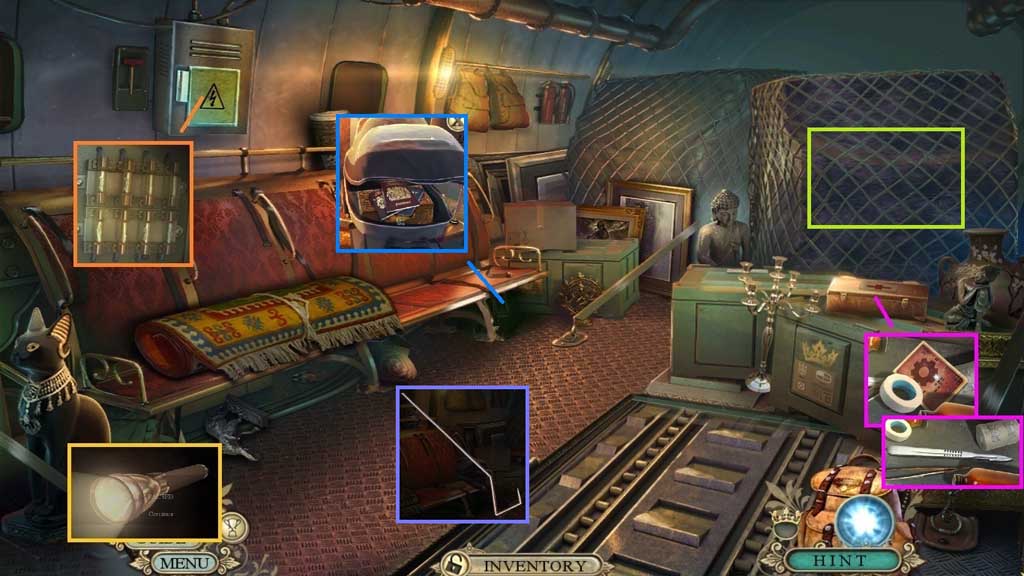
- Click the first aid kit; collect 1 /20 fact cards.
- Click the items aside; collect the scalpel.
- Click the case 2x’s; collect the wire.
- Examine the passport and click the box.
- Click the net.
- Click the wire 3x’s; collect the bent wire.
- Move down once.

- Speak to both men.
- Place the bent wire onto the key when the ball is in the green section and click it once.
- Collect the locker key and insert it into the locker.
- Collect the calling card and 1/ 2 torn notes.
- Move to the Cargo Hold.
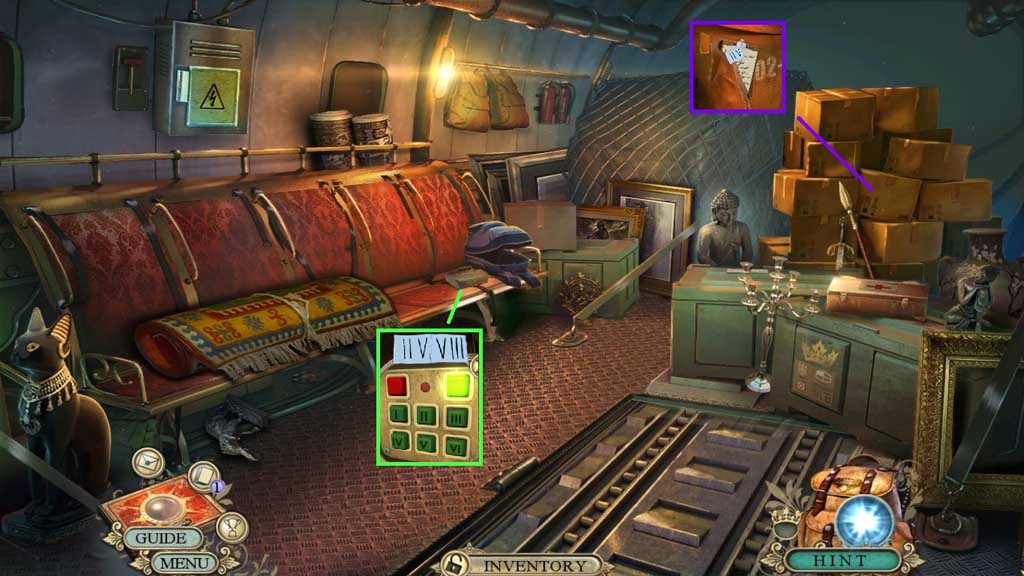
- Select the scalpel to collect 2 /2 torn notes and examine the clipboard.
- Examine the box and place the 2 torn notes onto it.
- Click II – V – V – III.
- Attempt to collect the item in the box.
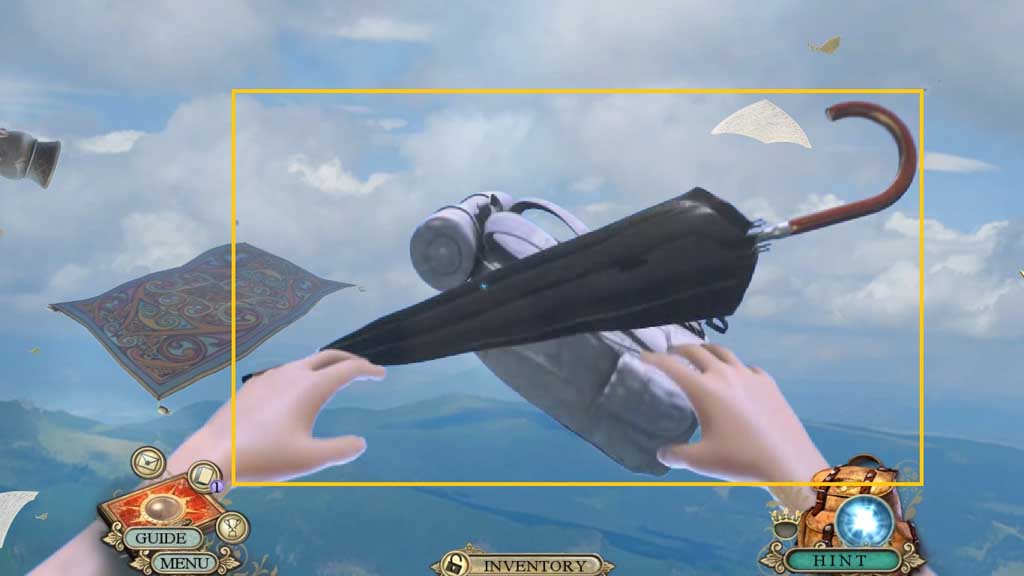
- Click the umbrella 2x’s.
- Click the handle and then the backpack.
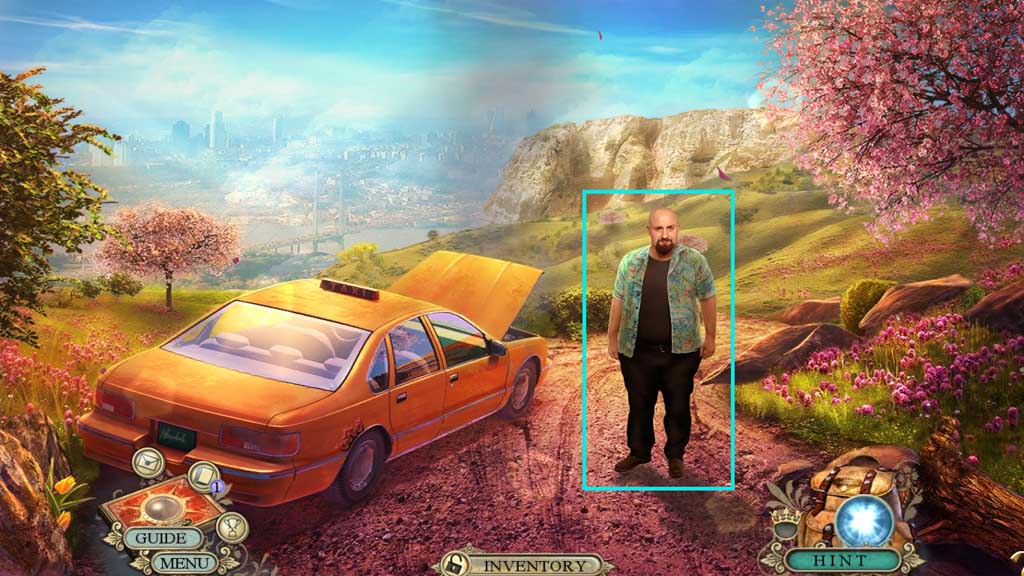
- Give the driver the bottle of water and the calling card.
- Click the hidden objects area.
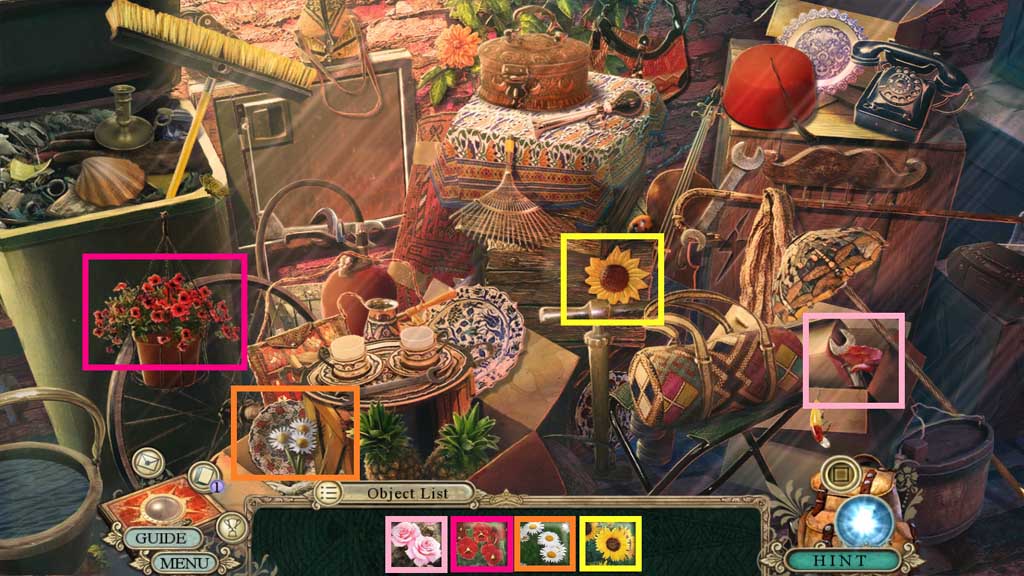
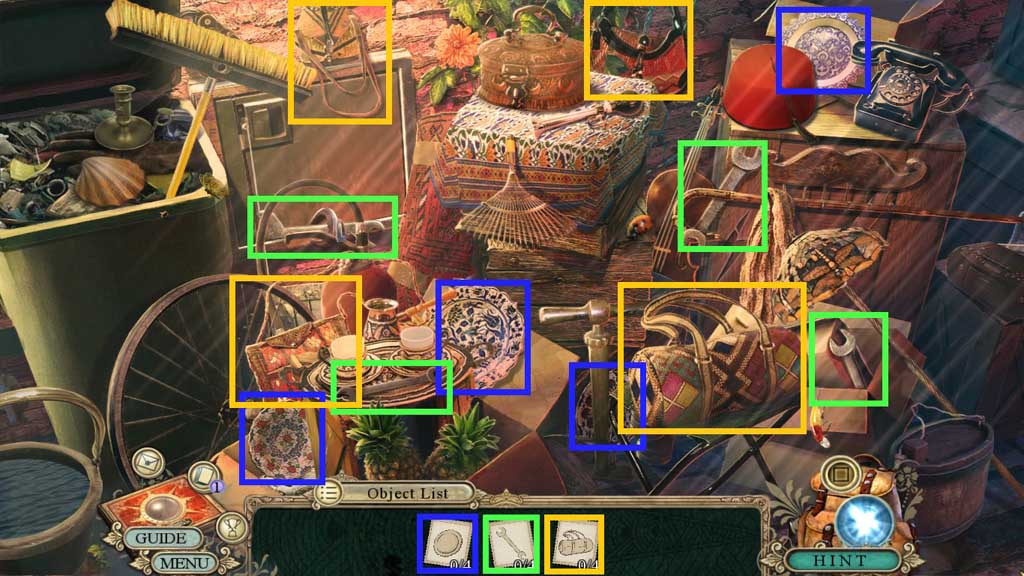
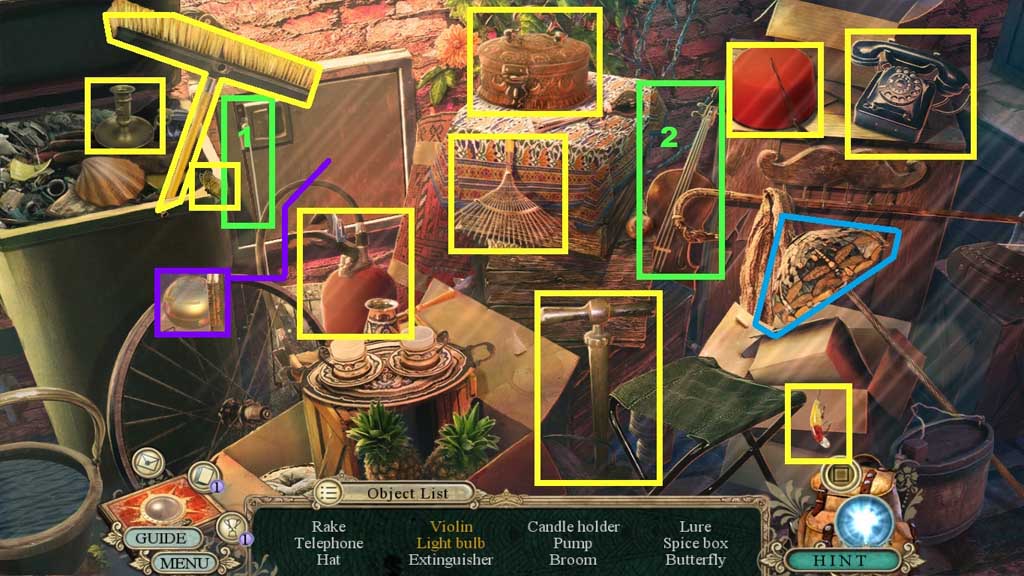
- Find the items.
- Collect the bow and place it with the violin; collect the violin.
- Click the lampshade; collect the light bulb.
- Collect the brass puzzle.
- Click the brass puzzle to trigger a mini game.
- Solve the game by aligning the image correctly.
- Collect the vintage lighter.
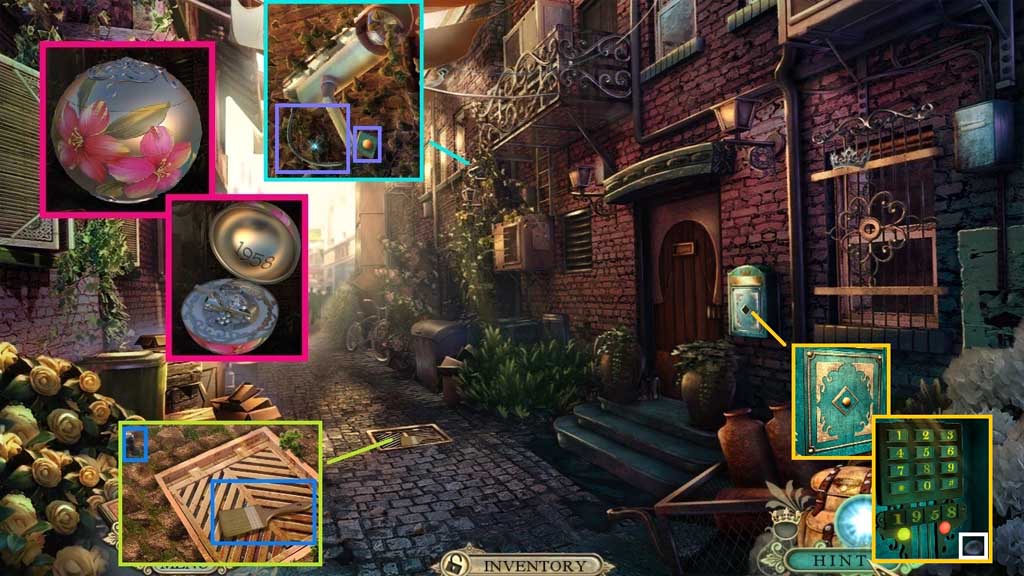
- Collect the pawn and the archeology brush.
- Click the vines; collect the strange key and the cable.
- Insert the strange key; collect 1 /3 glass eyes.
- Enter the code 1958.
- Move into the Bathhouse.
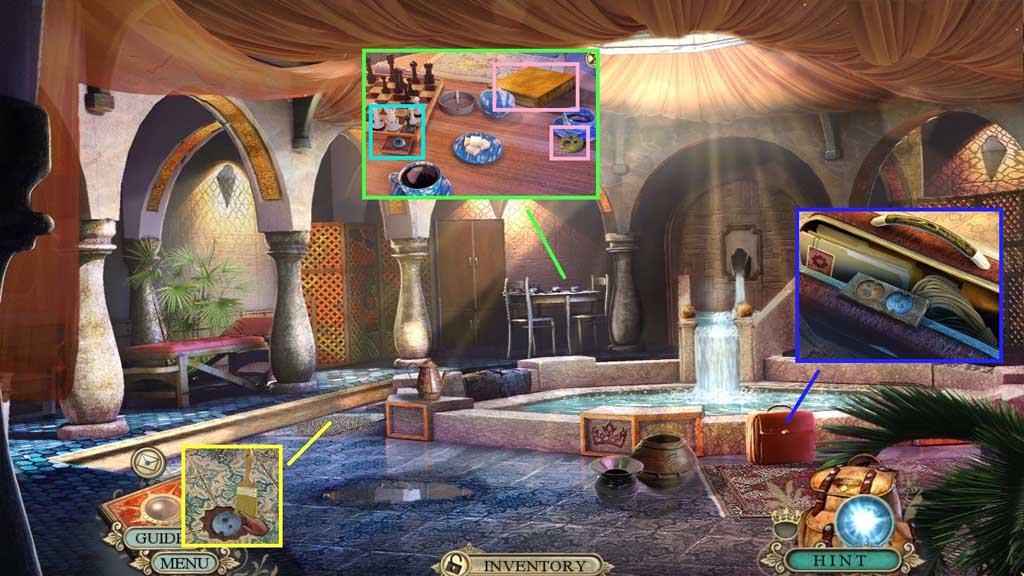
- Select the archeology brush to collect the silver coin.
- Collect the gold coin and the Sultan’s book.
- Place the pawn onto the chess board; collect 2 /3 glass eyes.
- Insert the gold and silver coins; collect the sturdy rope and 2 /20 fact cards.
- Move down once.
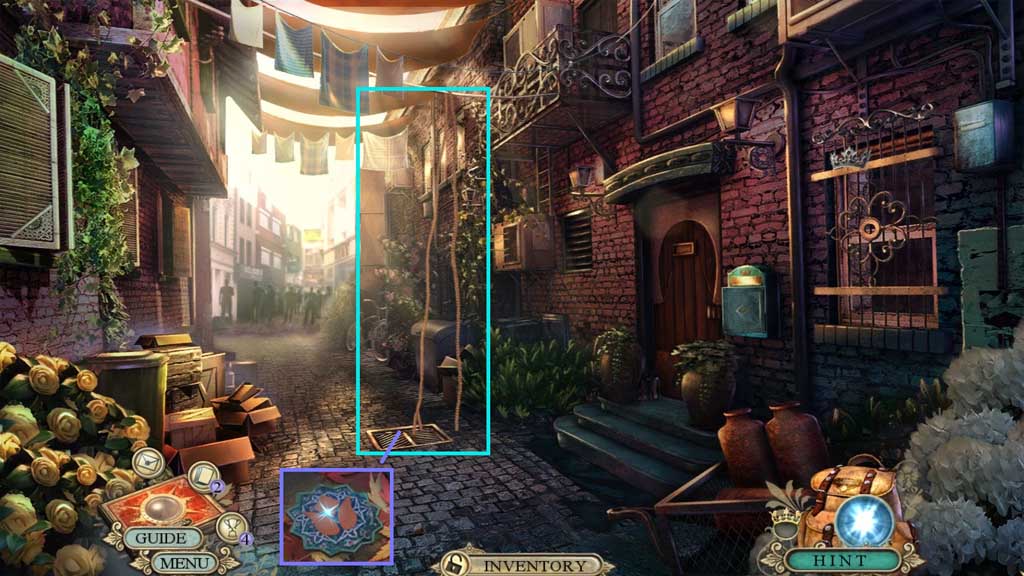
- Place the sturdy rope onto the line and the grate; click it once.
- Collect the tulip tile.
- Move into the Bathhouse.
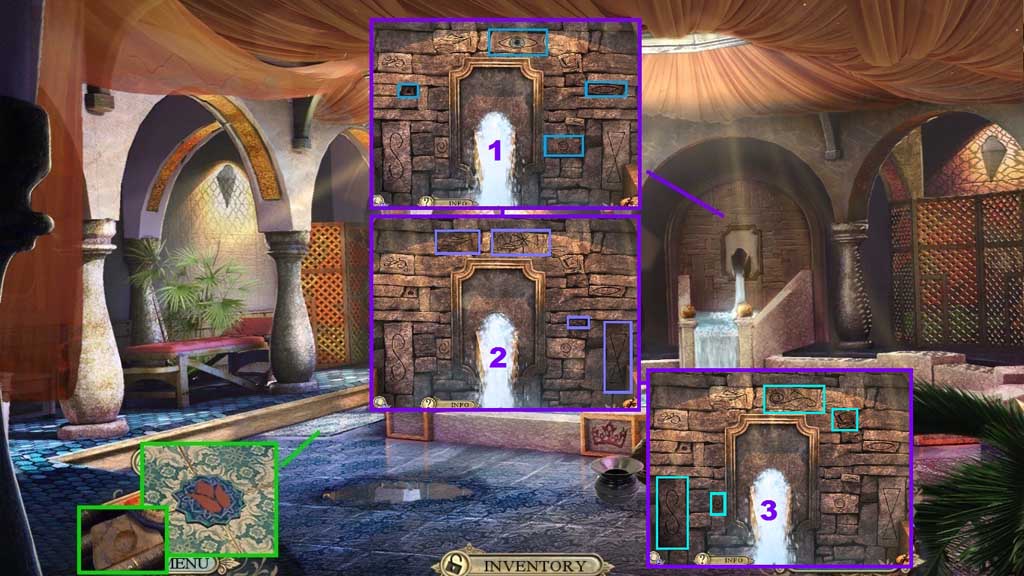
- Insert the tulip tile; collect the rock.
- Insert the rock to trigger a puzzle.
- Solve the puzzle by recreating the images.
- Move to the Safe House.
- Click the chair and zoom into the hand; collect 3 /3 glass eyes.
- Collect 3/20 fact cards.
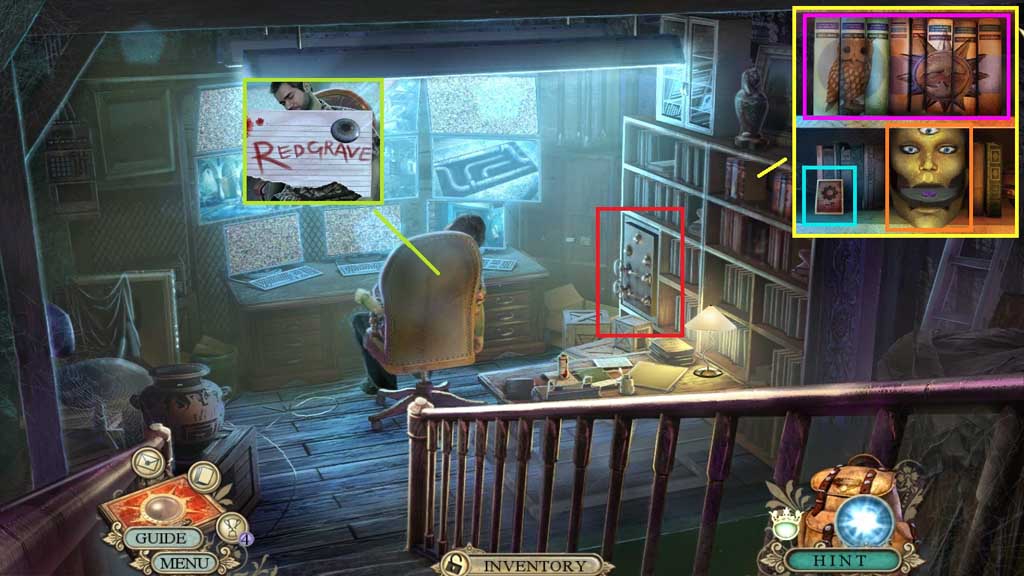
- Place the Sultan’s Book to trigger a puzzle.
- Solve the puzzle by aligning the books to create the image shown.
- Insert the 3 glass eyes and click the button.
- Click the hidden objects area.
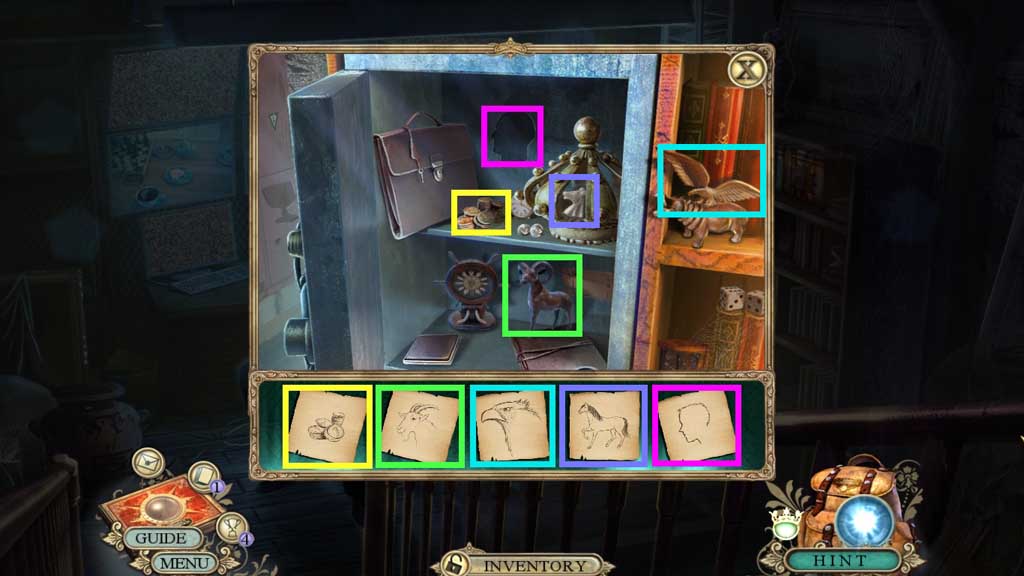
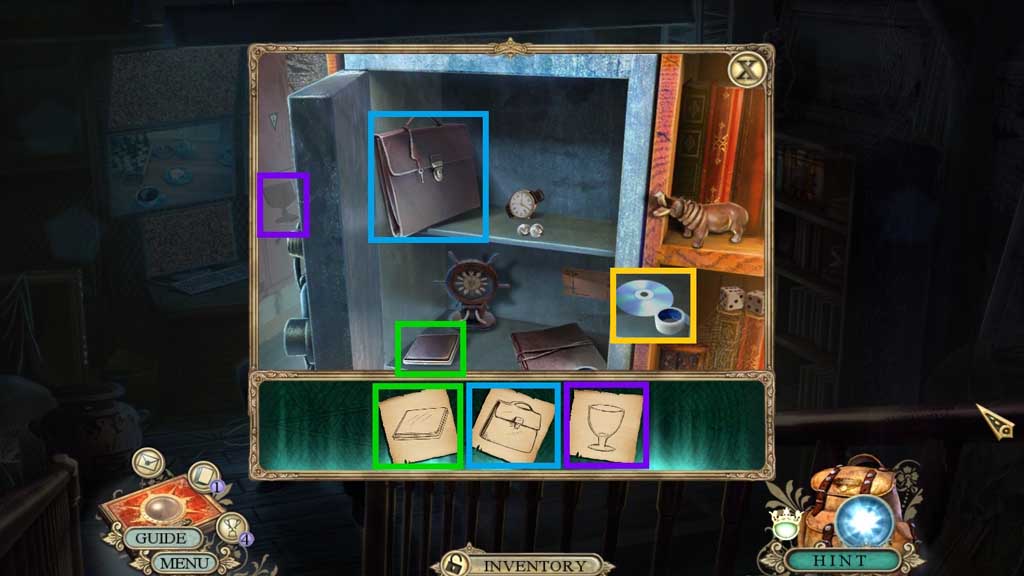
- Find the items.
- Collect the Sultan’s CD.
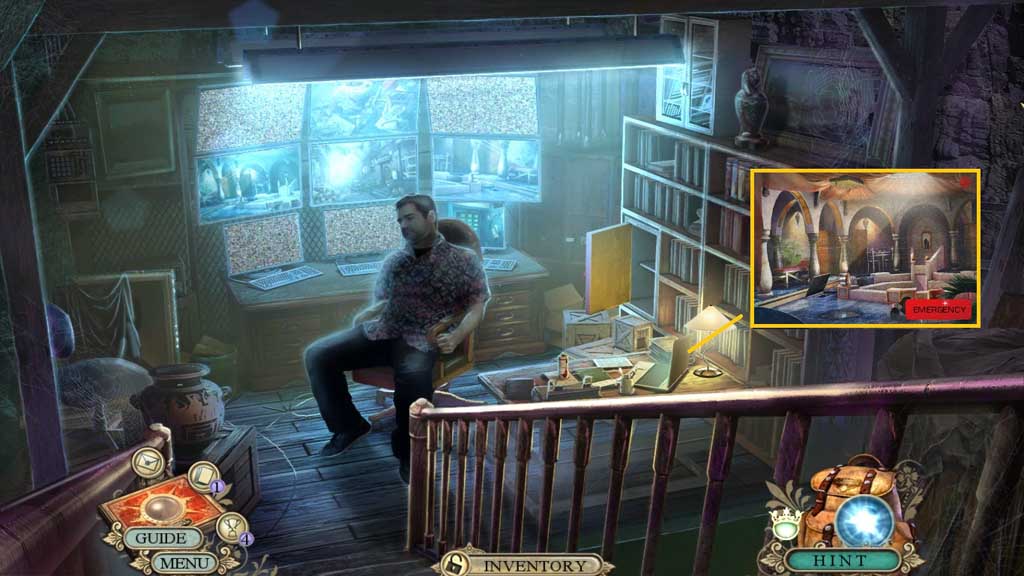
- Click the laptop.
- Attach the cable and insert the Sultan’s CD.
- Read the messages.
- Click the emergency button.
- Move down once.

- Move up the ladder to the Rooftop.