Hidden Expedition: Smithsonian Castle: Chapter Two: Enter the Tower
Our Hidden Expedition: Smithsonian Castle Walkthrough will guide your steps as you explore the Smithsonian Castle, investigating an anomaly that's be reported there. Trust our detailed directions, custom marked screenshots, and simple solutions to all the puzzles you'll encounter as you follow the clues to unlocking the secrets of time travel in this exciting hidden object adventure game!
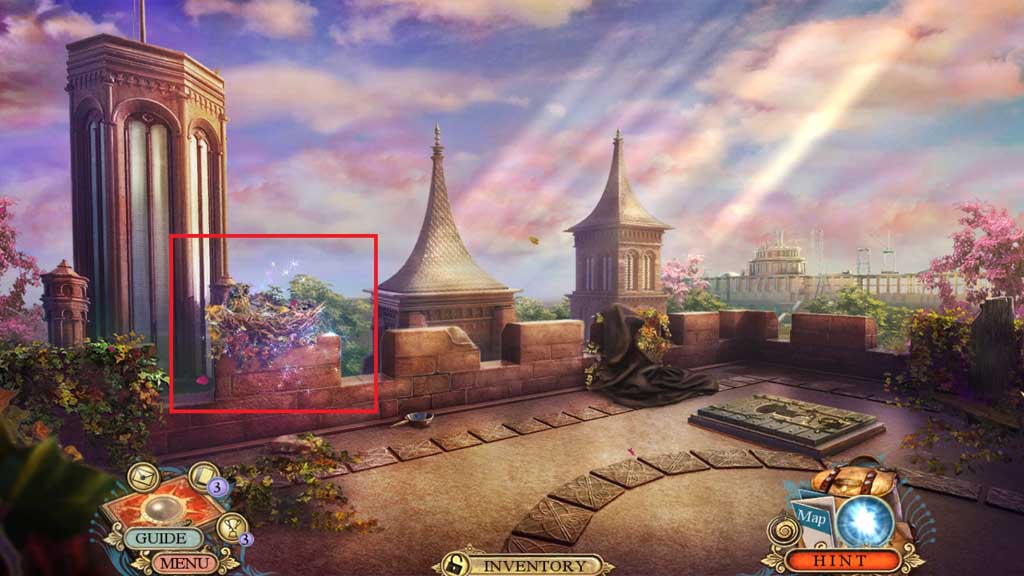
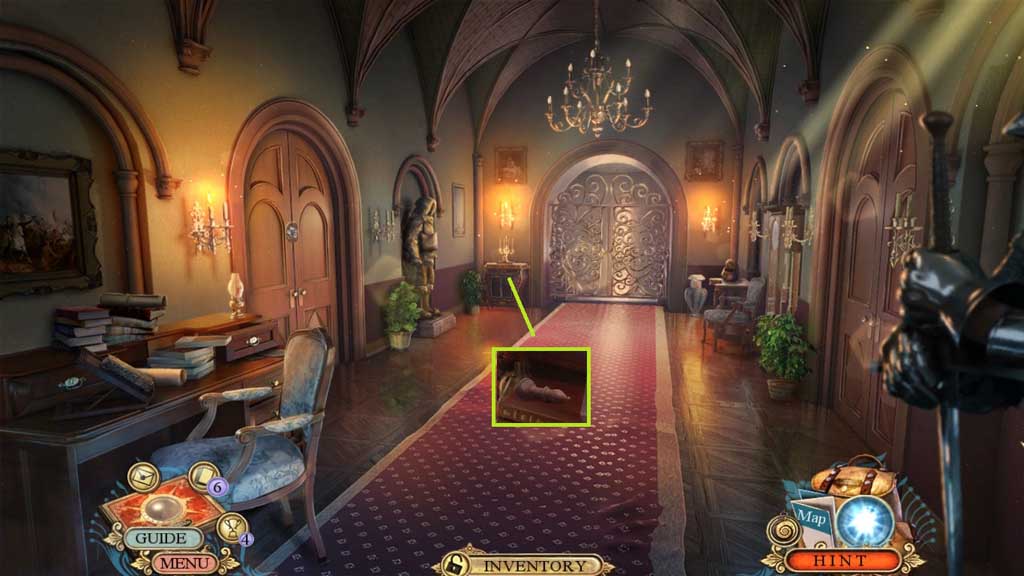
- Click the hidden objects area.
- Find the items.
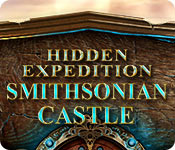
- Collect the trapdoor decoration.
- Click the cloak; collect the broken bracelet and the wooden tile.
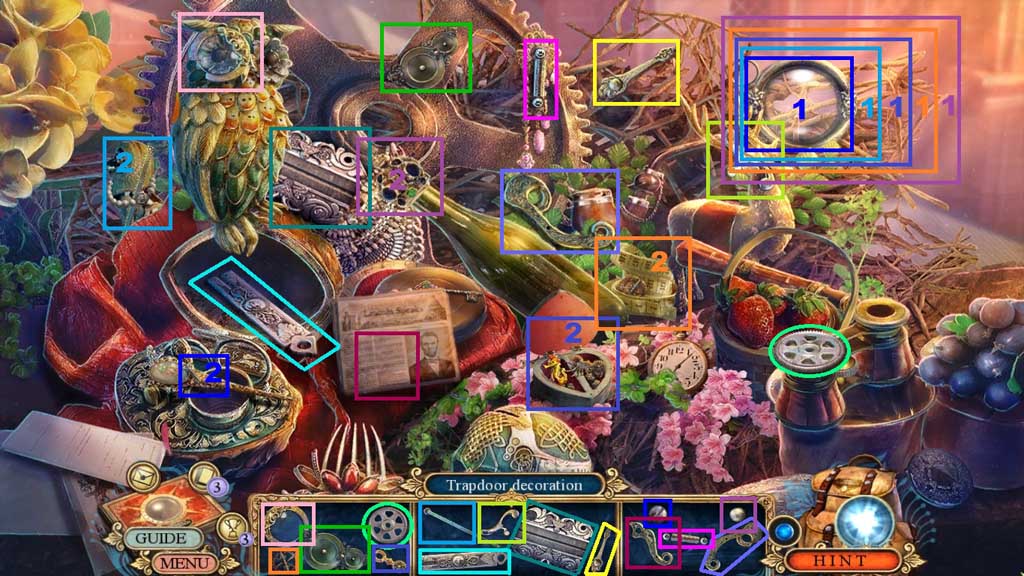
- Insert the trapdoor decoration and click it once.
- Enter the trapdoor.

- Select the nail file to remove the rust on the clasp; open the bag.
- Collect the can of lighter fluid.
- Collect the fact card and the Smithsonian seal.
- Click the page; collect 2 /2 wooden tiles.
- Click the drawer open; collect 1 /2 clock hands.
- Click the empty lighter and pour in the can of lighter fluid; receive the lighter.
- Attach the pendant onto the broken bracelet; receive the bracelet.
- Click the Smithsonian seal; click the 3 pieces to receive the clock face.
- Move to the right.
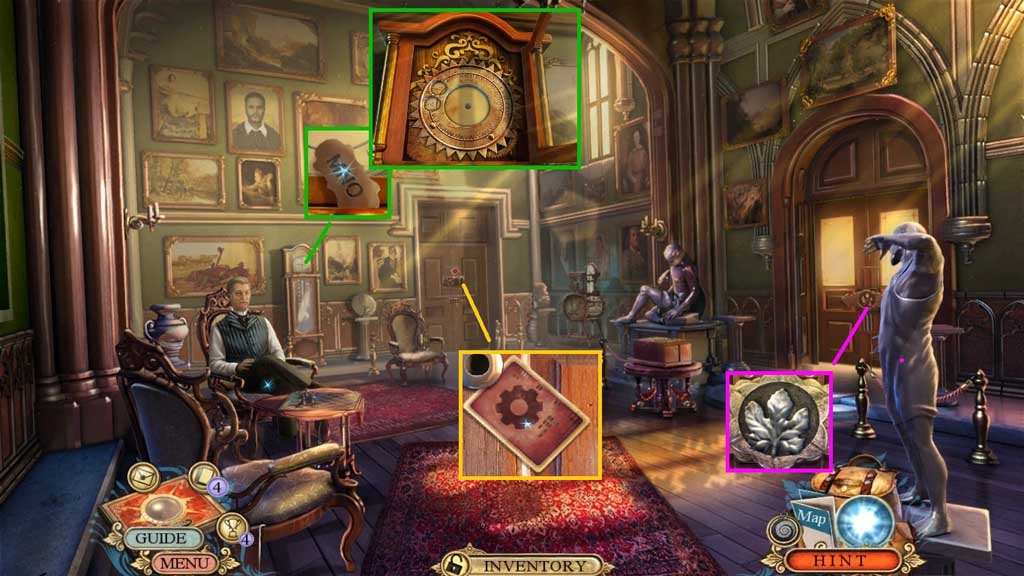
- Collect the label; click the clock door and insert the clock face.
- Collect the silver leaf.
- Collect the fact card.
- Move down once.
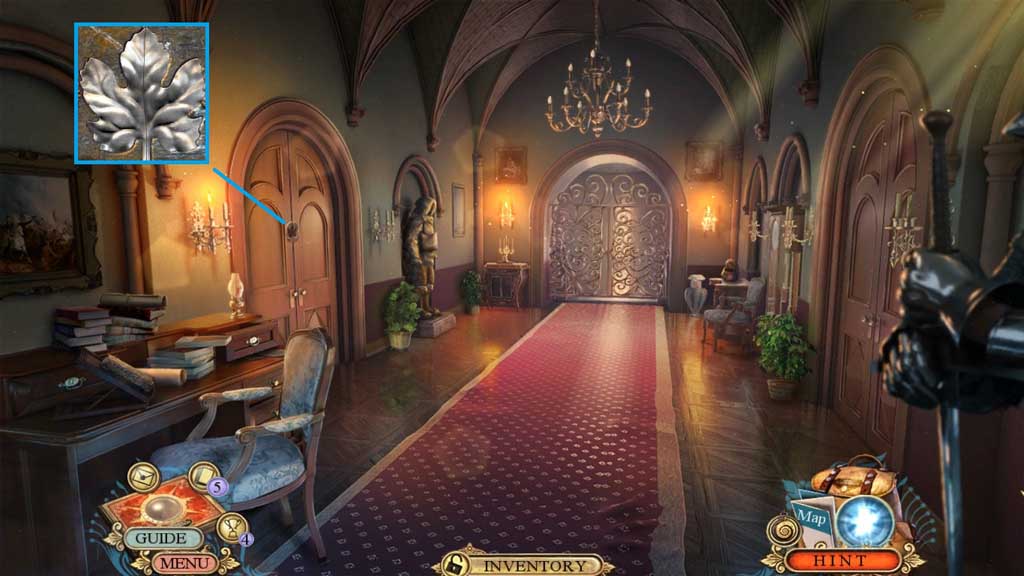
- Insert the silver leaf.
- Click the door.
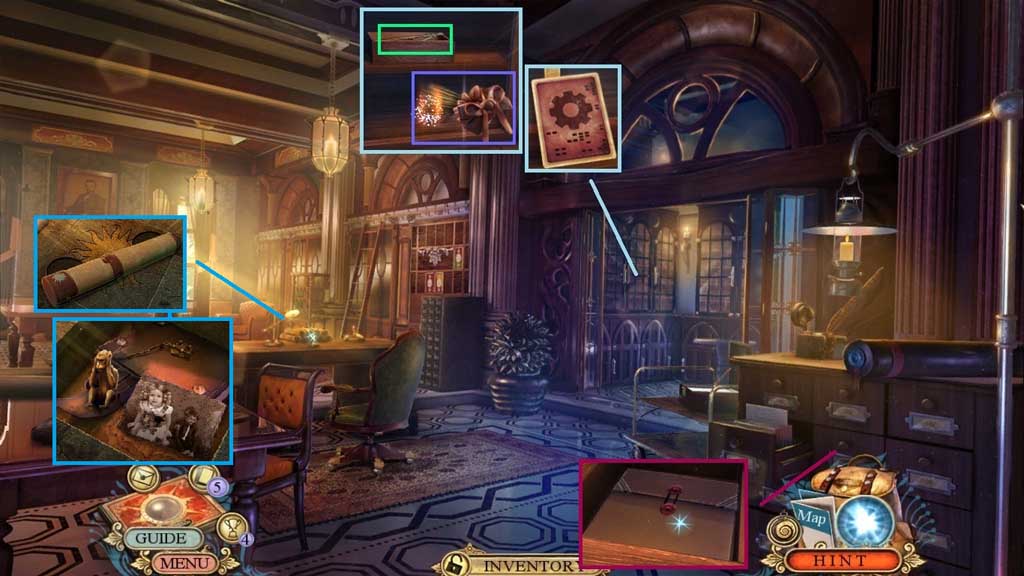
- Collect the fact card; click the cupboard and the box.
- Collect the mechanical divider and place the hair band to receive the brush.
- Place the label onto the drawer; collect the envelope.
- Click the scroll case; insert the 2 wooden tiles to trigger a mini game.
- Solve the game by aligning the tiles correctly.
- Click the photo; collect 1 /2 monkey figurines.
- Move down once and go to the right.
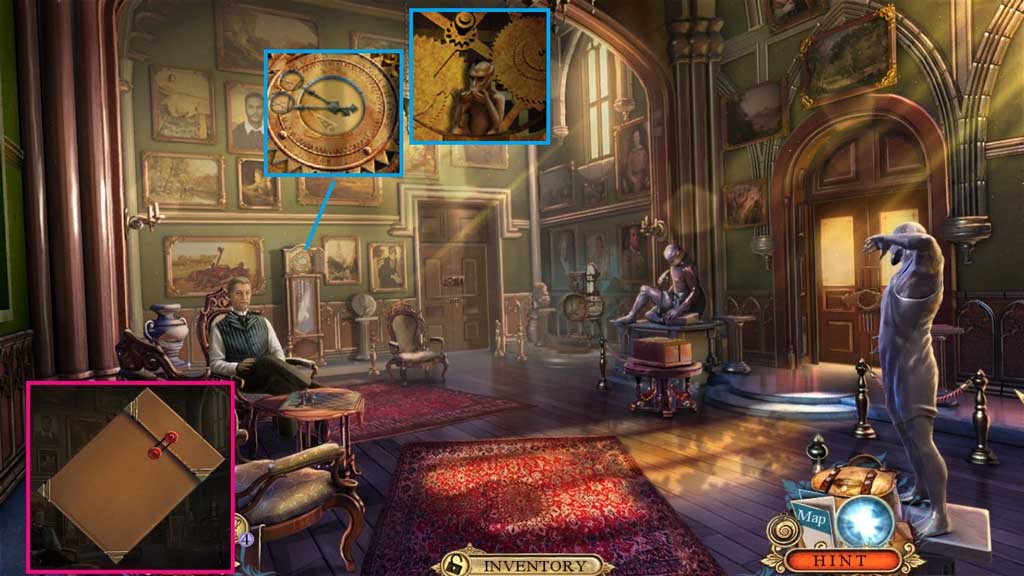
- Click the file envelope 3x’s to recieve 2 /2 clock hands.
- Attach the clock hands and set the time correctly.
- Collect 2 /2 monkey figurines.
- Move down once.
- Place the 2 monkey figurines.
- Collect the bishop chess piece.
- Move to the right.
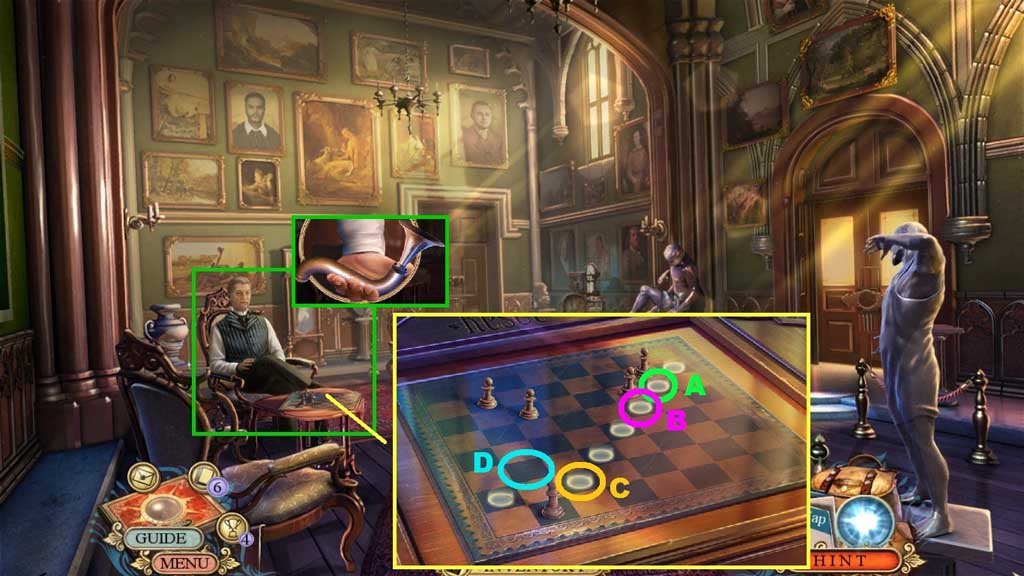
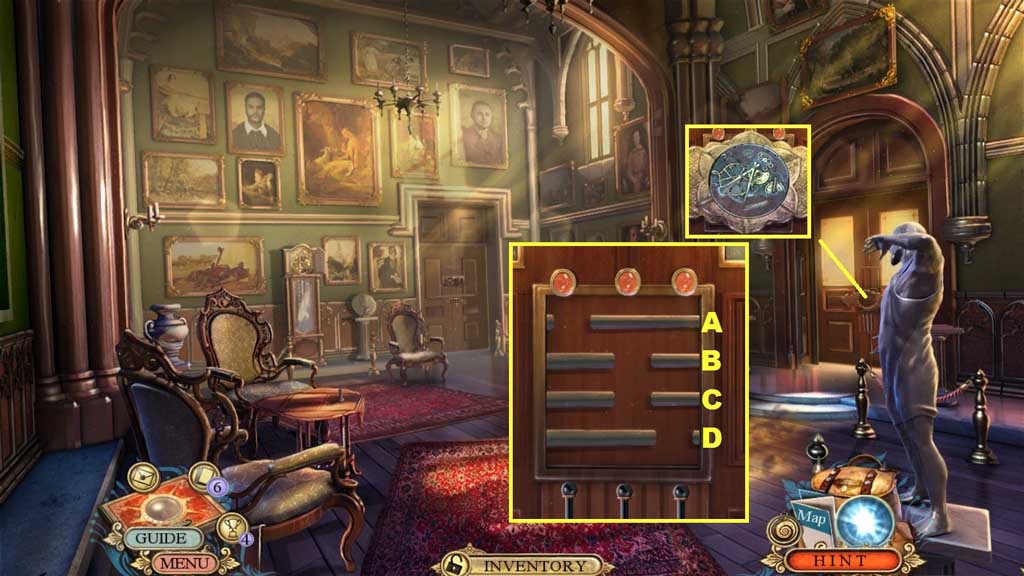
- Give the man the bishop chess piece to trigger a mini game.
- Solve the game by moving the pieces correctly across the board.
- Use the following solution to solve: A – B – A – C – D – C
- Collect the speaking tube.
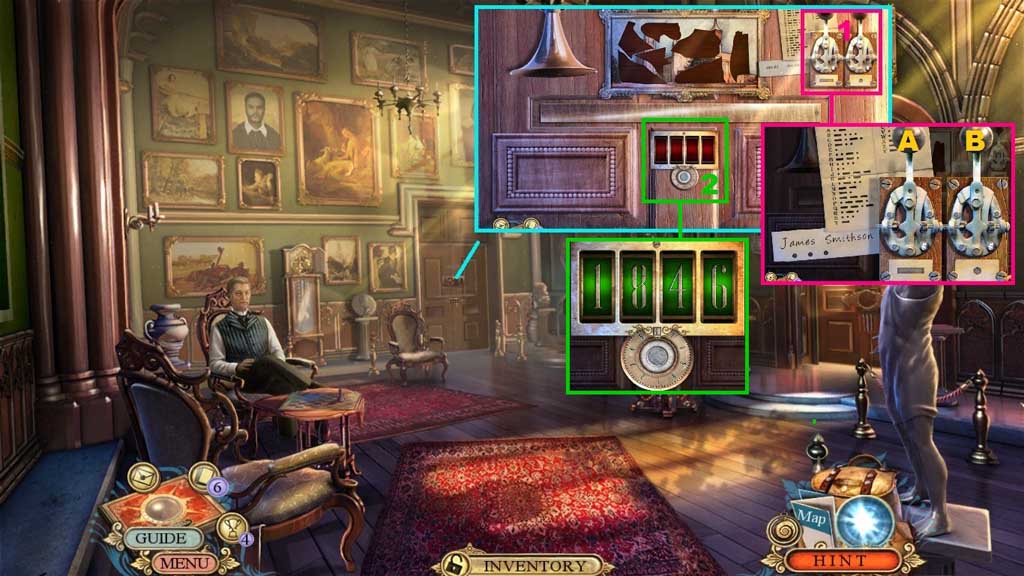
- Insert the speaking tube into the door to trigger a mini game.
- Solve the game by following the clues to unlock the door.
- Part 1: Click the levers in the correct sequence; use the following solution to solve: B – A x 3 – B x 3
- Part 2: Enter the correct numbers into the dial: 1- 8 – 4 - 6.
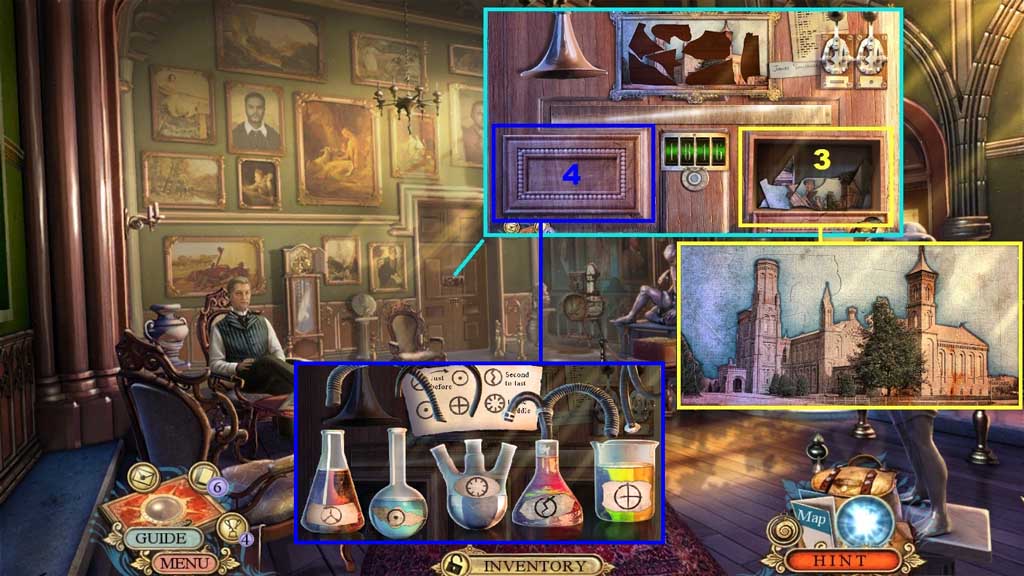
- Part 3: Assemble the pieces correctly to create the image.
- Part 4: Place the labels correctly and arrange the vials according to the diagram.
- Enter the doorway.

- Read the note; collect the mechanical activator.
- Collect the megatherium badge, the eagle sign and the bottle decor.
- Move down once.
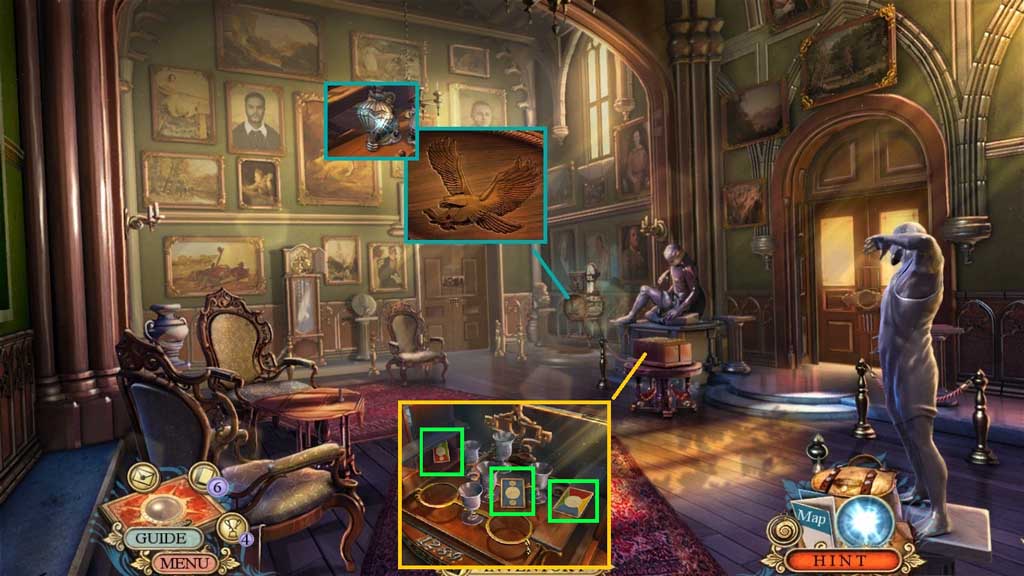
- Insert the eagle sign; collect the hot air balloon sign.
- Insert the bottle décor.
- Click the 2 bottles; collect 3 catalog cards.
- Move ahead.
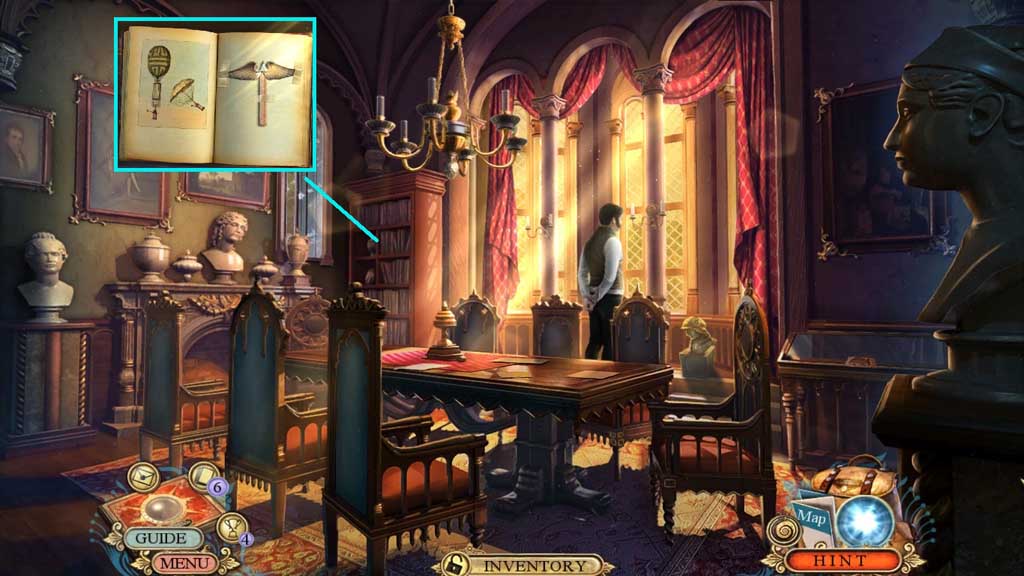
- Click the books; insert the hot air balloon sign.
- Collect 1/ 2 Caduceus and the miniature pencil.
- Move to the Archives.
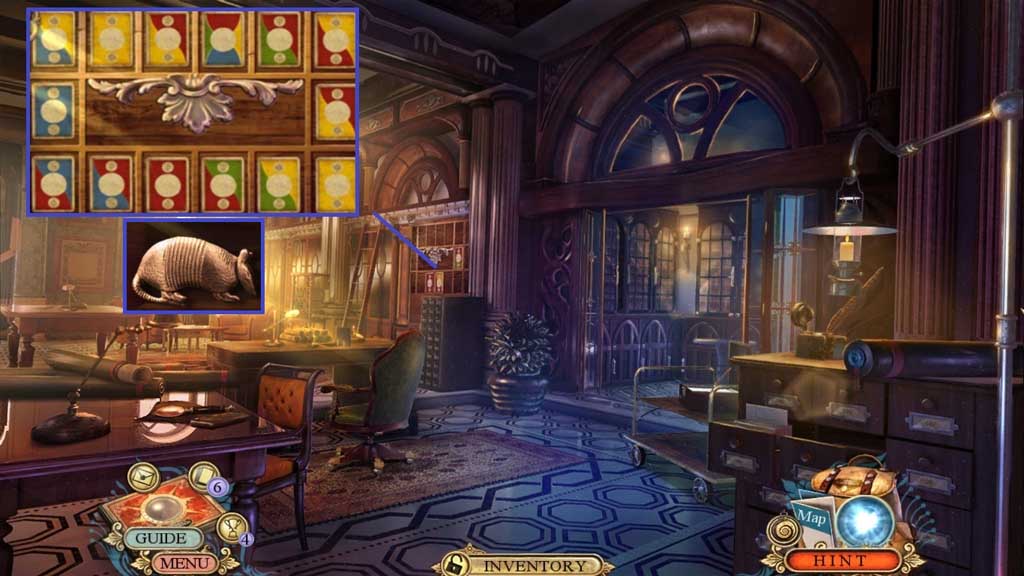
- Place the 3 catalog cards to trigger a mini game.
- Solve the game by arranging the cards to match the adjacent cards.
- Collect the animal motif.
- Move to the Regent’s Room.
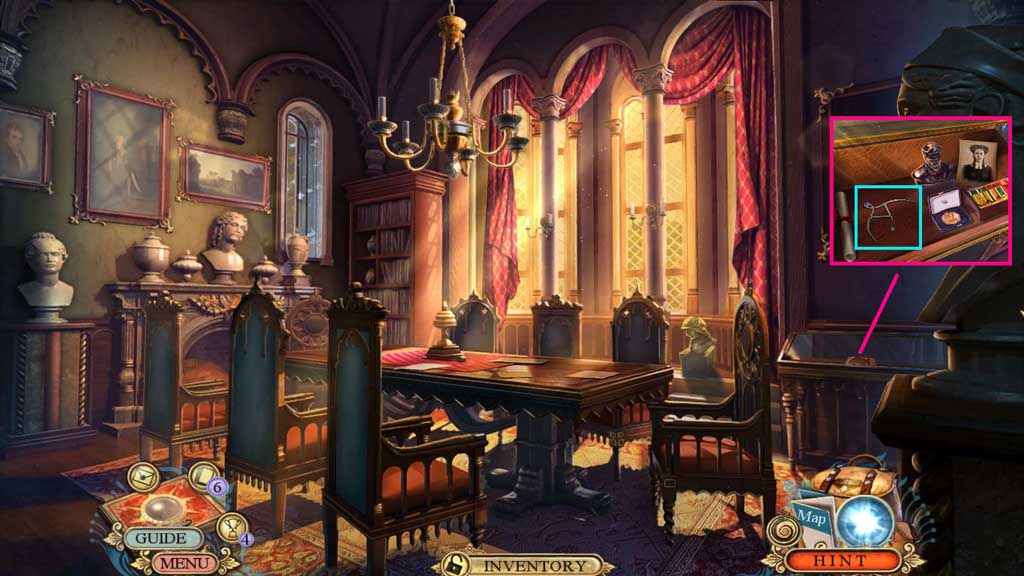
- Place the animal motif.
- Click the photo; collect the mechanical calipers.
- Click the mechanical activator.
- Place the mechanical divider, the miniature pencil, and the mechanical calipers onto the mechanical activator; receive the activator.
- Move down once.
- Place the activator to trigger a mini game.
- Solve the game by
- Use the following sequence to solve.
- D – left / C – left / B – left / A – left / B – left / D – left / A – left / B – left / D – middle / C – middle / B – middle / A – middle / B – middle / C – middle / A – right / B – right / D – right / A – right / B –right
- Move to the right.