
Grim Tales: The Stone Queen: Chapter Seven: Brandon
Our Grim Tales The Stone Queen Walkthrough will provide key insight into why this once kind benefactor has turned her back on the people of Stoneville. Armed with solutions to countless puzzles, custom screenshots clearly marked to show you exactly what to do, and detailed instructions that will guide you from start to finish, you'll have no problem uncovering the truth that's brought this tiny mining town to its knees.
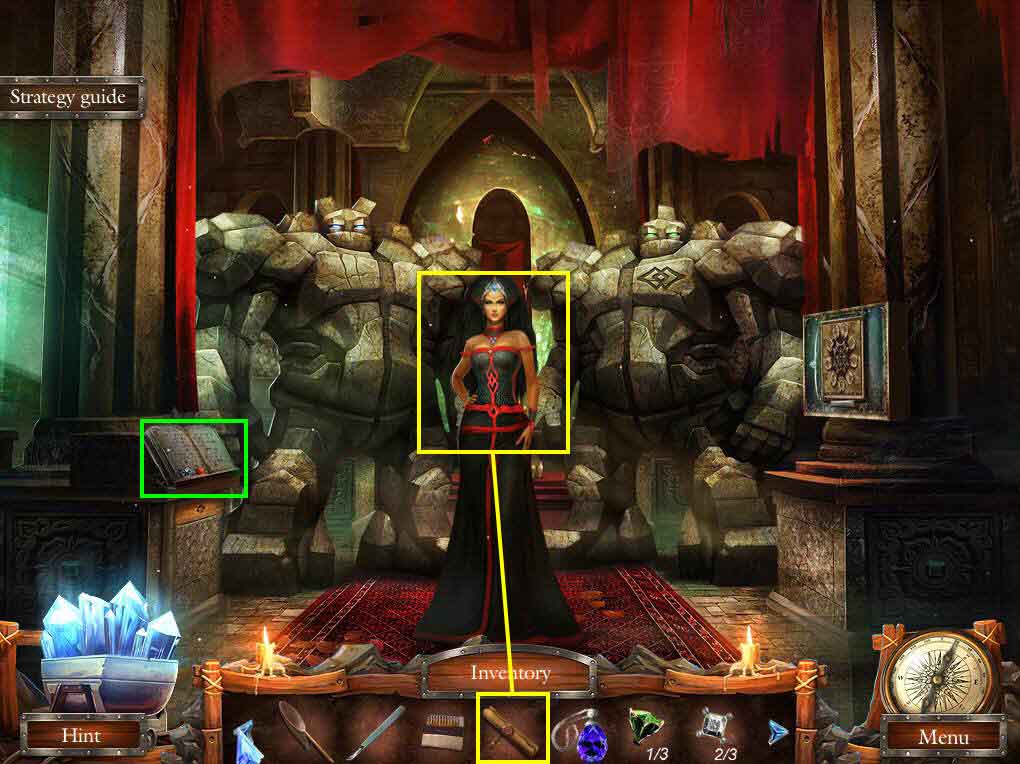
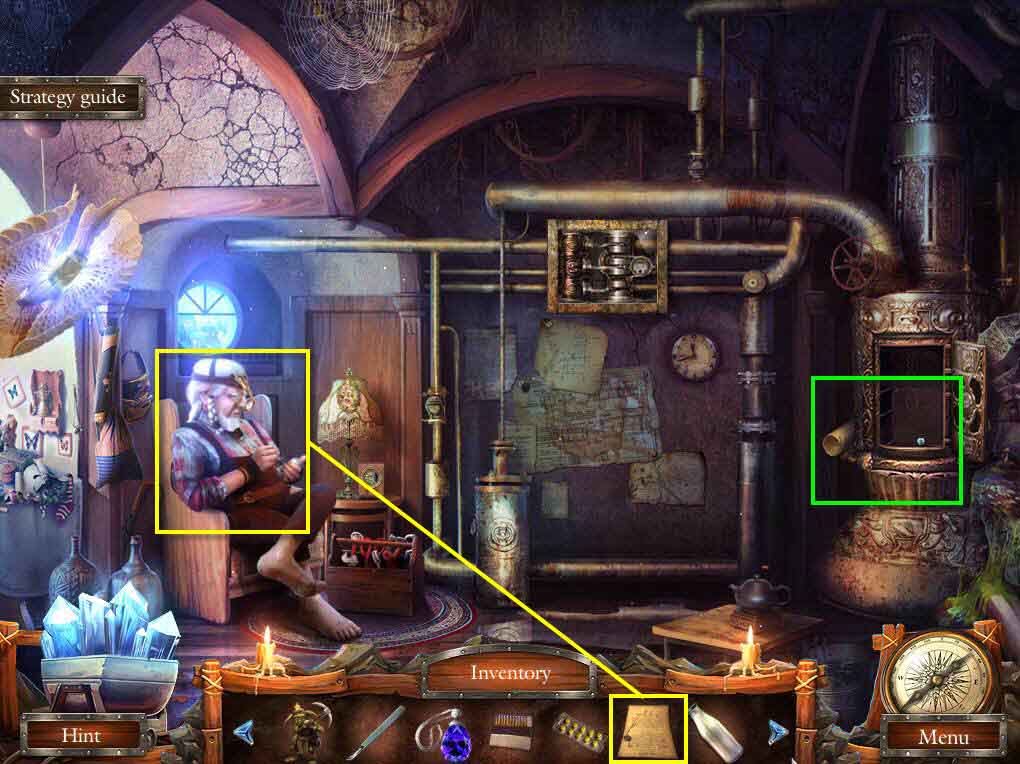
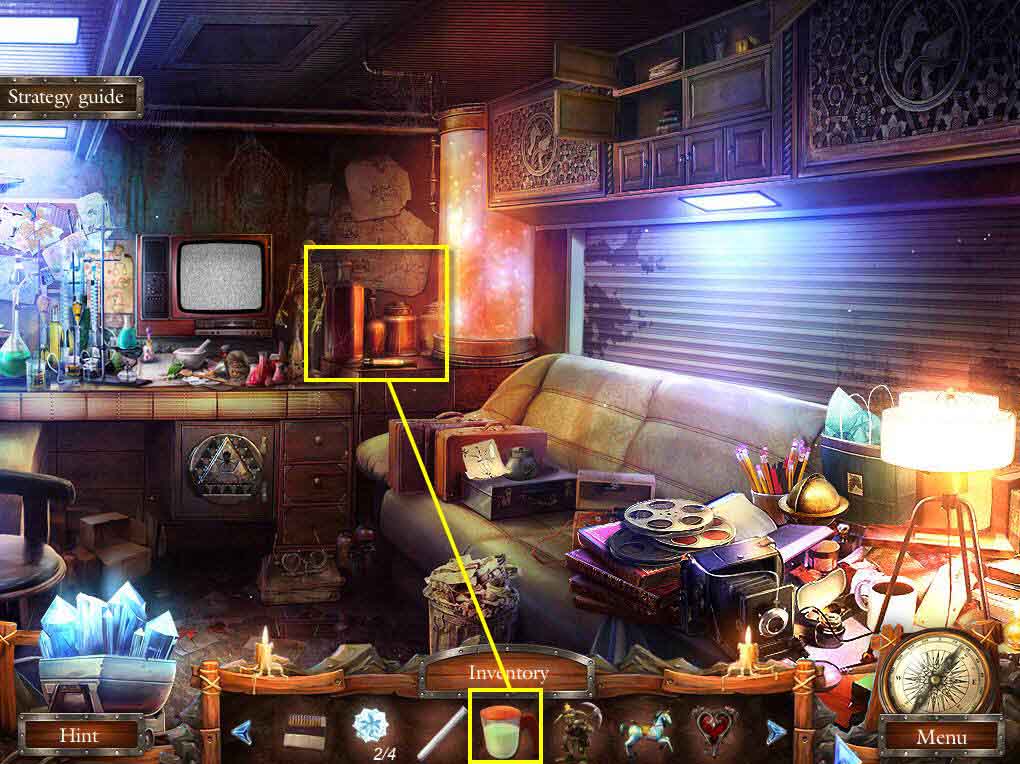
- Click on the chronicle to zoom in.
- Take the 1/3 TOPAZ and the MOLECULE.
- Use the LETTER on the Stone Queen.
- You will receive the LETTER OF POWERS.
- Go to the waterfall.
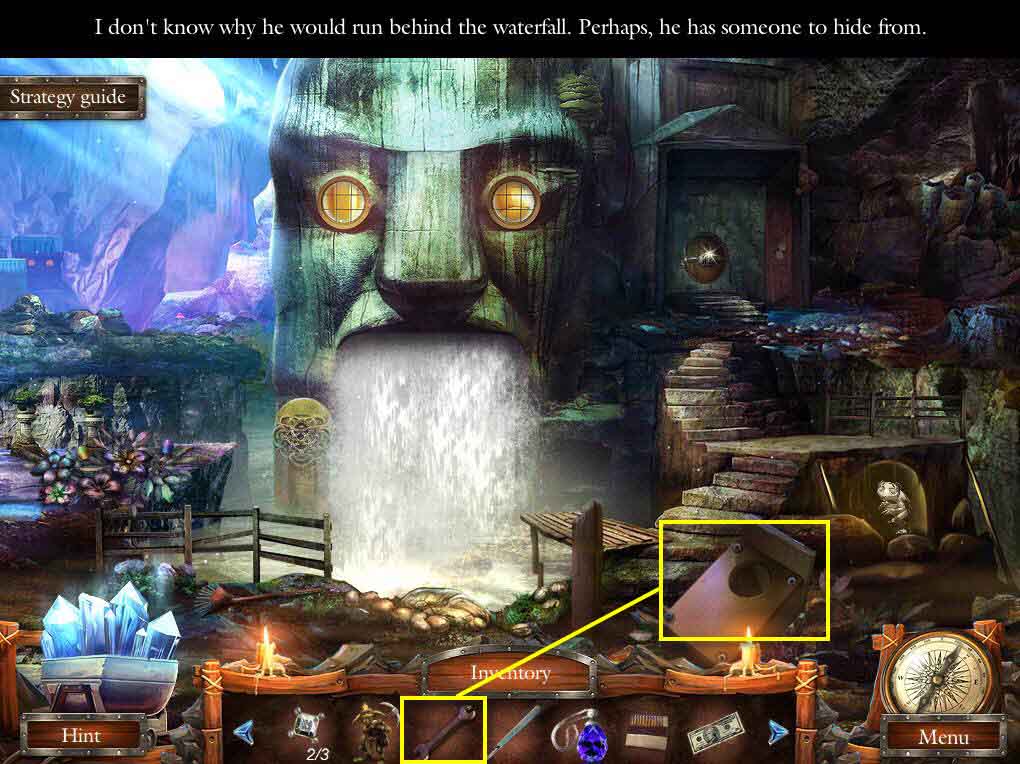
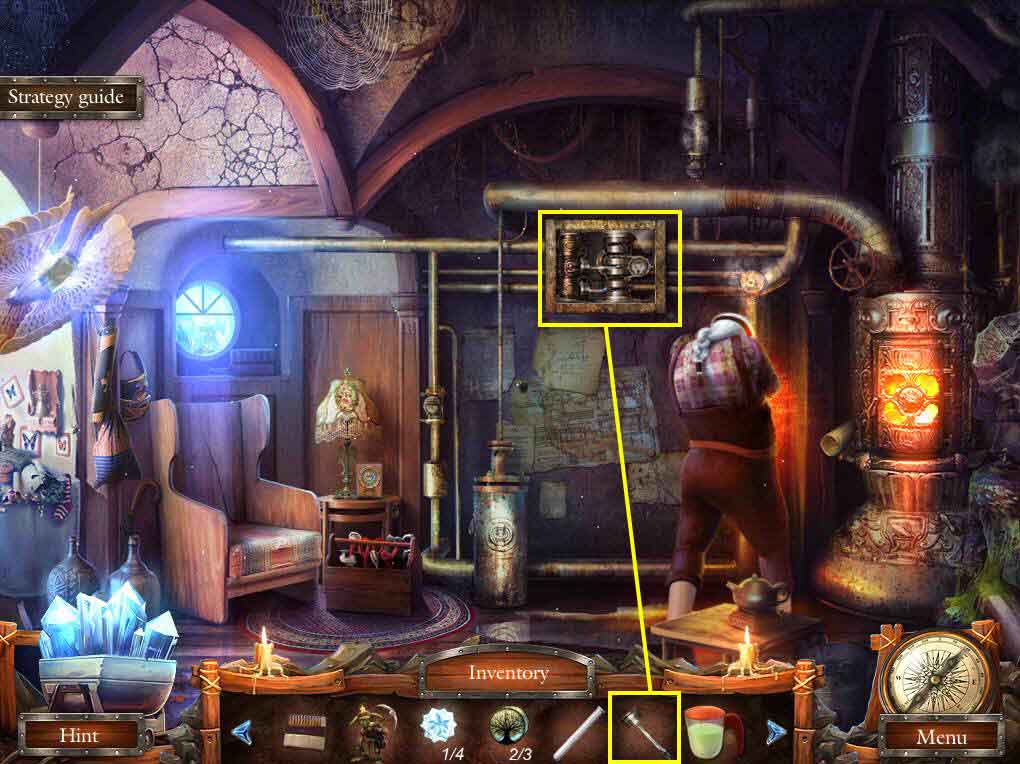
- Click on the starling-house to zoom in.
- Use the WRENCH on the nuts.
- Take the NUTS.
- Click to remove the lid.
- Take the HEAD.
- Go to the water tower.

- Click on the ladder to zoom in.
- Use the NUTS on the floor.
- This will start a mini-game.
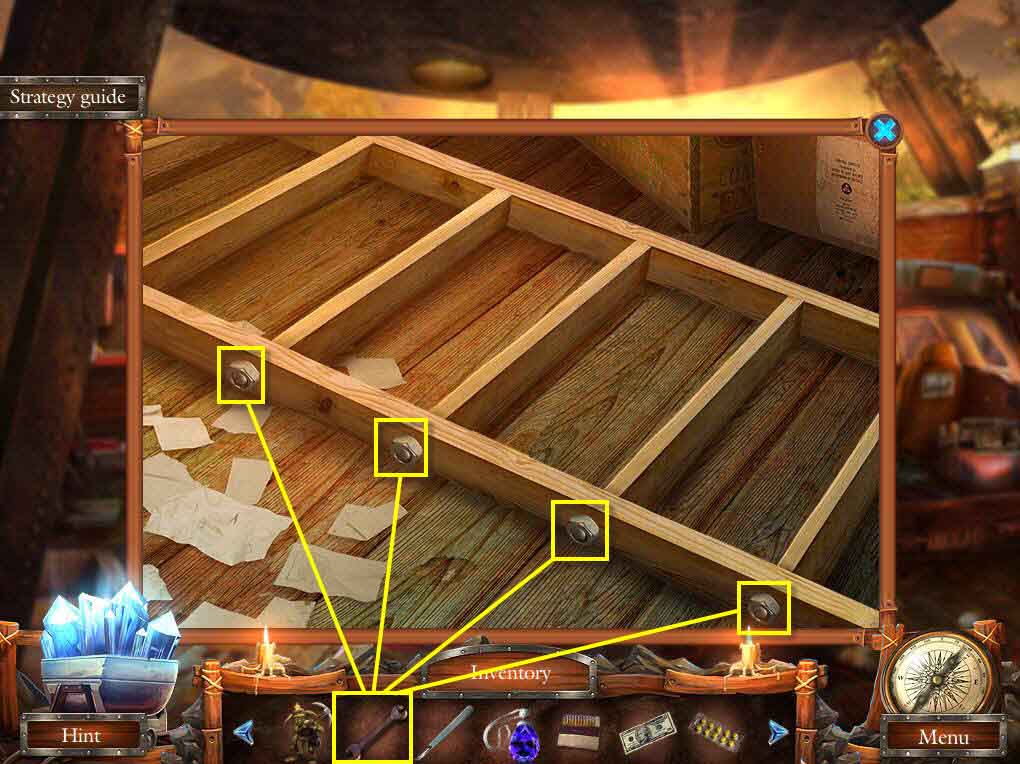
- The goal is to move the 4 boards into the correct position.
- Use the nuts on the bolts.
- Use the WRENCH on the nuts to tighten them.
- Take the LADDER.
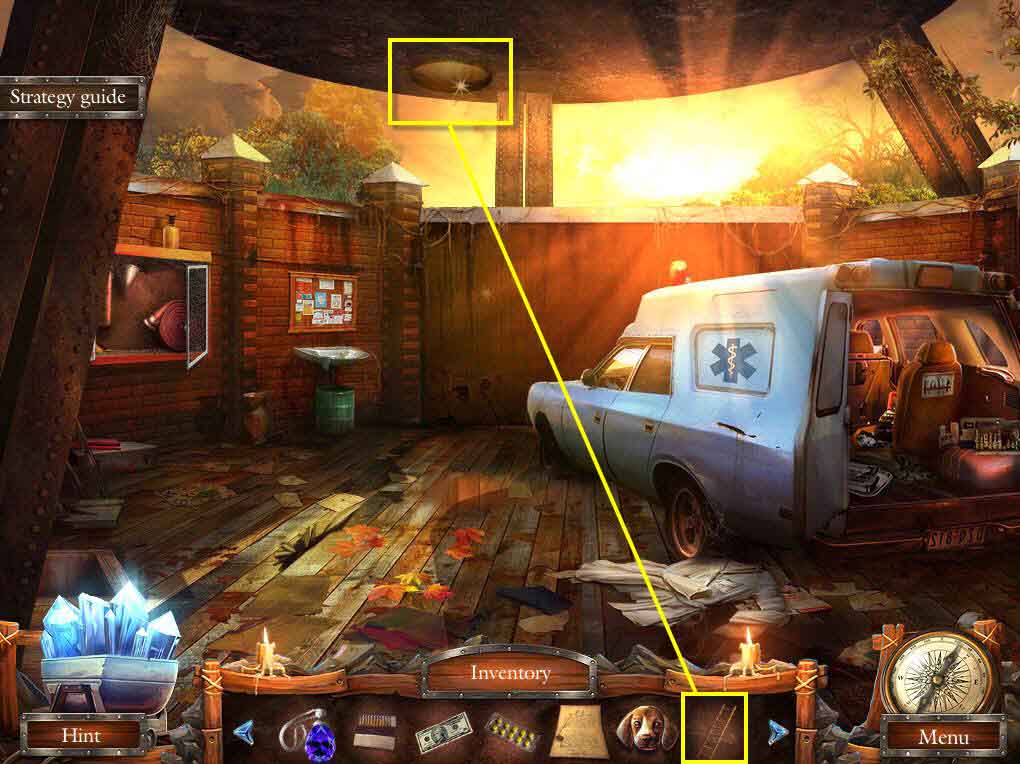
- Click on the manhole on the water tower to zoom in.
- Use the LADDER on the manhole.
- Go up the ladder.
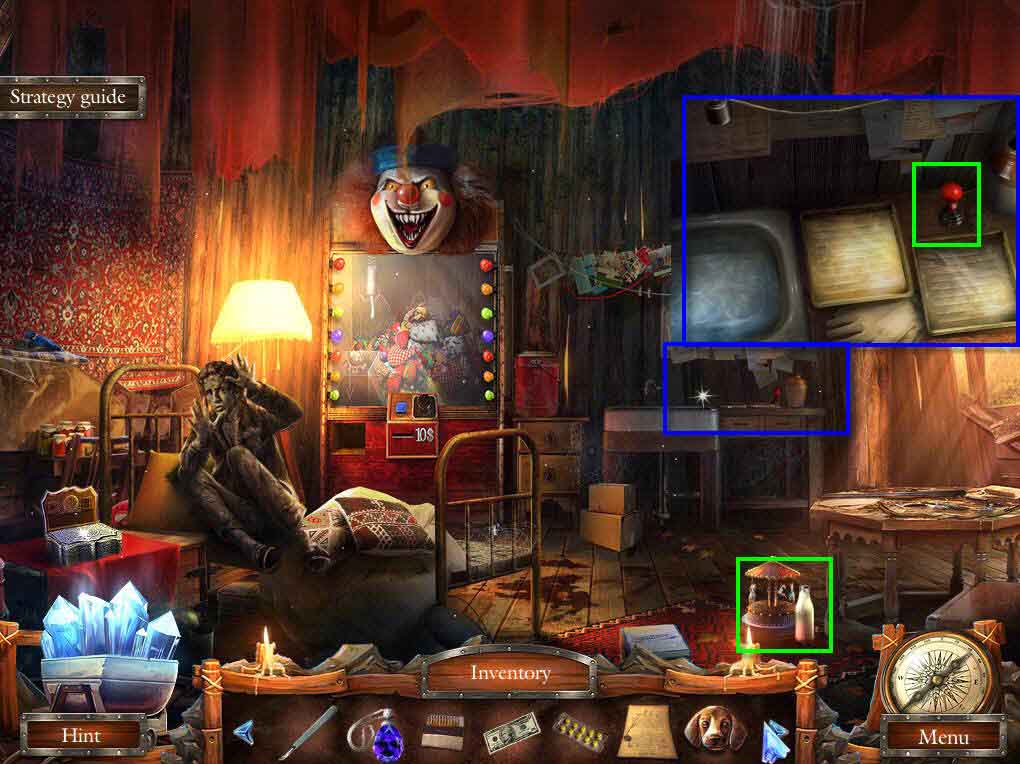
- Click on the carousel to zoom in.
- Take the MILK.
- Click on the dark room area to zoom in.
- Take the JOYSTICK.
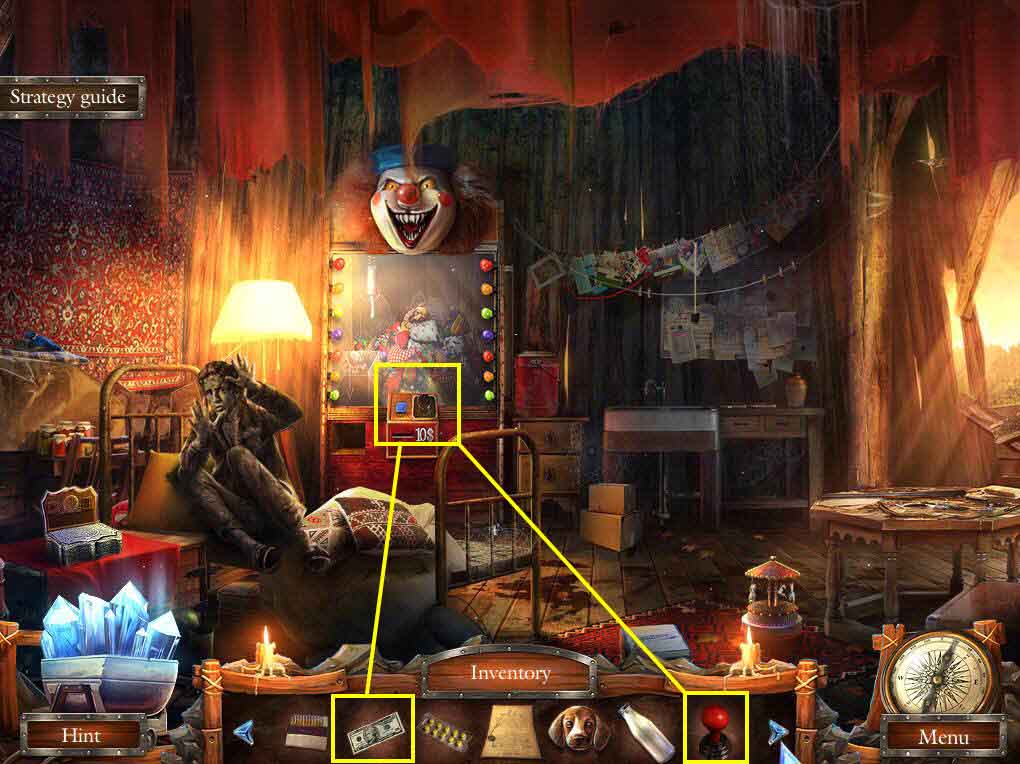
- Click on the device to zoom in.
- Use the JOYSTICK on the controls.
- Use the $10 DOLLARS on the slot.
- Click the right arrow twice.
- Click the up arrow twice.
- Click the button.
- Take the HEAD.
- Go back to the water fall.
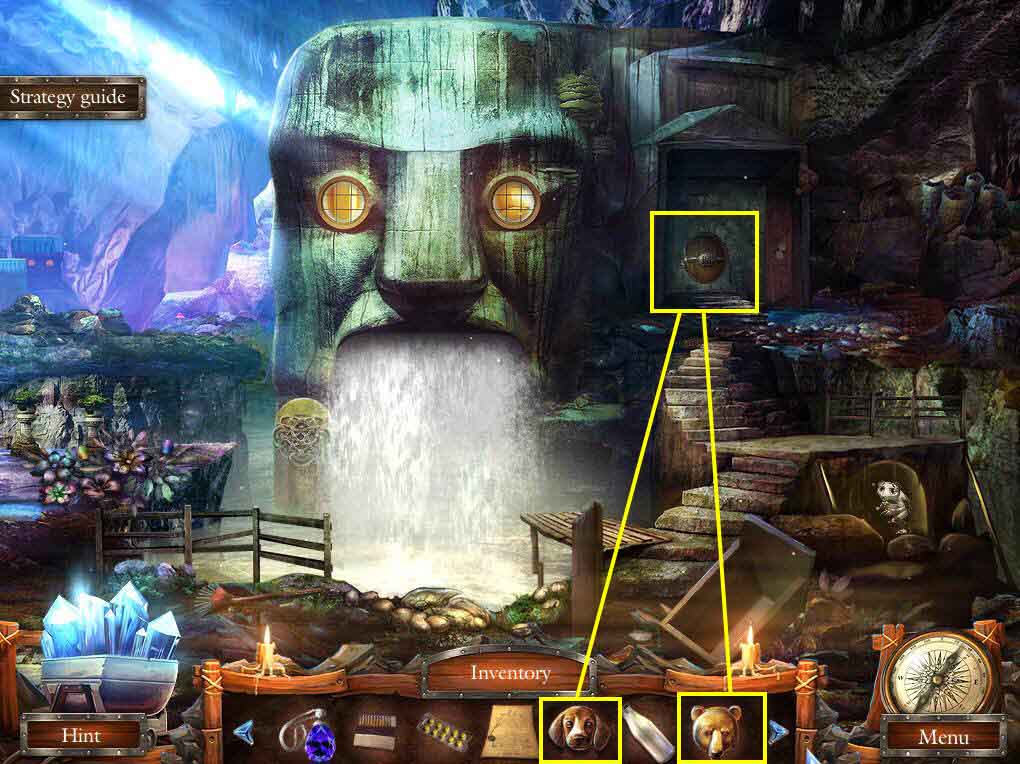
- Click on the door to zoom in.
- Use the 2 HEADS on the device.
- This will trigger a mini-game.
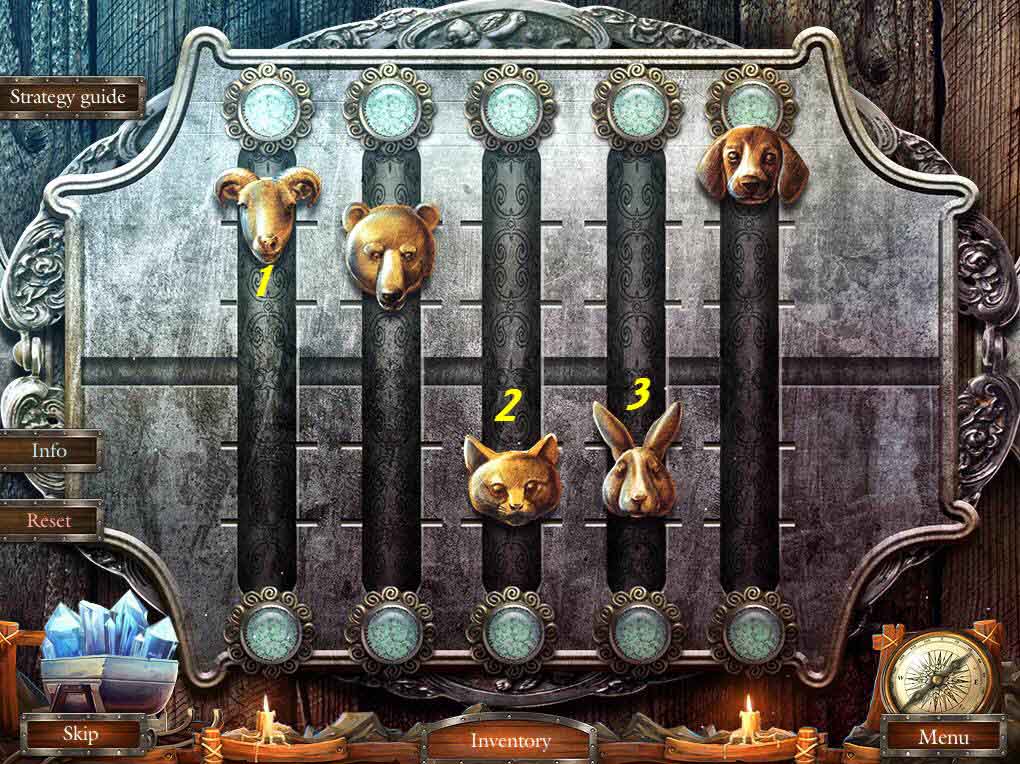
- The goal of the game is to drag the heads to the center line.
- When you move one head, the other one may move as well.
- Move the goat to the middle first, then the cat, and finally the rabbit.
- Go through the door.
- Click on the halfling to talk to him.
- Use the LETTER OF POWERS on him.
- Click on the stove to zoom in.
- Read the instructions.
- Take the 1/4 STAR.
- Go to the Stone City.
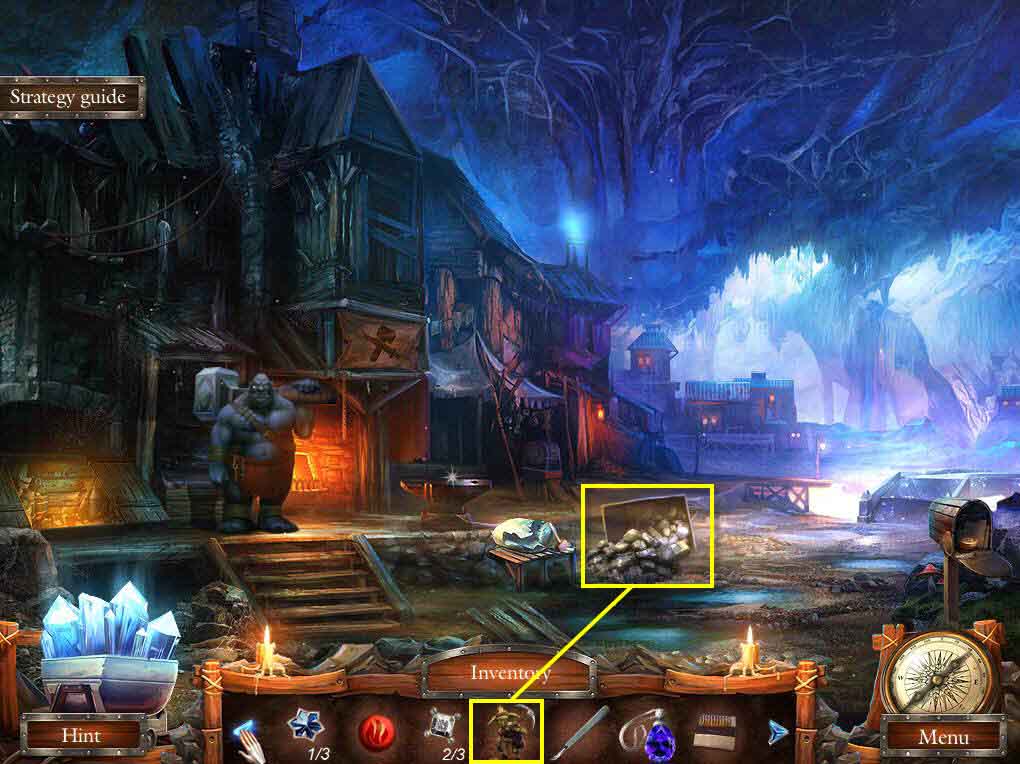
- Click on the overturned trolley to zoom in.
- Use the GOBLIN on the trolley.
- Take the COAL, CRUSHED WELDING MASK, and the 2/3 EMERALD.
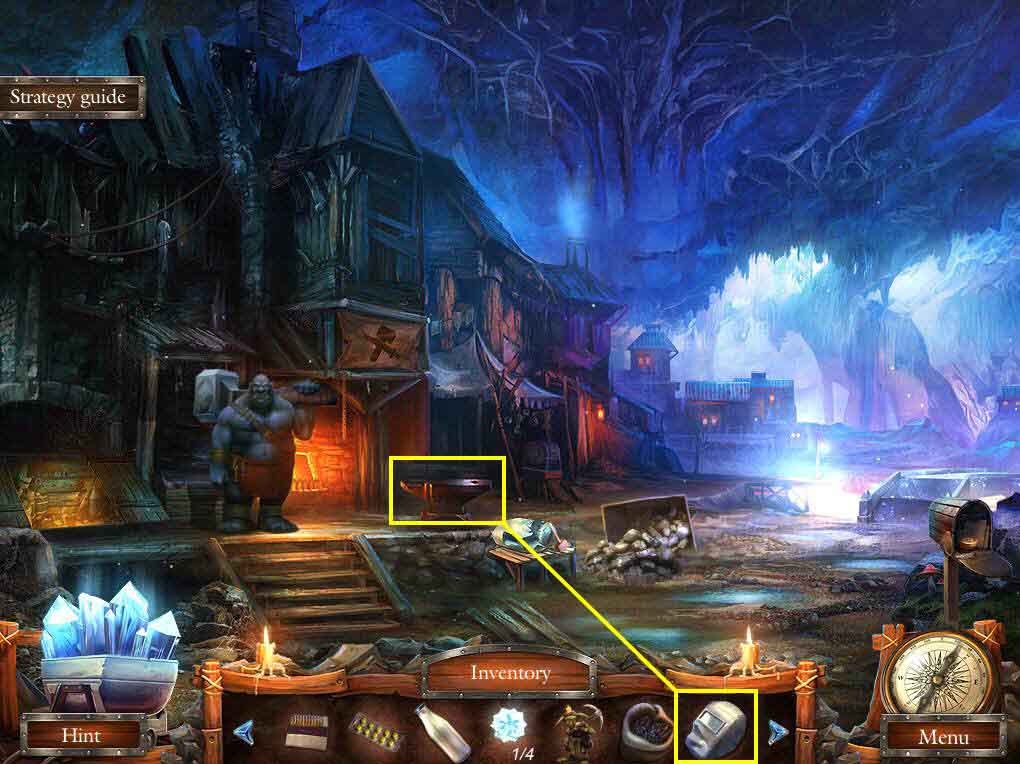
- Click on the anvil to zoom in.
- Use the CRUSHED WELDING MASK on the anvil.
- Take the WELDING MASK when the blacksmith is done.
- Go back to the halfling inside the waterfall.
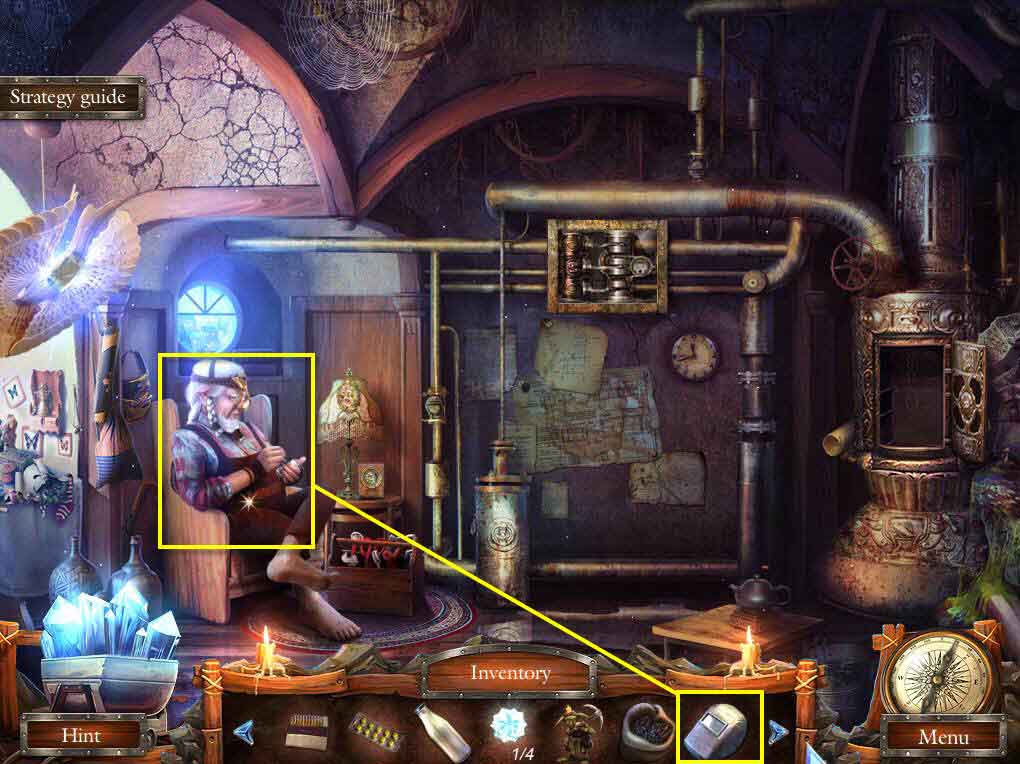
- Click on him to zoom in.
- Use the WELDING MASK on him.
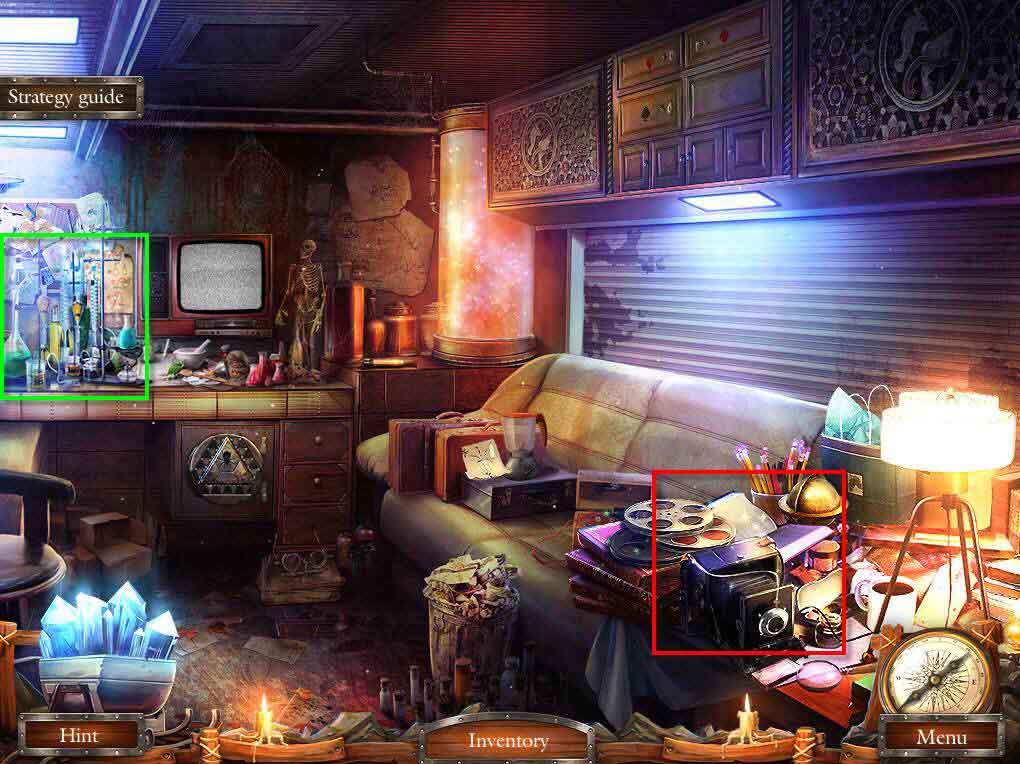
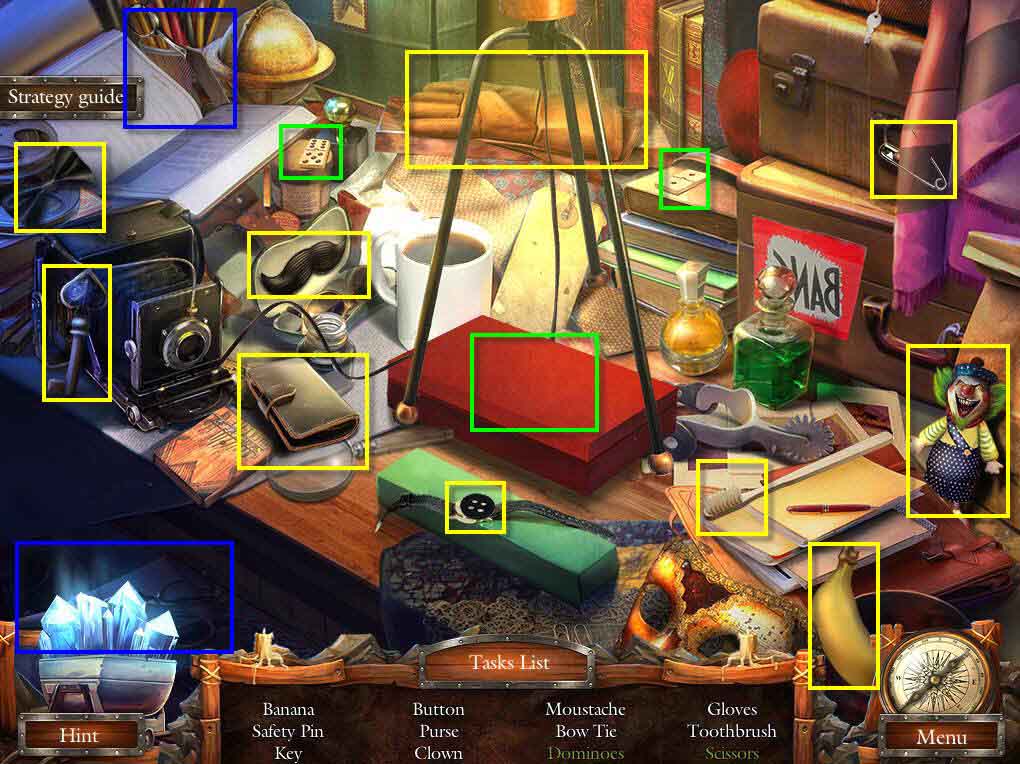
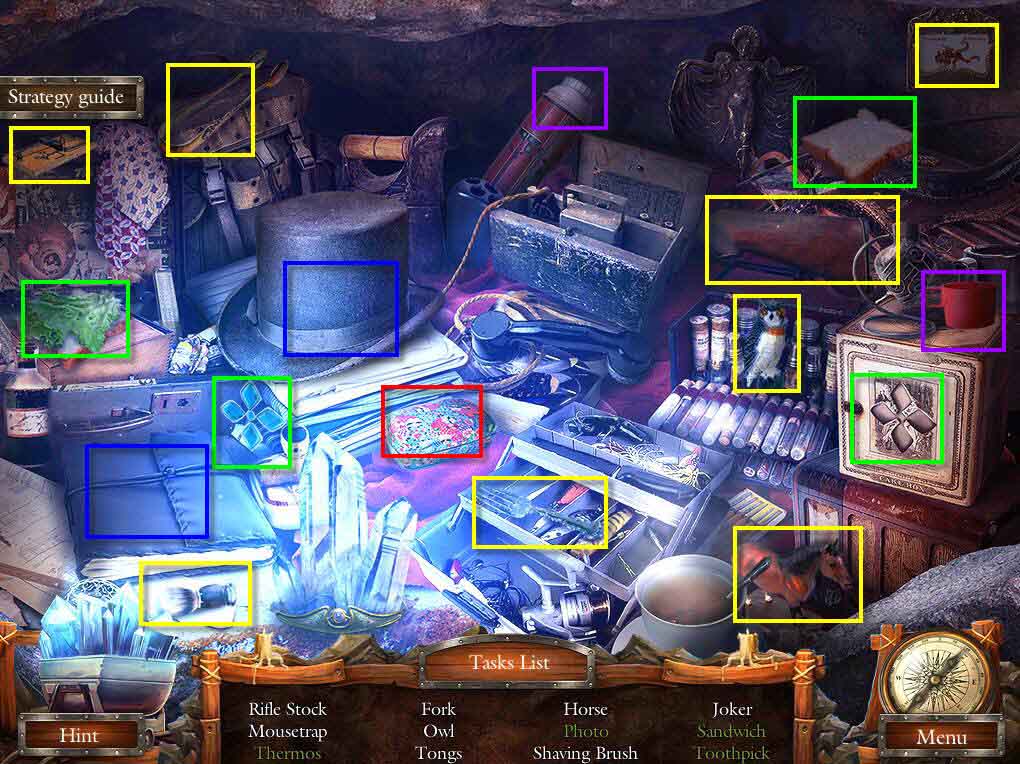
- Click on the sparkles to play an HOS.
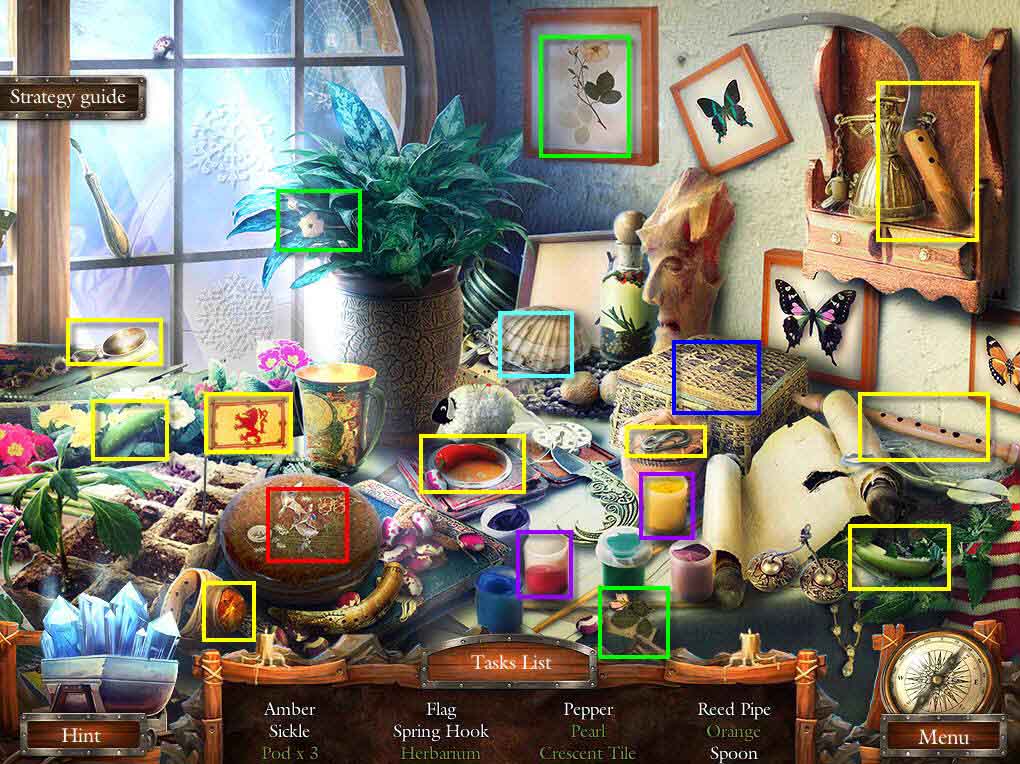
- Find all the items on the list.
- You will receive the CRESCENT TILE.
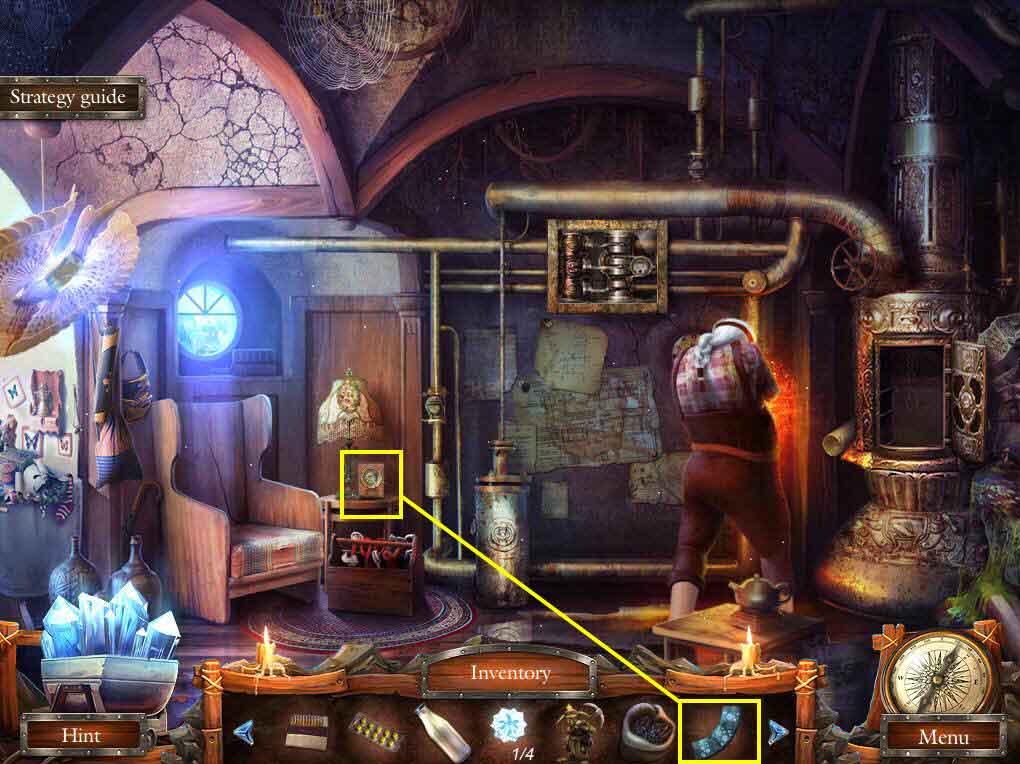
- Click on the calendar to zoom in.
- Use the CRESCENT TILE on the device.
- This will start a mini-game.
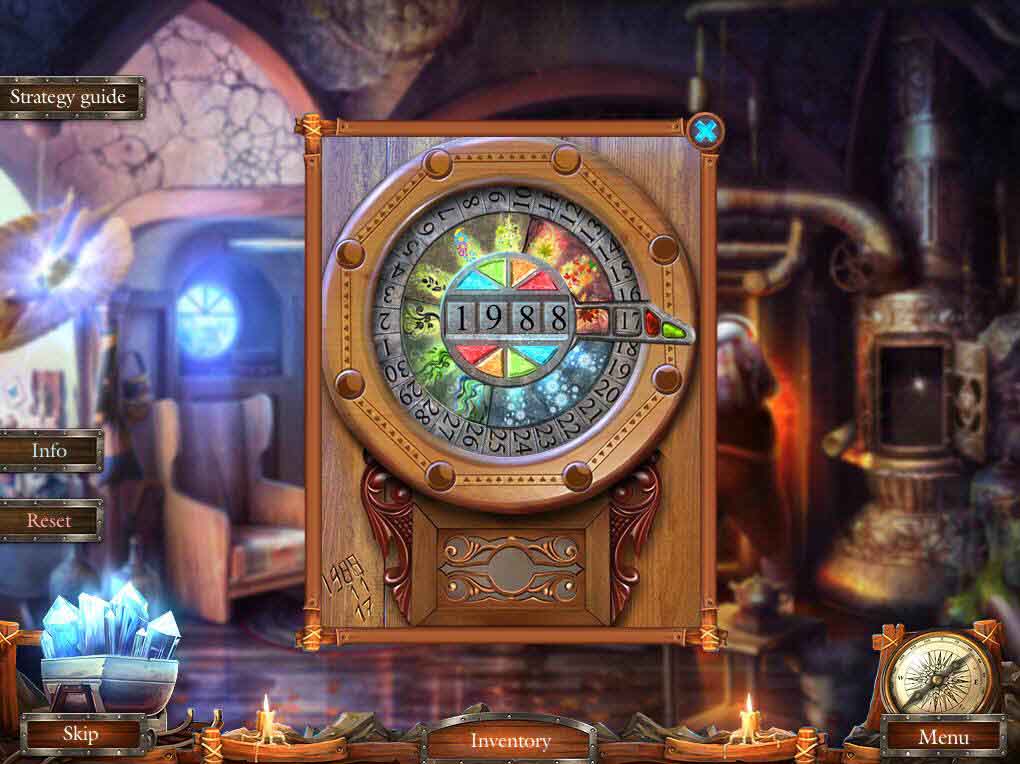
- Change the numbers to 1988.
- Now, move the seasons ring so the final bottom orange section is in the frame.
- Move the dial so that 17 is in the frame.
- See the screenshot for the solution.
- Click the green button.
- Take the 1/3 RUNE and the SERVANT'S STONE.
- Go to the water tower.
- Click on the servant to zoom in.
- Use the SERVANT'S Stone on him.
- You will receive the HEX KEY.
- Go back one screen.
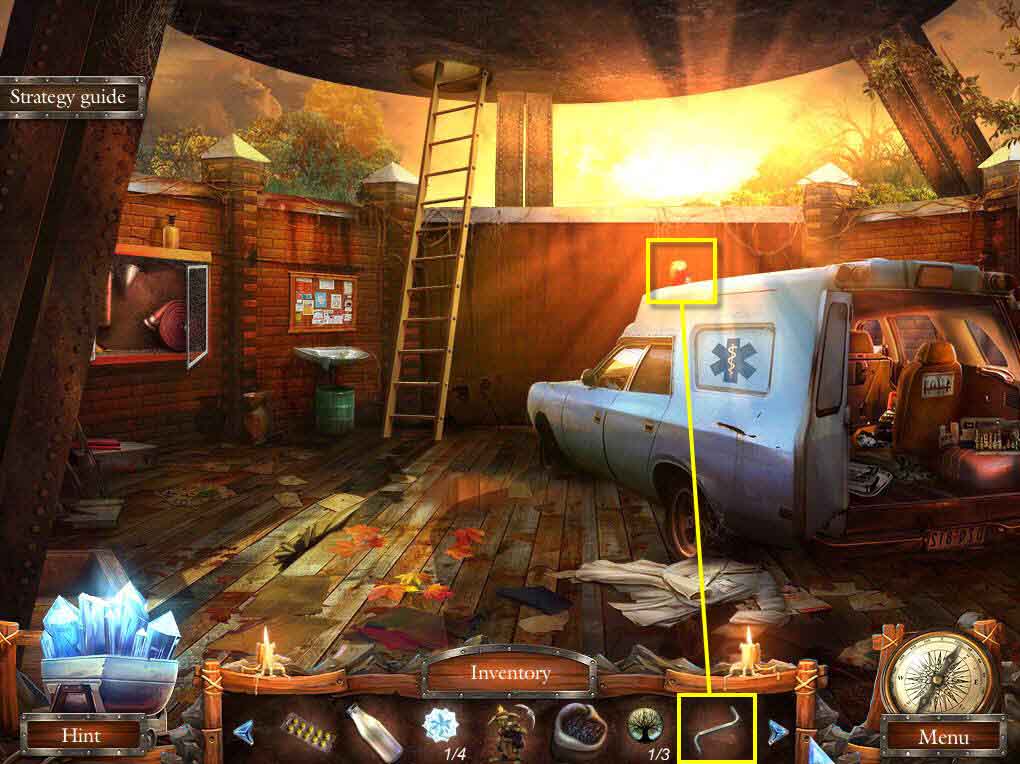
- Click on the emergency light on the ambulance to zoom in.
- Use the HEX KEY to get rid of the cover.
- Take the RED LIGHT BULB.
- Go back up the ladder.
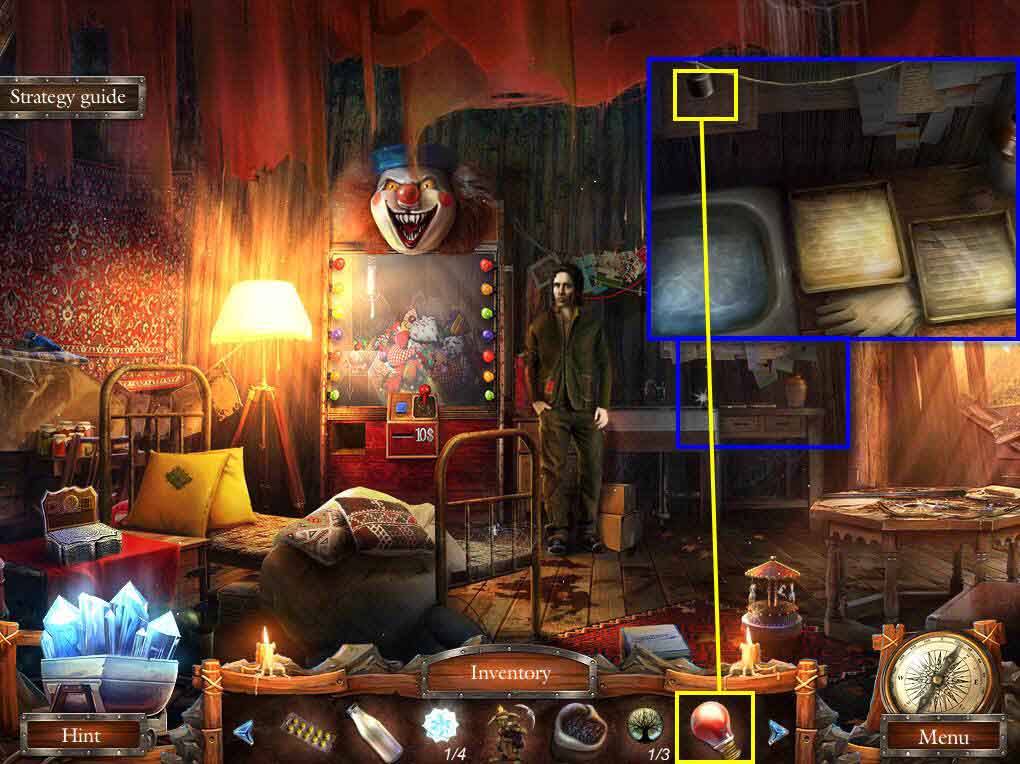
- Click on the dark room area to zoom in.
- Use the RED LIGHT BULB on the socket.
- Take the PHOTO.
- Go back two screens.
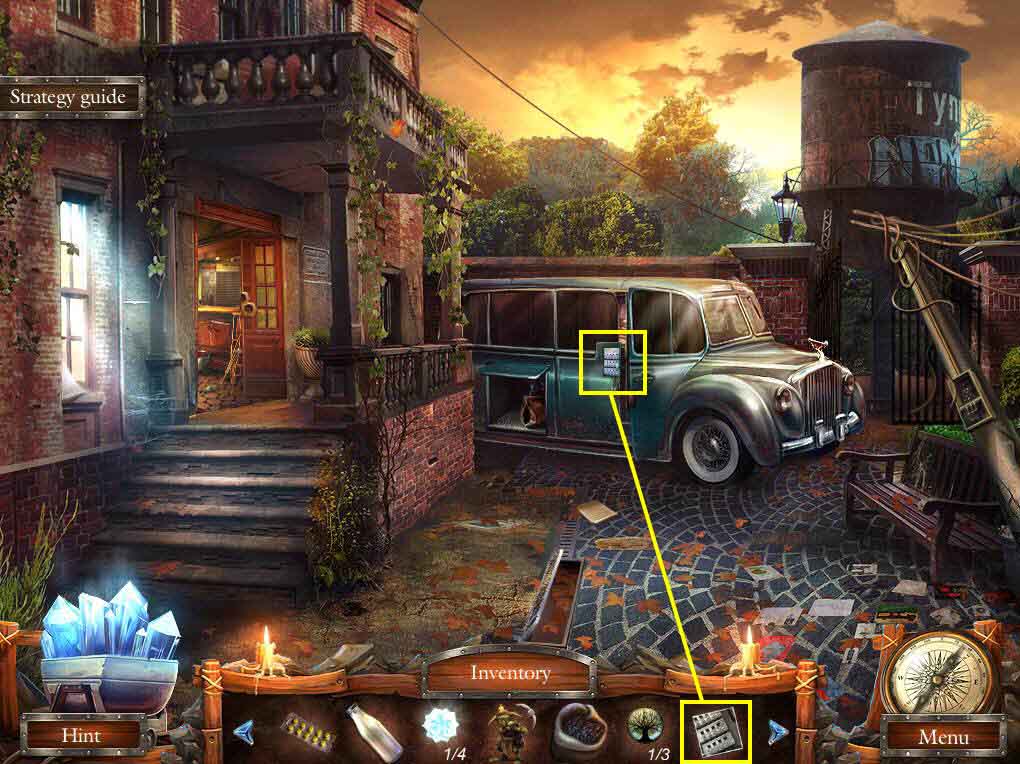
- Click on the lock on the van to zoom in.
- Use the PHOTO on the left.
- This will start a mini-game.
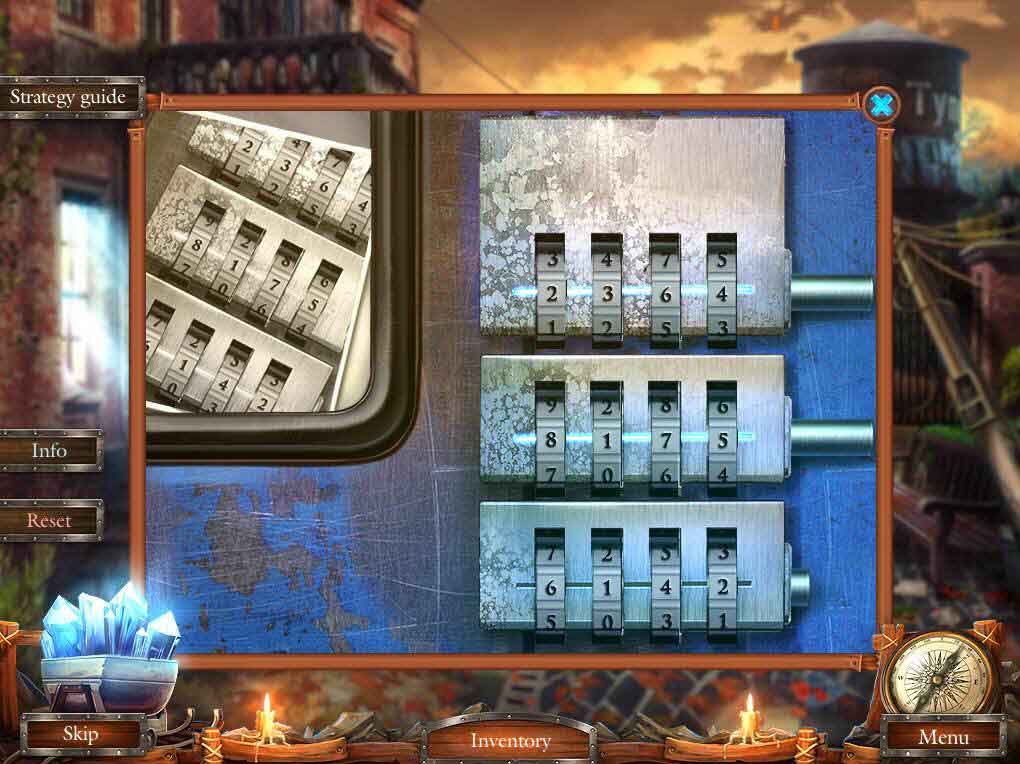
- The goal of the game is to input the right numbers for each lock by looking at the photo.
- For the first lock: 2, 3, 6, 4
- Second lock: 8, 1, 7, 5
- Third lock: 6, 1, 4, 2
- See the screenshot for the solution.
- Go inside the van laboratory.
- Click on the chemistry set to zoom in.
- Take the TEST TUBE.
- Click on the sparkles to play an HOS.
- Find all the items on the list.
- You will receive a SPADE KEY.
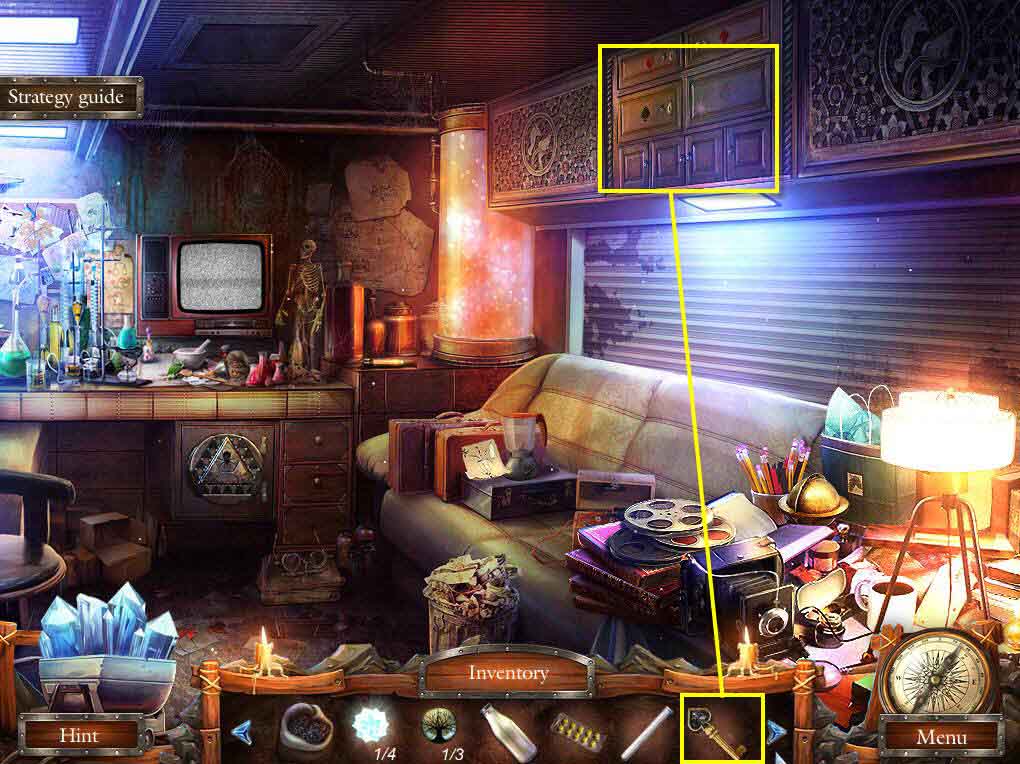
- Click on the overhead compartments to zoom in.
- Use the SPADE KEY on them to open it.
- Take the 2/3 RUNES and the FUEL.
- Go to the halfling by the waterfall.
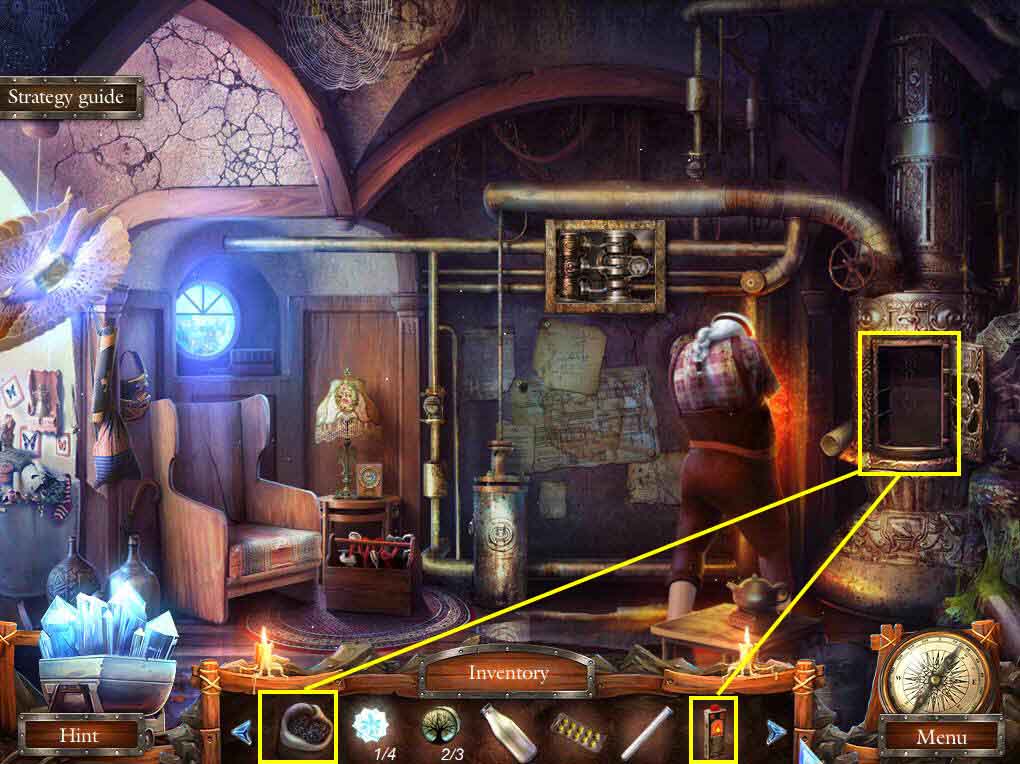
- Click to zoom in on the stove.
- Use the COAL, the FUEL, then the MATCHES on the stove.
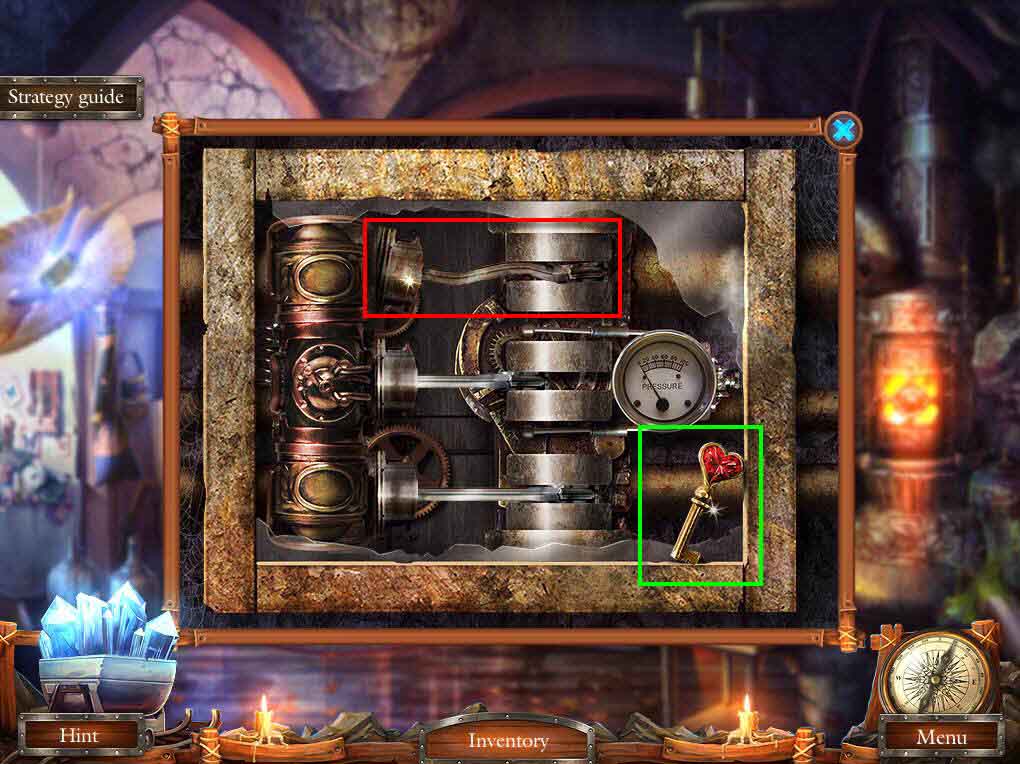
- Click to zoom in on the pump.
- Take the HEART KEY.
- Click to remove the bent piston.
- Go back to the van laboratory.

- Click to zoom in on the overhead compartments.
- Use the HEART KEY.
- Take the PISTON and the VALERIAN.

- Click on the mixer to zoom in.
- Click to remove the lid.
- Use the VALERIAN, the MILK, and the PILLS on the mixer.
- Click to put the lid back on.
- Click the button.
- Take the SLEEPING POTION.
- Go back to the halfling in the waterfall.
- Click on the pump to zoom in.
- Use the PISTON.
- You will receive the KNOWLEDGE AMULET.
- Go to the Stone Castle.

- Click to zoom in on the chronicle.
- Use the KNOWLEDGE AMULET on the slot.
- Take the 3/3 RUNES.
- Go to the waterfall.
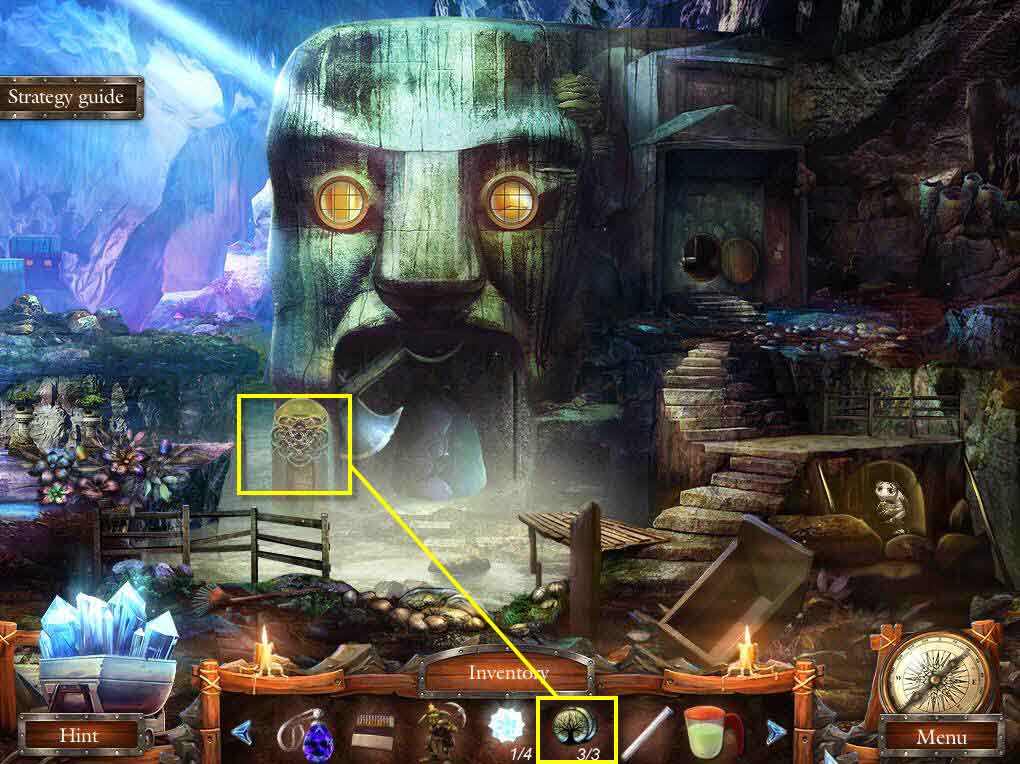
- Click on the rune area to zoom in.
- Use the 3/3 RUNES on the area.
- This will start a mini-game.

- The goal of the game is to click the right runes to get from the tree to the ship.
- Click the following: tree, axe, man, logs, and then ship.
- Go forward.
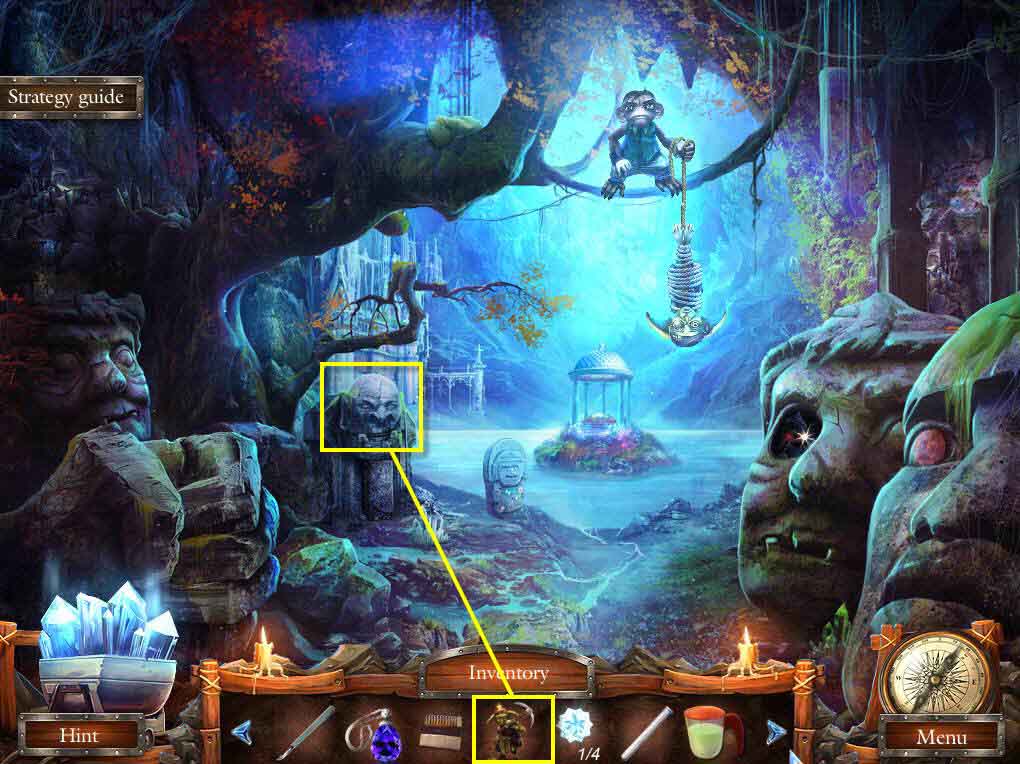
- Click to zoom in on the head.
- Use the GOBLIN on it.
- Take the 2/4 STAR and the DIAMOND KEY.
- Go back to the van laboratory.

- Click on the compartments to zoom in.
- Use the DIAMOND KEY.
- Take the TOY HORSE and the RUBY HEART.
- Click to zoom in on the test tube.
- Use the SLEEPING POTION on the syringe.
- You will get the AMPOULE.
- Go back to the halfling in the waterfall.
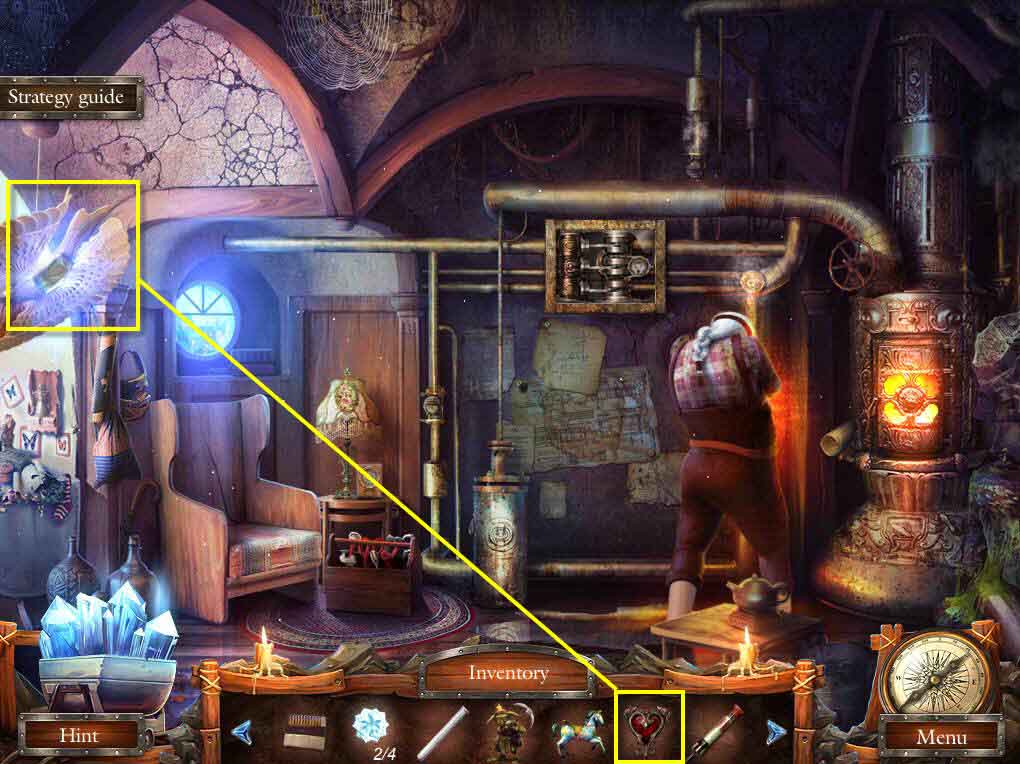
- Click to zoom in on the bird.
- Use the RUBY HEART on it.
- Take the CRYSTAL.
- Go to the inside of the water tower.

- Click to zoom in on the carousel.
- Use the TOY HORSE on it.
- Take the SLINGSHOT and the 3/4 STAR.
- Go back to the old city.
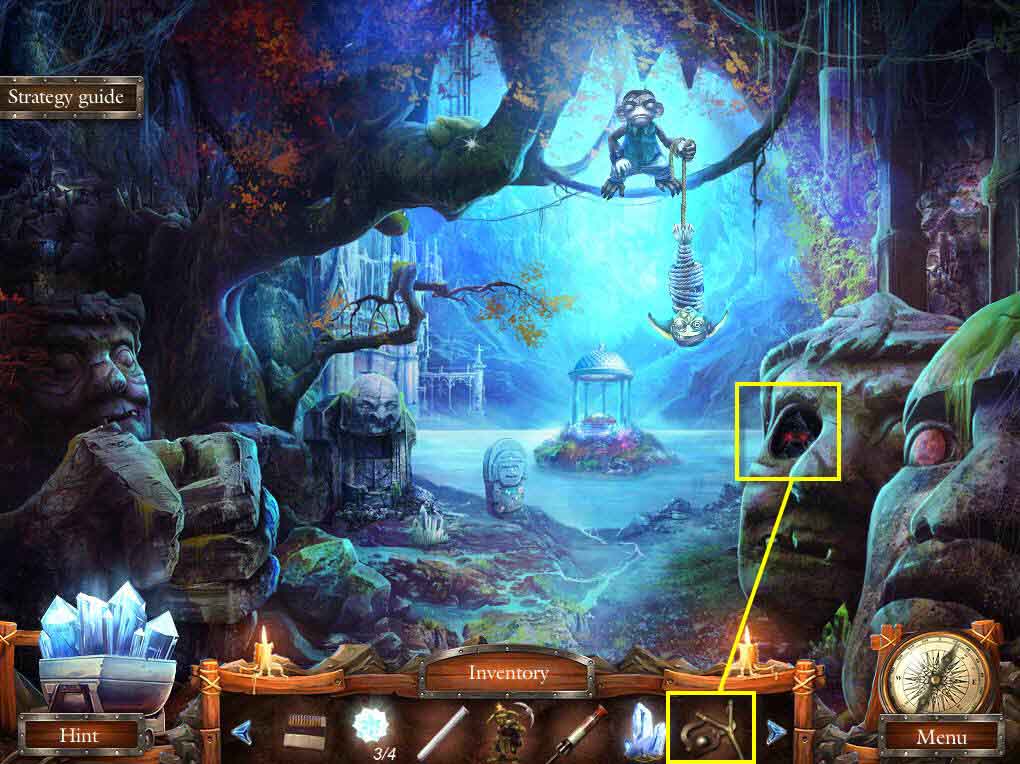
- Click to zoom in on the eye where the bat is.
- Use the SLINGSHOT on the bat.
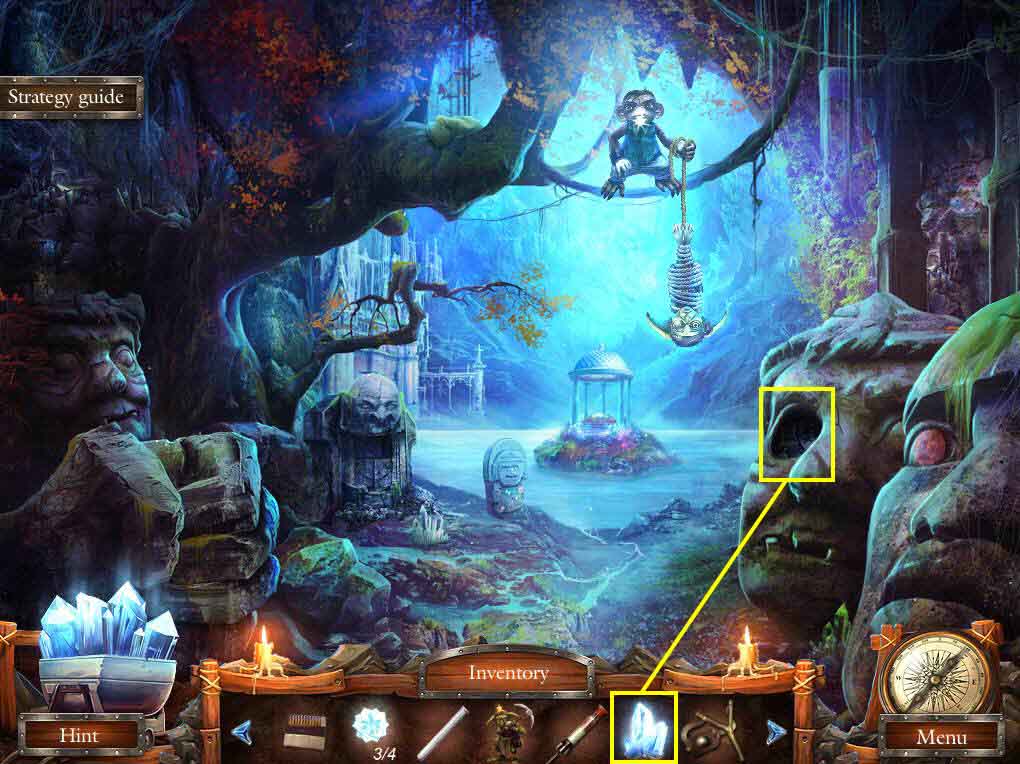
- Click to zoom back into the eye.
- Use the CRYSTAL on the eye.
- Click the sparkles to play the HOS.
- Find the items on the list.
- You will receive the RIFLE STOCK.
- Go back to inside the water tower.

- Click on the rifle table to zoom in.
- Use the RIFLE STOCK on the table.
- This will start a mini-game.
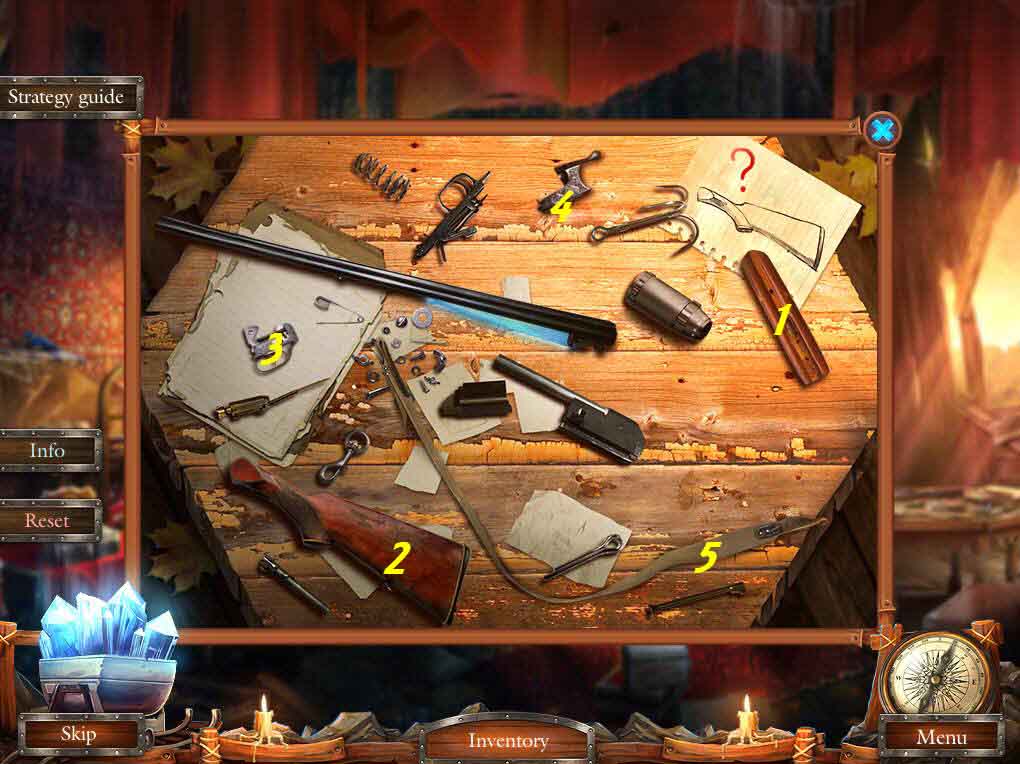
- The goal of the game is to build the rifle by placing the right parts in the right order.
- See the screenshot for the solution.
- Use AMPOULE on the rifle.
- You will get the RIFLE.
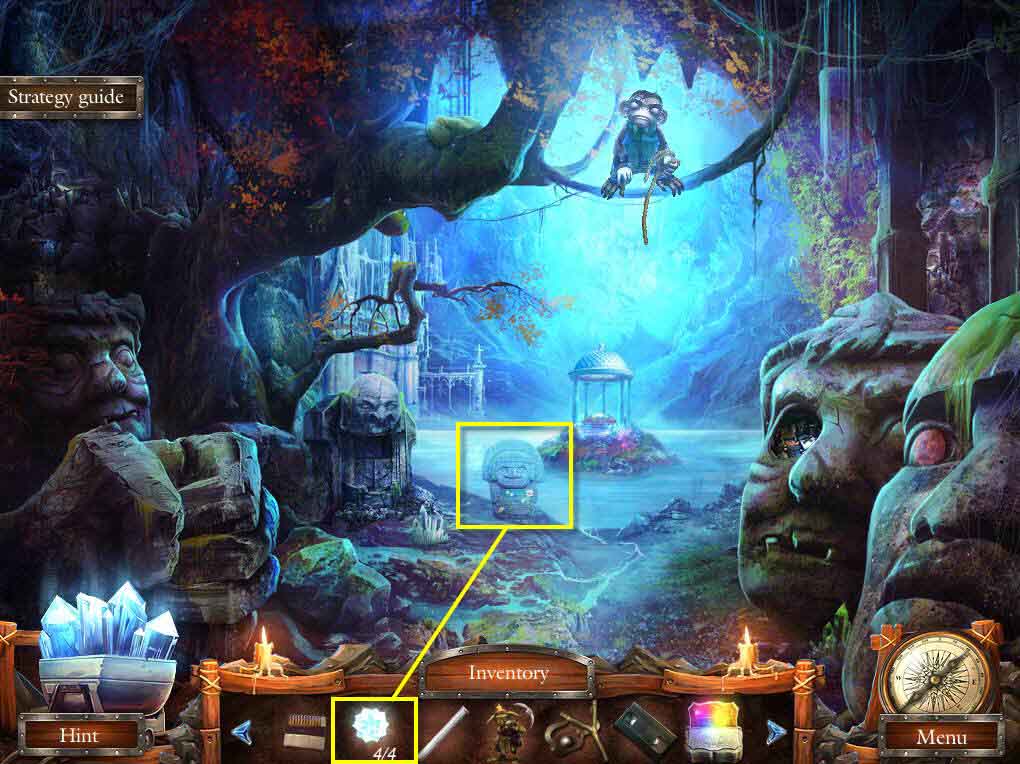
- Go back to the old city.
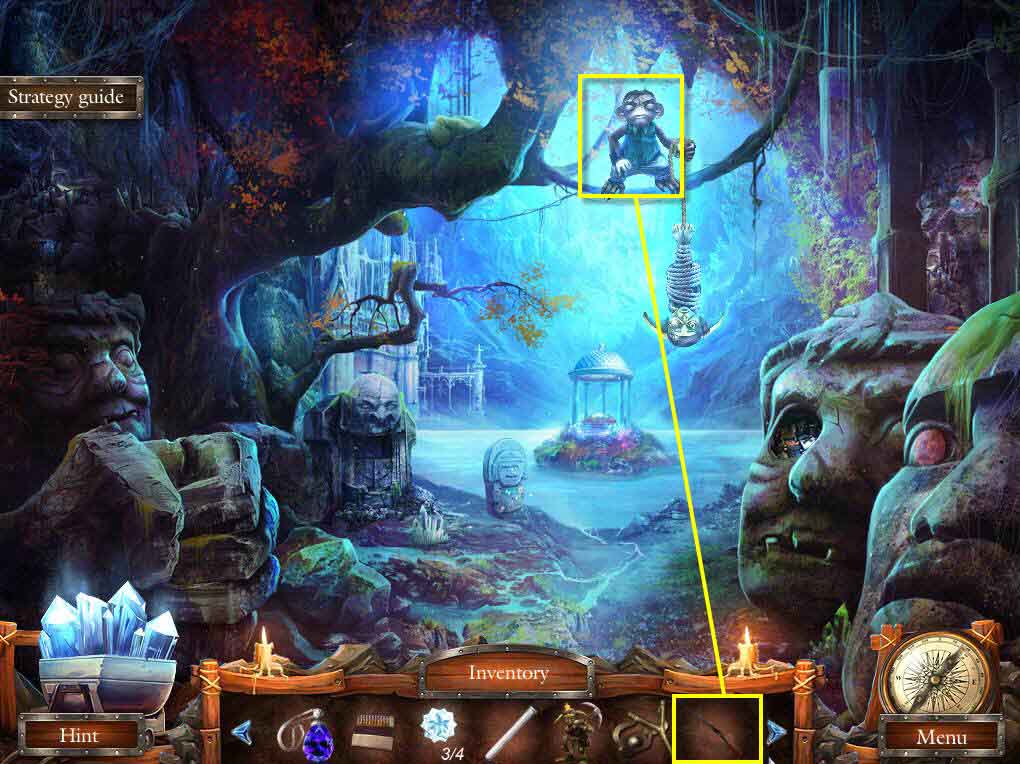
- Click on the monkey to zoom in.
- Use the RIFLE on him.

- Click to zoom in on the goblin.
- Use the SCALPEL on the rope to free him.
- You will receive the SPIDER AMULET.
- Go back to the van laboratory.
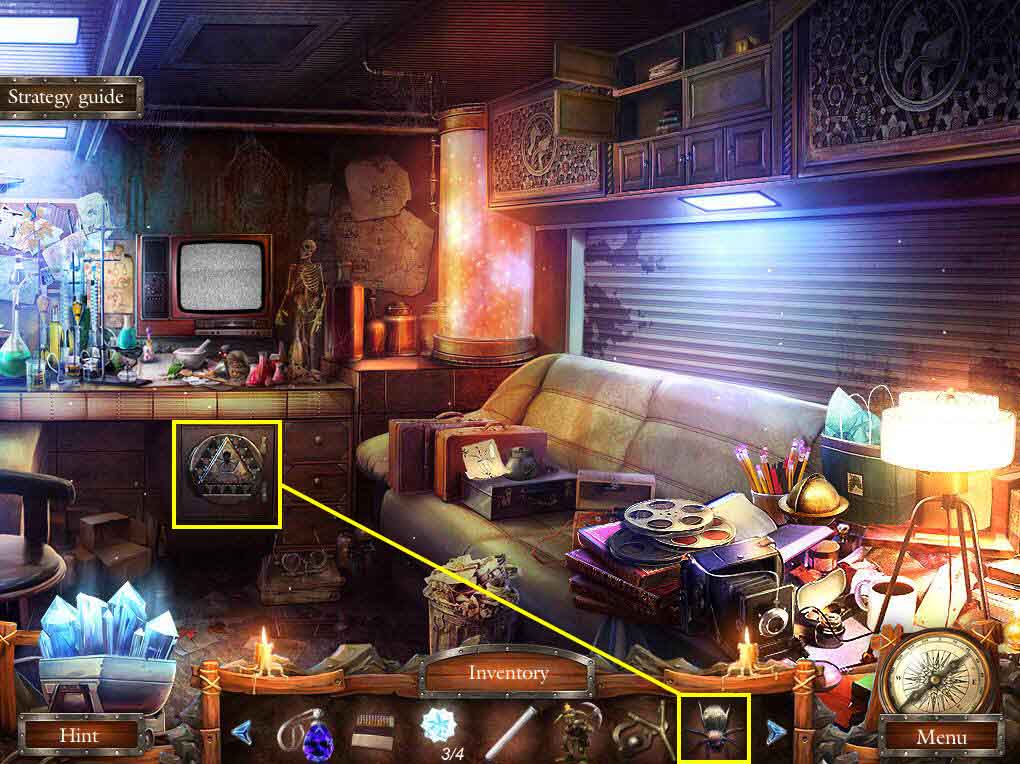
- Click to zoom in on the safe.
- Use the SPIDER AMULET on the slot.
- This will start a mini-game.
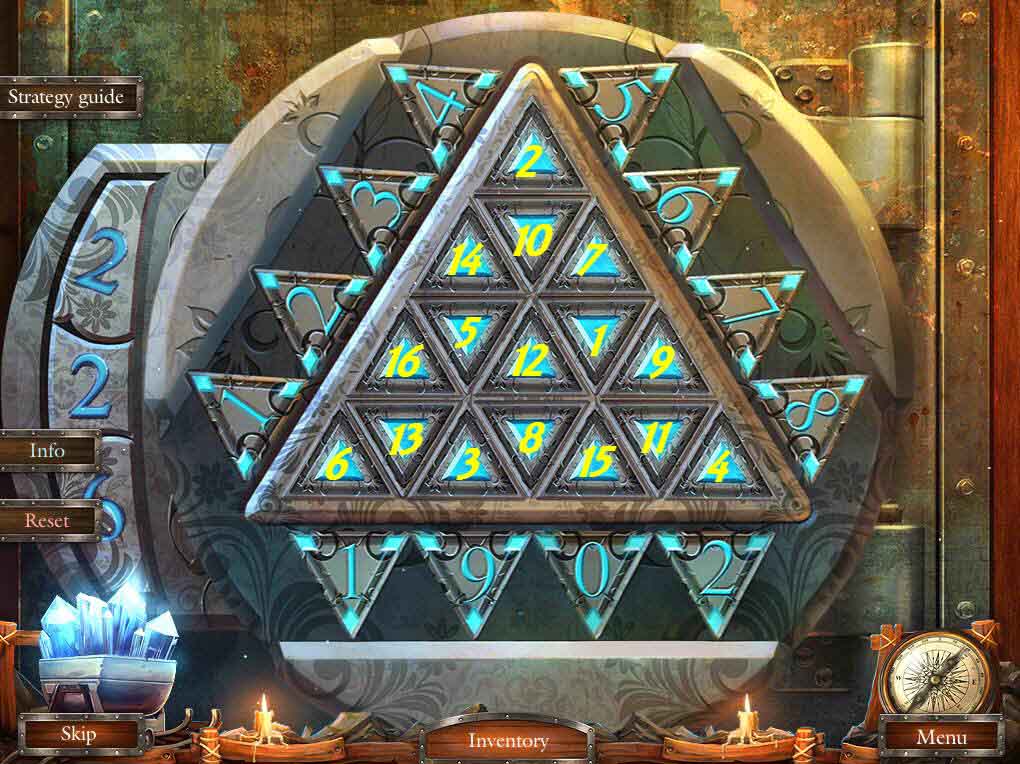
- The goal of the game is to select the right triangle.
- Check the numbers on the left and find the triangle that lights up those numbers.
- See the screenshot for the solution.
- Take the 4/4 STAR, the VIDEOTAPE, and the MUSIC SHEET.
- Go to inside the water tower.
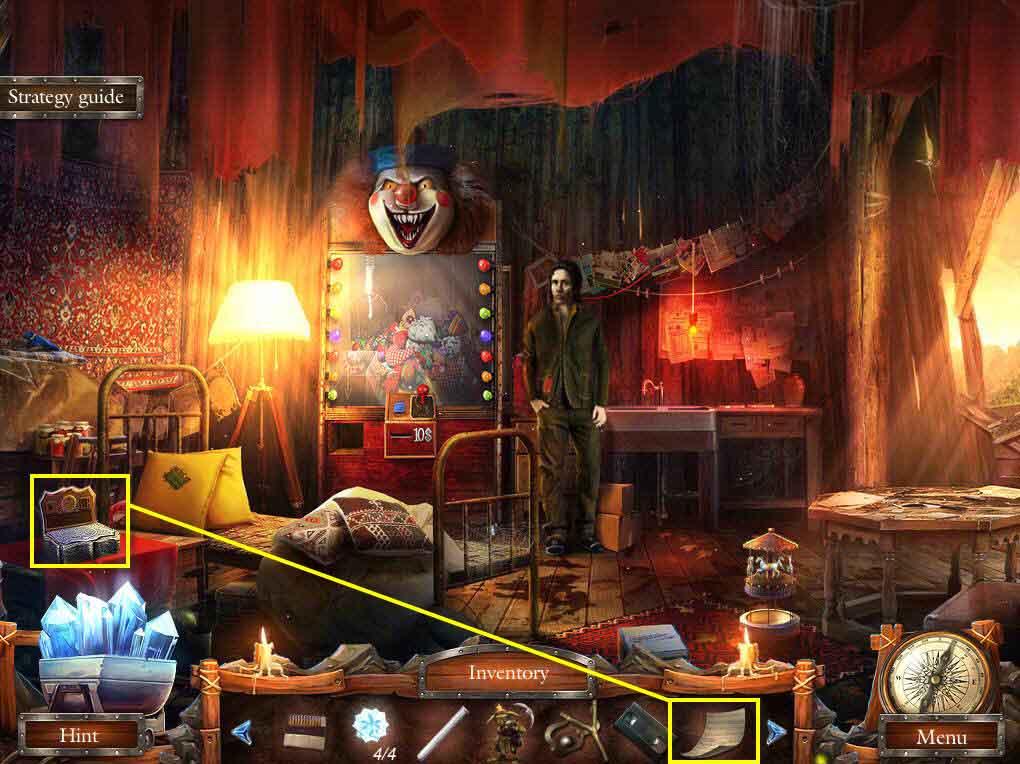
- Click on the music box to zoom in.
- Use the MUSIC SHEET on the box.
- This will start a mini-game.
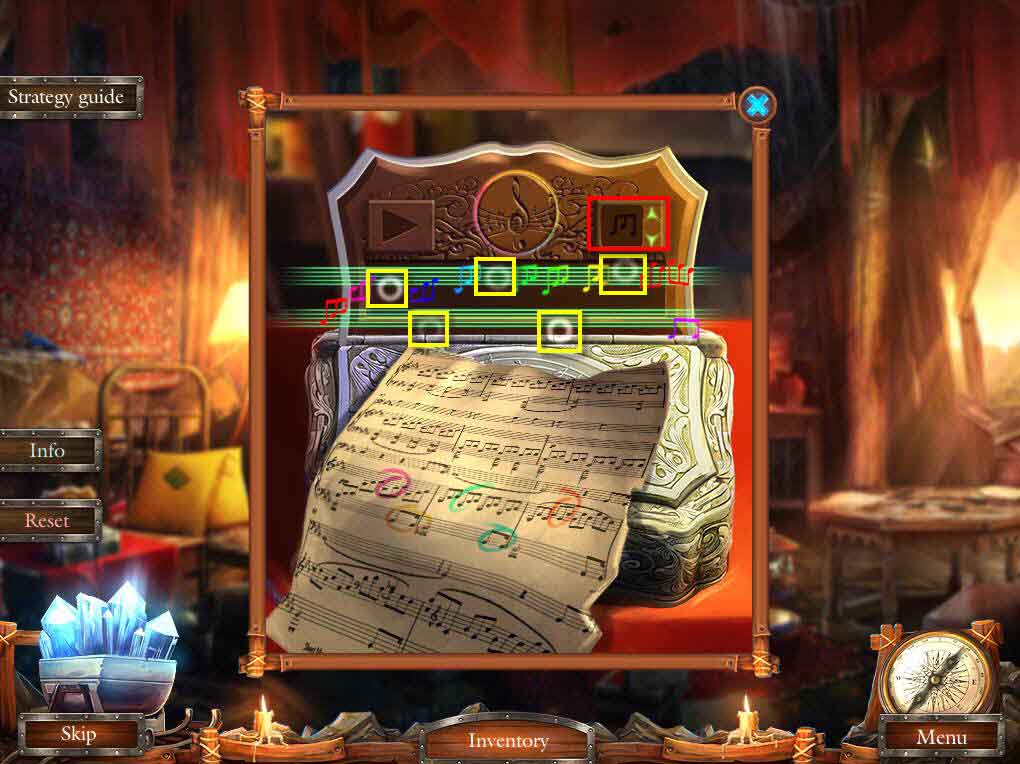
- The goal of the game is to find the missing notes on the colored line.
- The music sheet shows the missing notes circled.
- Click on the green arrows on the right to cycle through the notes.
- Once you find a missing note, click on it and drag it to the place where it's missing on the colored lines.
- Take the MUSIC BOX when done.
- Go back to the old city.
- Click on the octopus to zoom in.
- Use the 4/4 STARS on the slots.
- This will start a mini-game.
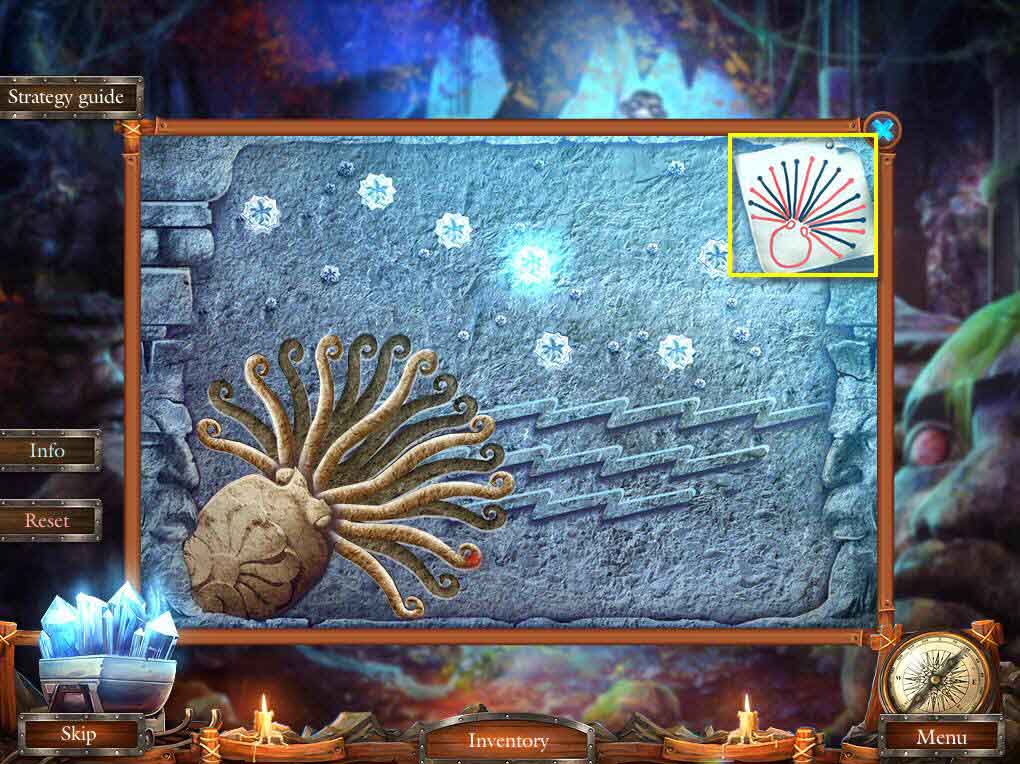
- The goal of the game is to move the tentacles so that they match the red lines from the clue in the upper right corner.
- When done, go forward.
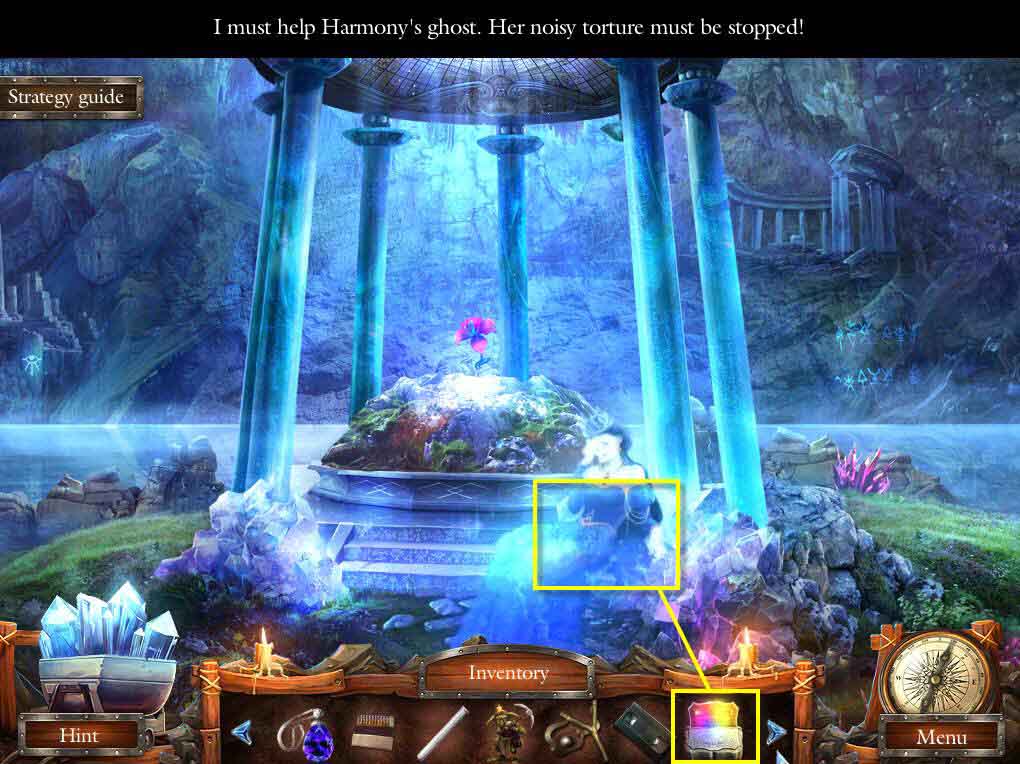
- Click to talk to the ghost.
- Click to zoom in on the the ghost.
- Use the MUSIC BOX on the shelf.
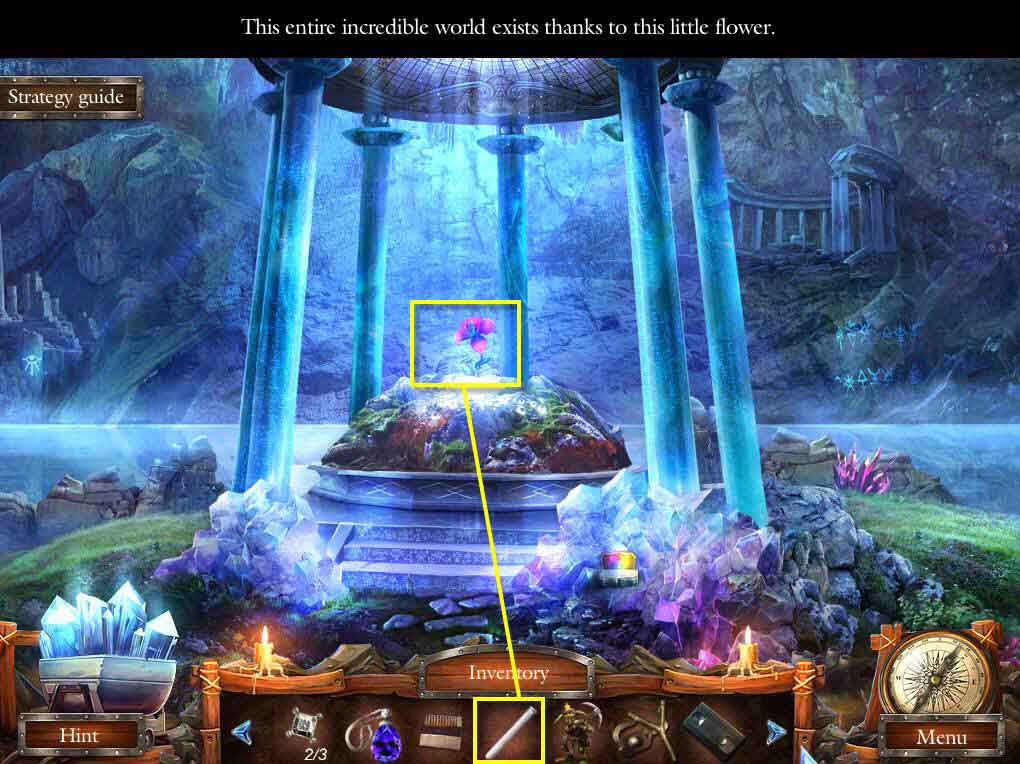
- Click to zoom in on the flower of life.
- Take the 2/3 TOPAZ that's at the base of the flower.
- Use the TEST TUBE on the flower.
- You will receive POLLEN.
- Go back to the van laboratory.
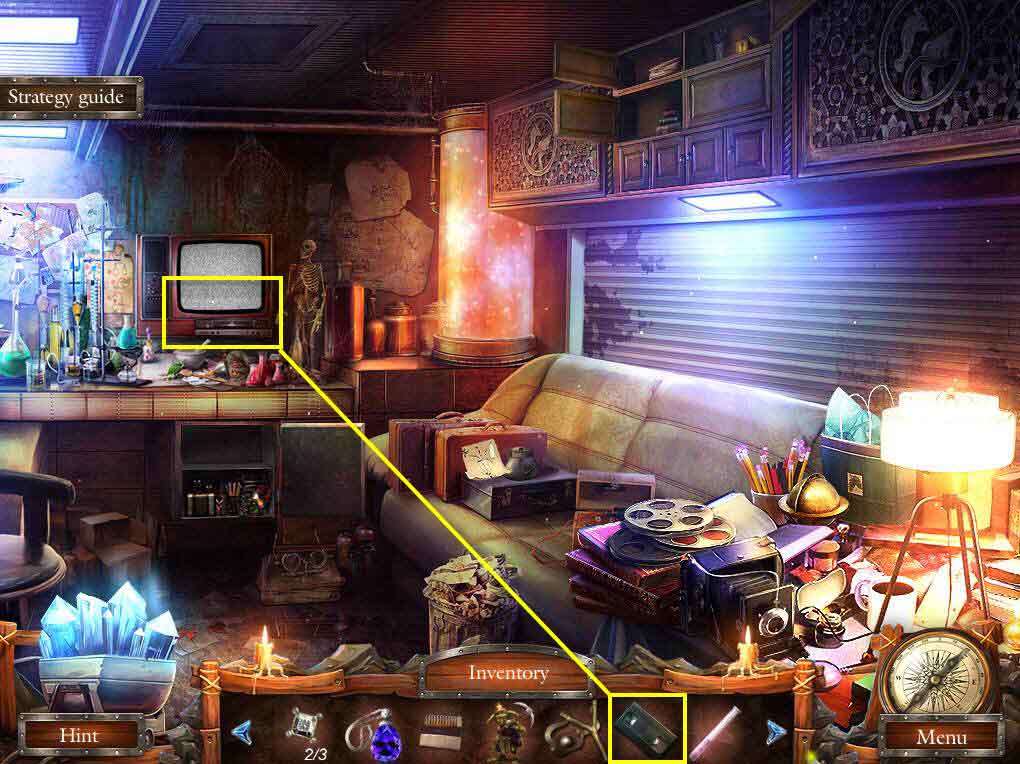
- Click on the chemistry area to zoom in.
- Use the VIDEOTAPE on the VCR.
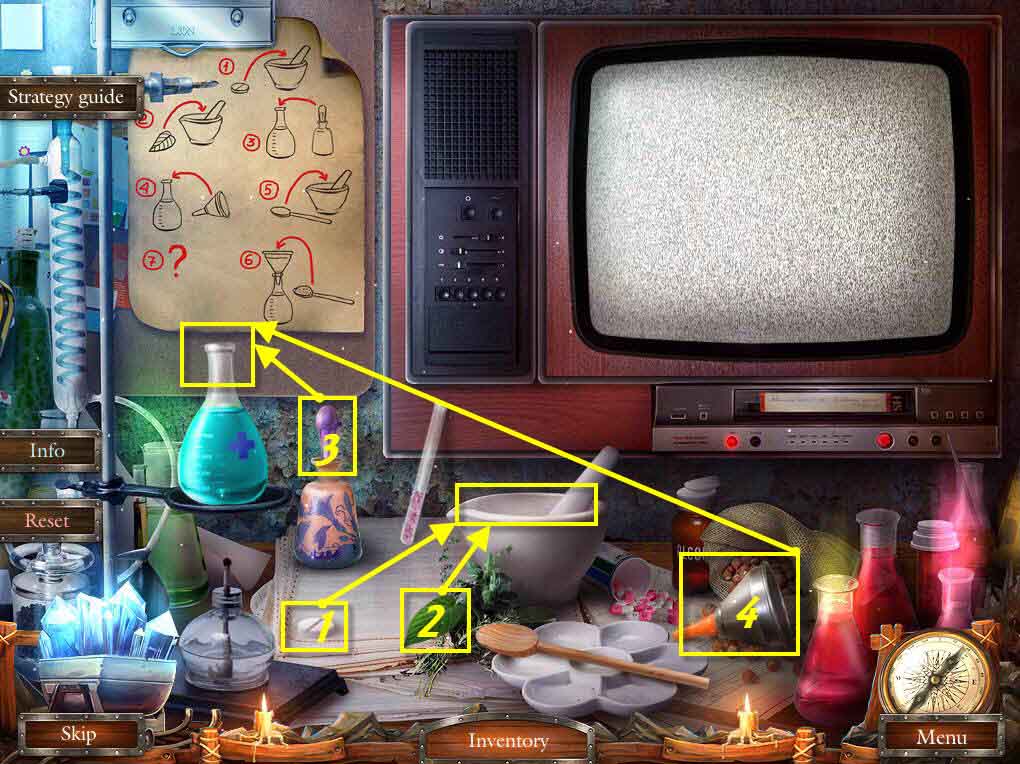
- Use the POLLEN on the table.
- Use the tablet on the mortar and pestle.
- Use the leaf on the mortar and pestle.
- Use the dropper on the flask.
- Use the funnel on the flask.
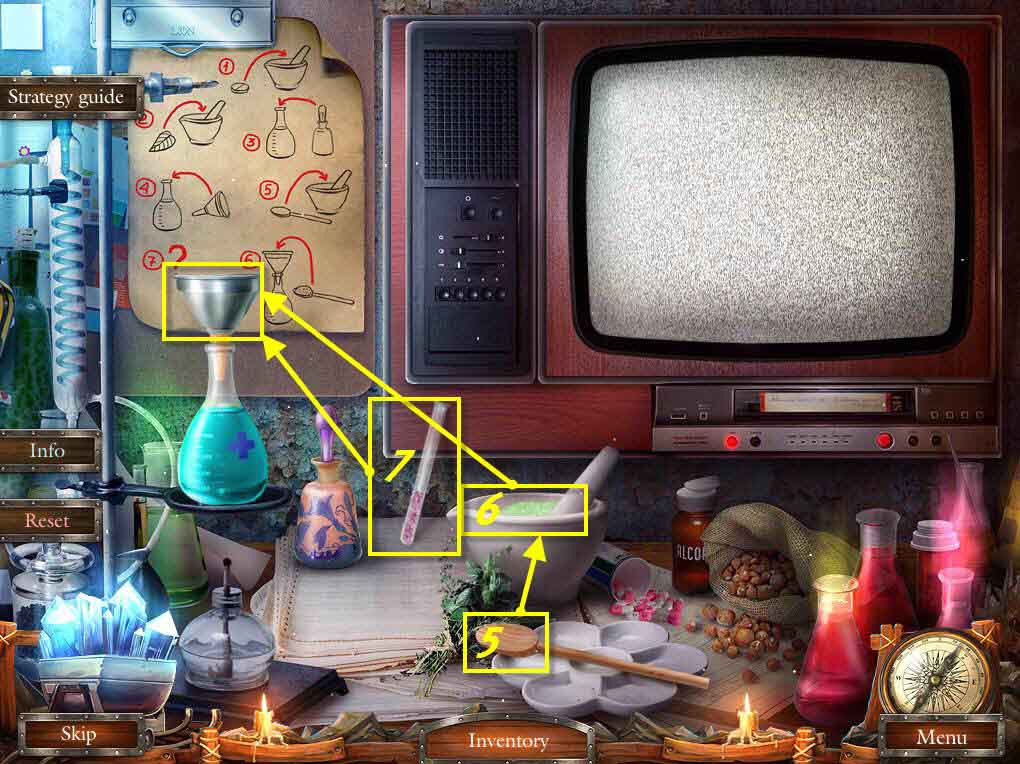
- Use the spoon on the mortar and pestle.
- Use the spoon on the flask.
- Use the pollen on the flask.
- Take the HEALING POTION.
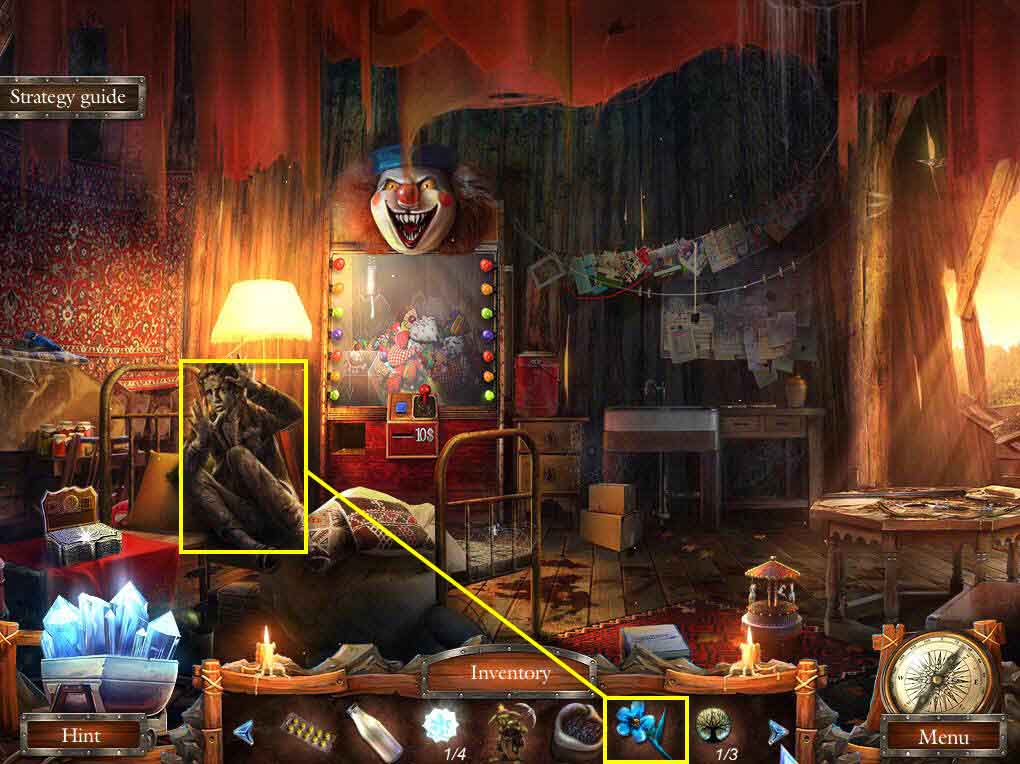
- Go to the hospital hall.
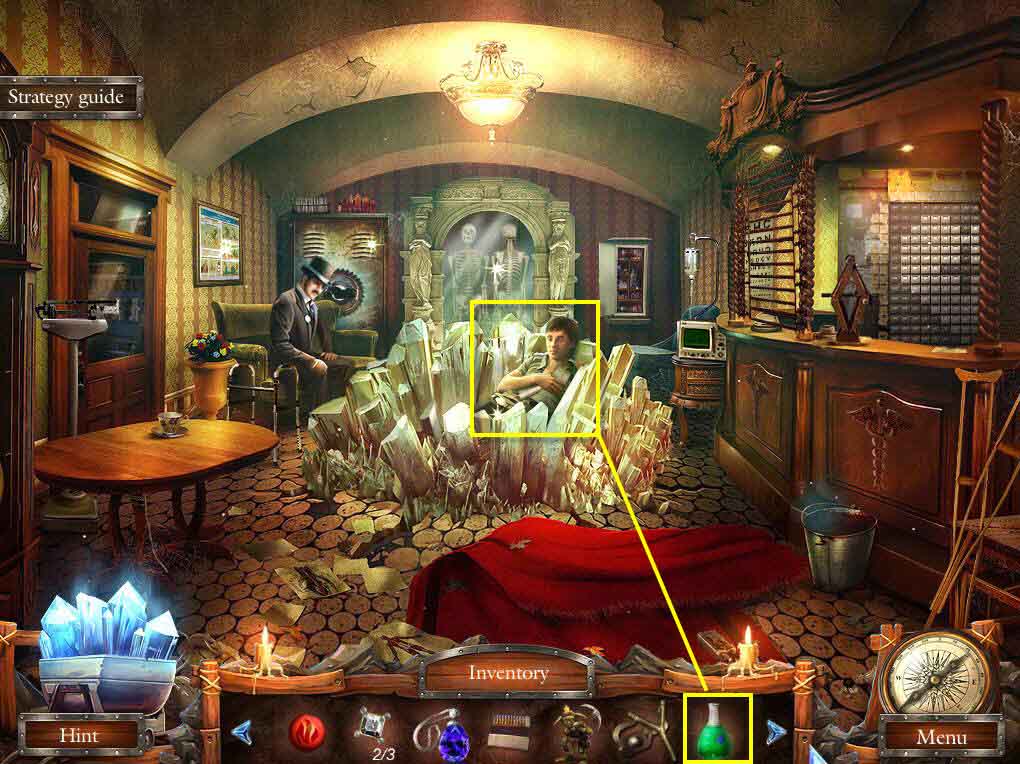
- Click on Brandon to zoom in.
- Use the HEALING POTION on him.
- Go back to the rotunda in the old city.