
Grim Tales: The Stone Queen: Chapter Two: The Hospital
Our Grim Tales The Stone Queen Walkthrough will provide key insight into why this once kind benefactor has turned her back on the people of Stoneville. Armed with solutions to countless puzzles, custom screenshots clearly marked to show you exactly what to do, and detailed instructions that will guide you from start to finish, you'll have no problem uncovering the truth that's brought this tiny mining town to its knees.
- Click on the window of the hospital to zoom in.
- Take the MONOCLE and the EMERALD 1/3.
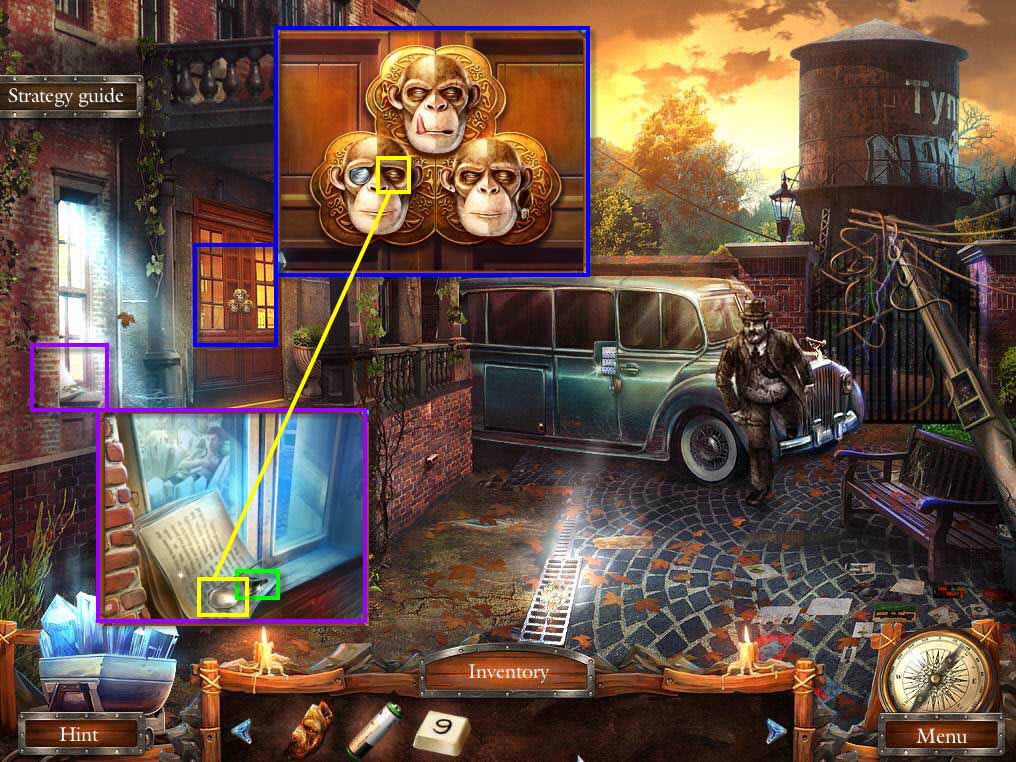
- Click on the hospital door to zoom in.
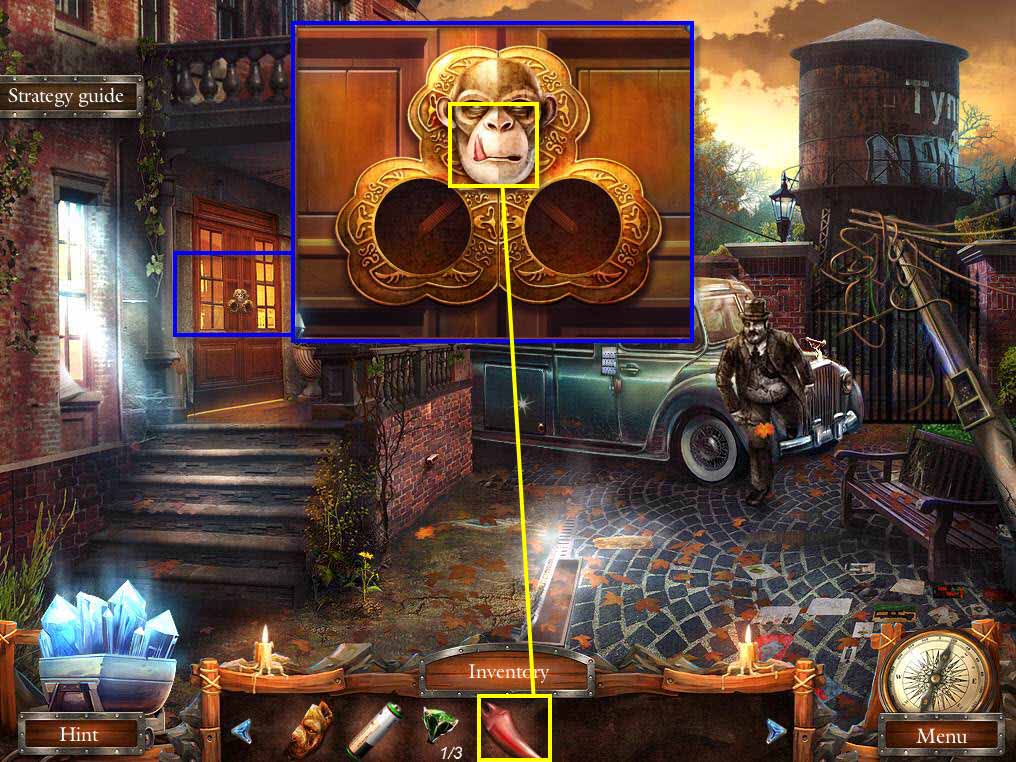
- Use the MONOCLE on the chimp head on the left.
- Take the TOY MONKEY HEAD.
-
Go back one screen.
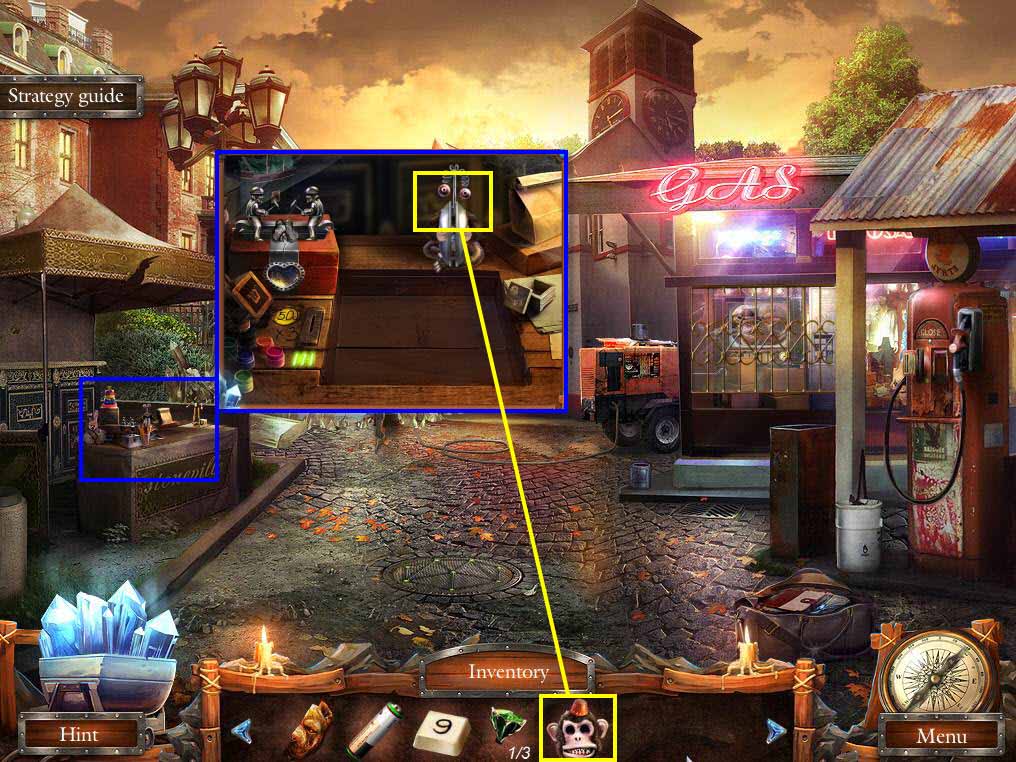
- Click on the stall on the left to zoom in.
- Use the TOY MONKEY HEAD on the toy monkey.
-
Take the SPIDER.
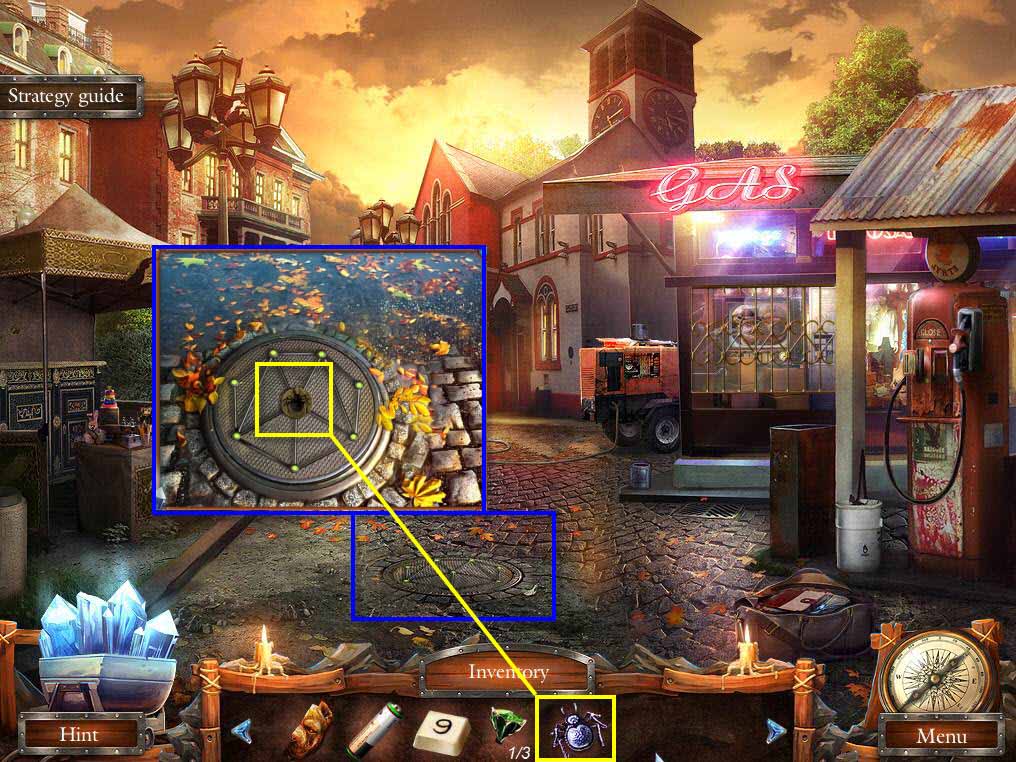
- Click on the hatch on the ground to zoom in.
- Use the SPIDER on the hatch.
-
This will start a mini-game.
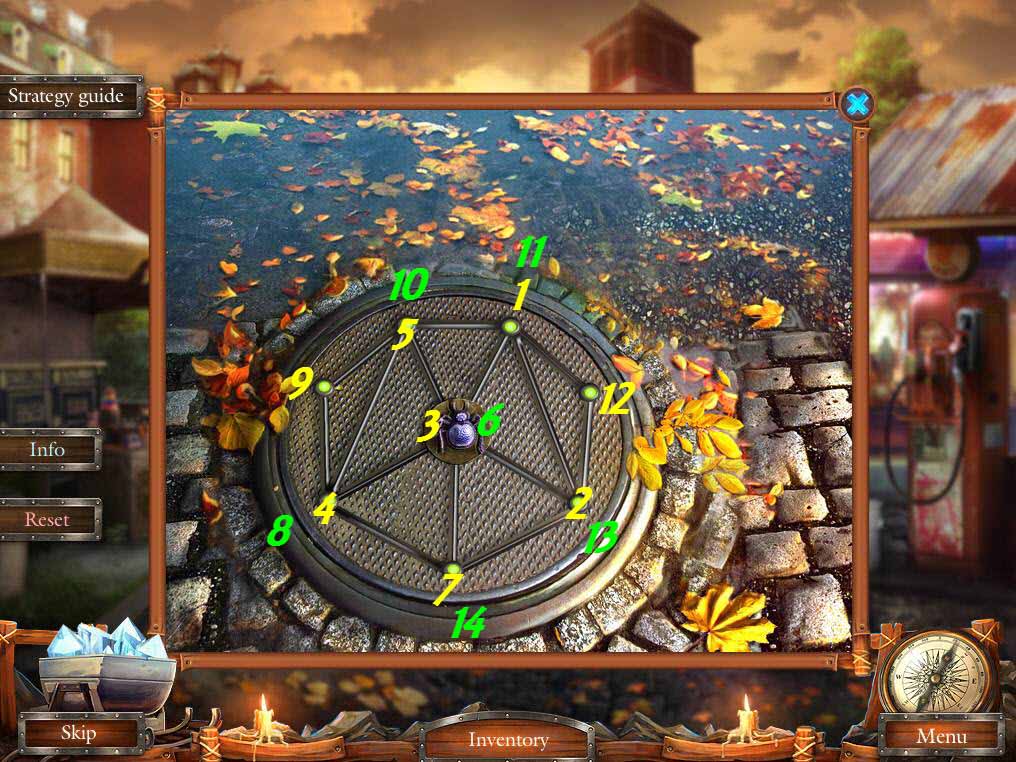
- The goal of the game is to move the spider from point to point without overlapping any lines.
- See the screenshot for the solution.
-
When you are done, click on the sparkles to play the hidden object scene.
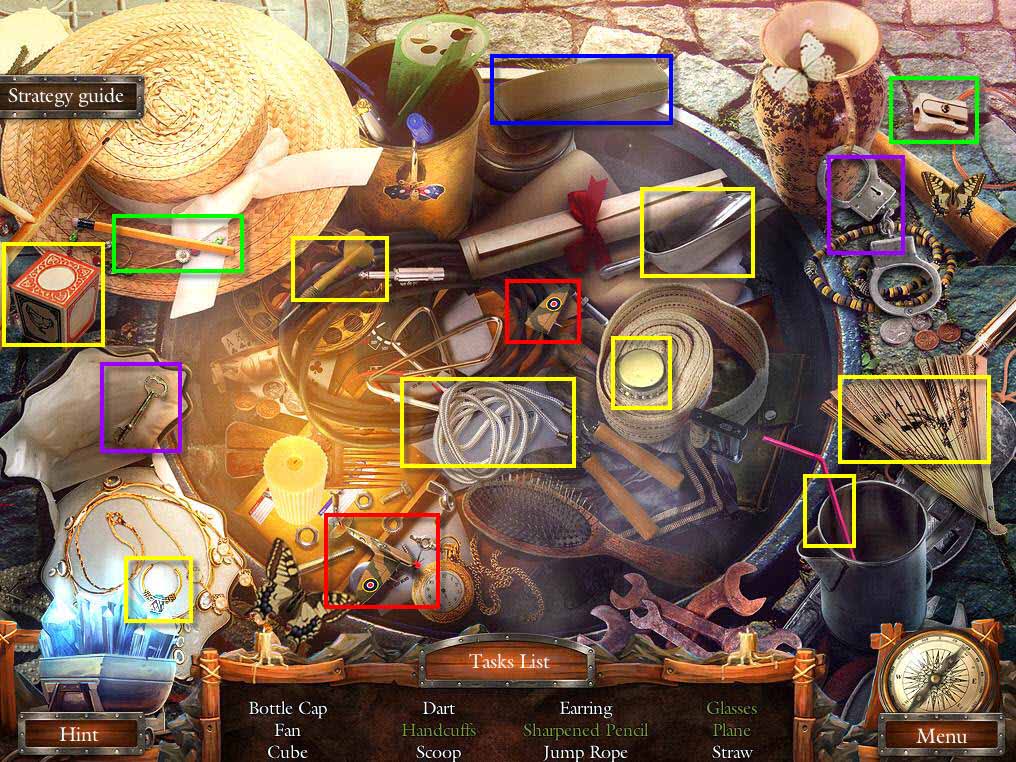
- Find all the items on the list.
- When you are done, you will receive the EARRING.
-
Go forward to the hospital.
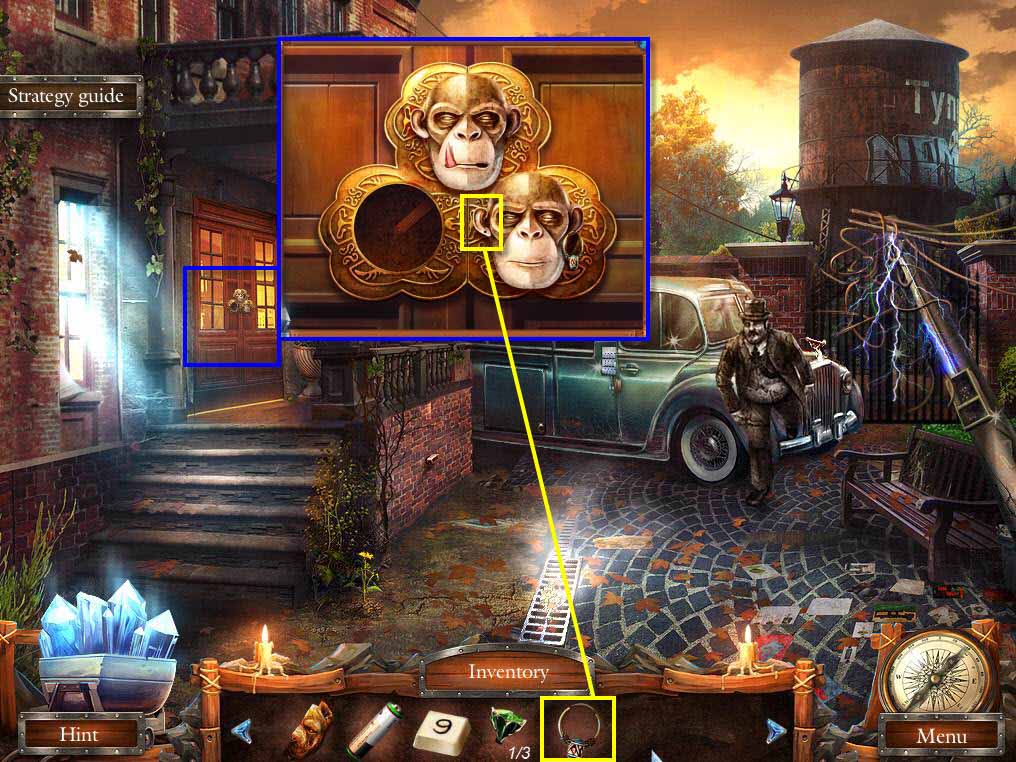
- Click on the door of the hospital to zoom in.
- Use the EARRING on the chimp head on the right.
-
Take the BRONZE BUTTON.
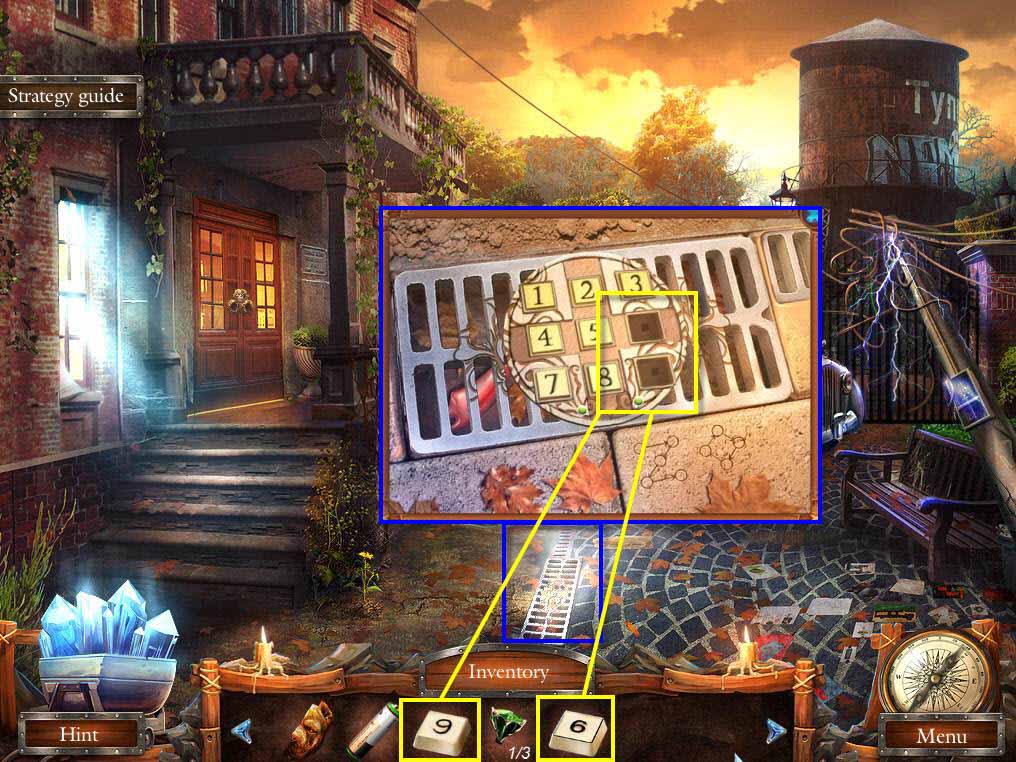
- Click on the grate on the ground to zoom in.
- Use the BRONZE BUTTONS on the empty slots.
-
This will start a mini-game.
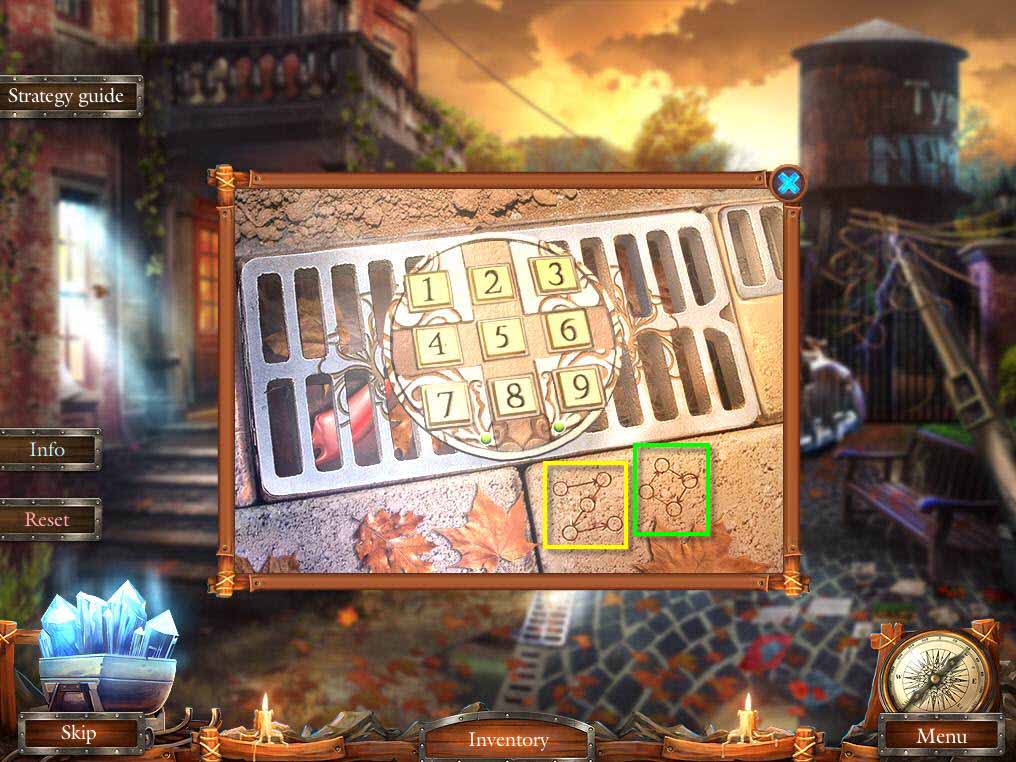
- The object of the game is to tap the right keys in the right order.
- There's a hint right below the grate.
- Click: 1, 3, 5, 7, 9
- Then Click: 2, 6, 8, 4
-
Take the FANG.
- Click on the hospital door to zoom in.
- Use the FANG on the final chimp head.
-
Enter the hospital.
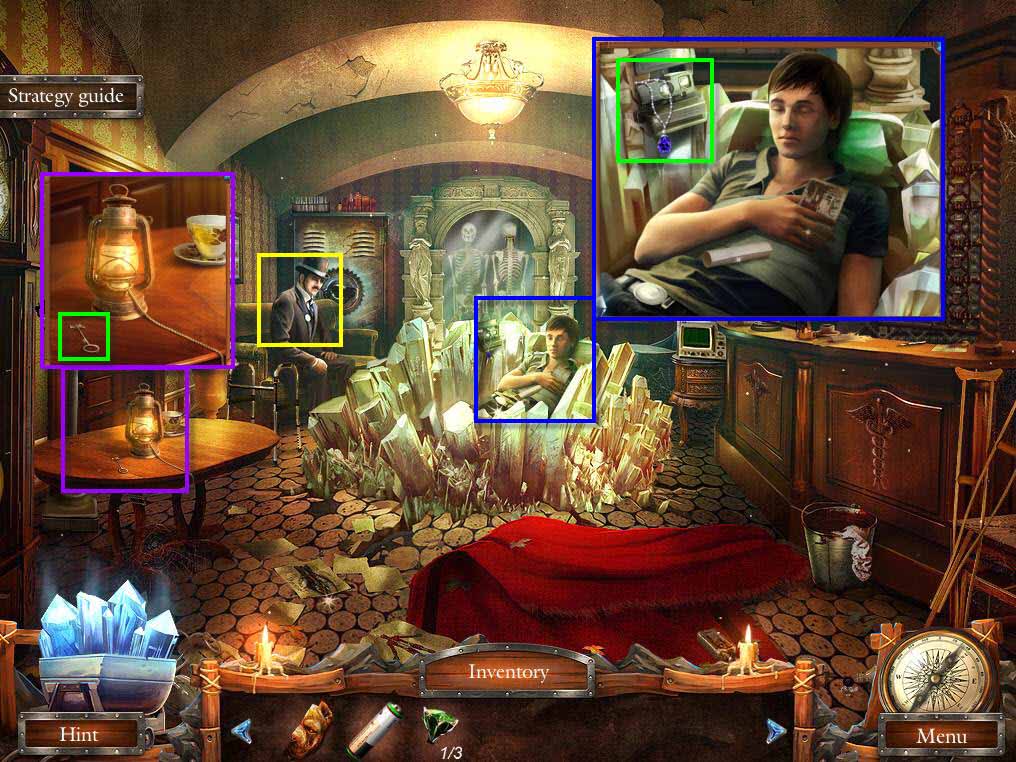
- Click on the man to talk to him.
- Click on the table on the left to zoom in.
- Take the CROSS SHAPED KEY.
- Click on Brandon to zoom in.
- Take the CAMERA and the BLUE CRYSTAL.
-
Go back one screen.
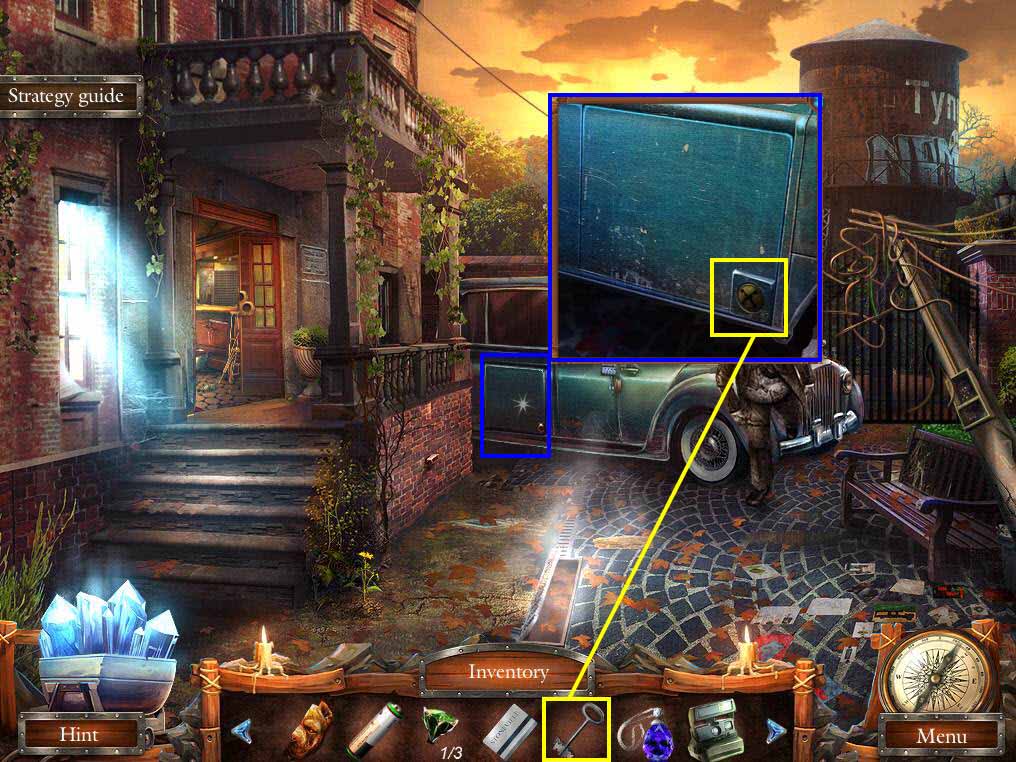
- Click on the car's luggage compartment to zoom in.
- Use the CROSS SHAPED KEY on the lock.
- Take the JACK and the GAS CAN.
-
Return to the hospital.
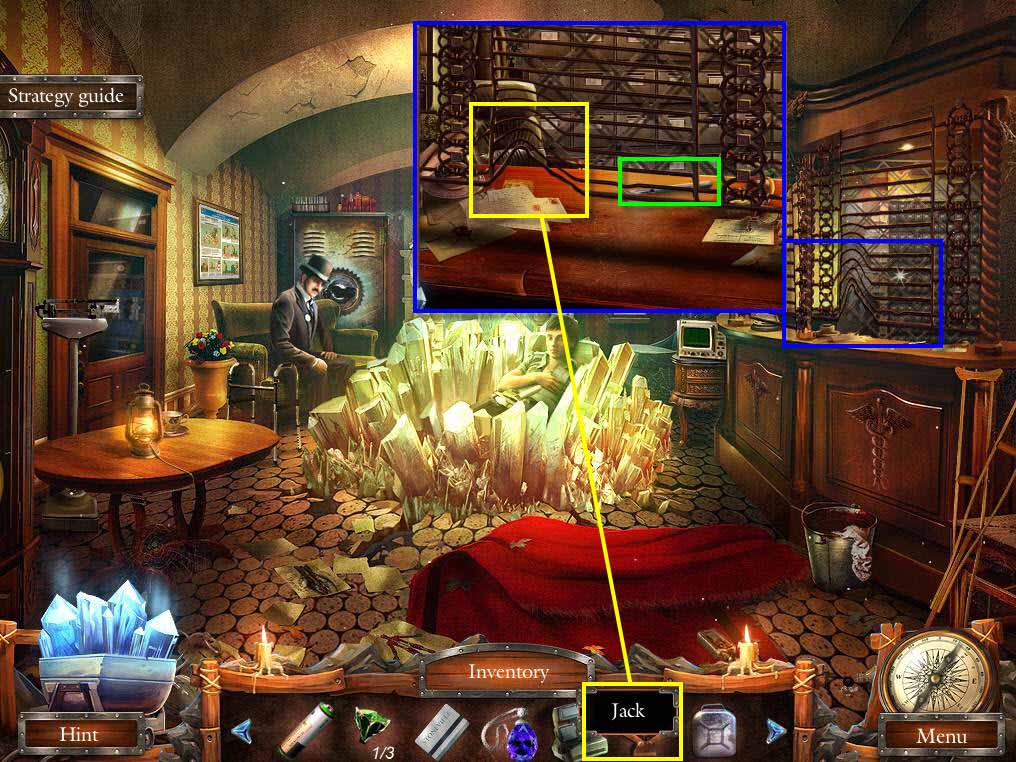
- Click on the reception area on the right where the card catalog is to zoom in.
- Use the JACK on the grate.
- Click to life the grate.
-
Take the SCALPEL.

- Click on the table on the left to zoom in.
- Use the SCALPEL on the rope.
- Take the OIL LAMP.
-
Go back one screen.
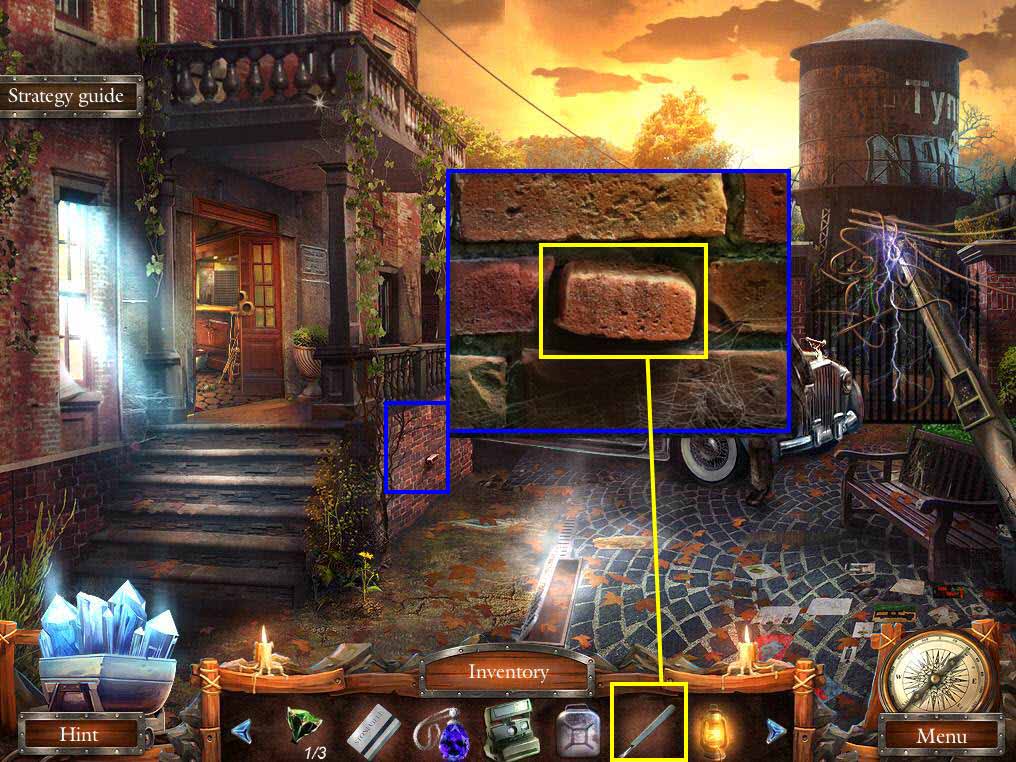
- Click on the brick wall to zoom in.
- Use the SCALPEL on the brick.
-
Take the PIECE OF AMULET.
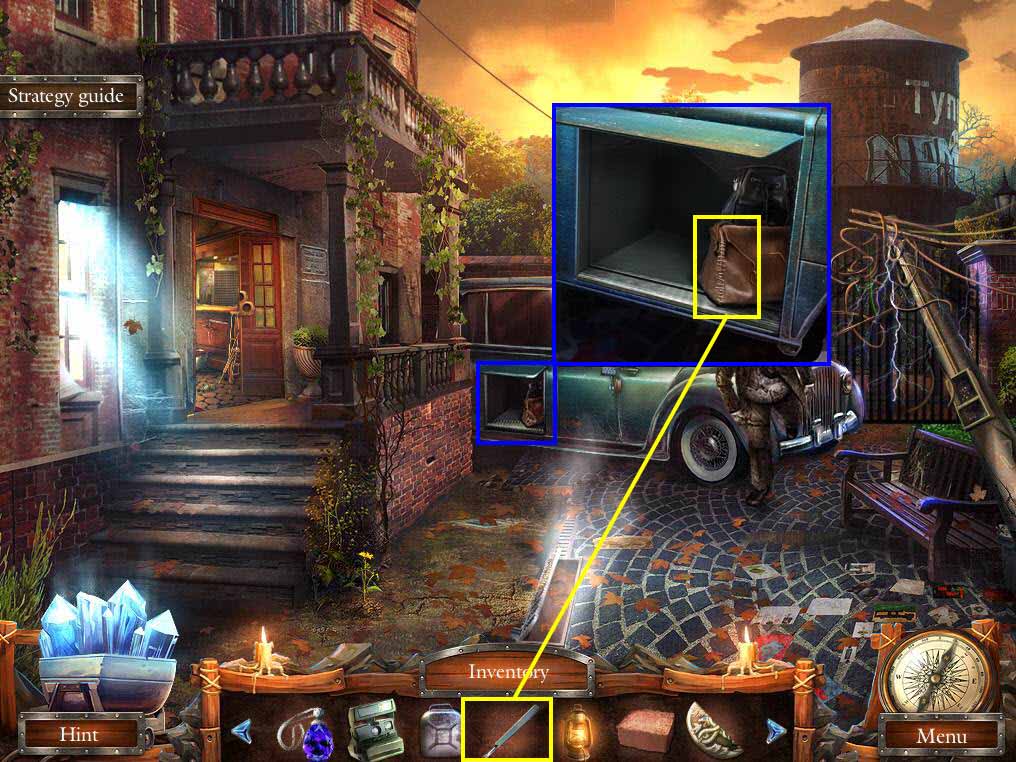
- Click on the luggage compartment to zoom in.
- Use the SCALPEL on the bag.
- Click to open the bag.
- Take the FUNNEL.
-
Go back one screen.
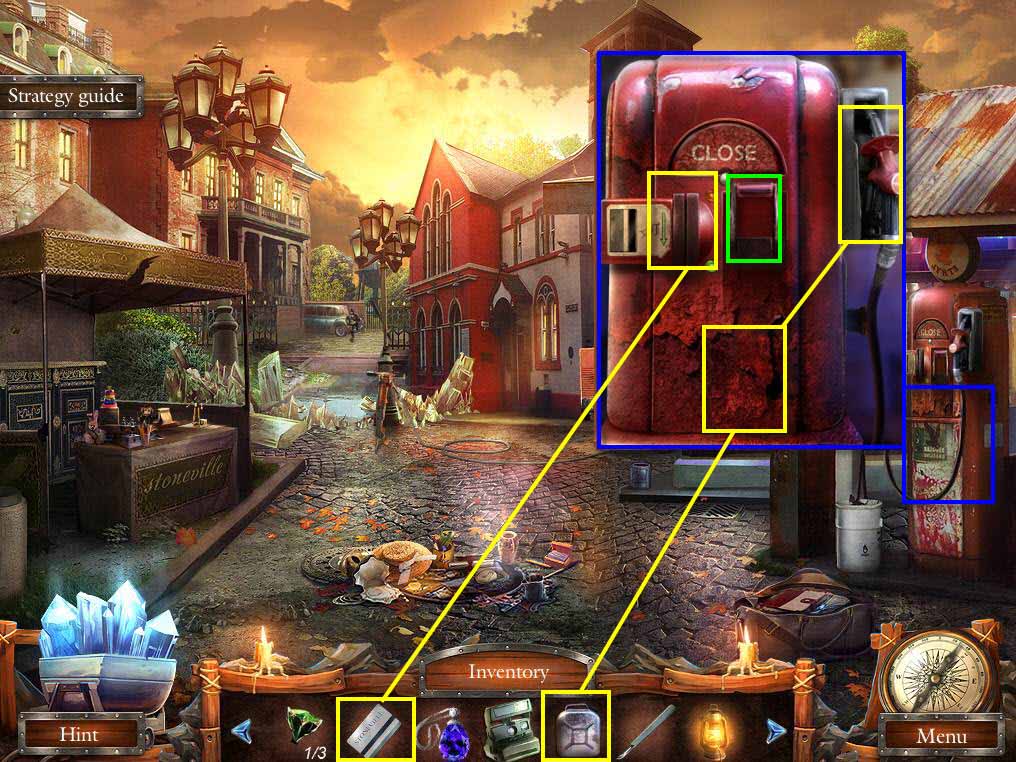
- Click on the fuel pump to zoom in.
- Use the CARD on the card swipe area.
- Pull the lever to turn the machine on.
- Use the GAS CAN on the fuel pump.
- Click on the handle and use it on the GAS CAN.
- Take the GASOLINE.
-
Go back one screen.
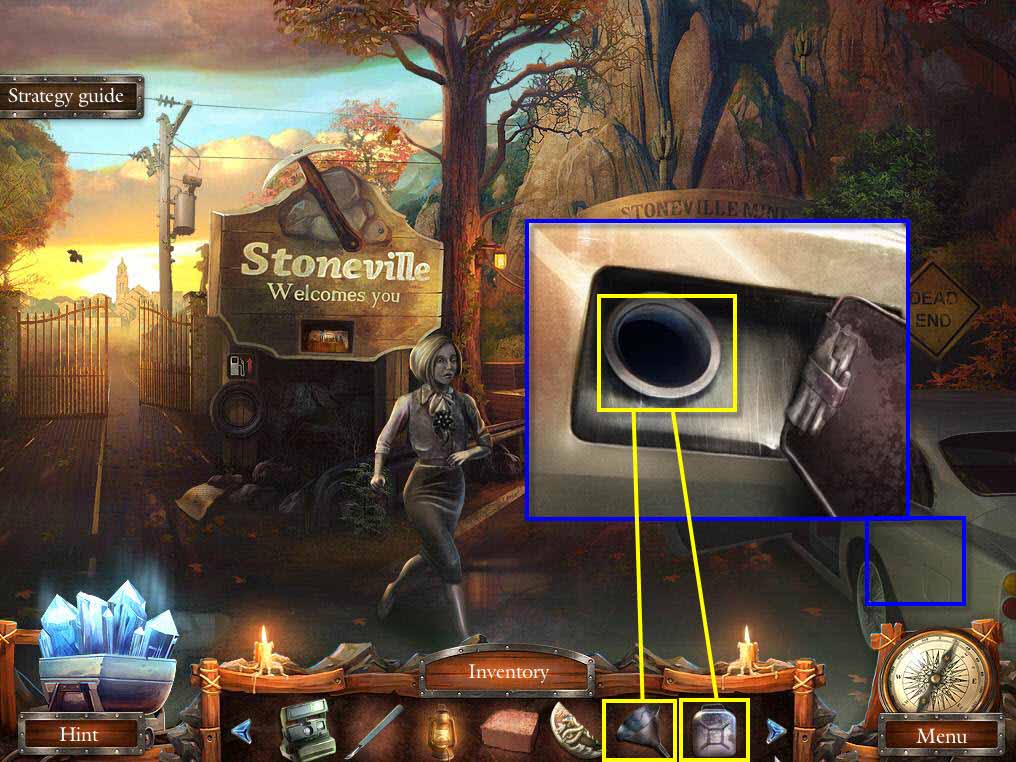
- Click on the fuel tank of the car to zoom in.
- Click to open the tank.
- Click to take the cap off the tank.
-
Use the FUNNEL on the gas tank and then use the GASOLINE on the funnel.
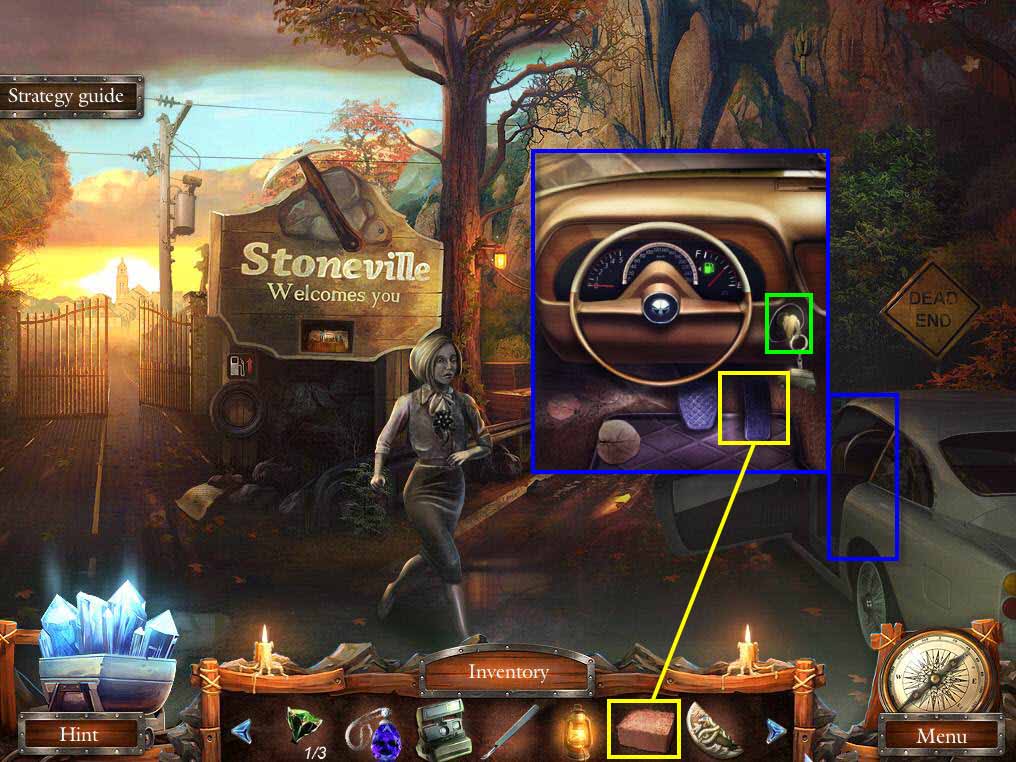
- Click on the car door to zoom in.
- Use the BRICK on the gas pedal.
- Click on the key to start the car.