
Death Pages: Ghost Library: Chapter Four: Hello, Hamlet
Our Death Pages: Ghost Library Walkthrough will be your companion as you fight to save three teenagers from a tragic end. Being engrossed in a book is one thing, but having your soul taken from your body and injected into a tragedy is quite another. When three teenagers are subjected to just such a fate it’s up to you to go into the story and make the ending a happy one, or else the children will be forced to follow the tale to its original tragic end. Use our tips, step-by-step instructions, and custom screenshots to help you turn tragedy into triumph.
Chapter One: Rescuing Mercutio
Chapter Two: Rescuing Juliet
Chapter Three: Rescuing Romeo
Chapter Four: Hello, Hamlet
Bonus Chapter
Ask for help in the comments below!
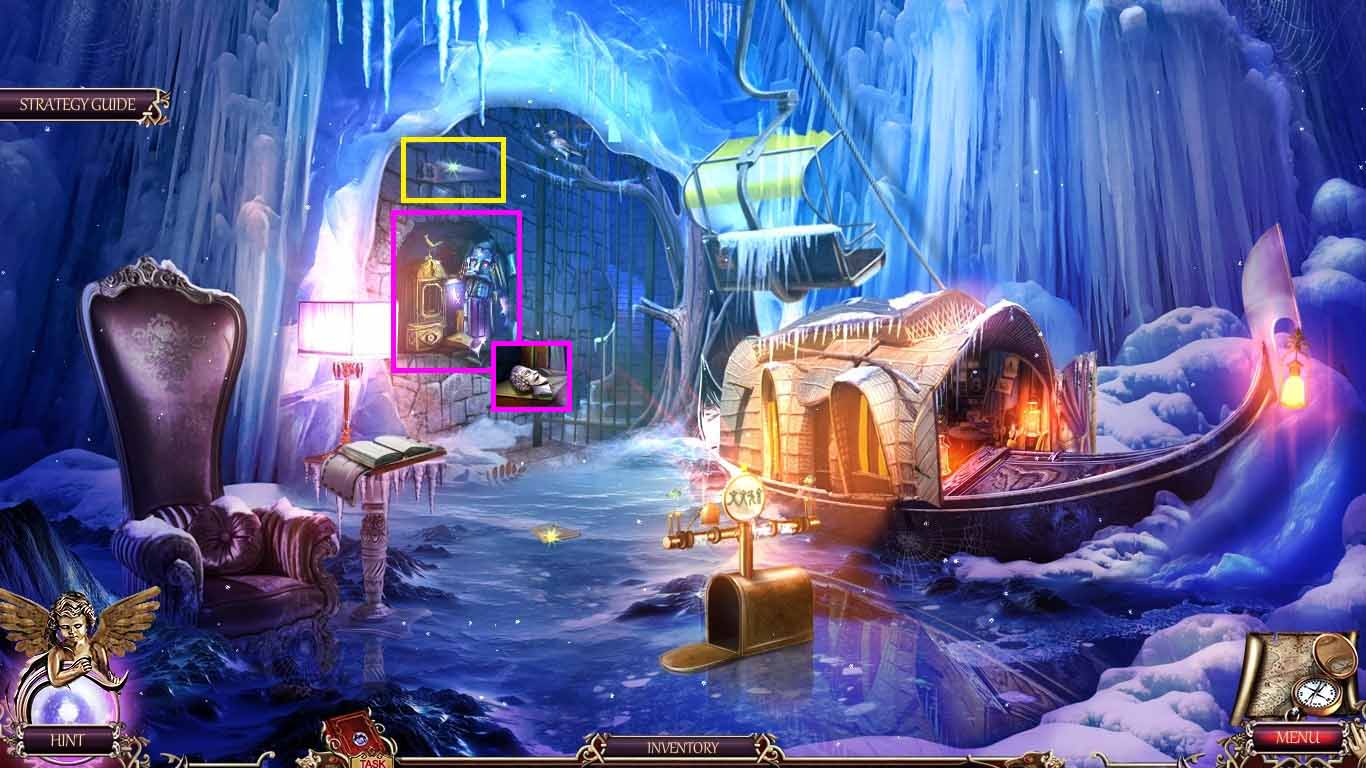
- Zoom into the ledge.
- Retrieve the saw by using the owlet.
- Zoom into the reader; collect the Shakespeare face.
- Move back one time.
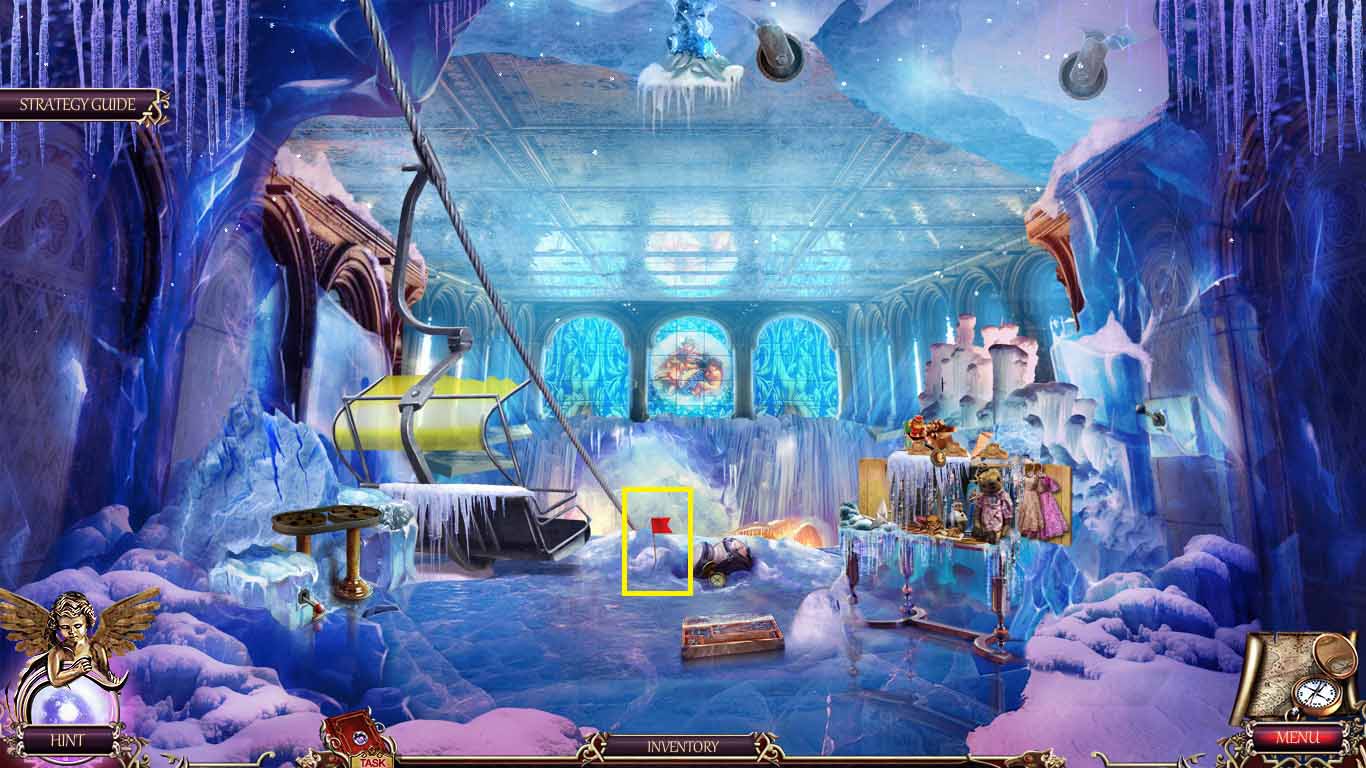
- Zoom into the snow pile.
- Collect the flag stick by using the saw.
- Move back one time.

- Zoom into the scoop net; insert the stick onto it.
- Collect the hand scoop.
- Move to the basement of the ice hall.

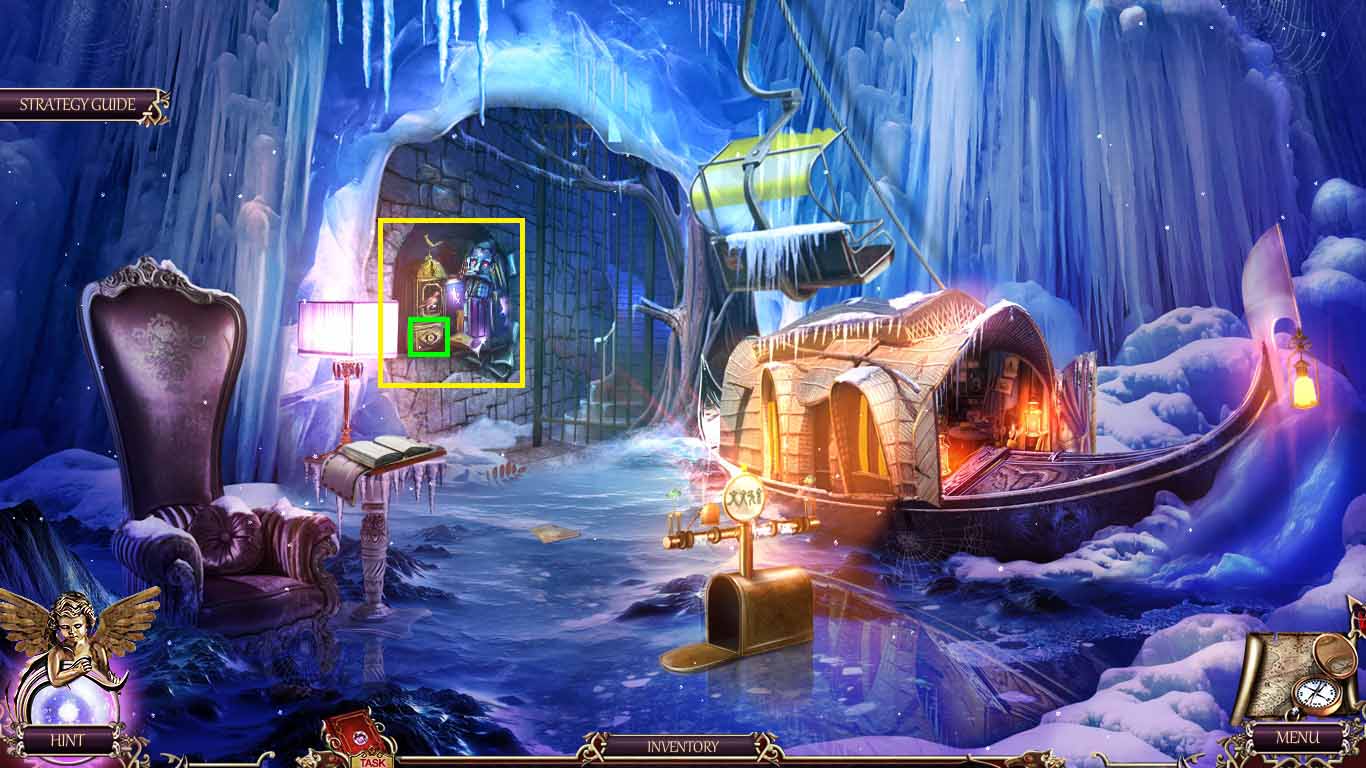
- Zoom into the nightingale.
- Collect it with the hand scoop.
- Zoom into the reader; put the nightingale into the cage.
- Collect the treble clef.
- Move back two times and move forward.

- Zoom into the ship; insert the treble clef into the box.
- Collect the wind up key and the button.
- Move back to the ice hall basement.
- Zoom into the reader; insert the wind-up key.
- Move upstairs.
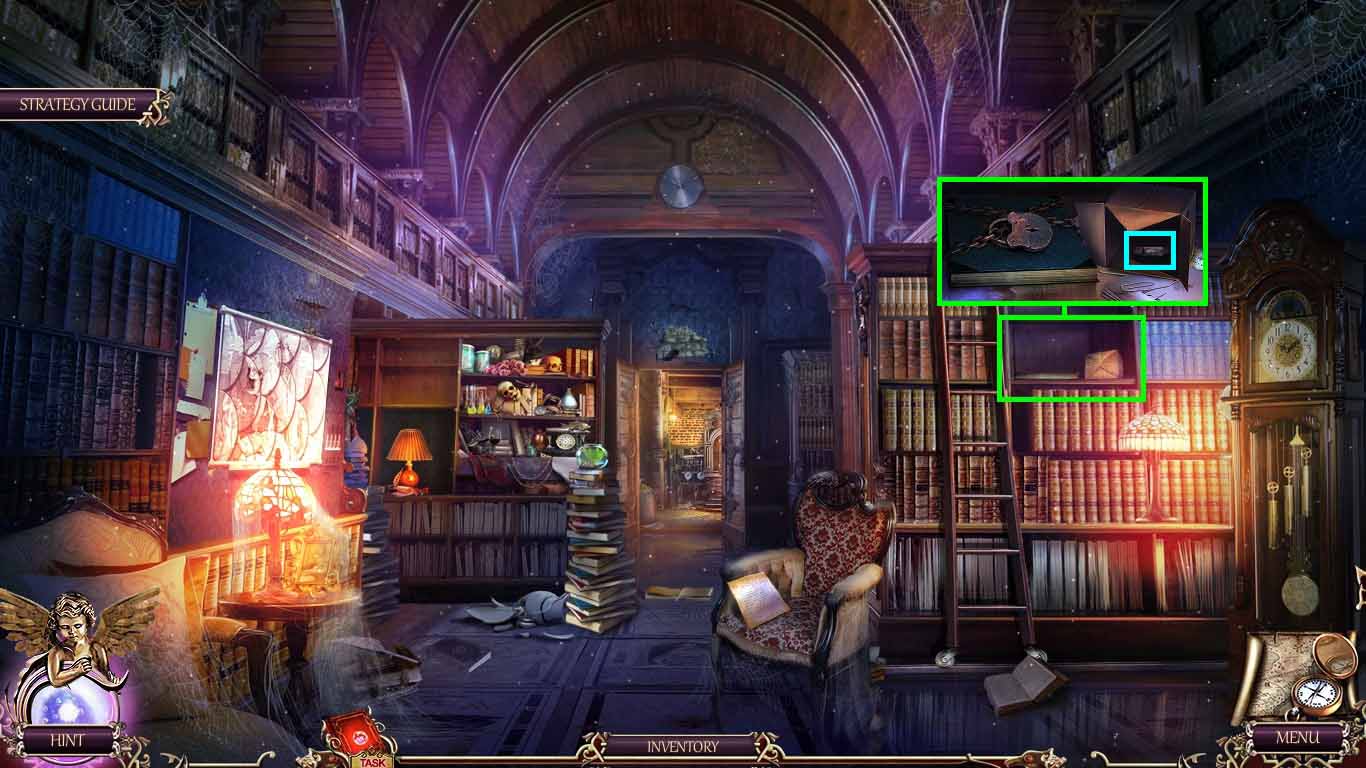
- Click anywhere two times.
- Zoom into the note; collect the 2nd Shakespeare face.
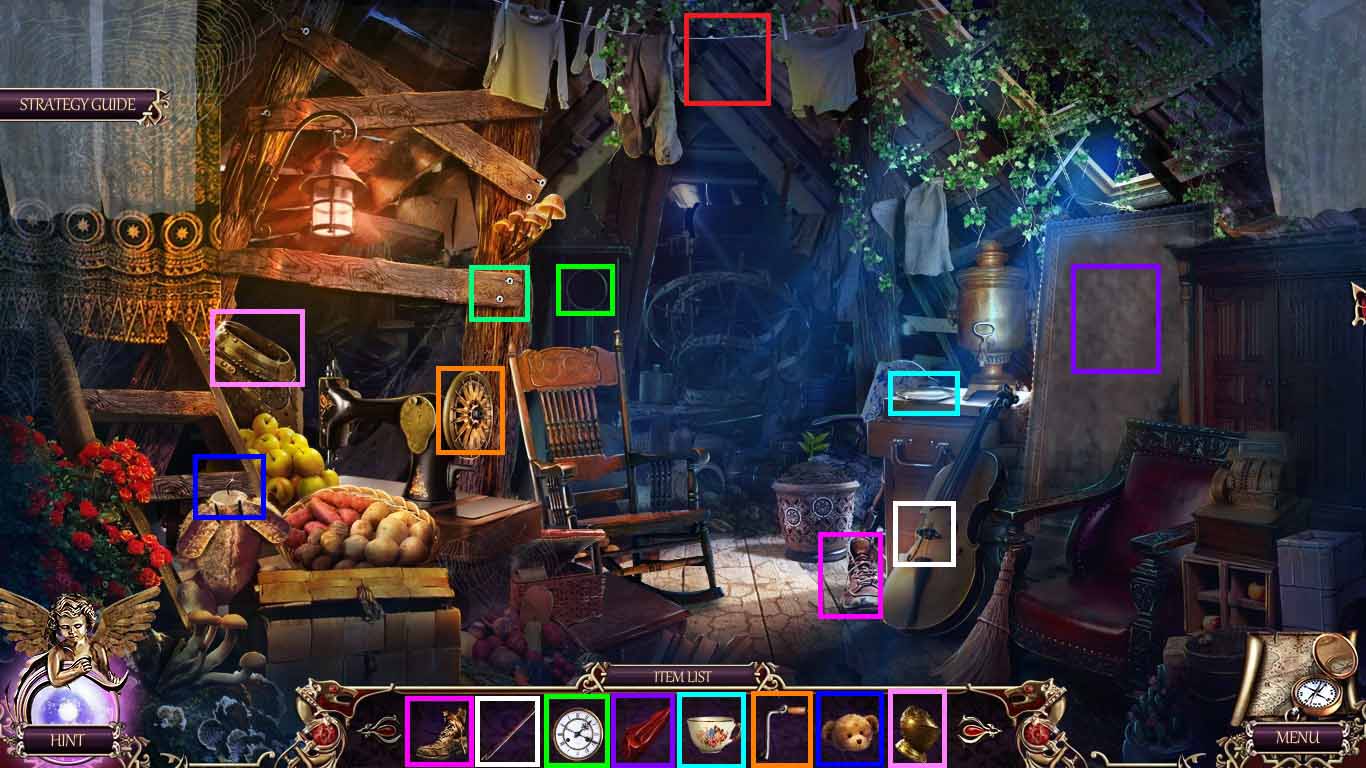
- Zoom into the shelves to access a hidden objects area.
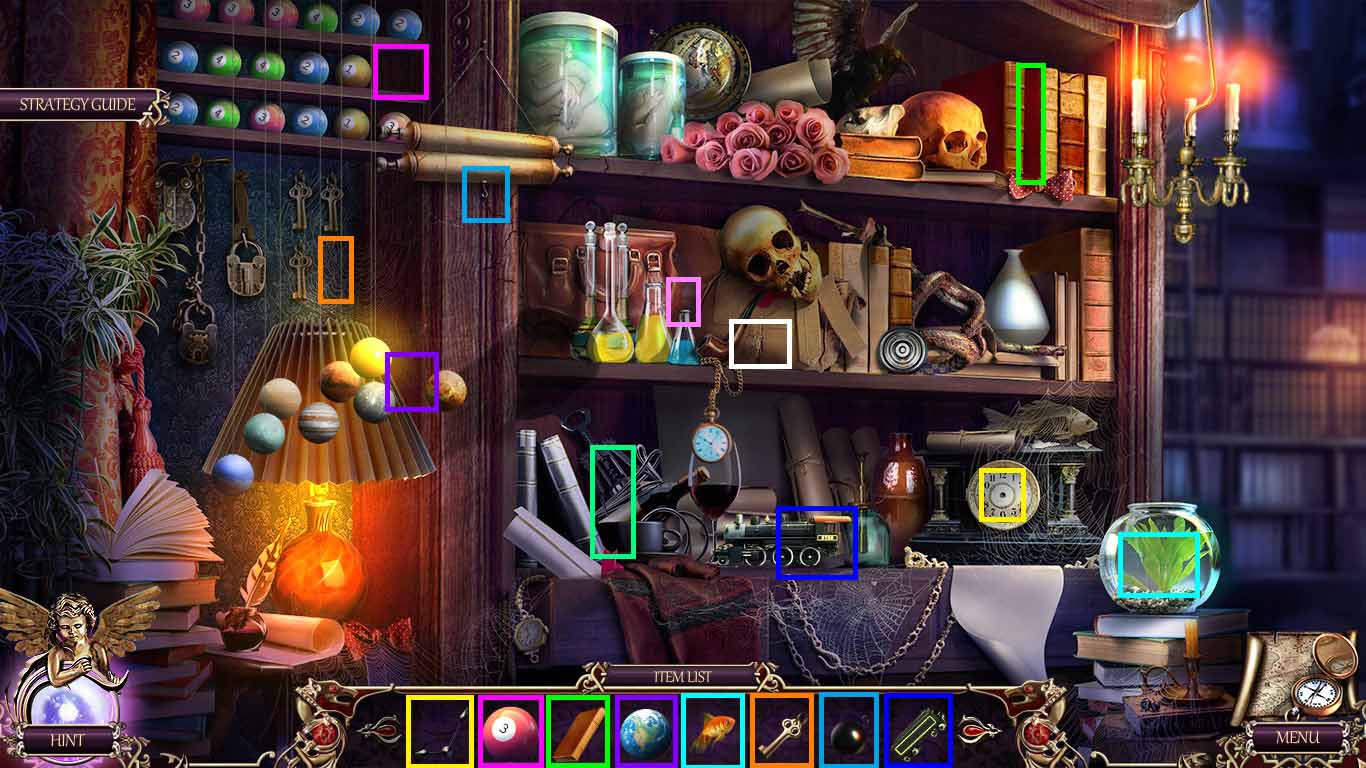
- Arrange the objects into the correct areas.
- Collect the wheel.
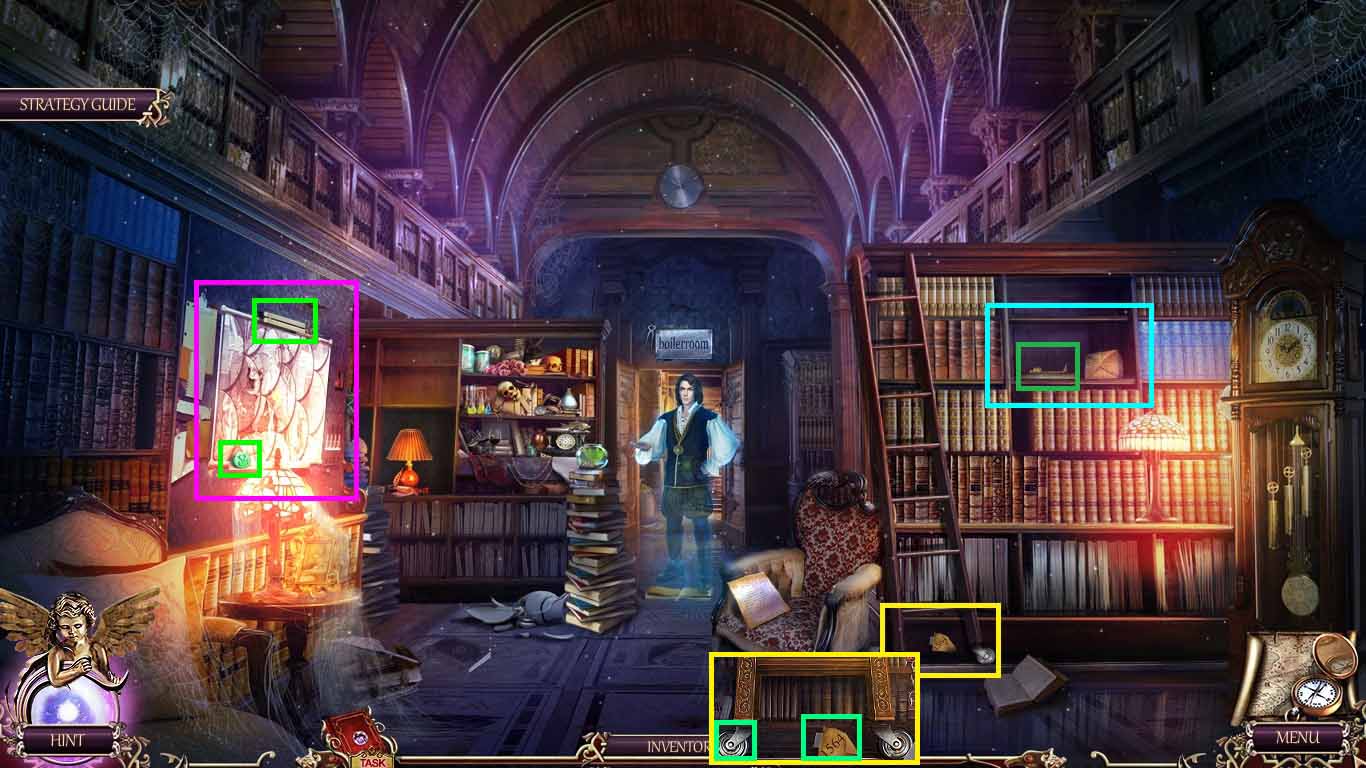
- Zoom into the rails; collect the data.
- Place the wheel onto the ladder.
- Zoom into the book; collect the broken key.
- Zoom into the board; collect the 2nd button and the lamp.
- Move to the main hall.
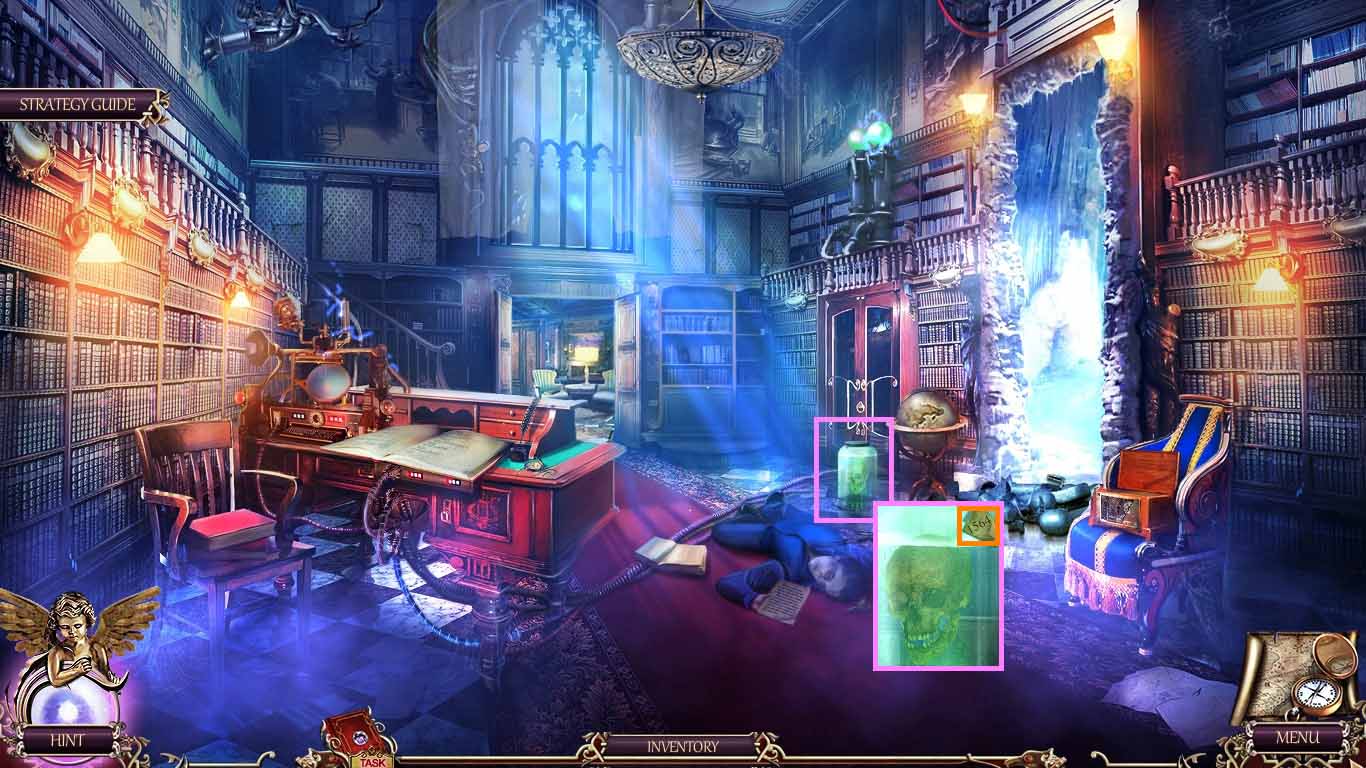
- Zoom into the jar containing the skull.
- Place the 2 Shakespeare faces and the data onto the jar to trigger a puzzle.
- Solve the puzzle using the following code: 1564.
- Collect the skull.
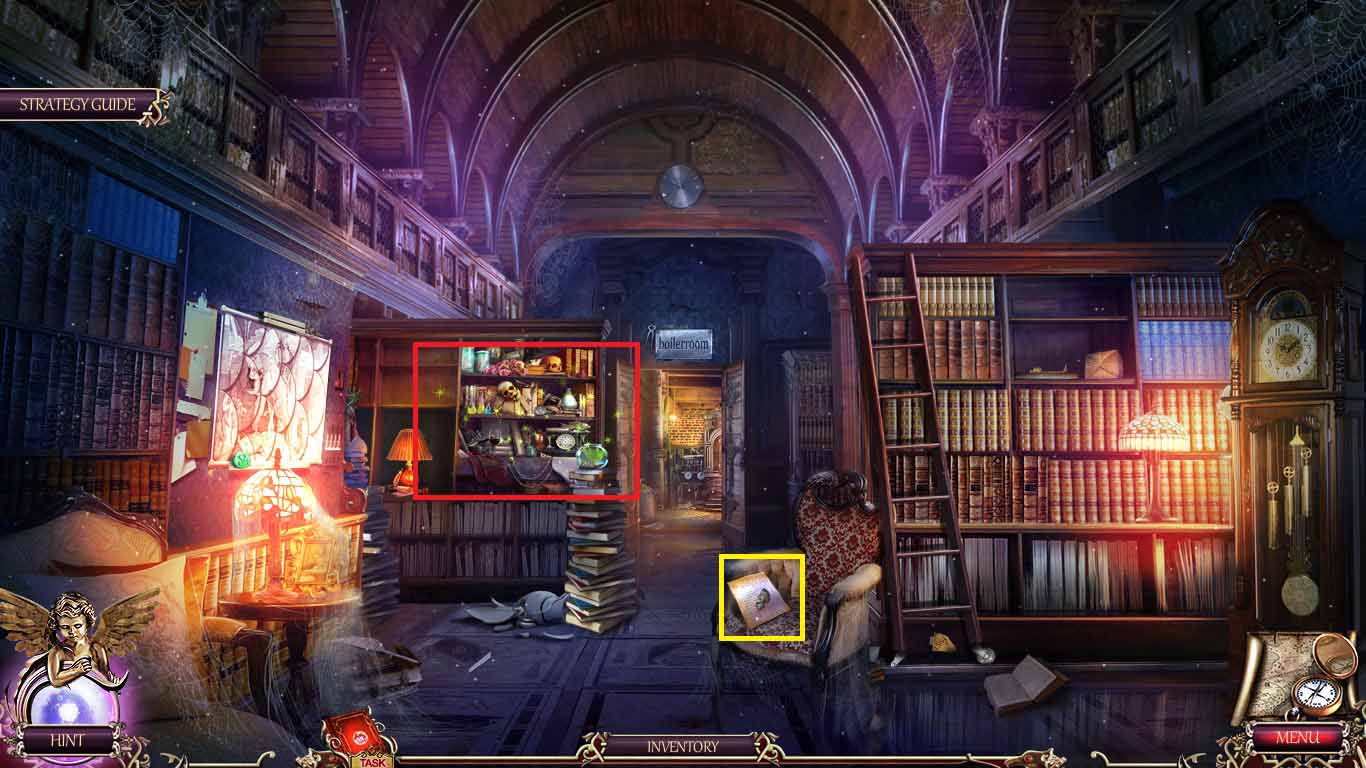
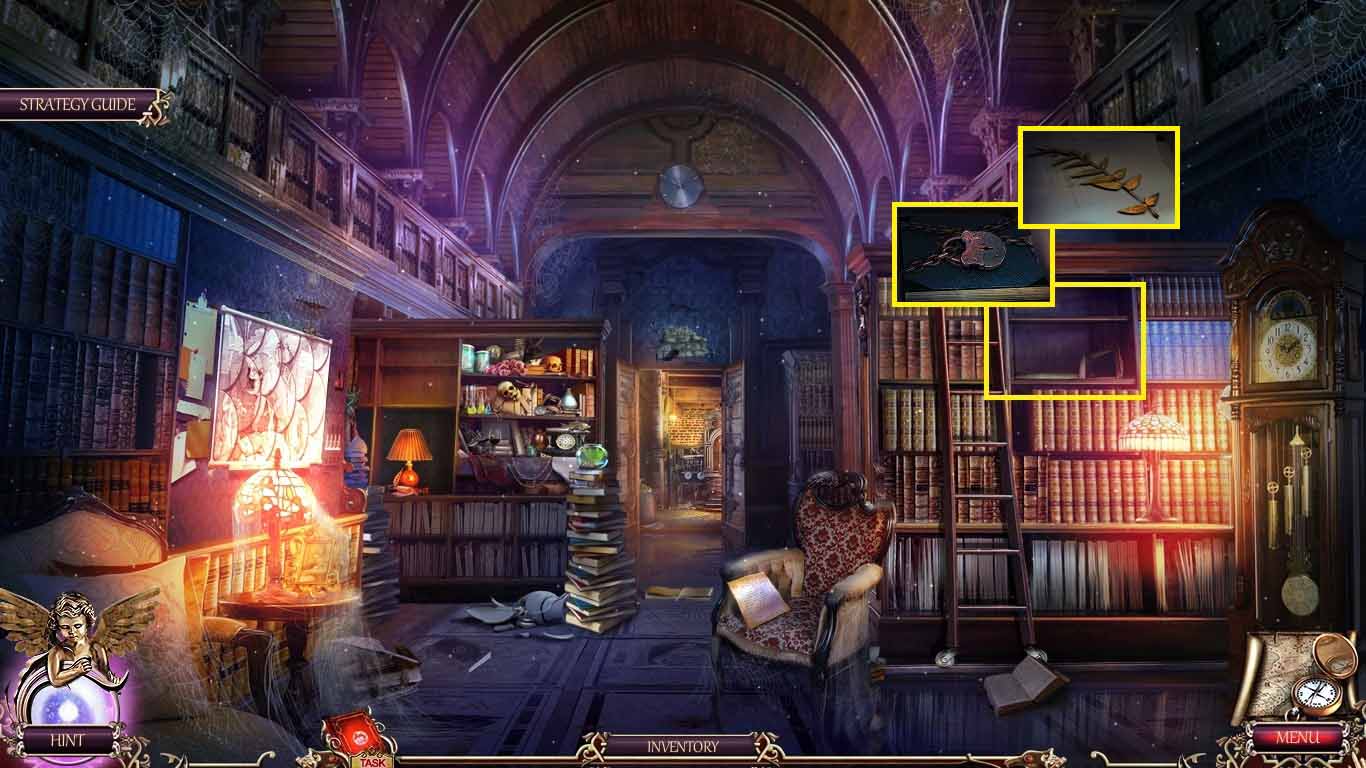
- Move to the repository of forgotten books.
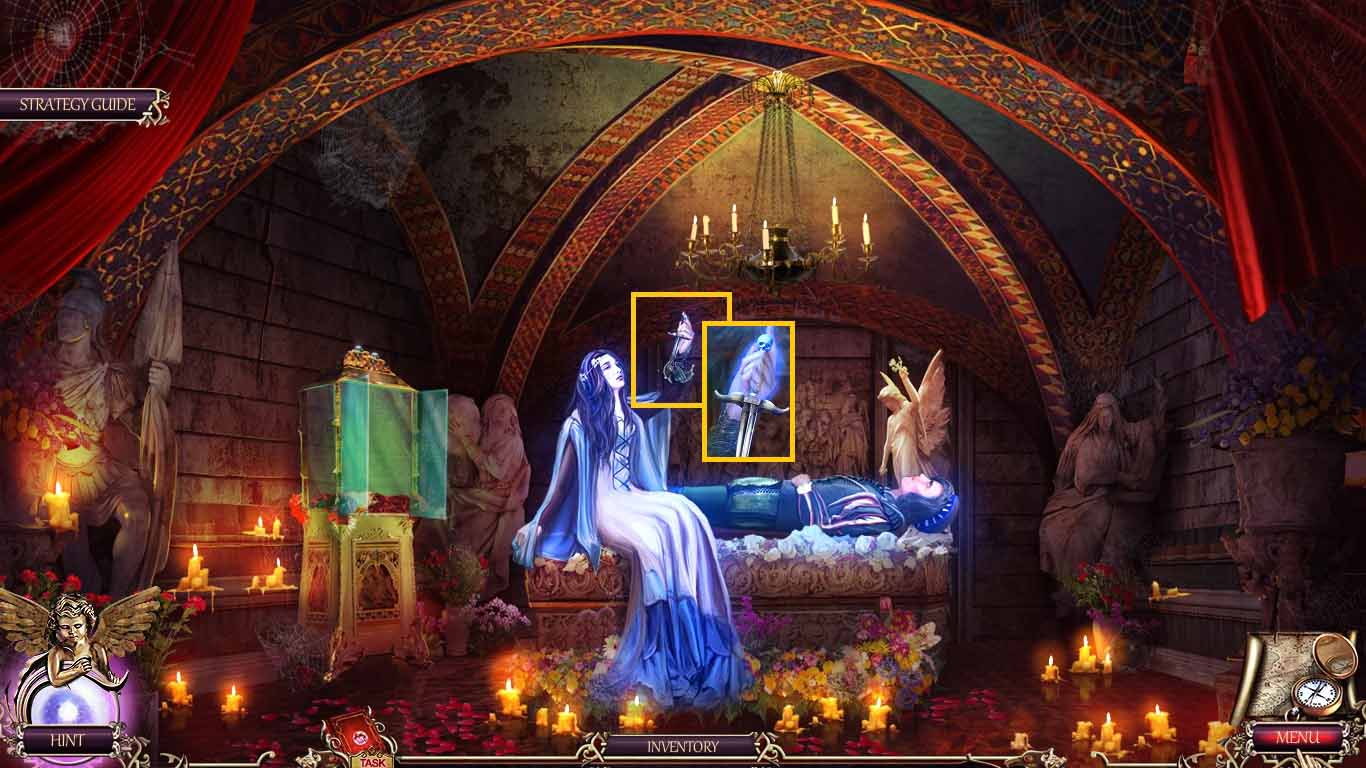
- Zoom into Hamlet.
- Put the skull into his hand.
- Zoom into the plate.
- Collect the plate and tongs by using the wrench.
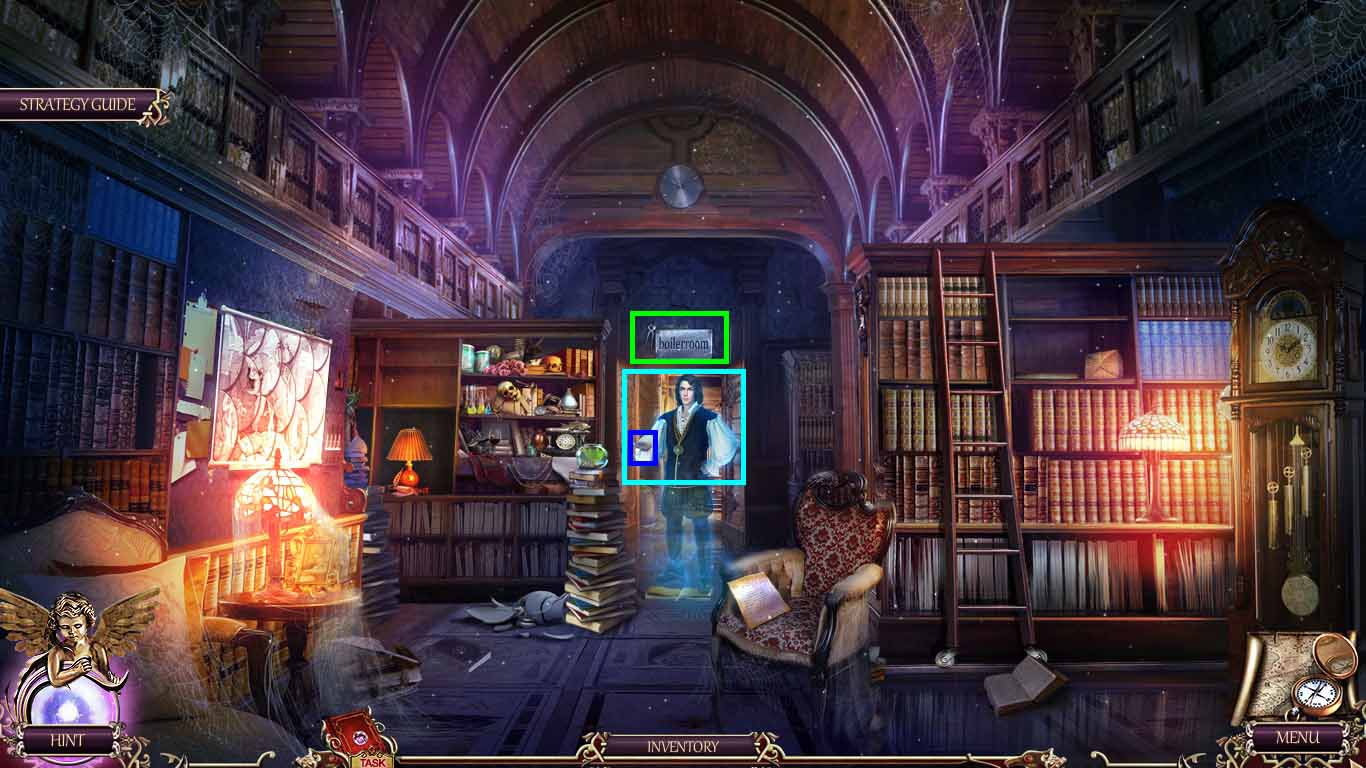
- Move forward to the boiler room.
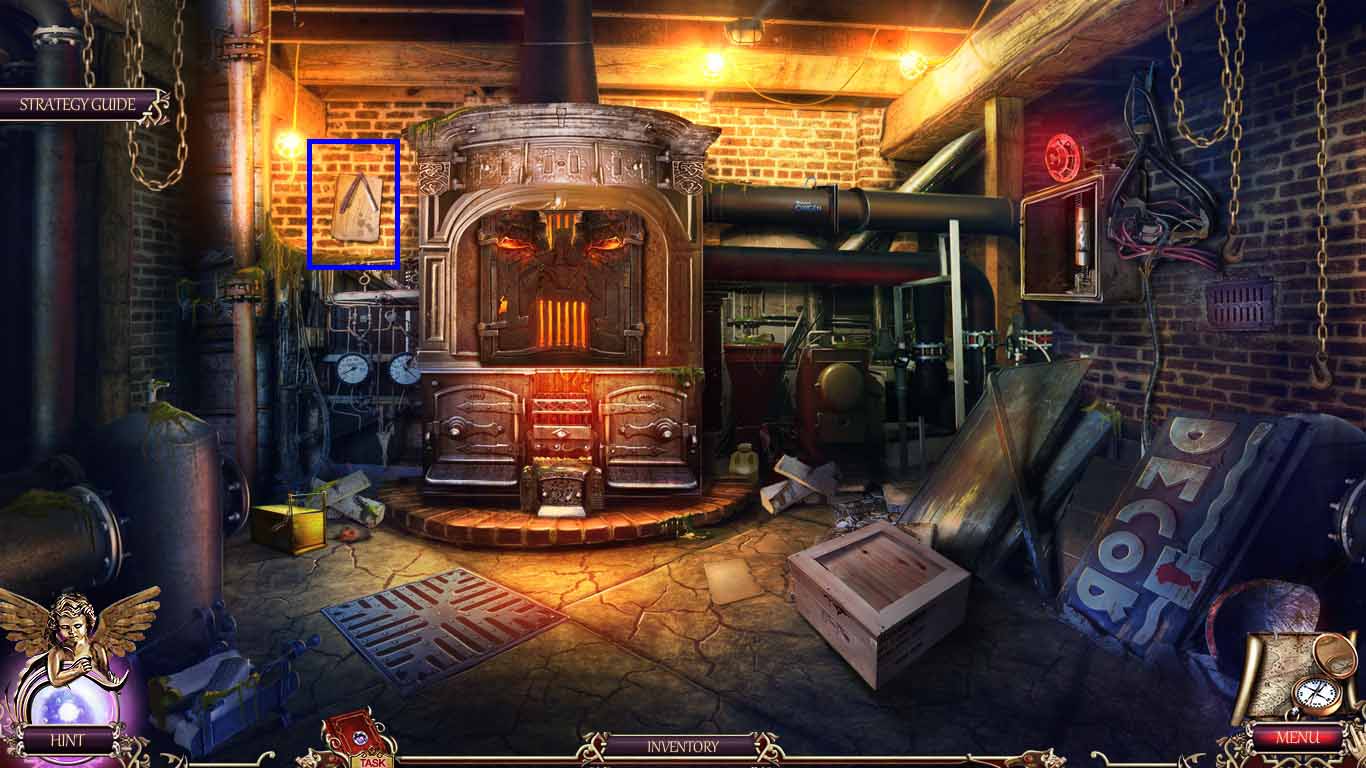
- Click anywhere in the room.
- Zoom into the note; collect the razor.
- Move back one time.
- Zoom into the book.
- Use the razor on the box; collect the fuse.
- Move forward.

- Zoom into the fire alarm.
- Use the electric tape to mend the broken wires.
- Insert the fuse into the slot.
- Zoom into the pipe; put the plate into the slot.
- Zoom into the furnace.
- Use the wrench on the door.
- Collect the fire book using the tongs.
- Zoom into the fire book and insert the 2 buttons onto it to trigger a puzzle.
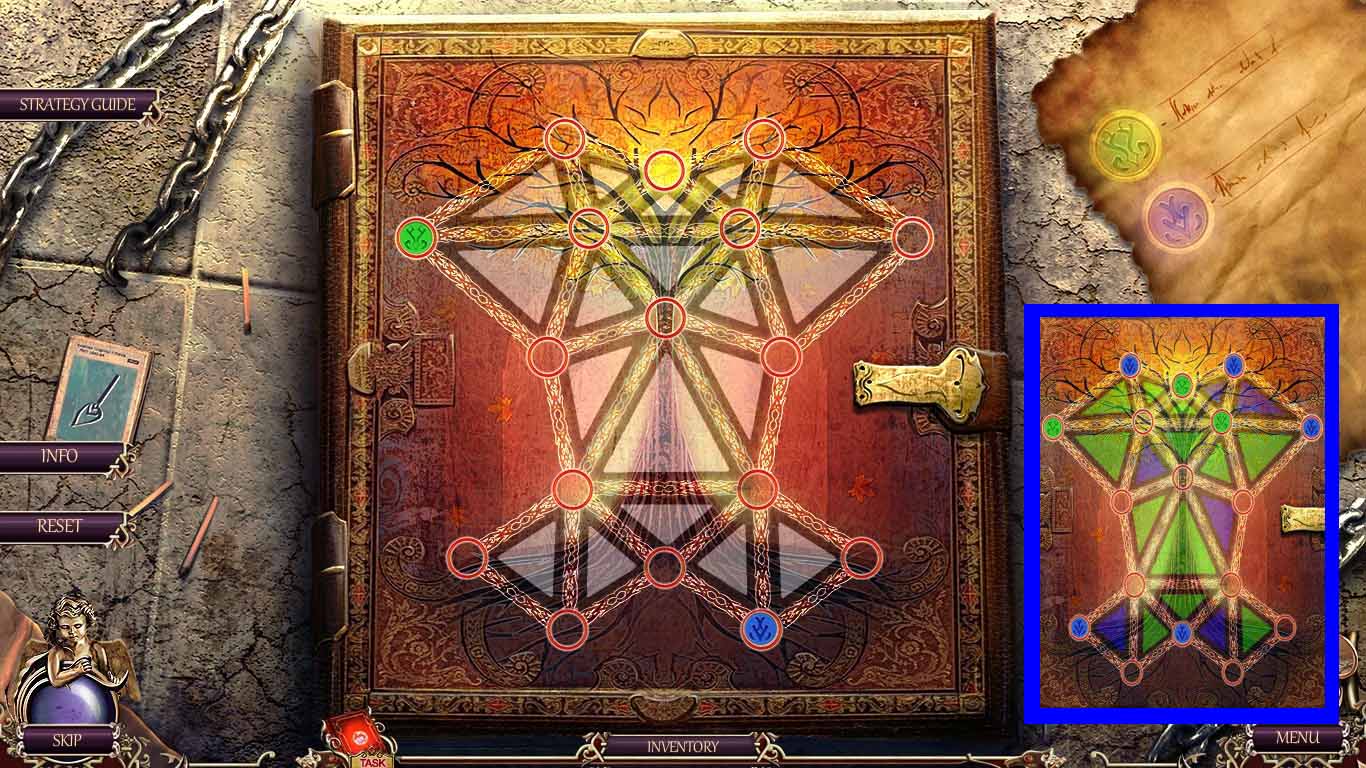
- Move the tokens to color in the triangles.
- The solutions are randomized.

- Zoom into Romeo’s father.
- Cut the wings using the razor.
- Move ahead to Juliet’s house.
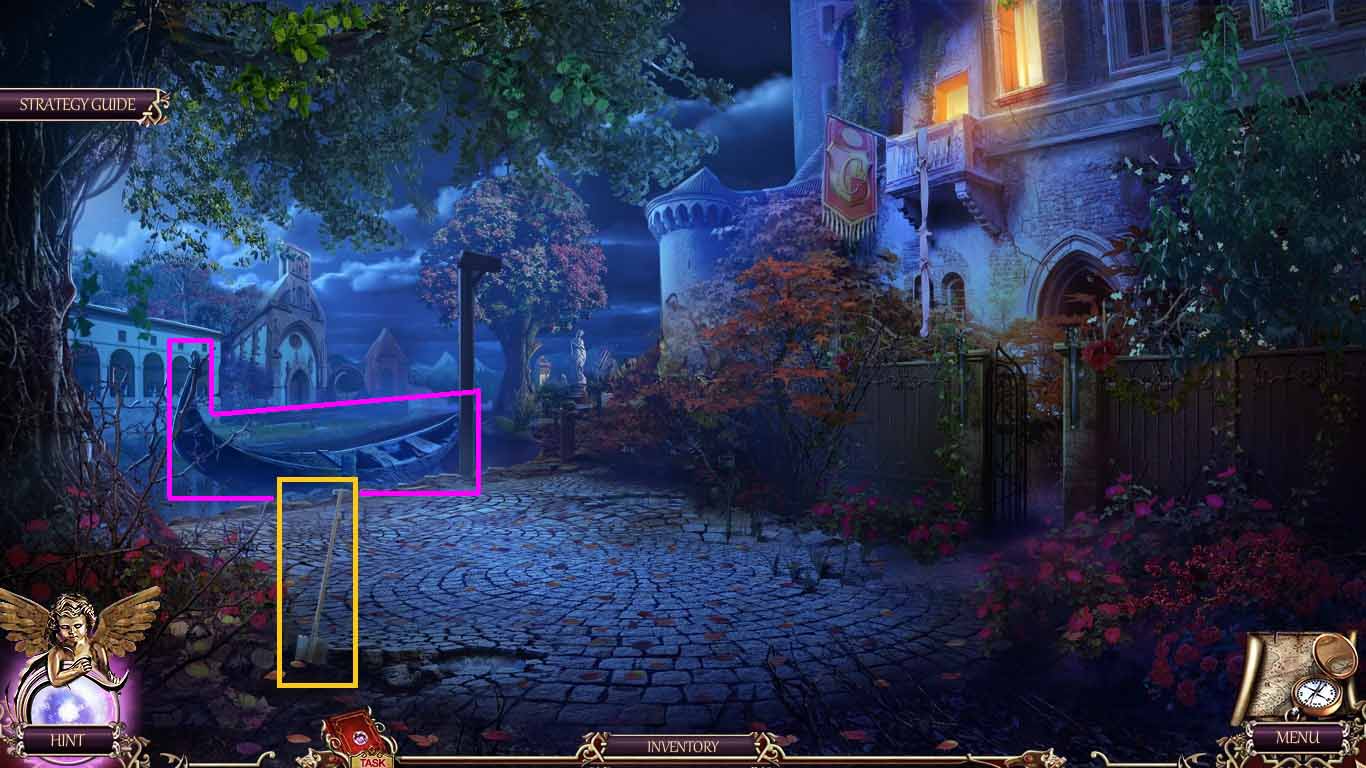
- Collect the shovel.
- Go into the gondola and head to the chapel.
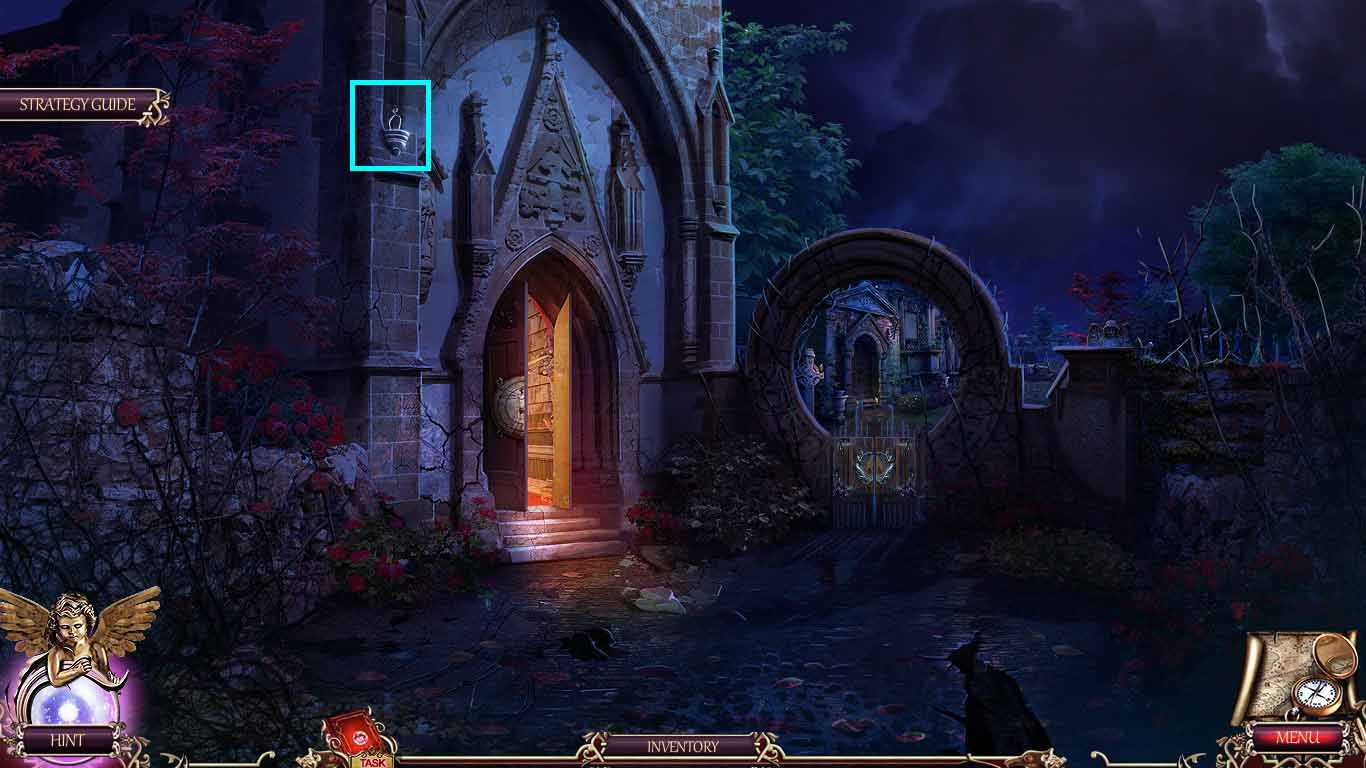
- Zoom into the ledge.
- Use the owlet to collect the nippers.
- Move into the vault.

- Zoom into Romeo.
- Place the razor on the rope to collect the 2nd wing.
- Move back one time.
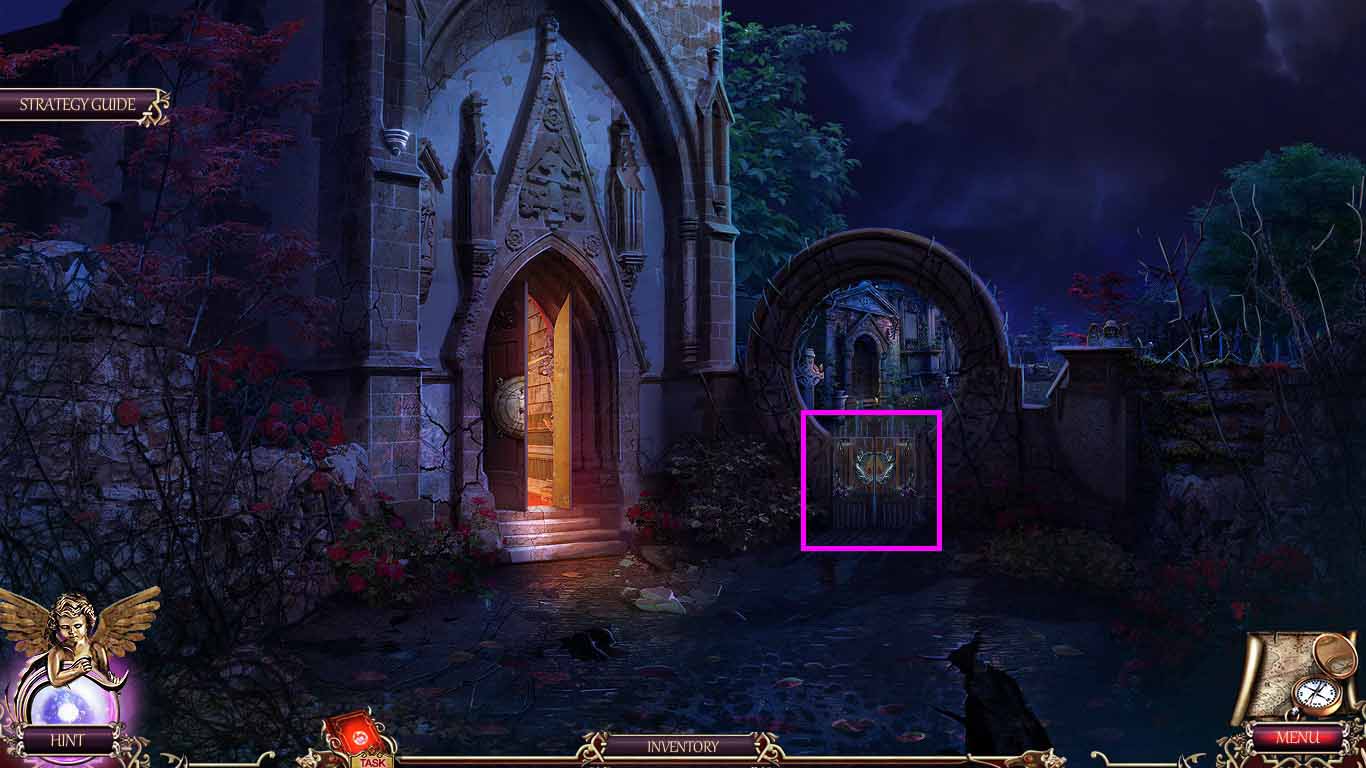
- Zoom into the gates.
- Insert the 2 wings.
- Move forward through the gate.
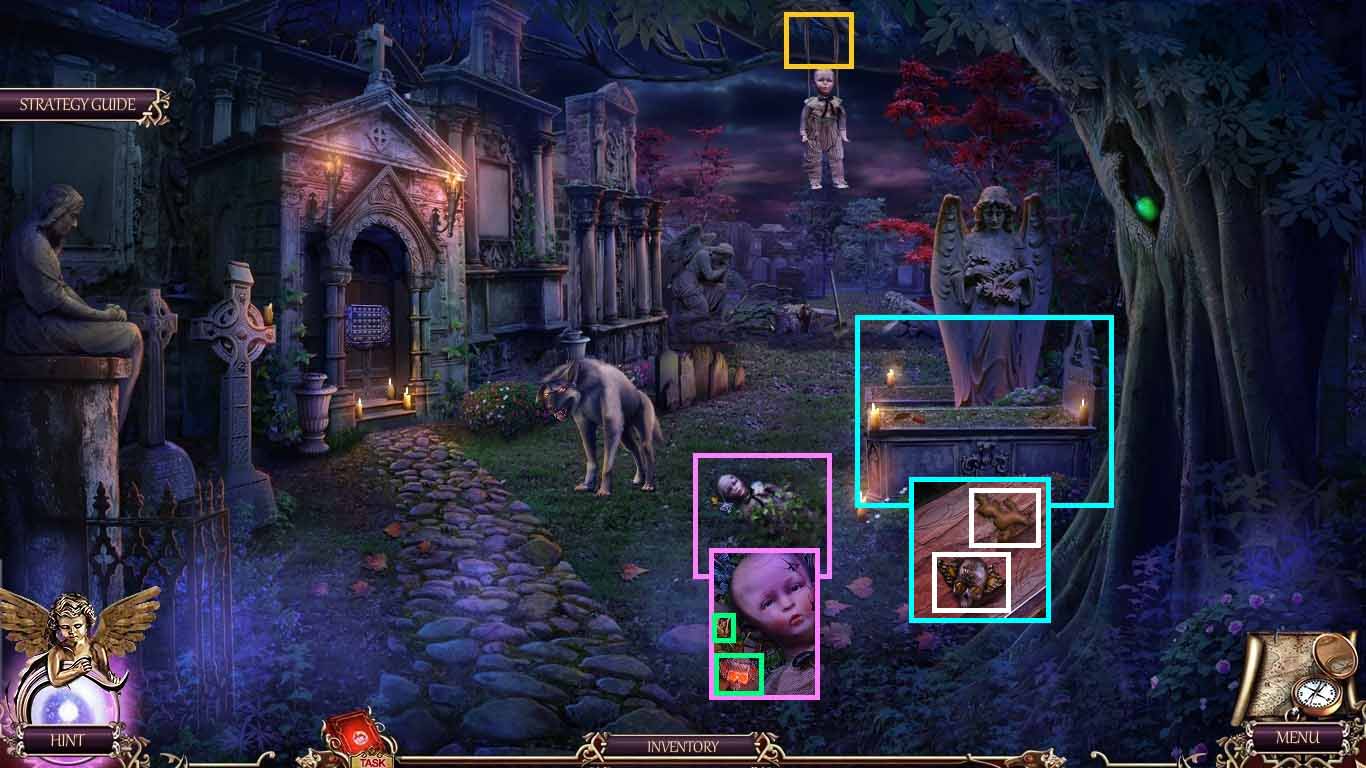
- Zoom into the branch.
- Clip the wires using the nippers.
- Zoom into the doll.
- Collect the stone flower and the puzzle piece.
- Zoom into Romeo’s grave.
- Dig up the dirt using the shovel; collect the 2nd puzzle piece and the ginger.
- Move back two times and go up the balcony to Juliet’s room.
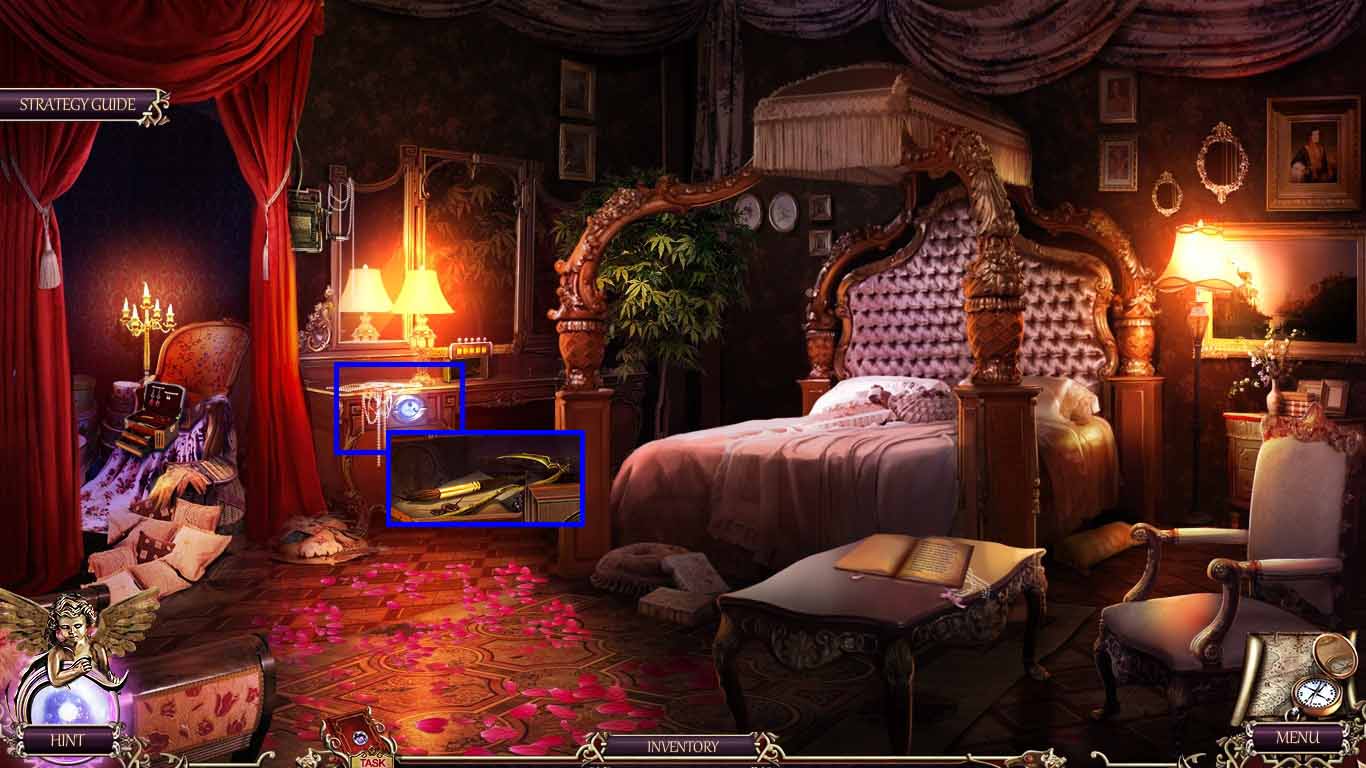
- Zoom into the drawer; insert the stone flower.
- Collect the brush and the scythe key.
- Move to the vault.
- Zoom into Juliet.
- Insert the scythe key to collect the dagger.
- Move back one time and move forward to the cemetery.
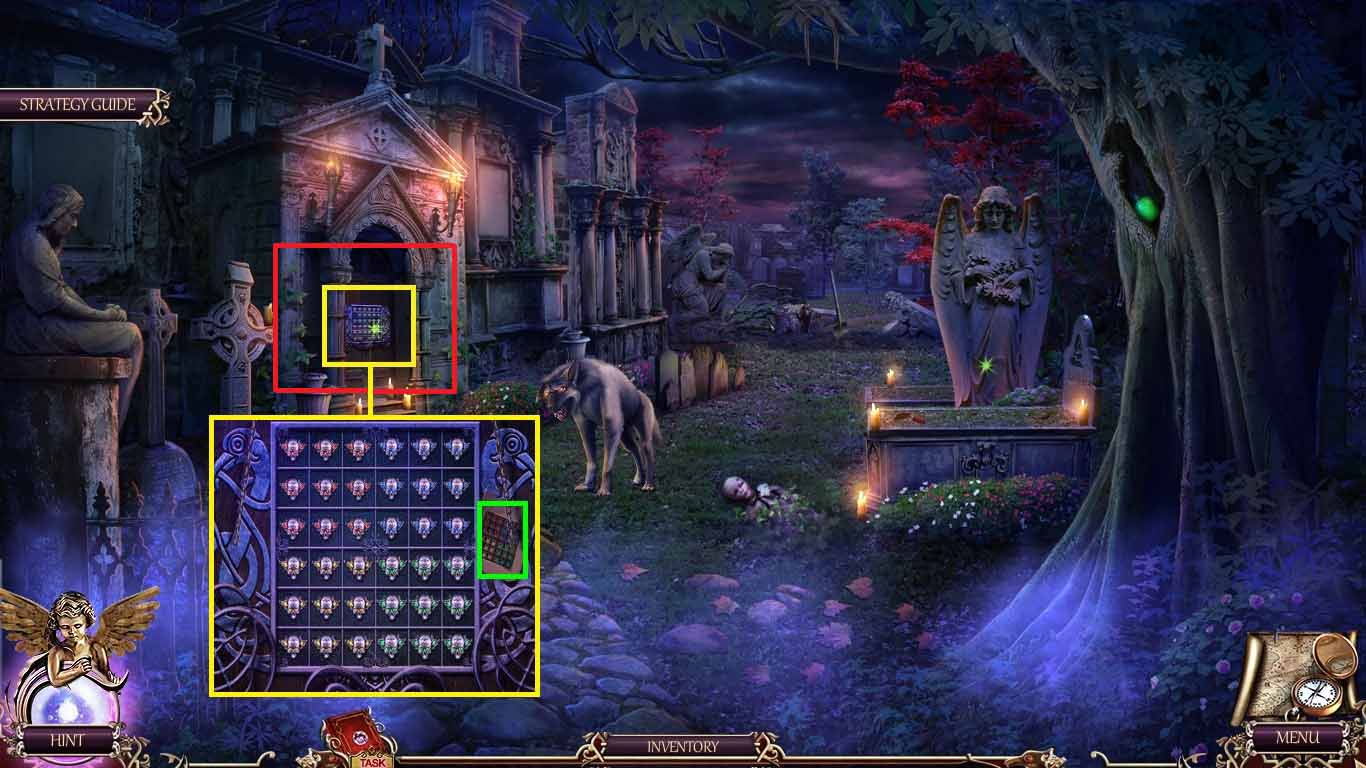
- Zoom into the door; insert the dagger into the skull.
- Place the 2 puzzle pieces into the lock to trigger a puzzle.
- Click the faces to match the code.
- The board will be randomized.
- Once solved as shown; zoom into the tomb to access a hidden objects area.
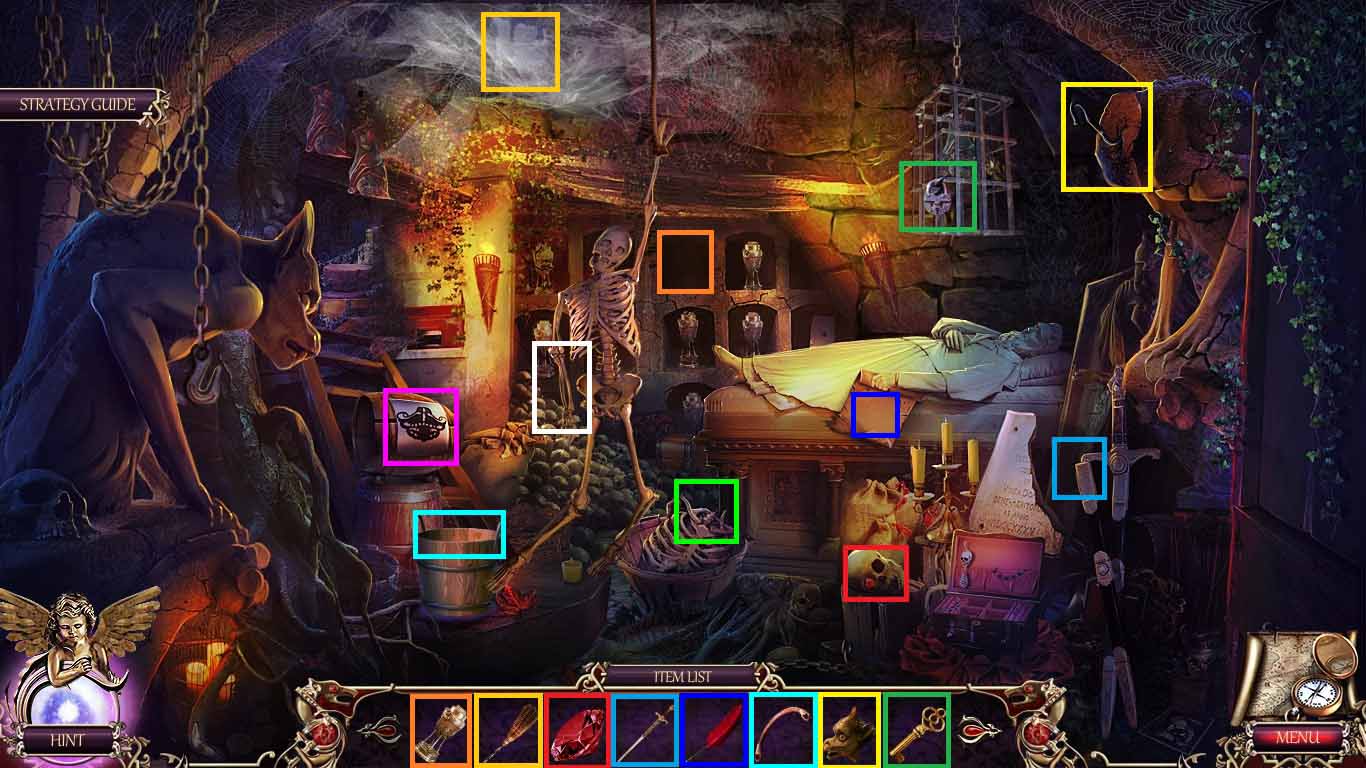
- Arrange the objects into the correct areas.
- Collect the bucket.
- Move back two times.
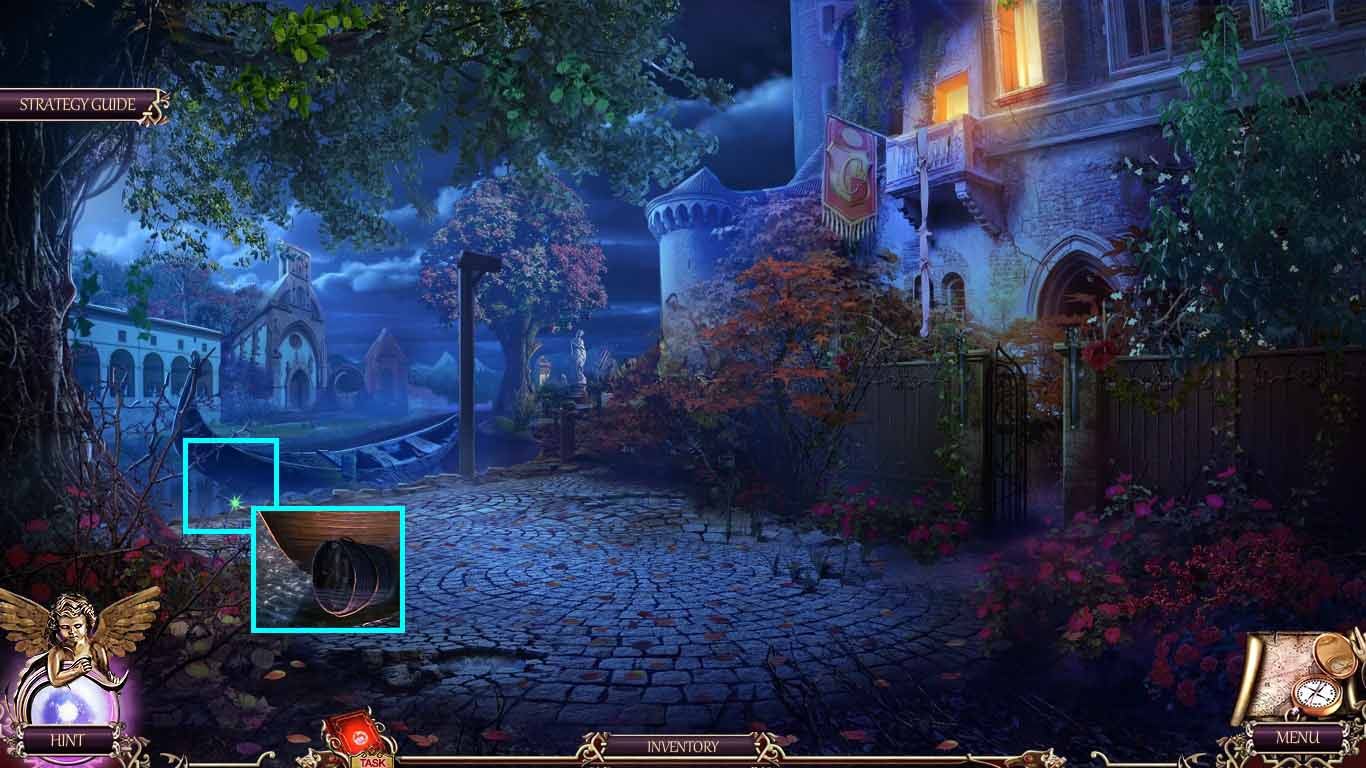
- Zoom into the water.
- Collect the water by using the bucket.
- Move back one time.
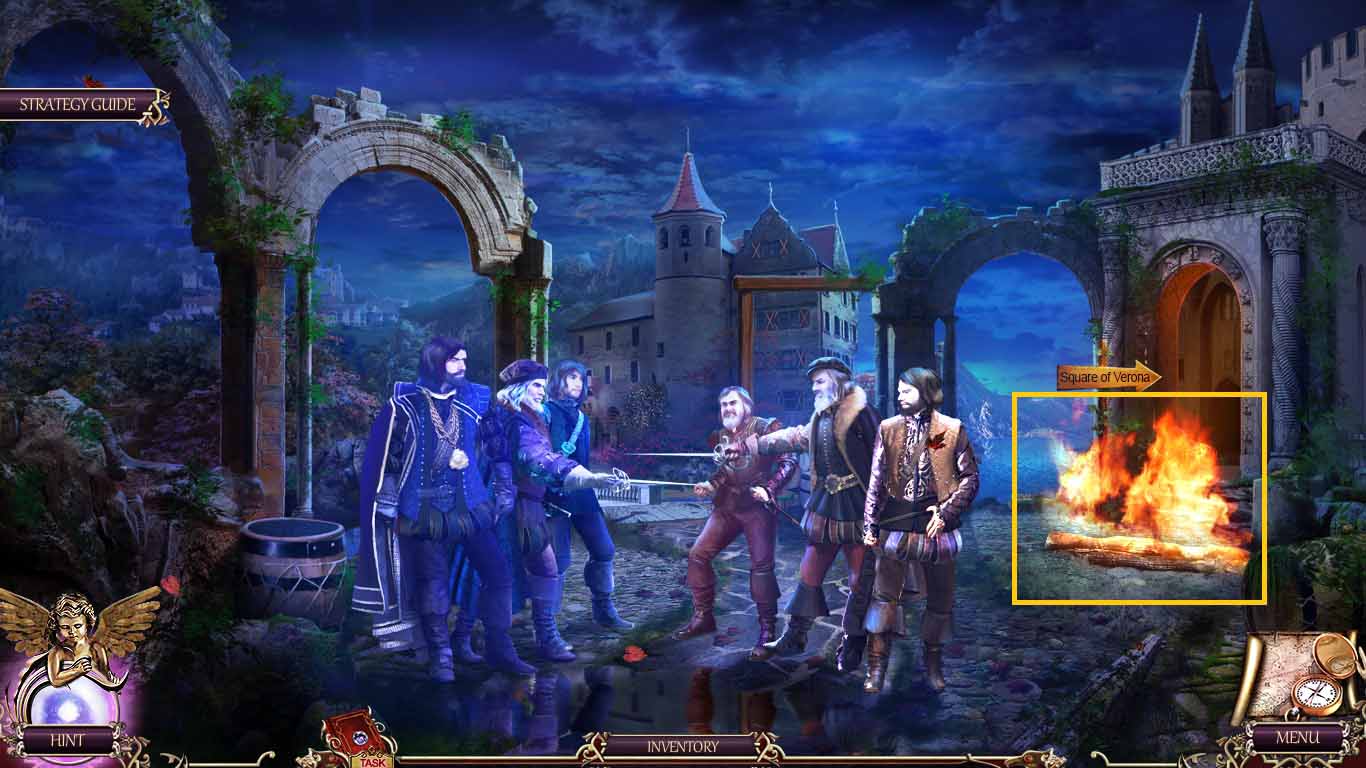
- Douse the flames using the water.
- Move to the right to the square; move ahead to the trade lane.
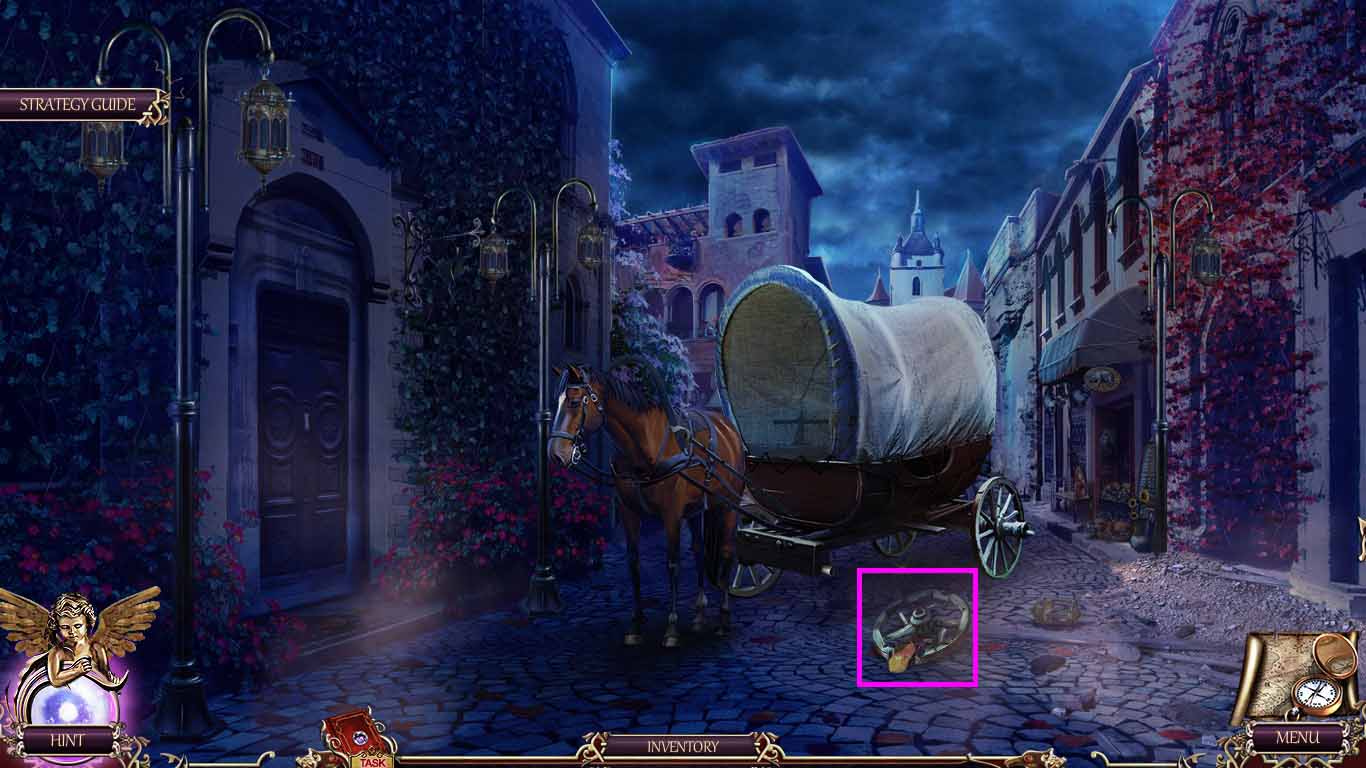
- Zoom into the wagon; collect the spokes.
- Move back once.

- Zoom into the wheel; insert the spokes to trigger a puzzle.
- Click two spokes at a time to put them near the matching rims.
- Collect the wheel.
- Move forward.

- Zoom into the wagon.
- Put the wheel onto the axle.
- Move forward into the café.
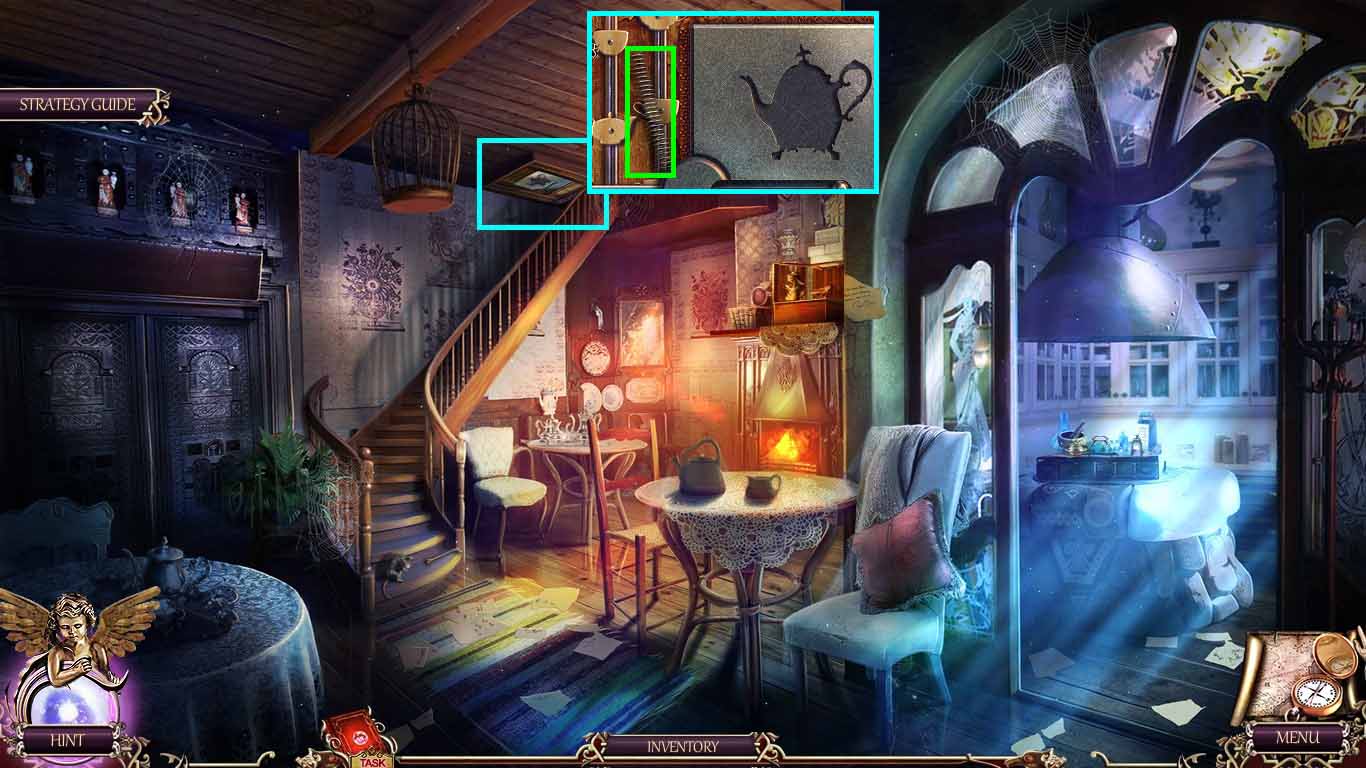
- Zoom into the attic; collect the spring.
- Move back to the boiler room.
- Zoom into the mousetrap; click it.
- Place the spring onto the mousetrap; collect it.
- Move to the café.
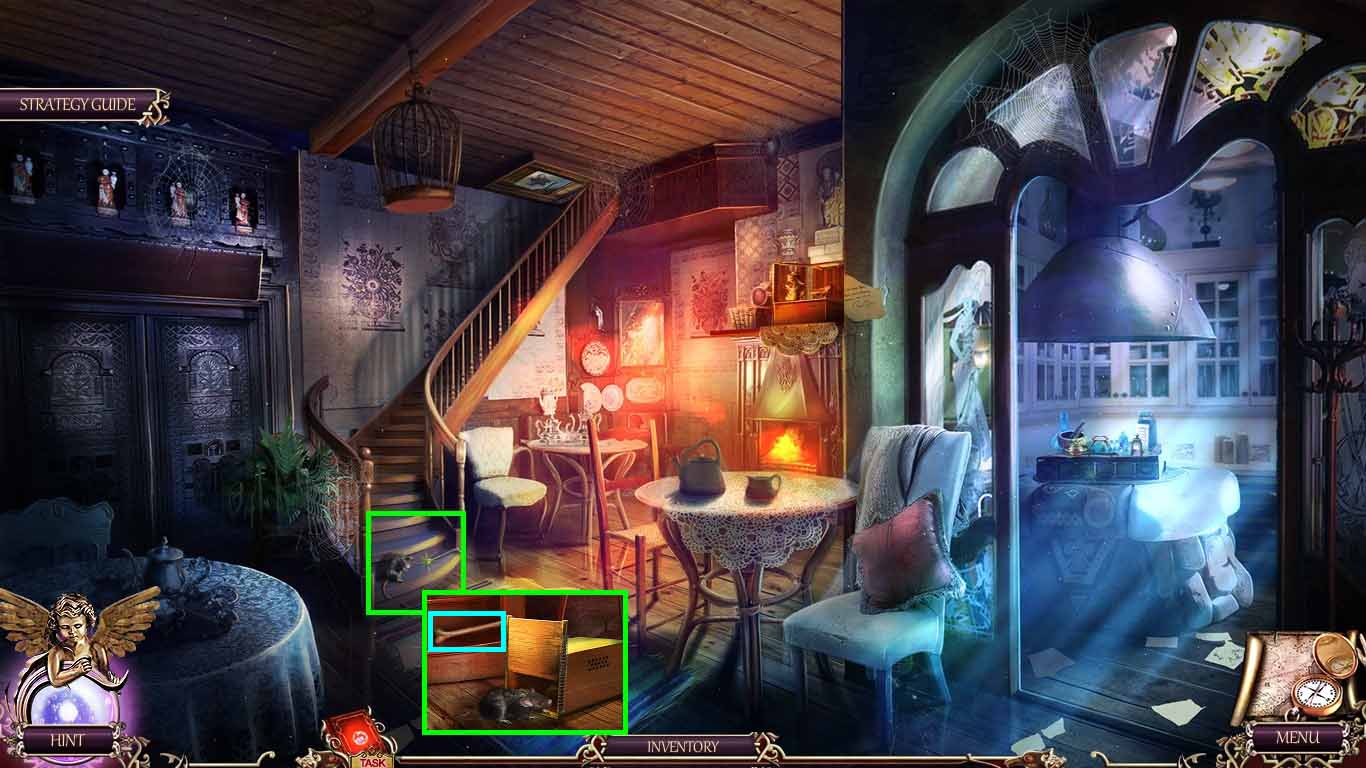
- Zoom into the rat.
- Put the mousetrap near the rat; collect the bone.
- Move to the cemetery.
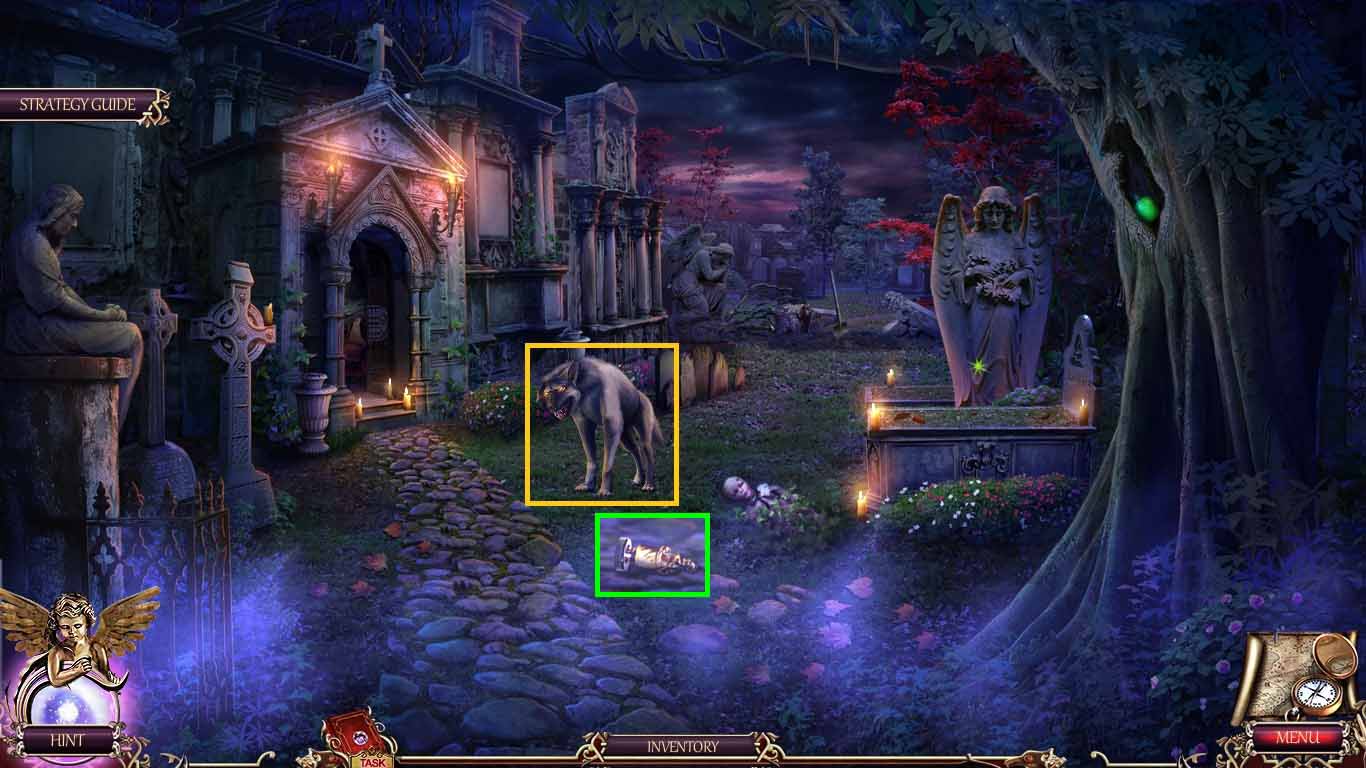
- Zoom into the dog; give him the bone.
- Collect the figure.
- Move to the café.
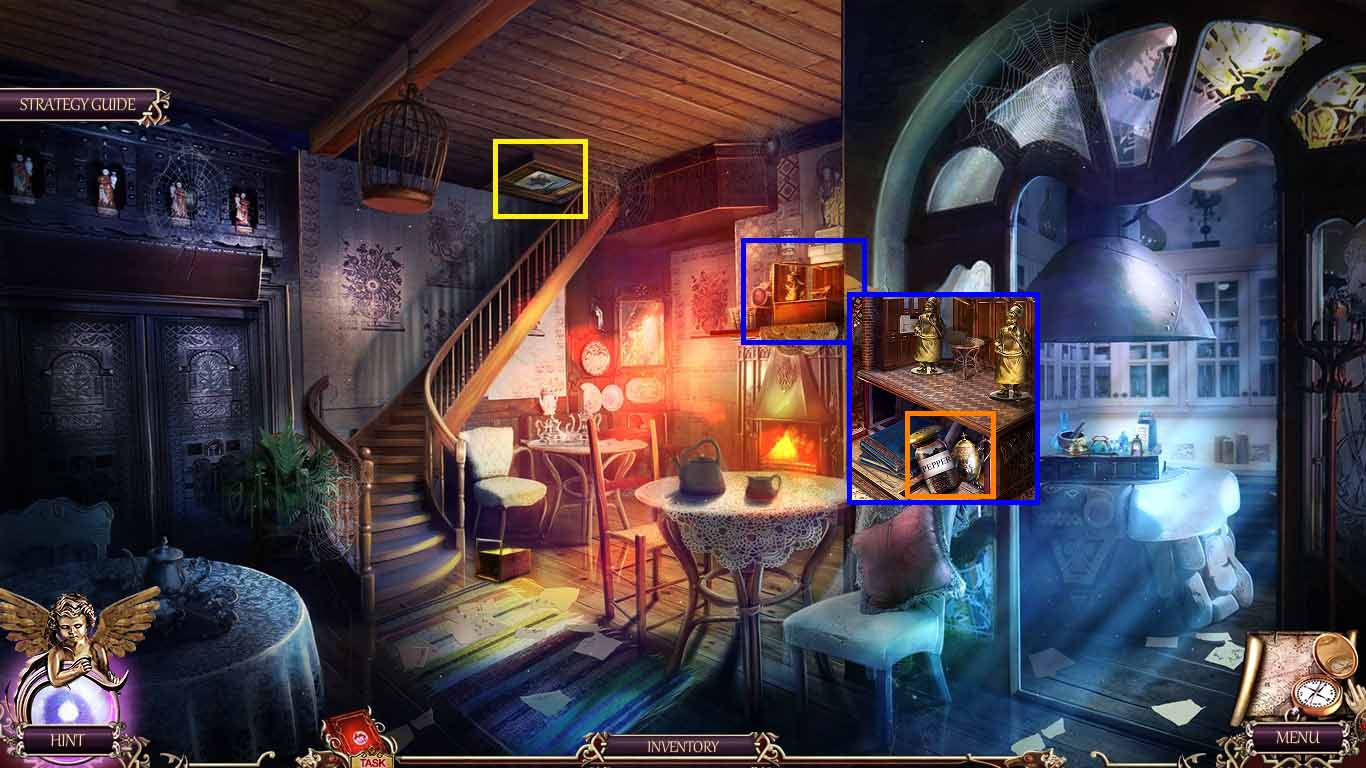
- Zoom into the cook figures.
- Place the figure onto the pedestal.
- Collect the pepper and the teapot.
- Zoom into the attic; insert the teapot into the center for a puzzle to trigger.
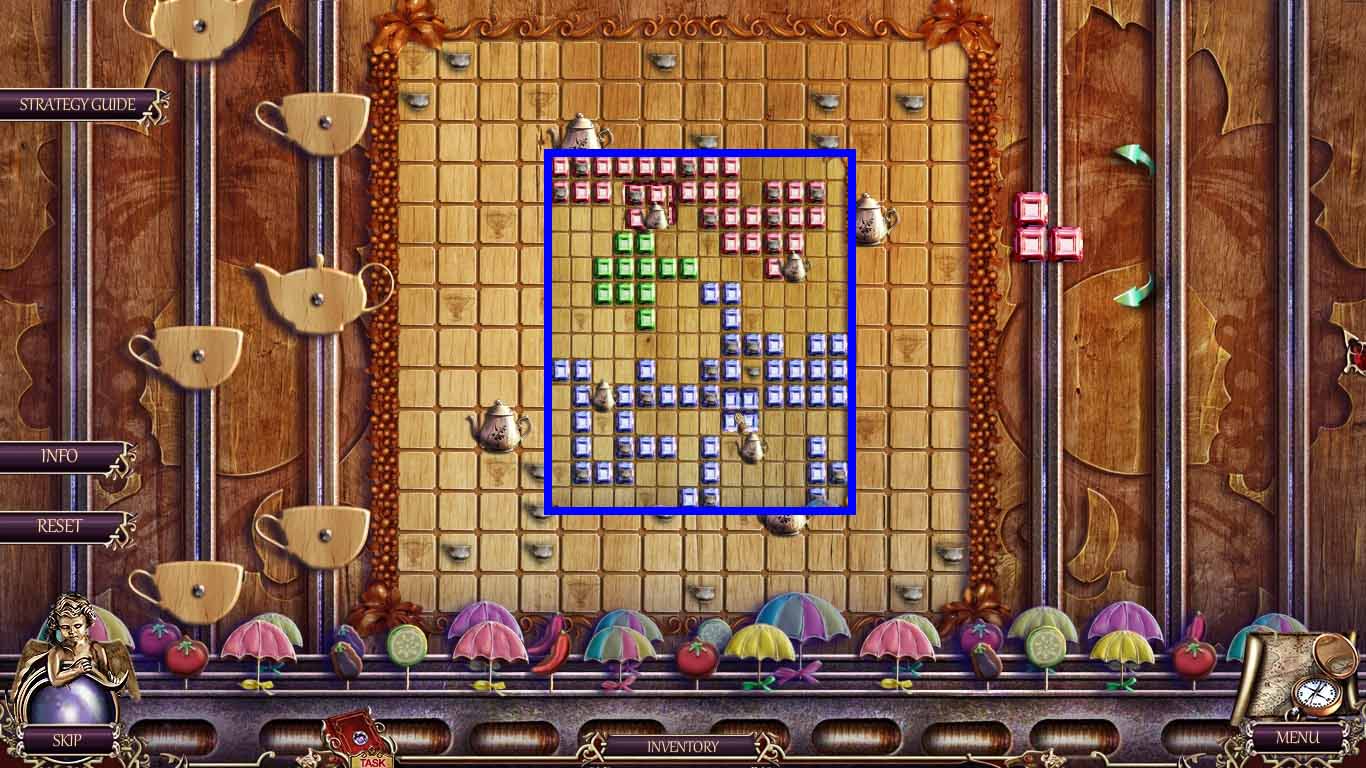
- Put the colored bars over the teacups.
- Connect any 2 teapots with matching colored gems to remove them.
- Clear the board.
- Move up to the attic hatch.

- Zoom into the beam.
- Use the owlet to collect the cocoa.
- Zoom into the attic to access a hidden objects area.
- Arrange the objects into the correct areas.
- Collect the crowbar.
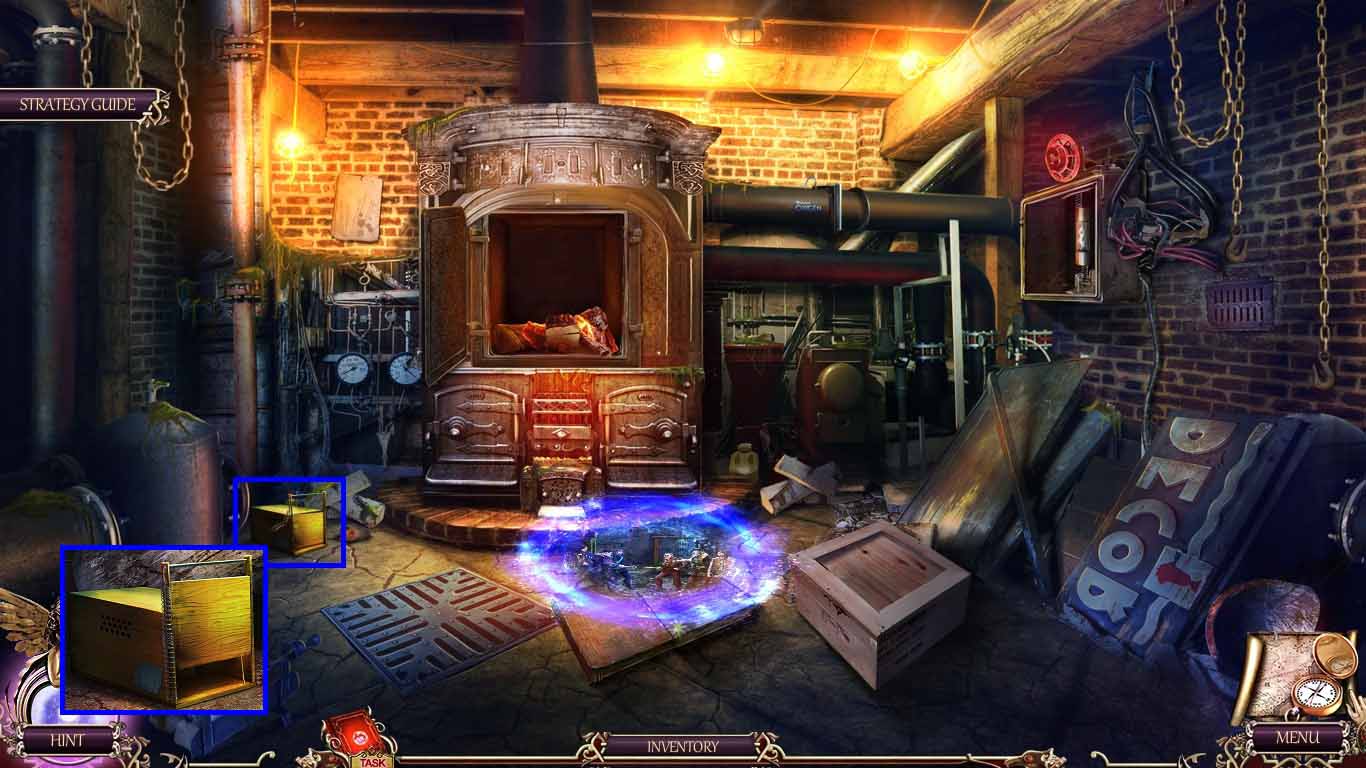
- Move back to the boiler room.

- Zoom into the crate; use the crowbar on it.
- Collect the circular saw blade.
- Move to the attic.
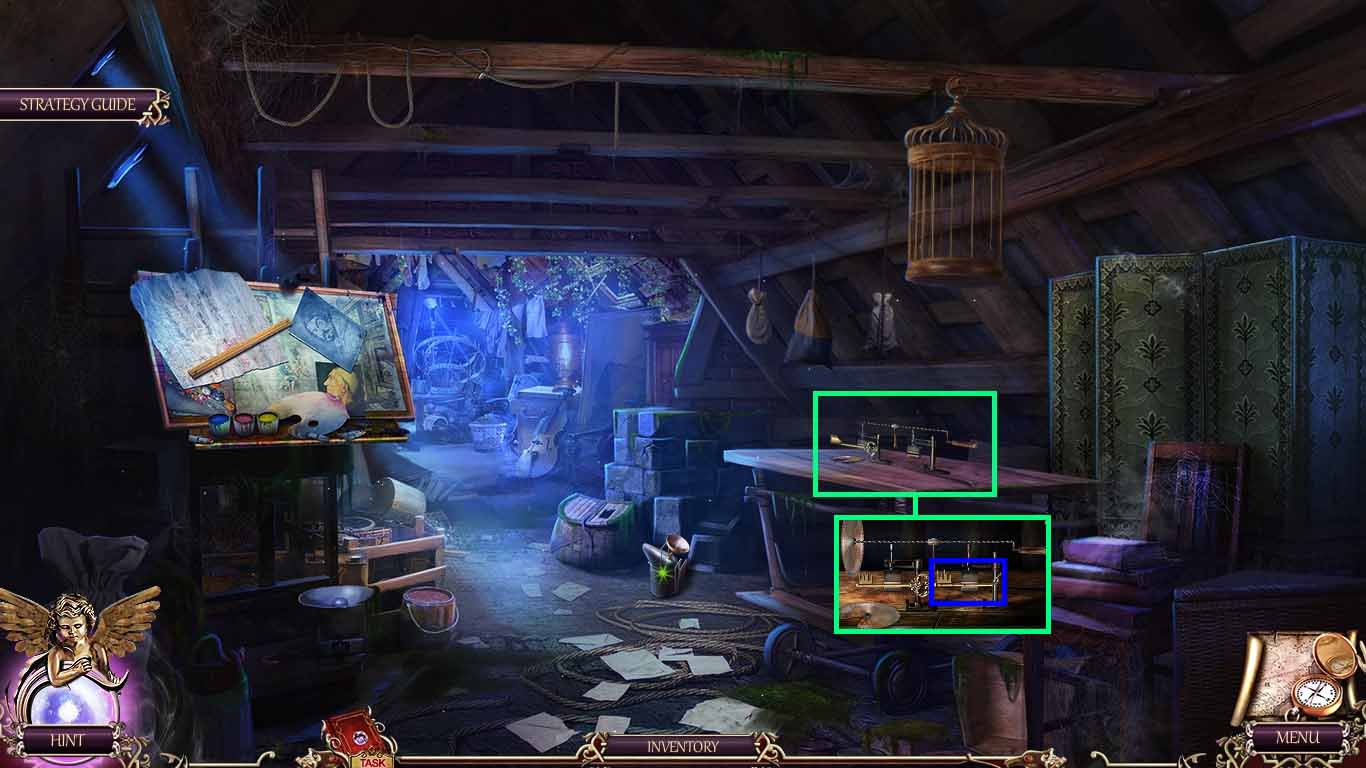
- Zoom into the workbench.
- Put the broken key and circular saw blade onto the workbench.
- Collect the key.
- Move back seven times to the repository of forgotten books.
- Zoom into the book.
- Insert the key into the lock; collect the valerian leaf.
- Move to the cemetery.
- Zoom into Romeo’s grave; use the crowbar on it.
- Collect the poison.
- Move to the café and up to the attic.
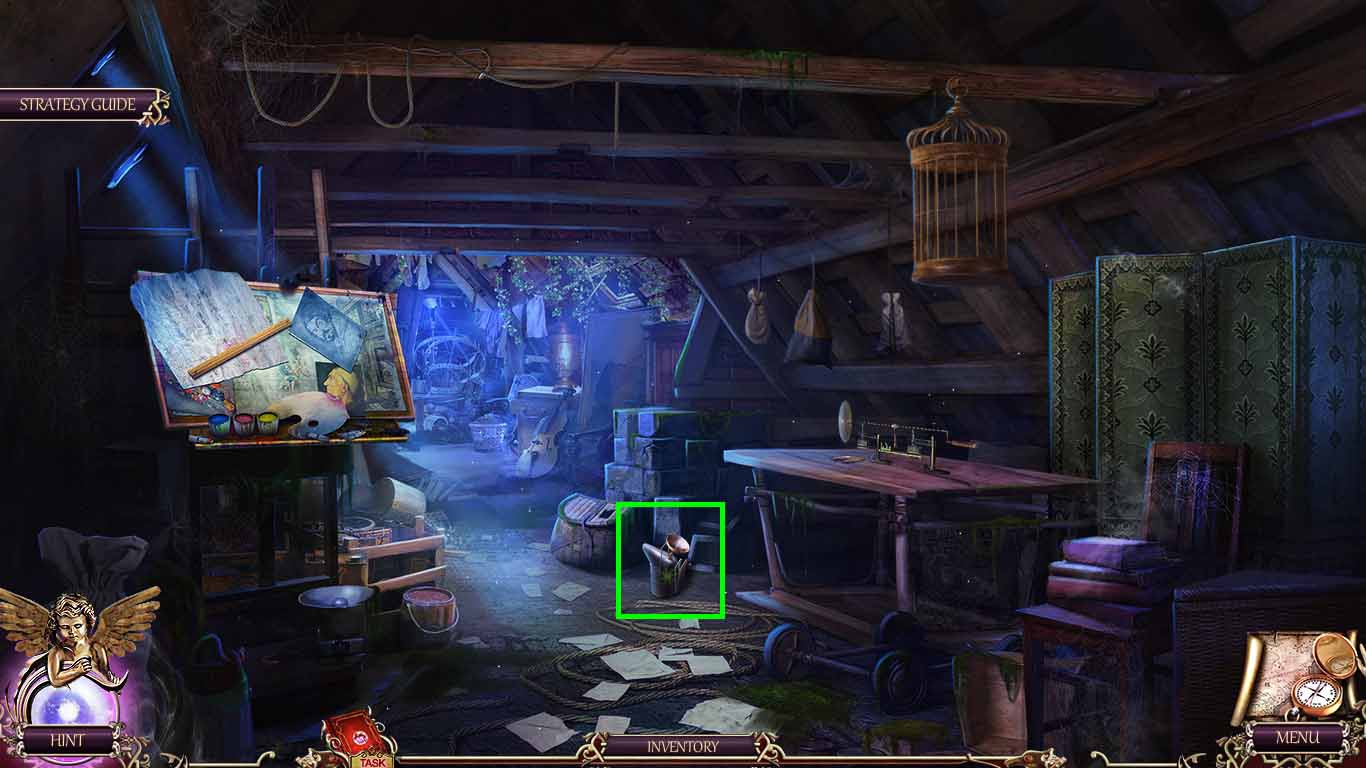
- Zoom into the smoker; put the poison into it.
- Collect the smoker.
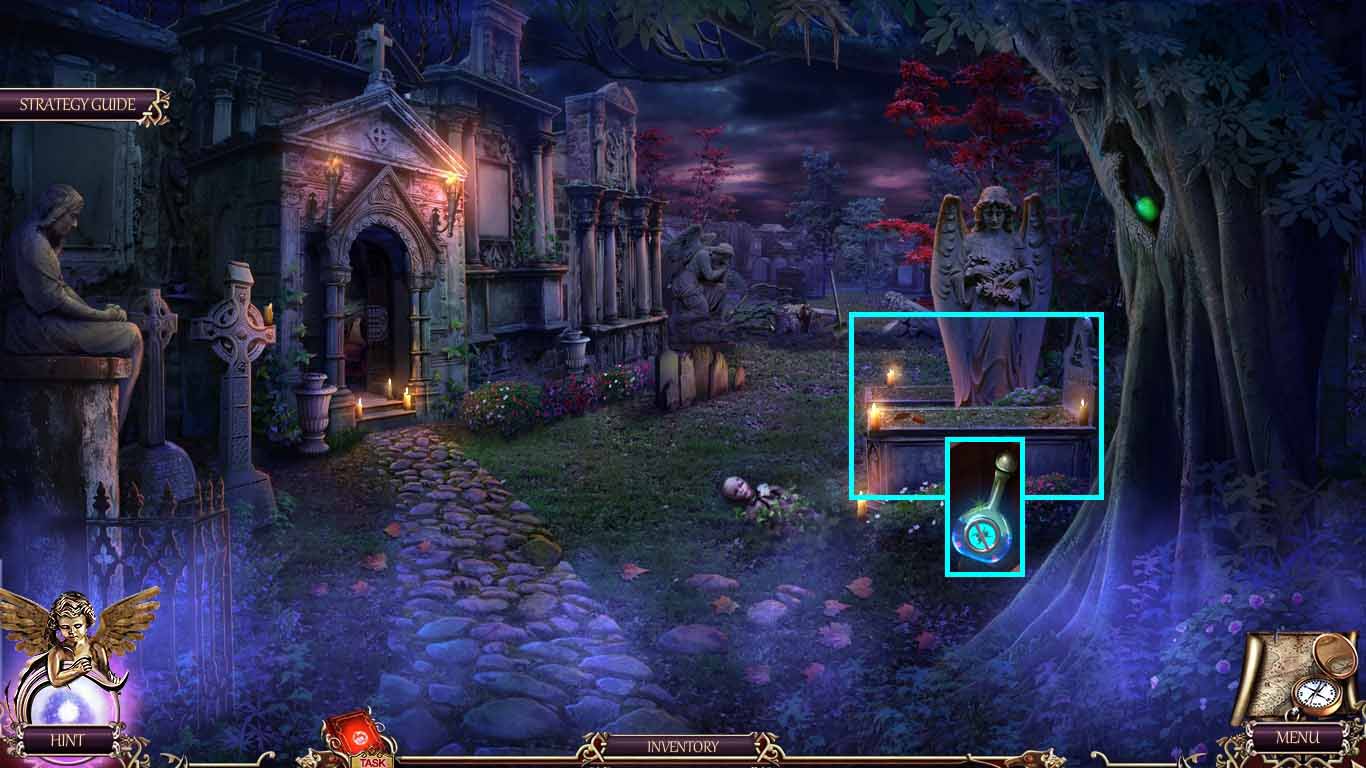
- Move to the cemetery.
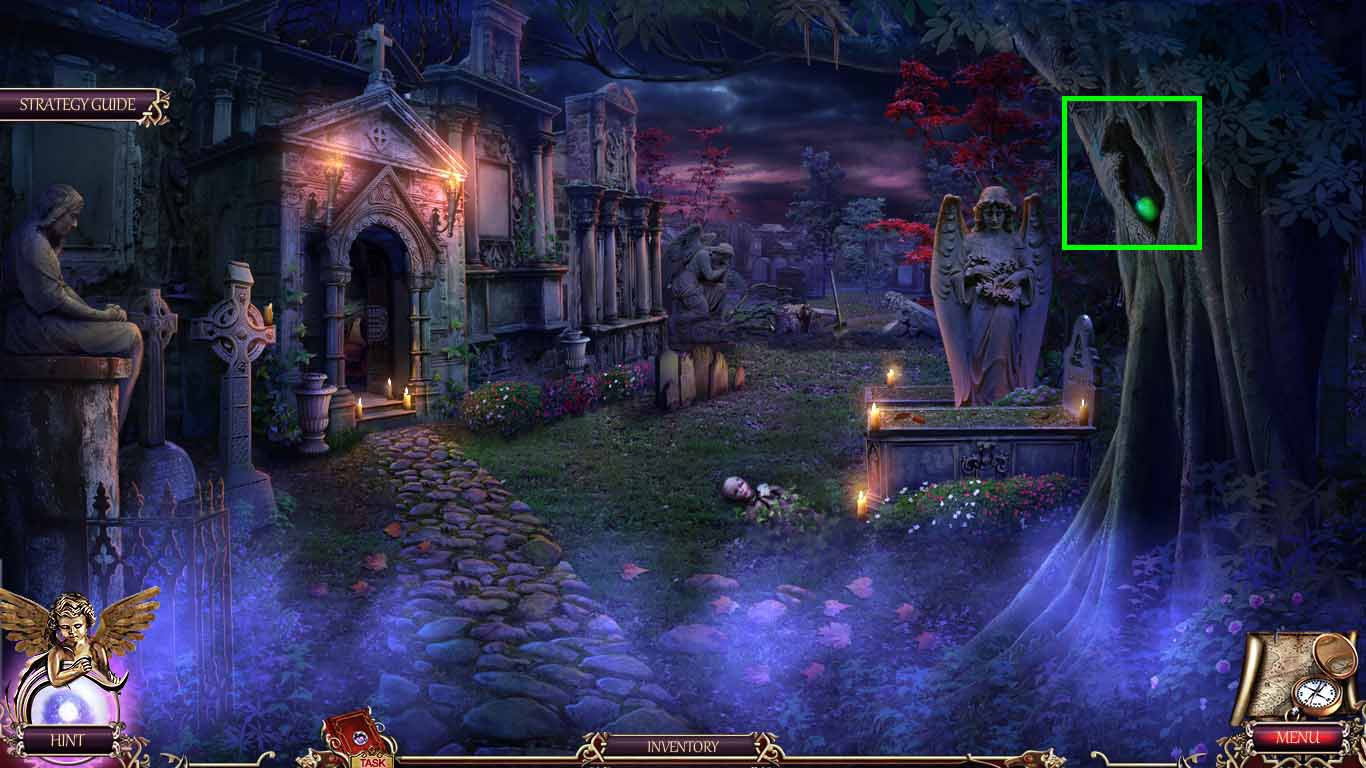
- Zoom into the hollow tree.
- Use the smoker on the bugs.
- Collect the phosphorous.
- Move to the attic.
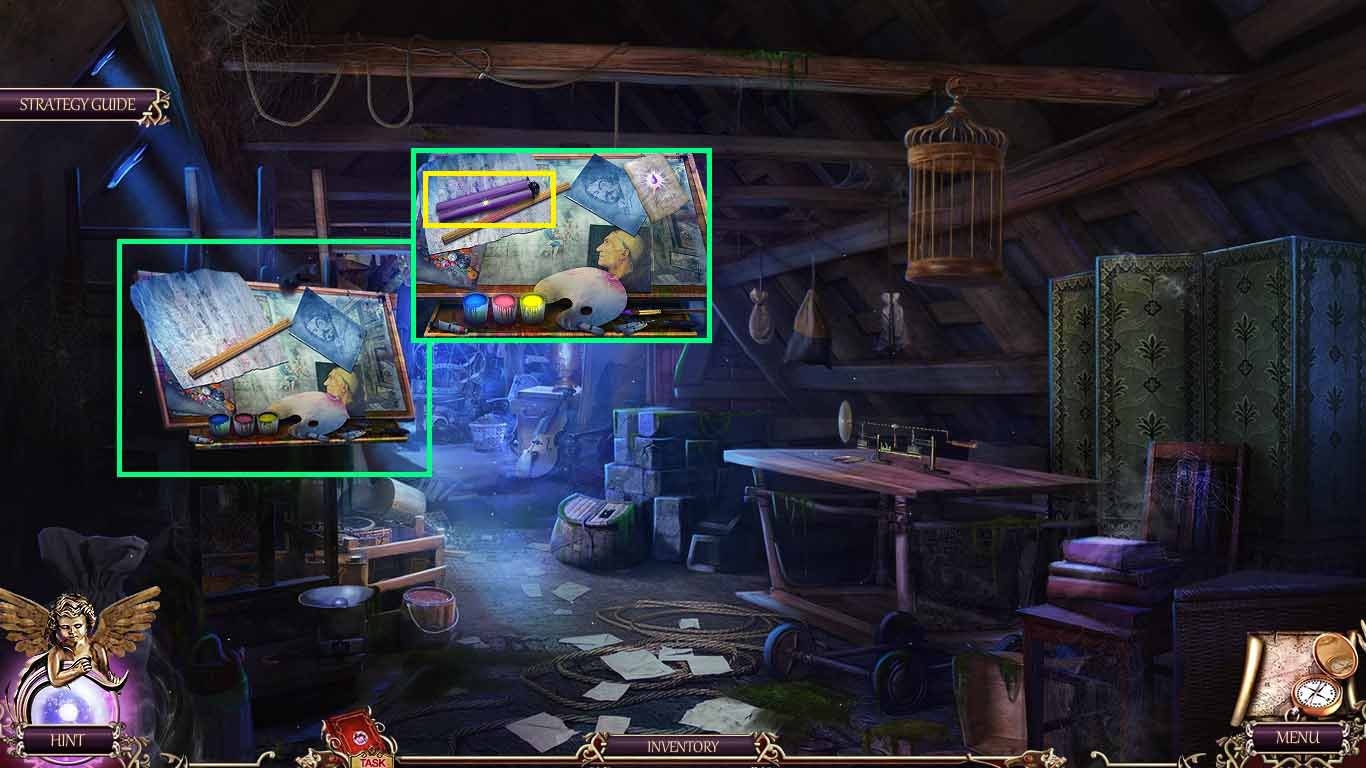
- Zoom into the painting collection.
- Place the brush, lamp, and the phosphorous onto it to trigger a puzzle.
- Solve the puzzle using the following formula:
- Dip the paintbrush into the blue then pink paint pots and then paint the lamp.
- Collect the ultraviolet lamp.
- Move to the repository of forgotten books.
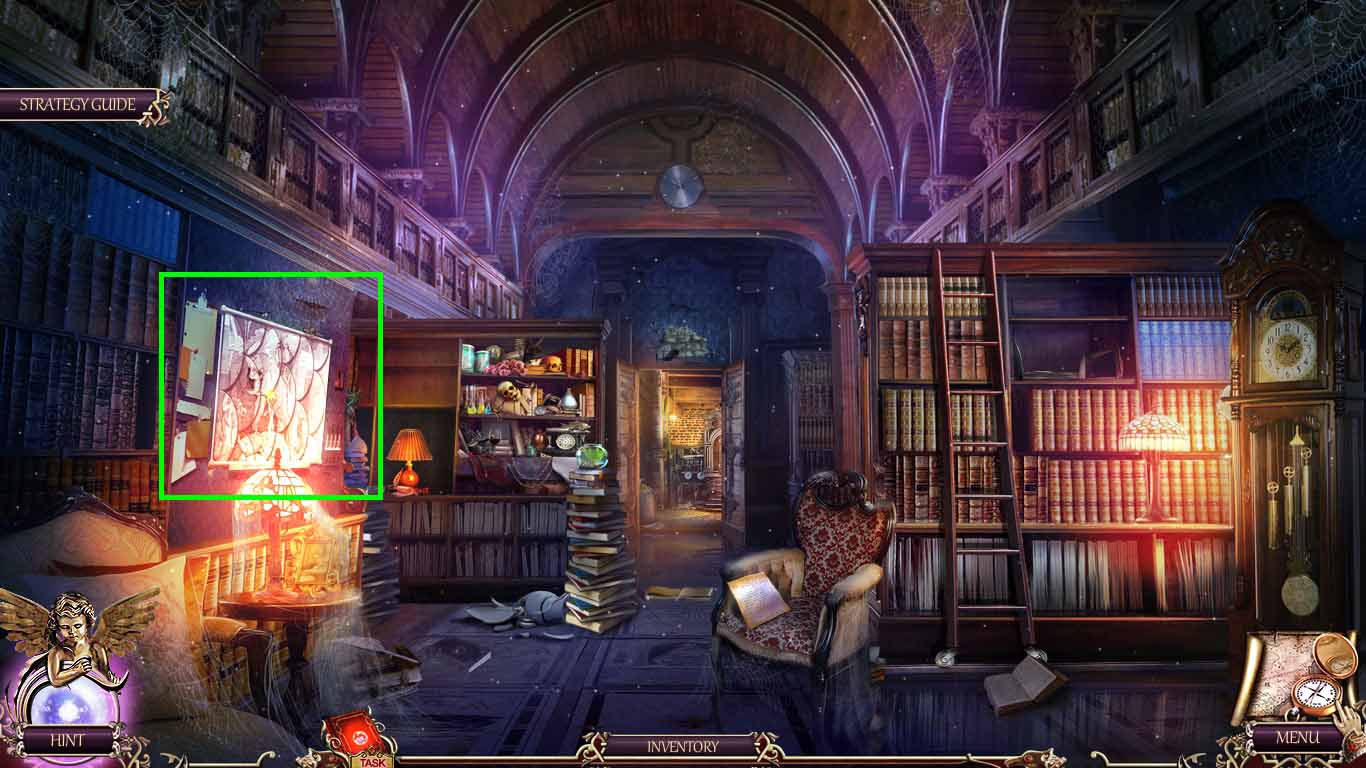
- Zoom into the board.
- Insert the ultraviolet lamp onto the board to trigger a puzzle.

- Click the scales and create a completed picture.
- Collect the burner.
- Move to the café.
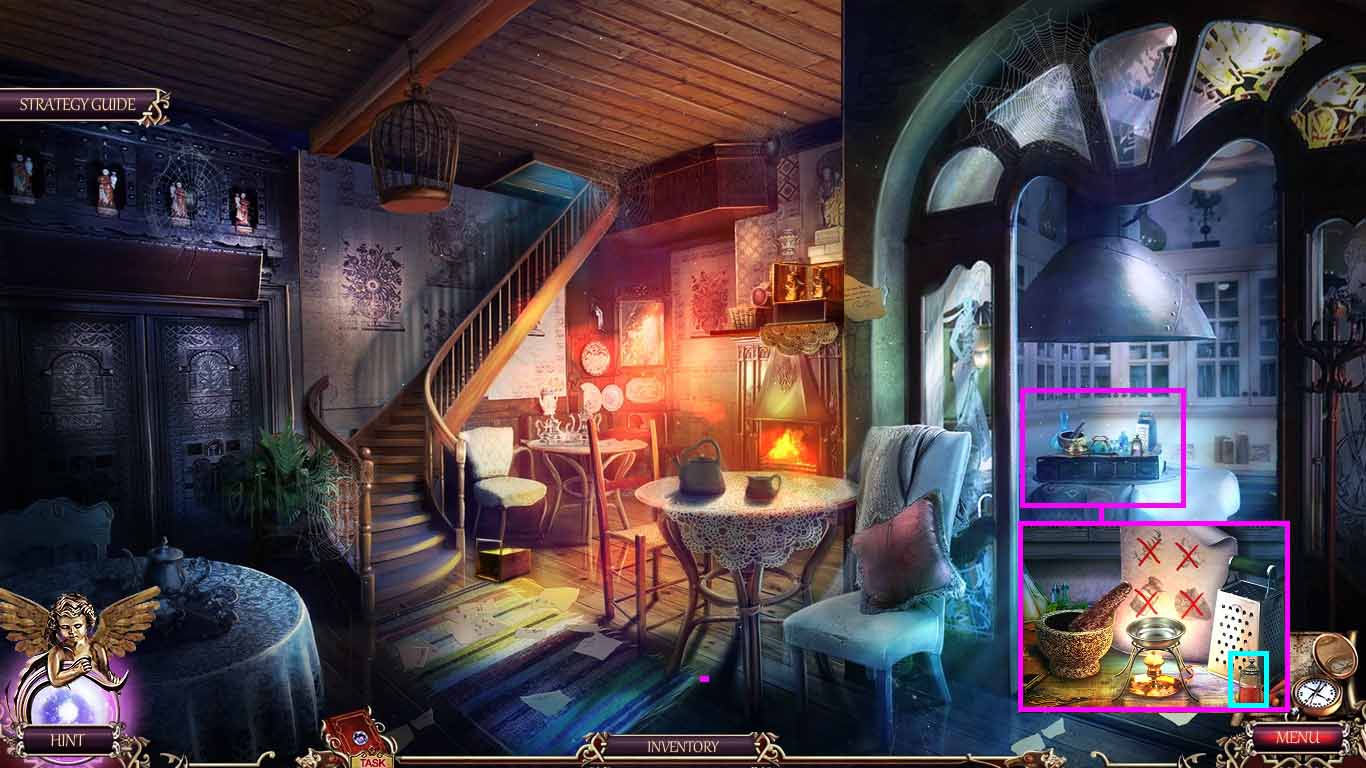
- Zoom into the kitchen table.
- Place the burner, cocoa, ginger, pepper and the valerian leaf onto the table.
- Click the bowl and move it to the burner.
- Click the bowl on the burner and move it to the bottle.
- Collect the awaken potion.
- Move into the vault at the chapel.
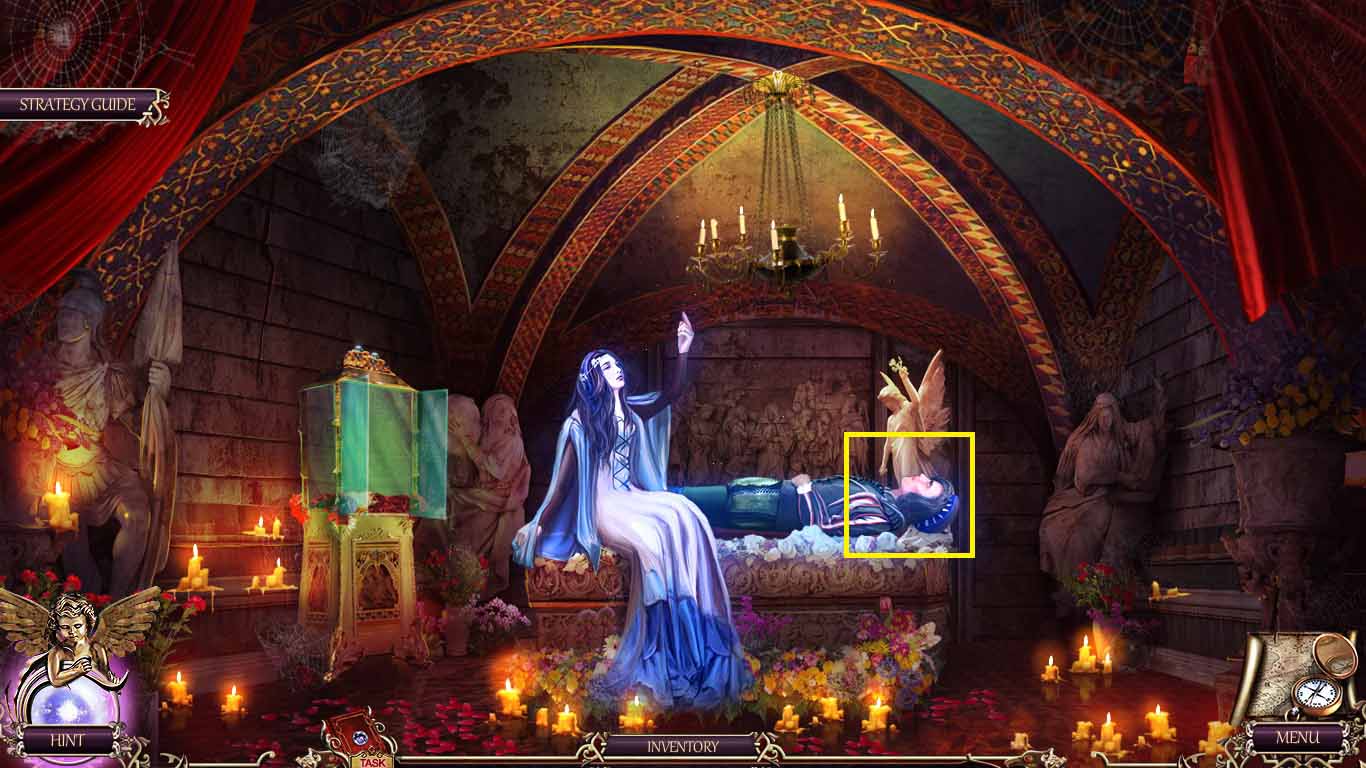
- Zoom into Romeo.
- Give him the awaken potion.
- Collect Martin’s soul, Ronald’s soul and Julie’s soul.
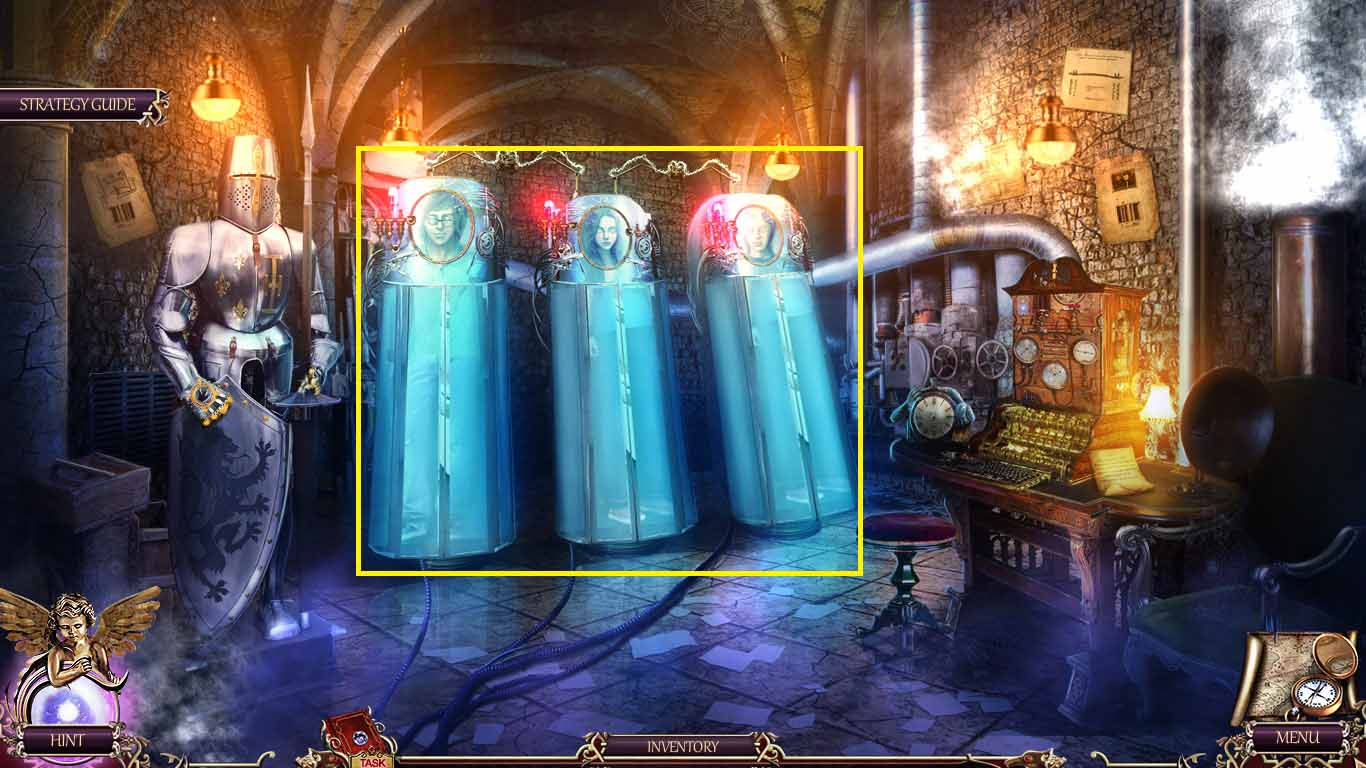
- Zoom into the left chamber.
- Insert Ronald’s soul.
- Zoom into the center chamber.
- Insert Julie’s soul.
- Zoom into the right chamber.
- Insert Martin’s soul.
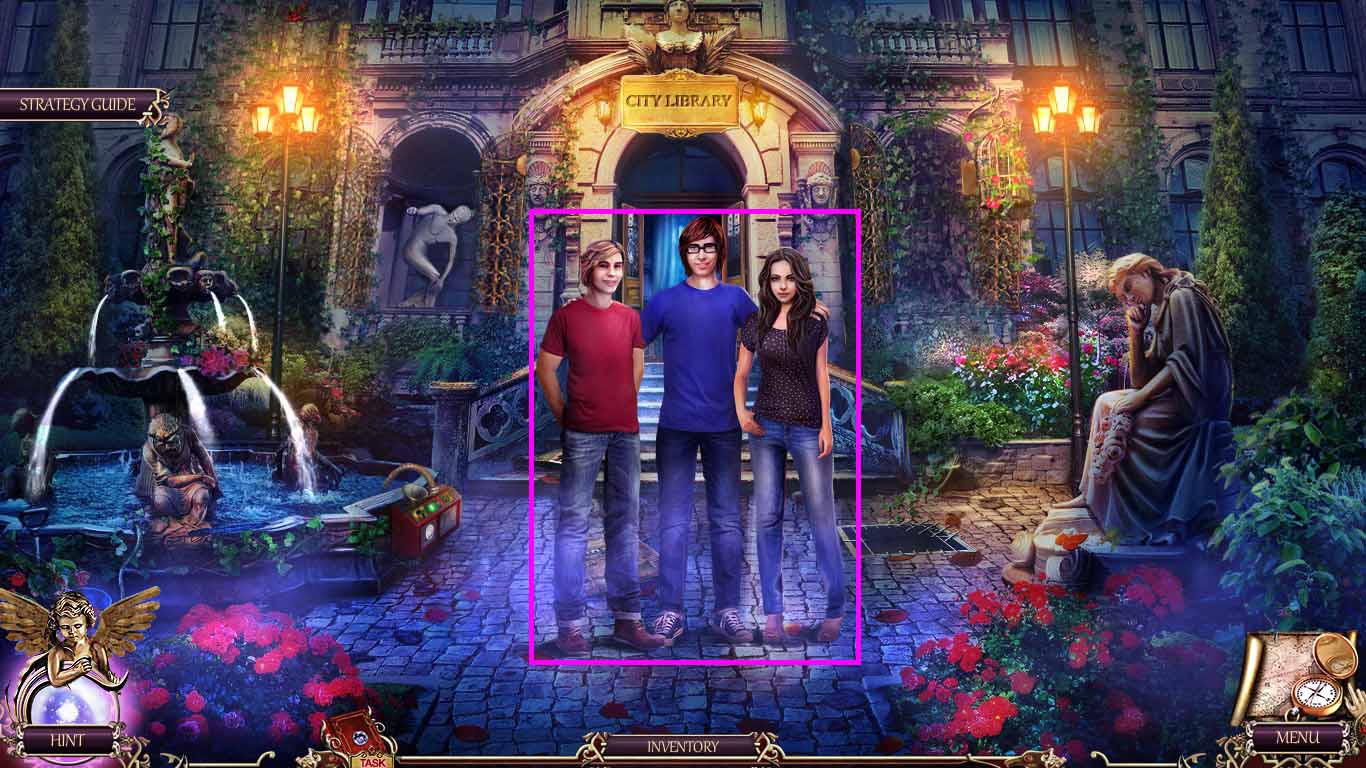
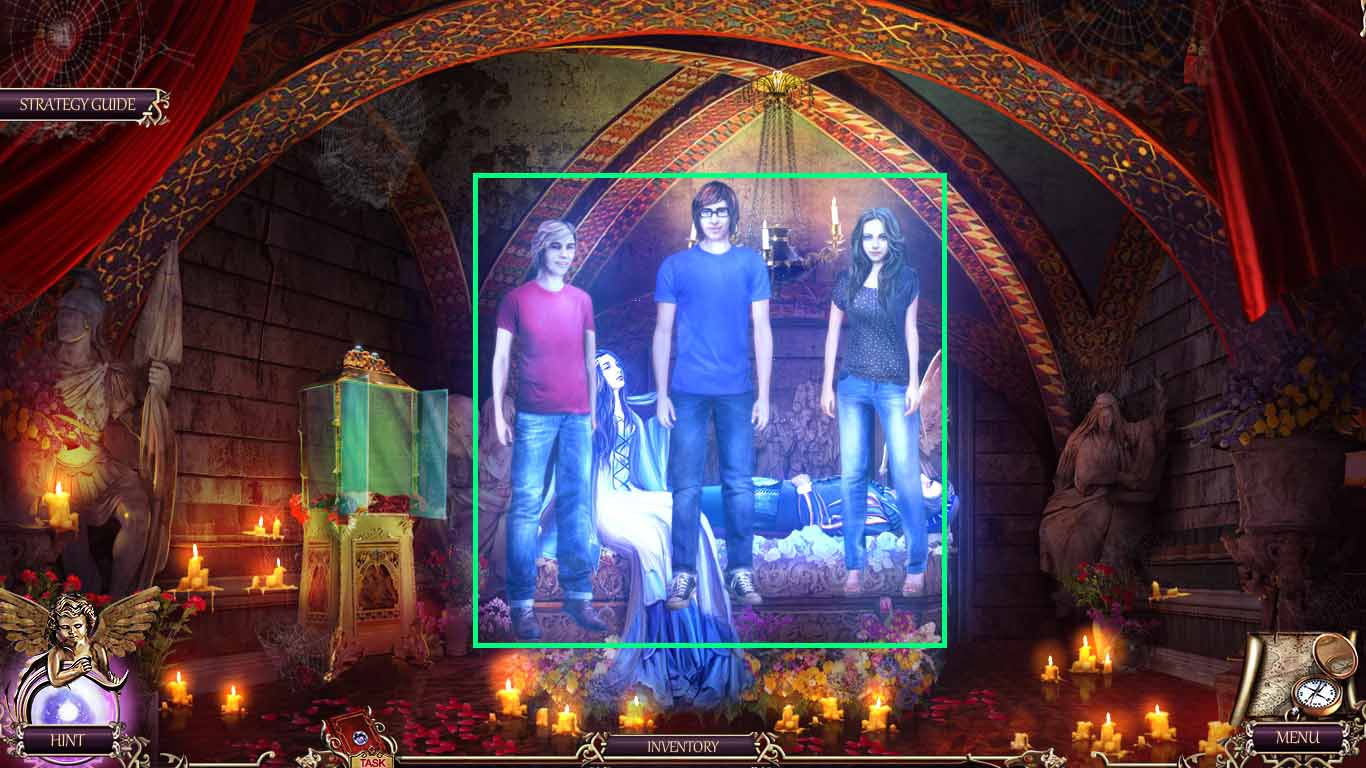
- Click the kids.
Chapter One: Rescuing Mercutio
Chapter Two: Rescuing Juliet
Chapter Three: Rescuing Romeo
Chapter Four: Hello, Hamlet
Bonus Chapter
Ask for help in the comments below!