
Dark Canvas: A Brush With Death: Chapter Four: The Lighthouse
Our Dark Canvas: A Brush with Death Walkthrough will be your guide as you race to save your daughter from a dark future. When Angie, your daughter, suddenly disappears while studying art in a small European town it’s up to you to discover what’s become of her. But first you’ll have to uncover the truth behind the strange paintings that seem to foretell death. Our insider tips, step-by-step instructions, and custom screenshots will help you as you investigate the mysterious town haunted by paintings.
General Info and Tips
Chapter One: The Art Gallery
Chapter Two: The Roof
Chapter Three: The Backyard
Chapter Four: The Lighthouse
Ask for help in the comments below!
Chapter One: The Art Gallery
Chapter Two: The Roof
Chapter Three: The Backyard
Chapter Four: The Lighthouse
Ask for help in the comments below!
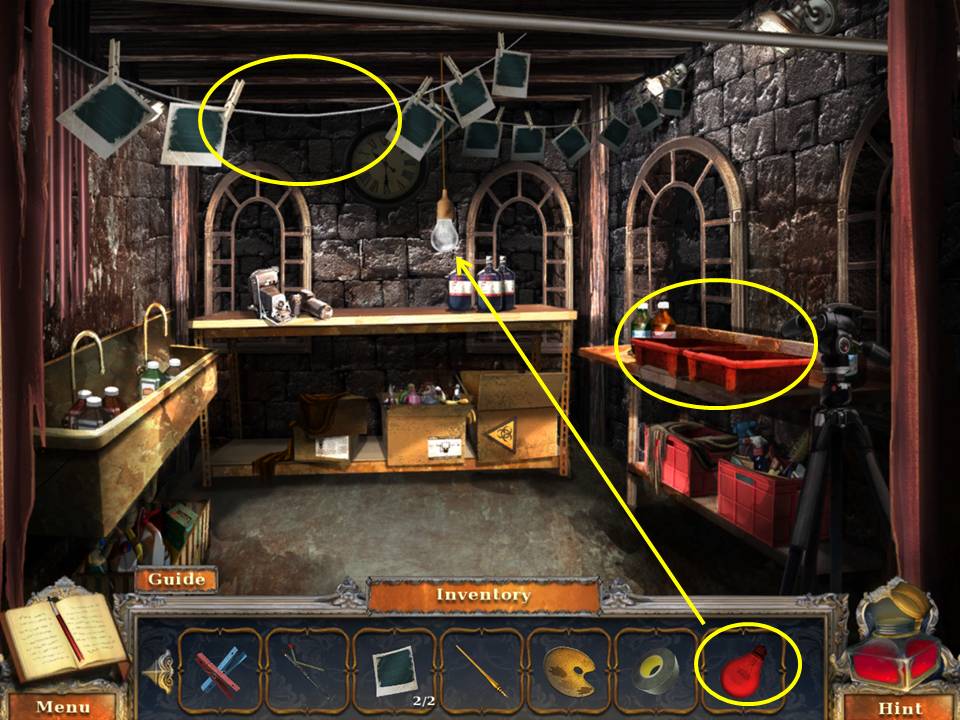
- Zoom into the lightbulb socket.
- Replace the white lightbulb with the RED LIGHTBULB.
- Zoom into the developer trays.
- Pour the developer inside.
- Put the two UNDEVELOPED PHOTOS in the tray.
- Withdraw the WET PHOTOS with the tongs.
- Zoom into the line. Pin the WET PHOTOS with the CLOTHESPINS.
- Take the PHOTOS OF VIRGIL.
- Go to the backyard.
- Give the PHOTOS OF VIRGIL to Rosario.
- Receive the RADIO.
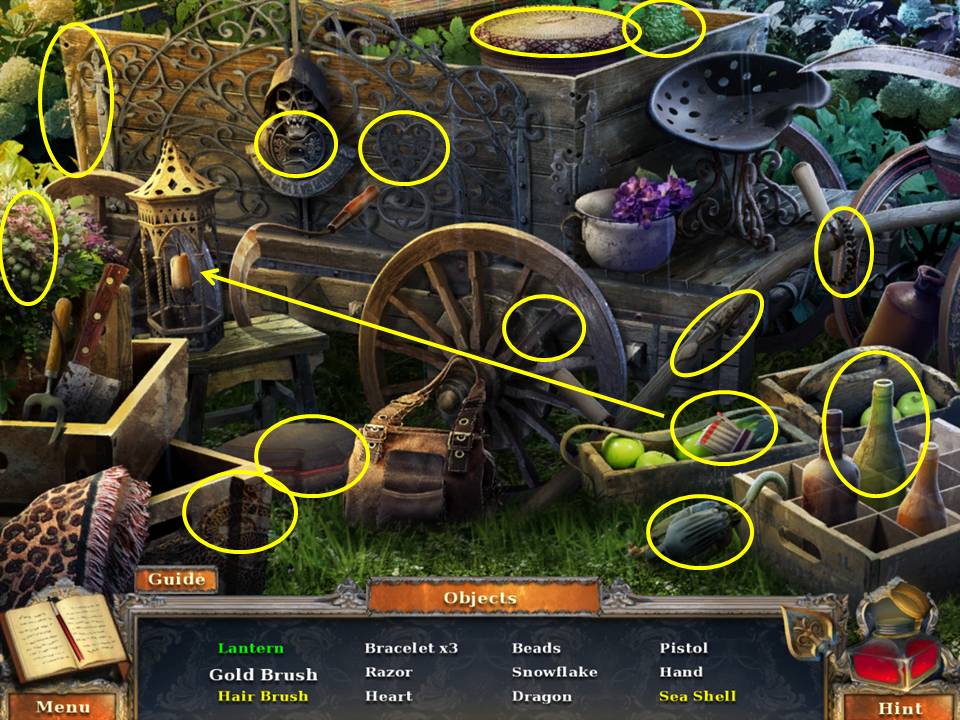
- Play the HOA.
- Find the items listed.
- Use the matches to light the lantern.
- Click the box to get the seashell.
- Click the wine bottle to get the hair brush.
- Receive the GOLD BRUSH.
- Go back to the church.
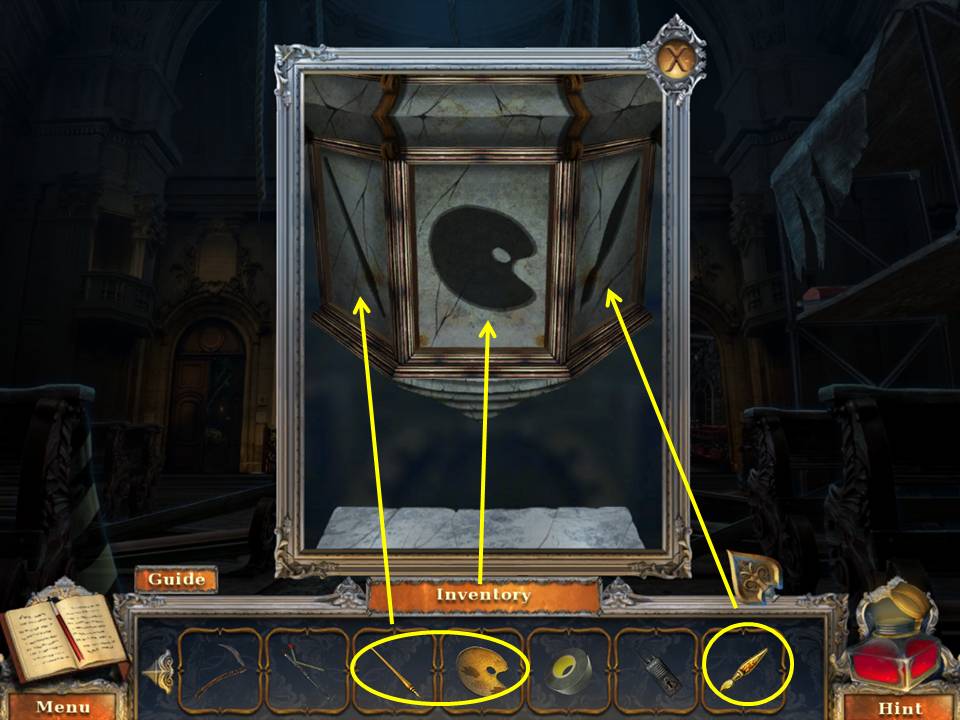
- Zoom into the panel.
- Place the GOLDEN PALETTE, GOLDEN PEN, and GOLD BRUSH in the spots.
- Receive the FLUTE.
- Go to the cemetery gate.
- Zoom into the gate.
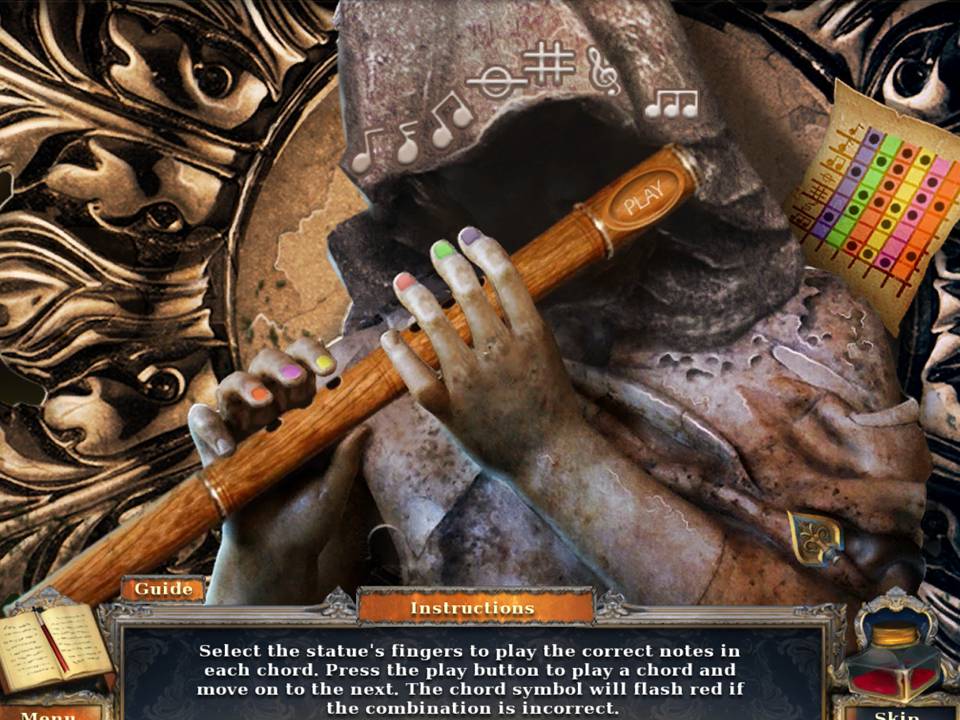
- Put the FLUTE in the figure’s hands.
- The object of this game is to position the fingers according to the music sheet in the top right corner.
- Follow each row beginning with purple and going across.
- For any space with a black circle click the corresponding finger to put it down.
- If no circle is there, leave the finger in the up position.
- Hit “play” after positioning each row.
- When finished, go through the gate into the cemetery.
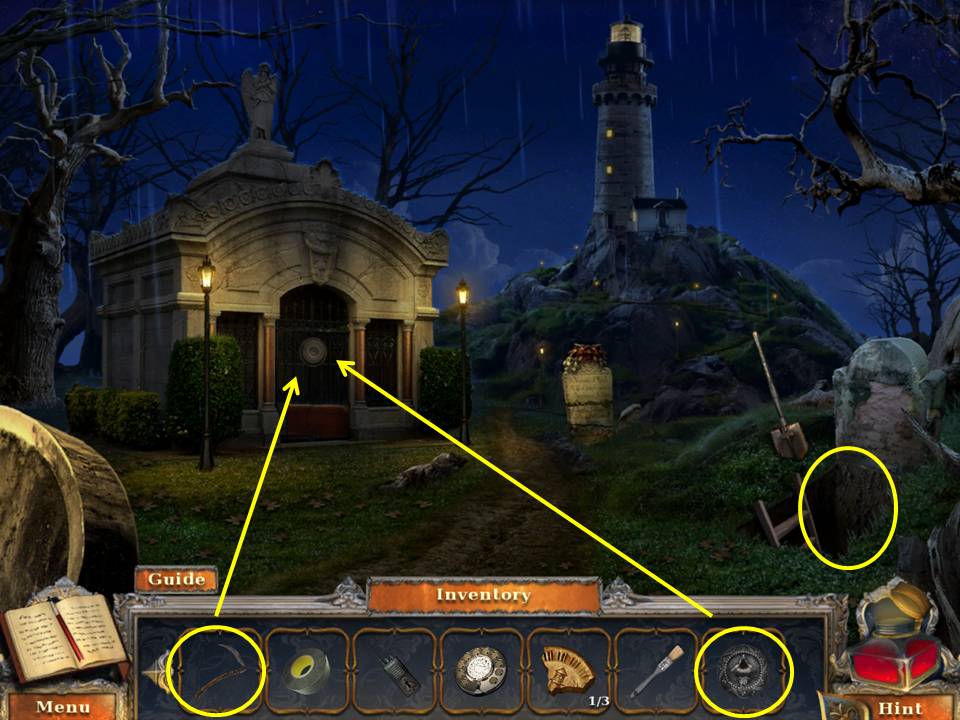
- Go forward to the outside of the lighthouse.

- Zoom into the bench.
- Take the ROTARY WHEEL.
- Zoom into the tree.
- Take the bag with the reaching tool.
- Open the bag.
- Take the THIN BRUSH and the STONE ROSE.
- Zoom into the stone.
- Take the first LIGHTHOUSE EMBLEM SHARD.
- Return to the cemetery gate.

- Zoom into the right side of the gate.
- Place the STONE ROSE in the appropriate space.
- Take the clue, code, and SILHOUETTE STONE.
- Go back to the cemetery.
- Zoom into the open grave.
- Shovel the dirt to uncover the box.
- Zoom into the box and dial the number 940.
- Take the clue, the second LIGHTHOUSE EMBLEM SHARD and the invoice.
- Zoom into the mausoleum door.
- Place the SILHOUETTE STONE, then the SCYTHE REPLICA in the appropriate spaces.
- Click to open the casket.
- Take the WORK GLOVES and VALVE.
- Light the candle with the MATCHES.
- Take the third LIGHTHOUSE EMBLEM SHARD.
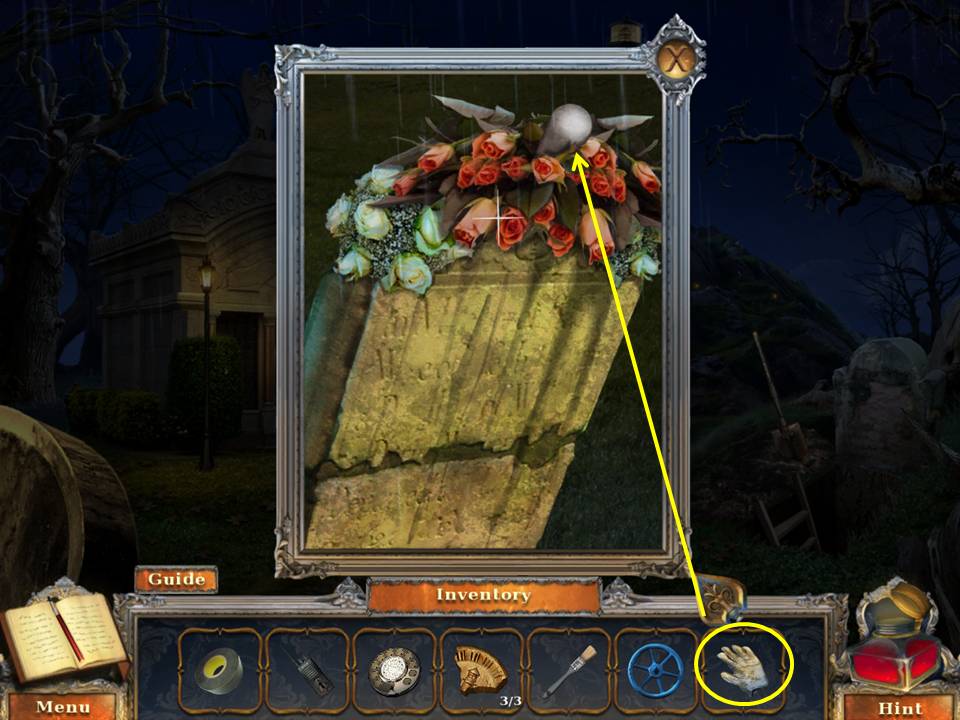
- Zoom into the gravestone.
- Don the WORK GLOVES to take the LEVER.
- Go back to the cemetery gate.
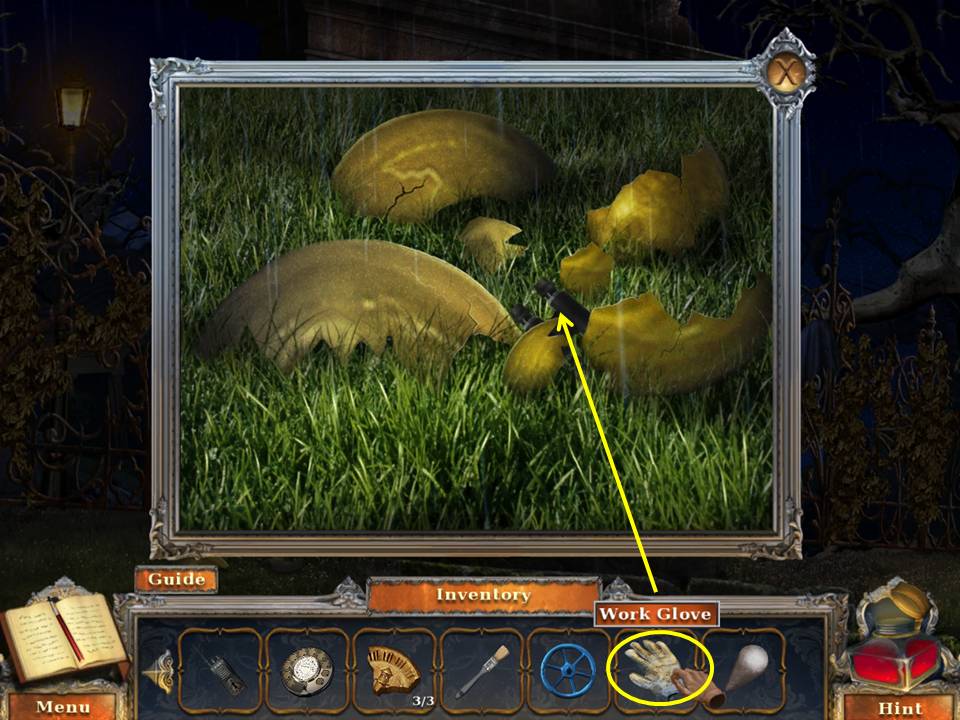
- Zoom into the broken shards.
- Wear the WORK GLOVES to take the CONDUCTOR.
- Go back to the outside of the lighthouse.
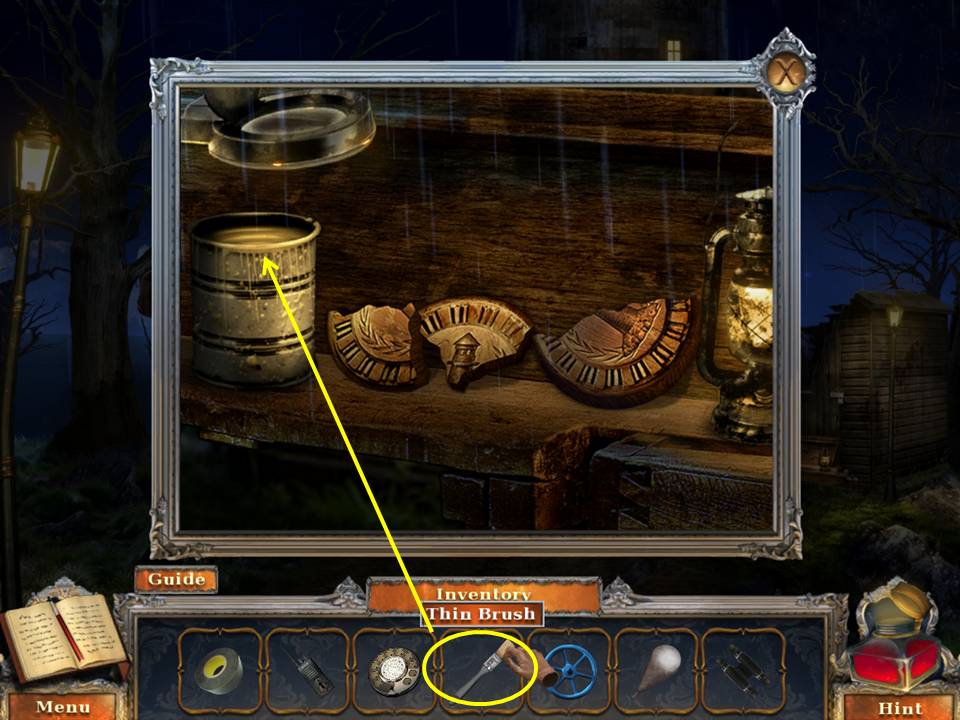
- Zoom into the bench.
- Put the three LIGHTHOUSE EMBLEM SHARDS on the bench.
- Dab glue on the shards with the THIN BRUSH.
- Take the repaired LIGHTHOUSE EMBLEM.
- Zoom into the lighthouse door and place the LIGHTHOUSE EMBLEM into the niche.
- Go into the lighthouse.
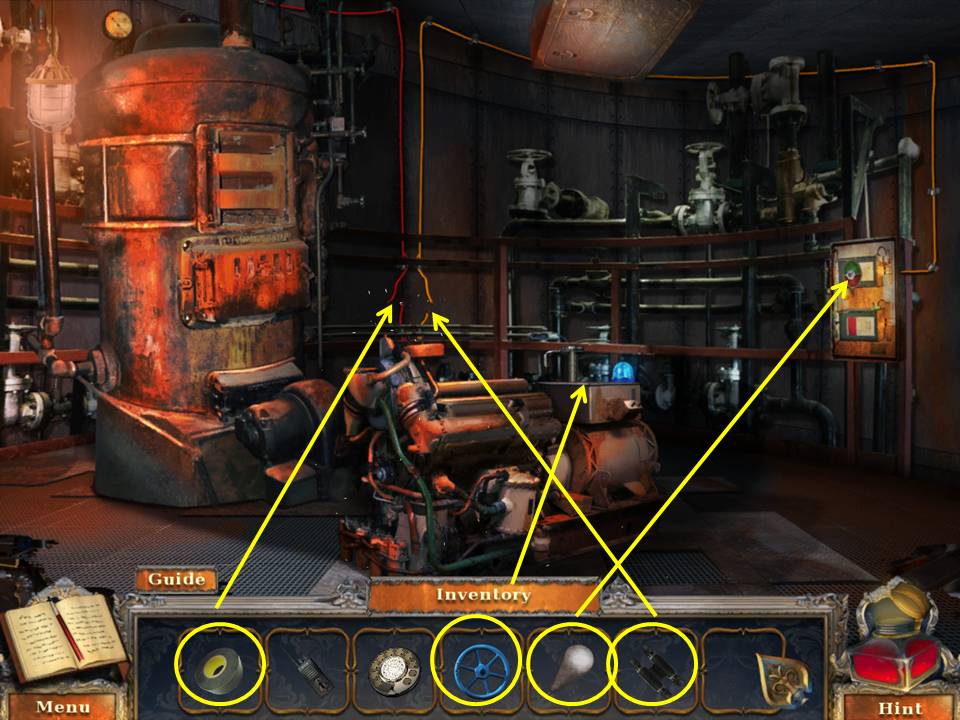
- Zoom into the generator.
- Place the VALVE on the post.
- Click the valve to cut the power.
- Zoom into the cut wires.
- Fix the wires with the CONDUCTOR.
- Secure with ELCTRICAL TAPE. Zoom back into the generator.
- Restore the power.
- Zoom into the panel.
- Place the LEVER on the switch.
- Click it to lower the stairs.
- Ascend the stairs to the lighthouse loft.
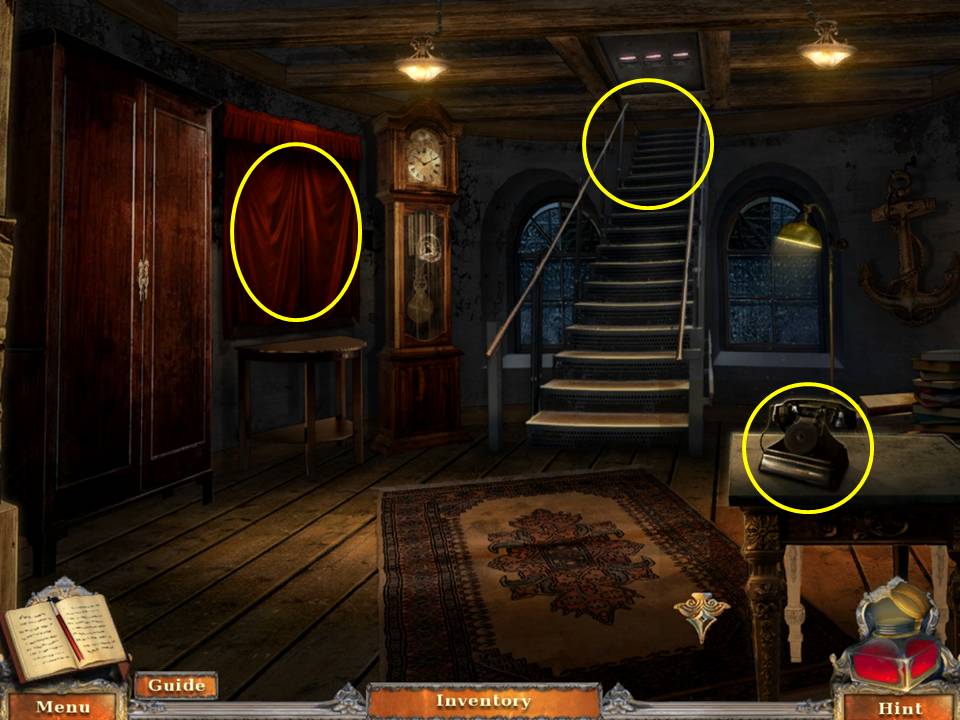
- Click to open the curtain.
- View the painting.
- Zoom into the phone.
- Place the ROTARY WHEEL on the phone.
- Take the SCREWDRIVER.
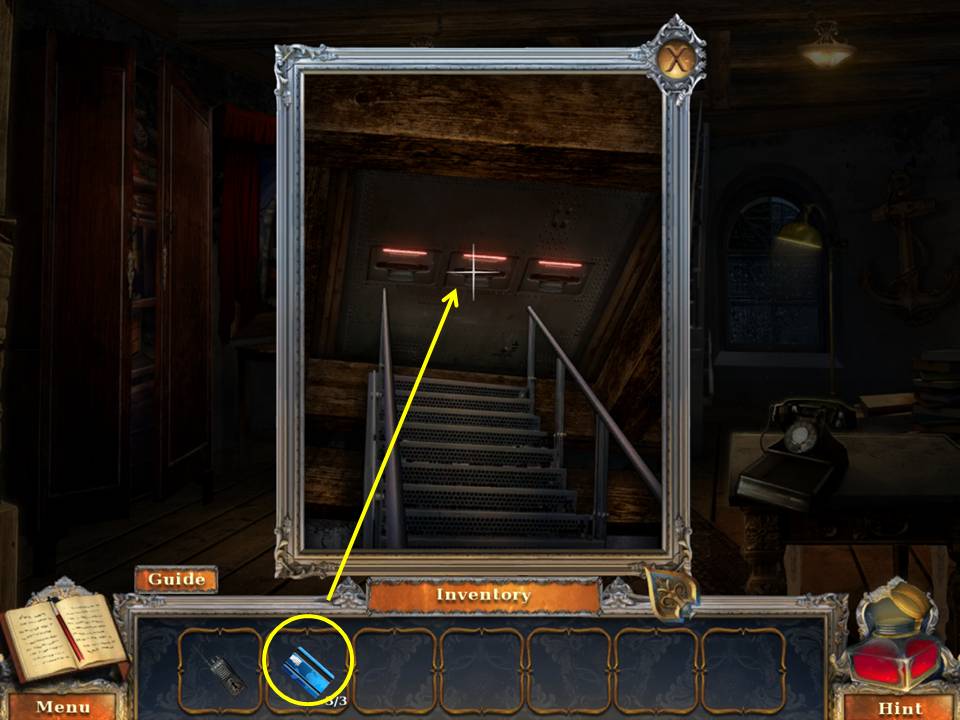
- Zoom into the stairs.
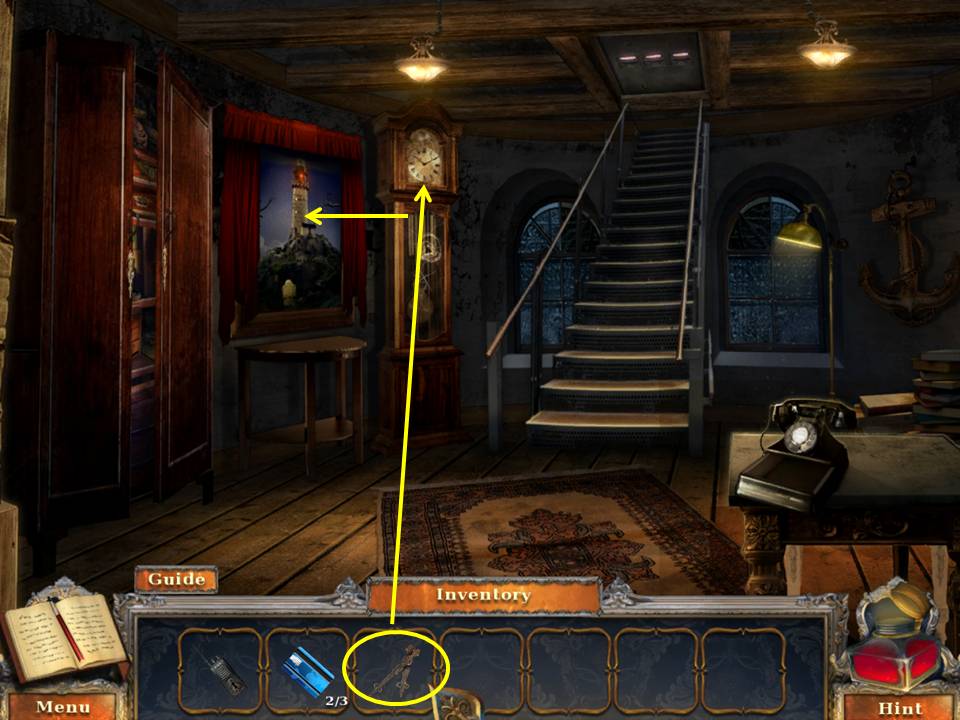
- Take the WARDROBE HANDLE.
- Put it on the wardrobe.
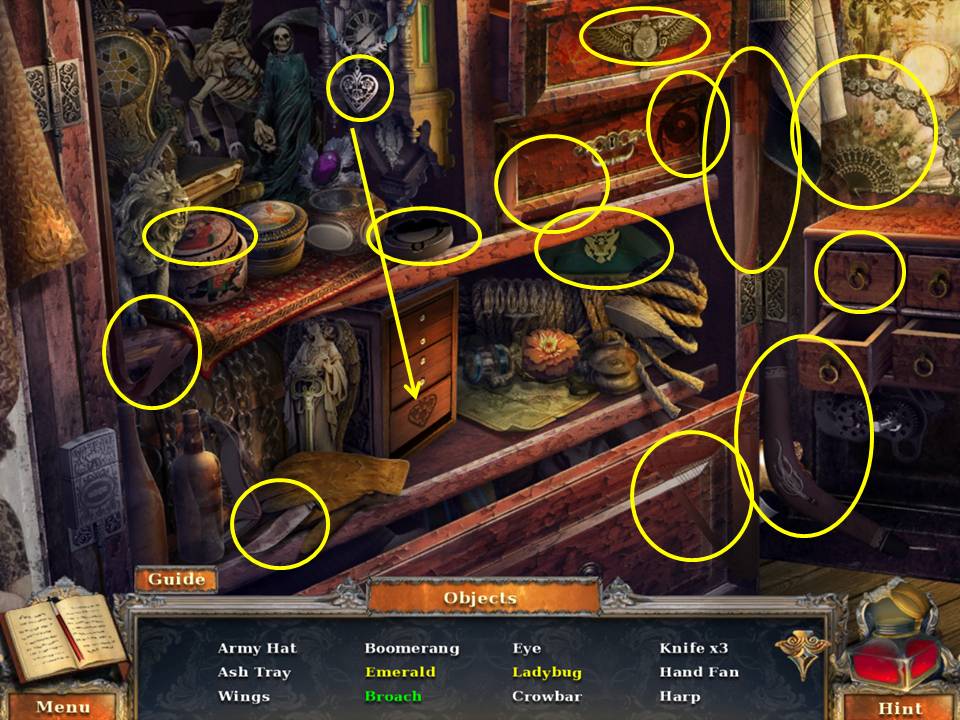
- Play the HOA.
- Find the items listed.
- Open the drawer to get the emerald.
- Click the lid to get the ladybug.
- Use the heart to open the box and get the brooch.
- Receive the CROWBAR. Return downstairs.

- Zoom into the furnace.
- Unscrew the panel with the SCREWDRIVER.
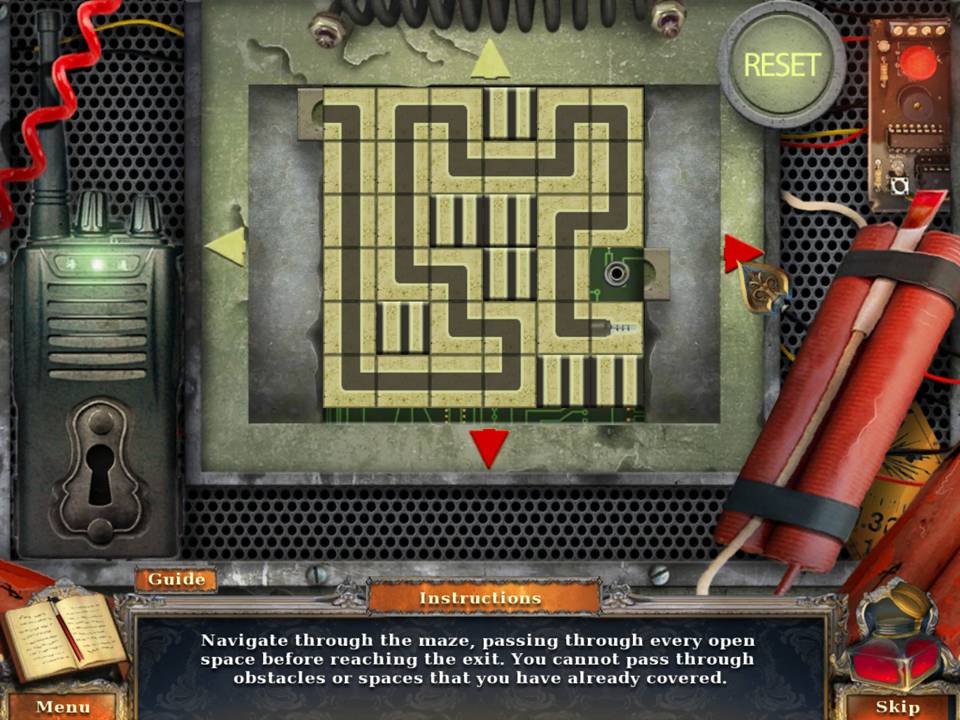
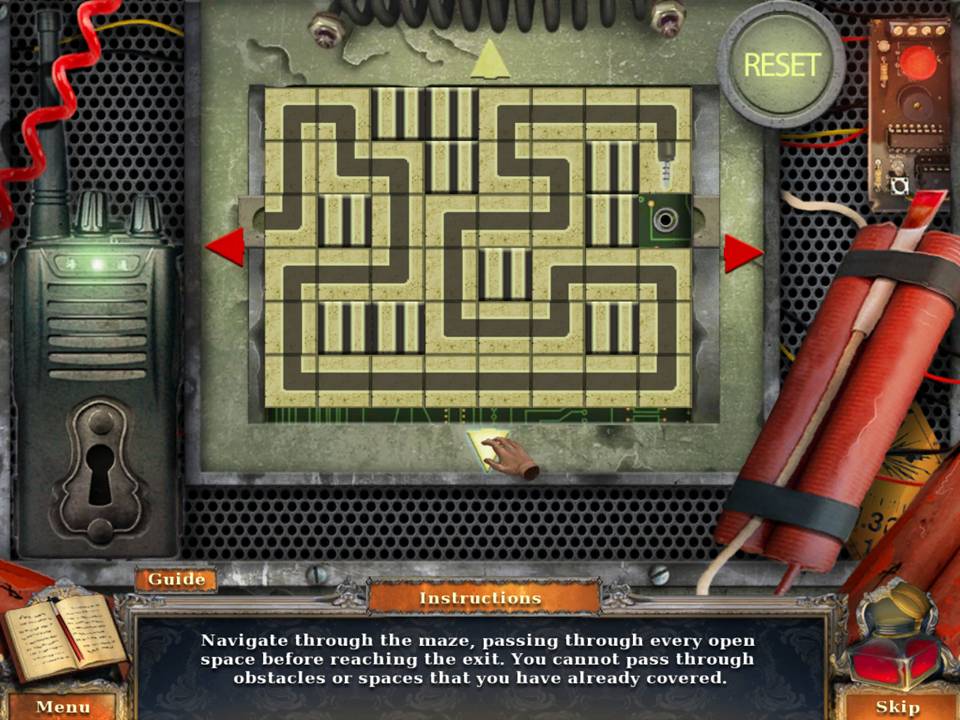
- Zoom into the bomb.
- Put the radio next to the puzzle.
- Using the arrows, follow the path shown in the screenshot to solve the puzzle.
- Collect the first BOMB KEYCARD.
- Leave the lighthouse.
- Zoom into the stone.
- CROWBAR the stone.
- Zoom into the bomb.
- Put the radio next to the puzzle.
- Using the arrows, follow the path shown in the screenshot to solve the puzzle.
- Take the second BOMB KEYCARD.

- Go back to the lighthouse loft and play the HOA.
- Find the items listed.
- Open the drawer to get the white mask.
- Use the key to open the box and get the teddy bear.
- Click the lion head to get the beetle.
- Receive the CLOCK HANDS.
- Zoom into the clock.
- Put the CLOCK HANDS on the face.
- Take the SHARP PENDULUM.
- Zoom into the painting.
- Slice the canvas with the SHARP PENDULUM to see the bomb.
- Zoom into the bomb.
- Put the radio next to the puzzle.
- Using the arrows, follow the path shown in the screenshot to solve the puzzle.
- Take the third BOMB KEYCARD.
- Zoom into the stairs insert the three BOMB KEYCARDS into the slots.
- Throw the RADIO at the red button.
- Release the captives.
- Congratulations! You've completed Dark Canvas A Brush with Death!
General Info and Tips
Chapter One: The Art Gallery
Chapter Two: The Roof
Chapter Three: The Backyard
Chapter Four: The Lighthouse
Ask for help in the comments below!
Chapter One: The Art Gallery
Chapter Two: The Roof
Chapter Three: The Backyard
Chapter Four: The Lighthouse
Ask for help in the comments below!