
Dark Canvas: A Brush With Death: Chapter One: The Art Gallery
Our Dark Canvas: A Brush with Death Walkthrough will be your guide as you race to save your daughter from a dark future. When Angie, your daughter, suddenly disappears while studying art in a small European town it’s up to you to discover what’s become of her. But first you’ll have to uncover the truth behind the strange paintings that seem to foretell death. Our insider tips, step-by-step instructions, and custom screenshots will help you as you investigate the mysterious town haunted by paintings.
General Info and Tips
Chapter One: The Art Gallery
Chapter Two: The Roof
Chapter Three: The Backyard
Chapter Four: The Lighthouse
Ask for help in the comments below!
Chapter One: The Art Gallery
Chapter Two: The Roof
Chapter Three: The Backyard
Chapter Four: The Lighthouse
Ask for help in the comments below!
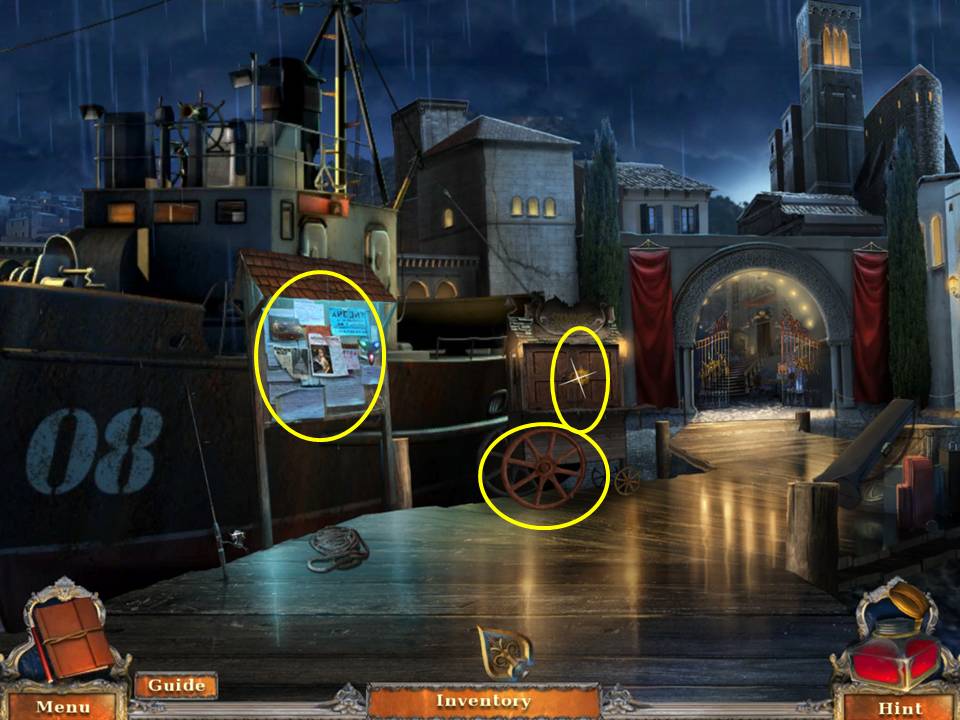
- Zoom into the message board.
- Take the JEWEL and MATCHES.
- Read and take the two clues.
- Zoom into the cart wheel.
- Take the BRUSH TOKEN.
- Zoom into the cart. Insert the JEWEL in the lock.
- Play the HOA.
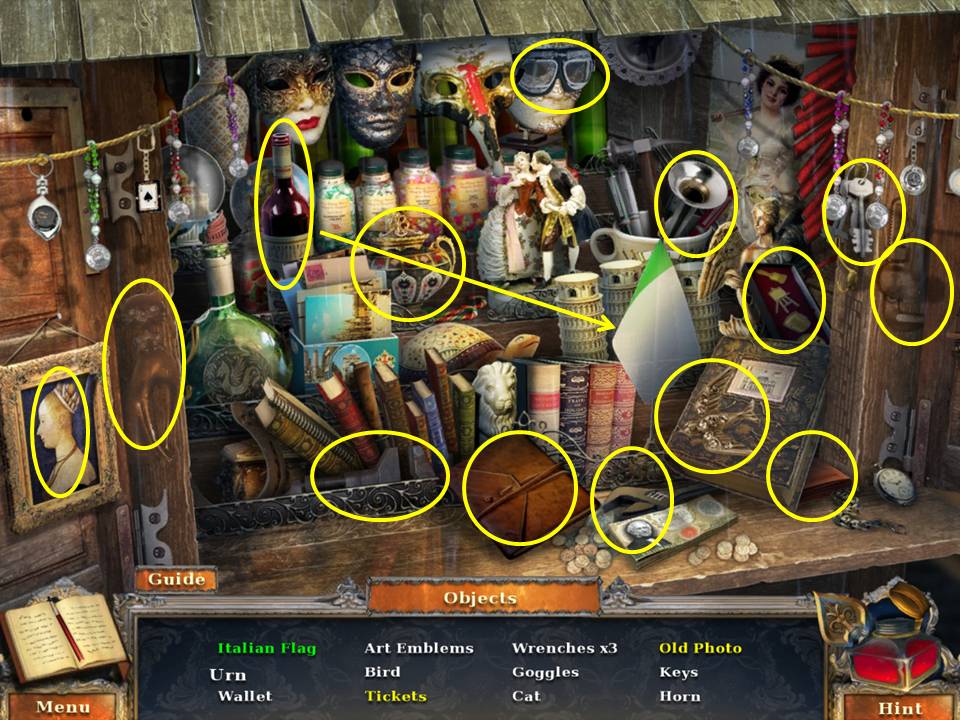
- Find the items listed.
- Pour the wine on the flag to get the Italian flag.
- Click the portfolio to get the tickets.
- Click the painting to take it out of its frame and get the old photo.
- Receive the ART EMBLEMS.
- Zoom into the lock on the gate.
- Insert the ART EMBLEMS to initiate a puzzle.
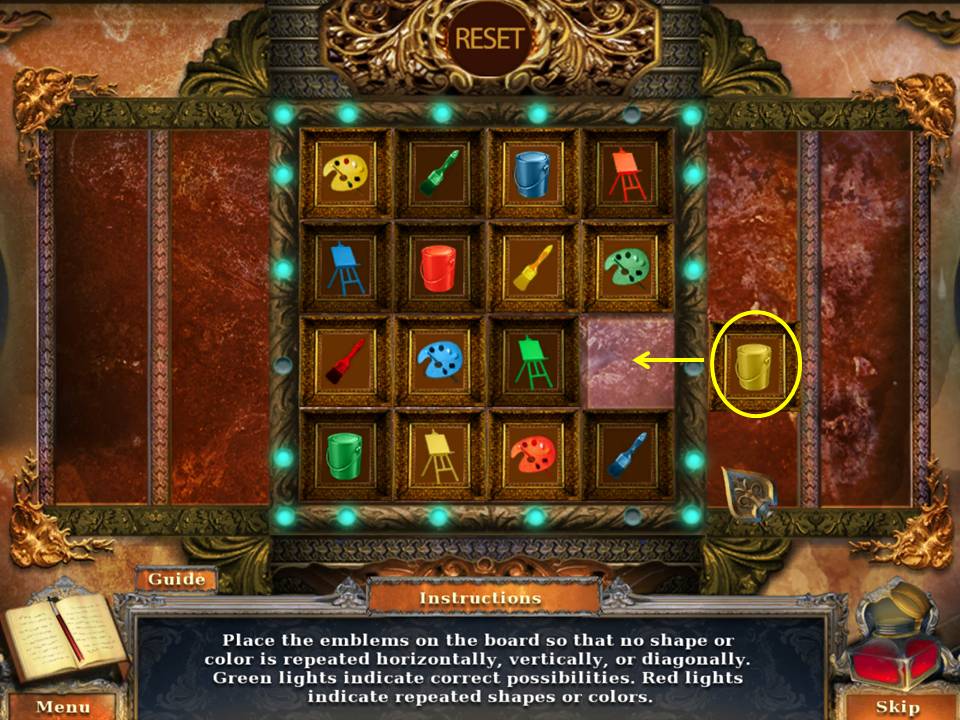
- The object of the puzzle is to position the emblems so that no color or symbol repeats in the same line vertically, diagonally, or horizontally.
- Screenshot shows the final move required.
- When finished, go forward to the art gallery entrance.
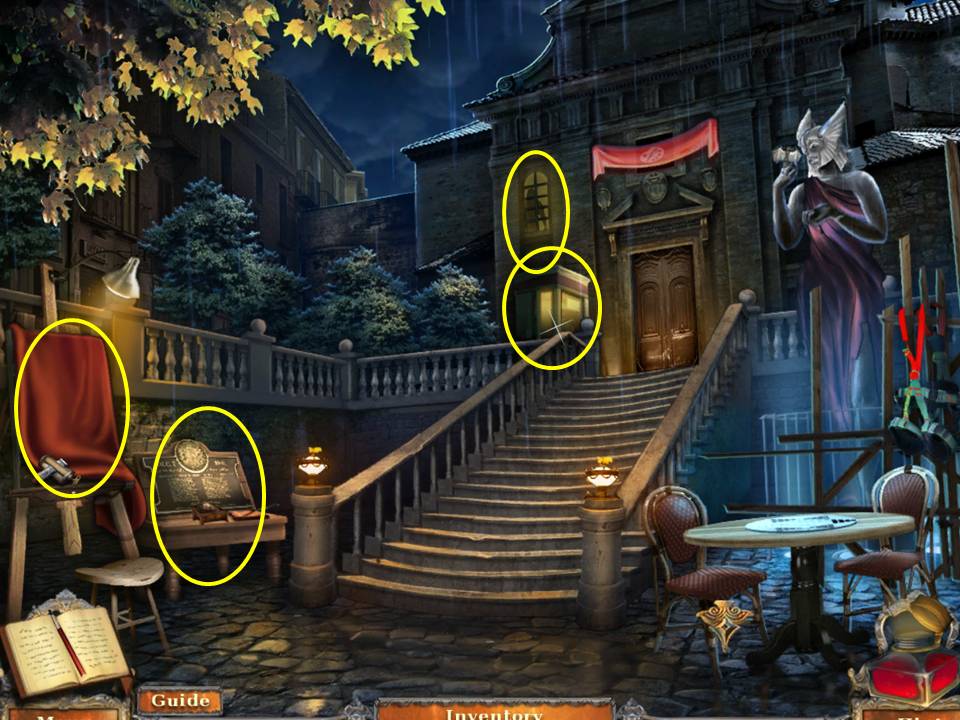
- Zoom into the easel.
- Click the drape to move it.
- Take the TUBE SQUEEZER.
- Zoom into the small table to the left of the staircase.
- Click the latches on the lion box.
- Take the LION EMBLEM. Insert the BRUSH TOKEN in the slot. Click to turn.
- Take the WIDE PAINTBRUSH and the CANDLEWICKS.
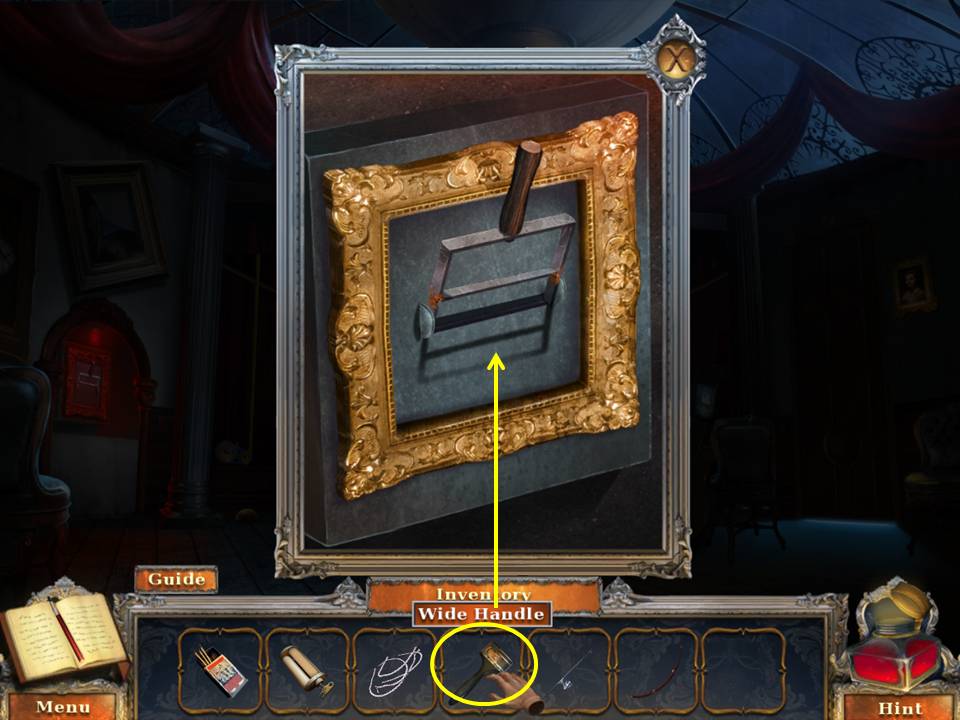
- Put the WIDE PAINTBRUSH on the cutting board. Click the handle.
- Receive the WIDE HANDLE.
- Zoom into the window.
- Zoom into the ticket booth. Insert the LION EMBLEM in the niche. Return to the dock.
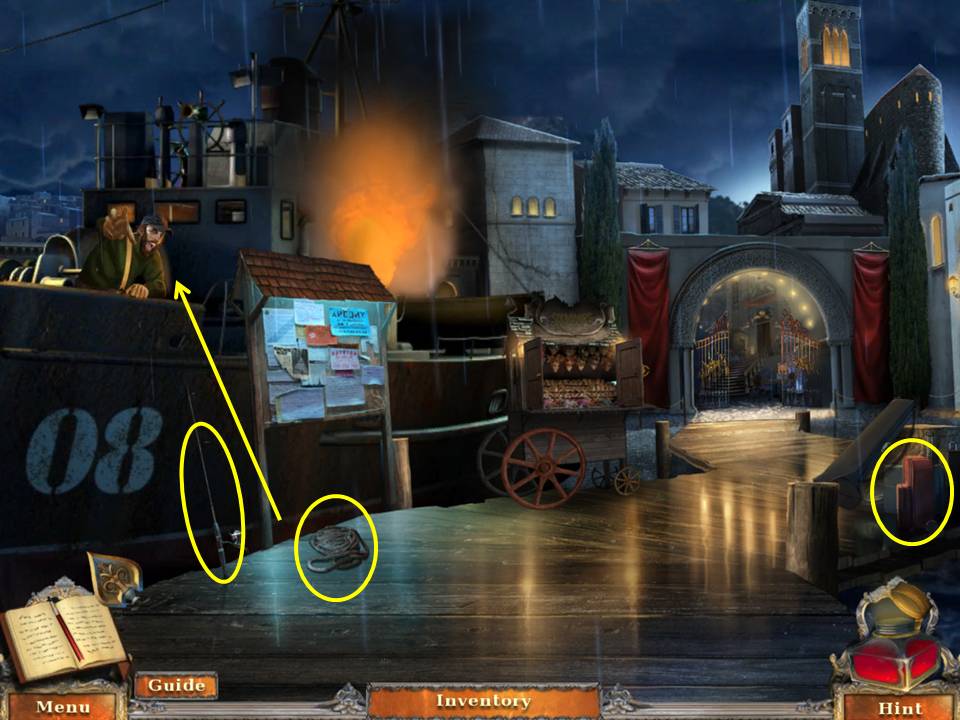
- Toss the ROPE to the captain.
- Take the KNIFE the captain drops and the FISHING POLE.
- Zoom into the luggage.
- Cut the BELT with the KNIFE.
-
Return to the art gallery entrance.

- Cut the HARNESS at right near the statue with the KNIFE.
- Return to the dock.
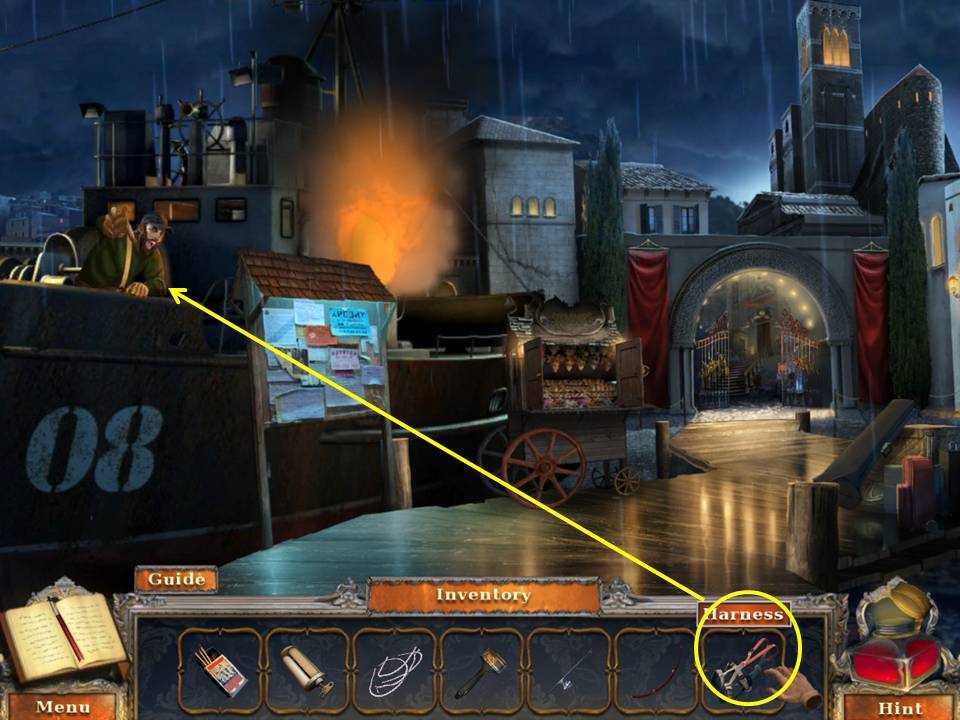
- Give the captain the harness.
- Talk to the captain.
- Take the GALLERY TICKET from the captain.
- Go forward.
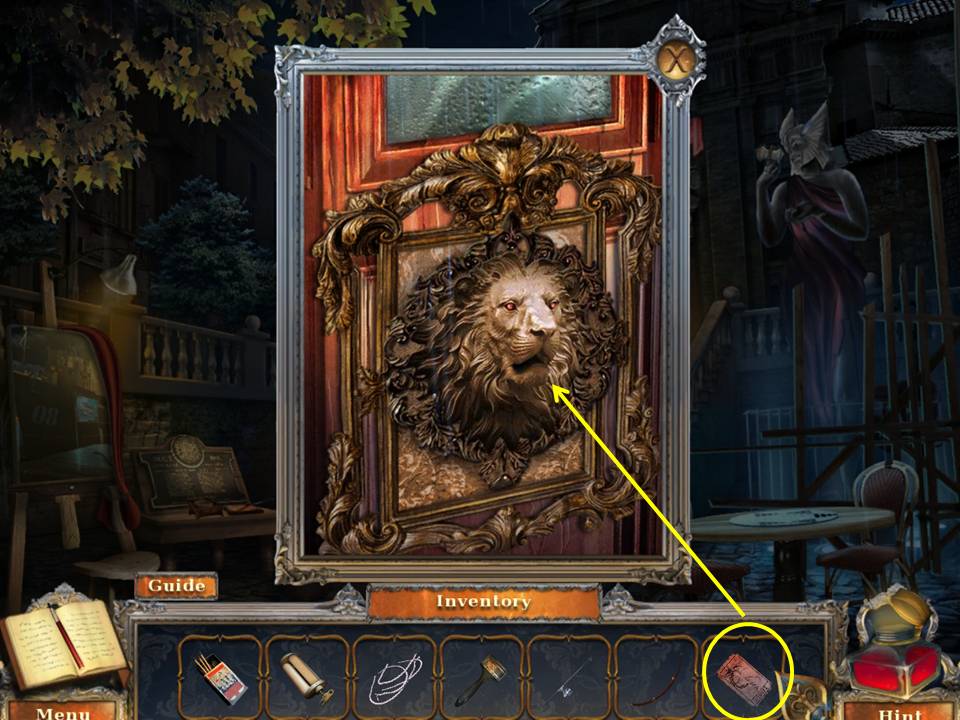
- Zoom into the ticket booth.
- Insert the GALLERY TICKET into the lion’s mouth.
- Enter the art gallery.
- Zoom into the switch and click it.
- Replace the broken switch with the WIDE HANDLE.
- Click the switch.
- Zoom into the crank.
- Wrap the BELT around the gears.
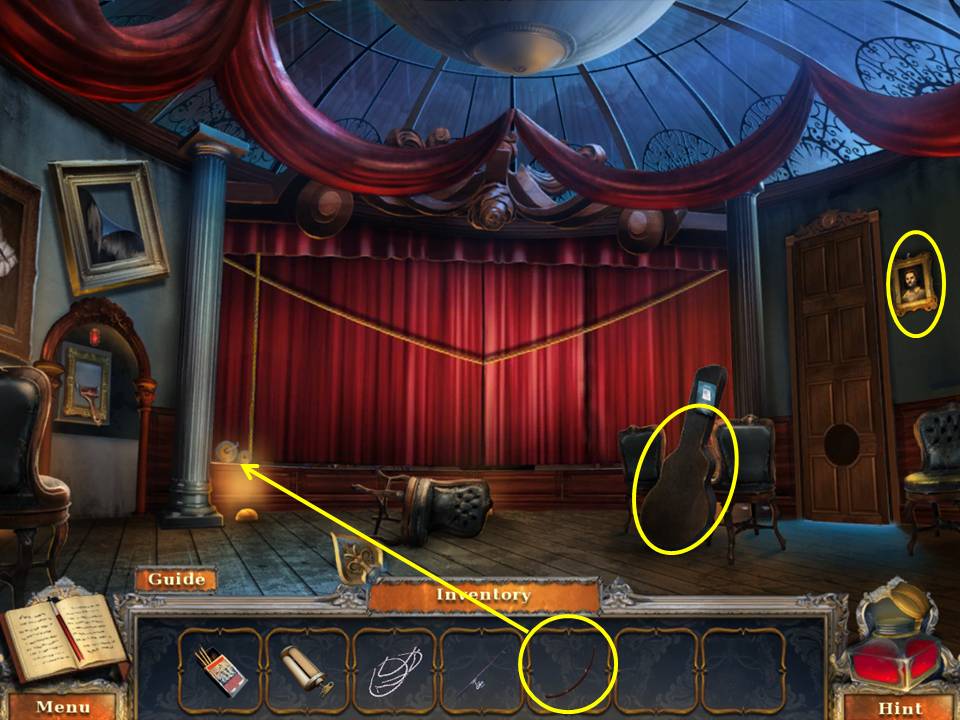
- Zoom into the guitar case.
- Take the clue.
- Click to open the case.
- Take the GUITAR STRING.
- Zoom into the painting at left.
- Click the portrait at right.
- Take the HOOK.
- Zoom into the stage.
- Click the frame at the bottom left corner.
- Click the metronome to stop it.
- Take the SMALL RED LIGHTBULB.
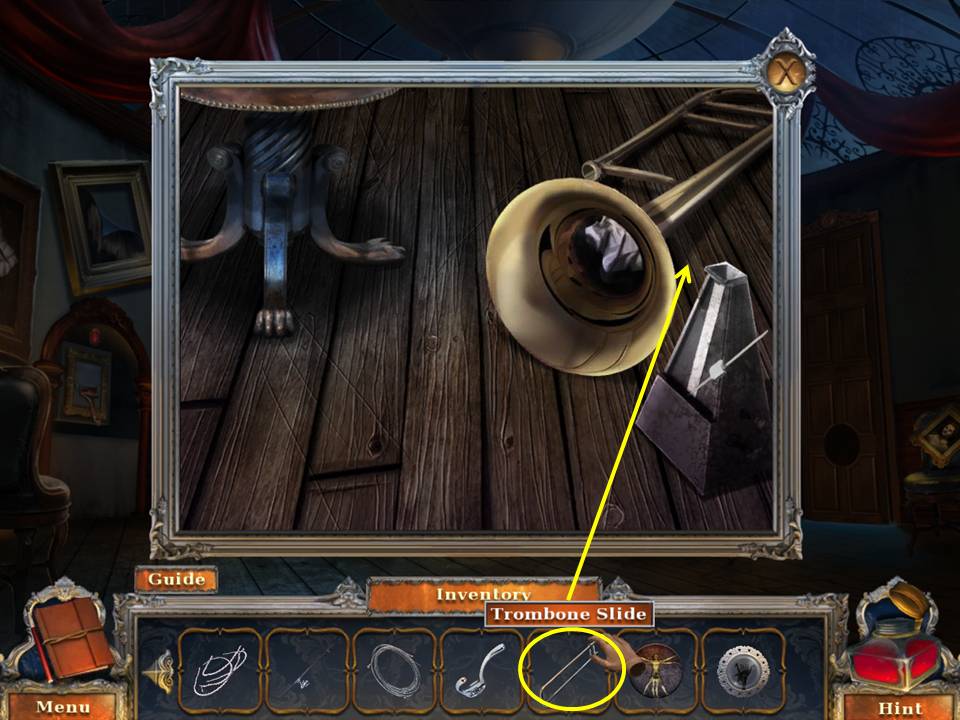
- Try to click and move the paper from the trombone.
- Leave the art gallery and zoom into the statue at right.
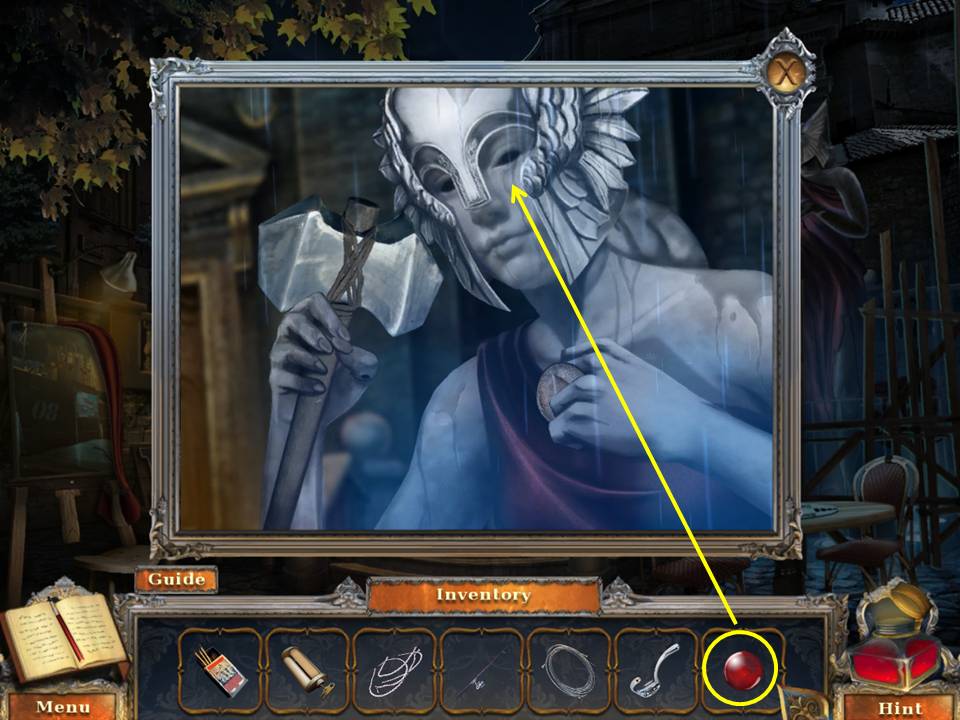
- Insert the SMALL RED LIGHTBULB in the statue’s eye socket.
- Take the STONE HAMMER.
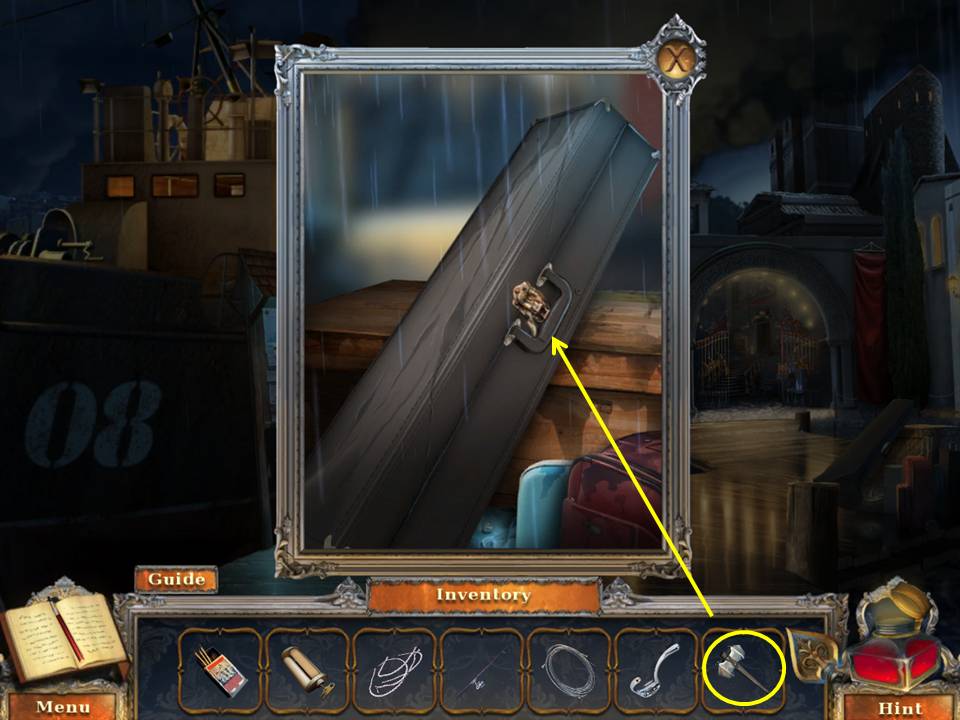
- Go to the dock.
- Zoom into the luggage.
- Smash the trombone case’s lock with the STONE HAMMER.
- Take the VITRUVIAN DISC and the TROMBONE SLIDE.
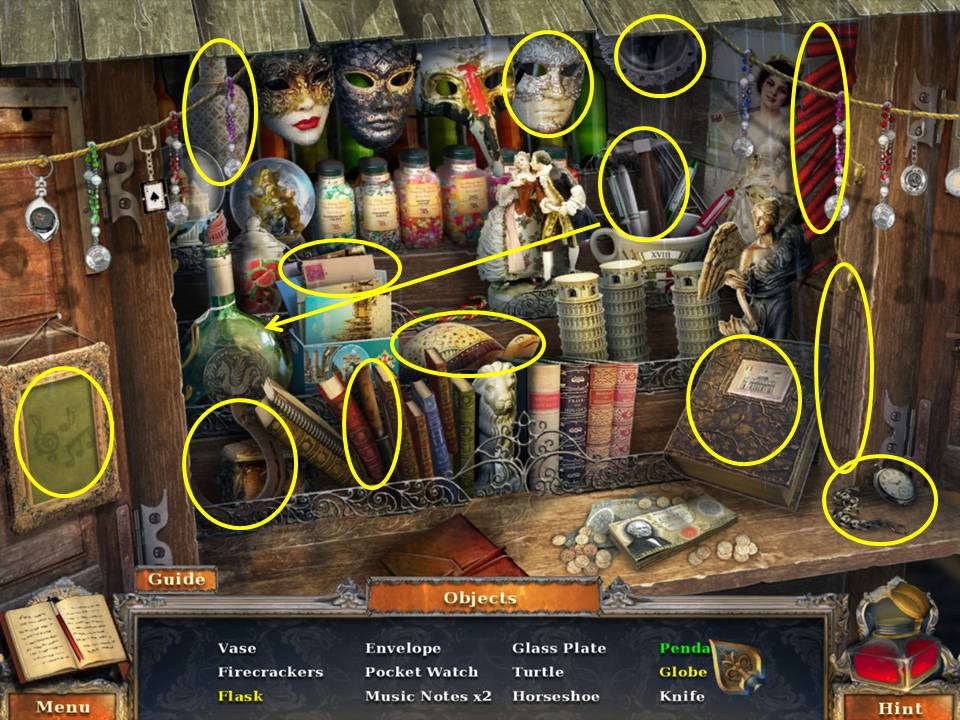
- Play the HOA.
- Find the items listed.
- Click the book to get the flask.
- Click the mask to get the globe.
- Break the bottle with the hammer to get the pendant.
- Receive the DECORATIVE GLASS PLATE.
- Go back to the art gallery.
- Zoom into the stage.
- Put the TROMBONE SLIDE on the trombone.
- Take the clue and the TRICK CANDLES.
- Zoom into the door. Insert the VITRUVIAN DISC into the space.
- Enter the vitruvian room.
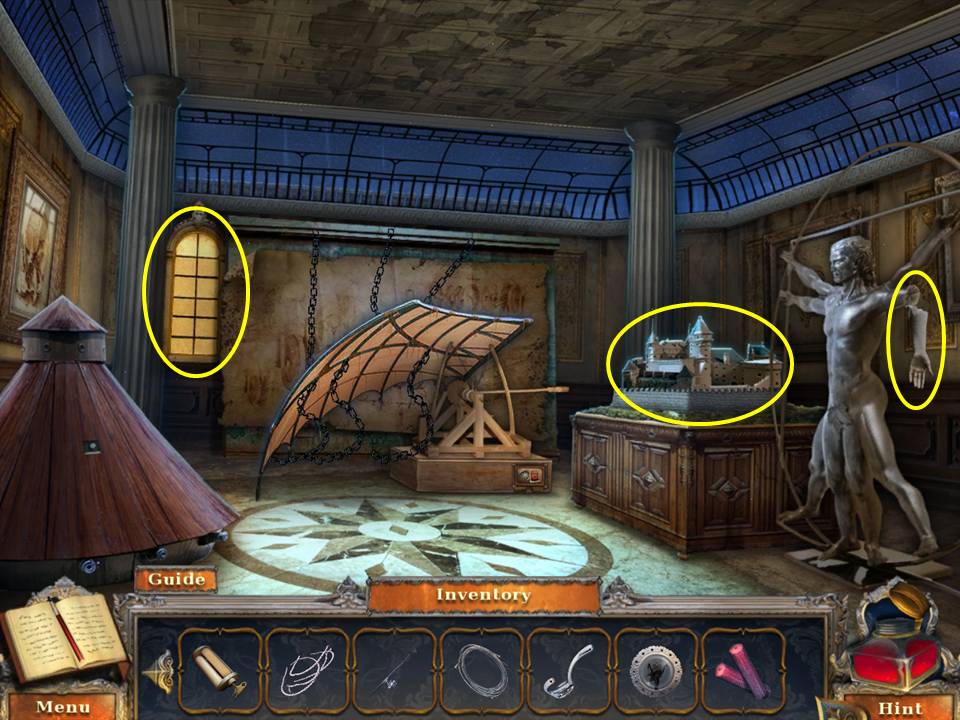
- Take the vitruvian man’s MANNEQUIN ARM.
- Zoom into the castle.
- Take the GUITAR PEG and MINIATURE CANNONBALLS.
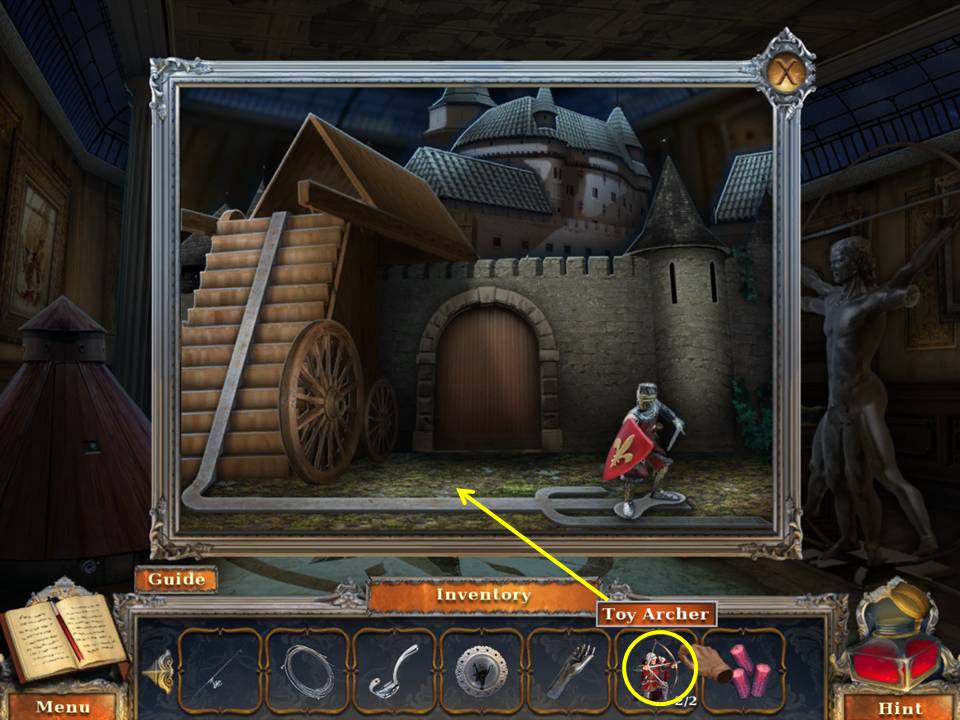
- Click to look out the window.
- Click down once.
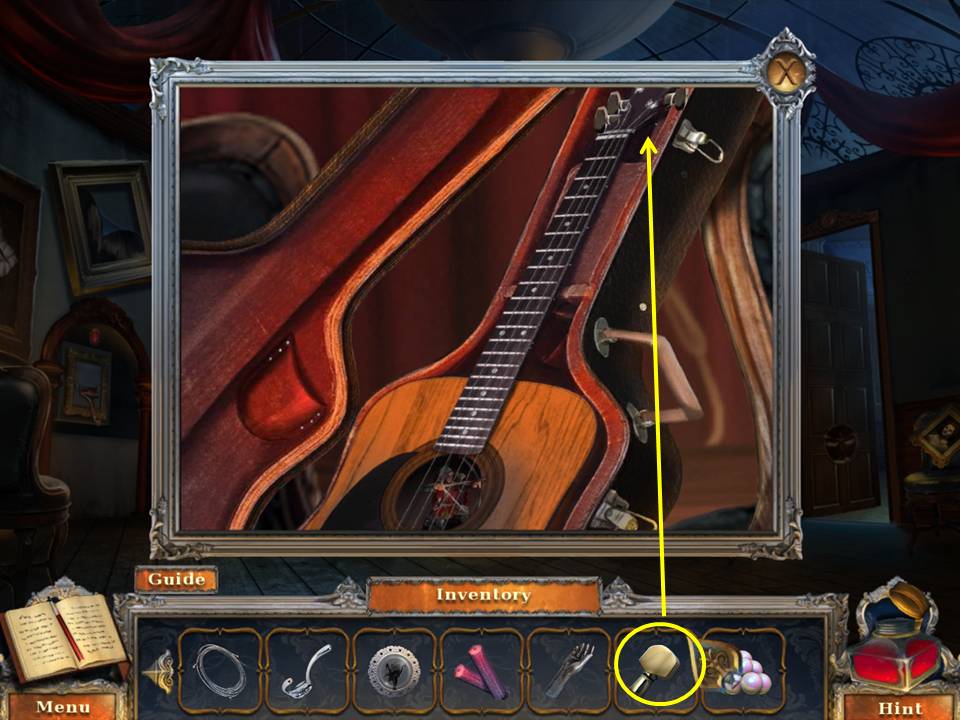
- Zoom into the guitar. Insert the GUITAR PEG.
- Click to turn until the strings break.
- Take the TOY ARCHER.
- Go to the art gallery entrance.
- Zoom into the table at right.
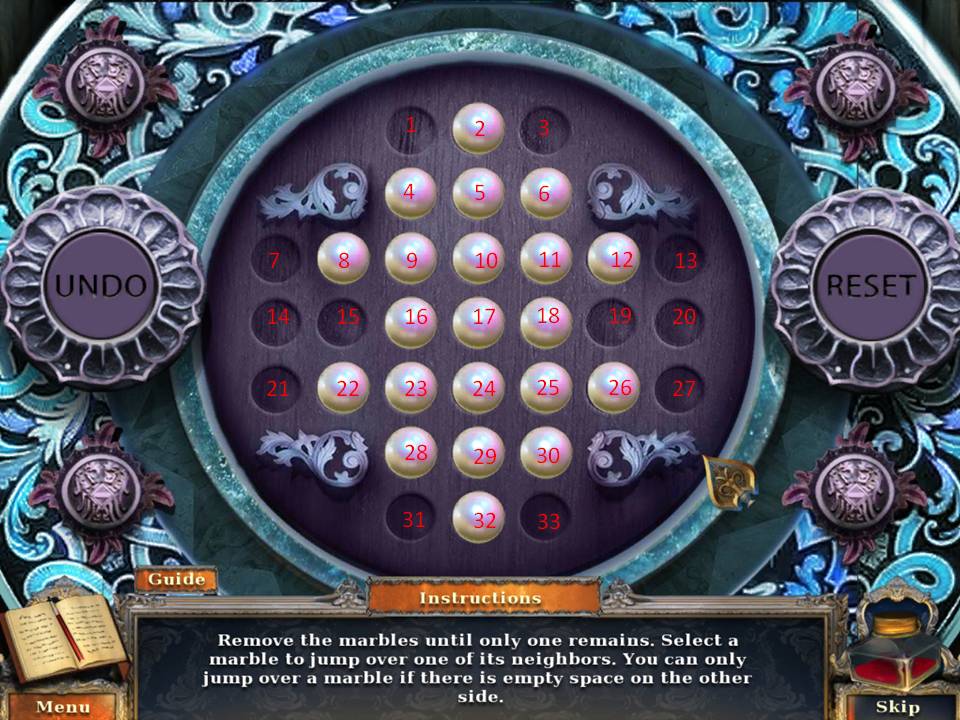
- Put the miniature cannonballs in the scene to initiate a puzzle.
- The object of the game is to “jump” over the cannonballs to remove them, thus clearing the board.
- Assuming the spaces are numbered one to 33, going left to right and beginning at the top.
-
Make these moves.
- 9-1
- 1-3
- 11-9
- 3-11
- 12-10
- 25-33
- 33-31
- 23-25
- 26-24
- 17-15
- 5-17
- 18-16
- 31-23
- 29-17
- 22-24
- 17-29
- 15-17
- 8-10
- 10-24
- 29-17
- When finished, take the second TOY ARCHER.

- Zoom into the cutting board and put the TRICK CANDLES on it.
- Click the handle to cut them.
- Take the SMALL TRICK CANDLES.
- Go to the vitruvian man room.
- Zoom into the castle and put the TOY ARCHERS in the scene.
- Take the PANEL KEY.

- Zoom into the base of the wing.
- Take the clue.
- Place the PANEL KEY in the keyhole.
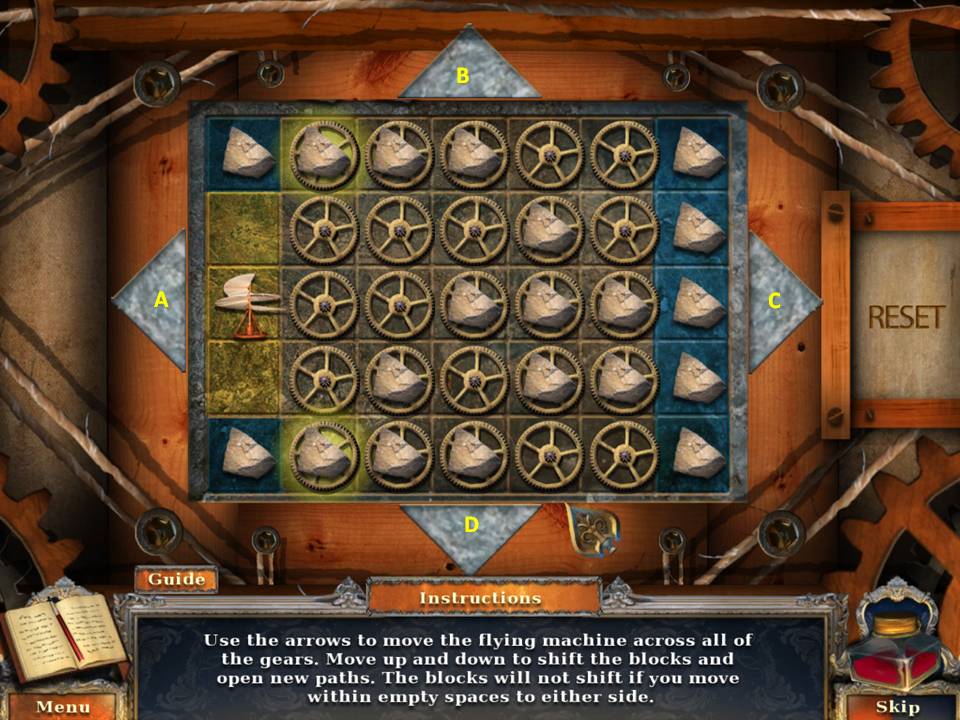
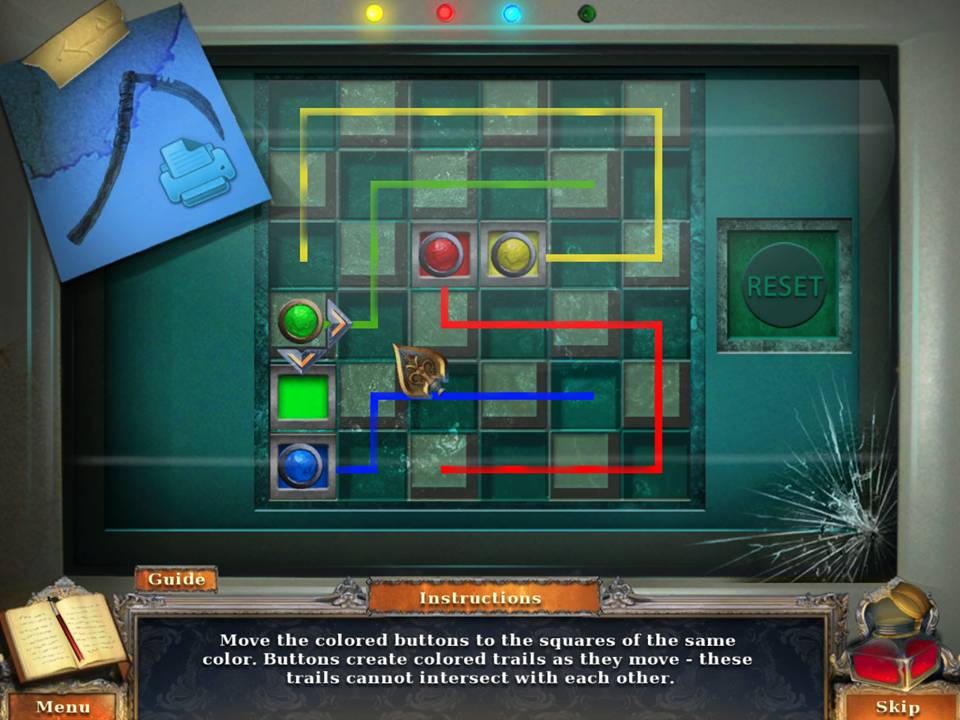
- Zoom into the base of the wing again to initiate a puzzle.
- The object of the puzzle is to use the arrows to move the flying machine over each gear.
- Moving up and down will shift the blocks and open new paths.
- The blocks will not shift if you move within the three yellow spaces on the left.
- Assuming the left arrow is “A,” the top is “B,” the right is “C,” and the bottom is “D,” click in this order: B, C, D, D, D, C, B, B, B, B, C, D, D, D, D, B, C, D, B, B, B, B, D, C, B, C, C, C, C.
- When finished, enter the back room.
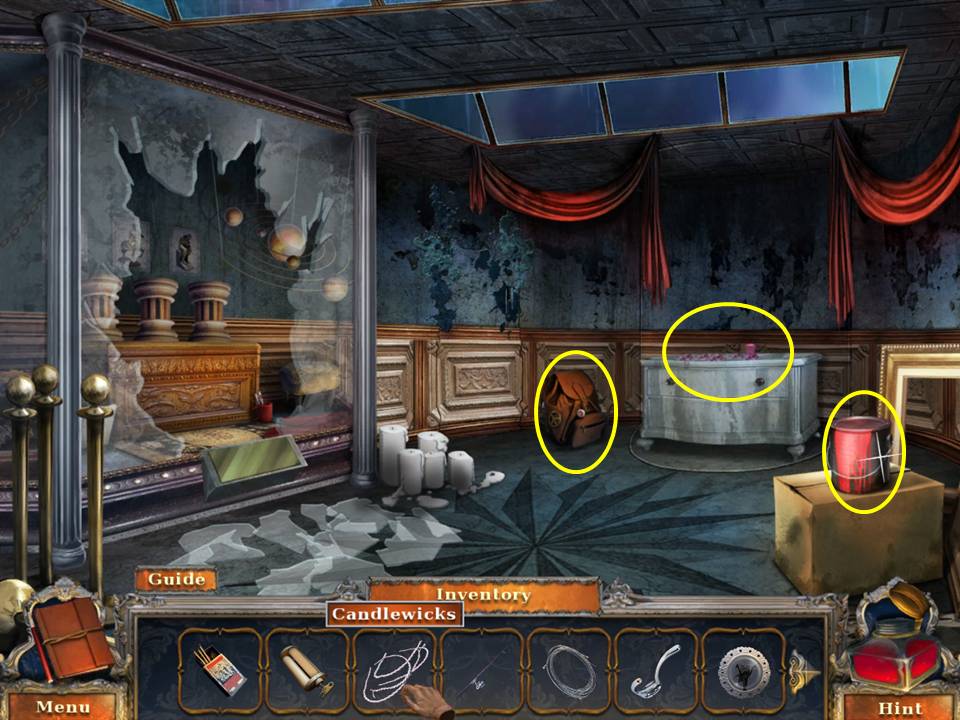
- Take the PAINT CAN.
- Zoom into the bag.
- Click to open.
- Take the COMPUTER DISC and the clue. Zoom into the dresser.
- Put the SMALL TRICK CANDLES into the scene.
- Put the CANDLEWICKS on the candles.
- Light the wicks with the MATCHES.
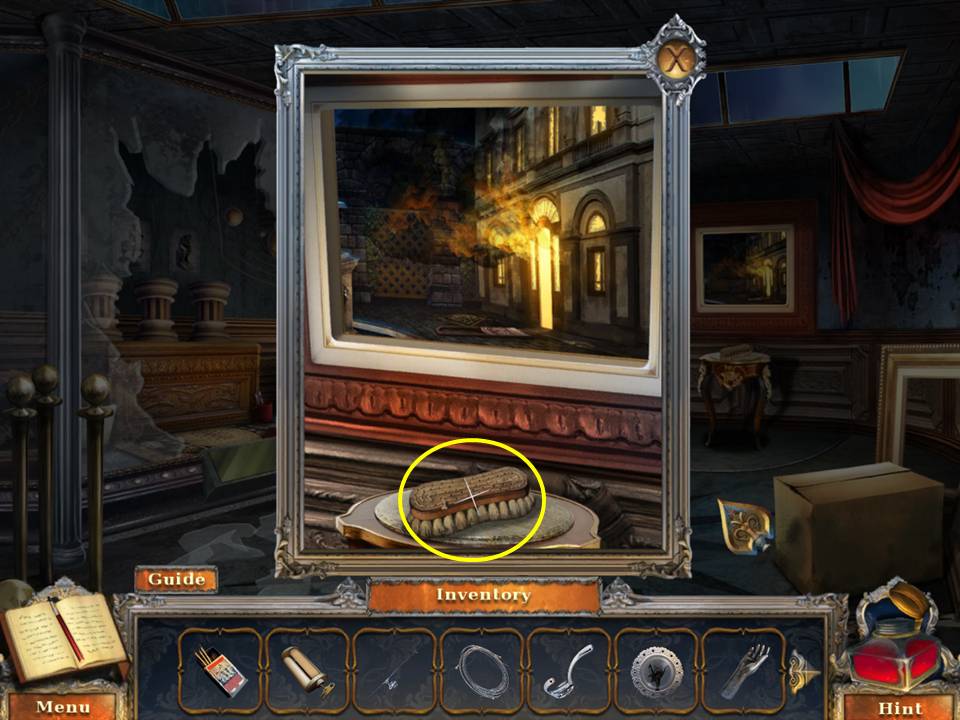
- When the wall turns, zoom into the table.
- Take the SCRUBBING BRUSH.
- Use the MATCHES to light the candles on the floor.
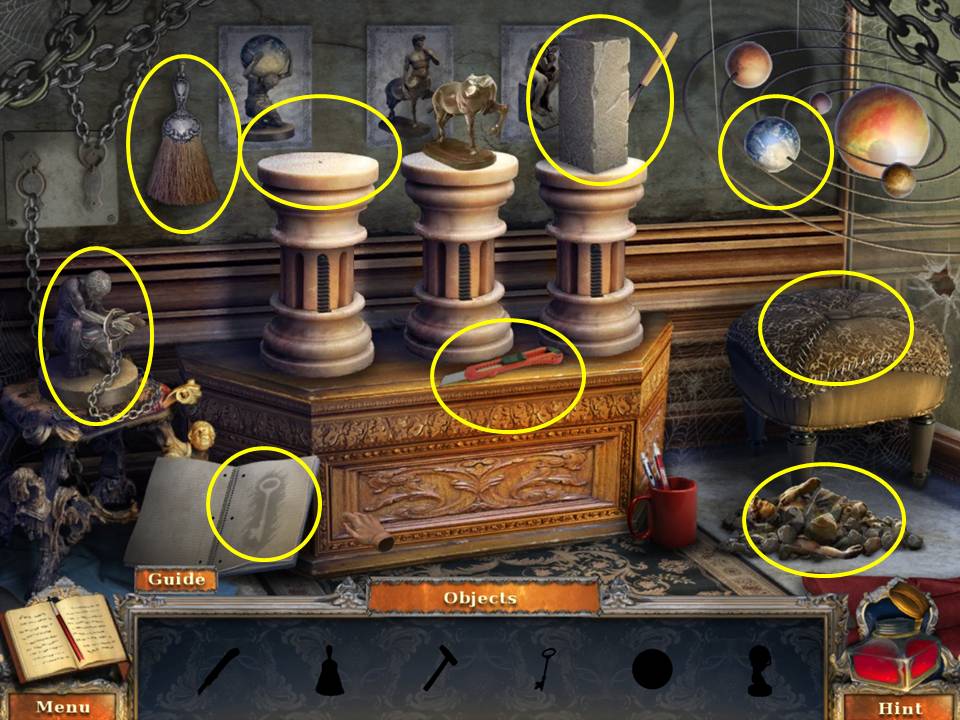
- Play the HOA. Find the silhouetted items at the bottom of the page.
- Click the notebook to get the key.
- Cut the footstool with the retractable knife to get the hammer.
- Zoom into the statue of Atlas.
- Unlock the handcuffs with the key.
- Put the earth in the Atlas’ hands.
- Brush the debris to get the statue torso.
- Put the statue torso on the horse.
- Put Atlas on the pedestal.
- Zoom into and hammer the block.
- Receive the MAGNET. Go to the dock.
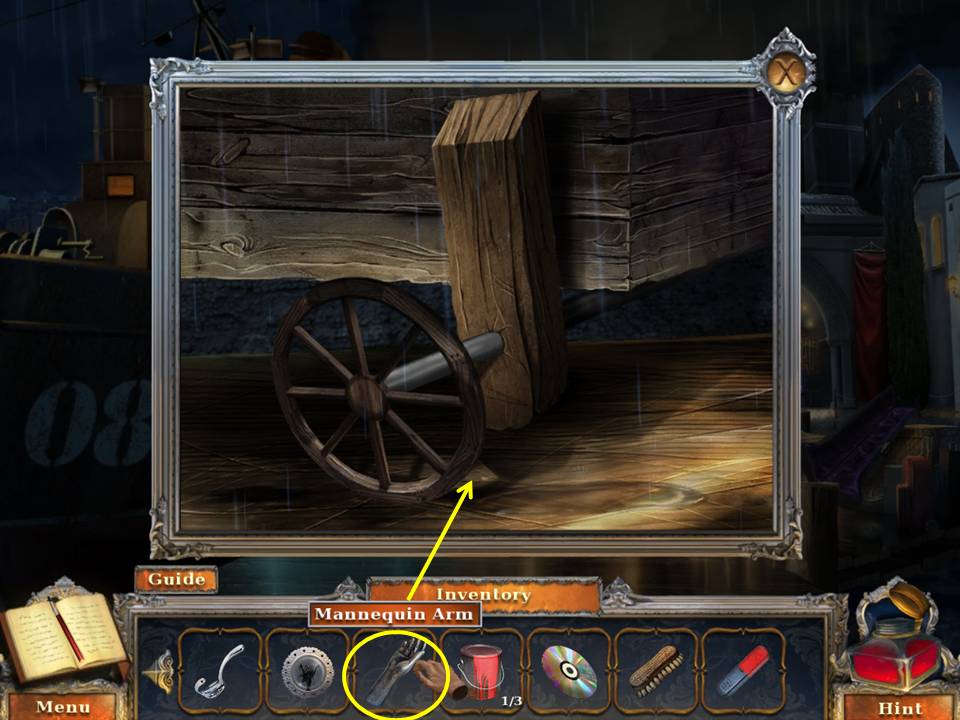
- Zoom into the cart’s wheel.
- Lever it up with the MANNEQUIN ARM.
- Take the WHEEL.
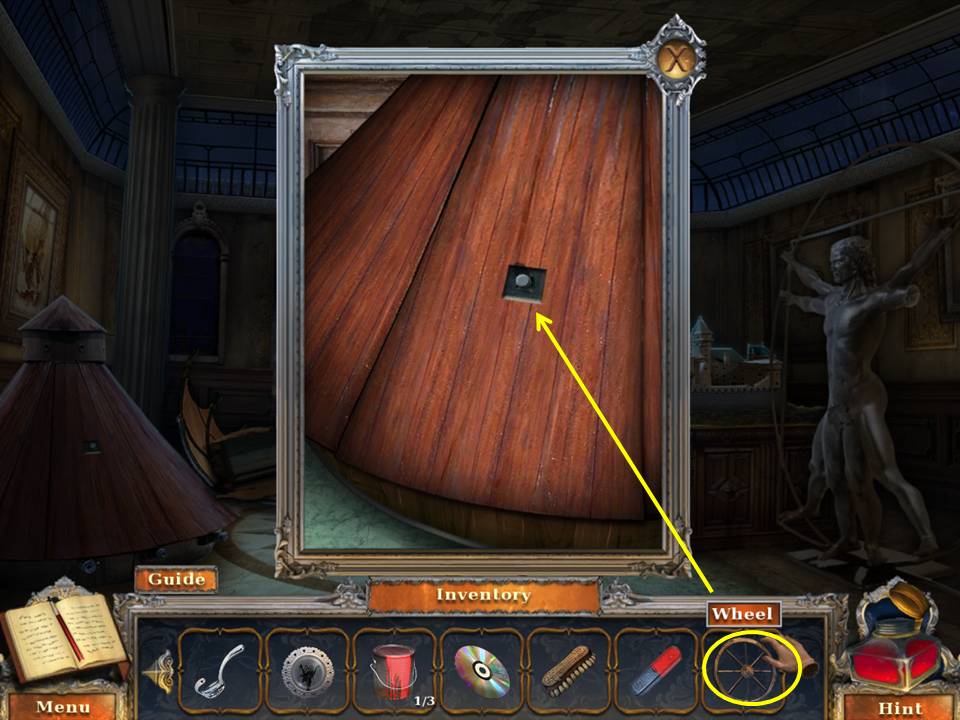
- Go to the vitruvian room.
- Zoom into the cone.
- Use the wheel on the latch to open the panel.
- Take the TURPENTINE BOTTLE and the SMALL GREEN LIGHTBULB.
- Go into the back room.
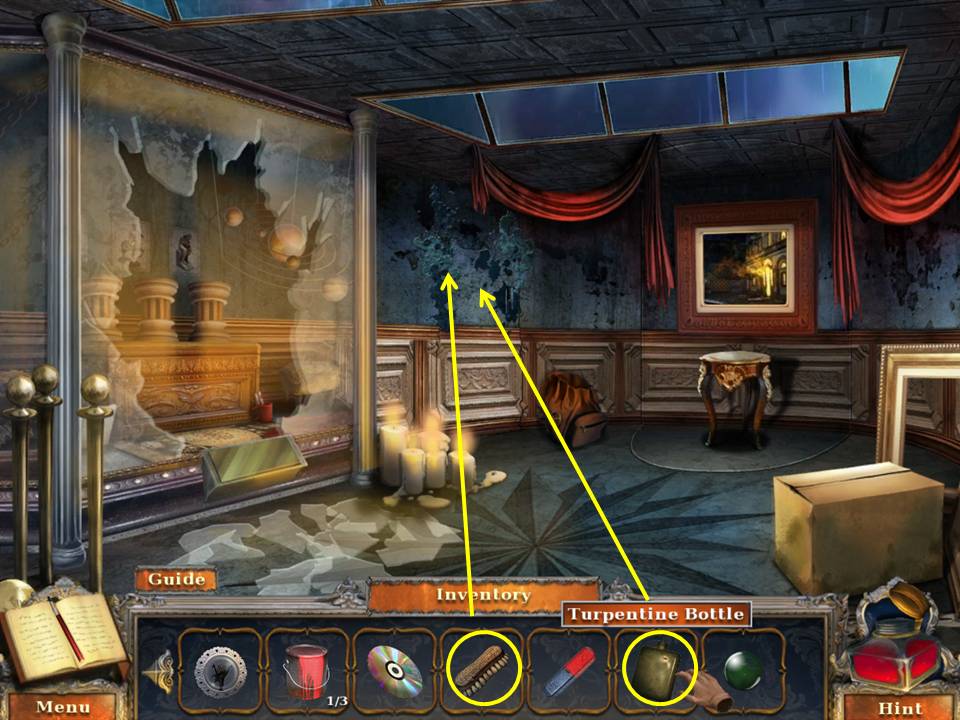
- Pour the contents of the TURPENTINE BOTTLE on the wall.
- Scrub the paint from the wall with the SCRUBBING BRUSH.
- Go out the door to the gate.
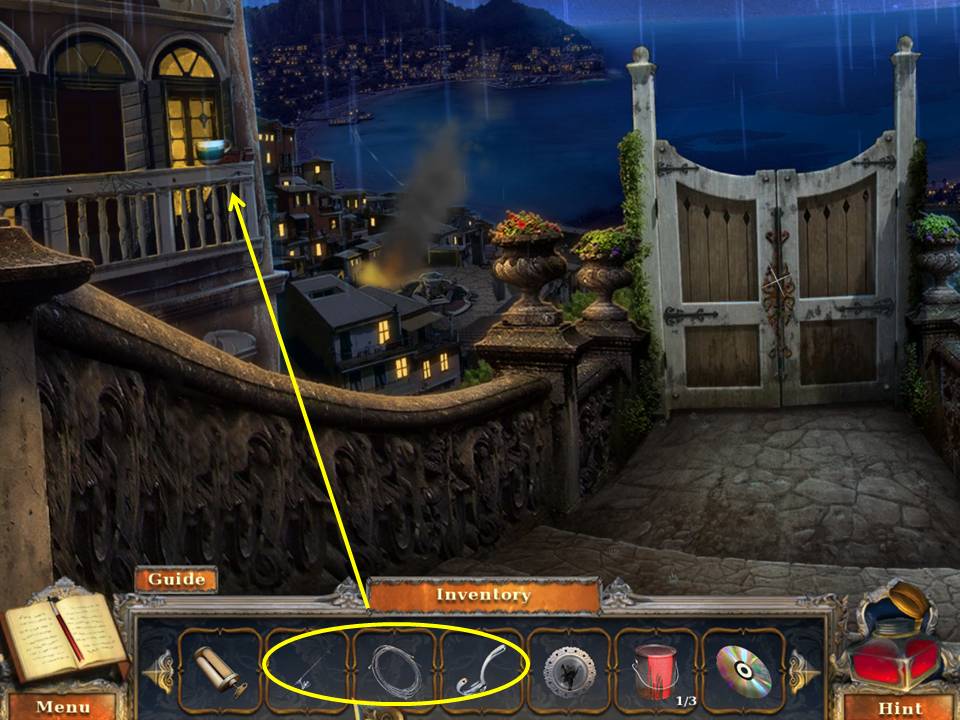
- Cast the FISHING POLE over the EMPTY CREAMER.
- Put the GUITAR STRING on the pole and add the HOOK.
- Receive the EMPTY CREAMER.
- Go to the vitruvian room.

- Zoom into the cone.
- Put the EMPTY CREAMER under the tube.
- Use the TUBE SQUEEZER to fill it with oil.
- Take the CREAMER WITH OIL.

- Go back to the art gallery entrance.
- Zoom into the statue.
- Insert the SMALL GREEN LIGHTBULB in the statue’s eye.
- Take the TOKEN.
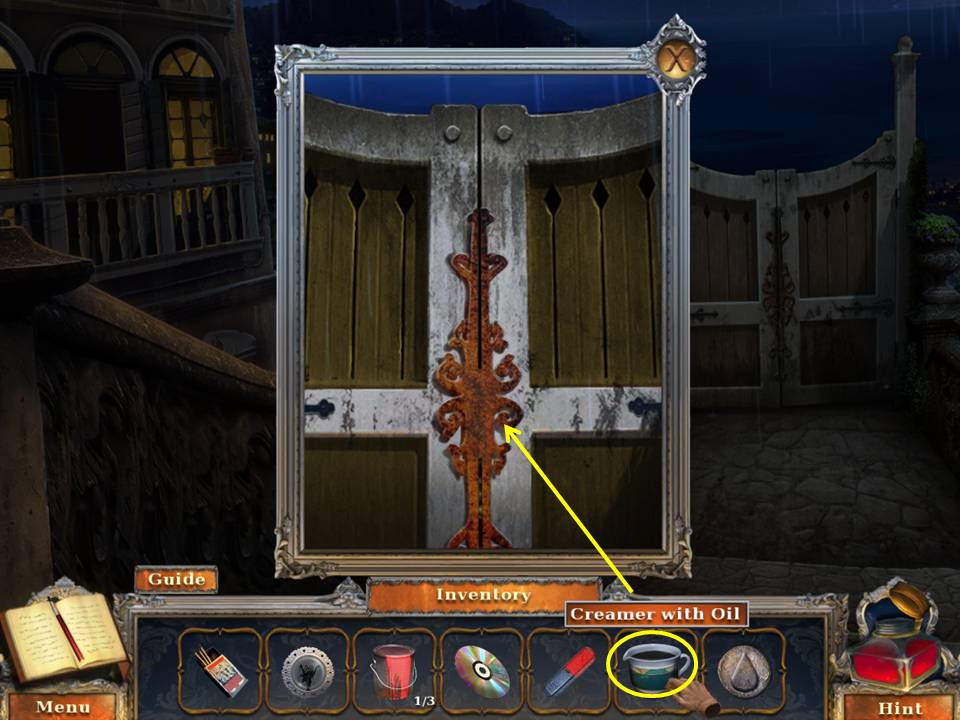
- Go back to the gate.
- Zoom in and pour the contents of the CREAMER WITH OIL on the rusty hinge.
- Go to the fountain.
- Zoom into the bakery.
- Take the ART STORE KEY from the baker.
- Zoom into the art store door.
- Take the HANGING ORNAMENT.
- Zoom into the lock.
- Open the door with the ART STORE KEY. Go in.
- Zoom into the computer.
- Insert the COMPUTER DISK.
- Zoom into the computer screen.
- Move the disks per the screenshot.
- Take the SCYTHE REPLICA.
- Zoom into the shelf.
- Take the PAPER CUTTER and second PAINT CAN.
- Leave the art store.
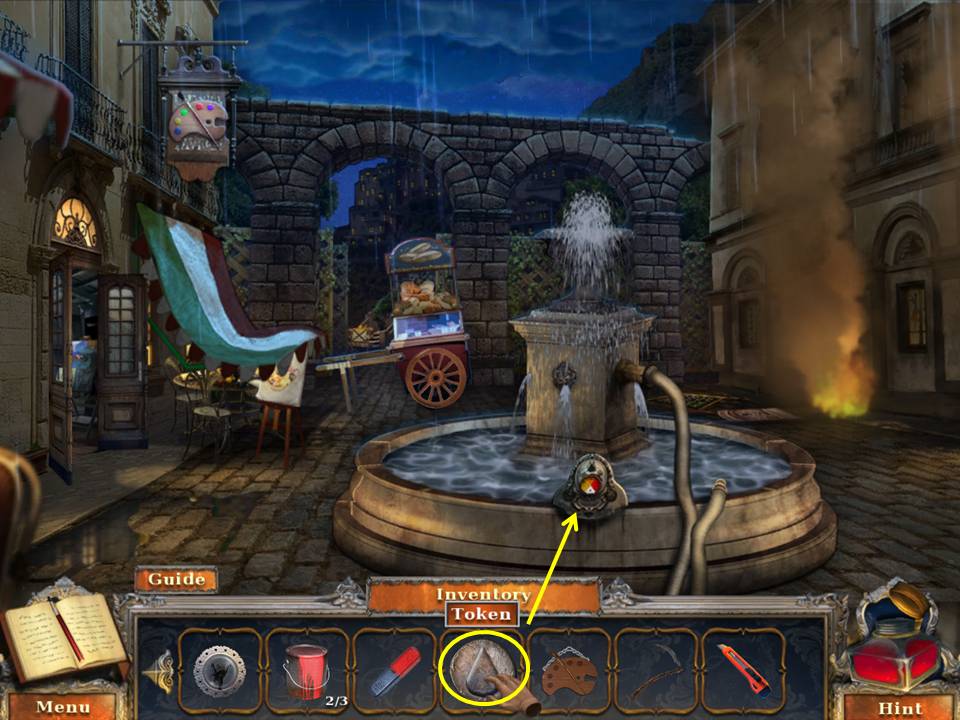
- Zoom into the fountain.
- Insert the TOKEN in the slot.
- Use the hose to extinguish the fire.
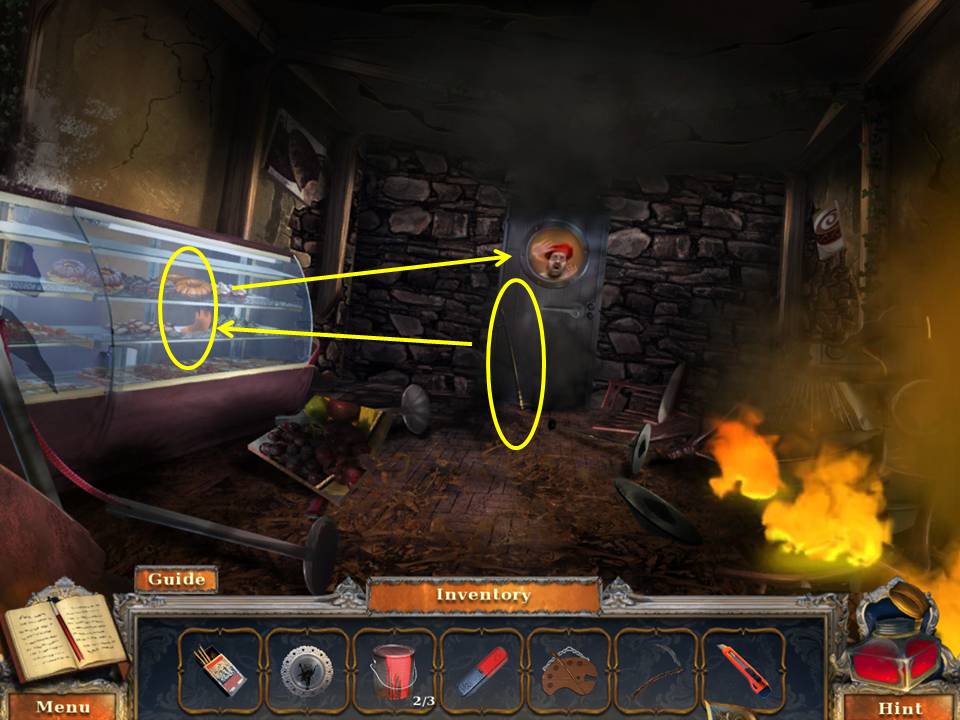
- Go into the bakery.
- Zoom into the freezer door.
- Take the FIREPLACE IRON.
- Zoom into the pastry case.
- Smash the glass with the FIREPLACE IRON.
- Take the OVEN MITT.
- Open the freezer door with the OVEN MITT.
- Go outside. Take the path to the bridge.
- Talk to Rosaria.
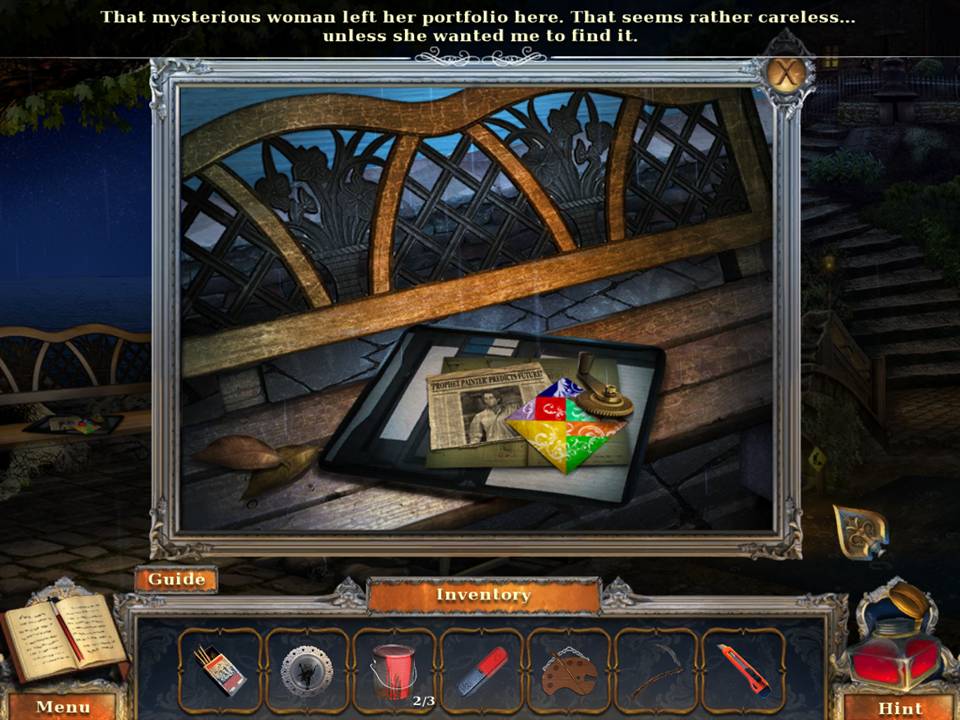
- Zoom into the bench.
- Take the CRAFT PAPER, TURNING HANDLE, and clue.
- Go back to the fountain.
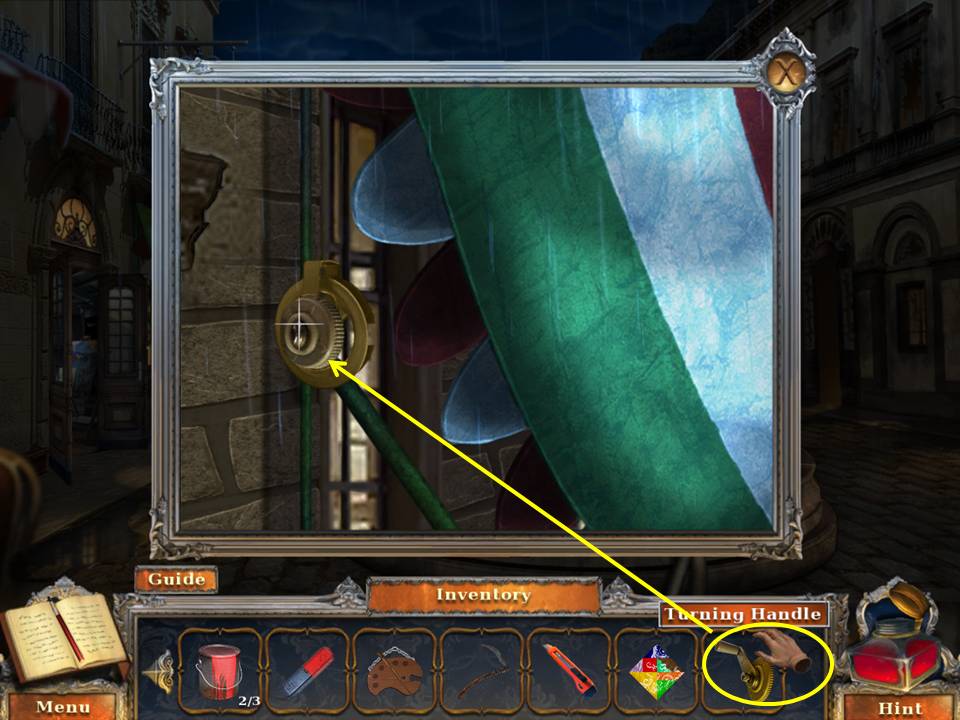
- Zoom into the awning.
- Put the TURNING HANDLE on the crank.
- Click to turn.
- Play the HOA.

- Find the silhouetted items shown.
- Turn the page on the easel.
- Click the honey jar.
- Use the paintbrush in the honey and paint honey roses on the easel page.
- Slice the cheese with the knife.
- Give the mouse a bit of cheese.
- Take the quill and dip it into the ink.
- Zoom into the fruit basket.
- Wipe the number eight button with the napkin.
- Put the number four and number eight buttons in the box.
- Zoom into the box. Click 4682.
- Take the CAMERA LENS.
- Go back to the art store and exit to the back alley.
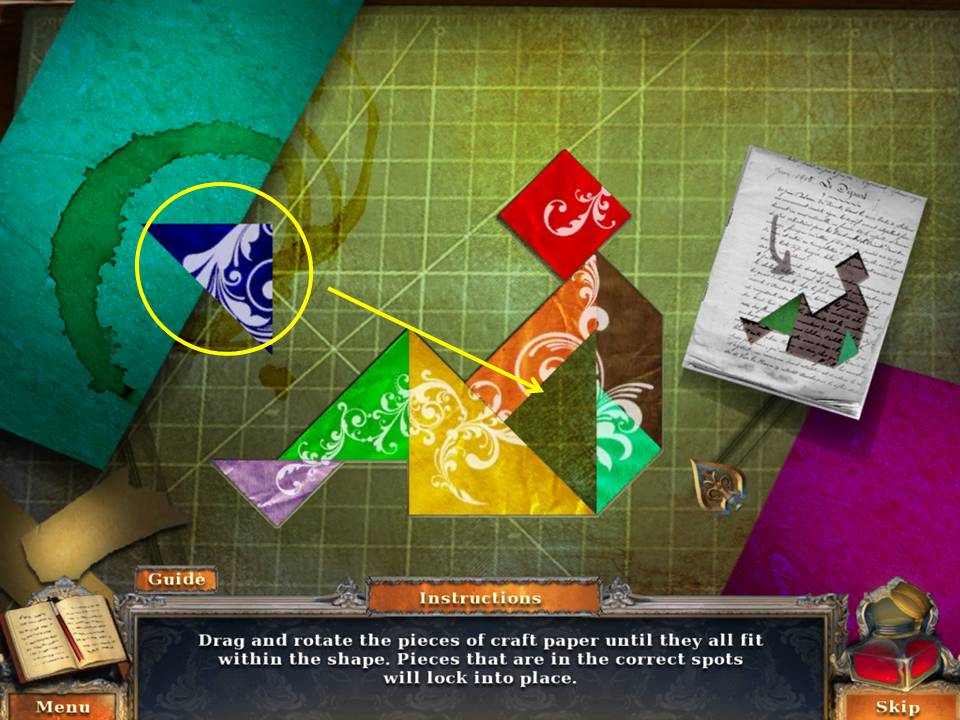
- Zoom into the easel.
- Put the CRAFT PAPER and PAPER CUTTER on the board.
- Assemble the paper pieces as shown in the screen shot.
- Some may need to be rotated.
- Take the GATE EMBLEM.

- Zoom into the projector.
- Put the CAMERA LENS and DECORATIVE GLASS PLATE on the projector.
- Zoom into the left wall.
- Take the clue.
- Place the HANGING ORNAMENT on the far right.
- When the wall opens, take the WOODEN GEAR, the third PAINT CAN, and the clue.
- Go back to the bridge.
- Zoom into the water.
- Put the three PAINT CANS into the water.
- Play the HOA.
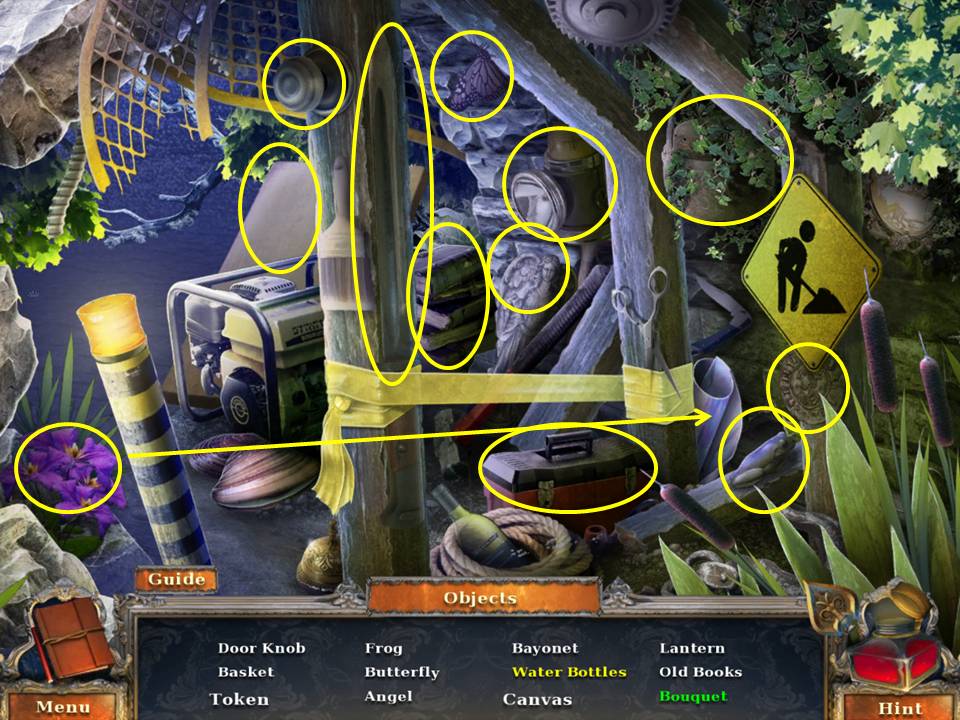
- Find the items listed.
- Open the toolbox to get the water bottle.
- Put the flowers in the paper to get the bouquet.
- Receive the first CANVAS.
- Climb the steps.
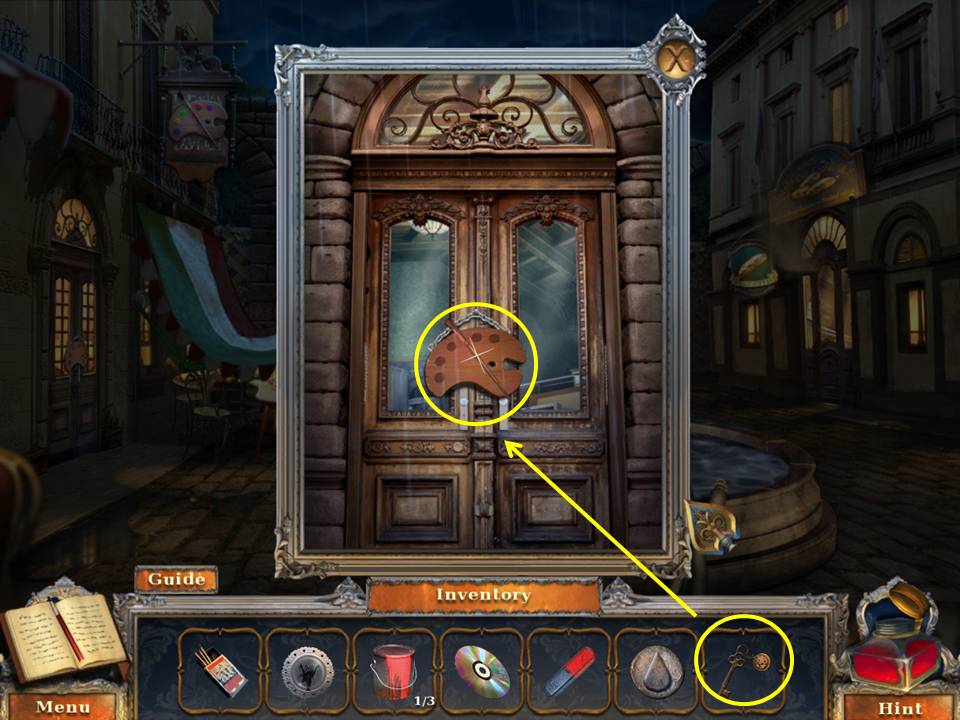
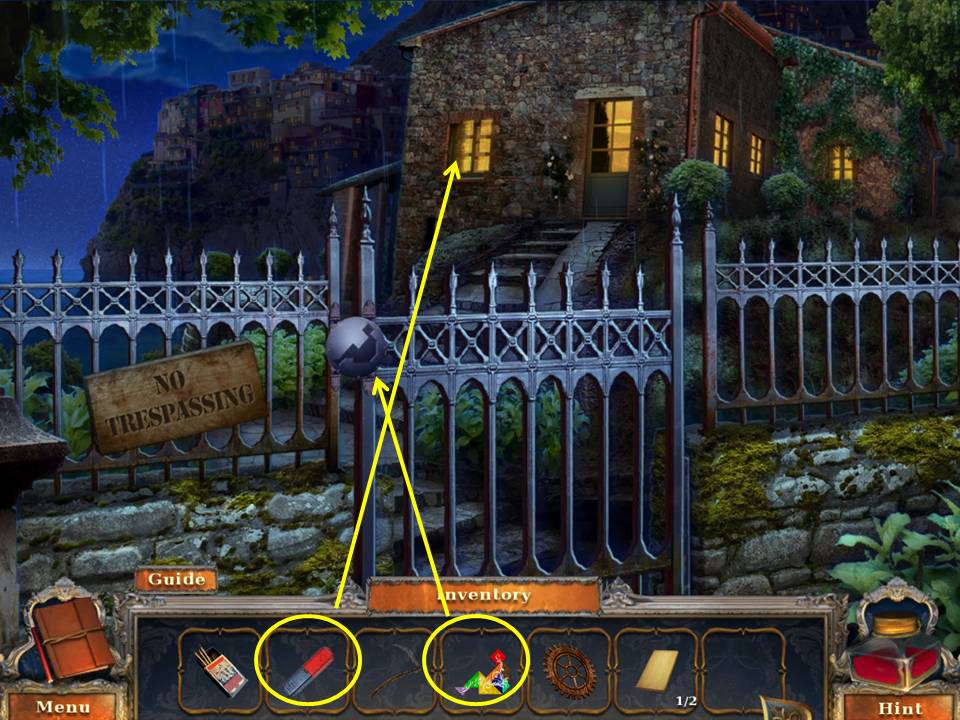
- Zoom into the gate.
- Insert the GATE EMBLEM in the space.
- Zoom into the window.
- Use the MAGNET on the latch.
- Go into the art studio.
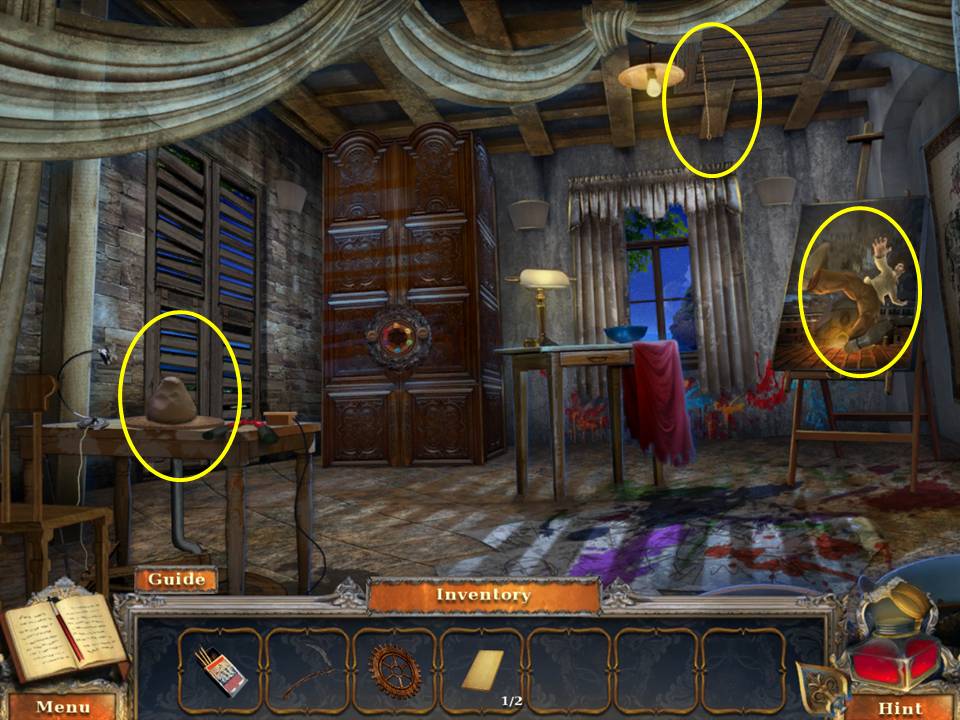
- Zoom into the painting.
- Zoom into the pottery wheel.
- Take the DRY CLAY and the BOLT CUTTERS.
- Zoom into the hatch.
- Pull the string.
- Cut the chain with the BOLT CUTTERS.
- Use the ladder to reach the roof.
- Zoom into the oven.
- Take the RED PAINT.
- Click to open the oven door.
- Zoom into the shelf.
- Take the BLUE PAINT and the HEAT RESISTANT GLOVES.
- Click to close the oven door.
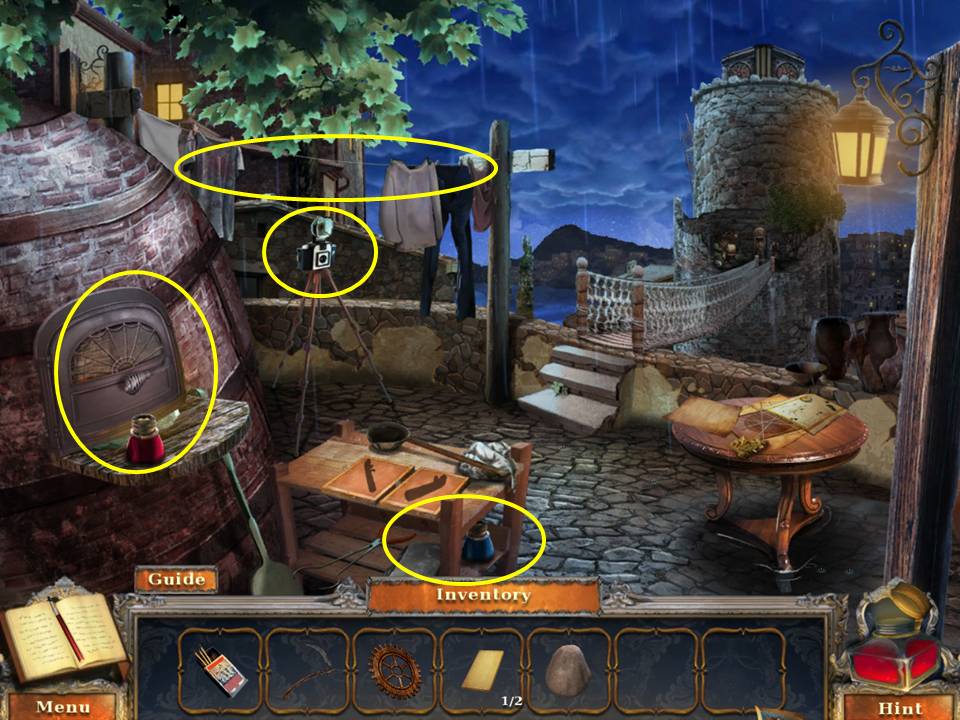
- Zoom into the clothesline.
- Take the CLOTHESPINS and VIRGIL’s DESK KEY.
- Zoom into the tripod.
- Take the CAMERA.
- Go back to the art studio.
General Info and Tips
Chapter One: The Art Gallery
Chapter Two: The Roof
Chapter Three: The Backyard
Chapter Four: The Lighthouse
Ask for help in the comments below!
Chapter One: The Art Gallery
Chapter Two: The Roof
Chapter Three: The Backyard
Chapter Four: The Lighthouse
Ask for help in the comments below!