
Amaranthine Voyage: The Shadow of Torment: Chapter Three: The Palace Terrace
Our Amaranthine Voyage: The Shadow of Torment Walkthrough will guide you through Anther as you work to banish Torment and restore magic. Use our detailed directions, custom screenshots, and simple puzzle solutions to help you uncover the mystery of Torment and the hold it has on Anther.

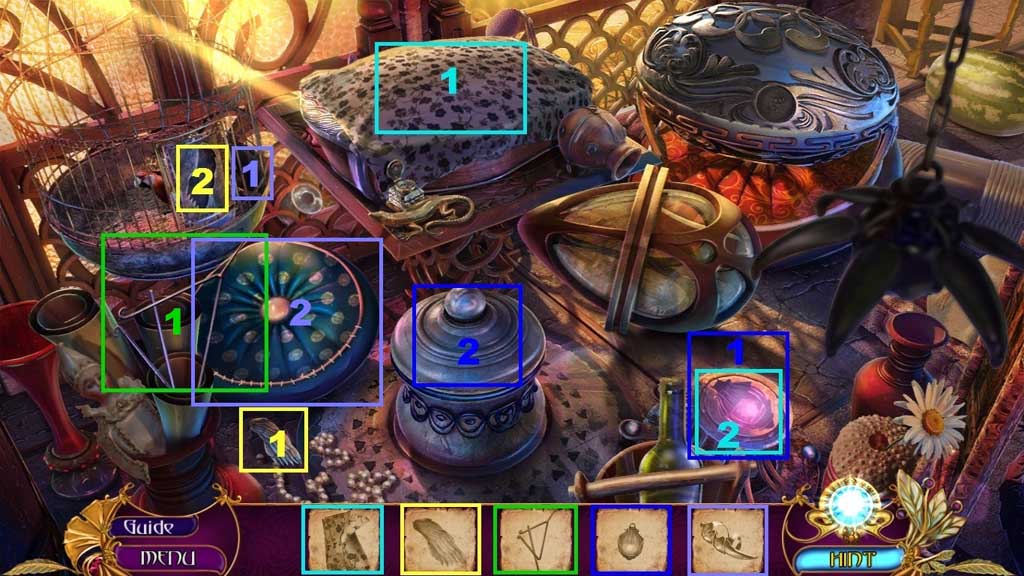
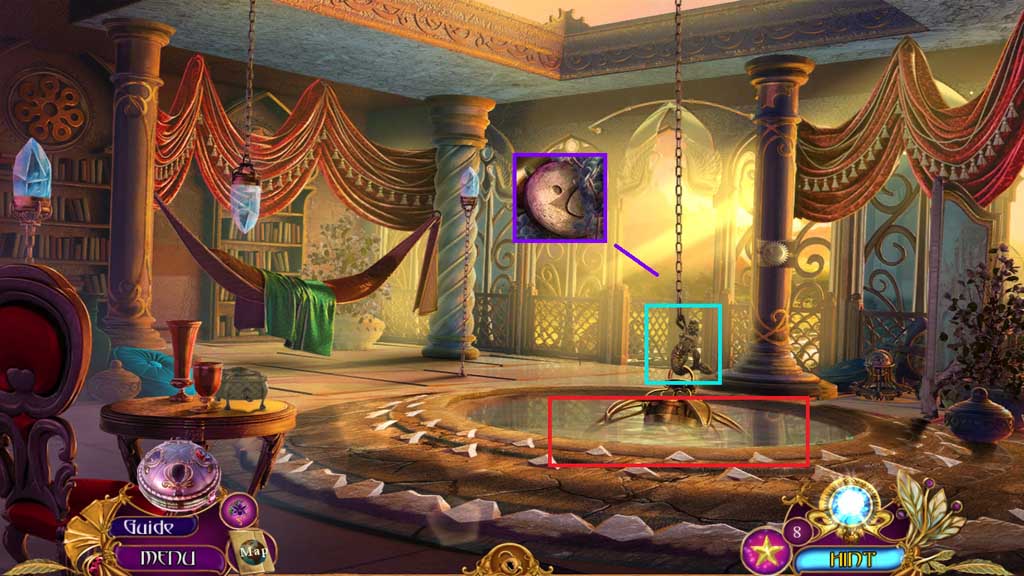
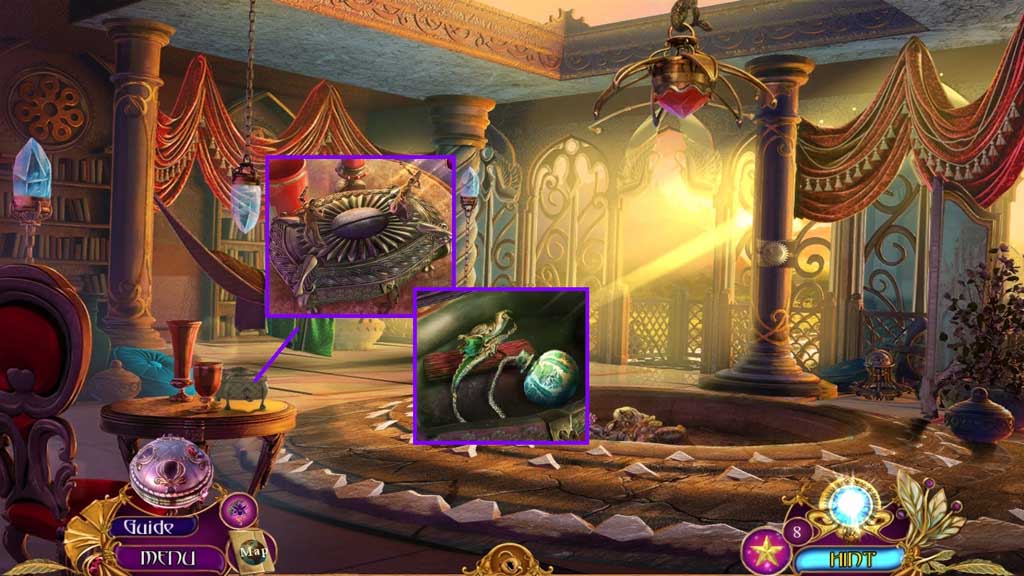
- Attach the tail hook onto the mermaid torso; collect the mermaid hook.
- Collect the notes and the stone daffodil.
- Click the room divider to trigger a hidden objects area.
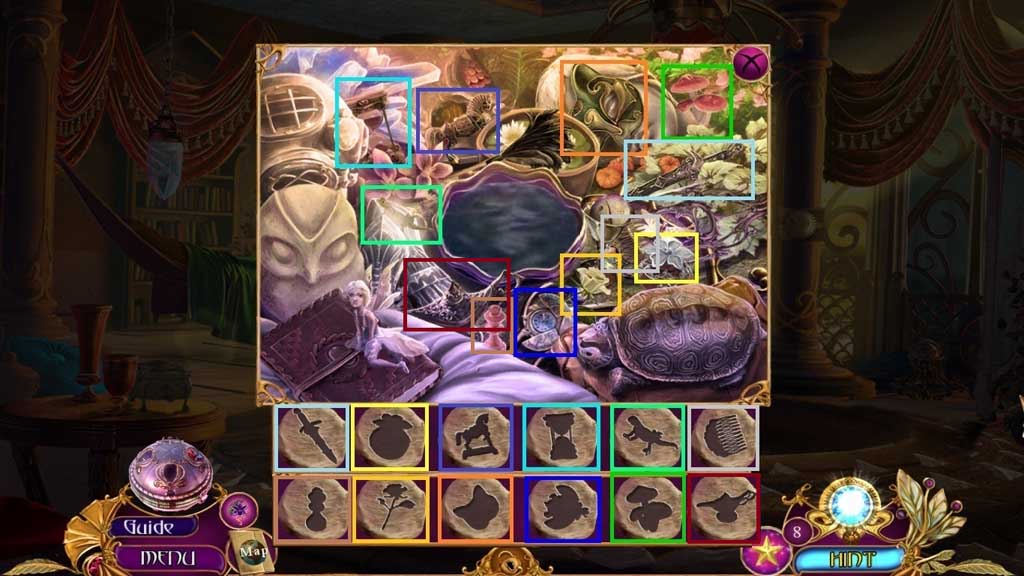
- Find the items.
- Insert the winged emblem; click aside the hay to collect the claw ring.
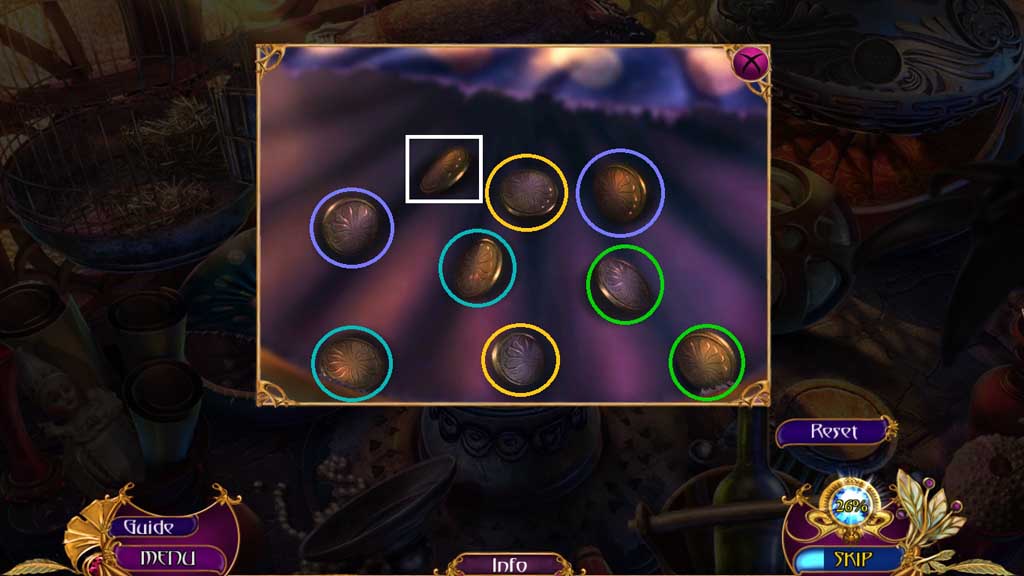
- Select the claw ring to slice open the pillow and trigger a mini game.
- Solve the game by finding the matching coins; collect the coin.
- Insert the coin into the trinket to trigger a mini hidden objects area.
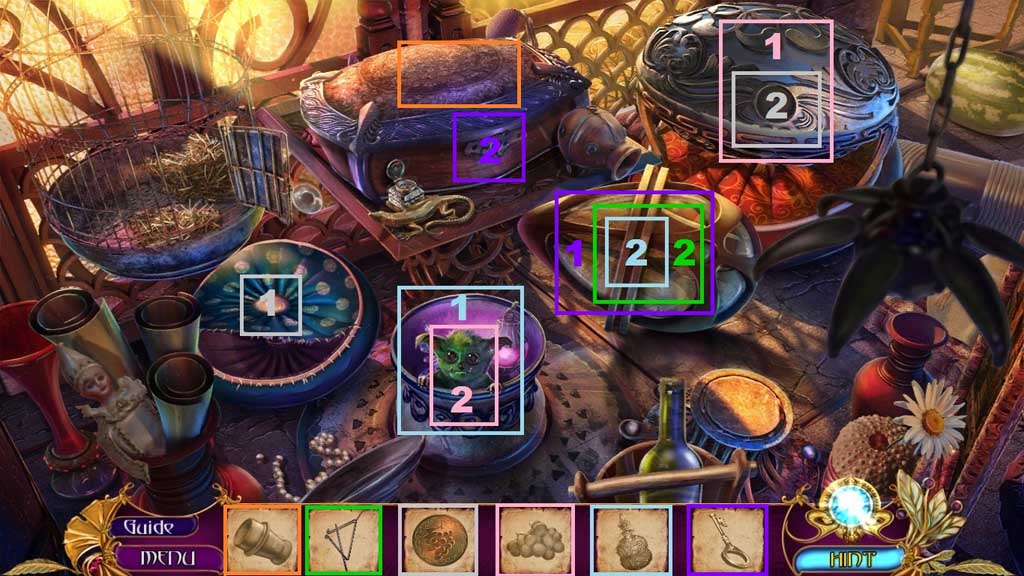
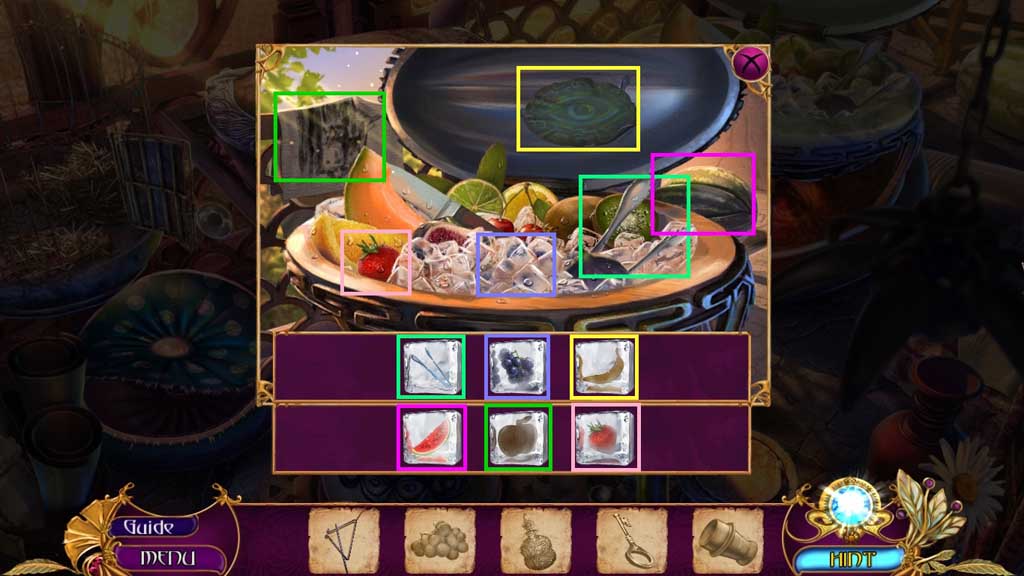
- Find the items; click the cloth to uncover the apple, click the eye to uncover the banana, click the ice to collect the grapes.
- Select the cloth to collect the lantern.
- Click the jar and insert the lantern; give the creature the grapes.
- Collect the freezing potion and use it on the strange egg shaped orb.
- Select the triangle to crack it open; move the shards aside and collect the key.
- Insert the key into the lock.
- Collect the eyepiece.
- Collect 1 /3 rune pebbles.
- Attach the mermaid hook.
- Click the lever to trigger a hidden objects area.
- Find the items.
- Collect 2 /3 rune pebbles.
- Move down 3x’s.
- Insert the stone daffodil; collect the wind up key and 3 /3 rune pebbles.
- Move to the Palace Garden.
- Insert the 3 rune pebbles to trigger a mini game.
- Solve the game by arranging the runes correctly.
- Click the compartment; collect the prince figurine.
- Move to the left.
- Place the prince and the princess figurines and insert the wind up key.
- Collect the levitation spray and 1 /3 emblem pieces.
- Move down once.
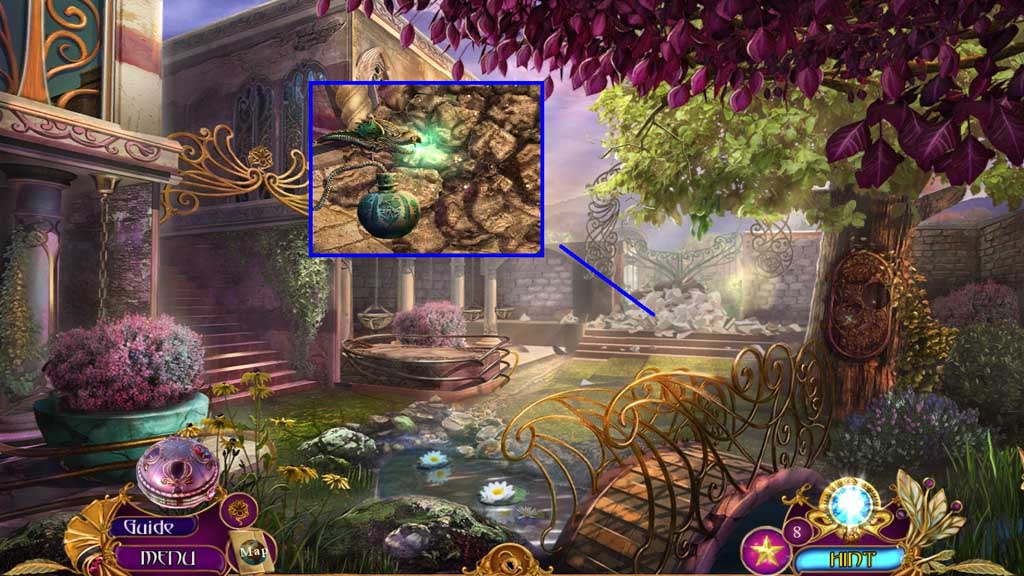
- Select the levitation spray to remove the rocks.
- Move ahead.
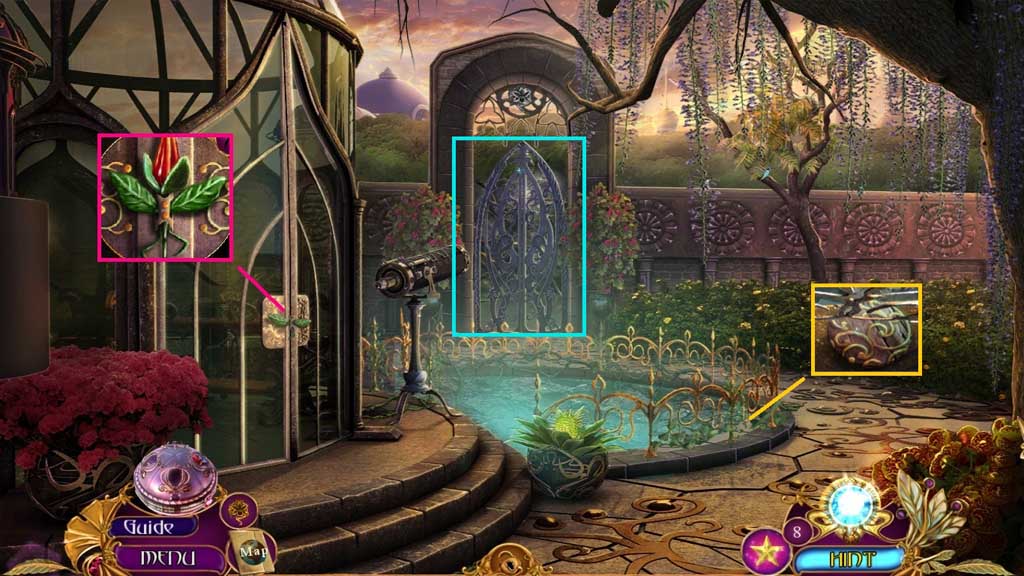
- Insert the porcelain tulip.
- Collect the patterned piece.
- Zoom into the gate.

- Collect 3/ 5 shard fragments.
- Click the 2 bowls; collect the rope.
- Collect the porcelain gecko.
- Attach the eyepiece onto the telescope.
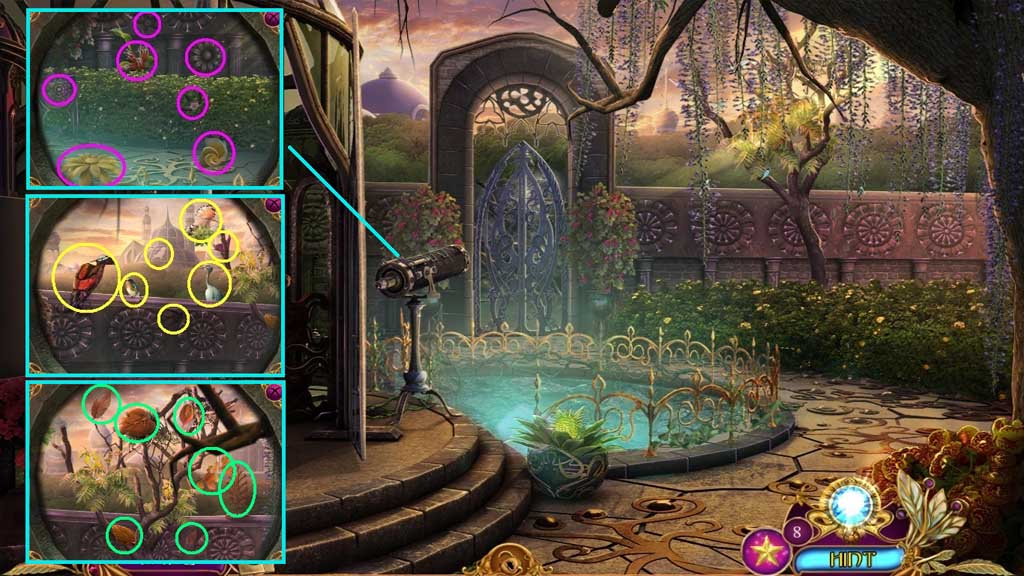
- Zoom into the telescope to trigger a mini game.
- Solve the game by finding the items.
- Move down 2x’s.
- Collect the white feather.
- Move to the Palace Garden.

- Insert the patterned piece to trigger a mini game.
- Solve the game by arranging the discs to complete the pattern.
- Collect 1 /2 golden numbers, 2 /3 emblem pieces and the pruning knife.
- Place the rope onto the vase; collect the vase with rope.
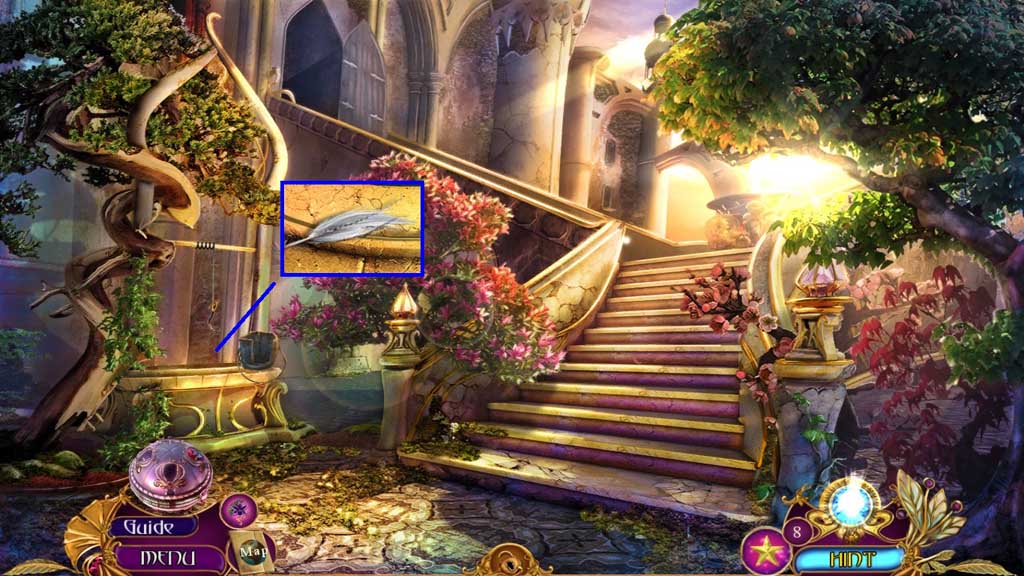
- Click the faulty arrow; use the pruning knife and the white feather on the faulty arrow; collect the twig arrow.
- Place the twig arrow into the bow; collect the bow with arrow.
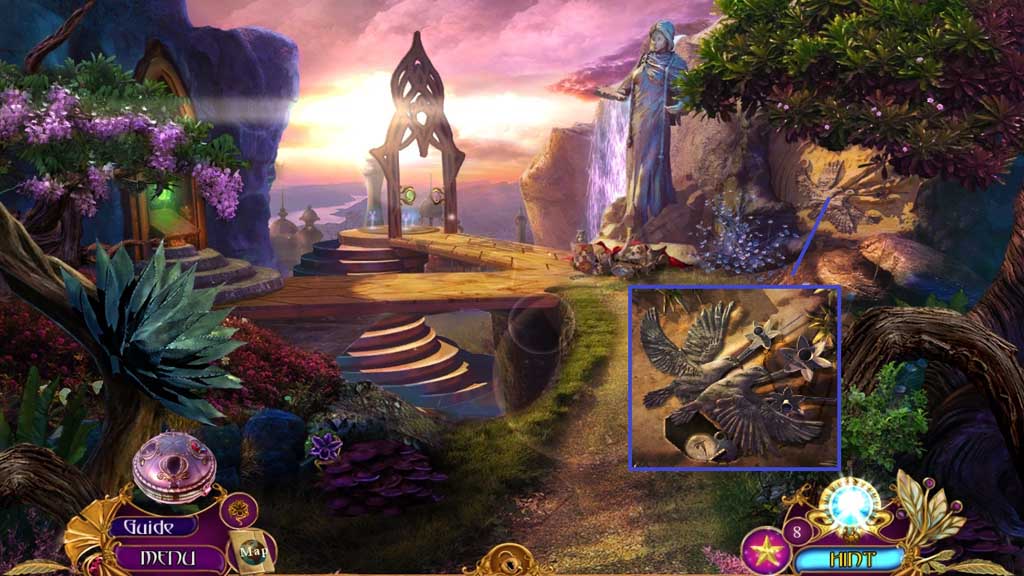
- Move ahead.
![]()
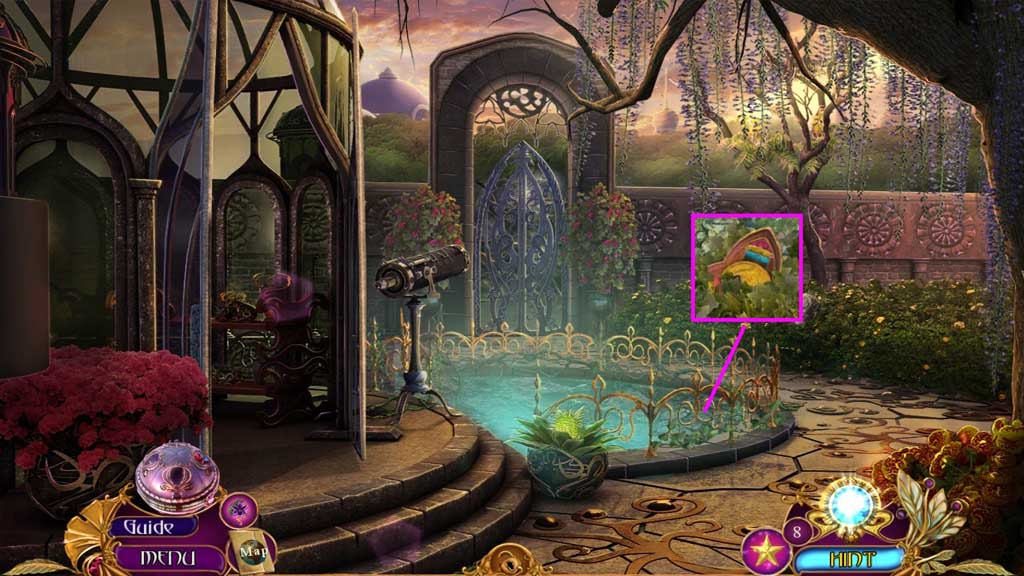
- Shoot the bow and arrow toward the nest.
- Collect 2 /2 golden numbers and 3 /3 emblem pieces.
- Move down 2x’s.
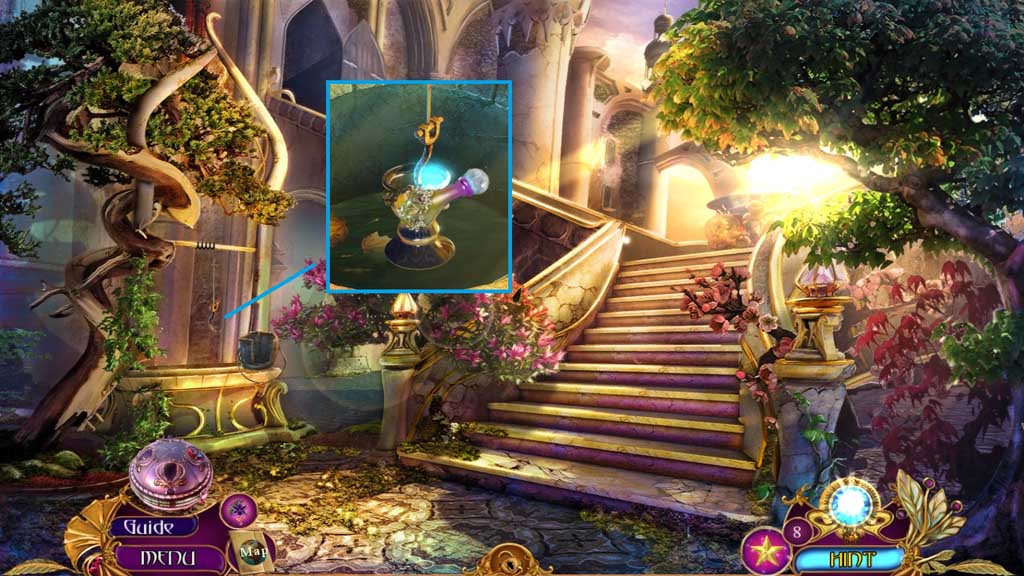
- Place the vase with rope into the well.
- Collect the growth potion.
- Move to the Palace Courtyard.
- Select the growth potion to grow the ferns.
- Collect the emblem.
- Move down once and go to the left.
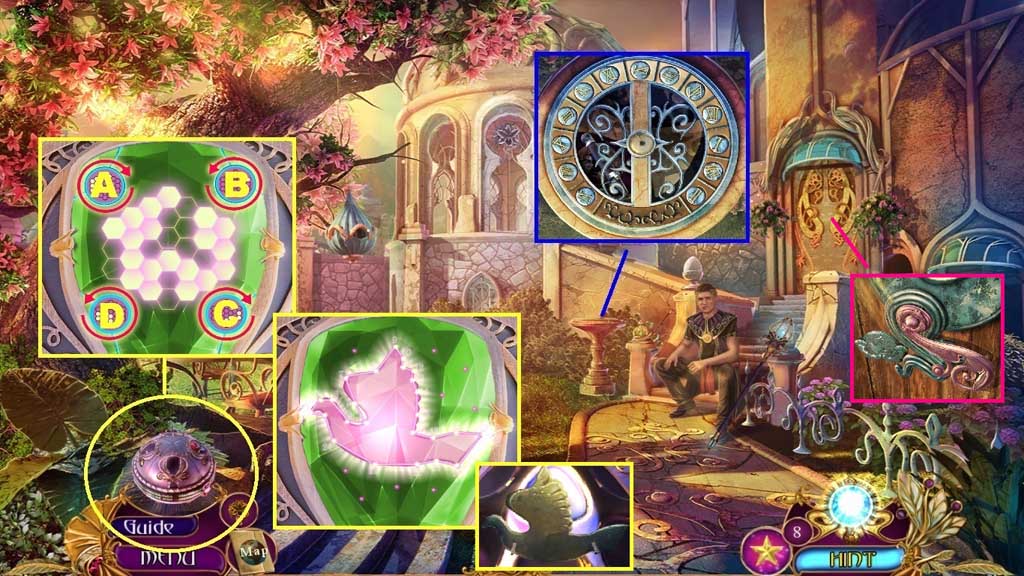
- Zoom into the emblem.
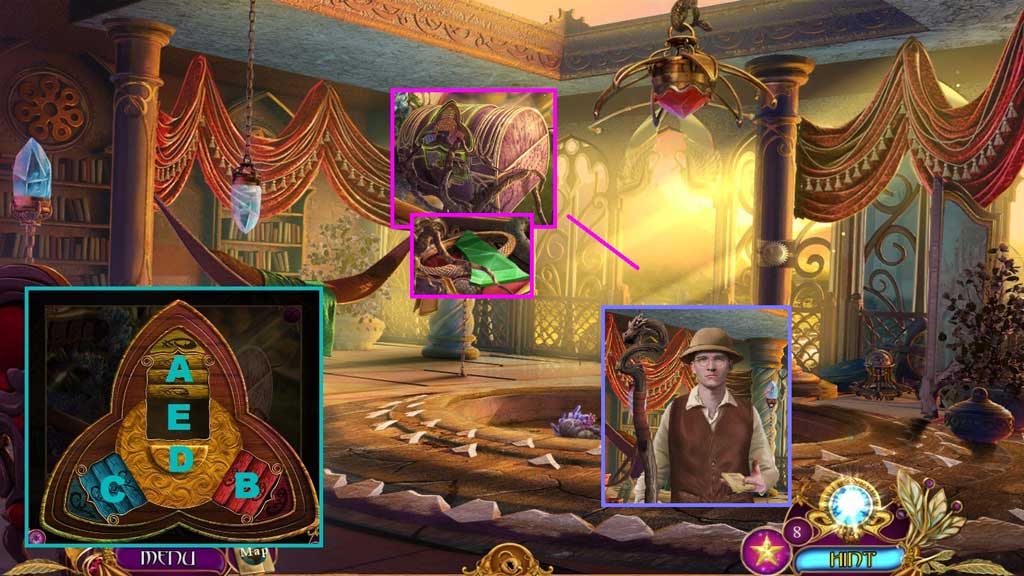
- Insert the 3 emblem pieces into the emblem to trigger a mini game.
- Solve the game by filling each compartment with the same color.
- Use the following sequence to solve: A x 2 – D – B – D x 2 - E – D – B – D x 2 – E – D x 2 – C – D x 2 – E – D x 2 – A – D – E – D – C – D – E – D x 2 – E – D x 2 – B – D – E – D x 2 – E
- Insert the chest emblem; collect 4 /5 shard fragments and the diamond bracelet.
- Collect the path instructions.
- Move down once and move ahead.
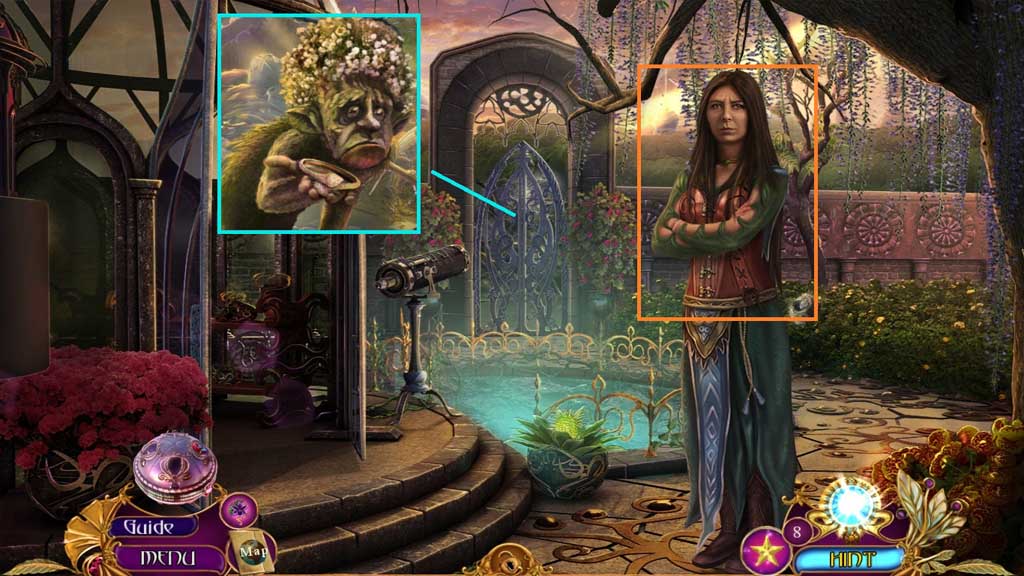
- Speak to the woman.
- Give the creature the diamond bracelet.

- Select the path instructions to trigger a mini game.
- Solve the game by clicking the mushrooms based on the icons shown on the instructions.
- Use the following sequence to solve: A –B – C – B –A – D – C – A – E – D – C – B
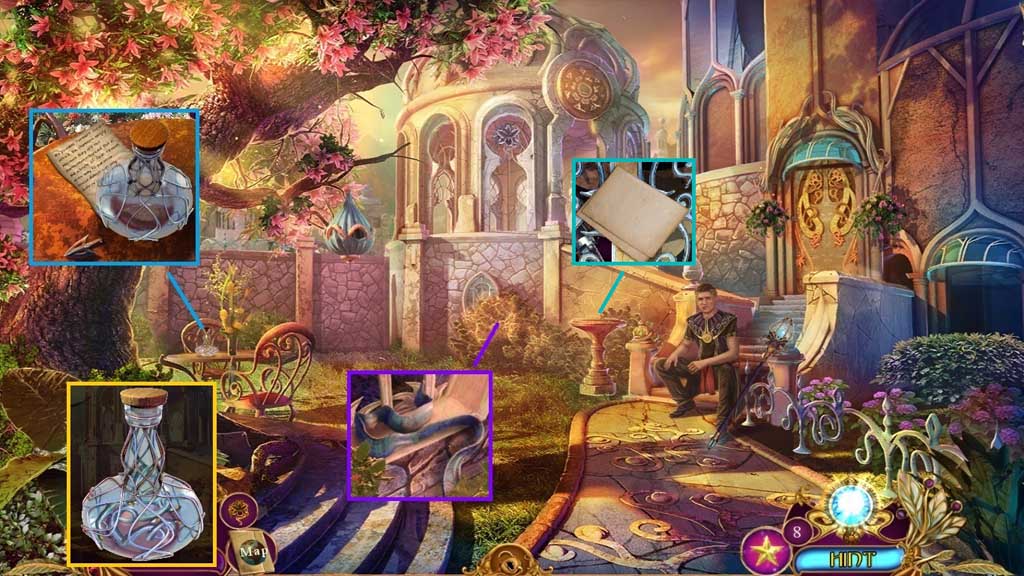
- Collect the note, the miniature arrow head and the bottle.
- Select the leather gloves to remove the bushes.
- Collect the curtain tie.
- Click the bottle open.
- Collect the note and 5/ 5 shard fragments.
- Insert the 2 golden numbers.
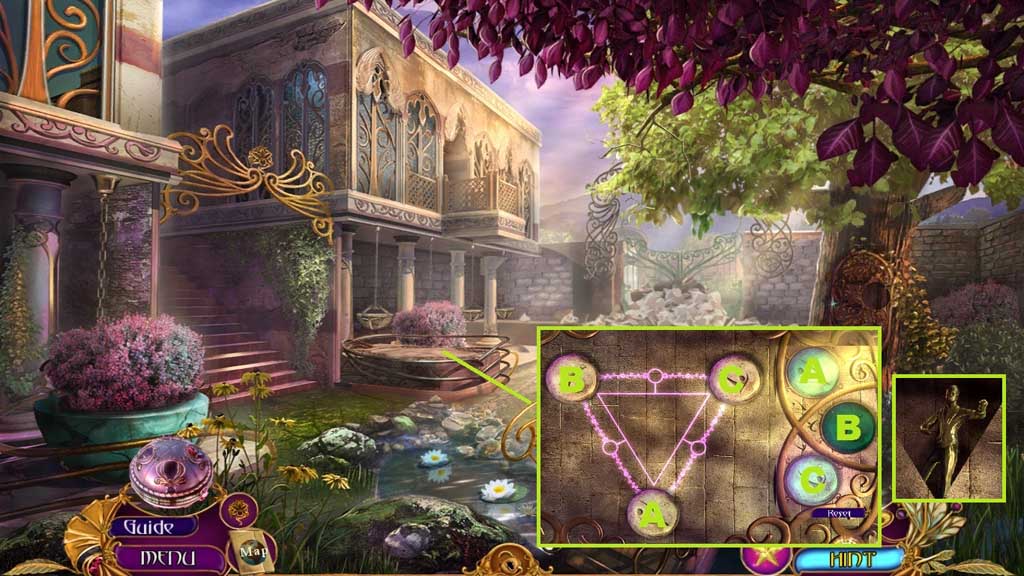
- Insert the 5 shard fragments into the orb to trigger a mini game.
- Use the following sequence to solve the 1st part: A – C – C – C – D – D – B
- Then connect the dots to solve the 2nd part.
- Collect the turtledove shape; insert it into the door.
- Move to the right.