
Vampire Legends: The True Story of Kisilova: Chapter Five: Wandering Around the Market
Our Vampire Legends The True Story of Kisilova Walkthrough is your primary detective's dossier, containing all the hints, notes, cheats, and solutions you need to help you get to the bottom of these mysterious murders happening in this tiny village. Use our detailed instructions, puzzle solutions, and custom screenshots to discover who, or what, is behind these deaths.
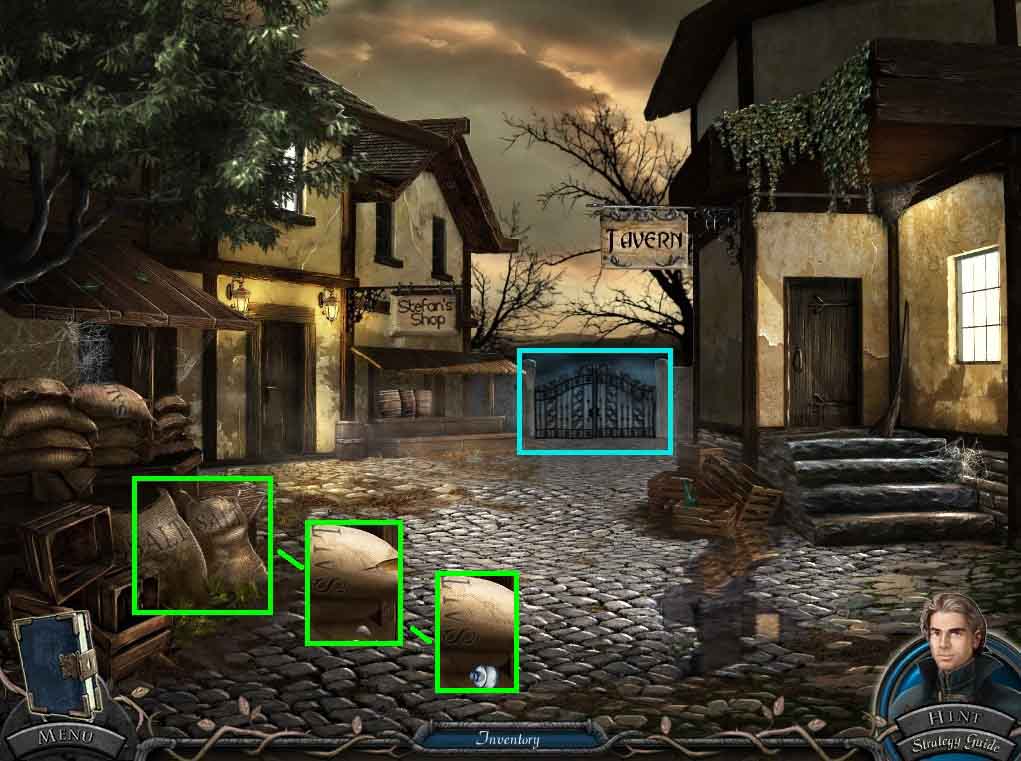
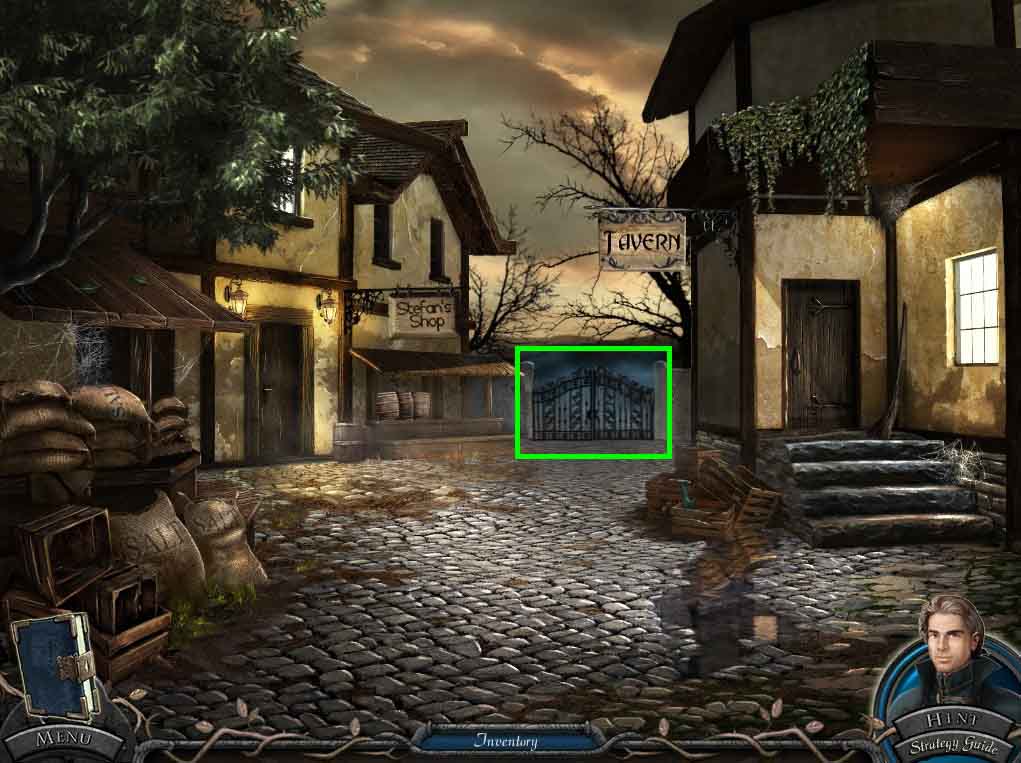
- Click the gate.
- Click the salt bags and select the awl to tear through it.
- Place the clean ink bottle into the spilled salt; collect the bottle of salt.
- Move into the tavern.
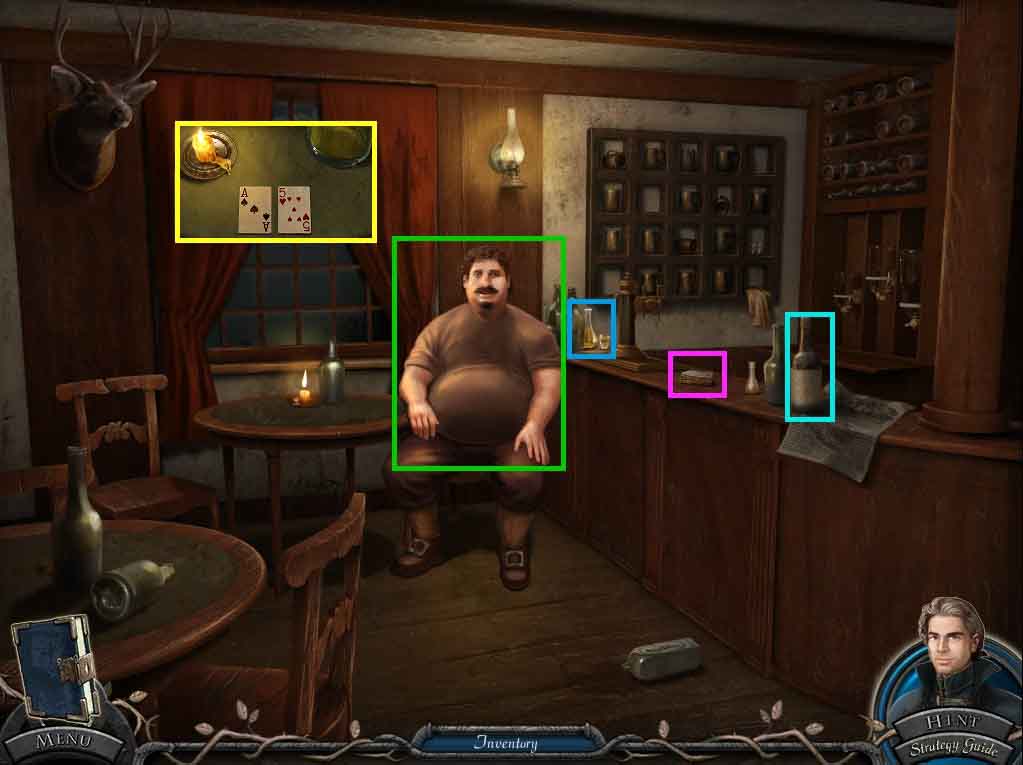
- Talk with Stefan.
- Collect the cards, vinegar and the Rakia.
- Hand the cards to Stefan, a puzzle will trigger.
- To solve the puzzle correctly guess the location of the ace.
- The solution is random.
- Collect the journal update with the code.
- Move back one time.
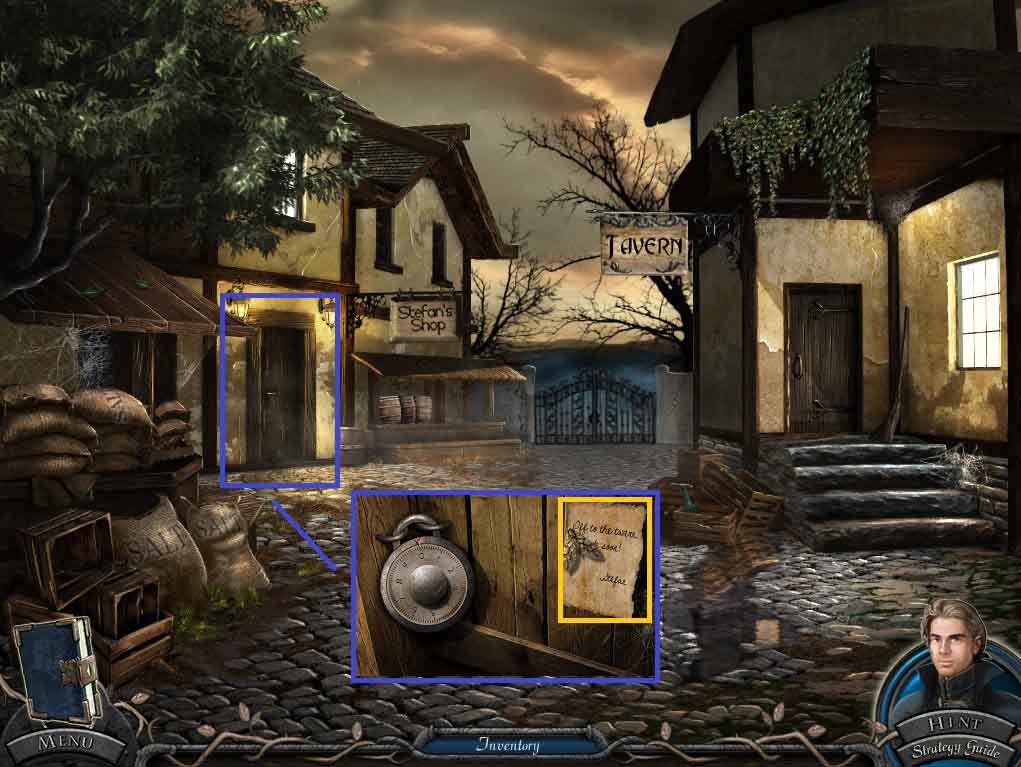
- Click the shop door to trigger a puzzle.
- Click the note.
- Click the code 1 – 6 – 3 – 7
- Move into the shop to access a hidden objects area.
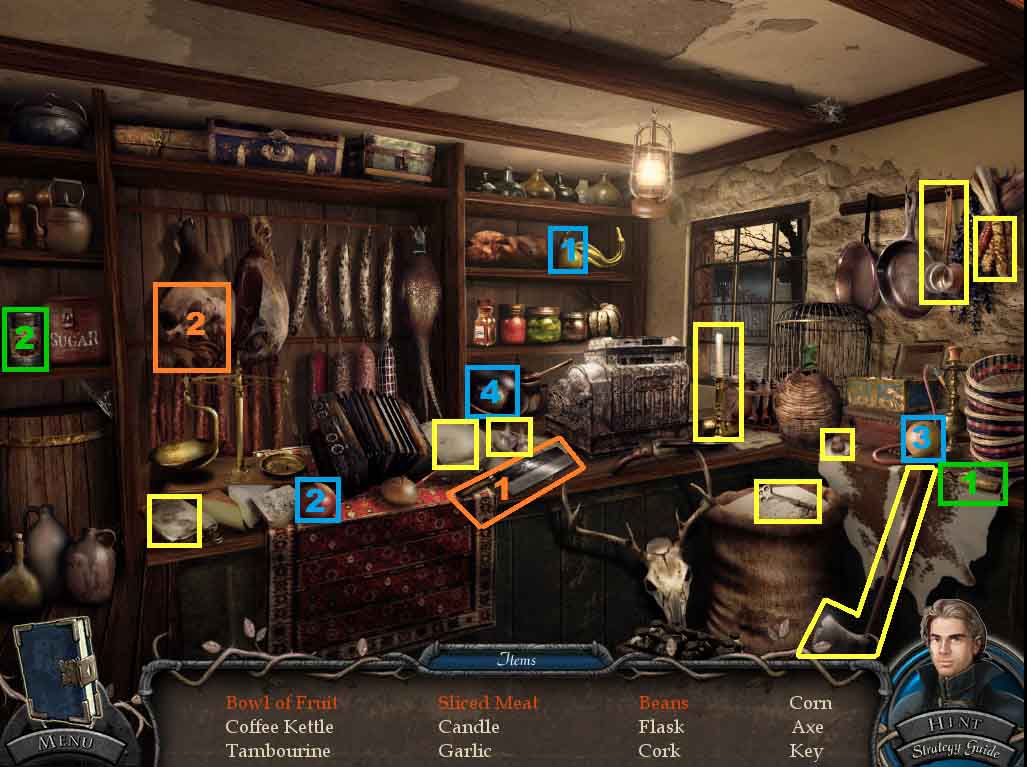
- Find the listed items.
- Place the fruit into the bowl; collect the bowl of fruit.
- Select the cleaver and use it to slice the meat; collect the meat.
- Select the can opener and use it to open the can of beans; collect the beans.
- Collect the key.
- Click the gate and insert the key into the lock.
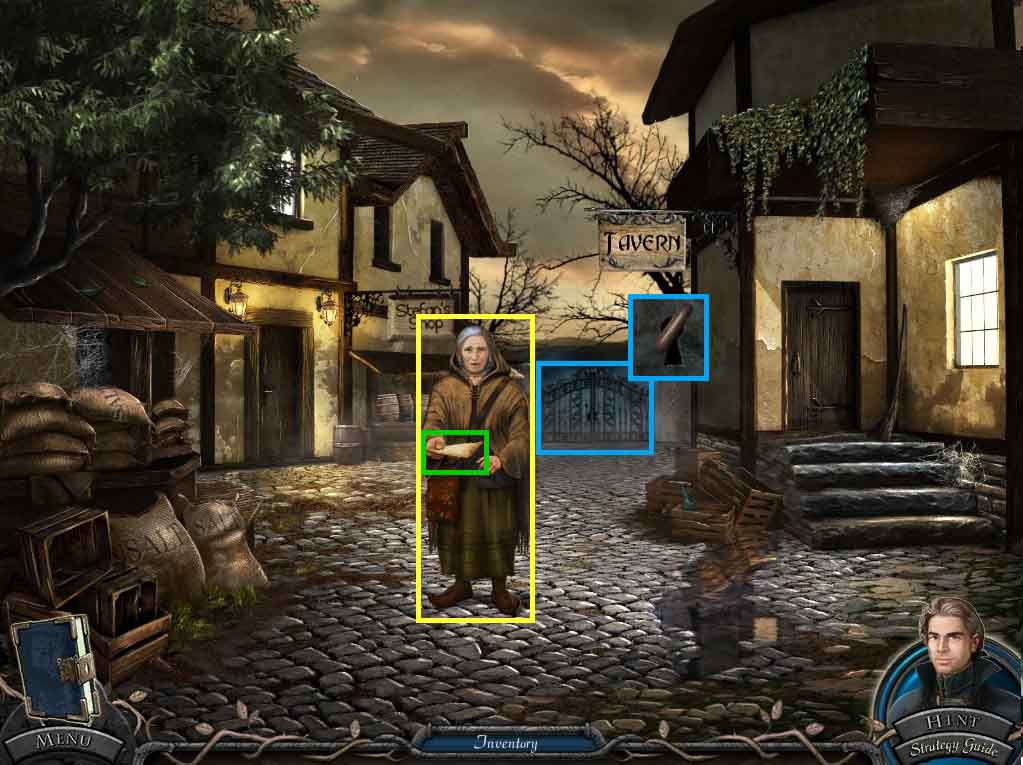
- Speak with the medicine woman.
- Collect the recipe.
- Move into the tavern.
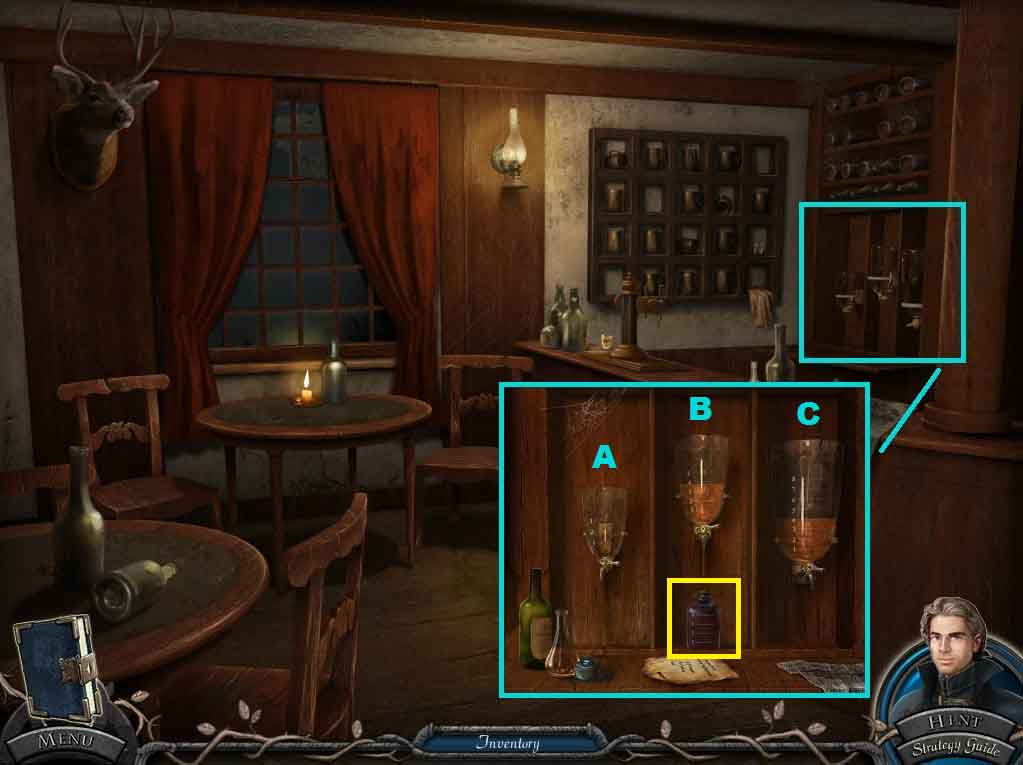
- Click the mixers.
- Put the Rakia, vinegar and the bottle of salt onto the shelf.
- Pour the ingredients into the container to trigger a puzzle.
- To solve the puzzle click the containers in the following sequence.
- (C-B) (B-A) (A-C) (B-A) (C-B) (B-A)
- Collect the corrosive substance.
- Move back one time.
- Click the gate and pour the corrosive substance onto the lock.
- Move ahead.
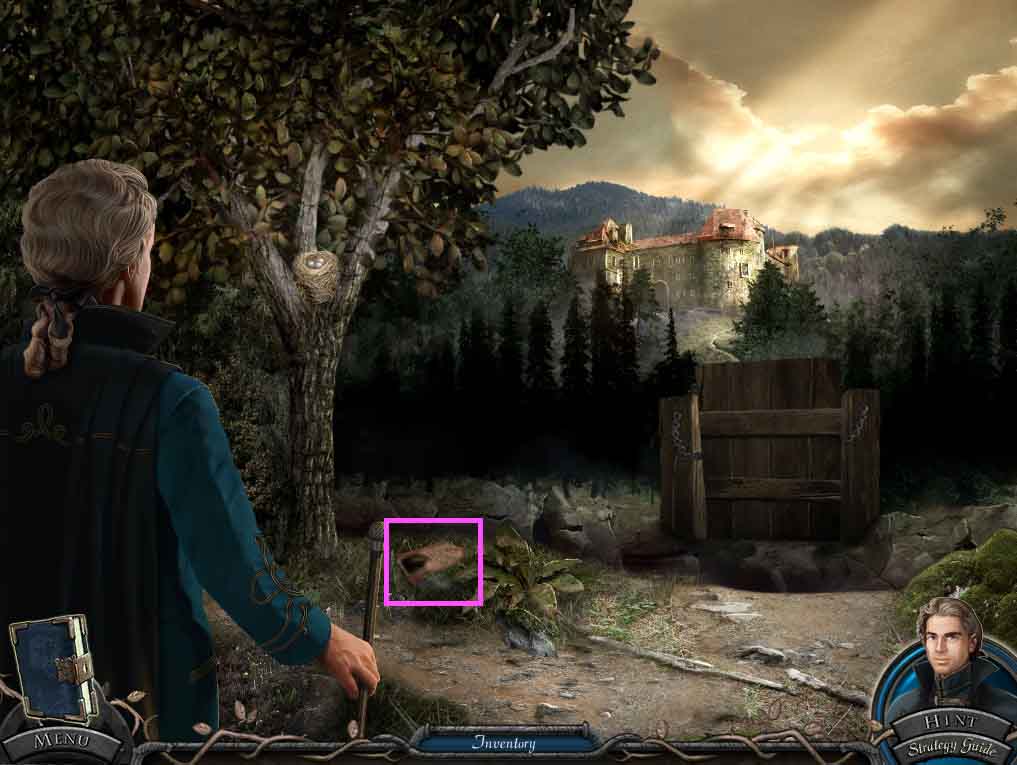
- Collect the note.
- Move up the path 2 times on the left.
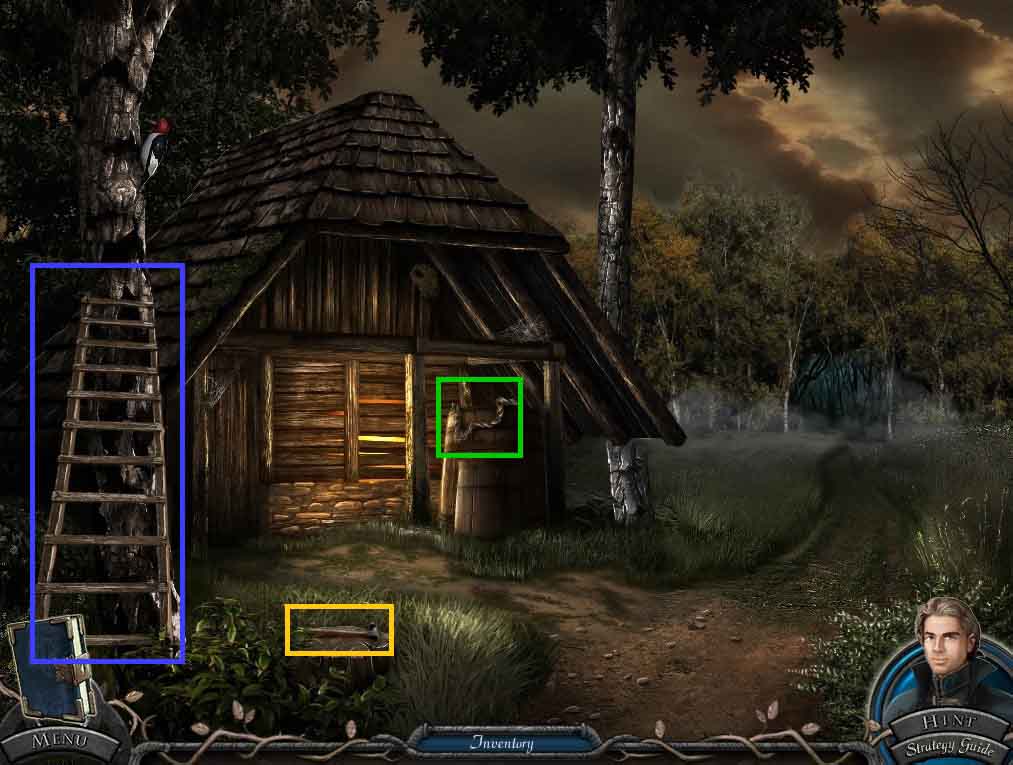
- Collect the ladder, the rope and the hammer.
- Try to move toward the right path.
- Move into the barn.
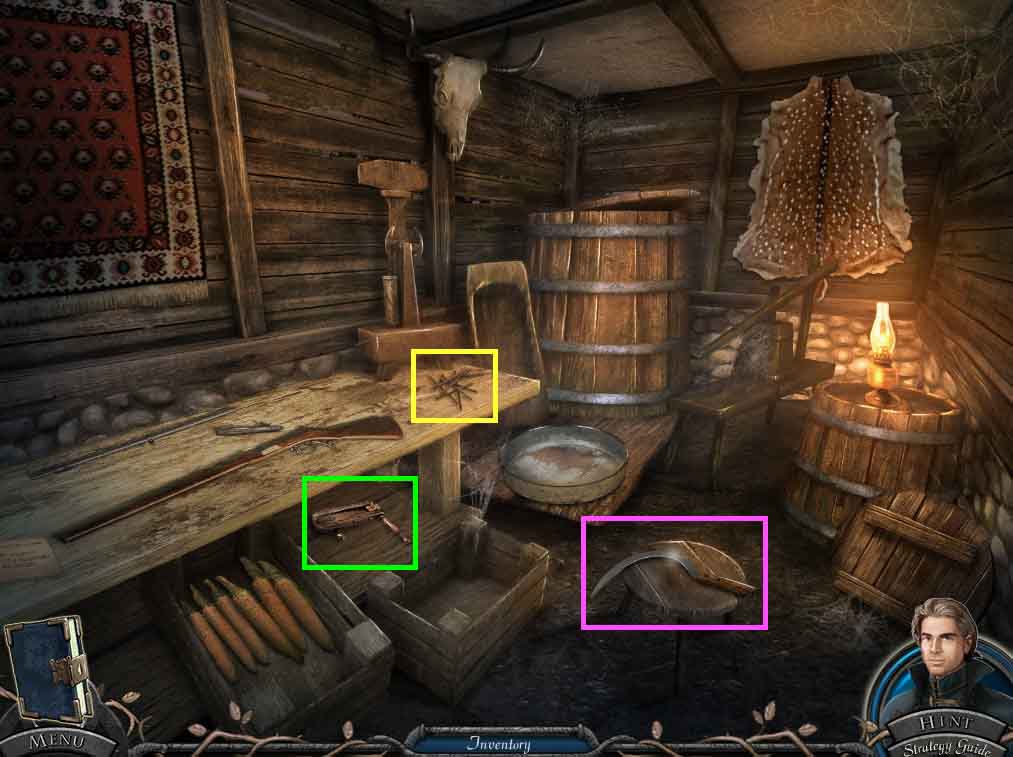
- Collect the bird scarer, the nails and the sickle.
- Move back two times.
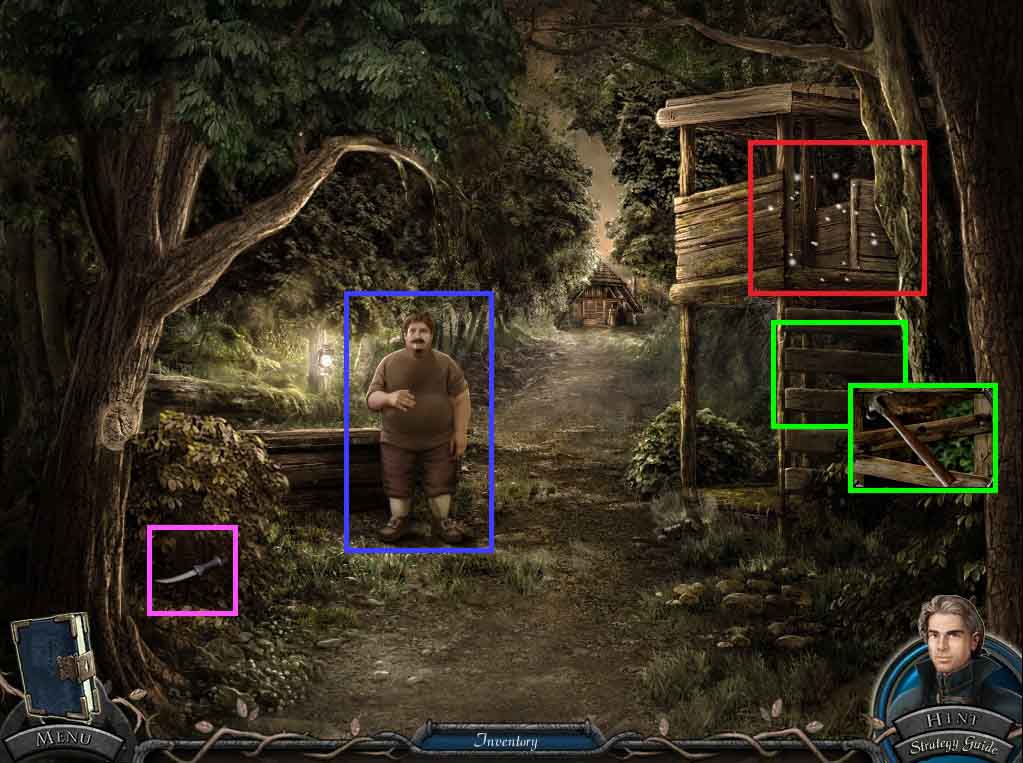
- Speak to Stefan.
- Select the sickle and use it on the bushes; collect the short sword.
- Click the steps and insert the nails.
- Use the hammer to drive in the nails.
- Click the elevated stand to access a hidden objects area.
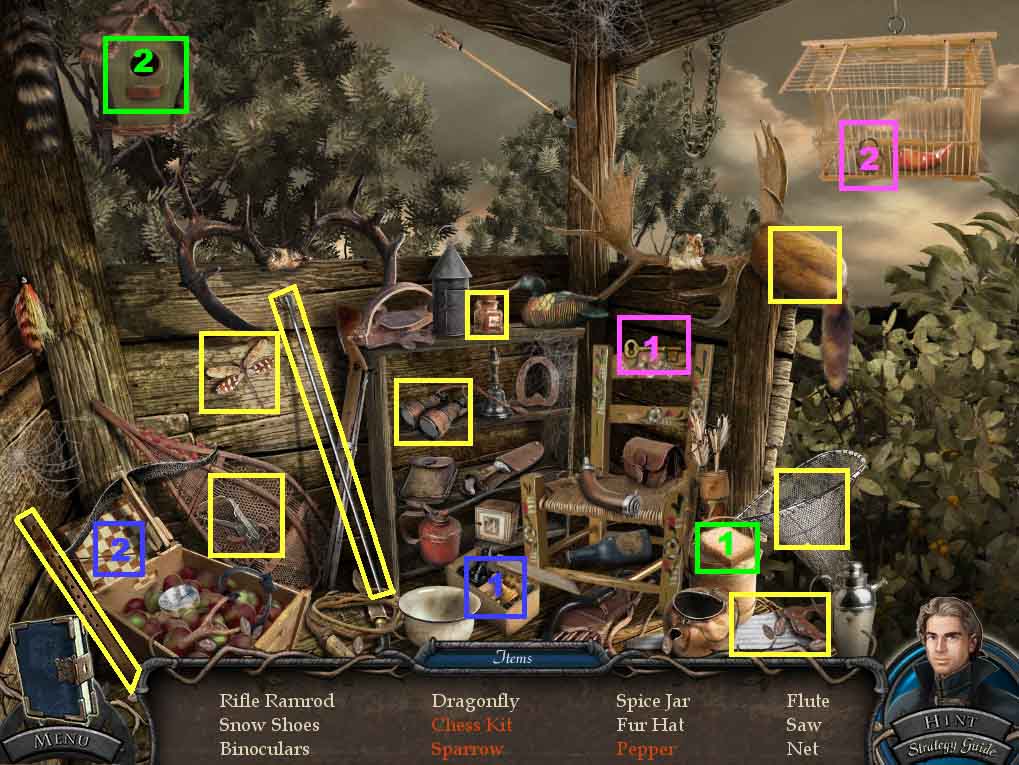
- Find the listed items.
- Place the bread onto the bird house; collect the sparrow.
- Lay the chess pieces by the chess board; collect the chess kit.
- Insert the key into the lock; collect the pepper.
- Collect the rifle ramrod.
- Move back one time.
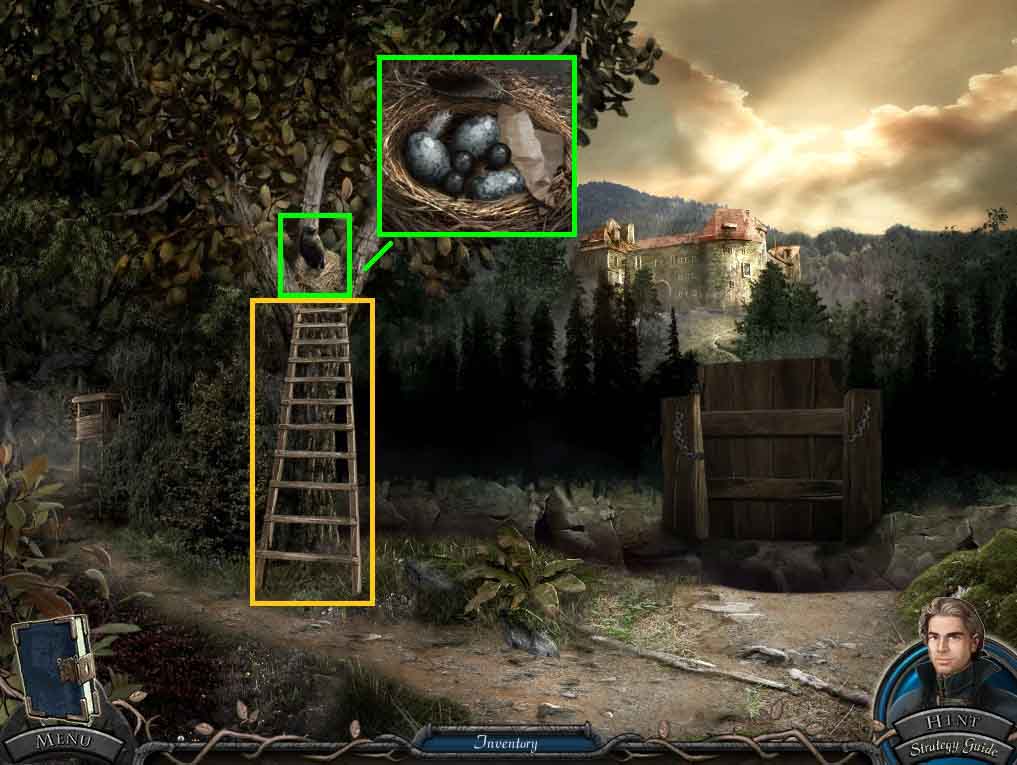
- Place the ladder onto the tree.
- Click the nest and use the bird scarer to scare the bird; collect the lead bullets.
- Click the crumpled note and read it.
- Move up the left path 2 times and go into the barn.
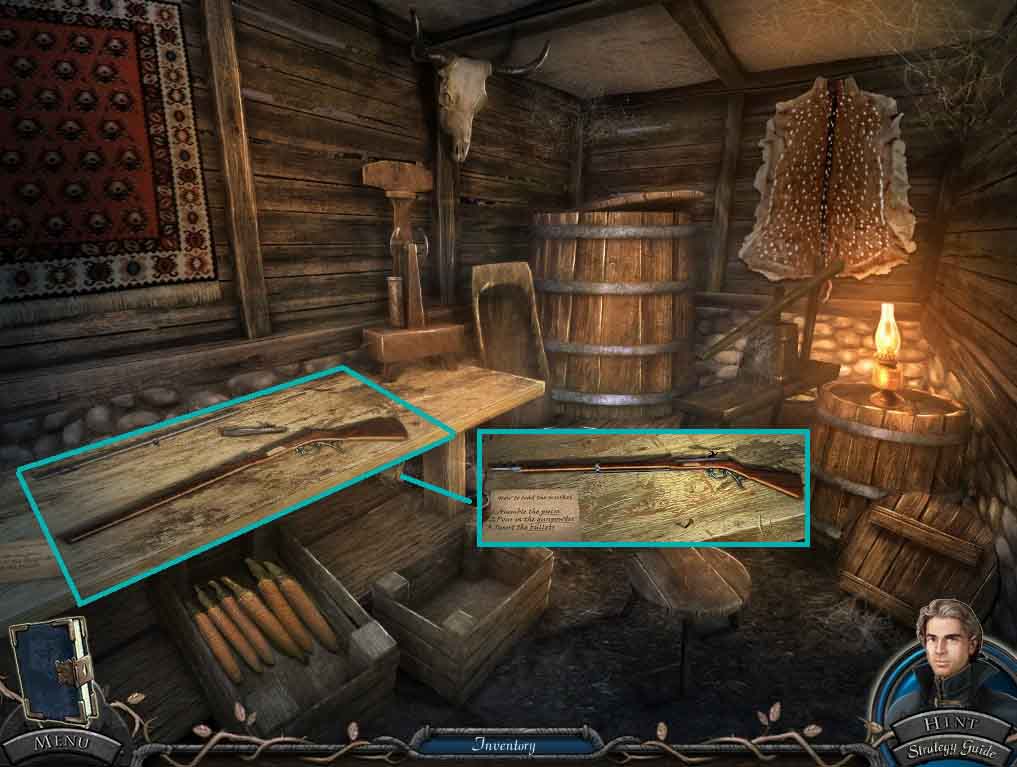
- Click the workbench and lay the rifle ramrod onto it.
- Assemble the parts.
- Place the gunpowder pouch and the lead bullets onto the rifle and collect the loaded musket.
- Move back 2 times.
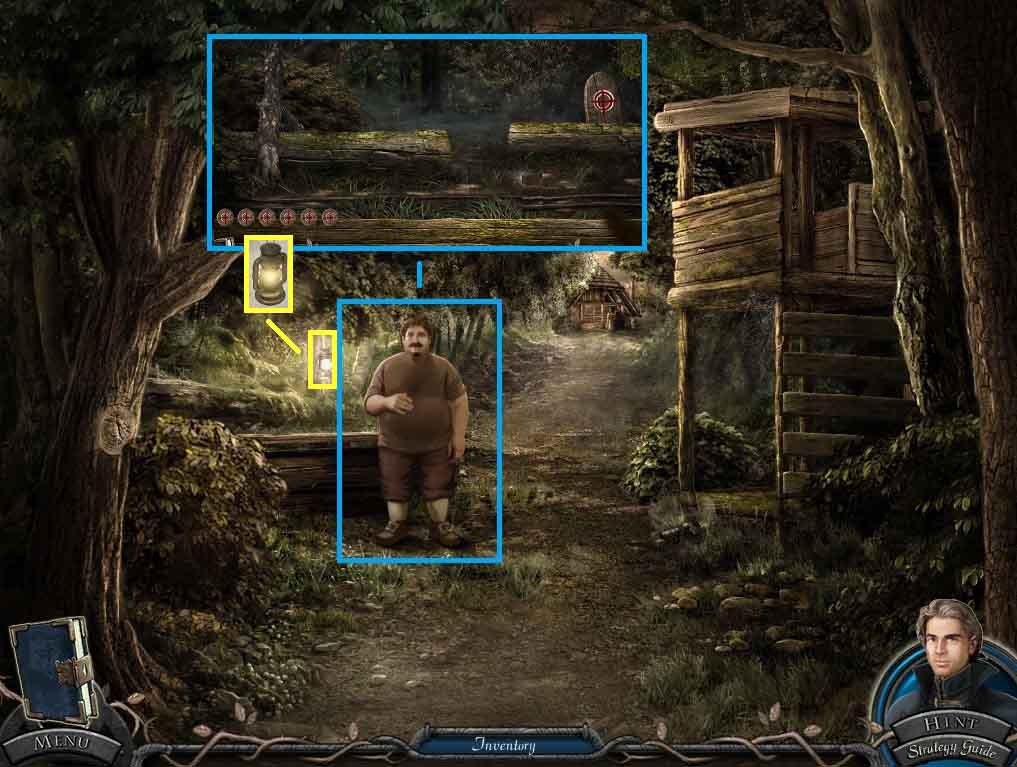
- Hand the loaded musket to Stefan and a puzzle will trigger.
- Solve the puzzle by shooting the targets as they pop up.
- Collect the lantern.
- Move ahead.
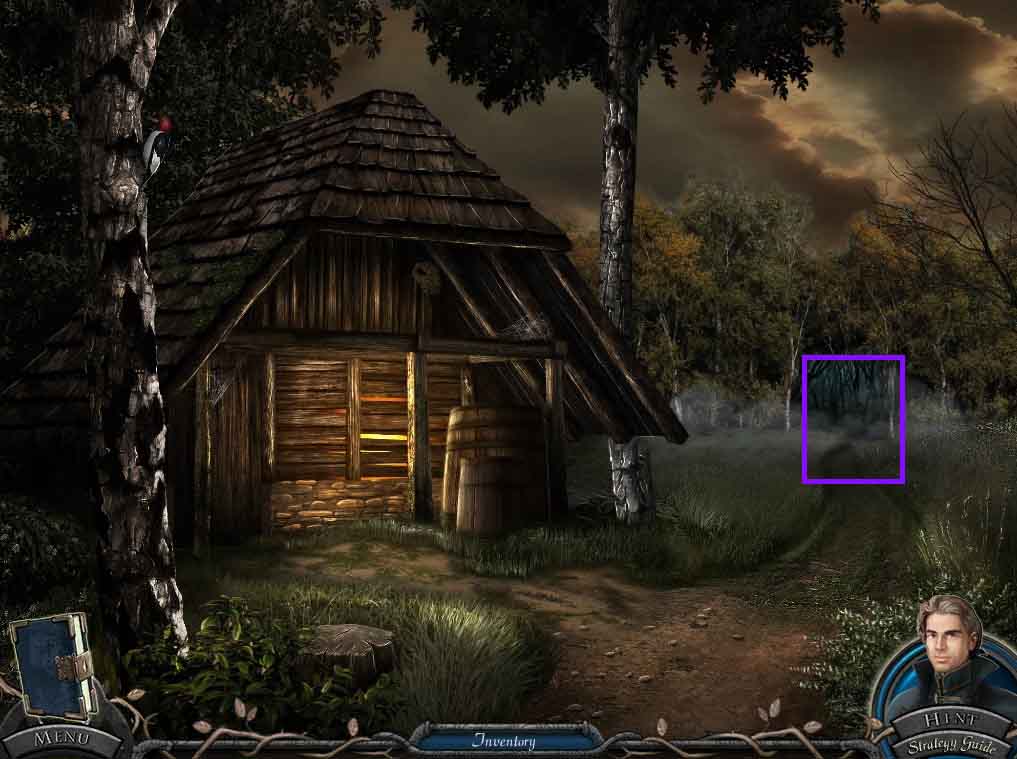
- Select the lantern to illuminate the path on the right.
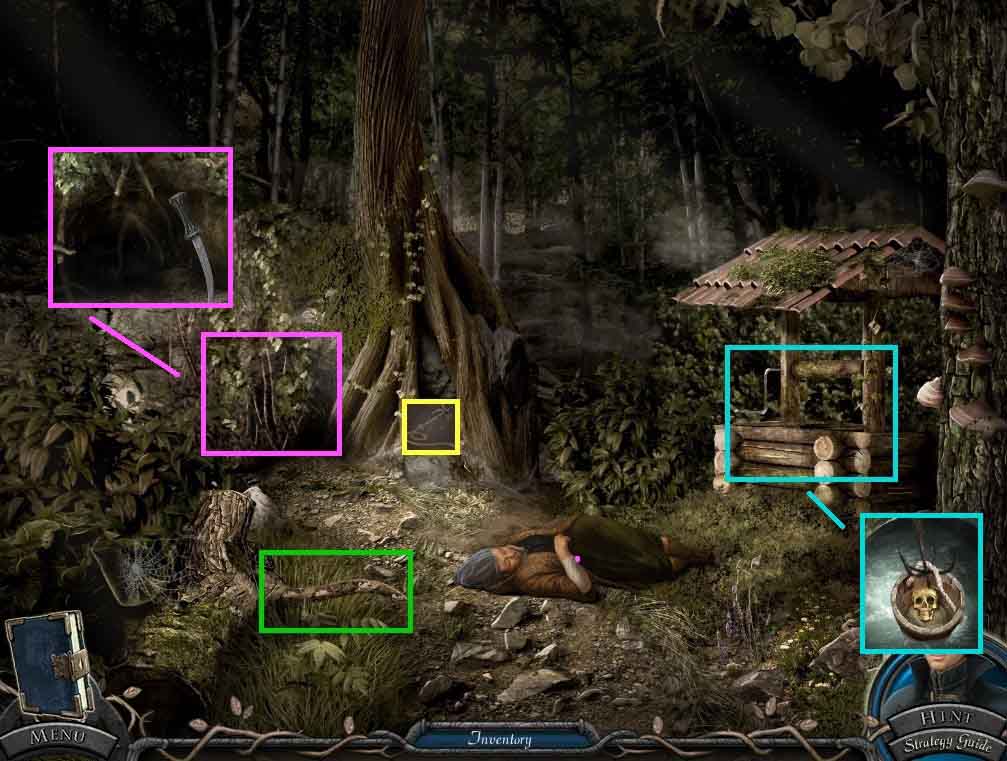
- Select the rope and place it onto the hook; collect the rope with hook.
- Collect the stick.
- Zoom into the well and place the rope with the hook onto the bucket.
- Click the bucket and collect the skull.
- Click the vines and cut them using the short sword 2 times to clear the path.
- Move into the path.
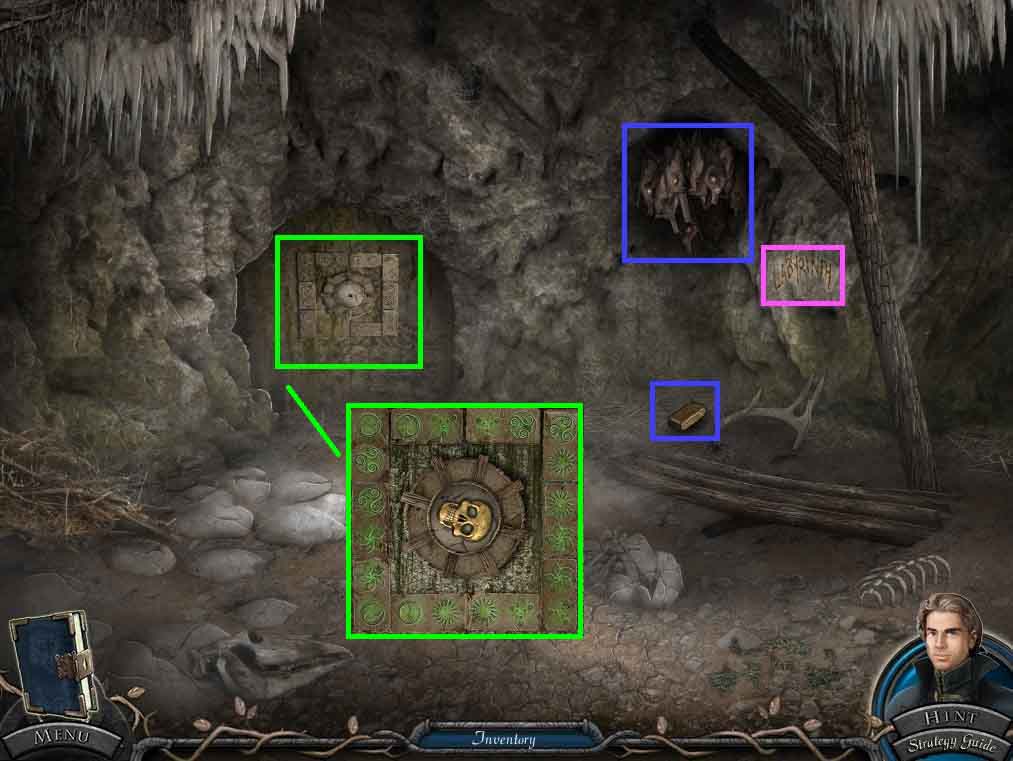
- Click the labyrinth etching.
- Click the bats and select the stick to clear them away.
- Collect the brick.
- Click the door; insert the brick and the skull to trigger a puzzle.
- Click the brick so that the matching icons are connected.
- Move through the passage once the puzzle is complete.
- Click the skeleton to access a hidden objects area.

- Find the listed items.
- Insert the wind up key into the instrument; collect the mechanical instrument.
- Insert the key into the lock; collect the diary.
- Click the brick; collect the pocket watch.
- Earn the grand hall puzzle piece.
- Move ahead and start the labyrinth puzzle.
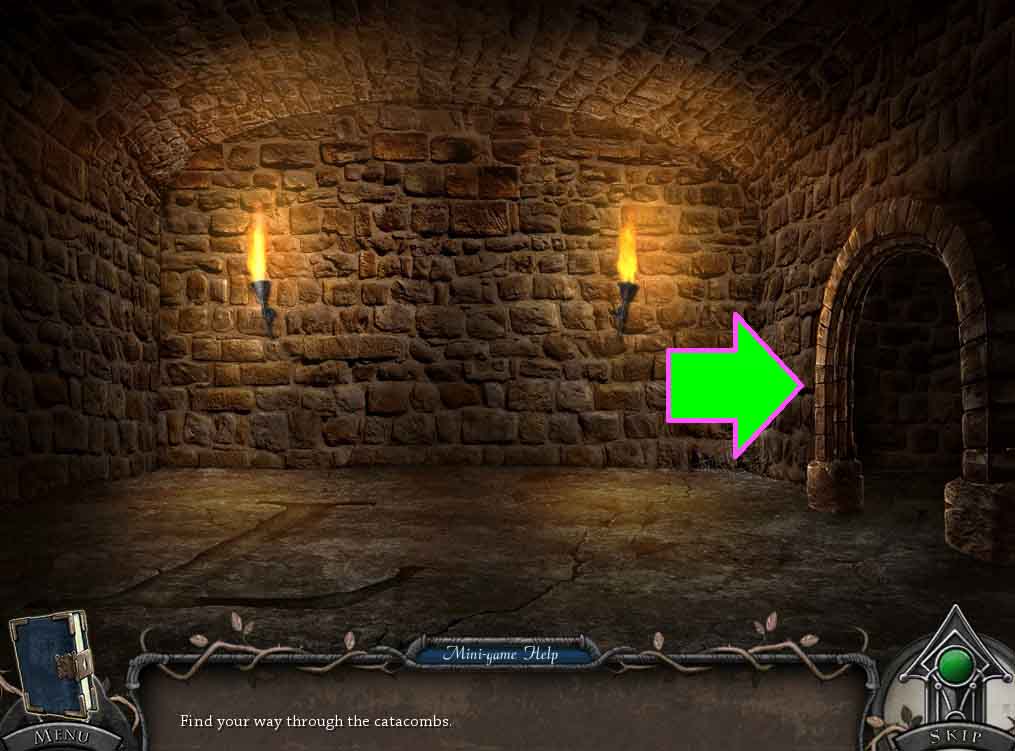
- Navigate your way through the labyrinth.
- Use the following directions to make it through.
- Right – Forward – Right – Forward –Left – Forward – Right – Right – Forward