
Vampire Legends: The True Story of Kisilova: Chapter Four: Exploring the Crypt
Our Vampire Legends The True Story of Kisilova Walkthrough is your primary detective's dossier, containing all the hints, notes, cheats, and solutions you need to help you get to the bottom of these mysterious murders happening in this tiny village. Use our detailed instructions, puzzle solutions, and custom screenshots to discover who, or what, is behind these deaths.
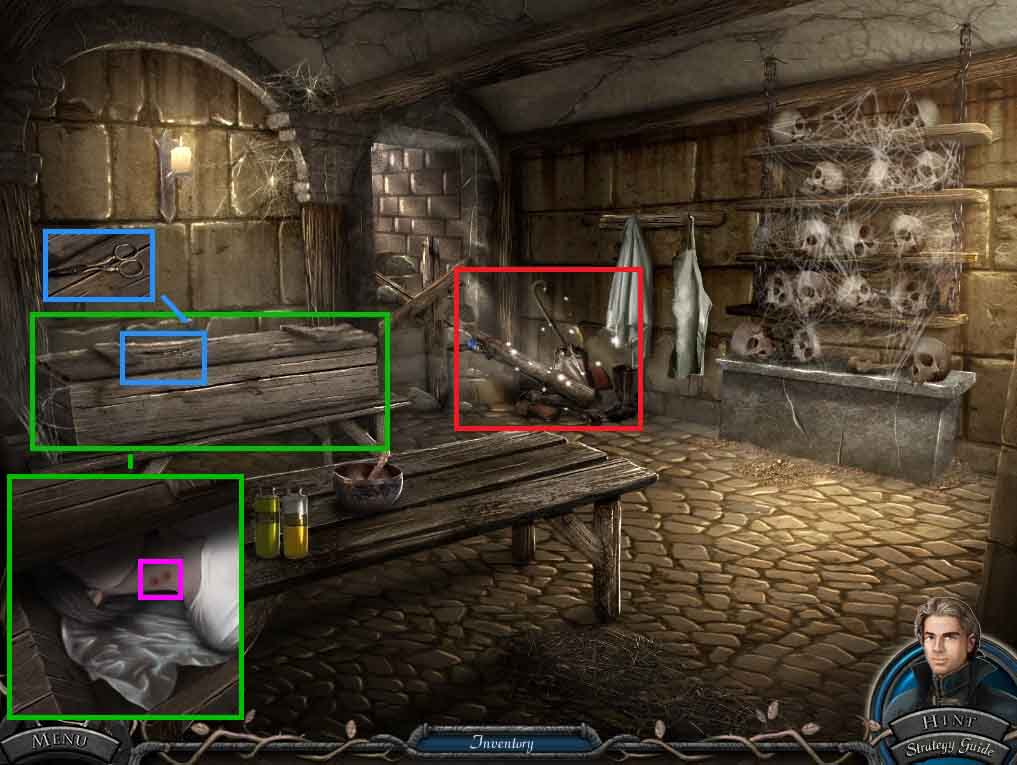
- Click the coffin; collect the scissors.
- Remove the lid using the crowbar.
- Zoom into the bite marks on the neck.
- Click the debris to access a hidden objects area.
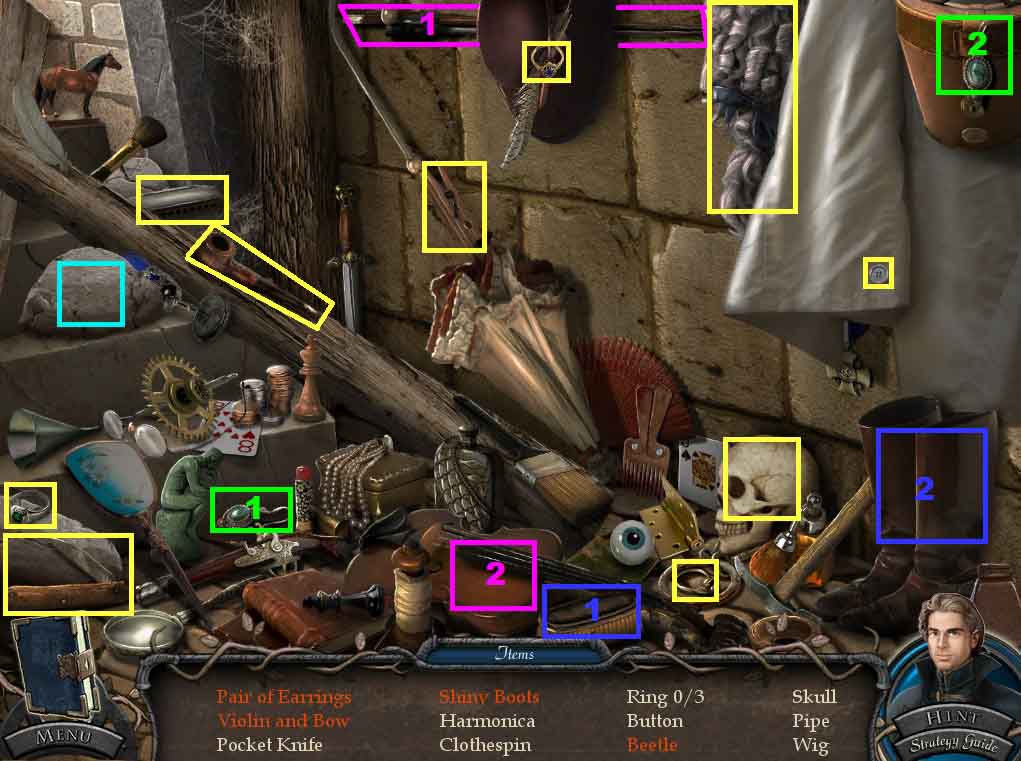
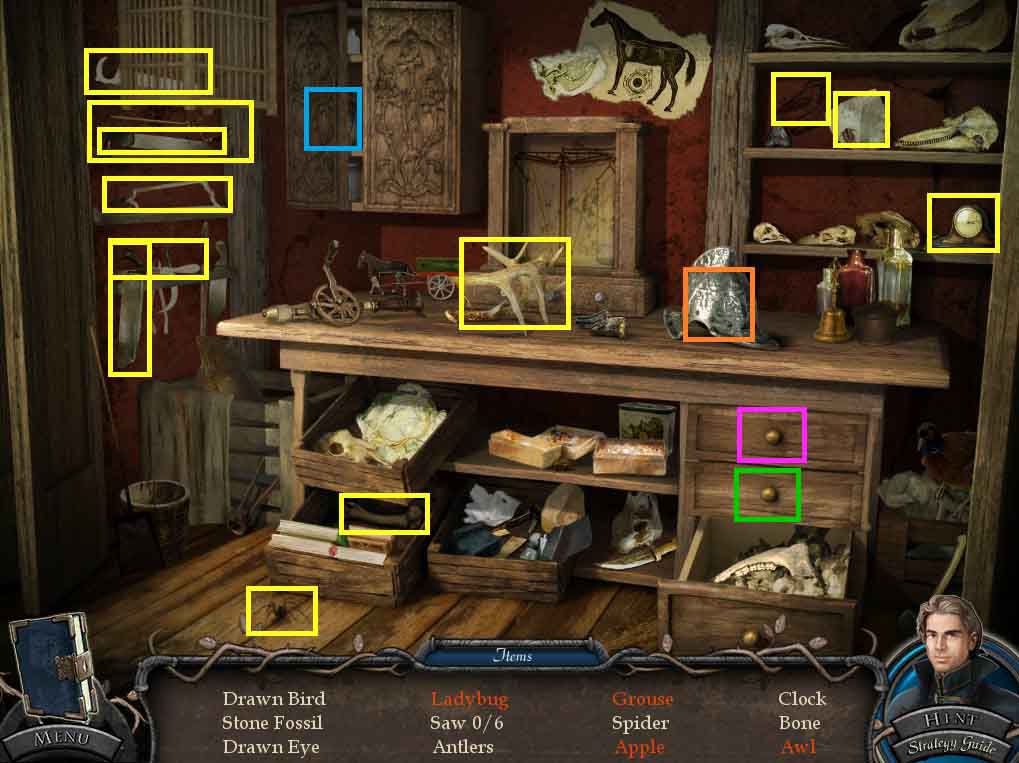
- Find the listed items.
- Place the earring next to the other earring; collect the pair.
- Select the brush and use it on the boots; collect the shiny boots.
- Place the bow onto the violin; collect the violin and bow.
- Click the rock; collect the beetle.
- Collect the skull.
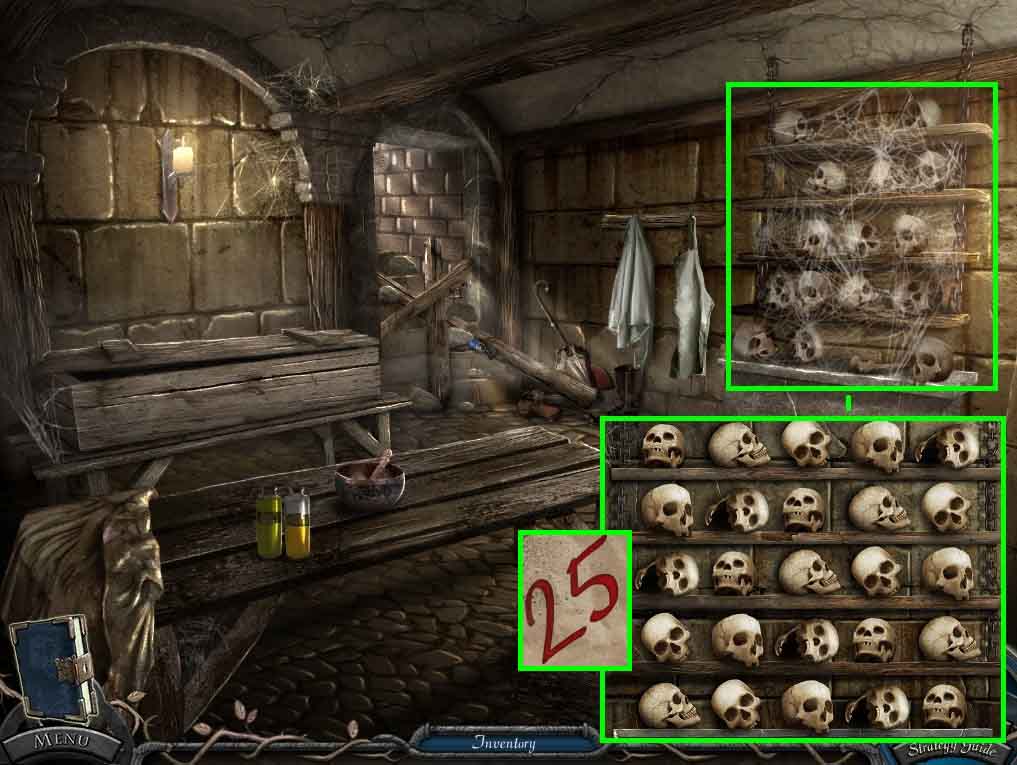
- Zoom into the skull rack.
- Select the brush and clear away the cobwebs.
- Insert the skull into the middle of the shelf to trigger a puzzle.
- Arrange the skull so the there are no shelves with 2 skulls that are alike on it.
- Click the crumpled paper 2 times; collect the 25 to collect the paper clue.
- Move back 4 times.
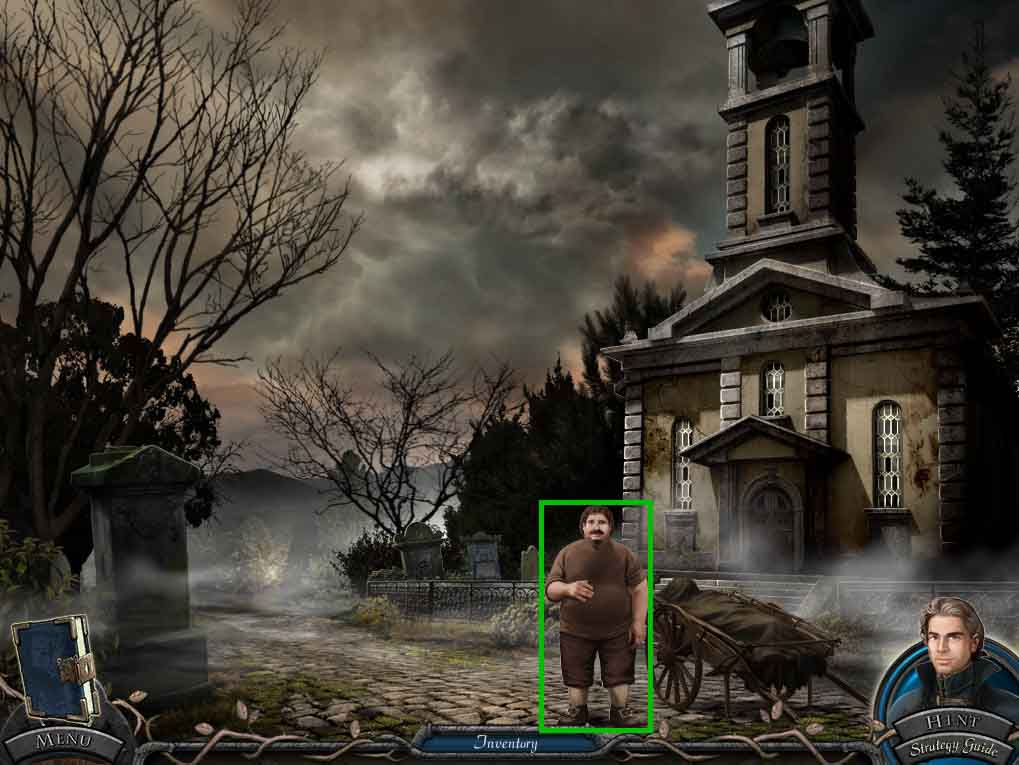
- Speak to Stefan.
- Move back and turn right into Philip’s house.
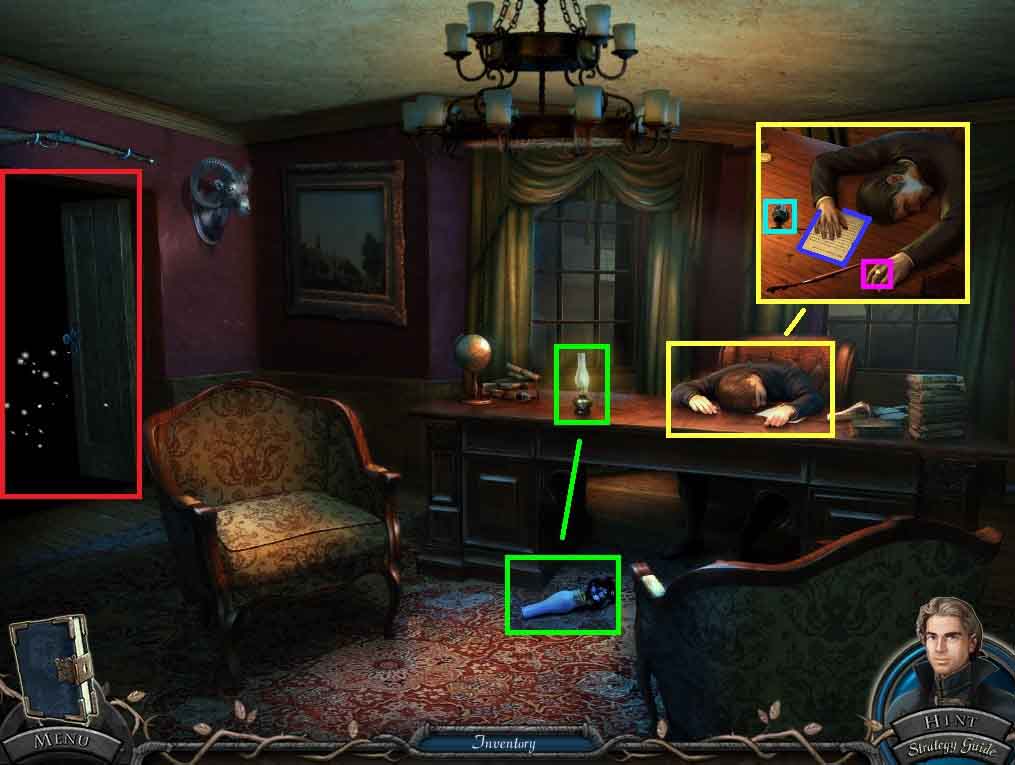
- Click the man.
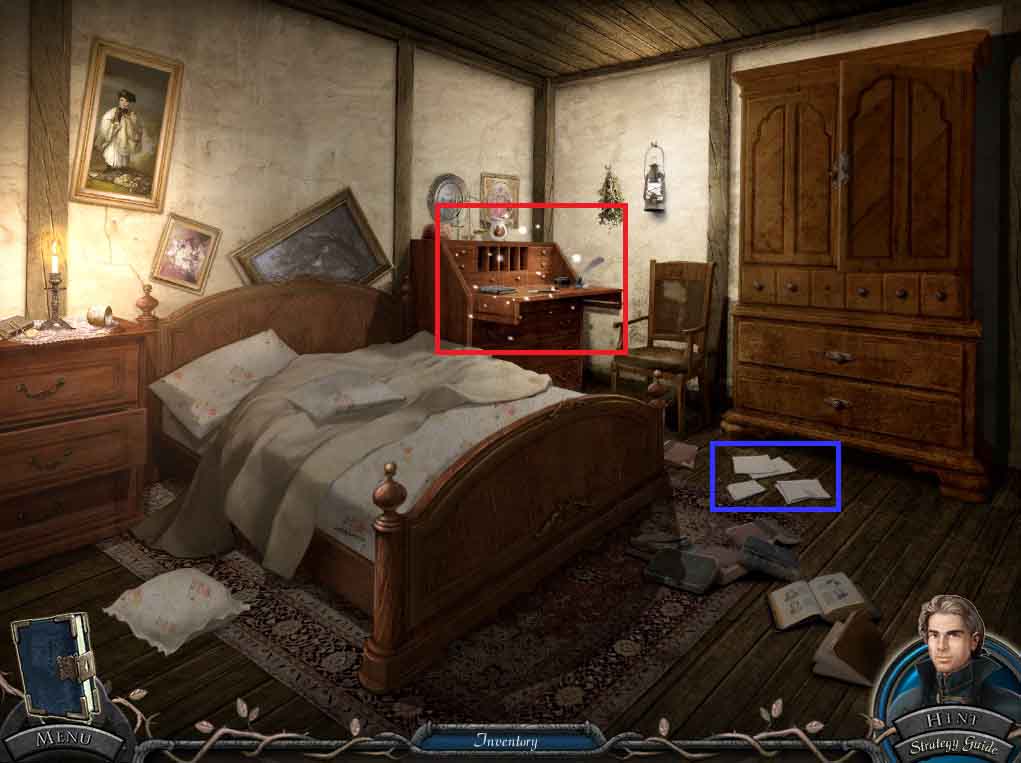
- Collect the papers on the floor.
- Click the desk to access a hidden objects area.
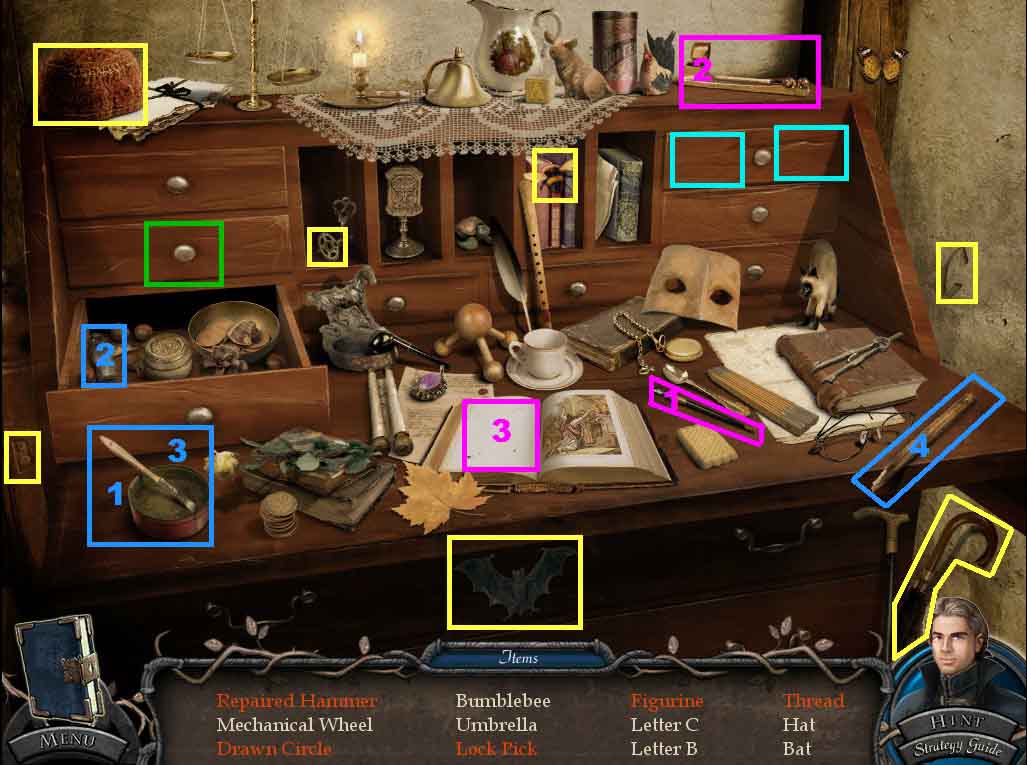
- Find the listed items.
- Insert the pen into the inkwell; place it onto the blank page and collect the drawn circle.
- Dip the brush into the glue and use it onto the 2 parts of the hammer; collect the repaired hammer.
- Click the drawer; collect the figurine and thread.
- Click the drawer; collect the lock pick.
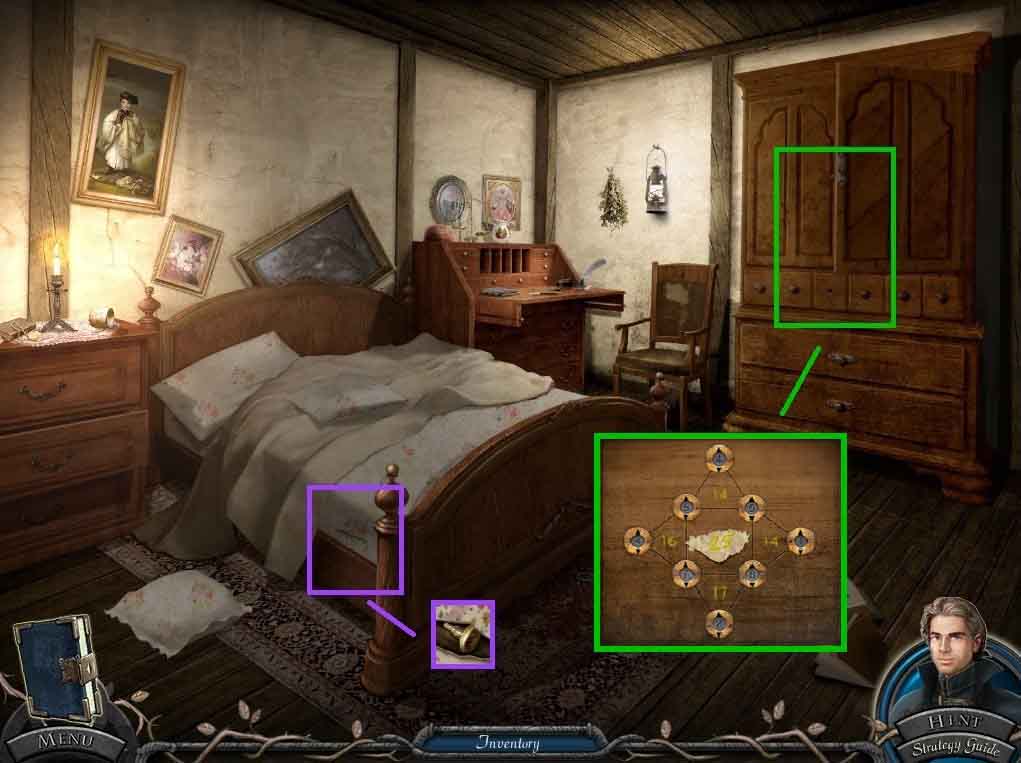
- Click the mattress.
- Select the scissors and cut the stitches; collect the knob.
- Click the cupboard and attach the knob; click the knob.
- Place the paper clue onto the board; a puzzle will trigger.
- Click the arrows to adjust the numbers to add up to the number in the middle of the triangle.
- Go into the passage to trigger a puzzle.
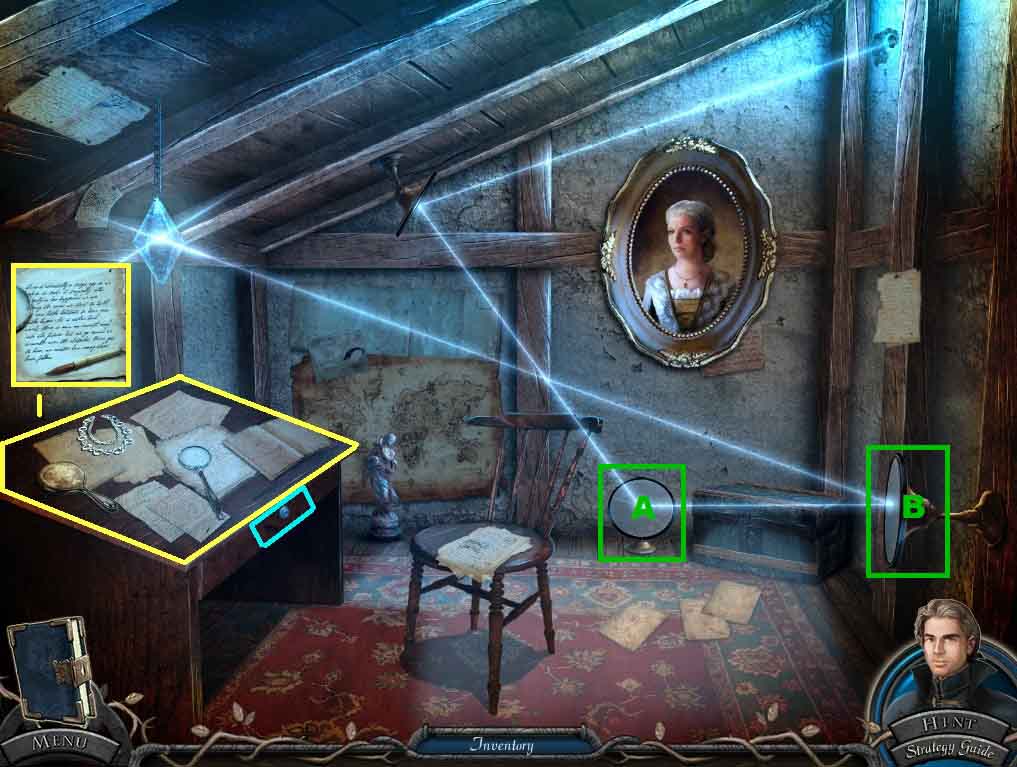
- Move the mirrors to make the beam shine onto the crystal.
- Click the mirrors as follows: A: 2 x’s and B: 2x’s.
- Click the desk; collect the note.
- Insert the lock pick into the desk and a puzzle will trigger.
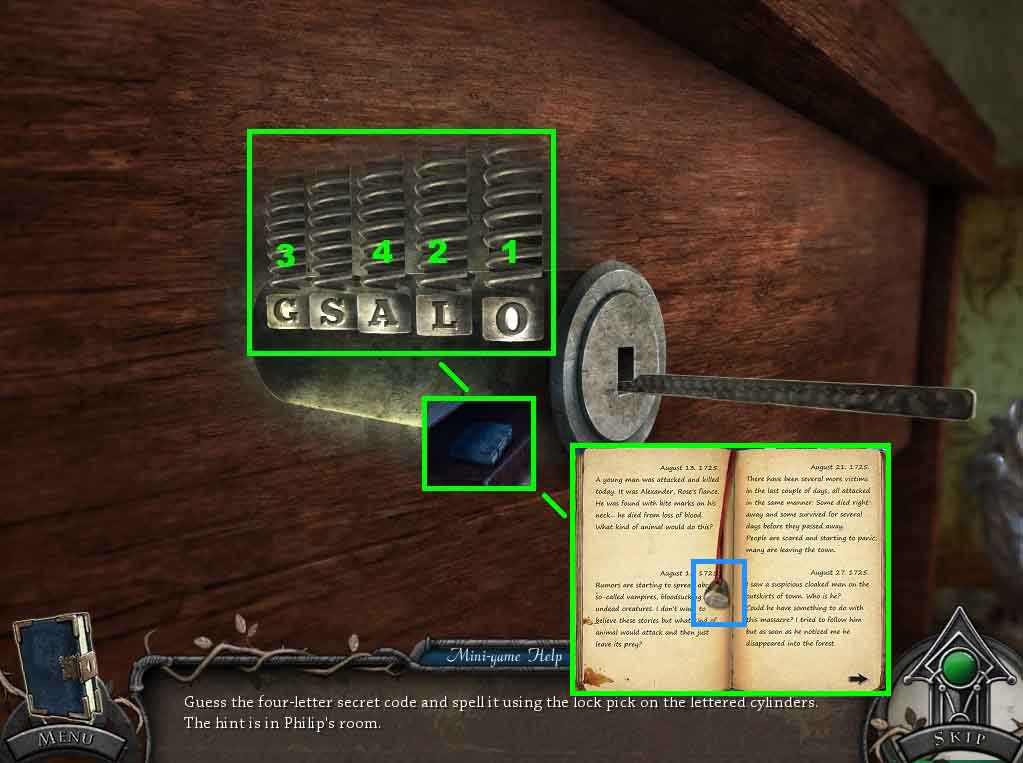
- Click the letters correctly to unlock the lock.
- Solution: O – L – G – A
- Collect the book and collect Philip’s ring.
- Click the pages of the book and read the entries.
- Move back 2 times and move ahead.
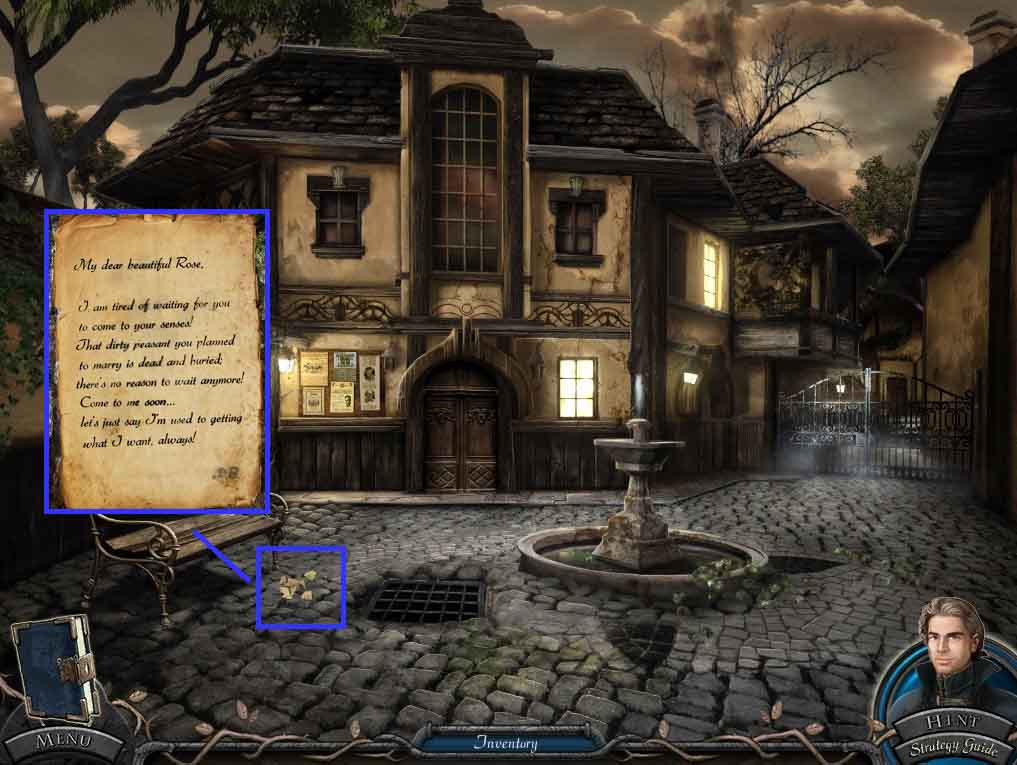
- Collect the letter pieces to trigger a puzzle.
- Assemble the pieces together.
- Collect the assembled letter.
- Move ahead and go into the town hall and move up the stairs.
- Place the lamp onto the desk.
- Select the matches to light the lamp.
- Click the mayor; read the note.
- Collect the mayor’s ring and the dirty empty ink bottle.
- Click the doorway to access a hidden objects area.
- Find the listed items.
- Click the helmet; collect the ladybug.
- Click the cabinet; collect the grouse.
- Click the top drawer; collect the awl.
- Click the center drawer and then click the cloth; collect the apple.
- Move back one time.
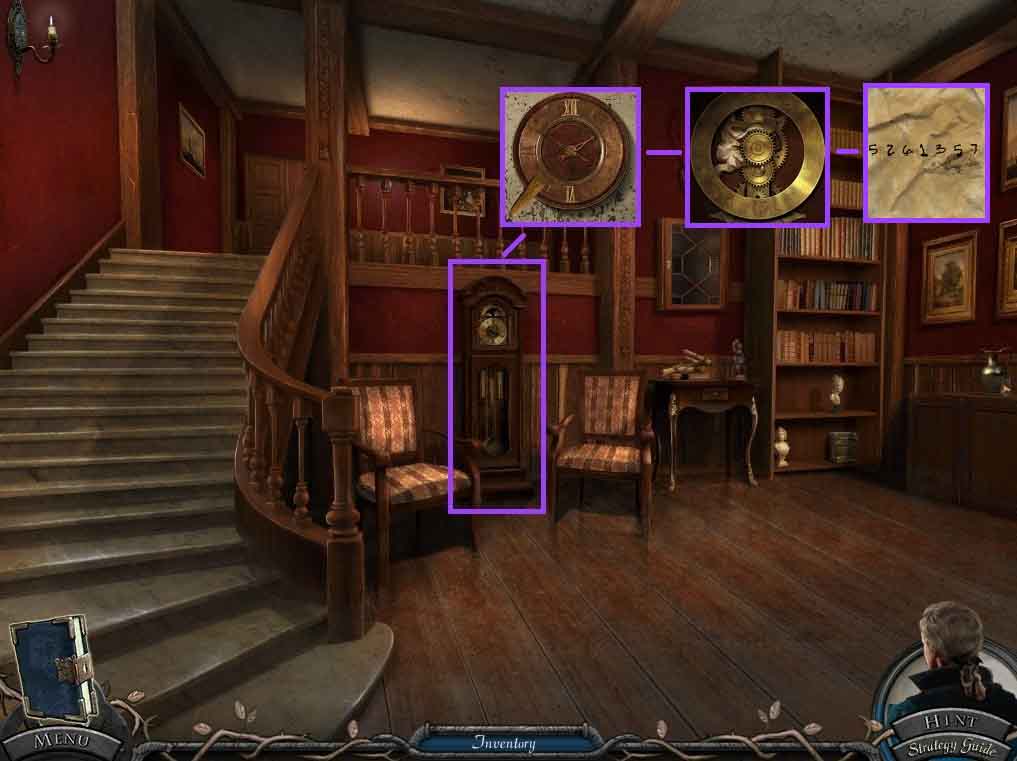
- Click the clock and click it once more.
- Select the awl to open the face and collect the seven digit number.
- Move upstairs.
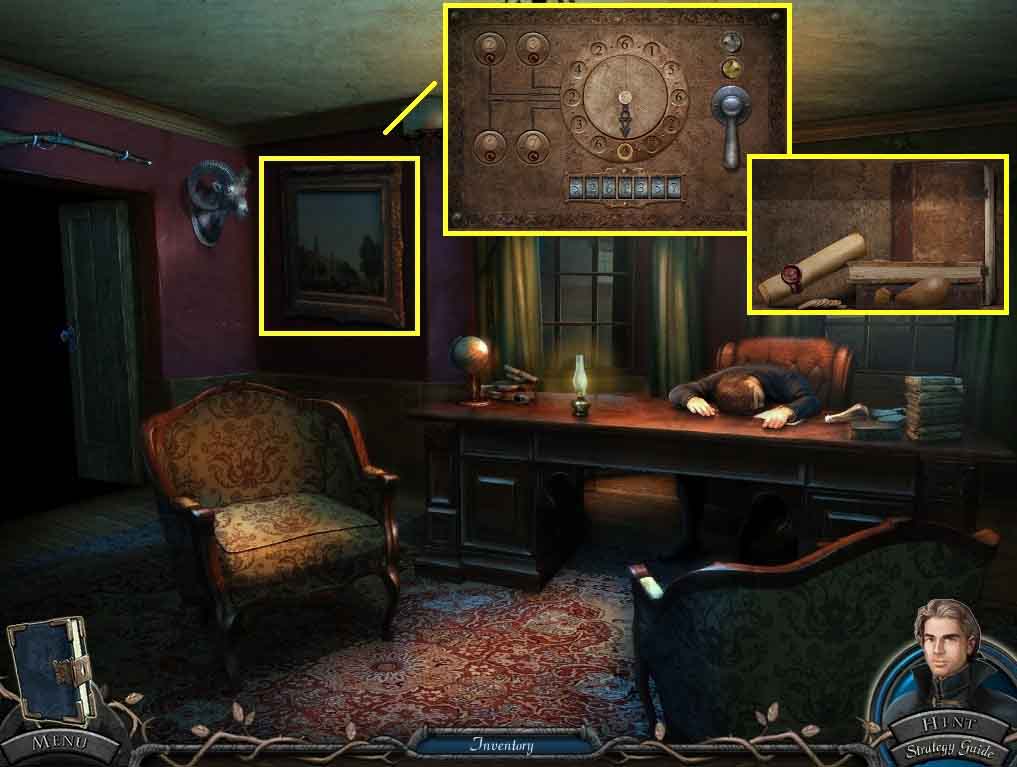
- Click the painting to uncover the safe.
- Insert Philip’s ring and the mayor’s ring into the safe and lay the seven digit number onto the safe for a puzzle to trigger.
- Solve the puzzle by entering the code correctly.
- Once the puzzle is completed, click the safe handle and collect the gunpowder pouch.
- Read the scroll and the book.
- Leave the town hall.
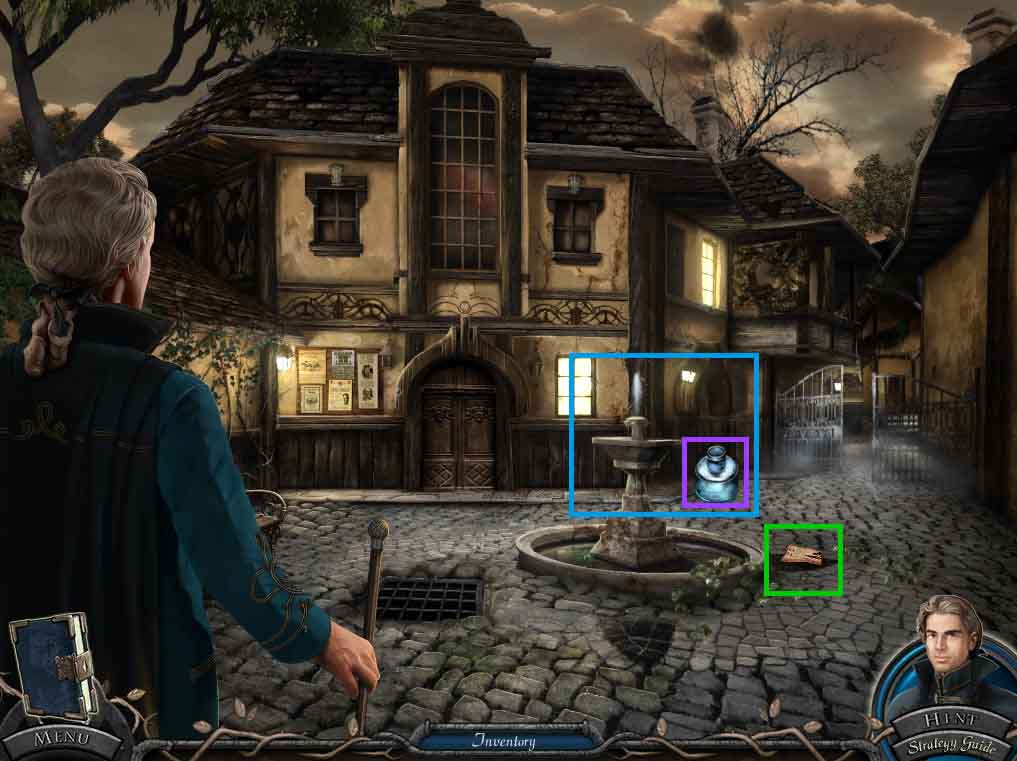
- Collect the note.
- Place the dirty empty ink bottle into the fountain.
- Collect the clean ink bottle.
- Move ahead through the gate.