
Sable Maze: Forbidden Garden: Chapter Six: Fergus
Our Sable Maze: Forbidden Garden Walkthrough will be a valuable companion as you make your way through the labyrinth in search of your kidnapped fiance. Trust our detailed instructions, our custom marked screenshots, and our simple puzzle solutions to help you discover what grudge this mysterious force holds over your family before it's too late for you beloved Ryan.
General Information & Tips
Chapter One: You Have Arrived
Chapter Two: Walking the Grounds
Chapter Three: Castle
Chapter Four: Imprisoned
Chapter Five: Enter the City
Chapter Six: Fergus
Chapter Seven: Home
Chapter Eight: Explore the Gardens
Chapter Nine: Enter the Labyrinth
Chapter Ten: Inside the Armory
Ask for help in the comments below!
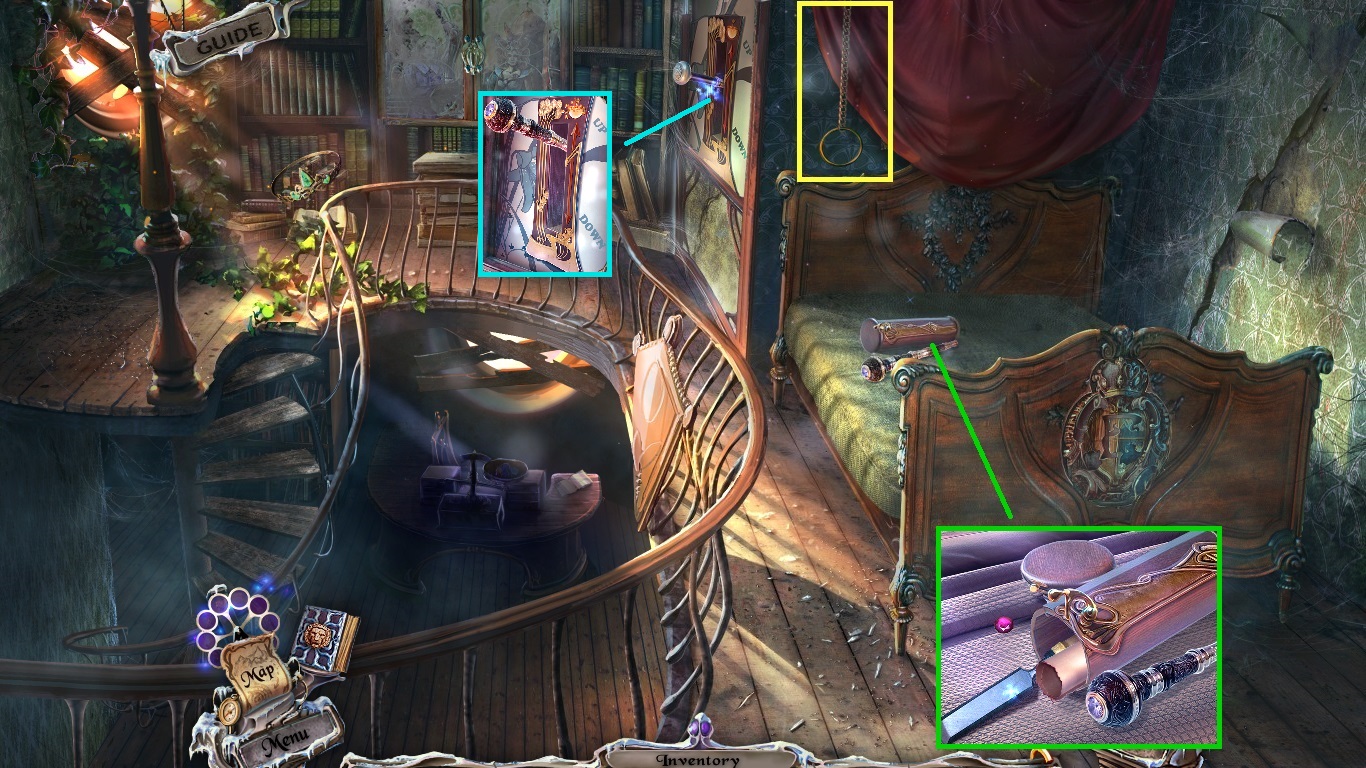
- Click the chain.
- Select the oil to lubricate the latch, click the case open.
- Collect the walking stick, the note, the chisel and 2 /3 gems.
- Click the handle and attach the walking stick; click it once to trigger a hidden objects area.

- Find the fragments.
- Collect the bowl.
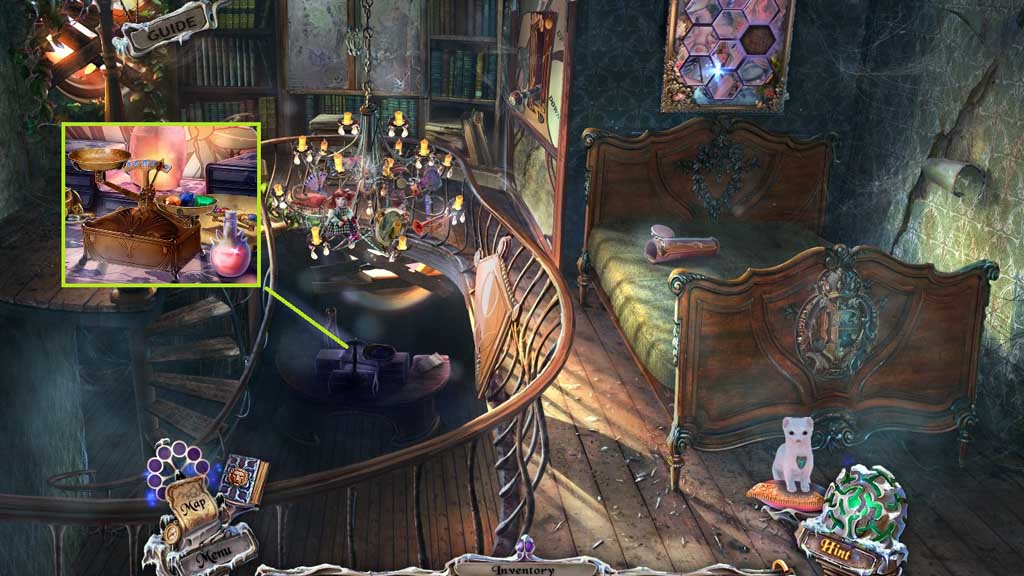
- Place the lit sky lantern onto the desk.
- Collect the red bottle.
- Place the bowl onto the scale.
- Move down once.
- Collect 3 /3 gems using the chisel.
- Move to the right.

- Place the 3 gems onto the scale.
- Collect the key and the spoon.
- Move down 2x’s.
- Insert the key.
- Move ahead.
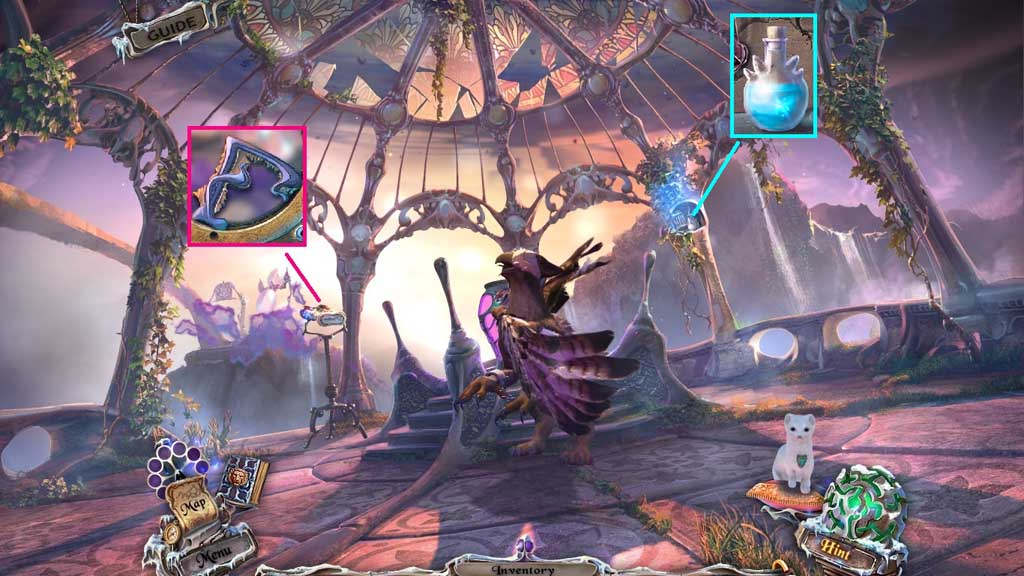
- Collect the letter.
- Collect the blue bottle.
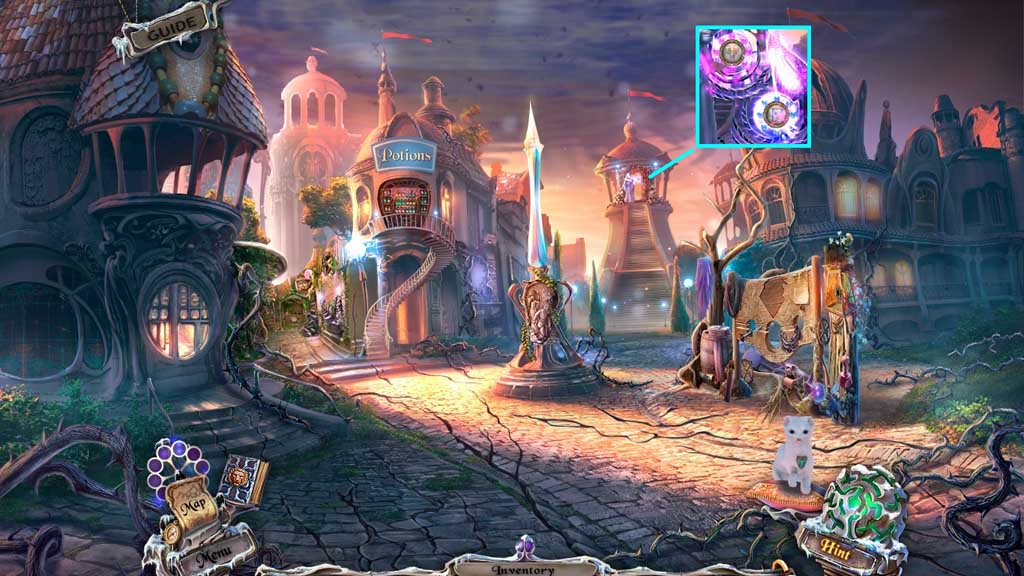
- Move down once.

- Click the potions and place down the white, red and blue bottles to trigger a mini game.
- Solve the game by placing the flasks with their color matched bases.
- Collect the sponge.
- Click the hidden objects area.
- Find the items.
- Select the fragments beneath the items and place them into the square.
- Collect the form.
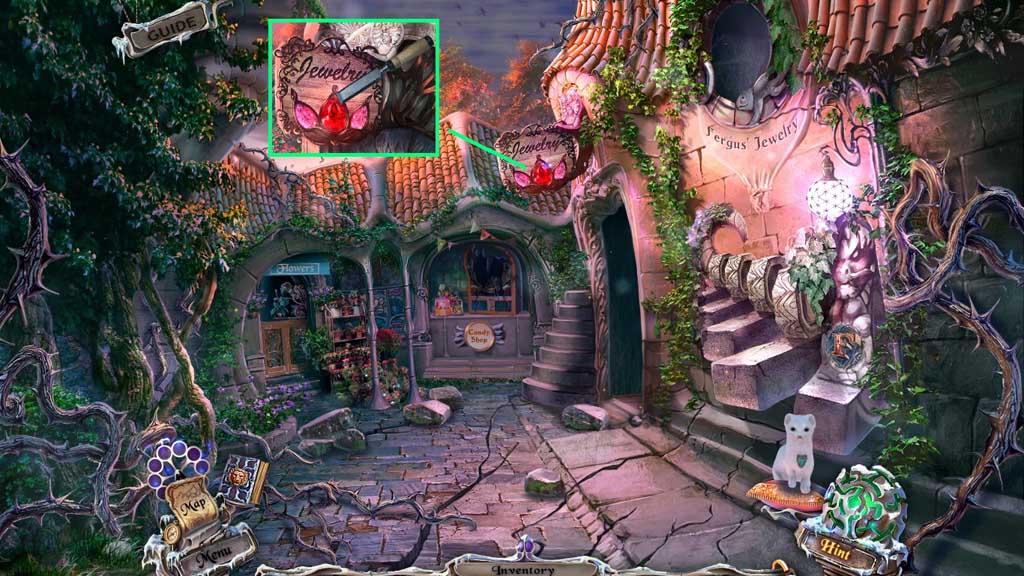
- Move to Fergus’s House.
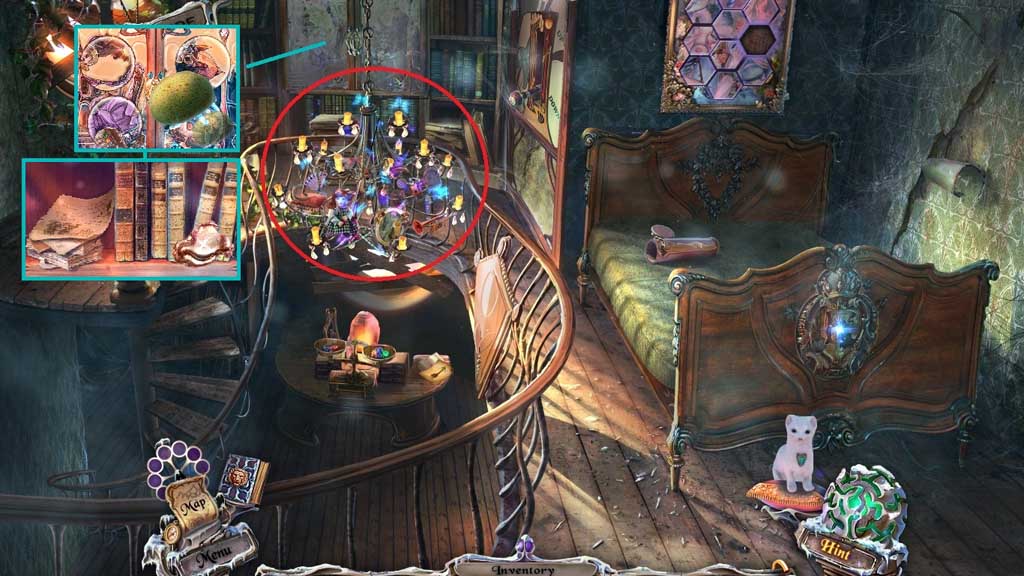
- Select the sponge to clean off the picture and trigger a mini game.
- Solve the game by restoring the image.
- Collect the notes and the tin.
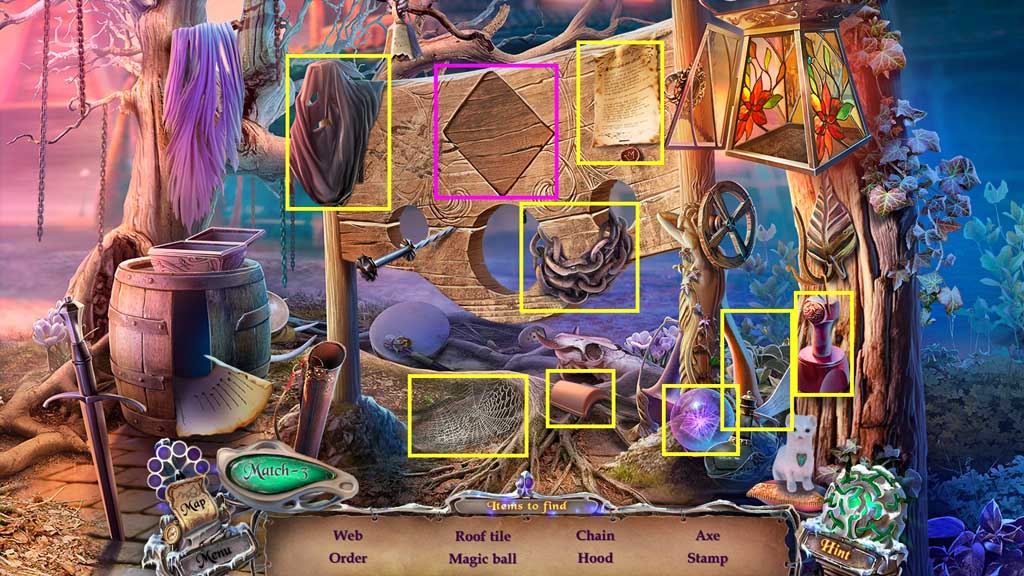
- Click the hidden objects area.
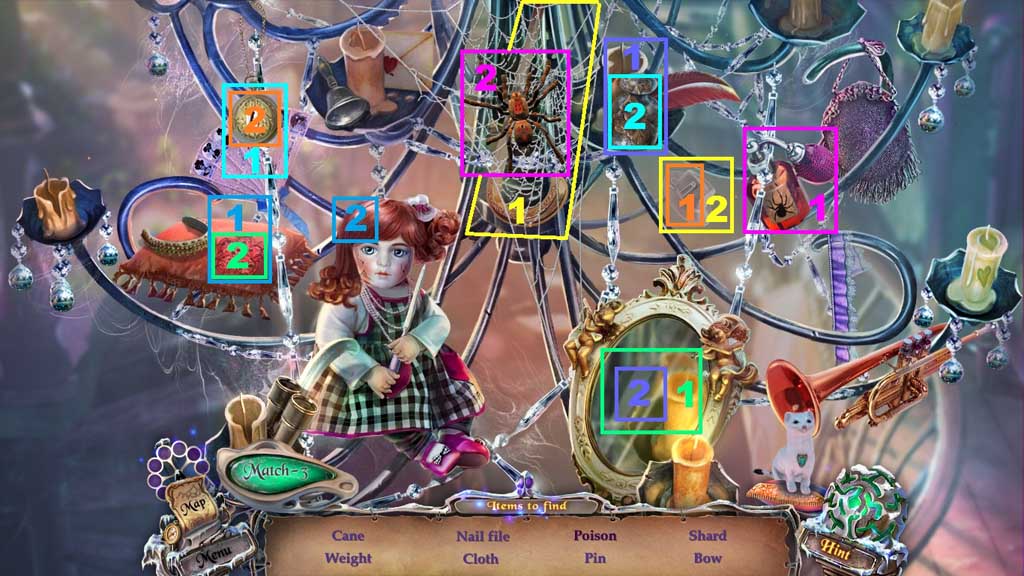
- Find the items.
- Select the poison to remove the spider; collect the cane.
- Use the cane to pull the hat closer; collect the pin.
- Insert the pin into the lock; collect the cloth.
- Use the cloth to clean and collect the weight.
- Use the weight to smash the mirror; collect the shard.
- Use the shard to slice the pillow; collect the bow.
- Place the bow into the dolls hair.
- Collect the nail file.
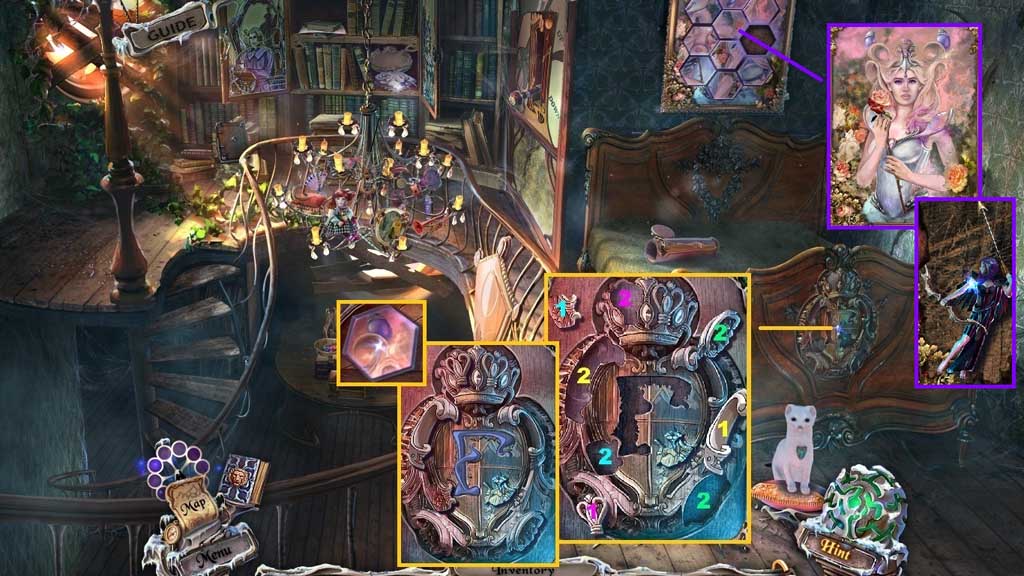
- Zoom into the footboard to trigger a mini game.
- Restore the pieces to solve the game.
- Insert the letter; collect the tile.
- Insert the tile into the frame to trigger a mini game.
- Solve the game by restoring the image.
- Collect the archer statuette.
- Move down once.
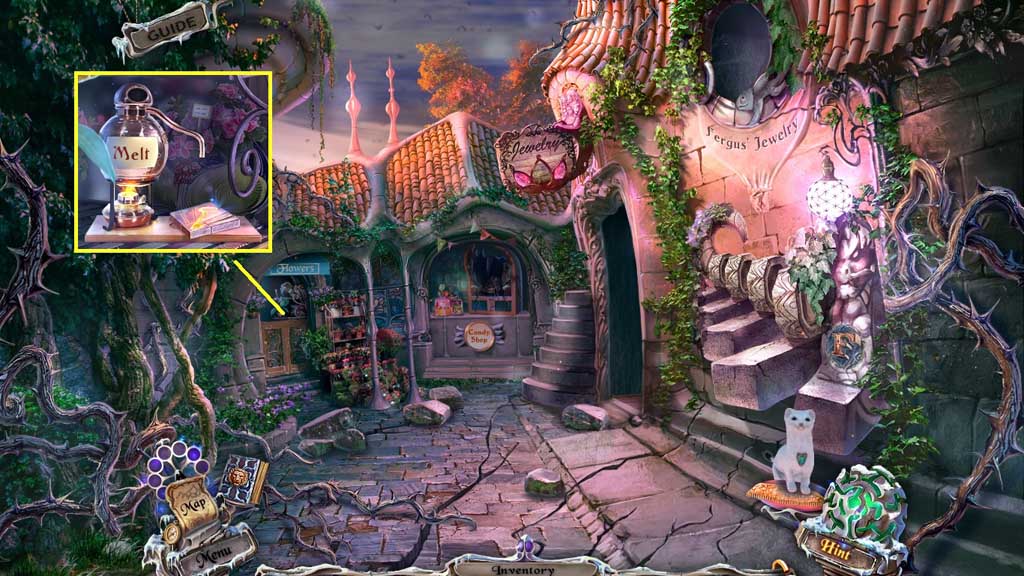
- Place the form onto the stand.
- Select the sponge to wipe the melting pot and insert the tin.
- Collect the form with key.
- Move to the Arbor.
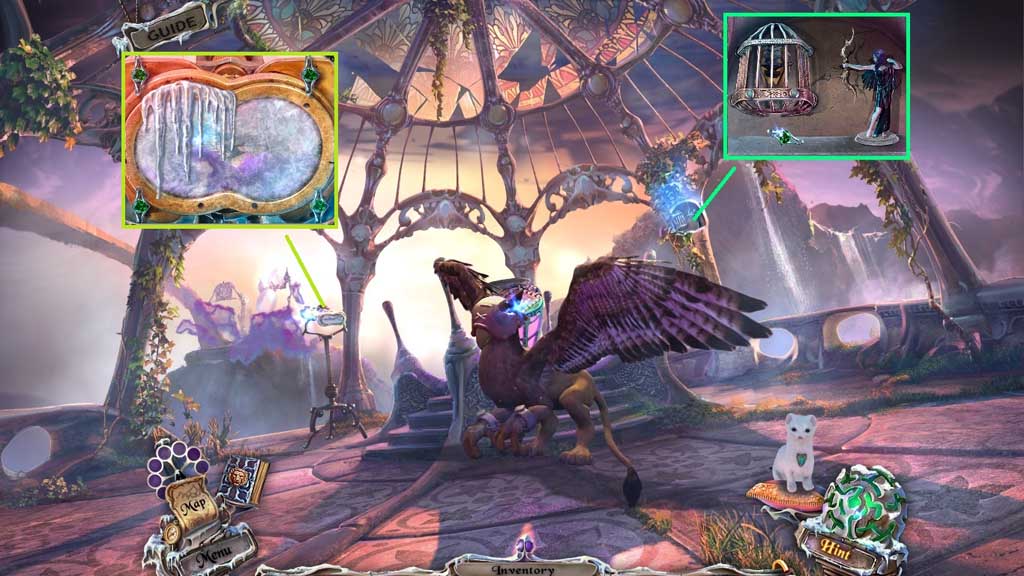
- Place the archer statuette; click it once.
- Collect 2 /2 valves.
- Attach the 2 valves; click each valve one time.
- Collect the ice.
- Create and collect the key by combining the form with key and the ice.
- Give the Griffin the bone.
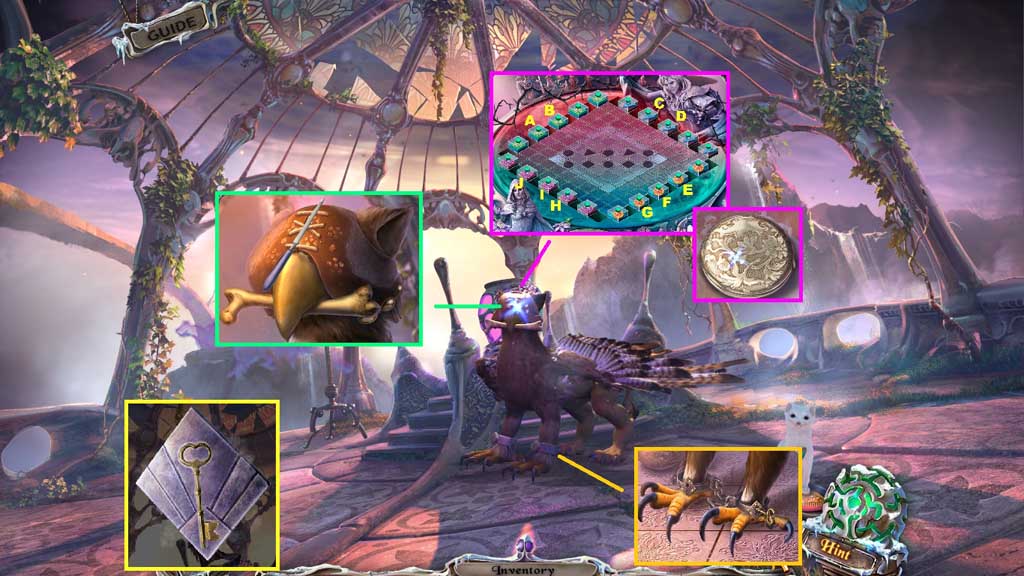
- Select the nail file to remove the stitching.
- Insert the key to release the manacles.
- Click the mini game.
- Solve the game by aligning the symbol tiles as shown on the field.
- Use the following sequence to solve: H x 7 – B x 6 – I x 5 – A x 4 – J x 3 – D x 3 – C x 5- E x 2 – F x 4 – C – G x 6
- Collect the watch with mirror.
General Information & Tips
Chapter One: You Have Arrived
Chapter Two: Walking the Grounds
Chapter Three: Castle
Chapter Four: Imprisoned
Chapter Five: Enter the City
Chapter Six: Fergus
Chapter Seven: Home
Chapter Eight: Explore the Gardens
Chapter Nine: Enter the Labyrinth
Chapter Ten: Inside the Armory
Ask for help in the comments below!
Chapter One: You Have Arrived
Chapter Two: Walking the Grounds
Chapter Three: Castle
Chapter Four: Imprisoned
Chapter Five: Enter the City
Chapter Six: Fergus
Chapter Seven: Home
Chapter Eight: Explore the Gardens
Chapter Nine: Enter the Labyrinth
Chapter Ten: Inside the Armory
Ask for help in the comments below!