
Sable Maze: Forbidden Garden: Chapter Ten: Inside the Armory
Our Sable Maze: Forbidden Garden Walkthrough will be a valuable companion as you make your way through the labyrinth in search of your kidnapped fiance. Trust our detailed instructions, our custom marked screenshots, and our simple puzzle solutions to help you discover what grudge this mysterious force holds over your family before it's too late for you beloved Ryan.
General Information & Tips
Chapter One: You Have Arrived
Chapter Two: Walking the Grounds
Chapter Three: Castle
Chapter Four: Imprisoned
Chapter Five: Enter the City
Chapter Six: Fergus
Chapter Seven: Home
Chapter Eight: Explore the Gardens
Chapter Nine: Enter the Labyrinth
Chapter Ten: Inside the Armory
Ask for help in the comments below!
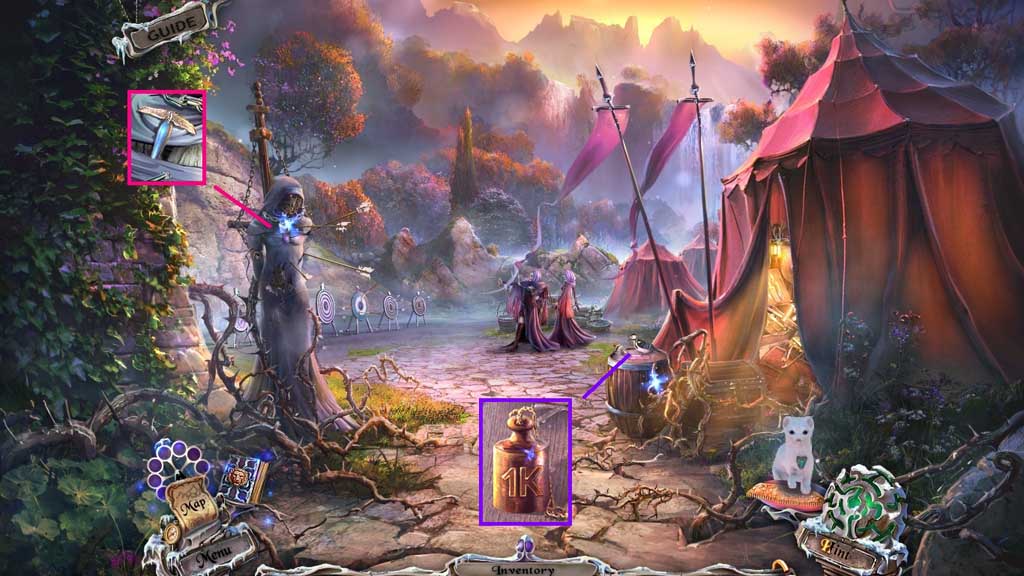
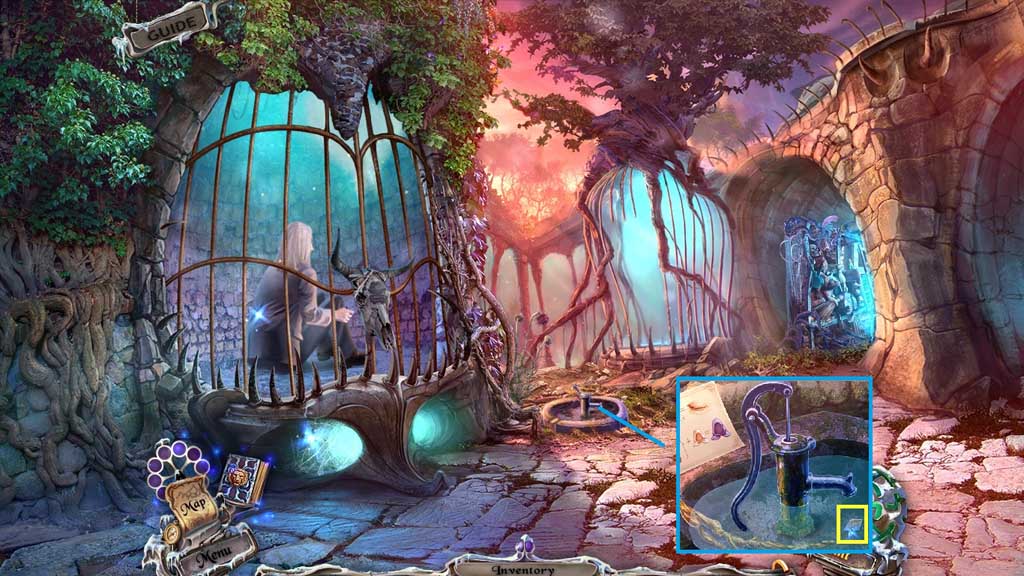
- Select the glass cutter to collect the glass.
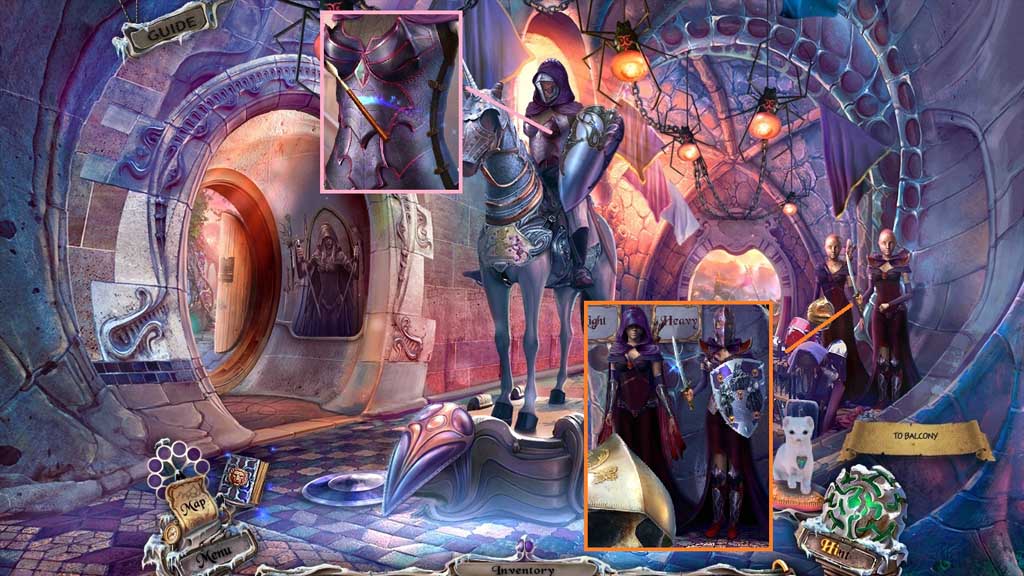
- Collect the picture of fruit and 1 /2 weights.
- Move to the Armory.
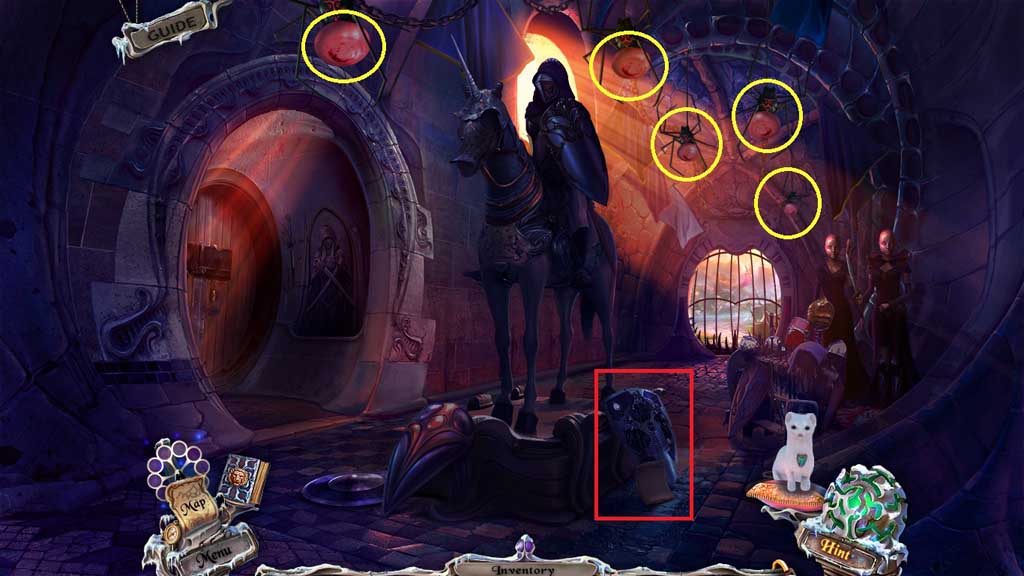
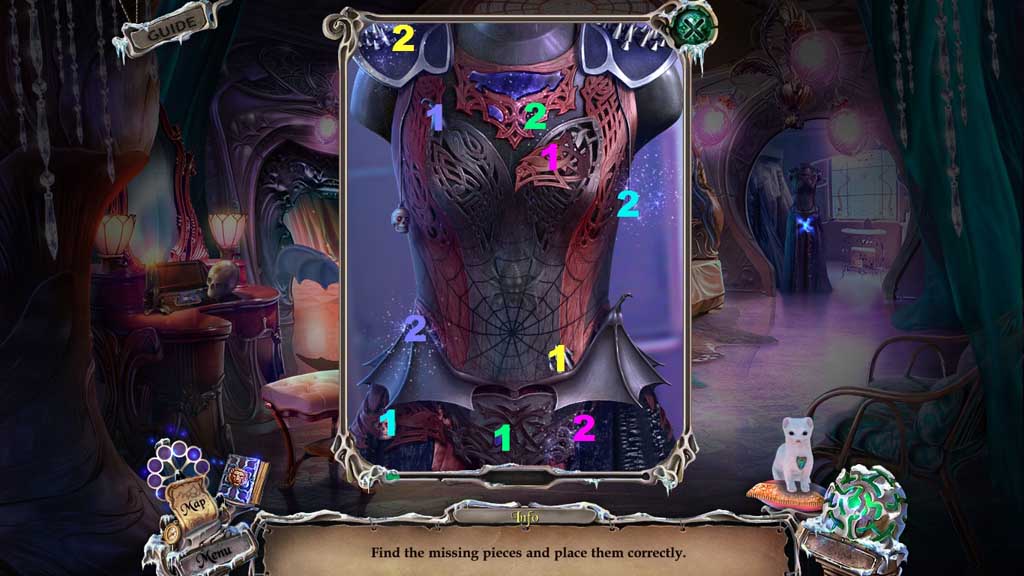
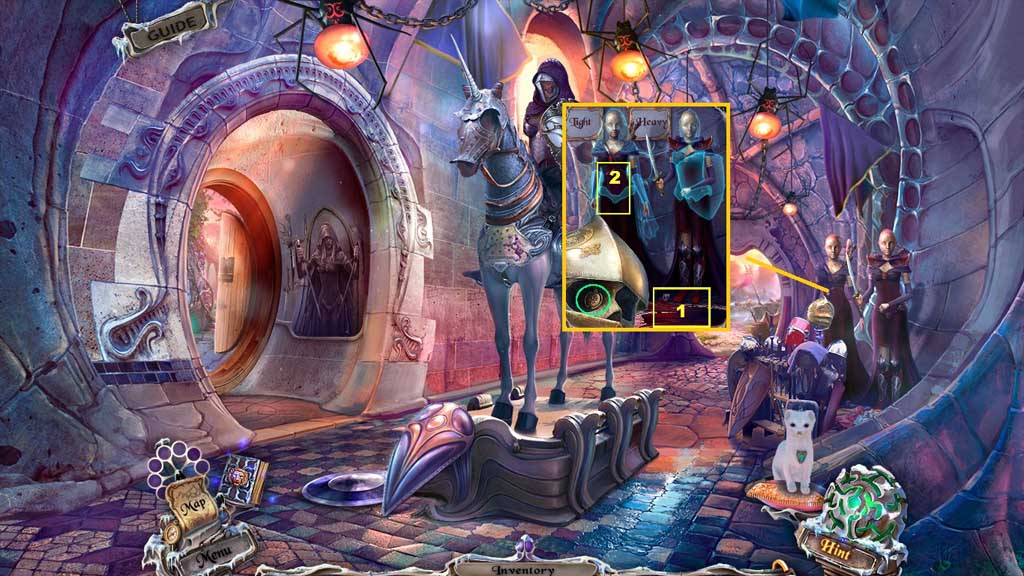
- Click the 5 lights; click the hidden objects area.
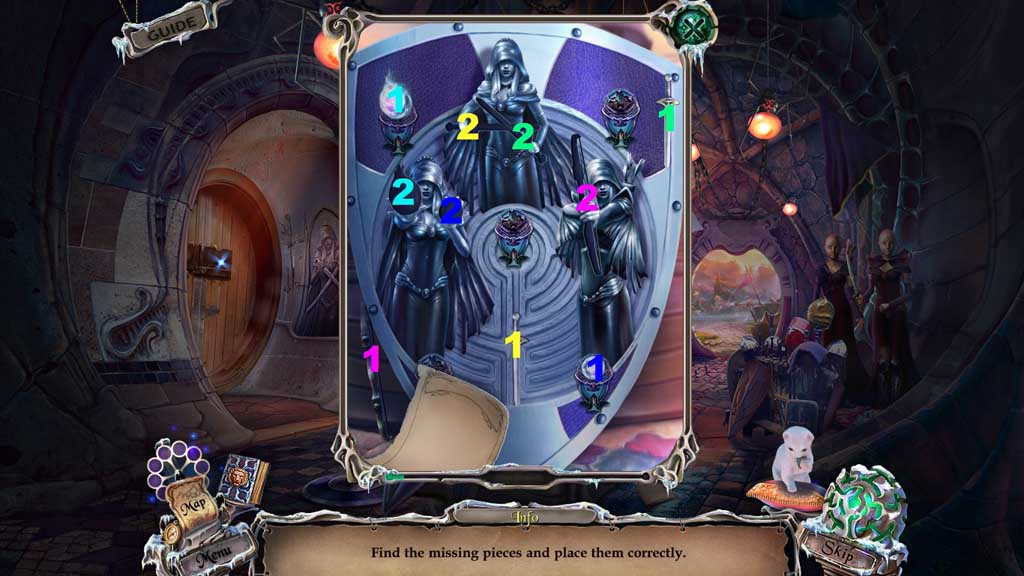
- Find the items and place them correctly.
- Collect the shield.
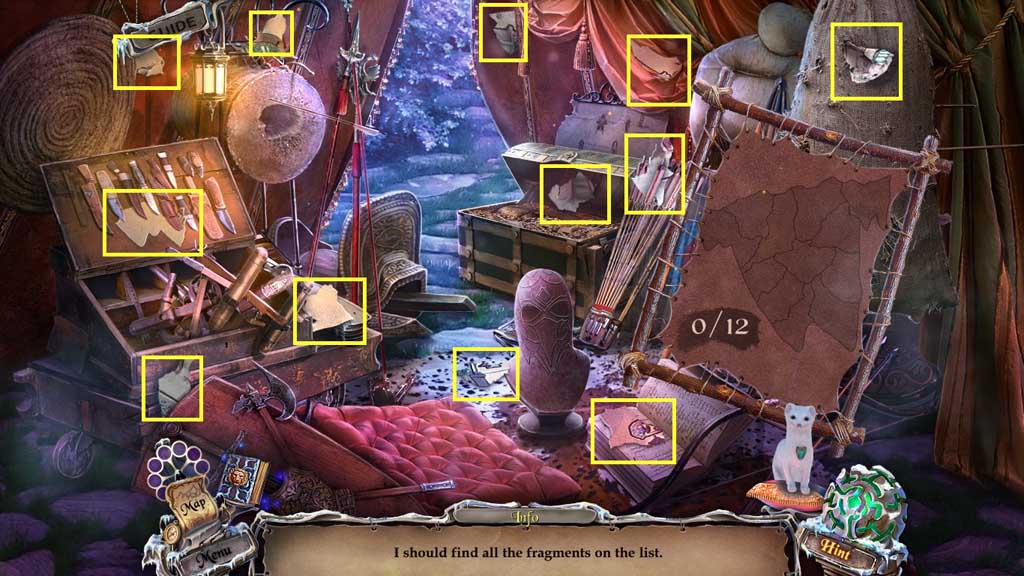
- Move ahead; click the hidden objects area.
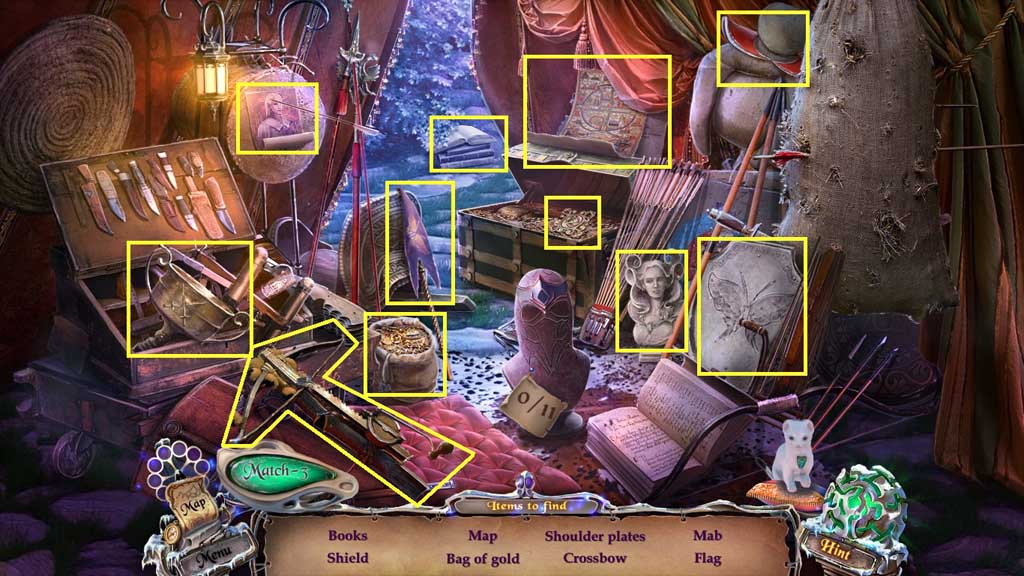
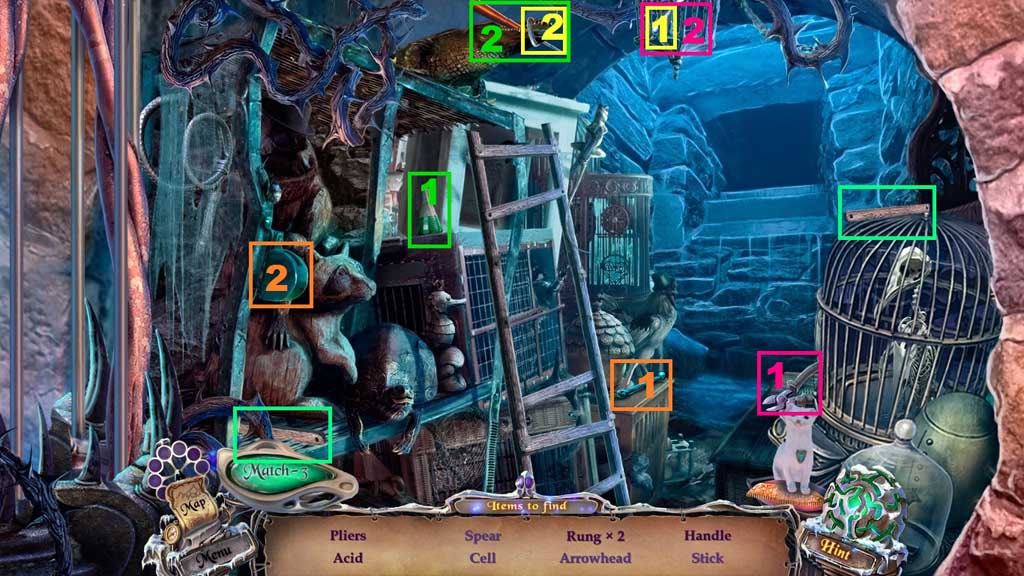
- Find the items.
- Collect the fragments beneath the items and use them to mend the helmet.
- Collect the helmet.
- Collect the handle.
- Collect 2 /2 weights.
- Move down once.
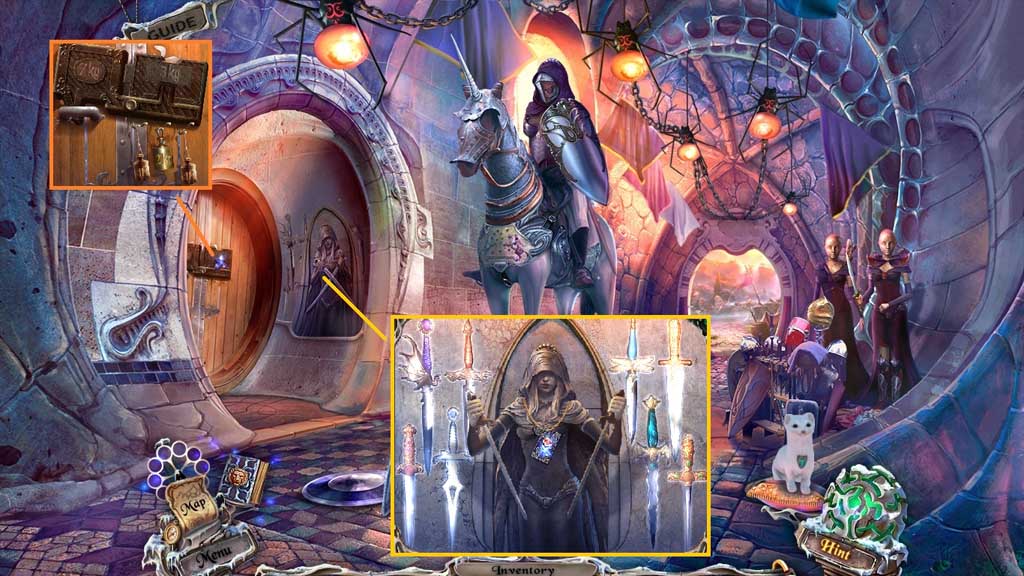
- Place the 2 weights onto the door.
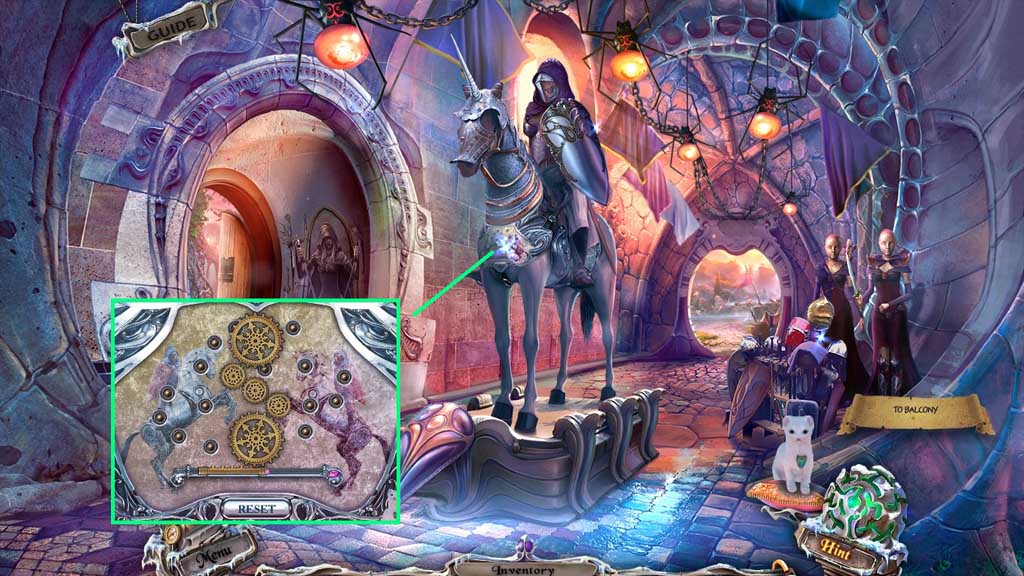
- Insert the handle into the wall to trigger a mini game.
- Solve the game by adjusting the handles correctly.
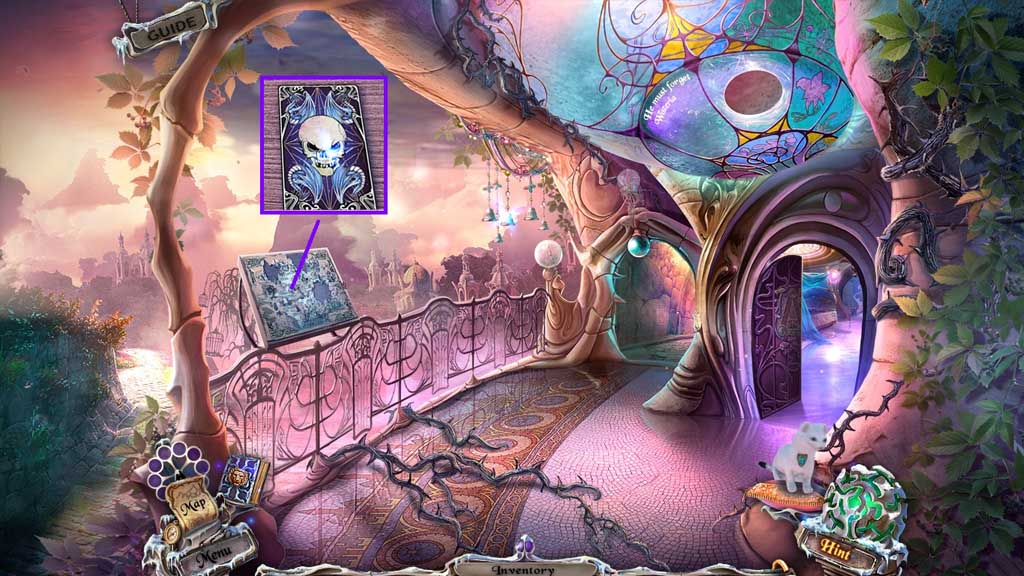
- Collect 1 /6 tarot cards.
- Move to the left.
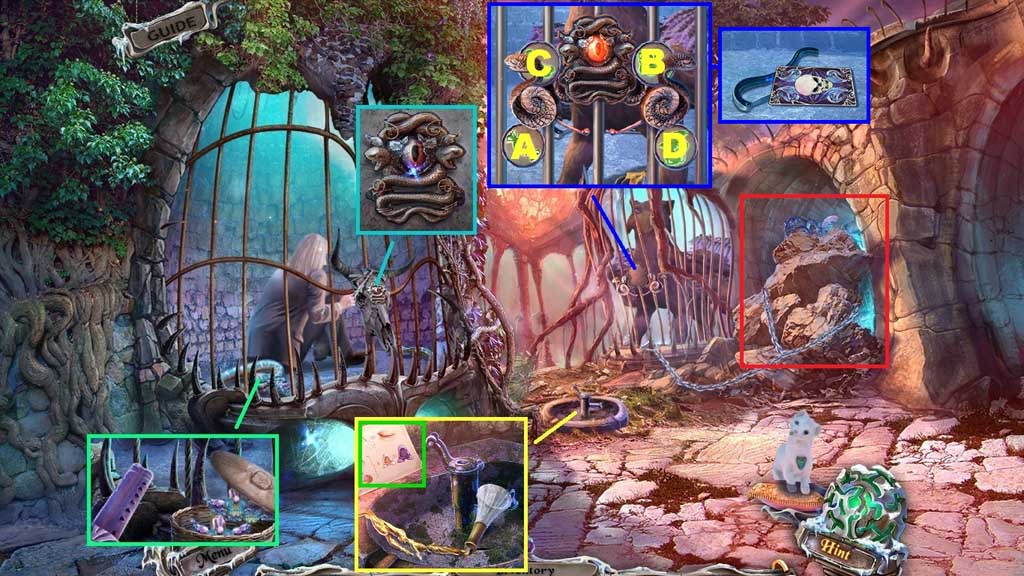
- Collect the tile.
- Place down the basket with snake and select the snake flute to acquire the basket with snakes.
- Read the instructions; pour the bottle with resin onto the crack.
- Insert the tile and click the outer tiles in order.
- Collect 2 /6 tarot cards and the lever.
- Click the hidden objects area.
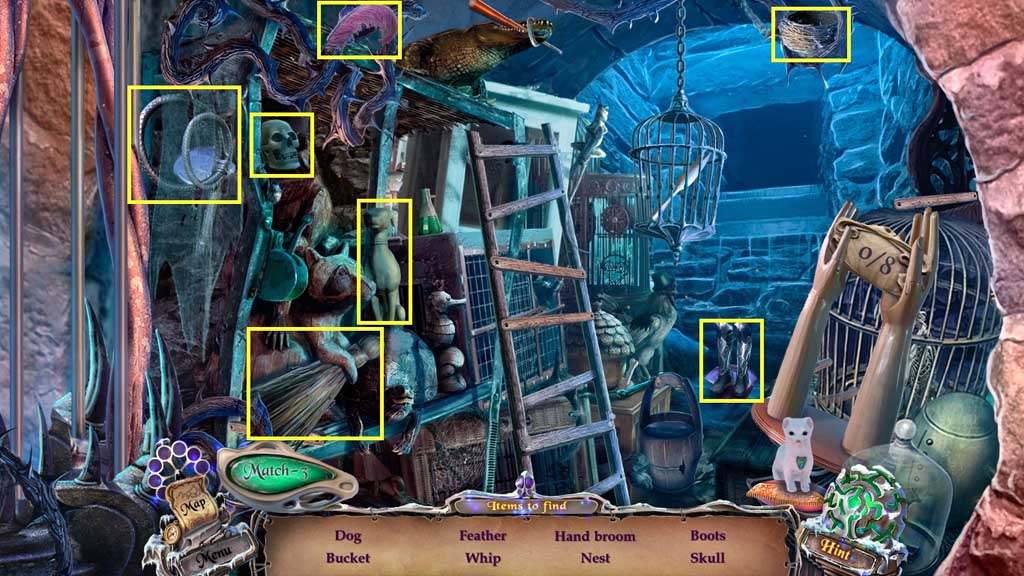
- Find the items.
- Collect the fragments beneath the items and use them to create the gauntlets.
- Collect the gauntlets.
- Place the lever onto the pump; collect 2 /2 tiles.
- Move down 2x’s.
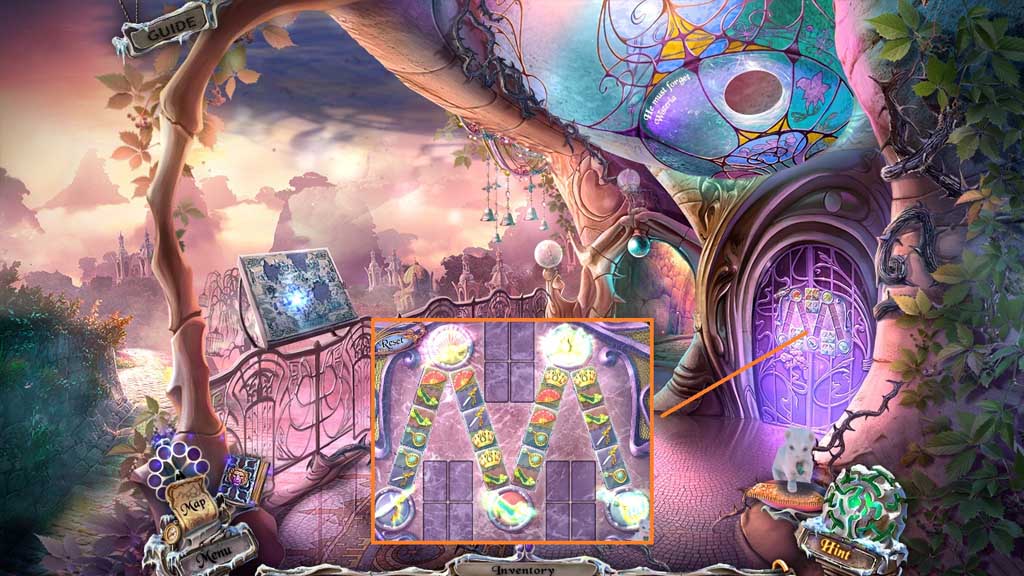
- Zoom into the door and place the 2 tiles onto the board to trigger a mini game.
- Solve the game by matching the dominoes end to end correctly.
- Move to the right.
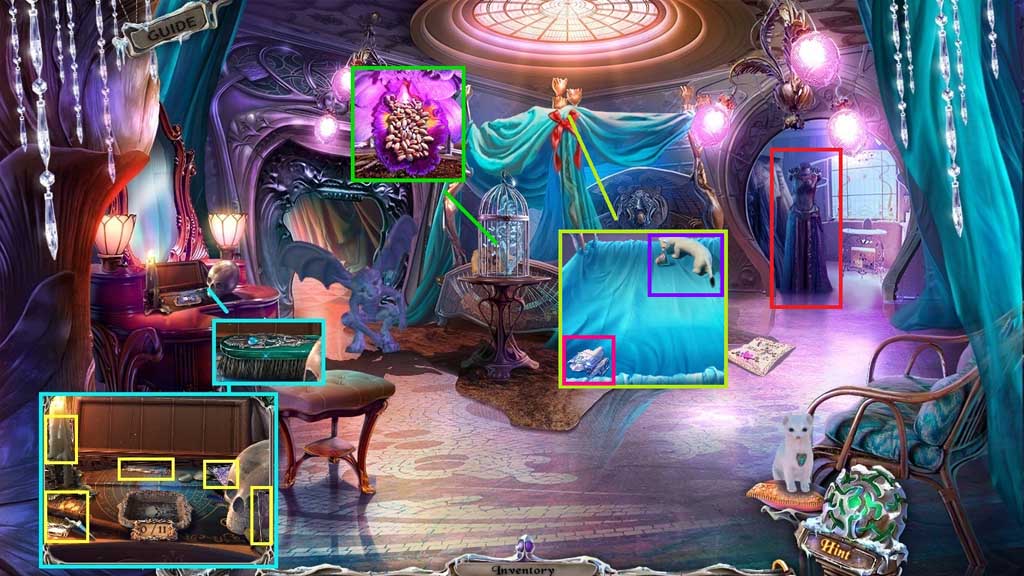
- Collect the brush.
- Click the 5 tarot cards.
- Read the note.
- Click the cage and select the scepter to melt the ice.
- Insert the bird; collect the grain.
- Collect 2 /3 maps of Mab’s Palace.
- Select the ermine to collect 2 /3 bells.
- Click the hidden objects area.
- Find the items and place them correctly.
- Collect the spider tile.

- Collect the torch; insert the spider tile.
- Collect 3 /6 tarot cards and the diary.
- Click the hidden objects area on the diary.
- Find the items and place them correctly.
- Click the diary open; collect the instructions.
- Move to the Armory.
- Select the brush to scrub the corrosion; collect the medallion.
- Click the cape and the belt from the floor and place it onto the soldier on the left.
- Place the gauntlets onto her arms.
- Place the shield and the helmet onto the soldier on the right.
- Move to the left.

- Select the torch to clear the cobwebs.
- Select the ermine to collect the gear.
- Move down once.
- Insert the gear to trigger a mini game.
- Solve the game by aligning the gears correctly.
- Move ahead.
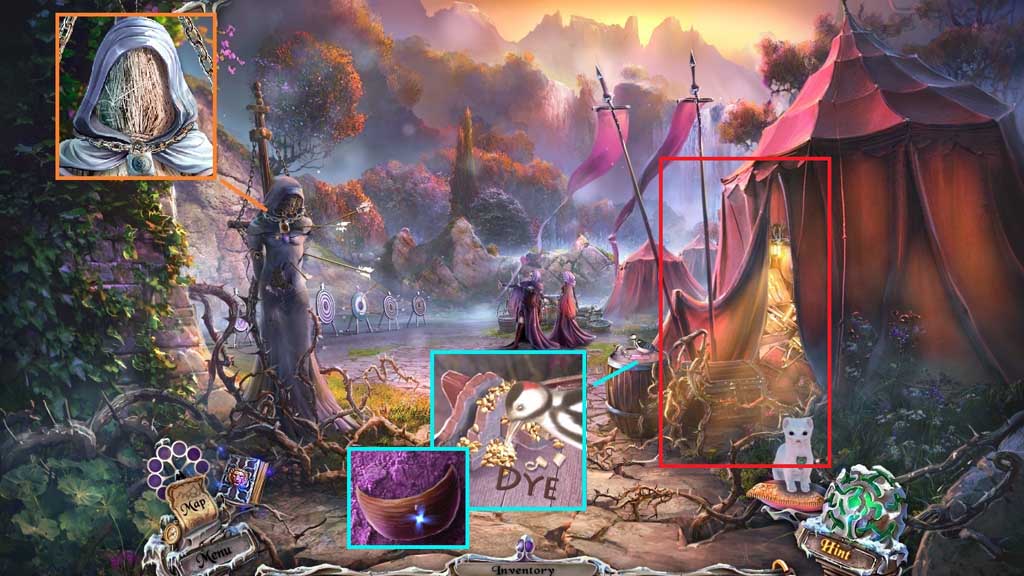
- Insert the medallion; collect the light hood.
- Place the grain onto the barrel.
- Collect the dye.
- Click the hidden objects area.
- Find the map fragments.
- Collect 3 /3 maps of Mab’s Palace.
- Move down 2x’s.
- Insert the 3 maps of Mab’s Palace.
- Collect 4 /6 tarot cards.
- Move to the Menagerie.
- Toss the dye and the light hood into the water.
- Collect the dark hood.
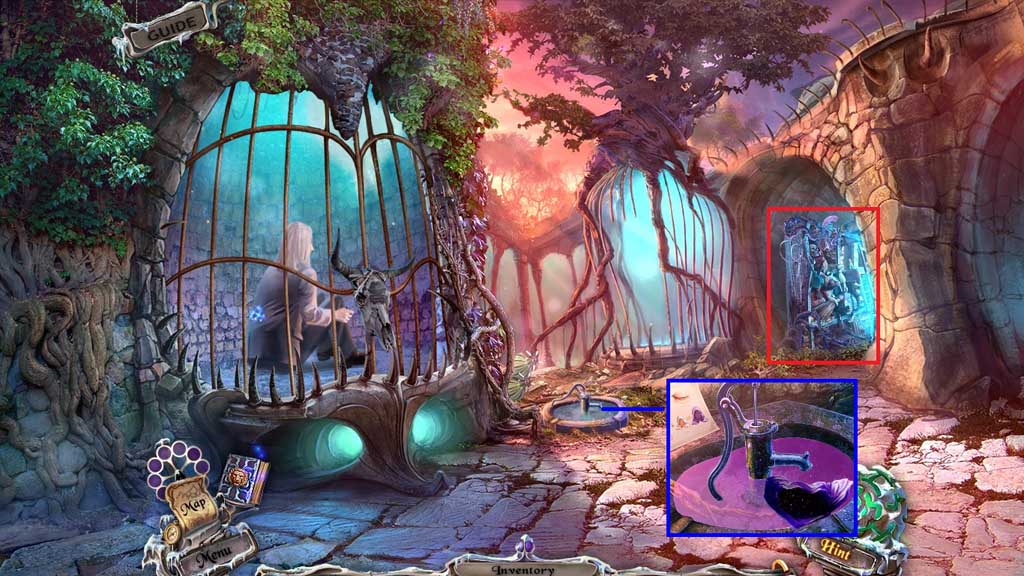
- Click the hidden objects area.
- Find the items.
- Select the lever and insert it into the mechanism; click it once.
- Select the pliers and use it to open the cage; collect the spear head.
- Select the acid to remove the ring on the alligator.
- Place the spear head onto the rod in the alligator’s mouth.
- Collect the spear.
- Move down once.
- Select the spear to collect the armor.
- Place the dark hood and the armor onto the soldiers.
- Collect the armor.
- Move ahead.

- Select the armor to give to the soldiers in the field.
- Select the spear to strike the target.
- Collect 3 /3 bells.
- Select the basket of snakes to scare the soldier in the field away.
- Collect the rasp.
- Move down once and go left.
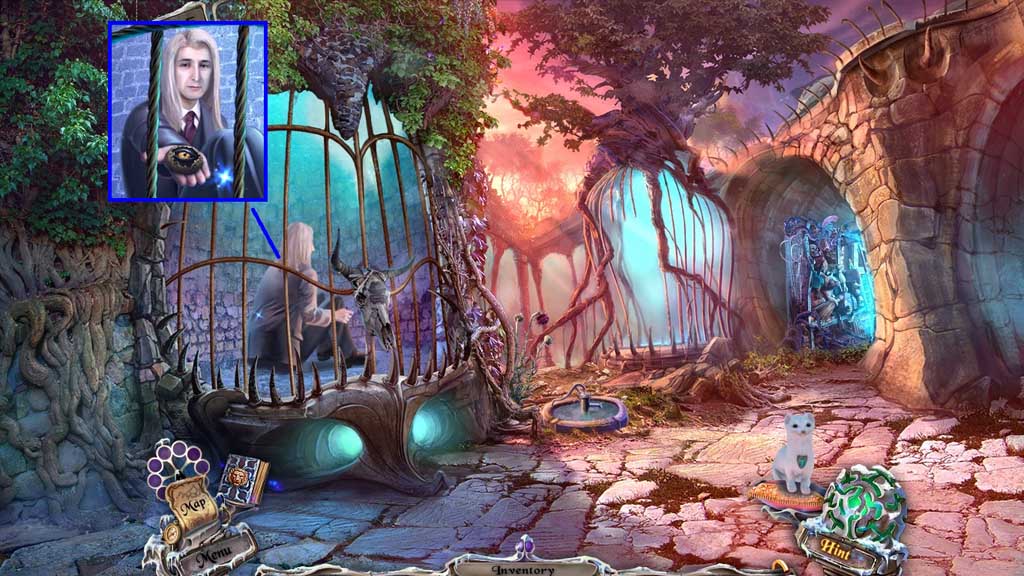
- Select the rasp to give to father.
- Collect the eye tile.
- Move down 2x’s.
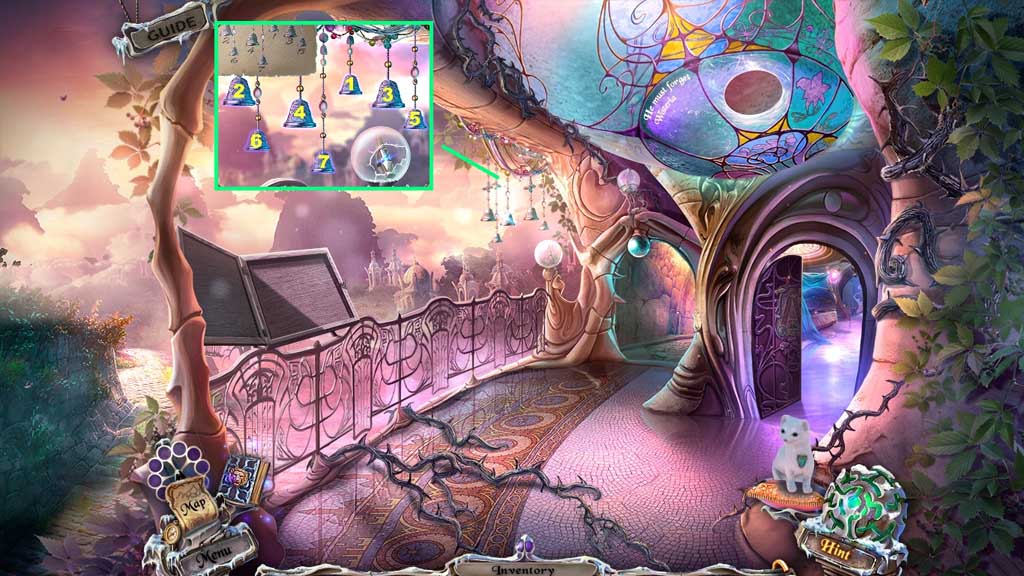
- Hang 3 bells to trigger a mini game.
- Solve the game by clicking the bells in the correct sequence.
- Collect the whistle.
- Move to the right.
- Blow the whistle to remove the gargoyle.
- Move to the left.
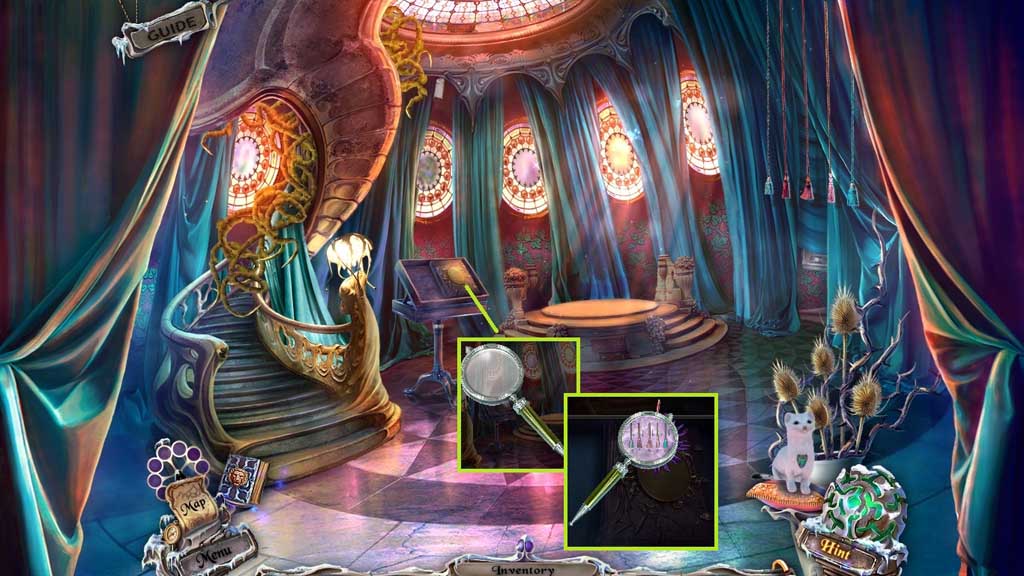
- Collect the magnifier frame and combine it with the glass.
- Collect the magnifier.
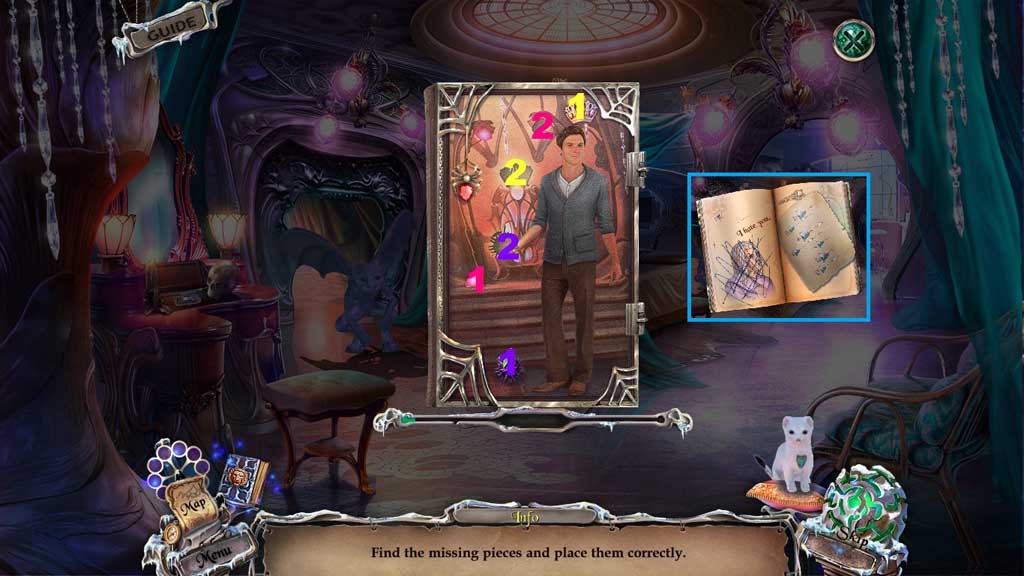
- Select the picture of fruit and place it onto the book.
- Use the magnifier for a closer view.
- Collect the instructions.
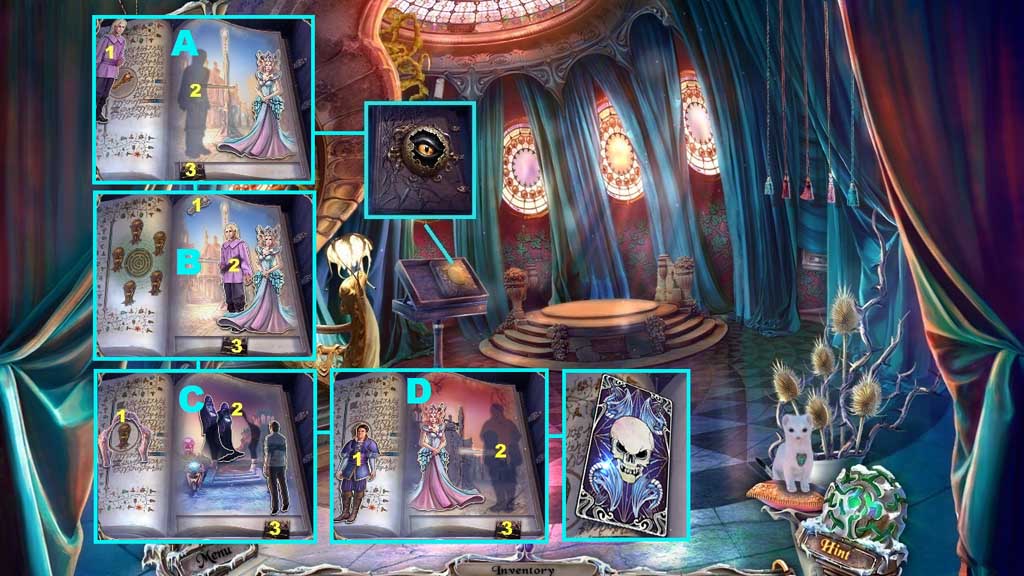
- Insert the eye tile; click it once a mini game will trigger.
- Solve the game finding the items and placing them correctly.
- Collect 5 /6 tarot cards.
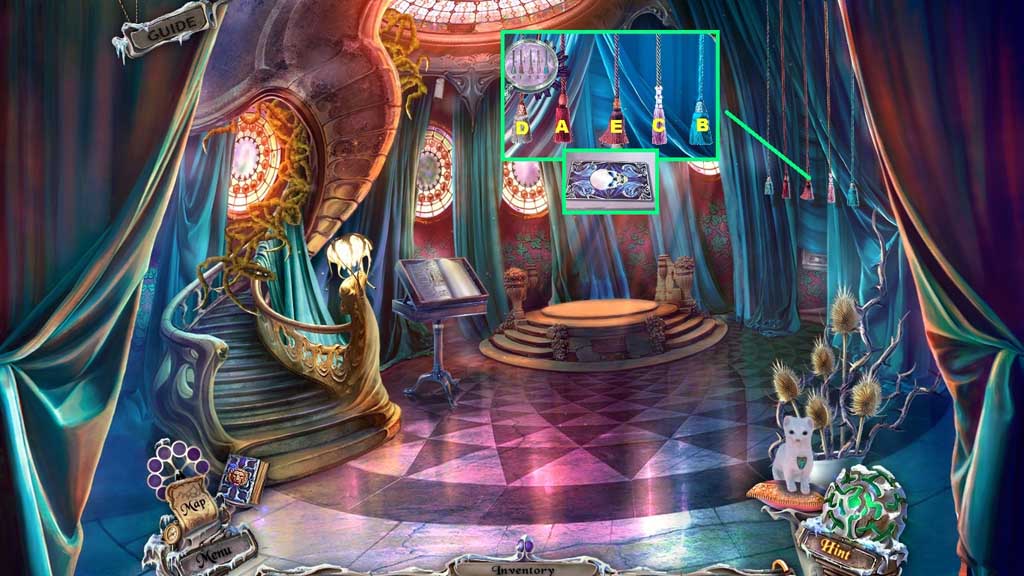
- Click the cords in the correct order.
- Collect 6 /6 tarot cards.
- Move down once.
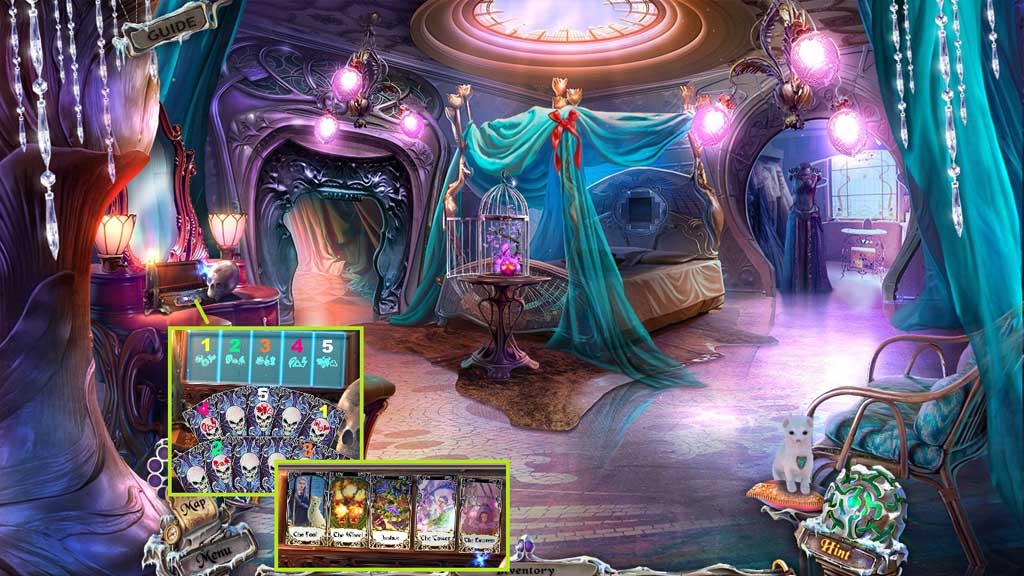
- Place the 6 tarot cards into the card holder and click the stack.
- Pick the 5 cards; collect the 5 tarot cards.
- Move to the left.
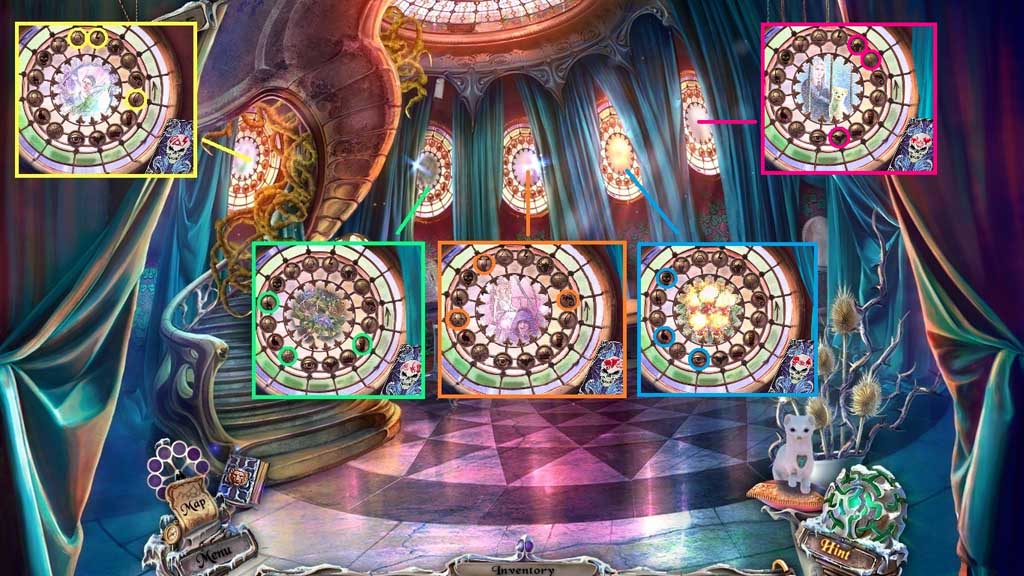
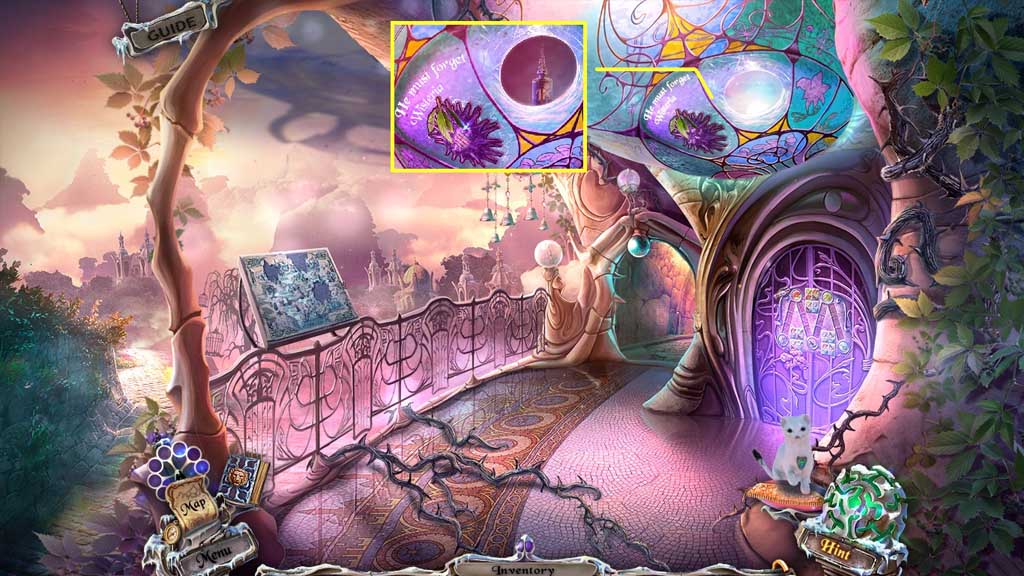
- Zoom into the stained glass windows.
- Click the center 2x’s and place down the matching tarot card.
- Click the 3 matching symbols.
- Do this for each stained glass window.
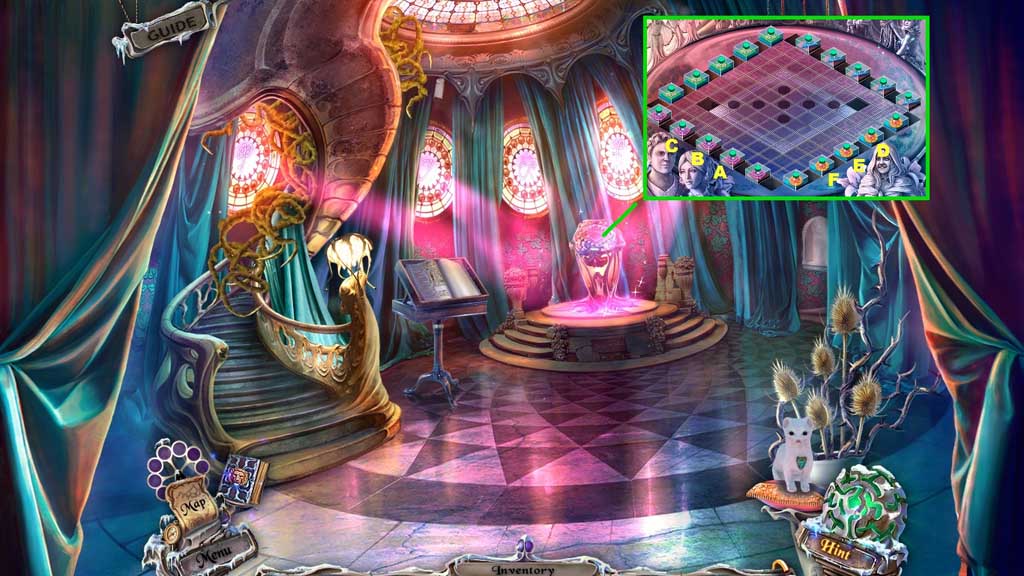
- Click the seal on the dais to trigger a mini game.
- Solve the game by aligning the symbol tiles as shown on the field.
- Use the following sequence to solve: F x 7 – C x 2 – F x 4 – E x 6 – D x 6 – A x 6 - B x 3
- Move upstairs.
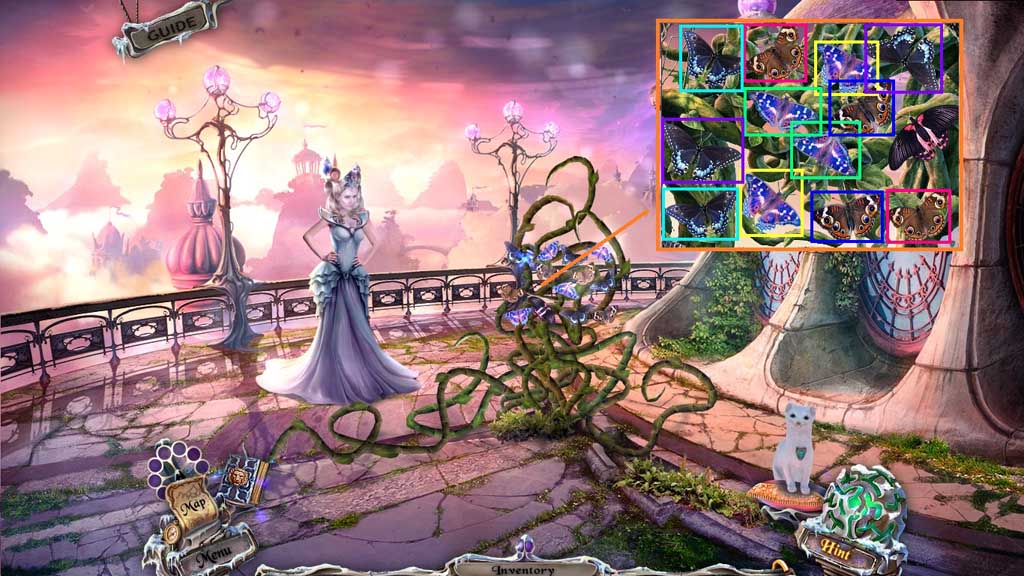
- Zoom into butterflies.
- Click the butterfly pairs.
- Congratulations! You have successfully completed the main game of Sable Maze: Forbidden Garden C. E.
General Information & Tips
Chapter One: You Have Arrived
Chapter Two: Walking the Grounds
Chapter Three: Castle
Chapter Four: Imprisoned
Chapter Five: Enter the City
Chapter Six: Fergus
Chapter Seven: Home
Chapter Eight: Explore the Gardens
Chapter Nine: Enter the Labyrinth
Chapter Ten: Inside the Armory
Ask for help in the comments below!
Chapter One: You Have Arrived
Chapter Two: Walking the Grounds
Chapter Three: Castle
Chapter Four: Imprisoned
Chapter Five: Enter the City
Chapter Six: Fergus
Chapter Seven: Home
Chapter Eight: Explore the Gardens
Chapter Nine: Enter the Labyrinth
Chapter Ten: Inside the Armory
Ask for help in the comments below!