Redemption Cemetery: Grave Testimony: Chapter 9: The Ship
The Redemption Cemetery: Grave Testimony Walkthrough will guide you through each chilling moment of this exciting hidden object adventure game. After witnessing a terrible murder, you find yourself at the mercy of gangsters on a cursed island moments from being buried alive. Suddenly, the gangsters are set upon by some unknown force and dragged under the deadly waters surrounding the island. Can you find your way off this cursed land alive? With our Redemption Cemetery: Grave Testimony Walkthrough you can!
Chapter 1: Intro and Skull Hill
Chapter 2: The Mining Town
Chapter 3: The Chapel
Chapter 4: The Mine
Chapter 5: The Small Town
Chapter 6: The Judge's House
Chapter 7: The Swamp
Chapter 8: The Secret Lab
Chapter 9: The Ship
Chapter 10: The End
Bonus Chapter
Ask for help in the comments below!
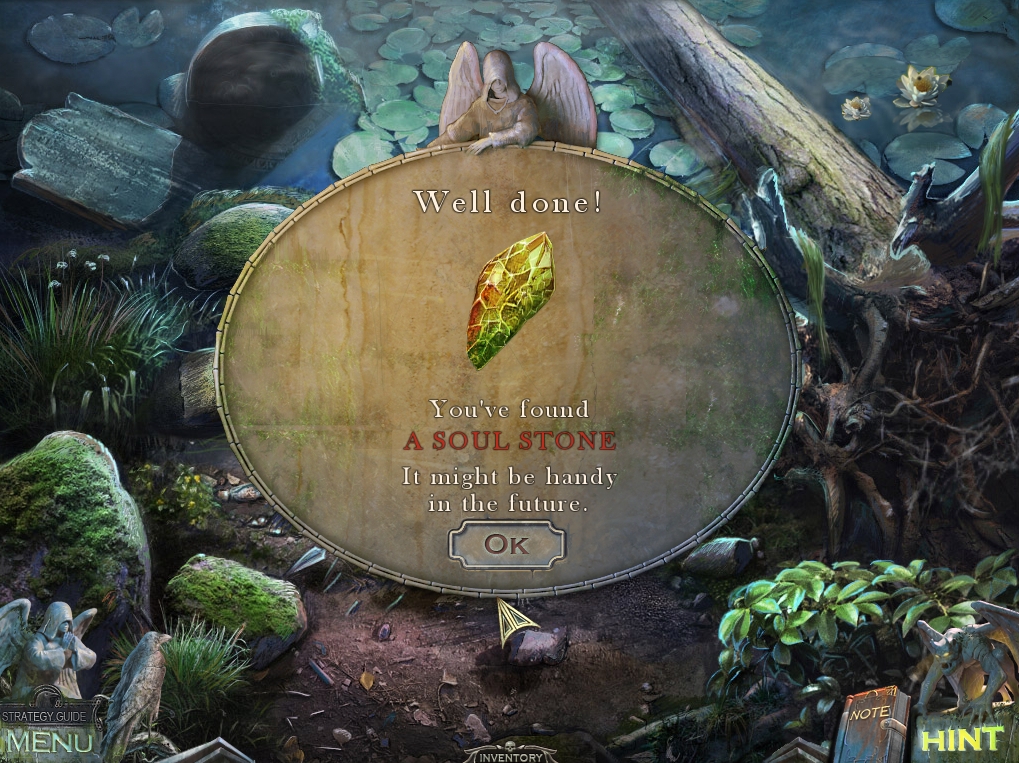
- Talk to the ghost in the water.
- Take the SOUL STONE that he leaves behind in the swamp.
-
Go back and right to the Lake of Death.
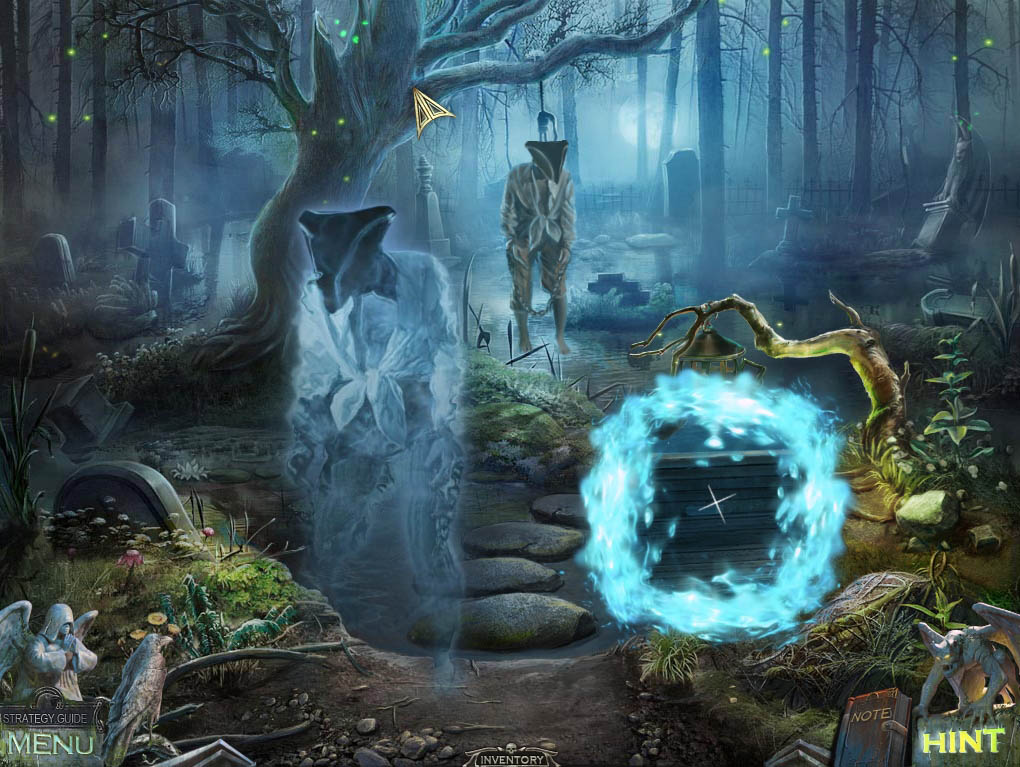
- Talk with the ghost here who will open a portal to the ship’s deck.
-
Go through the portal.
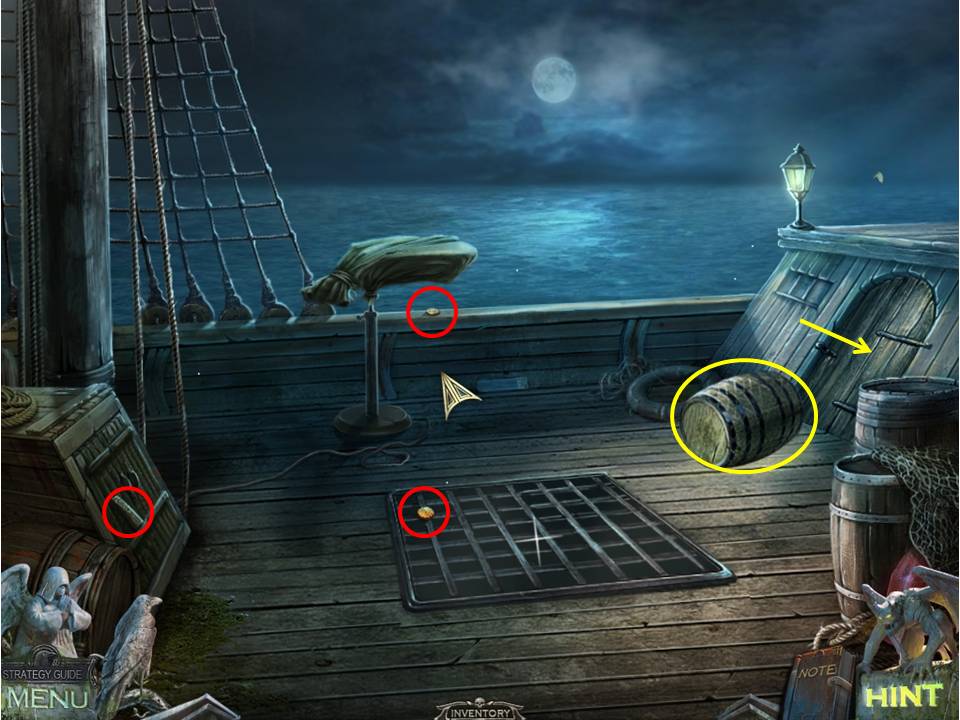
- Zoom into the grate in the deck.
- Take the COIN and note the sailor trapped below – listen to him or a key scene later will not play out.
- Zoom into the wooden hatch doors on the left. Take the WEDGE.
- Zoom into the bundle near the railing on the far edge.
- Take the COIN sitting on the railing. WEDGE the rolling barrel on the right.
-
Open the door at right and go inside.
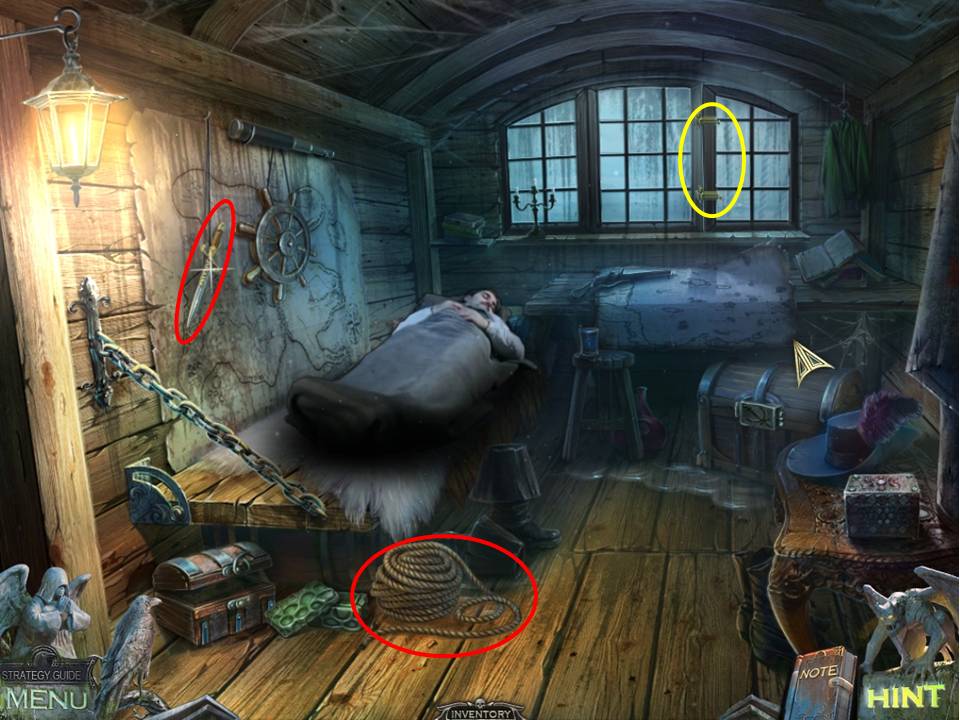
- Take the ROPE and DIRK.
- Talk to the man in the bed.
- Zoom into the window.
- Secure the latches with the two COINS.
-
Look outside the now-open window to initiate a puzzle.
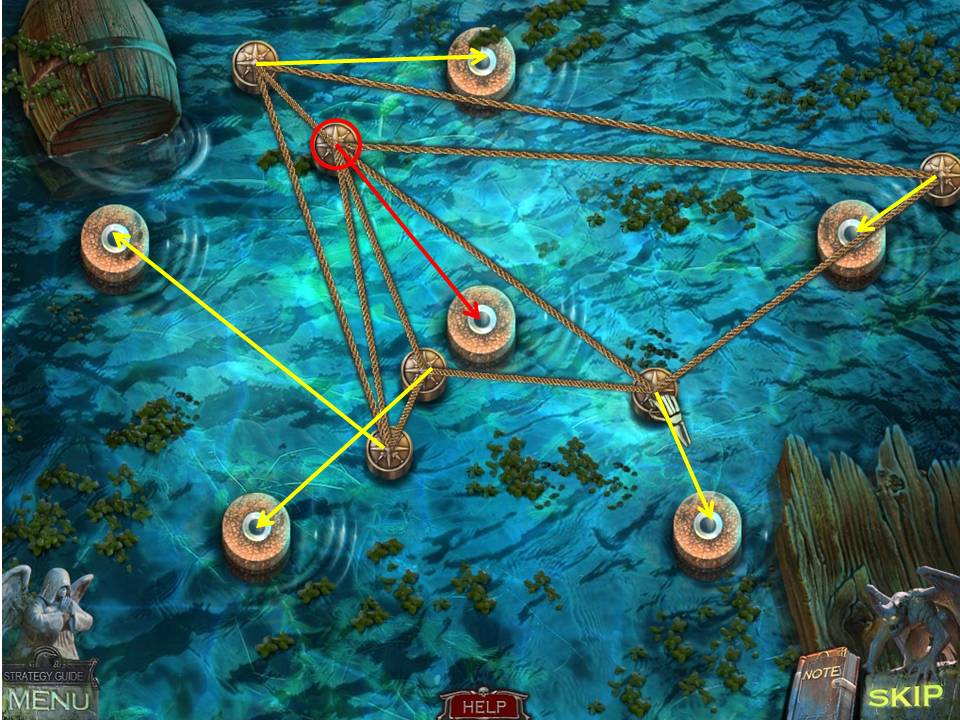
- The object of the puzzle is to retrieve the buoy with the medicine.
- Do this by untangling the ropes so none are crossing.
- The key is to move the ropes around a bit to make sure none are crossing, then place them on the platforms.
- Note the screenshot, which shows the ropes completely untangled and ready to place on the bases.
- Note the buoy circled in red, which has the most ropes attached to it and which will get placed in the center.
- Once in place, you’ll have a perfect pentagon, with all five corners leading to the middle.
-
When finished, take the MEDICINE.
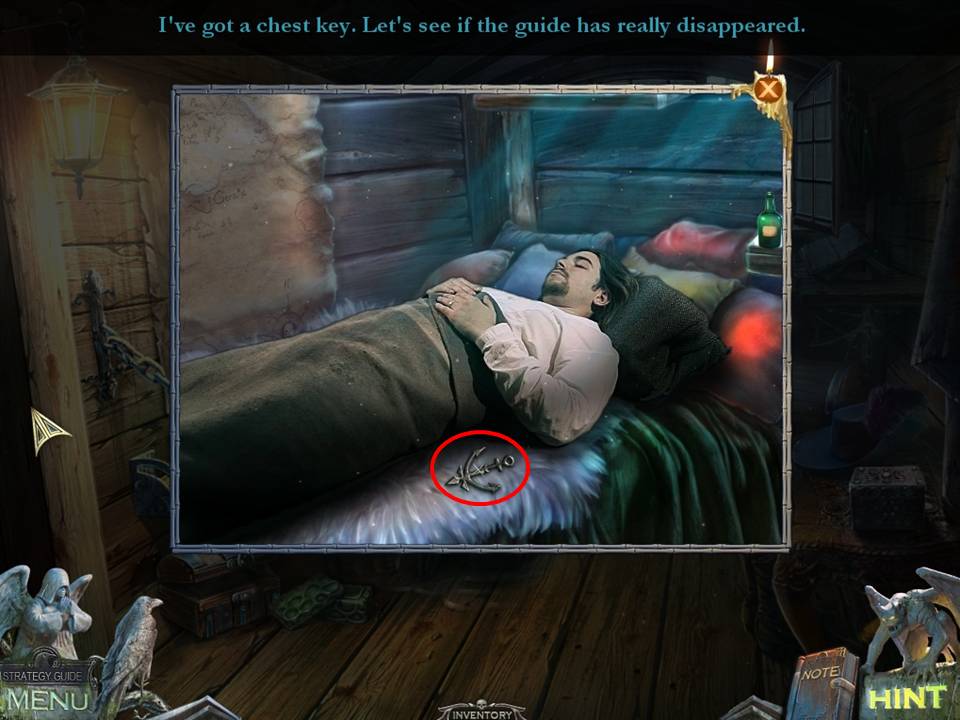
- Zoom into the sick man and give him the MEDICINE.
-
Receive the CHEST KEY.
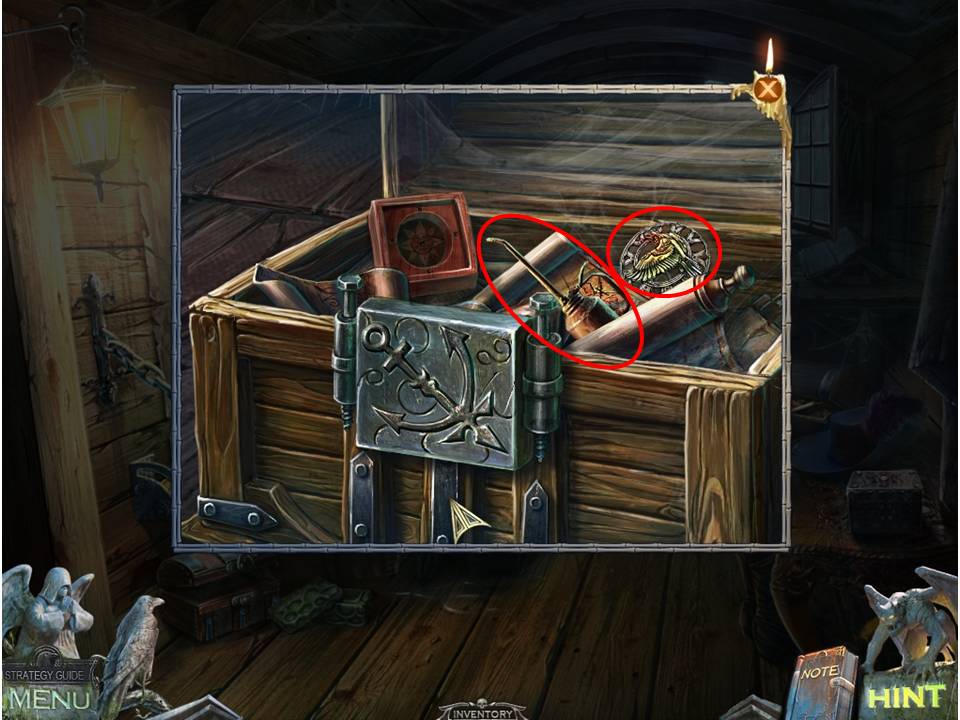
- Zoom into the chest at right.
- Unlock it with the CHEST KEY.
-
Take the CROW RUNE and the OIL CAN.
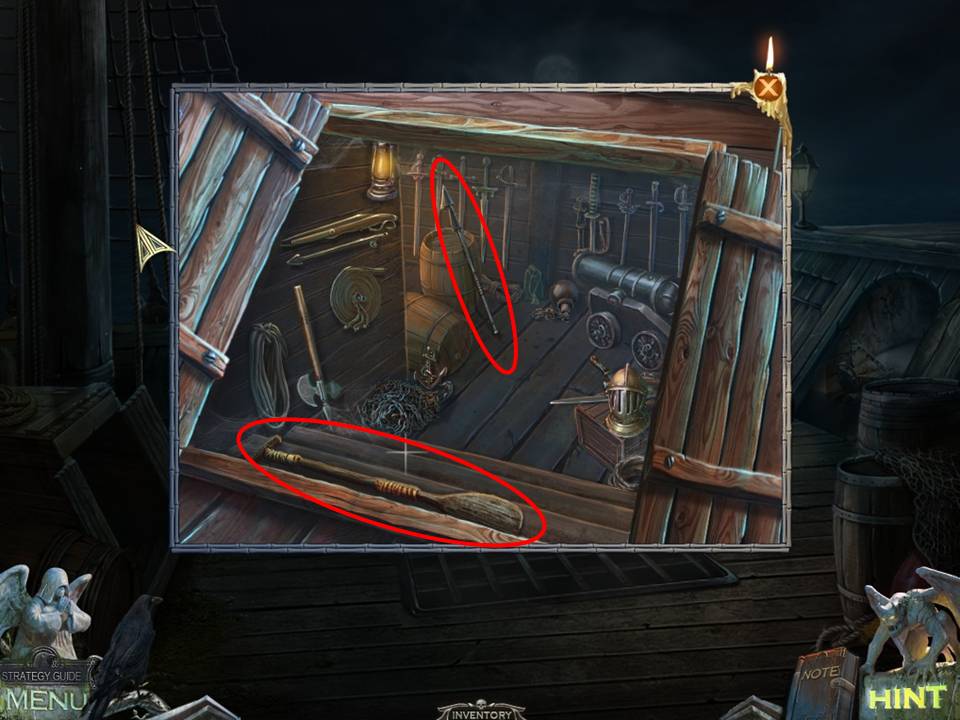
- Return to the deck.
- Zoom into and oil the hatch doors with the OIL CAN.
- Open the hatch doors.
-
Take the OAR and the HARPOON.
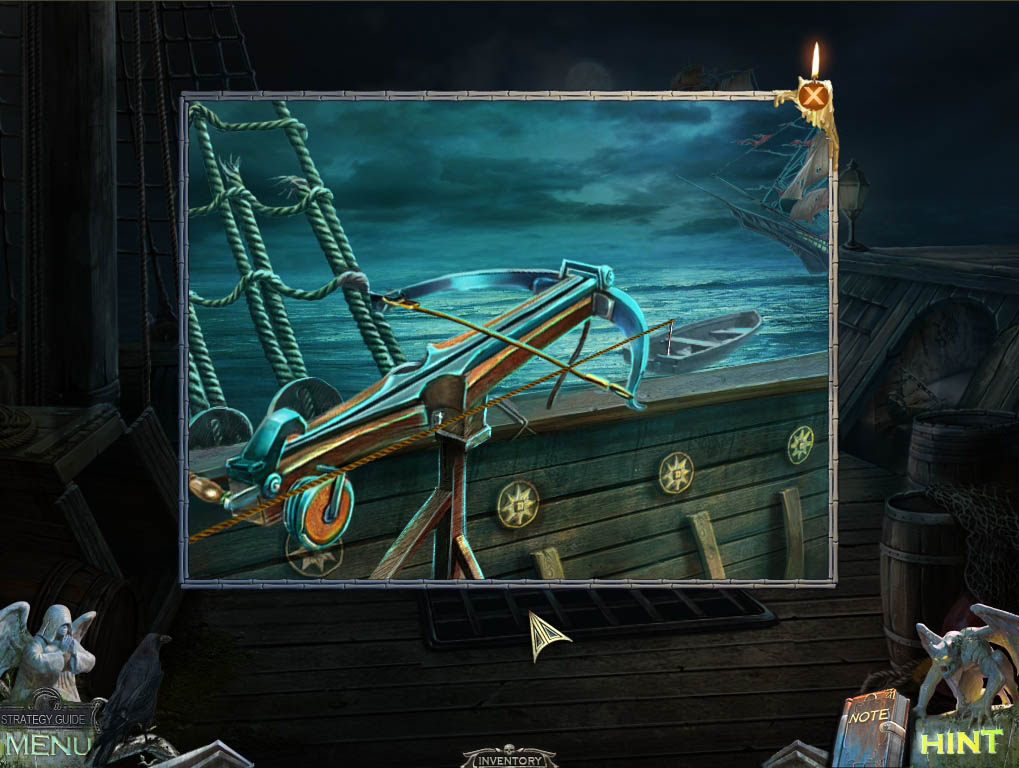
- Zoom into the bundled object by the railing.
- Cut the ropes with the DIRK.
- Combine the HARPOON and ROPE to get the HARPOON WITH ROPE.
- Use the HARPOON WITH ROPE on the spear gun to bring the boat closer, then use the OAR on the boat.
-
Move to the other ship.
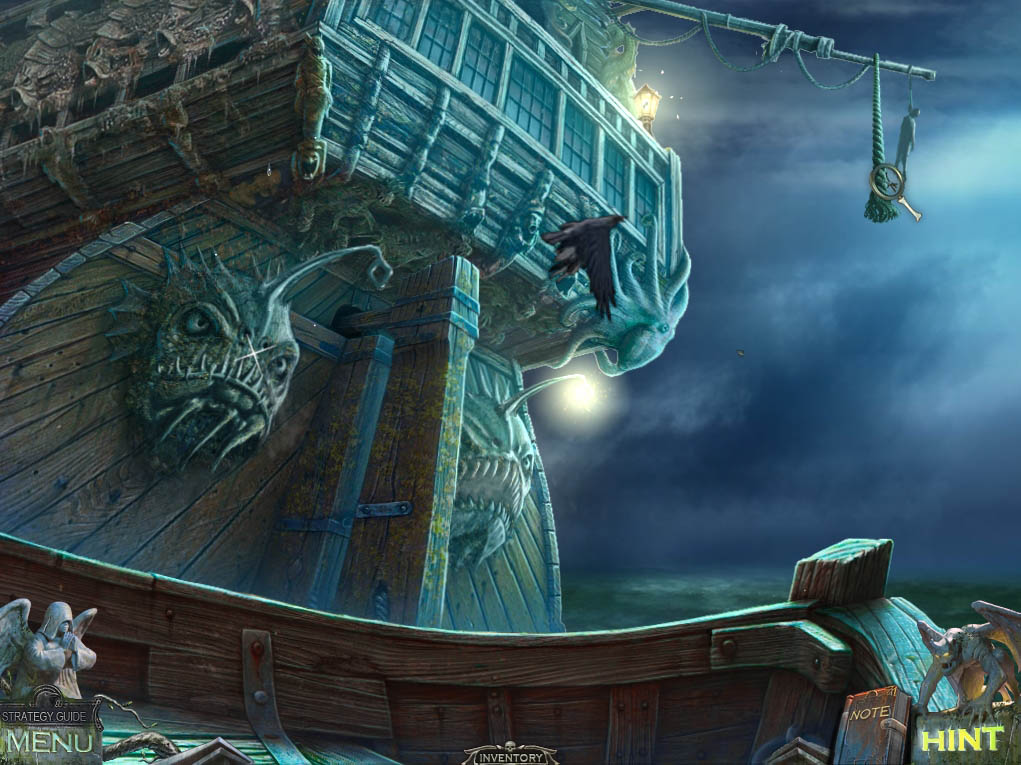
- Have the crow retrieve the rope, which you will use to move to the deck of the other ship.
-
Go up the rope.
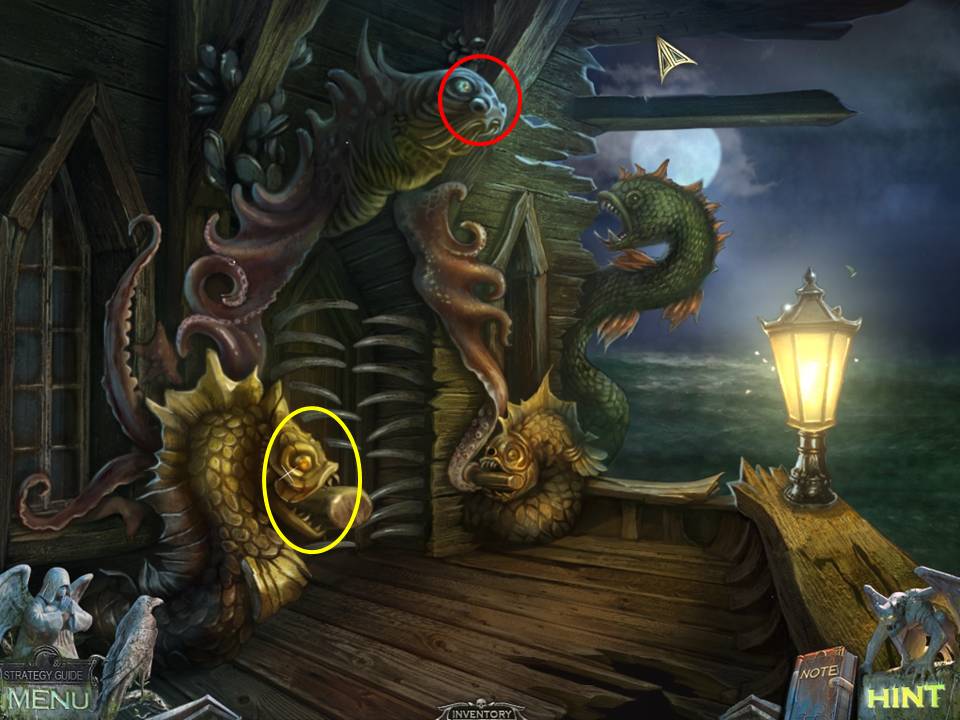
- Zoom into the fish statue on the left.
- Slice the seaweed from the top of its head with the DIRK.
- Zoom into the figure above the doorway.
- Take the ANGLERFISH LIGHT.
-
Go back down to the Boat.
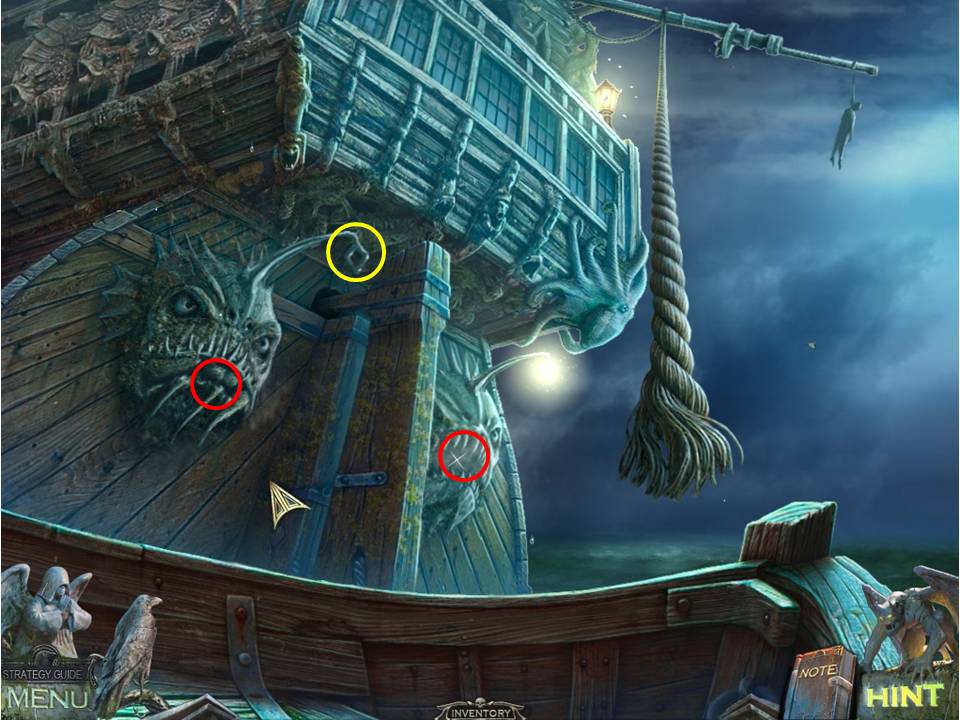
- Zoom into the anglerfish statue at left.
- Use the ANGLERFISH LIGHT on the statue.
- Take the HORN from its mouth.
- Zoom into the anglerfish statue at right.
- Take the second HORN.
-
Return to the rear of the ship.
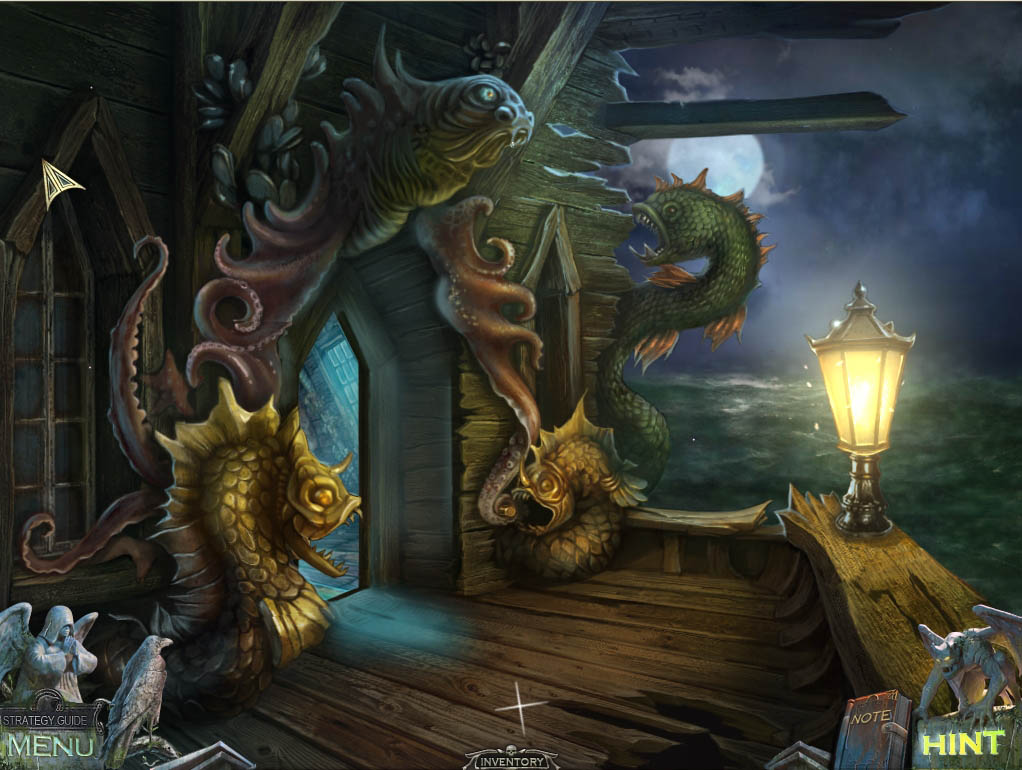
- Zoom into the fish on either side of the door.
- Place the HORNS on their respective statues to replace them, opening the way to the door.
-
Go inside to the Captain’s quarters.
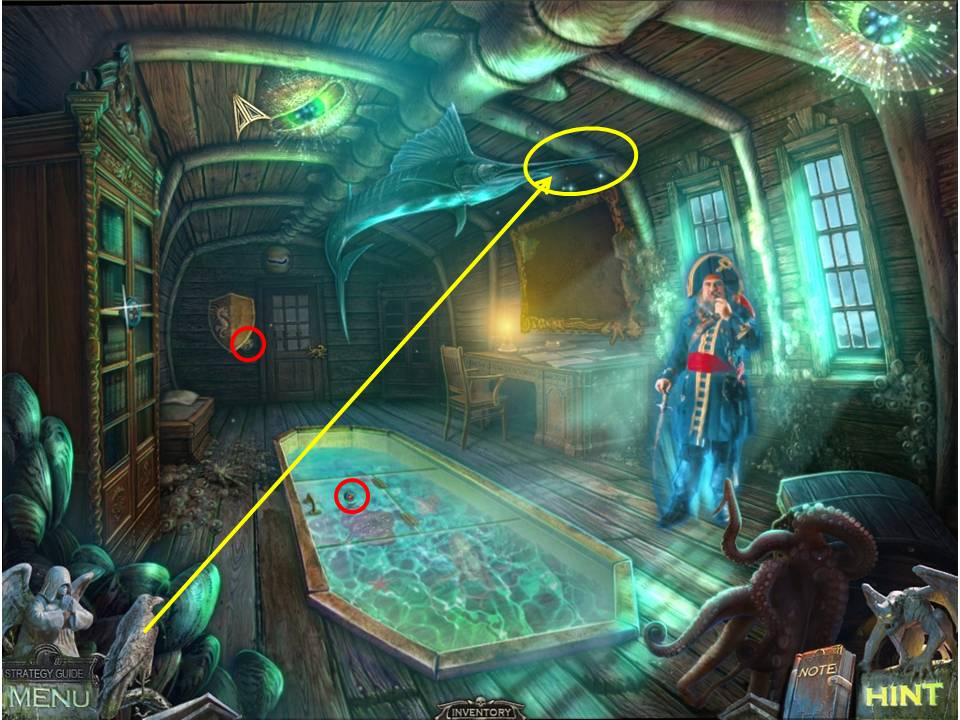
- Talk to the ghost.
- Zoom into the glass tank on the floor.
- Take the BEHEMOTH EYE.
- Examine the shield on the back wall at the far end of the room.
- Take the CROW RUNE.
- Have the crow knock down the FISH NOSE.
- Take the FISH NOSE.
-
Go back outside.
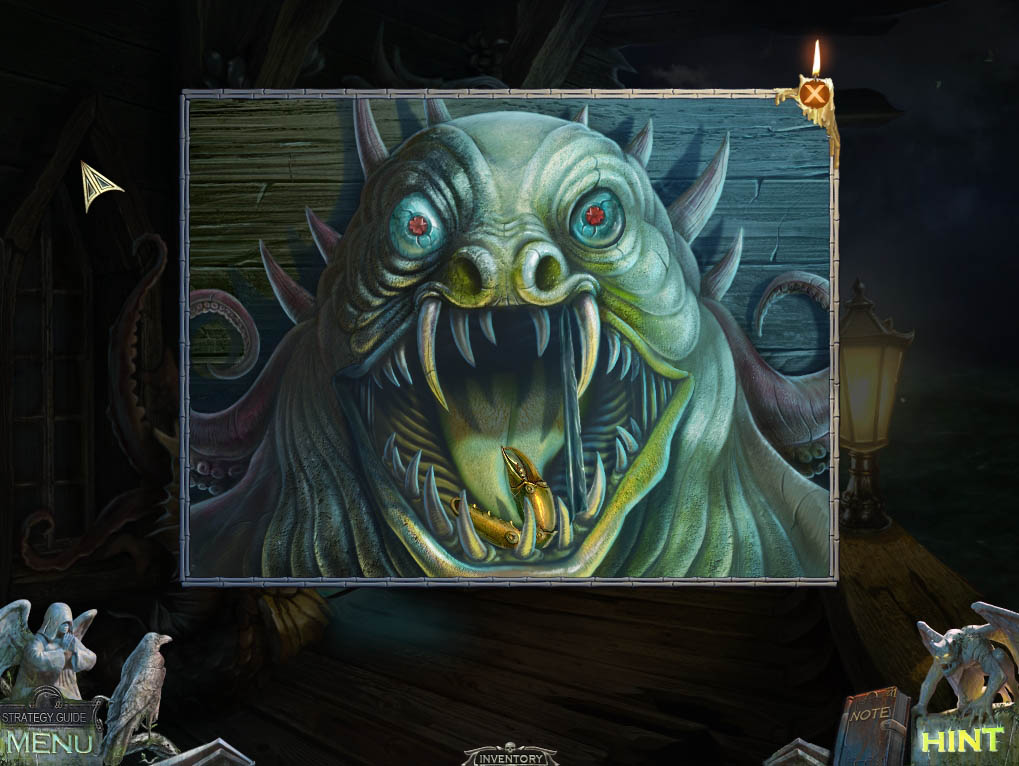
- Zoom into the monster above the door.
- Place the BEHEMOTH EYE in the empty socket. Click to open the mouth.
- Prop open the mouth with the FISH NOSE.
- Take the CRAB CLAW.
-
Return to the Captain's quarters.
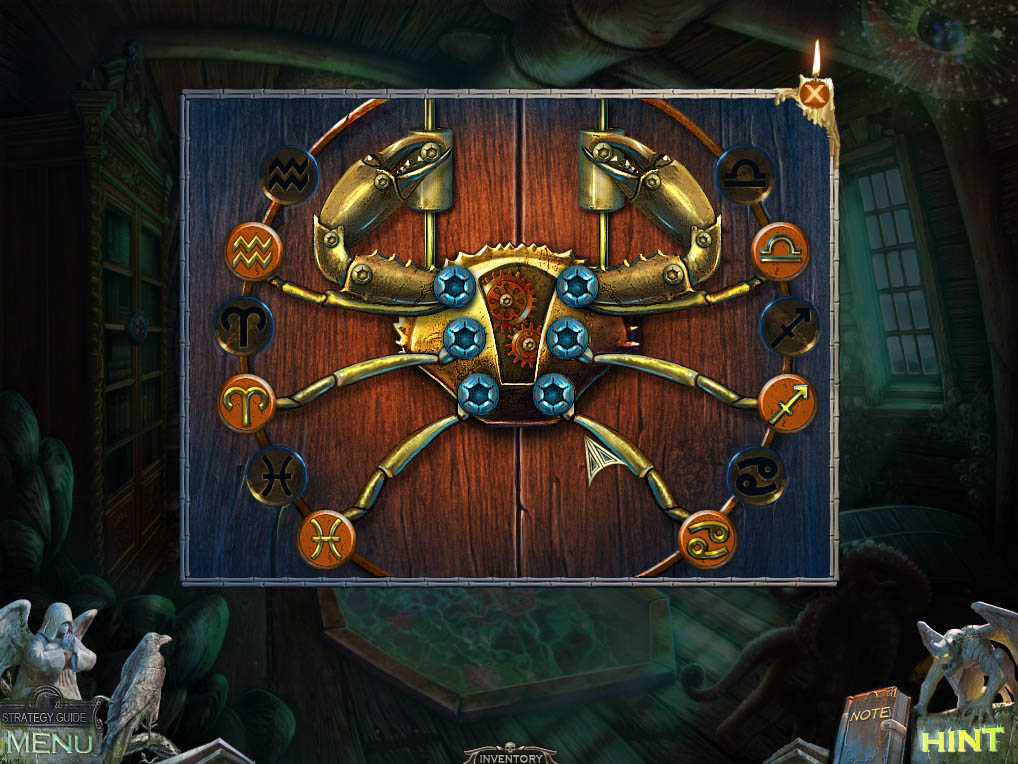
- Zoom into the door at the far end of the room.
- Use the CRAB CLAW on the crab mechanism to initiate a puzzle.
- The object of the puzzle is to arrange the crab's legs to match the darkened symbols above each leg.
- Click on the leg you wish to shift (it will be highlighted in blue) and then click on the leg where you want to shift it to – the legs will swap positions.
- See screenshot for solution.
-
Go through the door to the deck.
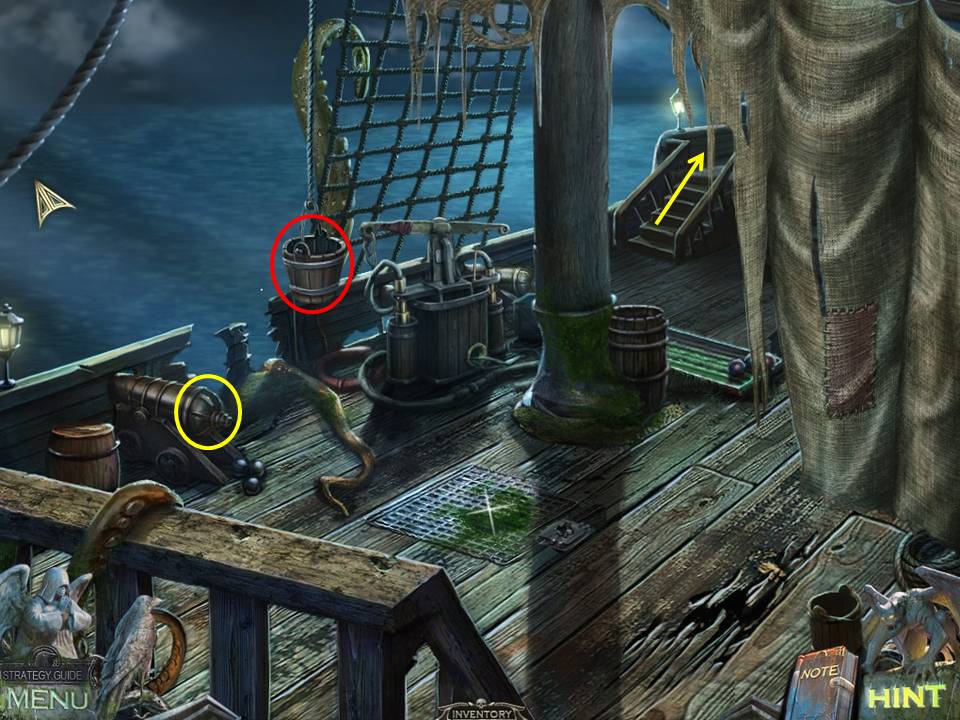
- Zoom into the cannon on the left.
- Click on the rear hatch to open it.
- Take the RAMROD.
- Zoom into the bucket hanging from the rope.
- Take the SCRAPER inside.
-
Go up the steps on the far end of the deck to the bow.

- Play the Hidden Object Area on the lower right.
- Find the items listed.
- Use the hat on the right to catch the crab.
- Move the shells to the left over to the one on the right to complete the shell necklace.
-
Gather the remaining objects, and receive the GEM.
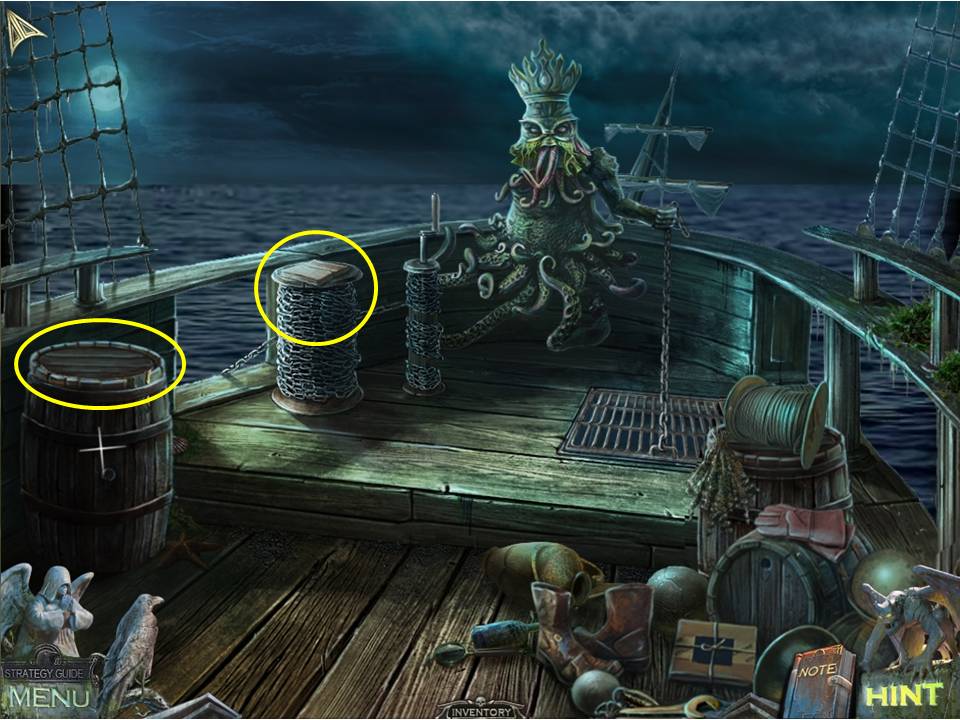
- Take a look at the barrel to the left and retrieve the MAP on it.
- Use the DIRK to prize open the lid and collect the ring inside.
-
Click on the book on top of the roll of chain, and use the SCRAPER to pick up the STARFISH stuck to the side of the boat.
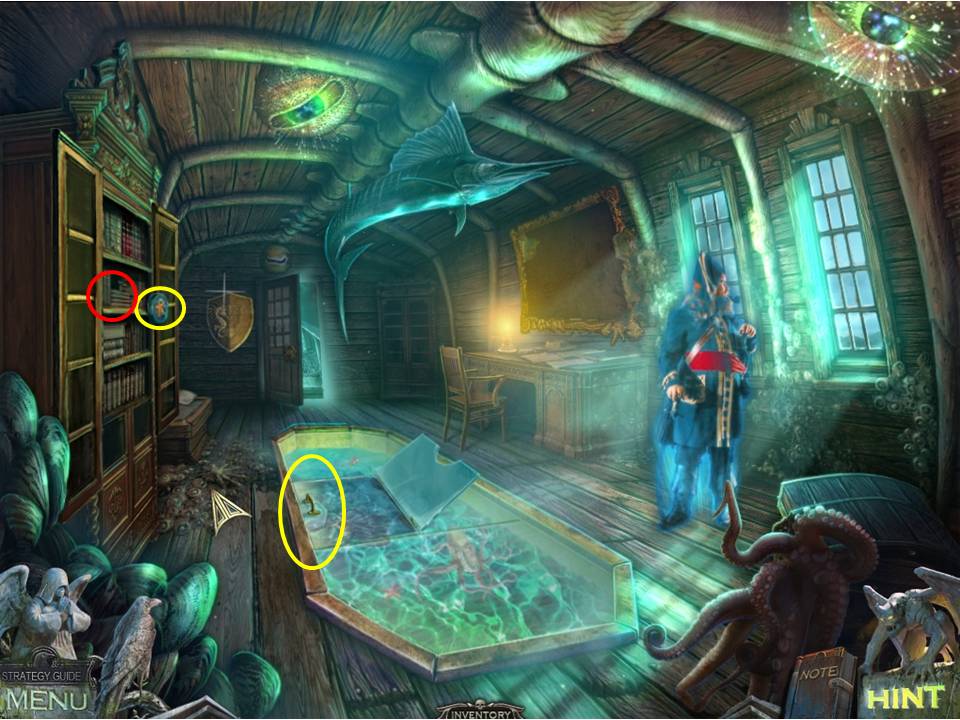
- Return to the Captain's quarters.
- Zoom into the bookcase at left.
- Use the STARFISH on the lock to open it.
- Take the GEM and the PIRATE HOOK.
- Combine the RAMROD with the PIRATE HOOK to get the RAMROD WITH HOOK.
- Zoom into the aquarium on the floor.
- Cut the glass with the RING.
-
Return to the bow.
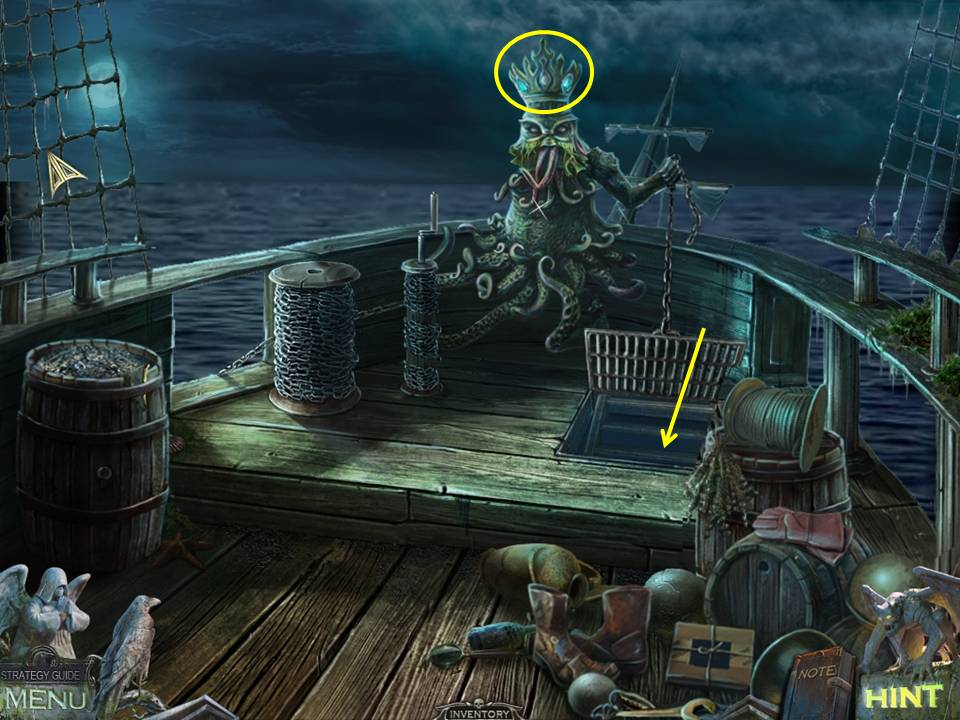
- Zoom into the statue on the bow.
- Place the GEMS on the spaces in the crown which will open the nearby grate.
-
Go down the hatch to the below deck area.
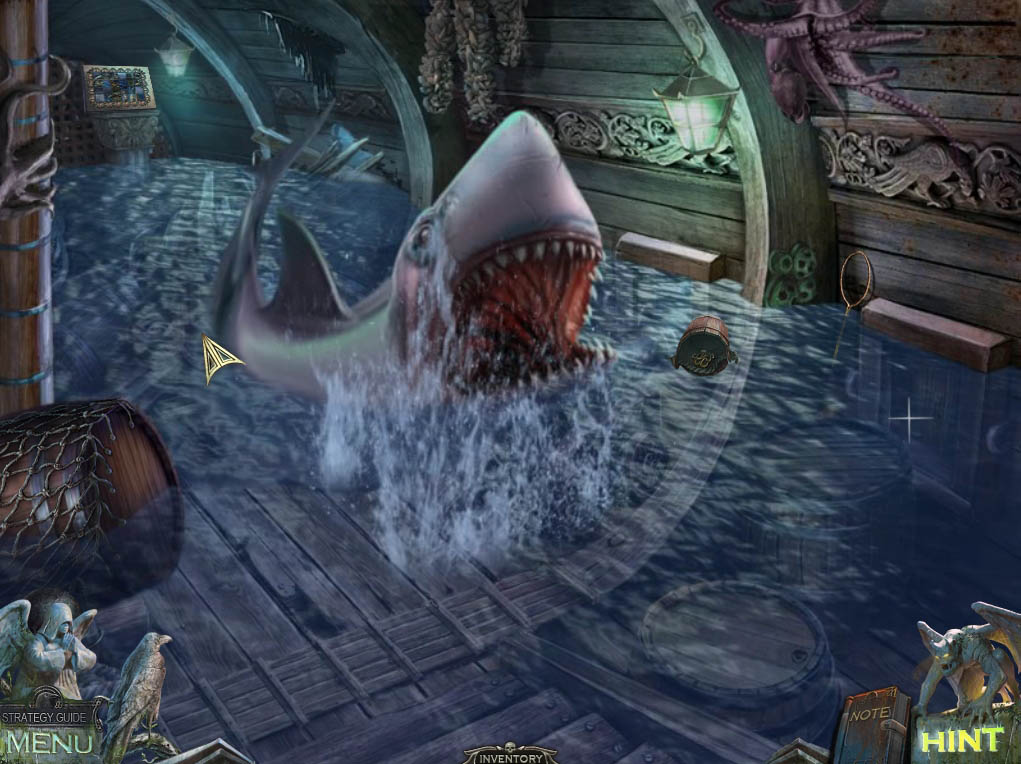
- Have a bit of fun with the shark by clicking on it to see what happens – this thing should have auditioned for Jaws!!
- Use the RAMROD WITH HOOK on the floating bucket to pull it closer.
-
Take the HATCH KEY inside it.
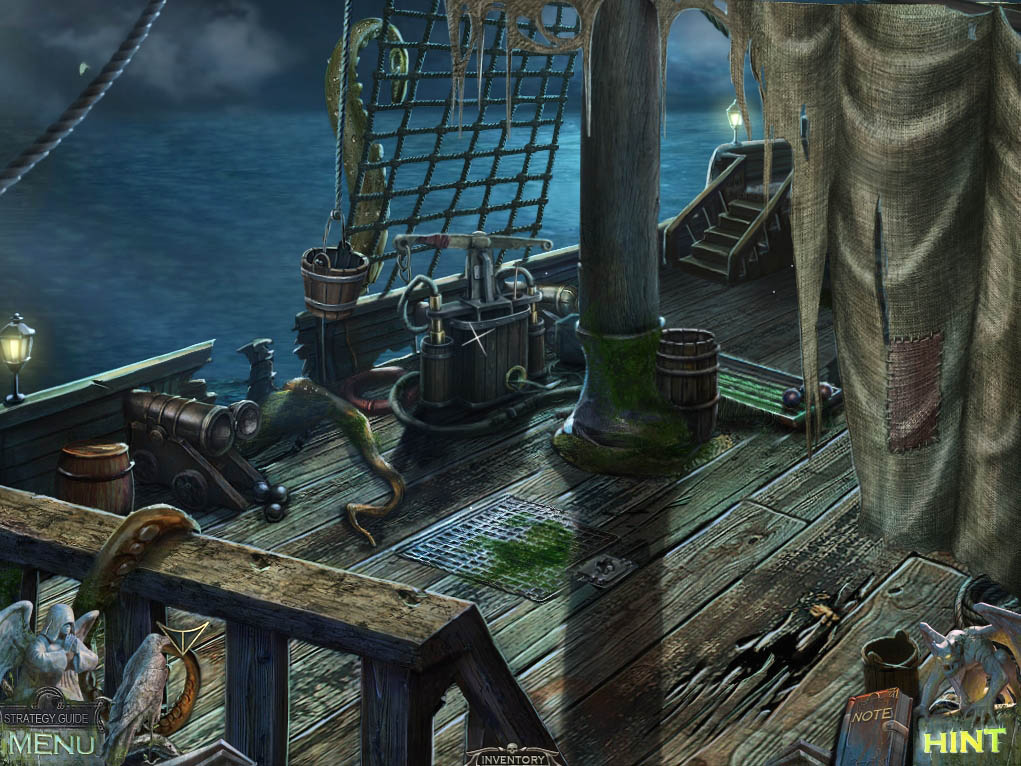
- Return to the Ship Deck.
- Zoom into the hatch grate and unlock it with the HATCH KEY.
- Take the BOARD inside – careful, the shark might be about down there!
-
Return below deck.
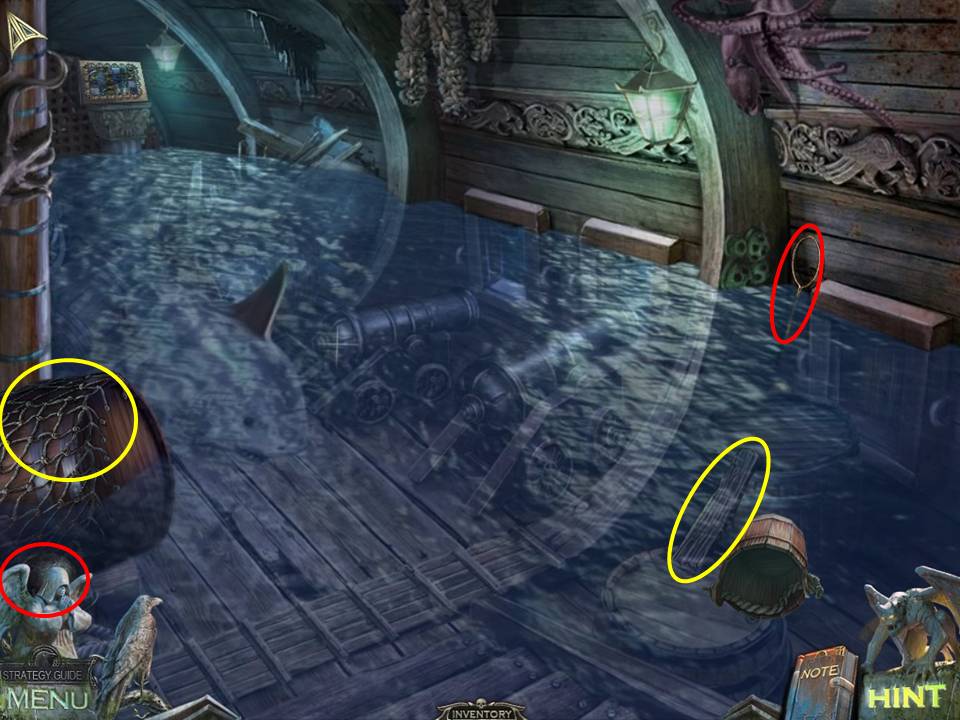
- Place the BOARD between the two barrels underwater on the right.
- Zoom into the far right side of the ship.
- Take the NET.
- Zoom into the barrel with the netting over it at left.
- Slice the FISHNET with the DIRK.
- Take the CANNONBALL.
-
Return to the main deck.
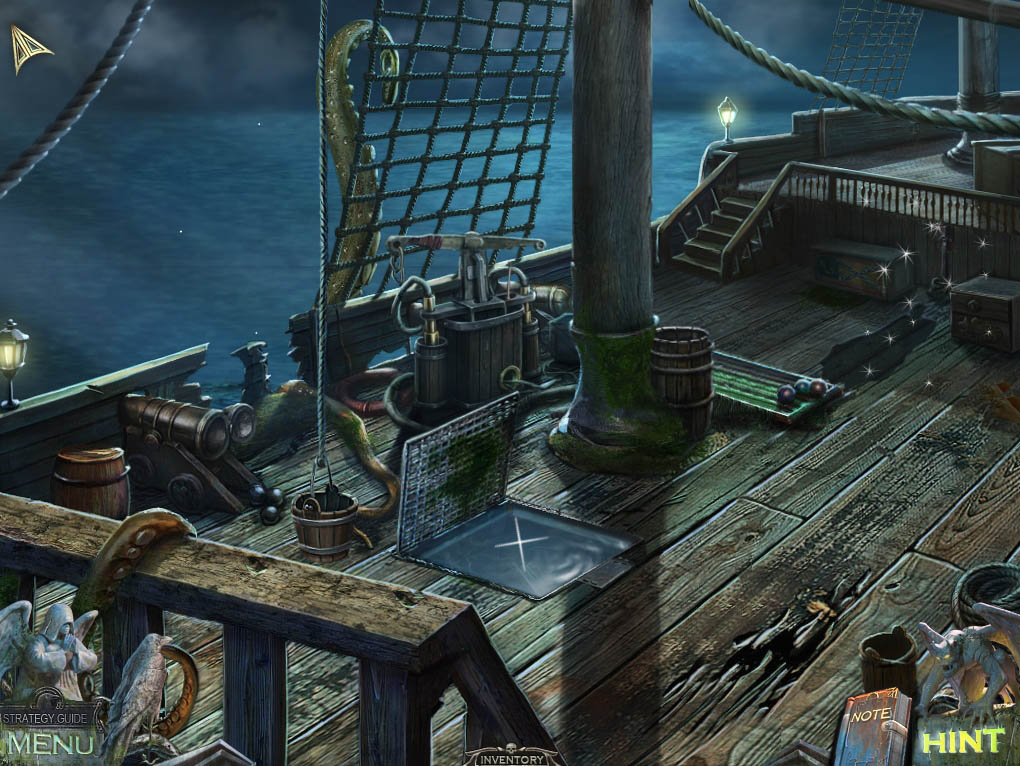
- Zoom into the suspended bucket on the left.
-
Weigh down the bucket with the CANNONBALL, which will move a sail and reveal a Hidden Object Area.
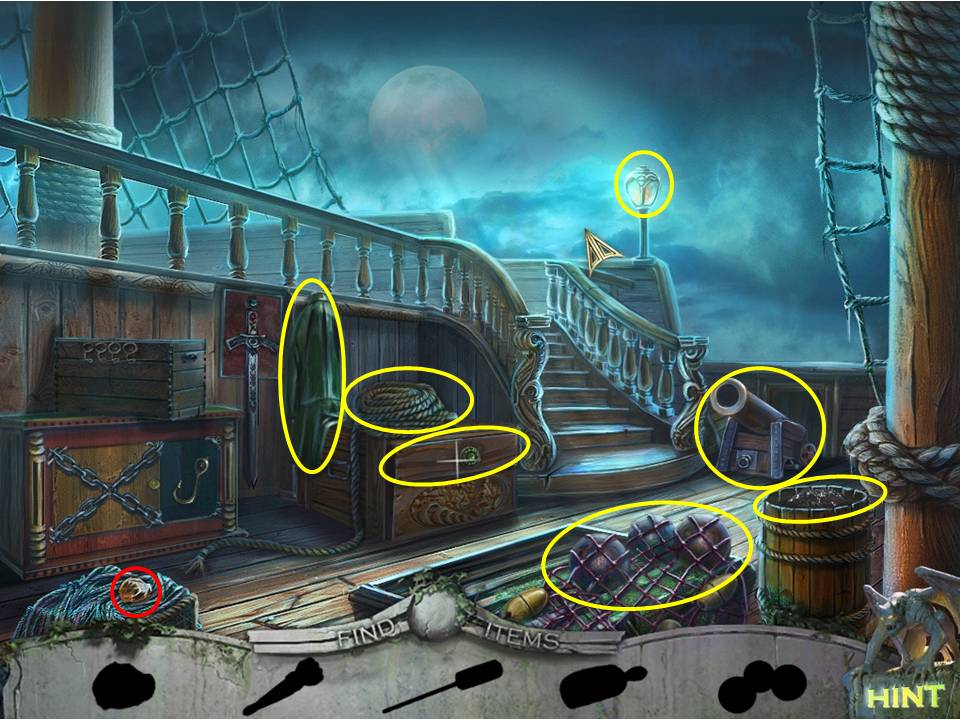
- Find the silhouetted objects in the scene, using them to obtain the rest of the items in the following order –
- Open the net to obtain the cannon balls
- Open the drawer under the roll of rope to get the scoop
- Scoop up the rock from the pile of rope on the left
- Click on the green coat and take the torch hidden behind
- Move the coil of rope to reveal a ramrod
- Scoop up some gunpowder from the barrel on the right and place it in the cannon
- Use the ramrod to pack the gunpowder down
- Place the cannon balls in the cannon
- Throw the rock at the lantern to break it open, then light the torch.
- Click on the cannon to aim it at the mast – look closely and you’ll see an ‘X’ underneath the crows nest to aim at.
- The mast will come crashing down. Examine the box and take the SEAHORSE inside to complete the puzzle.
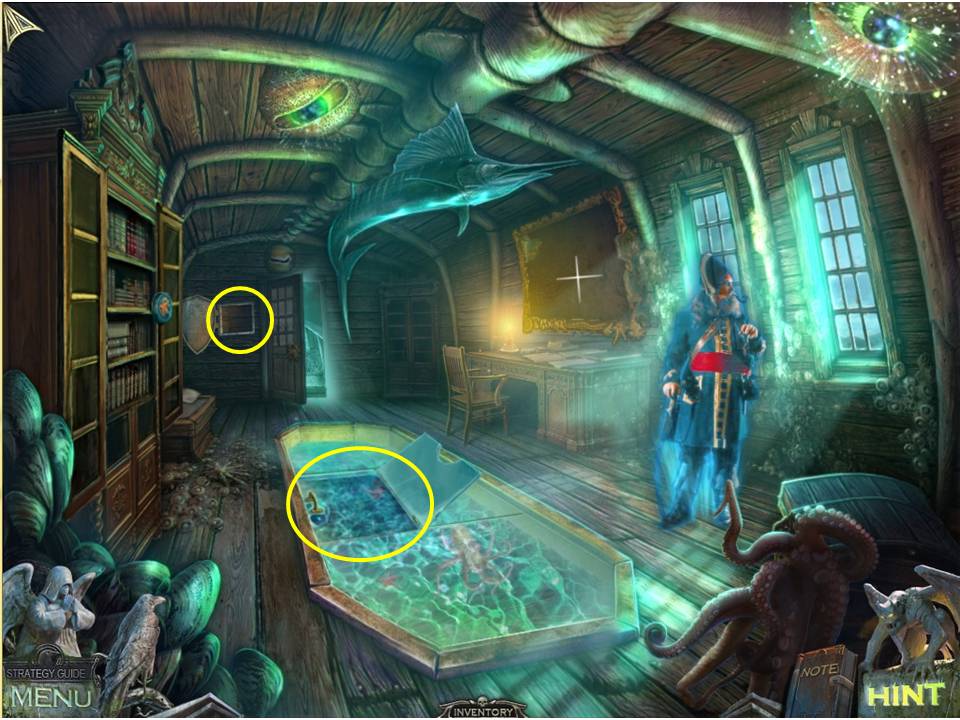
- Return to the Captain’s quarters.
- Zoom into the shield to the left of the door at the far end of the room.
- Place the SEA HORSE on the right half.
- Take the MAP inside.
- Combine the FISHNET and the NET to get a better NET.
- Zoom into the aquarium.
-
Scoop the ELECTRIC RAY with the NET.
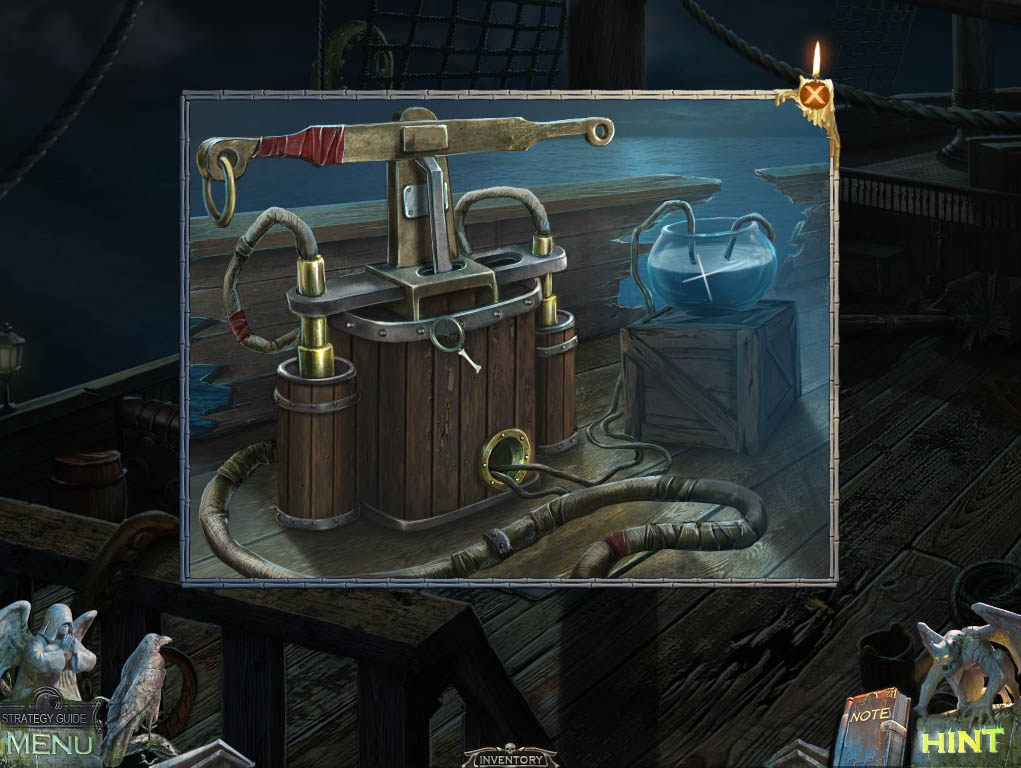
- Go back out to the deck.
- Zoom into the pump to the left of the mast.
- Place the ELETRIC RAY inside the bowl of water.
- The pump will work again, draining the water inside the nearby hatch.
- Go through the open hatch into the hold.
Chapter 1: Intro and Skull Hill
Chapter 2: The Mining Town
Chapter 3: The Chapel
Chapter 4: The Mine
Chapter 5: The Small Town
Chapter 6: The Judge's House
Chapter 7: The Swamp
Chapter 8: The Secret Lab
Chapter 9: The Ship
Chapter 10: The End
Bonus Chapter
Ask for help in the comments below!
